Here is a step by step tutorial and printable PDF woodworking plans for how to build a wooden DIY Christmas tree box stand!
The holidays are here and it's time time to show off your Christmas tree! But what if your tree is a little shorter at home than you realized?
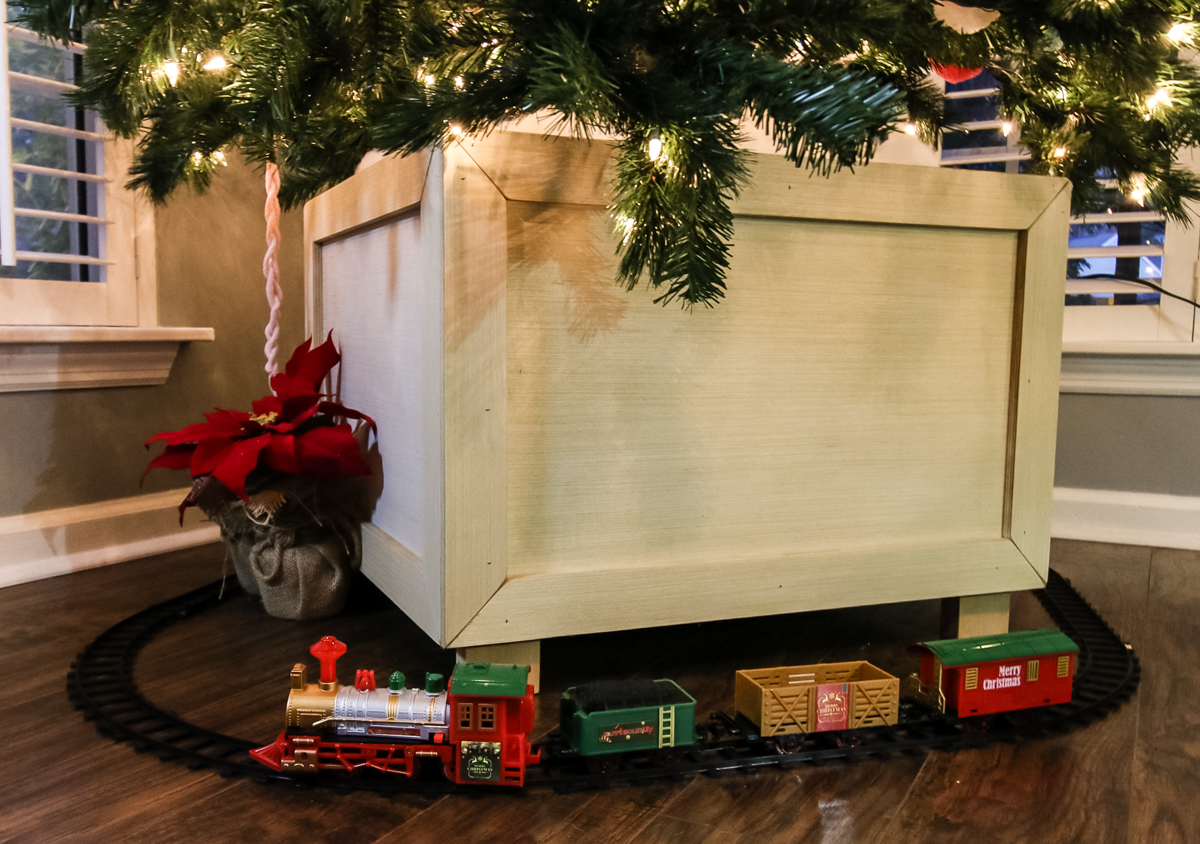
Or, what if you just want your space to look at little more grand? This DIY Christmas tree box stand is the perfect way to add height and decor to your space this holiday season and we've got the free, easy plans for you!
Some people also call these Christmas tree box skirts because they double as a tree skirt or tree collar. The stand covers the actual plastic tree stand for a sleek look, no fabric needed.

How to build a Christmas tree box stand
This Christmas tree box stand can be made in about two hours with less than one sheet of plywood. It's a simple build that will make a big impact.
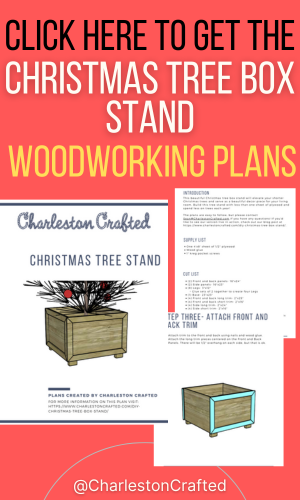
To help you out, we've designed PDF woodworking plans for you to follow! Grab your plans here to get the full cut list, material list and step by step instructions!
In the past, we built an even more simple Christmas tree stand out of plywood that we attached a plastic tree holder too for our real tree. That stand is rough and needs to be covered with a cool tree skirt but it adds easy height. This box stand stands alone and serves as its own decor piece!

Make sure you know how to fluff your artificial Christmas tree properly!
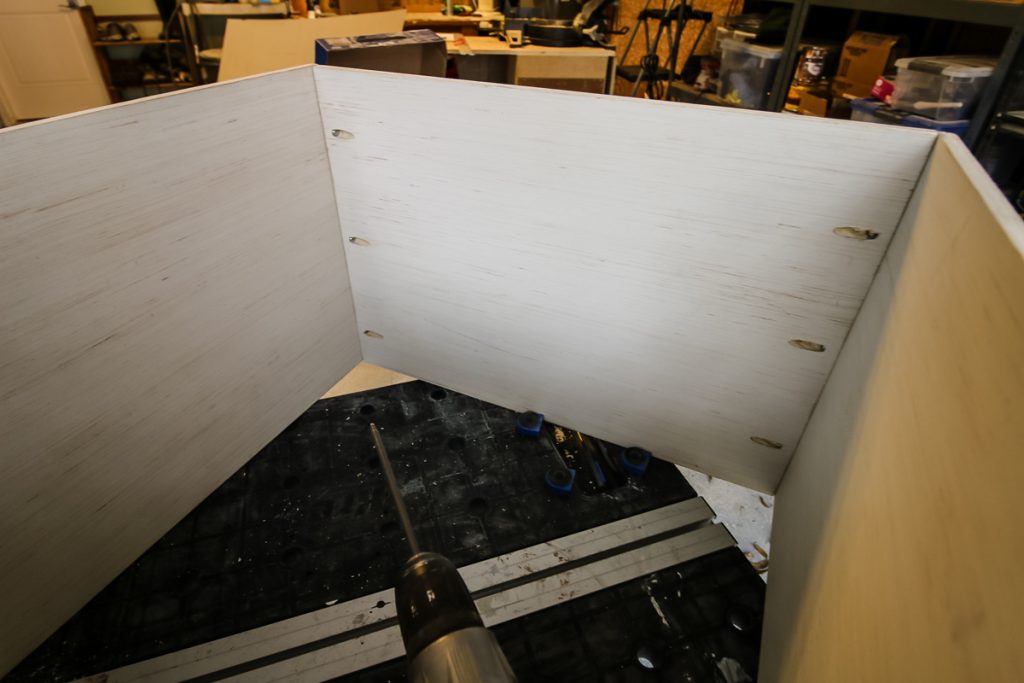
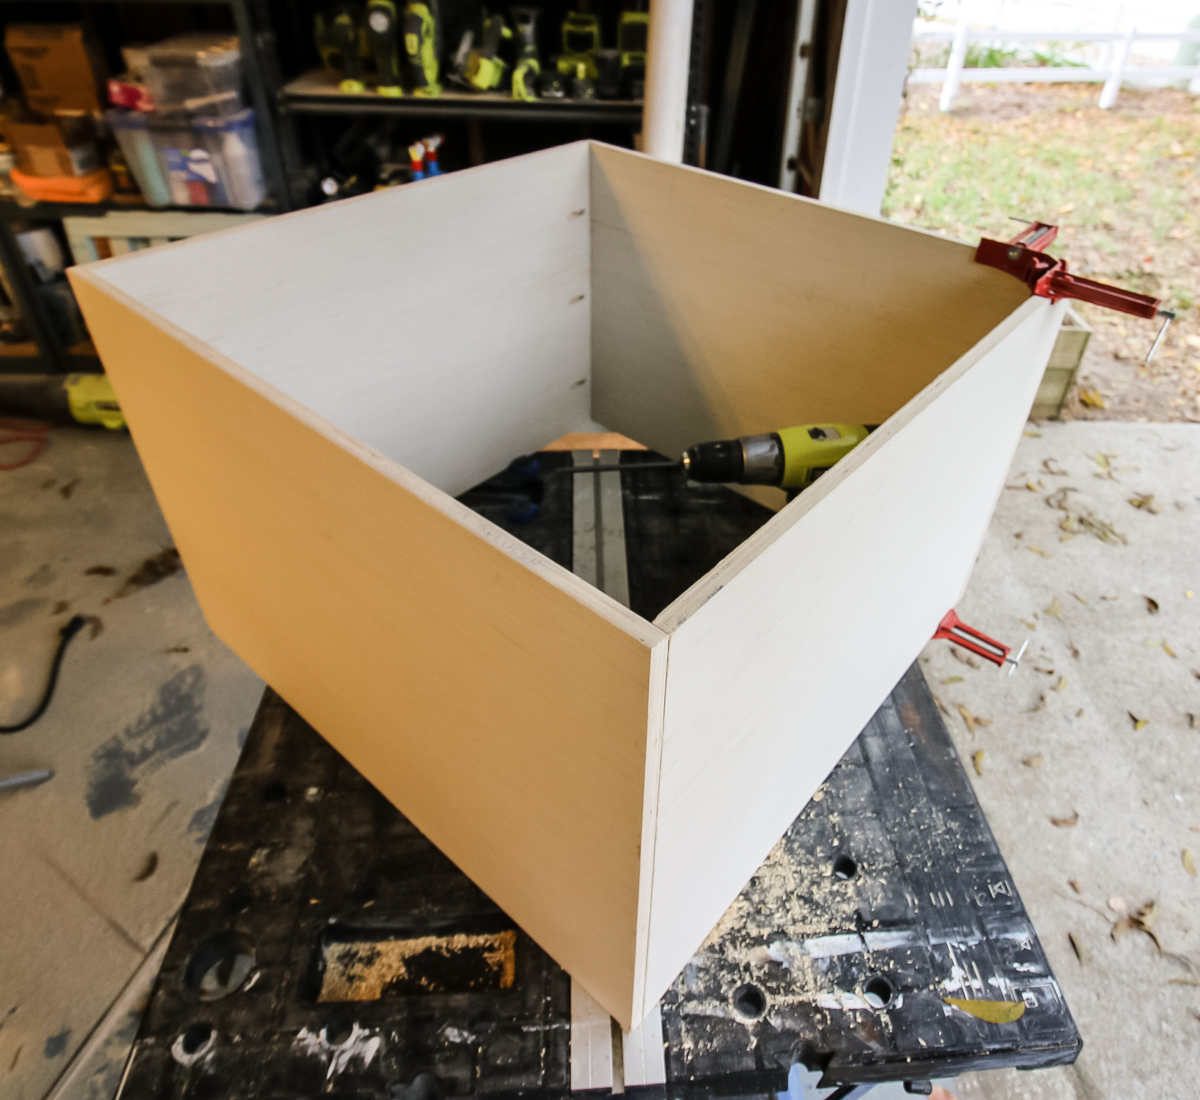
Step one: Building the box
First, we built the box by attaching four sides together with Kreg pocket hole joinery.
This is a simple design, literally attaching two boards together with screws and butt joints into two other boards.
The whole tree stand is built with ½" plywood, including the legs, but they need to be secure. Start by cutting eight strips of plywood 12" long and gluing them together two by two.
Step two: create and attach legs
The legs are created from two pieces of plywood glued together to make them thicker. Once the legs were dry, we attached them to the inside of the box using wood blue and a nail gun.
We measured so that each leg would show 2" on the bottom of the box and then 10" would be inside the box. You'll see why later...
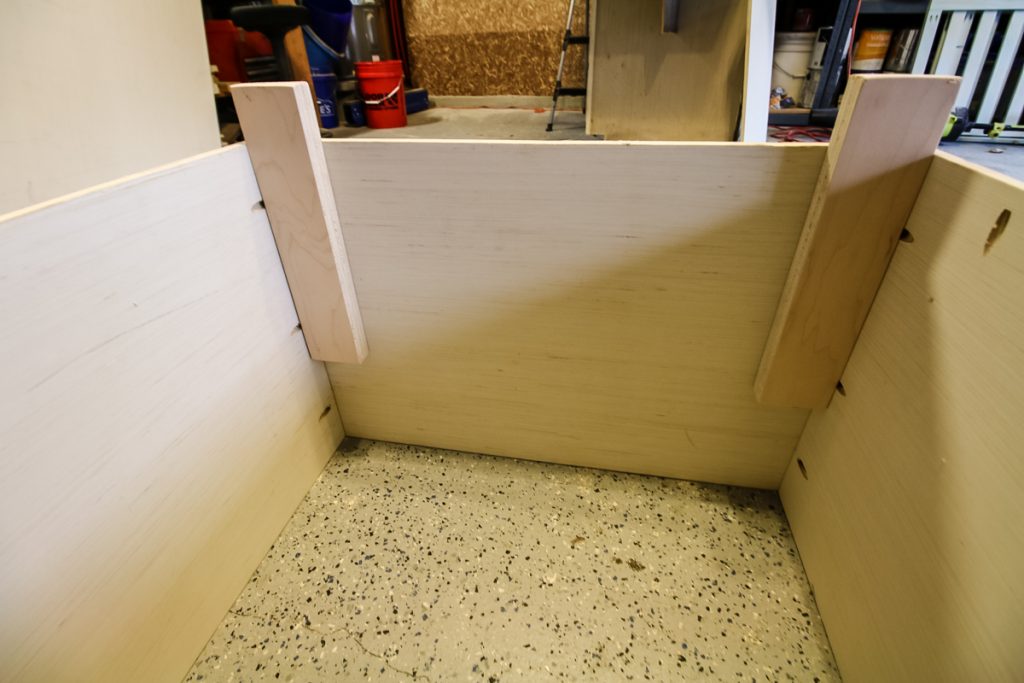
Step three: create base
Next, we cut a board to fit the inside of the gap and then gently dropped it into the box so that it would rest on top of the legs. This would elevate our tree exactly 12 ½".
When you're done with this project, use your extra plywood to make this funny Christmas silverware caddy!
Step four: Adding trim
We gave the box a little pizzazz by adding mitered moulding around the edges.
We just cut strips the same length as each side and then mitered the corners so they would fit. Each was attached with a nail gun.
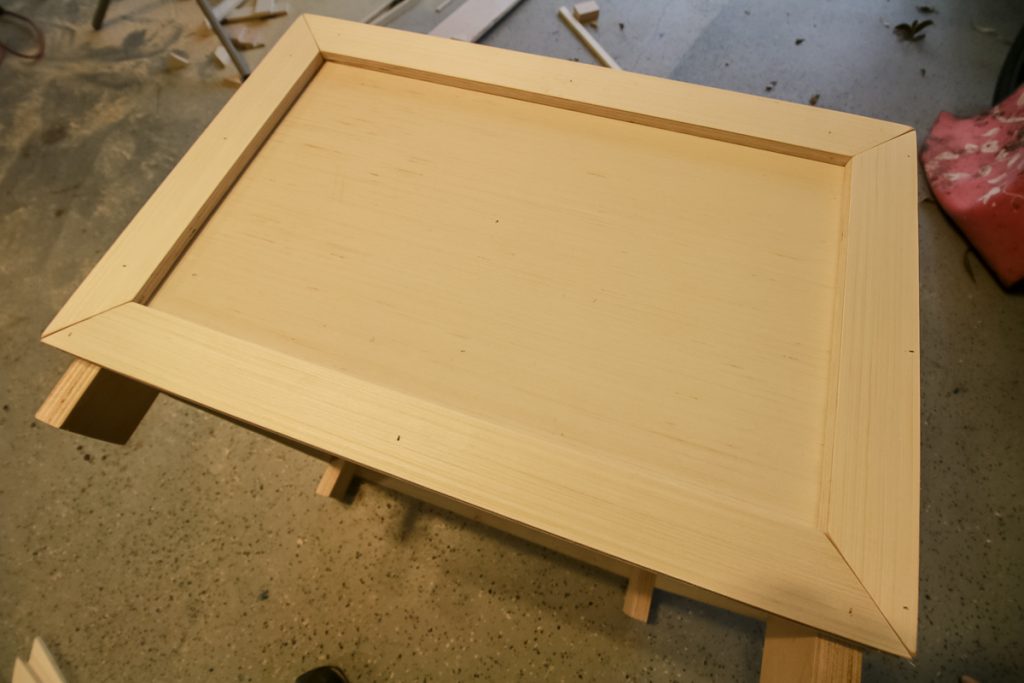
We thought about cutting out stars to add inside each rectangle but decided in the end to keep it simple. You could add starts or more cross beams or anything you want to style your Christmas tree box stand.
We also added a light "puritan pine" stain to the whole thing. We wanted to make sure it contrasted with our dark wood flooring, but would also work for each year, no matter what theme our tree was that year.
Check out our full review of Puritan Pine by Minwax wood stain.
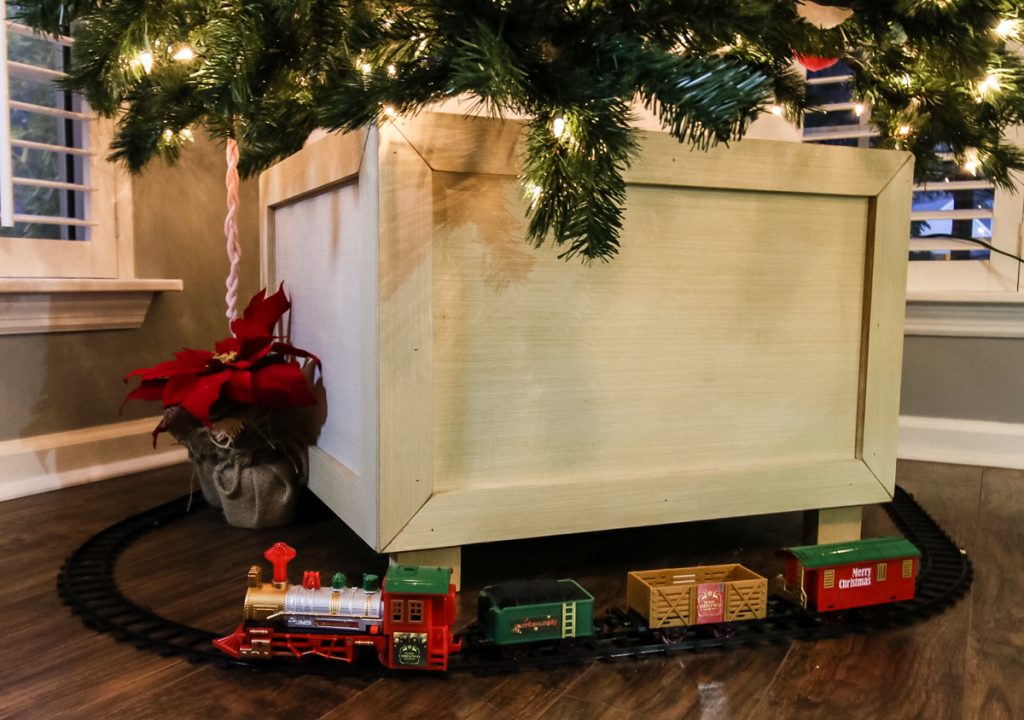
DIY Christmas tree box stand
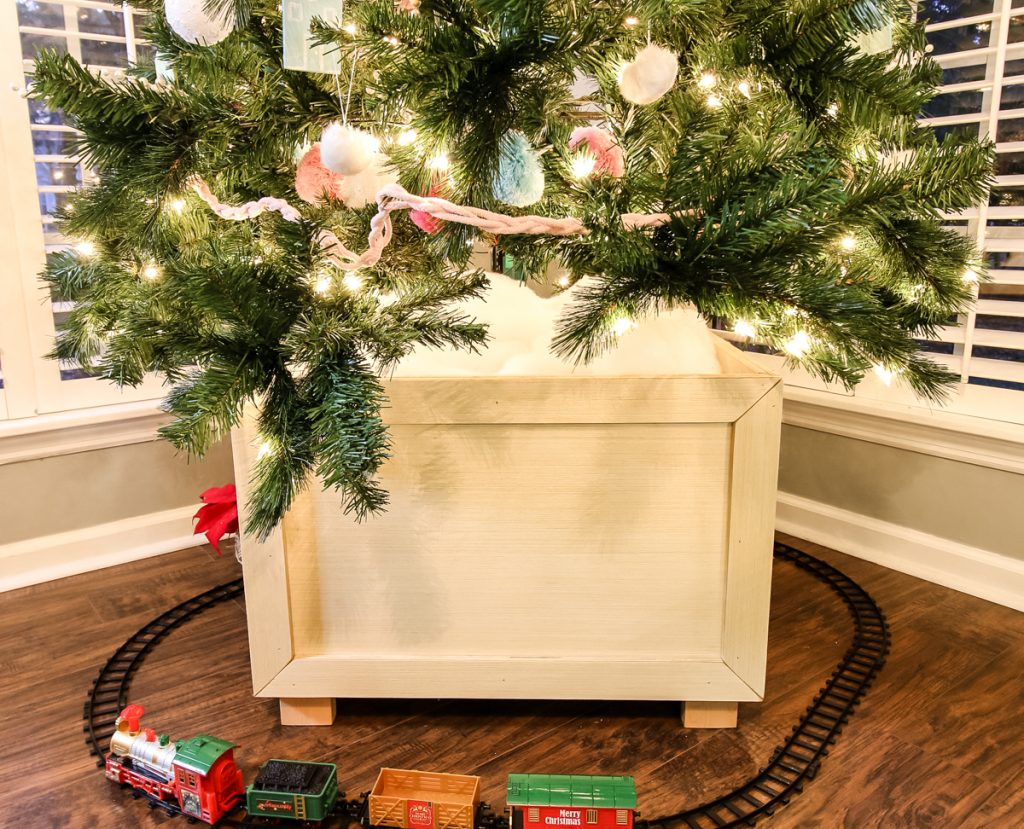
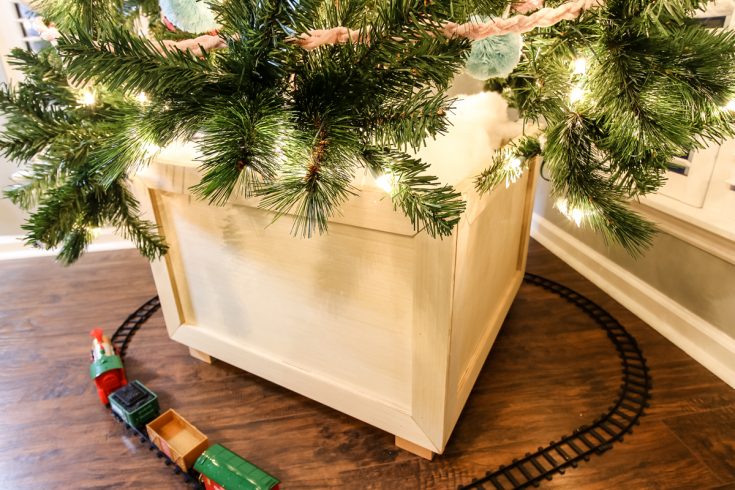
We used an artificial tree this year and placed it right inside the box. The hidden board that elevates the tree was sturdy for the tree.
The extra gap above the board to the top of the box is the right height for a standard artificial tree base. We added "snow" to the box with pillow/stuffed animal stuffing.
This DIY Christmas tree box stand is the perfect way to "elevate" your holiday decor. Make your small tree look bigger with this stand and have a Merry Christmas!
Paired with our DIY stockings holder on the mantel, the holidays are really coming into shape!

DIY Christmas tree stand woodworking plans
If you love this project, make sure you grab our woodworking plans to build one yourself!
Our Christmas tree box stand woodworking plans include the full cut list, material list and step-by-step instructions with computer model imagery to guide you through the whole build.
Build one today and save money on buying a shorter tree next year!
How to Build a Christmas Tree Box Stand
This beautiful Christmas tree box stand will elevate your shorter Christmas trees and serve as a beautiful decor piece for your living room. Build this tree stand with less than one sheet of plywood and spend less on trees each year!
Materials
- One 4'x8' sheet of ½" plywood
Tools
- Table saw or circular saw
- Kreg pocket hole jig
- Drill
Instructions
- Make Cuts:
(2) Front and back panels- 16"x24"
(2) Side panels- 16"x23"
(4) Legs- 3"x12"
(1) Base- 23"x23"
(4) Front and back long trim- 2"x25"
(4) Front and back short trim- 2"x16"
(4) Side long trim- 2"x24"
(4) Side short trim- 2"x16"
*All trim pieces should have 45 degree miter and measurement is for long edge* - Make 4 legs by gluing 2 pieces together.
- Attach side panels to the inside edge of the front and back panels using pocket holes.

- Attach the legs to the inside corners of the box with 2" sticking out from the bottom. Use wood glue and nails to attach.

- Attach trim to all sides using nails.
- Drop base into box to rest on top of legs.

- Stain as desired.


Looking for something?
We've been doing this since 2012 so we have a LOT of blog posts!
Search stuff like: Ceiling Projects | DIY Plant Stands | Thrift Flips

Hey there, I'm Sean, the woodworking enthusiast and builder behind CharlestonCrafted.com! Since 2012, I've been sharing the magic of turning raw materials into beautiful creations. I love teaching others the art and satisfaction of woodworking and DIY. I try to inspire fellow crafters to make something extraordinary out of nothing at all.


[…] Our indoor Christmas decor is a good mix of new and old this year. Starting with the tree, we went with a pastel theme with white accents. We used pastel ball garland and put in our Christmas snowball ornaments. The tree itself is inside our box stand that elevates the tree by a foot. […]