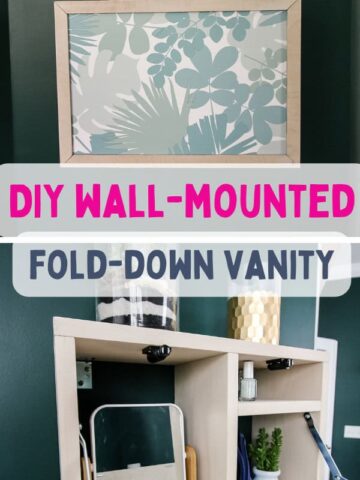
If you need a vanity but don't have a lot of space, check out how we built a wall-mounted fold-down vanity in our guest bedroom to give us what we needed without taking up the floor!
This post was sponsored by National Hardware. National Hardware's Made By Me kits are the perfect way to help get you started with a project like this. All opinions are our own. Thank you for supporting the brands that make Charleston Crafted possible!
Our guest bedroom is in the midst of a makeover, and we are trying to make the space both more functional for guests, but more importantly, for our family on a day-to-day basis.
In terms of making the space more functional for guests, we wanted to give our mothers a place to get ready in the room.
The guest bedroom is the first thing in our house when you walk in the front door and was designed to be an office, so there's no bathroom access in the room. Both of our mother's like to get their makeup ready, so we wanted to give them a better space to do that.
We designed a wall-mounted fold-down vanity and used the National Hardware Made By Me Fold Down Wall Organizer Hardware Kit to make it function.
Let's show you through the rest of this post how we built our DIY wall-mounted fold-down vanity and get you the free woodworking plans to make one yourself!
Check out the DIY built-in desk vanity with hidden storage we built at our old house!
DIY wall-mounted vanity
Our goal creating this DIY wall-mounted vanity was to make a space for our mothers to be able to do their makeup in their room in the morning.
This meant that the vanity needed to be functional, but couldn't be too big or the fold down door would stick out too far.
Lots of people make fold down makeup vanities that double as desks and use much bigger dimensions, but you have to stand much further away from the wall.
This one was designed to be the minimum depth - 8 inches - for the hardware to function properly.
Here's how we built the vanity and how we used National Hardware's kit to put the hardware on to make it work and hang on the wall!
Materials needed to build a DIY wall-mounted fold-down vanity
Here are the materials you'll need to build this DIY fold-down vanity:
- (1) ¾" x 7 ¼" x 8' board (standard 1x8 board)
- Wood glue
- Nails
- Stain
- National Hardware Fold Down Wall Organizer Hardware Kit
How to build a wall-mounted vanity
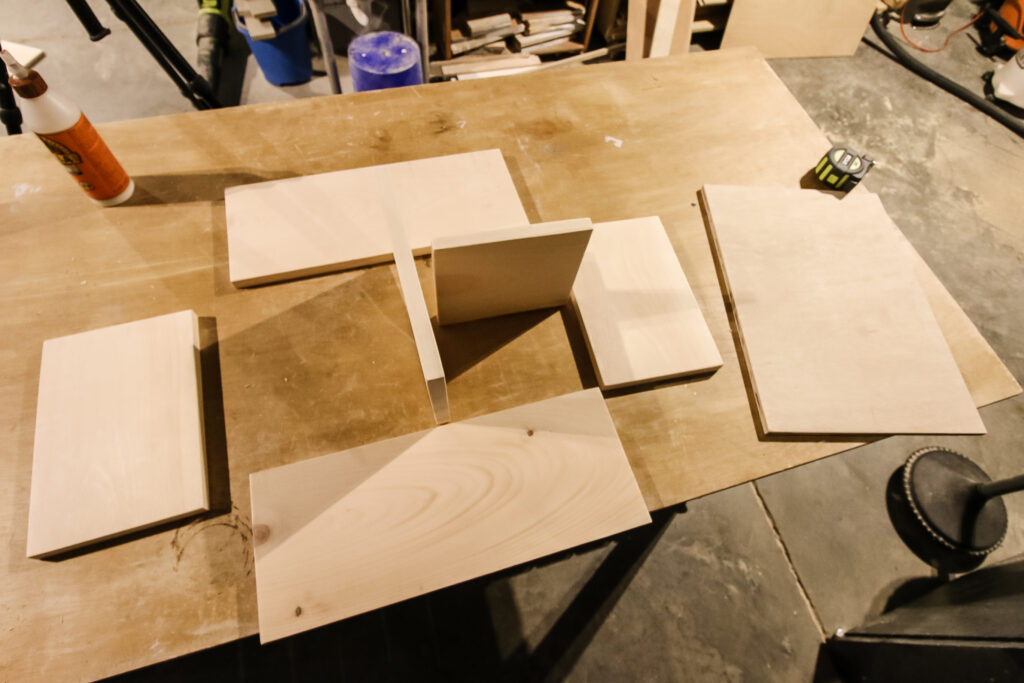
Building a wall-mounted vanity is a pretty straightforward project. The overarching idea is to build a square frame and use an inner framework that works for your needs.
The National Hardware Made By Me Fold Down Wall Organizer Hardware Kit actually comes with a good set of directions with specific dimensions you can use to build a vanity or desk.
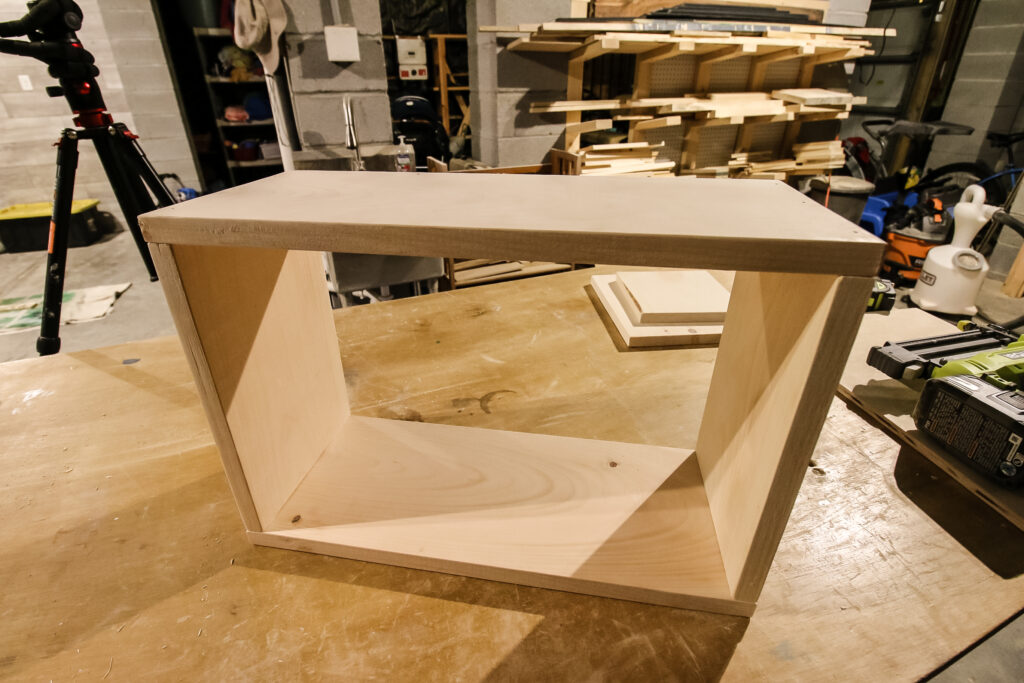
Start by building a square frame, using wood glue and either nails or screws to hold it together.
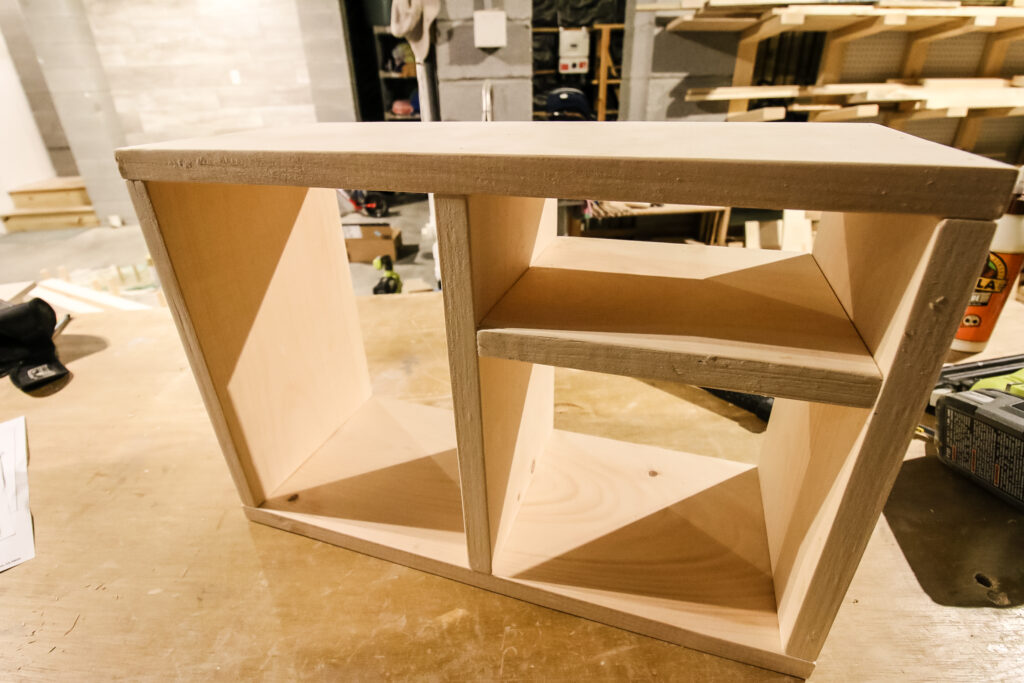
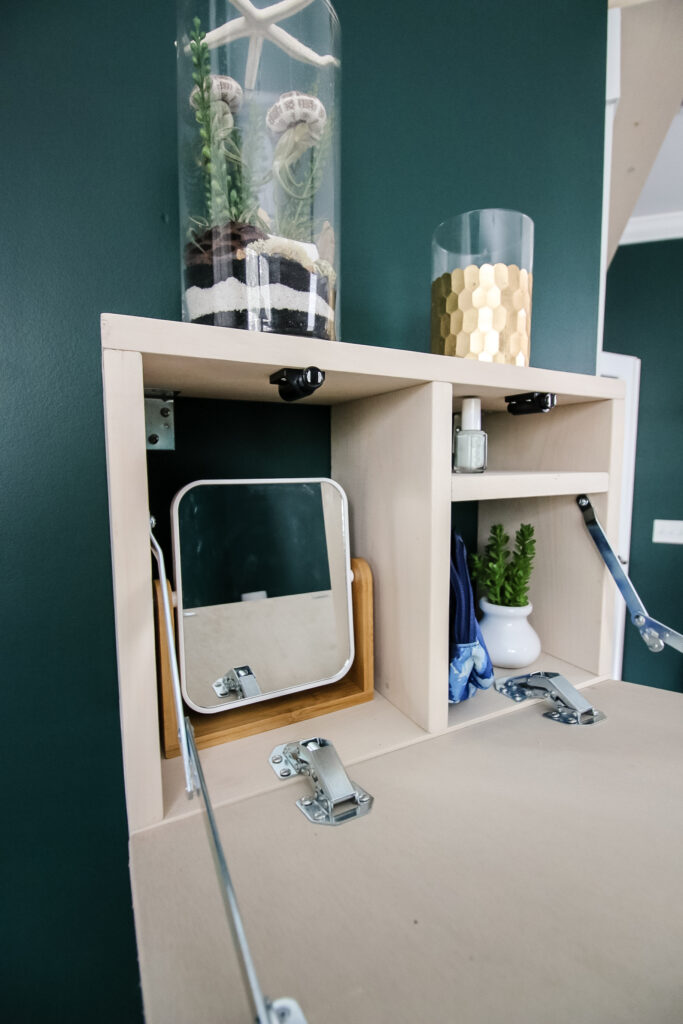
Then, attach a middle vertical divider and a horizontal divider on one side. These can be adjusted to the exact height you think you'll need for what you'll put in there.
You also need to cut a fold-down door out of plywood. This should be the exact same dimensions as the frame of the vanity.
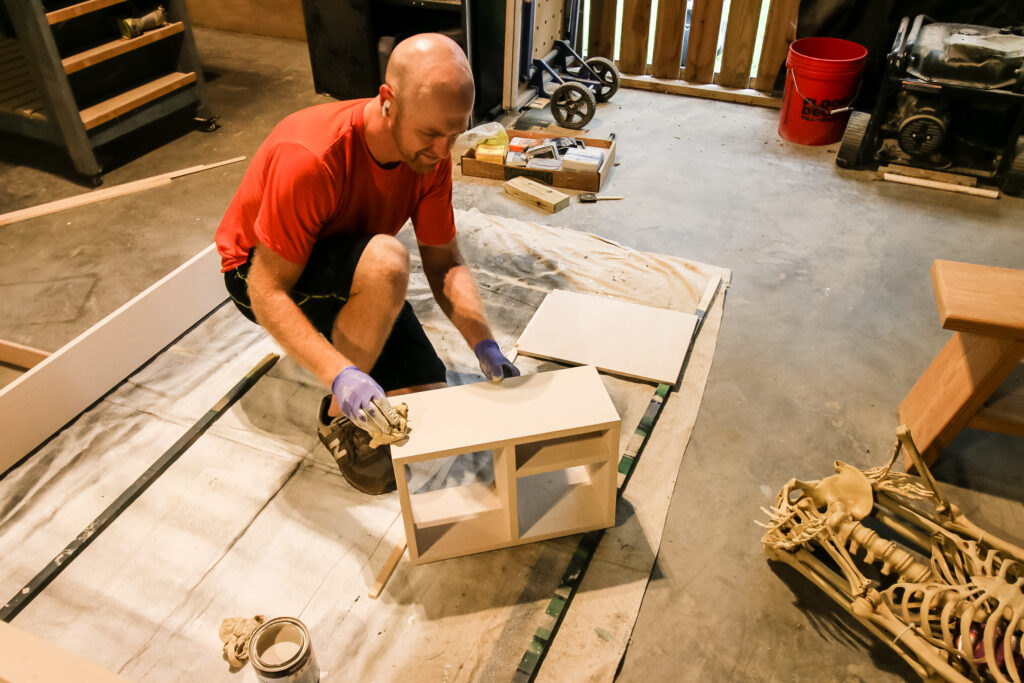
Once it's all assembled, fill any holes with wood filler, then add your stain of choice!
How to install National Hardware's Fold Down Wall Organizer Hardware Kit
This vanity wouldn't be really useful if it didn't have a convenient way to open it. Luckily, that's where the National Hardware Fold Down Wall Organizer Hardware Kit comes in handy!
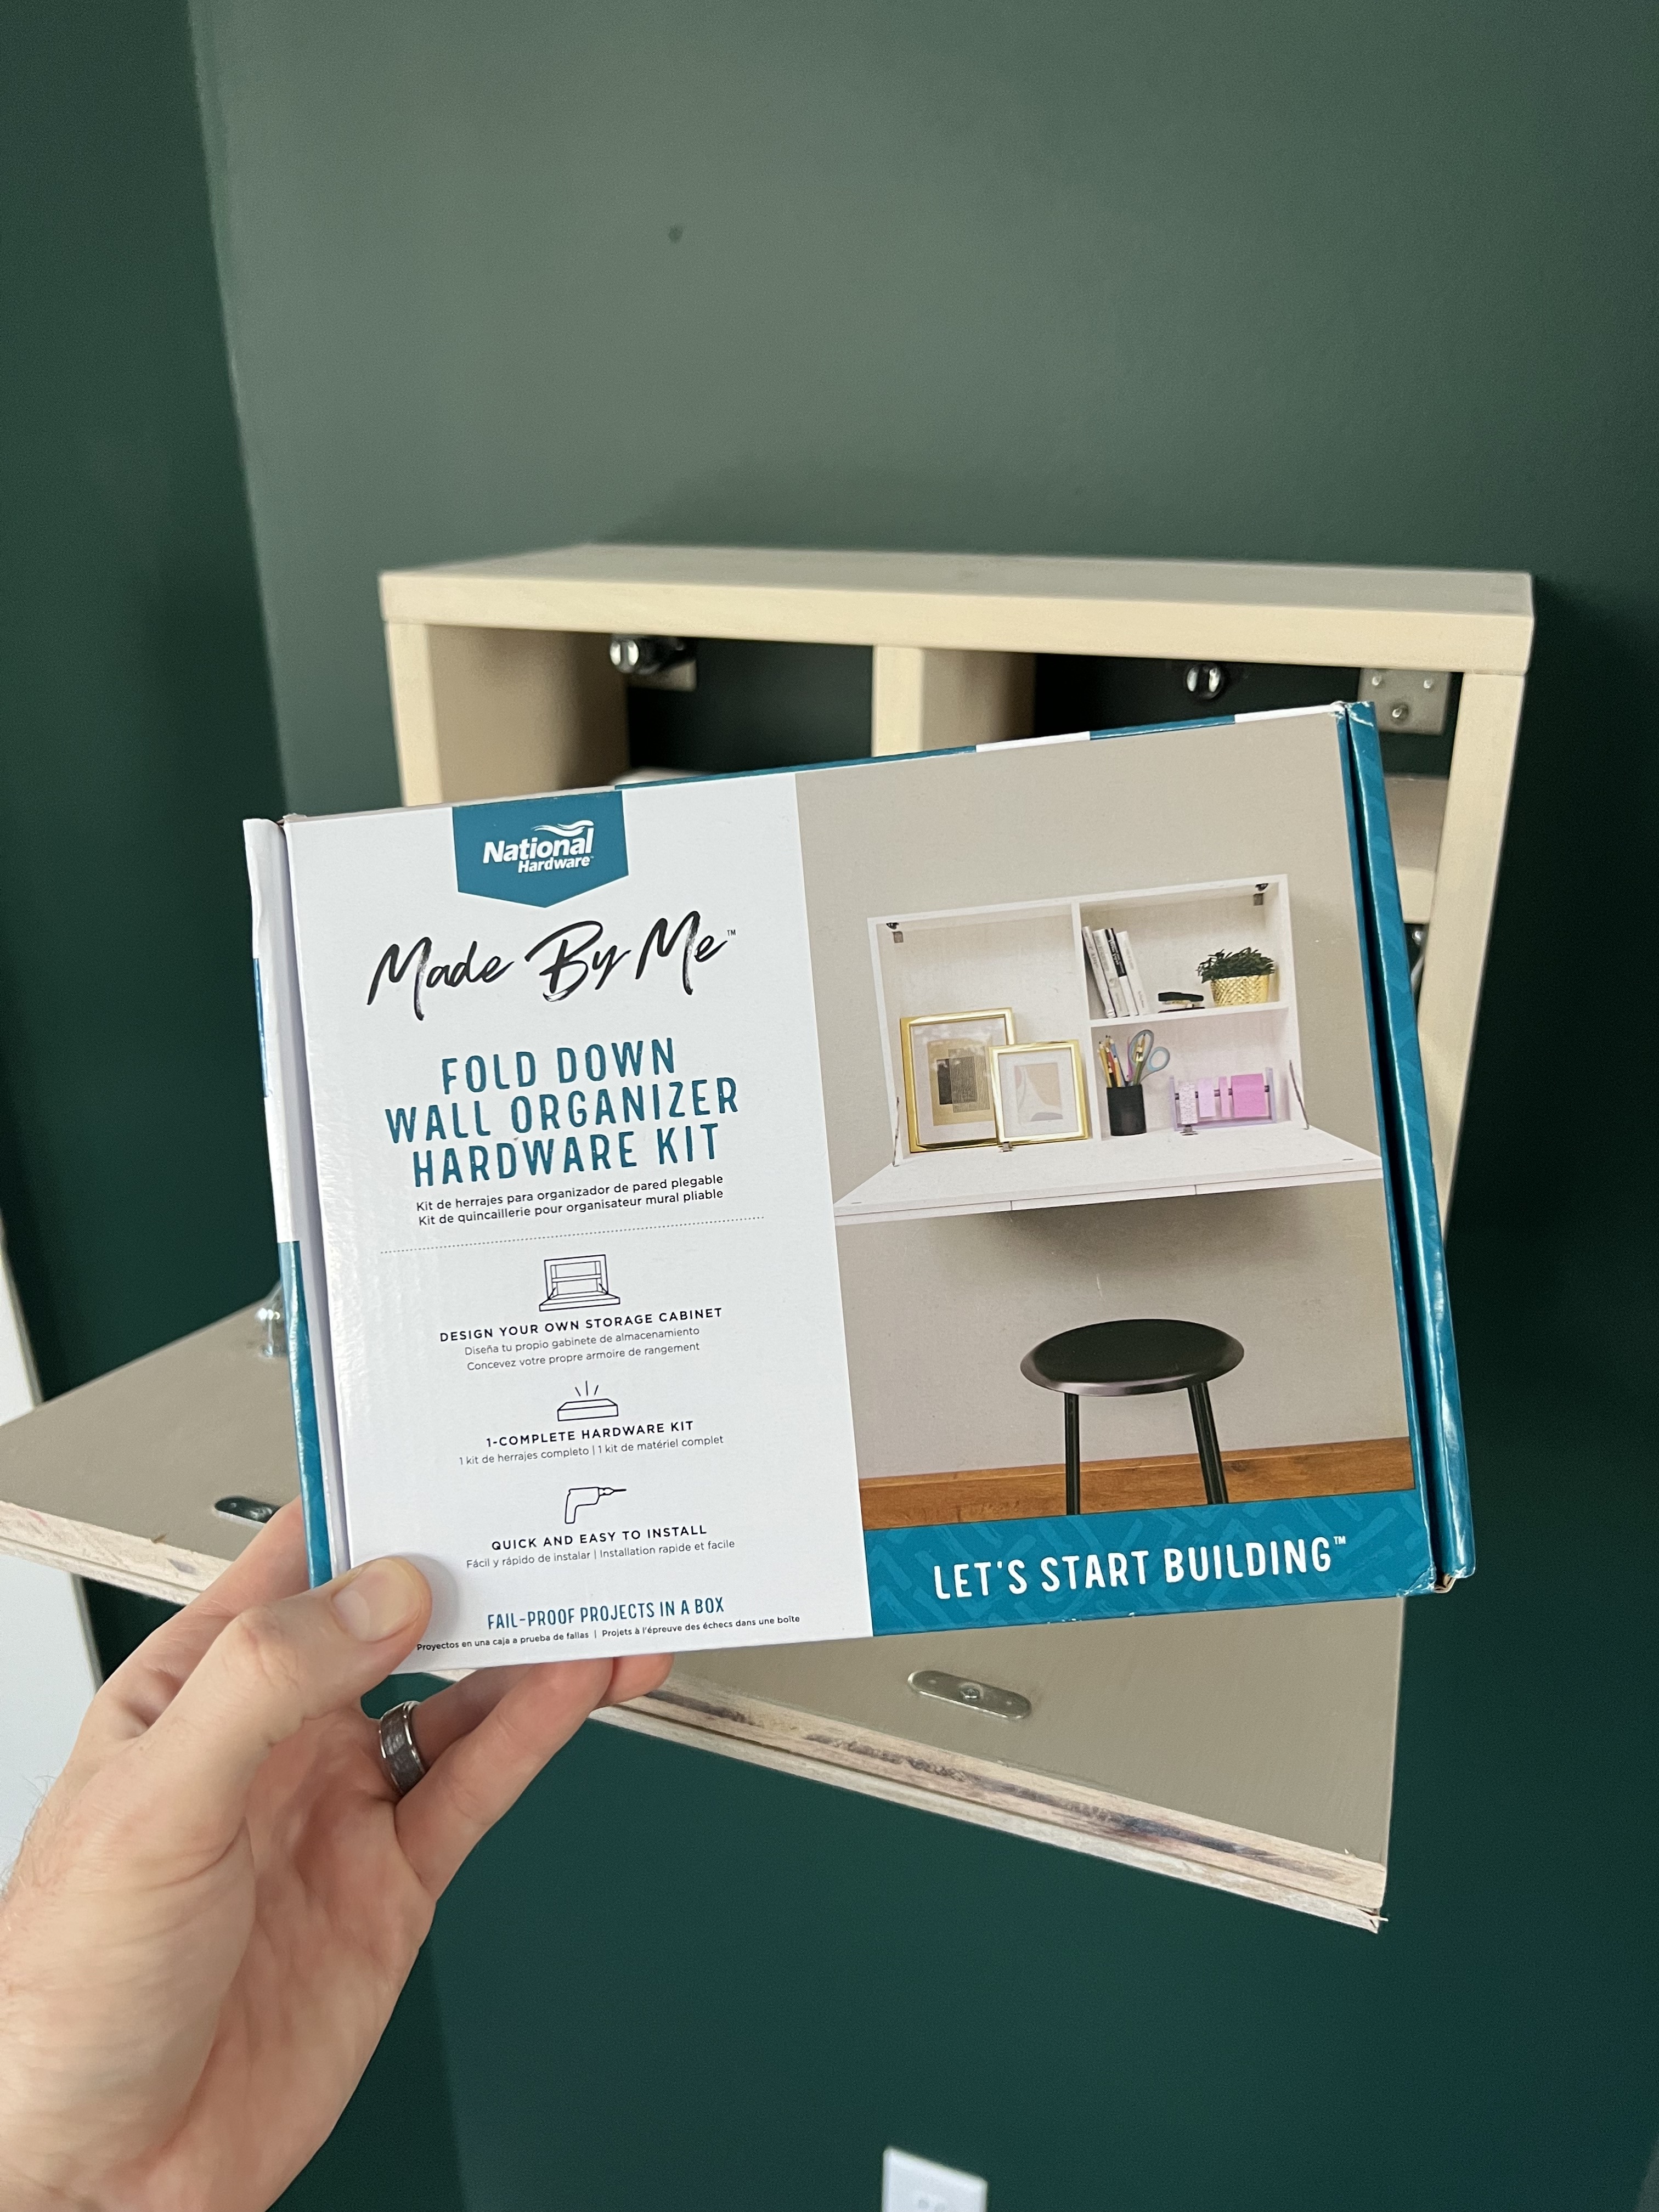
The hardware kit is great for multiple uses, including vanities, storage, desks or tables, all of which can be wall-mounted and save space on your floor.
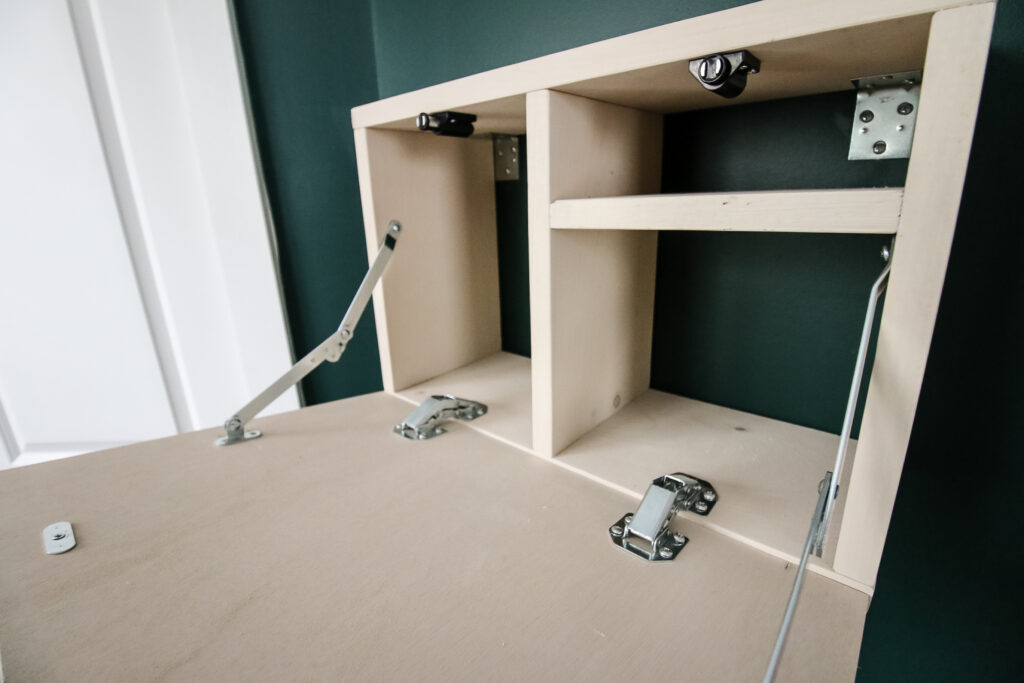
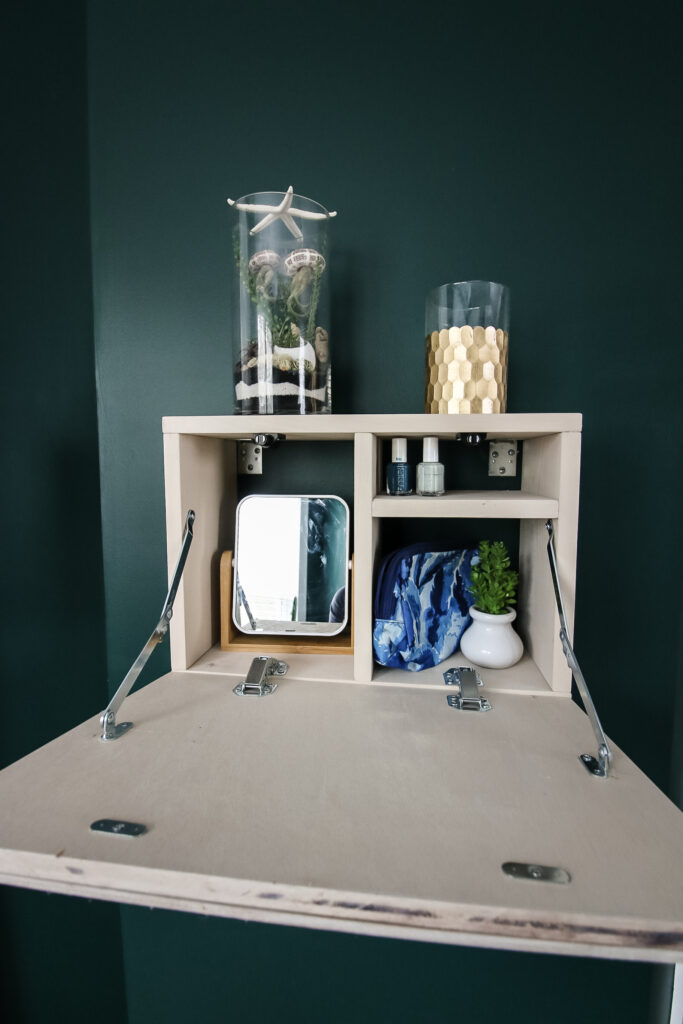
The kit comes with two hinges and two folding arms for ease with opening and closing your unit. It also includes two magnetic catches to latch closed and two support braces for mounting it to the wall.
The kit is nice because you don't have to go out and hunt for each piece individually that you would need for this project. It's bundled and ready to go along with step by step instructions.
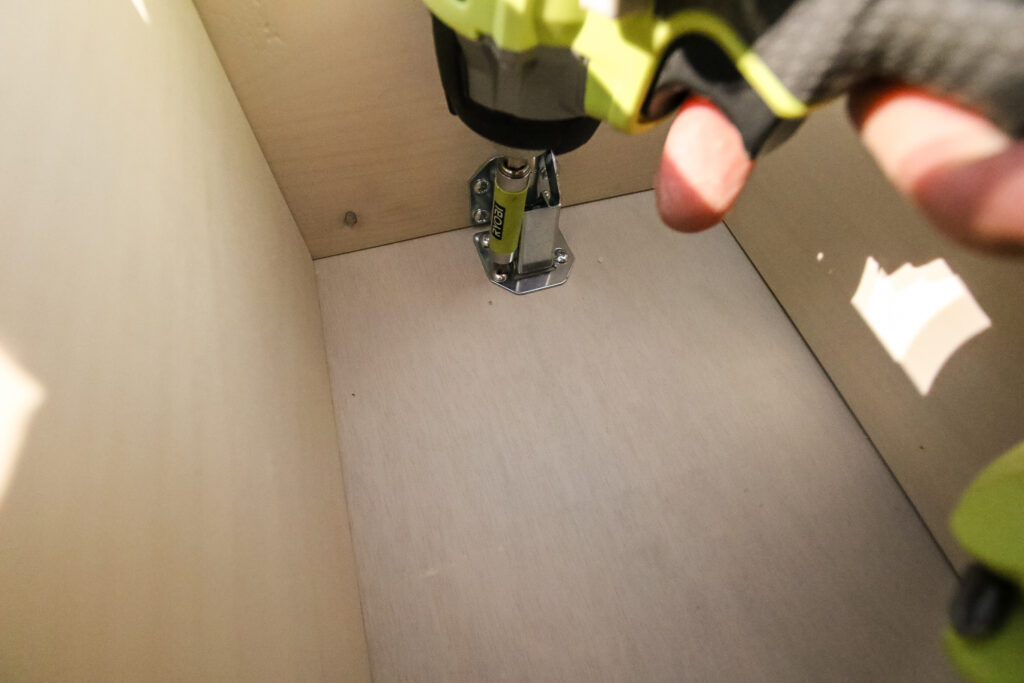
We started by attaching the two hinges to the frame and the face. These help open the door smoothly.
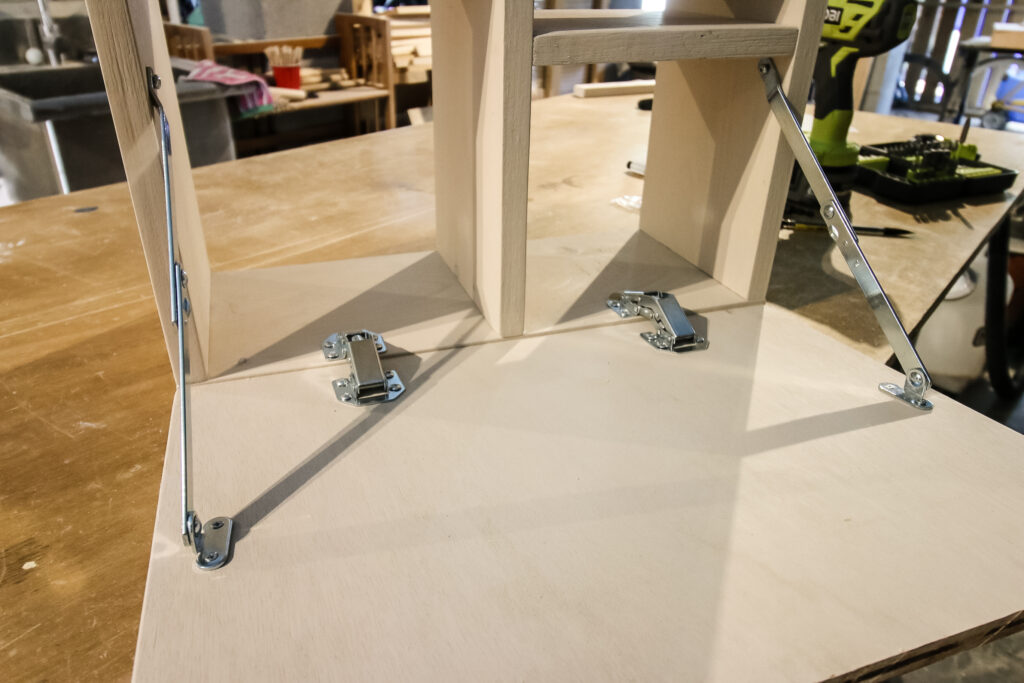
Then, we added the folding arms that help hold the door up when it is fully extended to open!
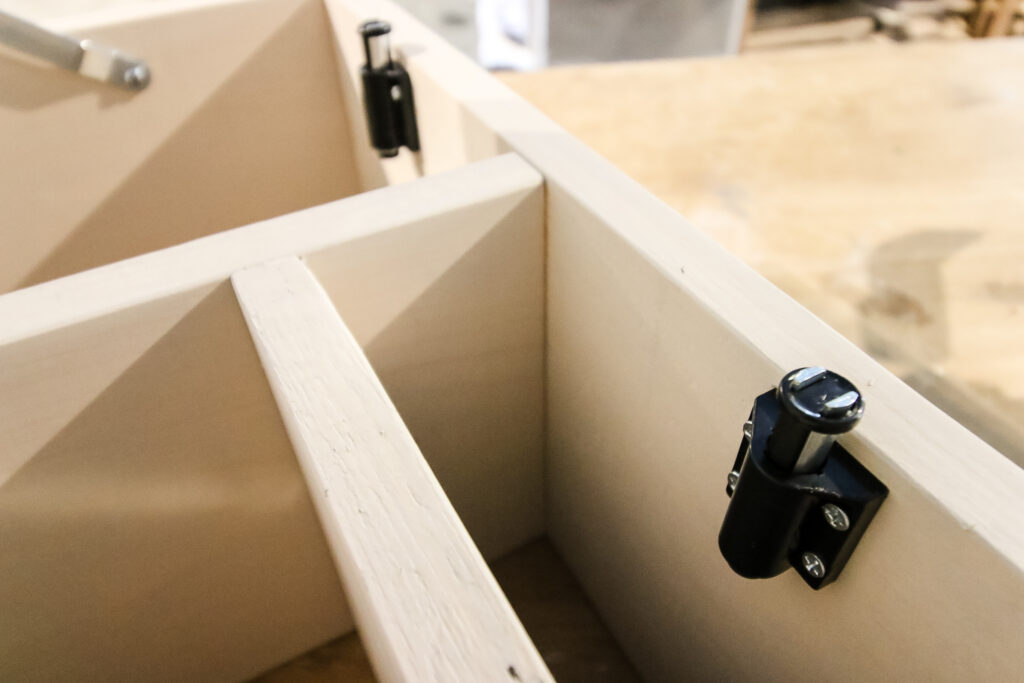
The door also opens and closes with a push thanks to the magnetic catches that are easily screwed into place!
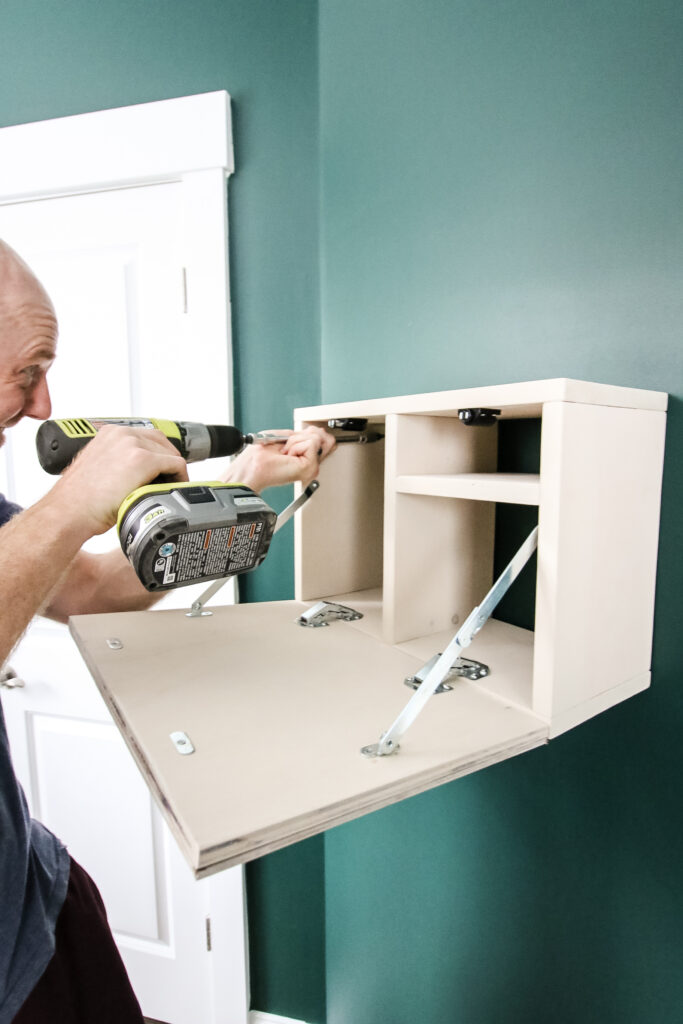
Finally, we mounted our vanity to the wall using the included heavy duty support braces. We anchored these into the wall for full support!
Check out these other projects we made with National Hardware Made By Me kits!
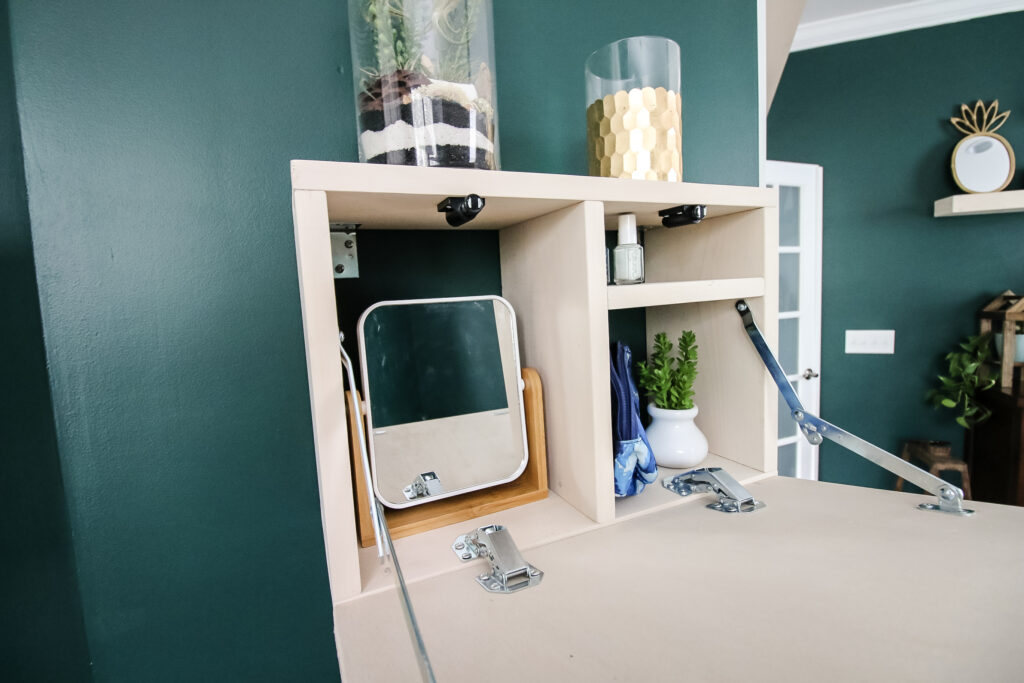
Final look at our wall-mounted DIY makeup vanity!
Once it was in place, we added to the door a piece of peel and stick wallpaper leftover from our jungle nursery at our old house so it would look like an art piece on the wall.
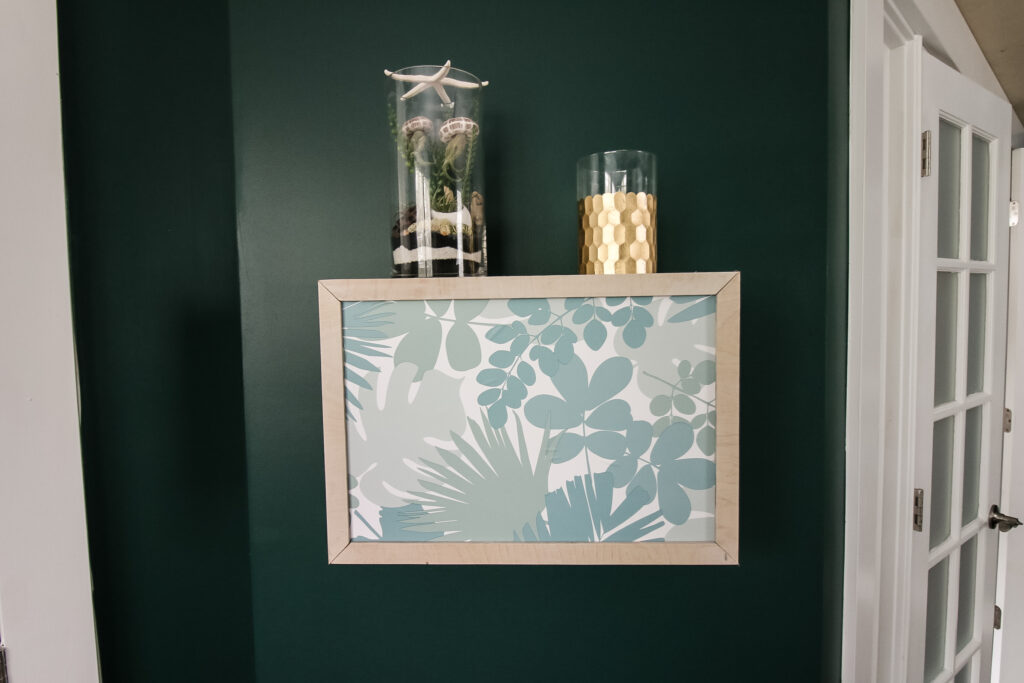
Now, the fold-down vanity is concealed during day-to-day non-use, but is easily opened up when our guests are in town!
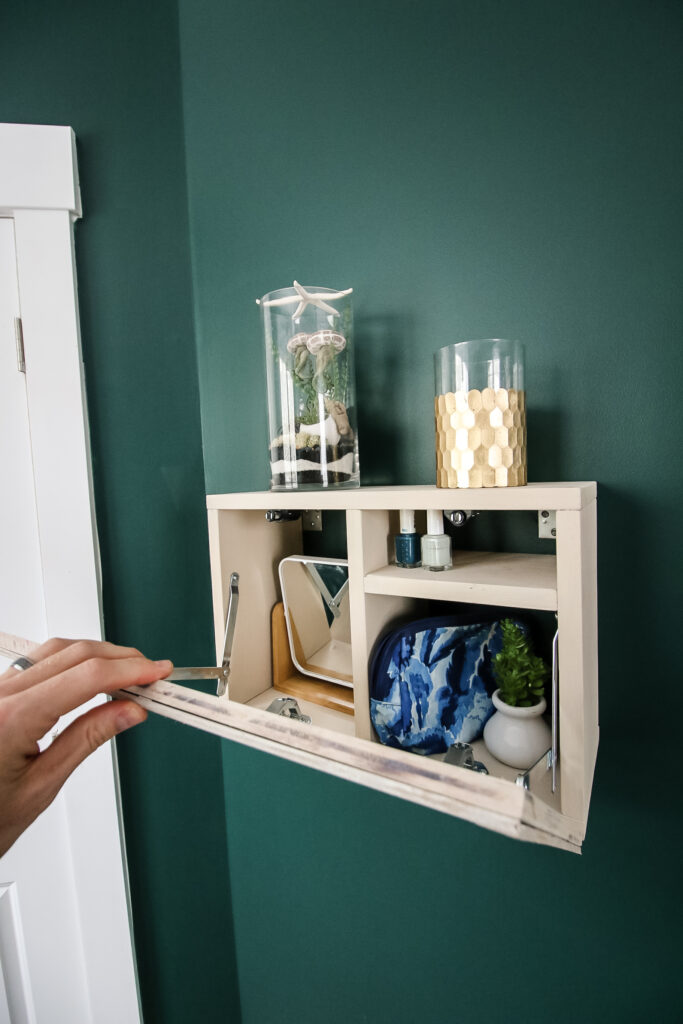
We put in a double sided vanity mirror to the inside for our guests, but the rest of the space will be available for them to put their stuff.
We love how this turned out and how nice it looks up on the wall. It's super convenient and suits exactly what we needed!
Free woodworking plans to build our DIY wall-mounted fold-down vanity!
Love this project and want one of your own? Inside of the National Hardware Made By Me Fold Down Wall Organizer Kit, they have free, simple woodworking plans to help you build this space saving fold-down vanity yourself!
This is a great project if you live in a small space or have guests that need a place to get ready, just like us.
Any questions about this project or the National Hardware Made by Me Fold Down Wall Organizer Kit?!

Looking for something?
We've been doing this since 2012 so we have a LOT of blog posts!
Search stuff like: Ceiling Projects | DIY Plant Stands | Thrift Flips
Looking for something?
We've been doing this since 2012 so we have a LOT of blog posts!
Search stuff like: Ceiling Projects | DIY Plant Stands | Thrift Flips

Hey there, I'm Sean, the woodworking enthusiast and builder behind CharlestonCrafted.com! Since 2012, I've been sharing the magic of turning raw materials into beautiful creations. I love teaching others the art and satisfaction of woodworking and DIY. I try to inspire fellow crafters to make something extraordinary out of nothing at all.