• Skip to primary navigation
  • Skip to main content
  • Skip to primary sidebar
Charleston Crafted
  • DIY
  • Woodworking
  • Popular Posts
  • Blog
  • About
  • Shop
menu icon
go to homepage
  • DIY
  • Woodworking
  • Popular Posts
  • Blog
  • About
  • Shop
search icon
Homepage link
  • DIY
  • Woodworking
  • Popular Posts
  • Blog
  • About
  • Shop
×
Home » Quick Projects

How to make a wooden bar tray

Published: Jan 17, 2018 · Modified: Dec 13, 2023 by Sean · As an Amazon Associate, we earn from qualifying purchases. This site contains affiliate links. ·

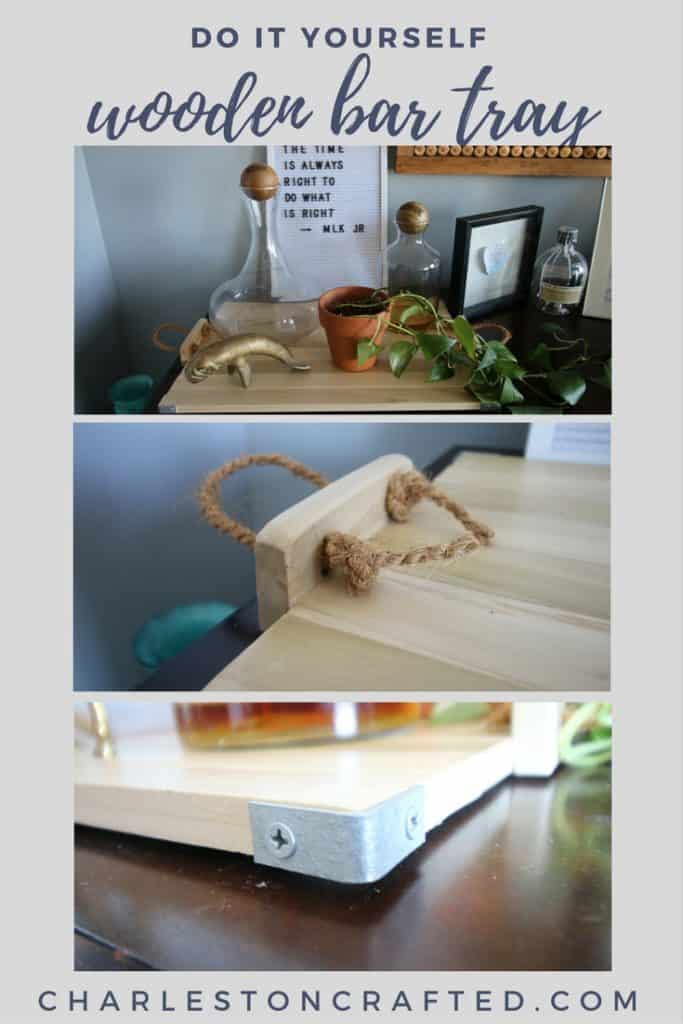
Wondering how to make a wooden tray? Here is a simple tutorial featuring cute rope handles!

Trays are great decor to add to any area of your home. They work to protect lower surfaces, corral decor together, and add detail and interest to any shelf or tabletop.

Trays also make a great gift - I particularly love to give them as host/hostess gifts!

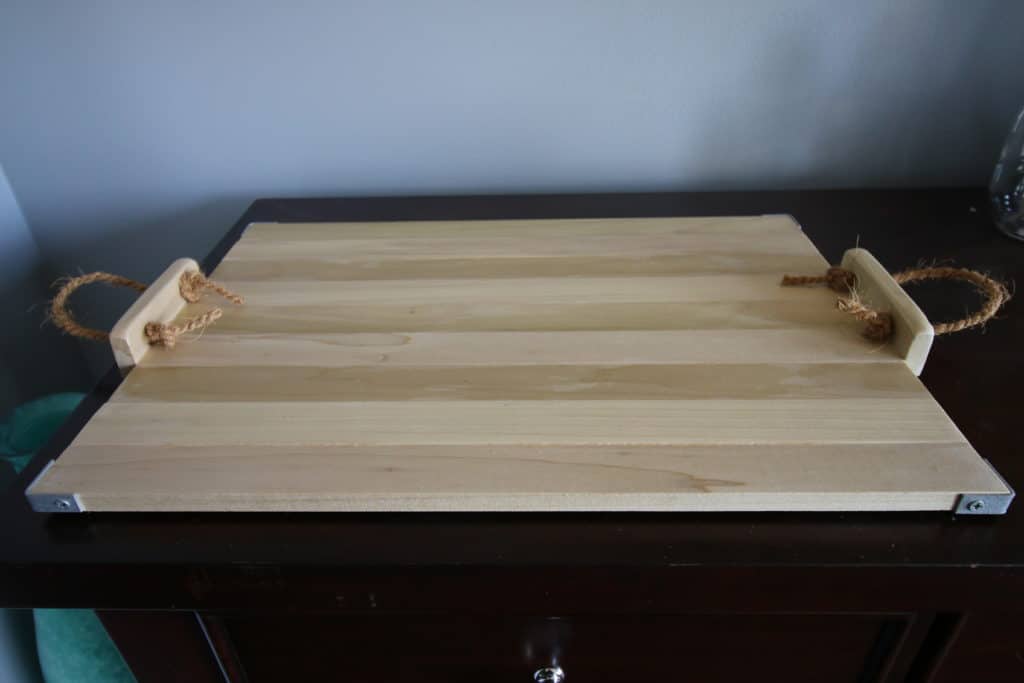
Today we want to share a tutorial for how to make a wooden tray with rope handles. It's a simple build but a totally cute result!
How to make a wooden bar tray - Charleston Crafted

How to Make a Wooden Bar Tray

This is a simple way to make a wooden bar tray. You don't have to have fancy equipment or a lot of skill to make a simple bar tray.

Working with simple lumber from the hardware store and tools you definitely have around the garage, you can make a really functional, beautiful bar tray.

Supplies needed:

  • Lumber of choice - we used 1"x2" poplar
  • Wood glue
  • Bar clamps
  • Saw
  • Sander
How to make a wooden bar tray - Charleston Crafted

Steps to make a wooden bar tray:

Here are the steps to follow to make a simple wooden bar tray.

Step 1: choose your wood

Start out by getting some nice wood, like poplar or oak, something with a nice grain.

If you want things done for you or you don't have a table saw, pre-cut, four foot long 1"x2" boards actual size ¾"x1 ½") are great for this project. If you feel like ripping some boards down, power to you.

When we originally built this project, we used the pre-cut 1x2s, but now we would definitely rip it down as we've gained more tools and experience.

Learn more about actual vs common dimensions in lumber here!

Step 2: Make your cuts

Here's the cuts you'll need to make a good sized wooden bar tray:

  • (9) Slats- 20" x 1 ½" x ¾"
  • (2) Handles- 5 ½" x 1 ½" x ¾"

If you're using pre-cut slats, you can just cut these down with a miter saw. If you need to cut them down from a 1x4 first, you can use a table saw to do that.

Then, sand all cut edges for a smooth finish.

Step 3: arrange the boards

After sanding them all down, we arranged them based on how we liked the grain. The light grey undertone to the poplar we chose was actually going to work perfectly for our space to balance out the dark walnut bar top.

If you want a stain, now would be be the time to do it. Here are the best food-safe wood stains, if you plan to put food on it!

Step 4: Glue the boards

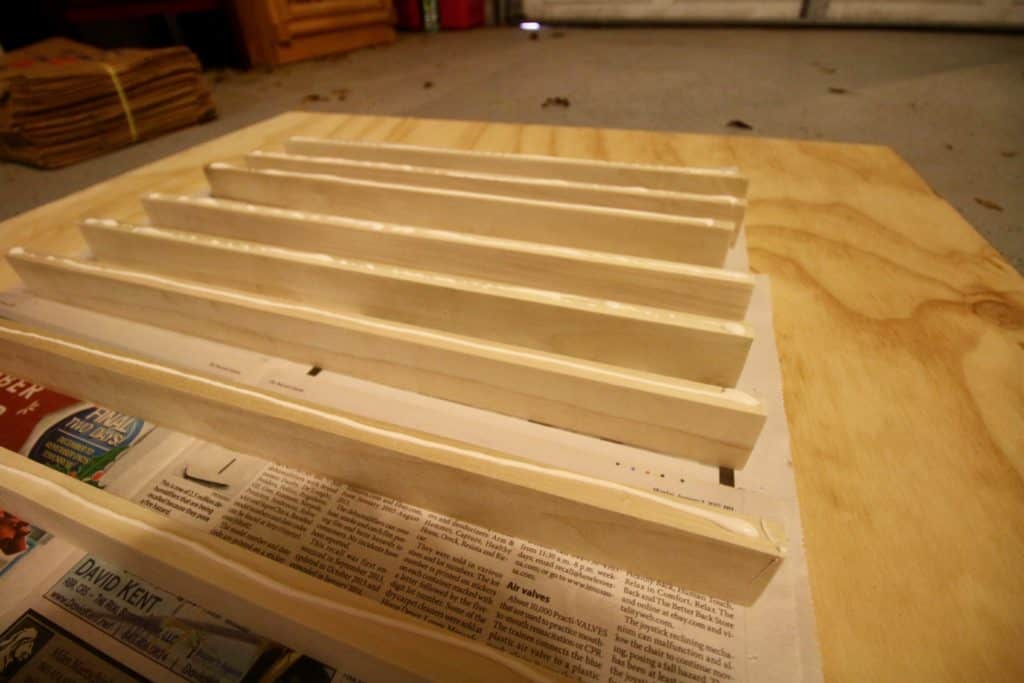
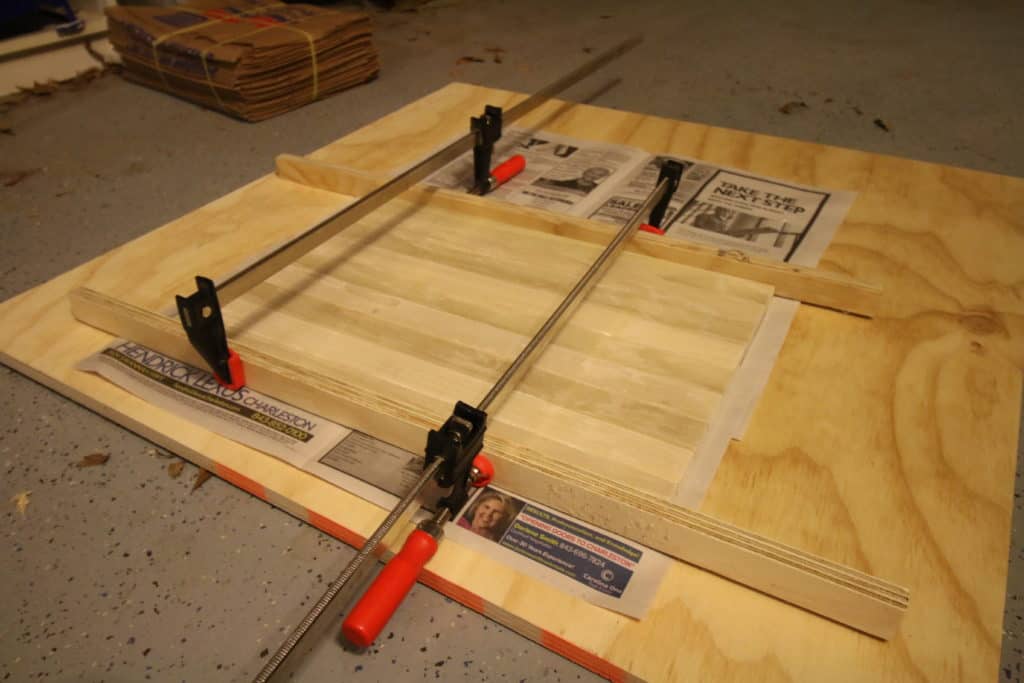
We then stood each board on its side and put a line of Gorilla Glue down on each edge.

Then we turned them down, pressed them together, and clamped them tight with two long bar clamps.
How to make a wooden bar tray - Charleston Crafted

Step 5: Make the handles

While the glue dried, we took two of the scraps cut off of the boards and used our RYOBI One+ jigsaw to cut a half moon on one edge of each piece.

We drilled two holes in each piece to thread rope through as a handle later.

Step 6: Final sand

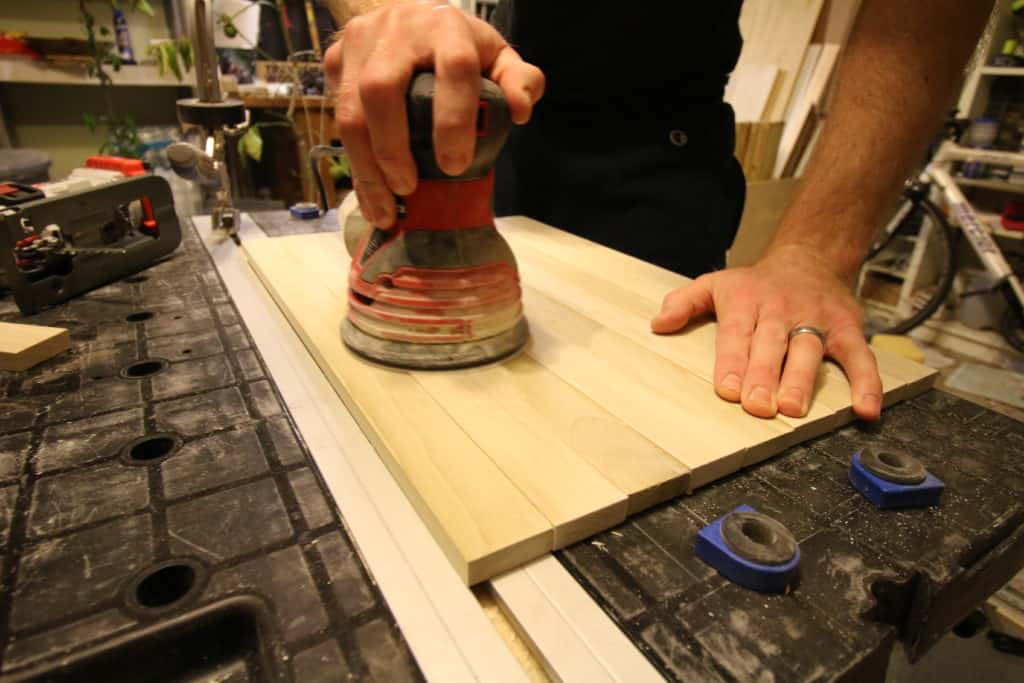
After the glue was dry, we sanded down the entire tray to make sure all the glue was gone and the edges were flush.

Then, we used the Gorilla Glue again to attach the two curved pieces to the two sides and clamped them down.
How to make a wooden bar tray - Charleston Crafted

Step 7: Add handles

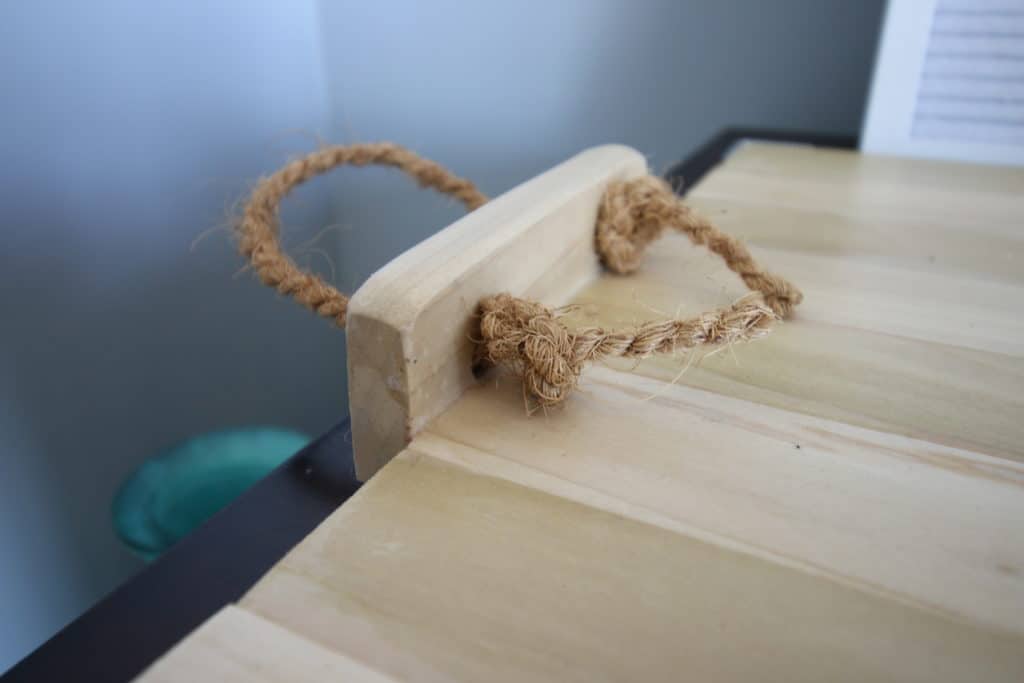
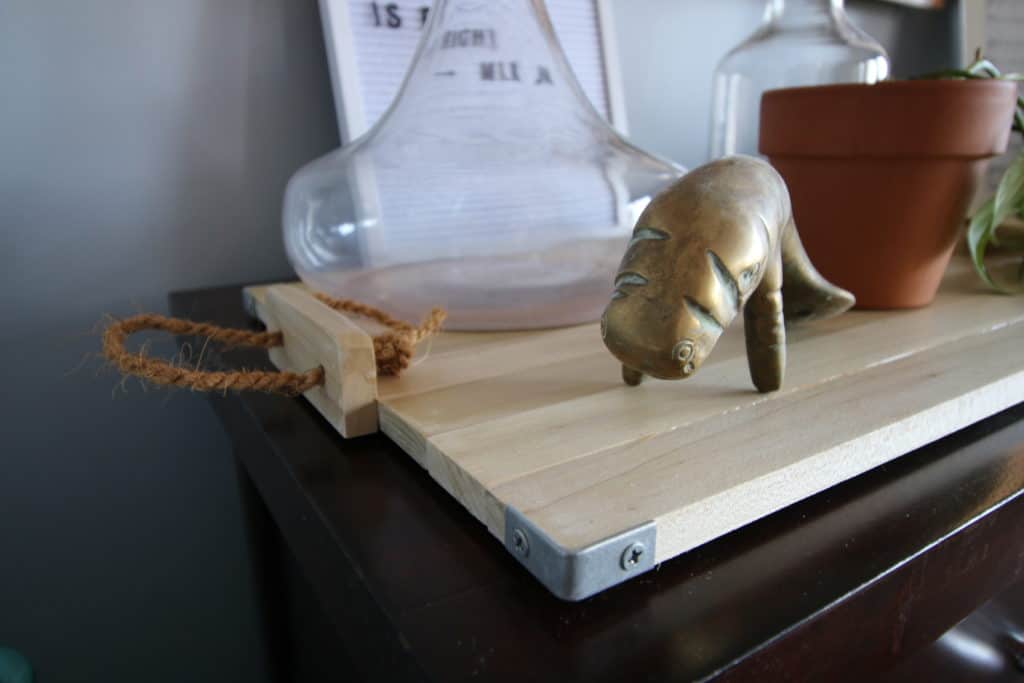
Once everything was done, we threaded the rope through the holes and tied knots off on each end. Then we added 1" corner braces to each corner to finish off our rustic look.

How to attach rope handles to wood

The easiest way to attach rope handles to wood is to drill 2 holes into the wood and thread the rope through, knotting in place. If you don't want to drill holes, adding eye screws can work as well.

You can use super glue or hot glue to attach rope to wood as a decorative accent, but it will likely not hold it strongly enough to work as a handle. Hardware is necessary for that secure of a connection.
How to make a wooden bar tray - Charleston Crafted

DIY wooden bar tray

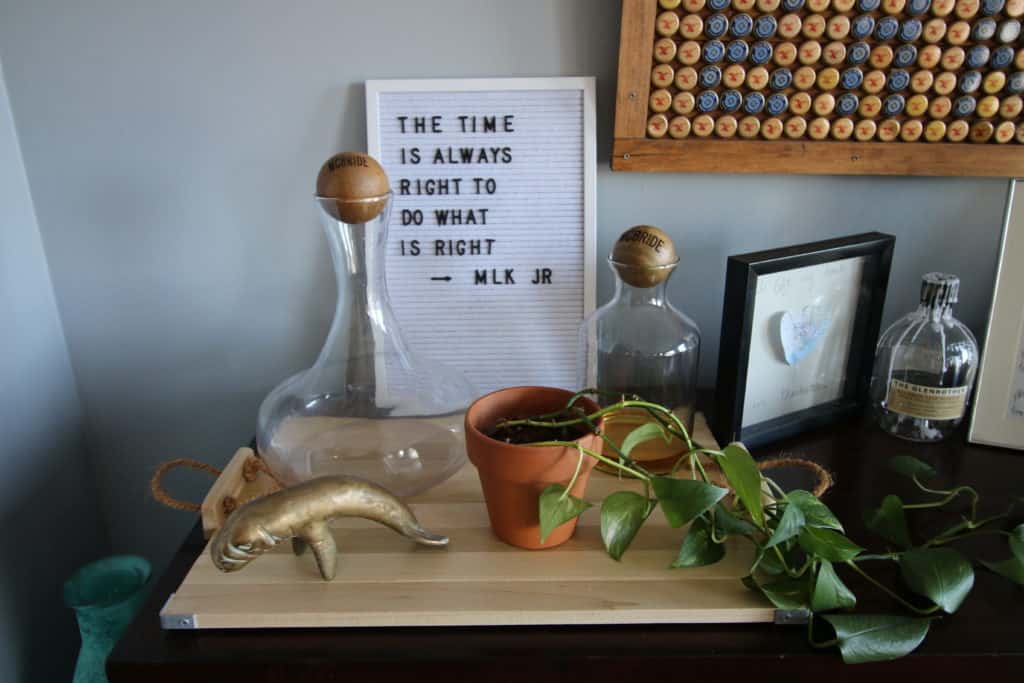
If you're looking for how to make a wooden bar tray, there are lots of levels and ways to do it, but this is a quick and simple method for doing it.
How to make a wooden bar tray - Charleston Crafted

This project is highly customizable and we would love to see what you do with it. You can make a beautiful wooden bar tray with just a few pieces of wood, wood glue and rope.
How to make a wooden bar tray - Charleston Crafted

You can do anything!

Want more DIY trays?

  • Wooden bar tray
  • Faux inlay wooden tray
  • Football Field serving tray
  • Desk cubby hole trays
  • Two tiered serving tray
  • DIY wooden laptop tray
  • Simple tile + wood tray
  • Paper organizer stacked tray
Charleston Crafted Signature

Follow us on:
Pinterest | Instagram | TikTok | YouTube | Facebook | Amazon Storefront | LTK Shop

Looking for something?

We've been doing this since 2012 so we have a LOT of blog posts!
Search stuff like: Ceiling Projects | DIY Plant Stands | Thrift Flips

Charleston Crafted logo banner
Sean headshot cropped
Sean

Hey there, I'm Sean, the woodworking enthusiast and builder behind CharlestonCrafted.com! Since 2012, I've been sharing the magic of turning raw materials into beautiful creations. I love teaching others the art and satisfaction of woodworking and DIY. I try to inspire fellow crafters to make something extraordinary out of nothing at all.

More Quick Projects

  • DIY folding desk for walking pad - Charleston Crafted
    DIY folding desk for walking pads
  • how to add drainage holes to a pot
    How to drill a hole in a ceramic pot for drainage
  • how to prevent a cabinet door from opening too far
    How to keep a cabinet door from opening too far - the EASIEST way!
  • Free printable no soliciting sign
    No Soliciting Sign- Free Printable

Primary Sidebar

Charleston Crafted about us image

Hey y'all!

We are Morgan & Sean McBride and we are crafting our home together in Charleston, South Carolina.

More about us

Popular Posts

  • DIY Coffered Ceiling
    DIY Coffered Ceiling
  • How to Make DIY Concrete Pumpkins via Charleston Crafted
    How to Make DIY Concrete Pumpkins
  • How to Make a Cupid's Arrow Valentine's Day Wall Hanging with felt on the Cricut
    How to make a Cupid's Arrow Valentine's Day Wall Hanging
  • Our Tropical Oasis - A backyard Hammock area - Charleston Crafted
    Our Tropical Oasis

Recent Posts

  • fisherman aesthetic home inspiration
    Fisherman Aesthetic Decor for Your Home
  • Senix Tools Review- Charleston Crafted
    Are Senix power tools any good?
  • Your Weekend To-Do List: 15 Things to Do for Summer Home Upkeep
    Your Weekend To-Do List: 15 Things to Do for Summer Home Upkeep
  • How to build a DIY gate pergola- Charleston Crafted
    How to build a DIY gate pergola

Privacy Policy

Footer

↑ back to top

Navigation

  • Home
  • Blog
  • Contact Us
  • Terms of Use
  • Disclaimer

Newsletter

  • Sign up for emails and updates
  • Follow us on Instagram
  • Work with Us

Browse by Category

  • Woodworking
  • Home Projects
  • Paint Colors
  • Room Reveals

© 2025 The Charleston Crafted Blog LLC DBA “Charleston Crafted” and “CharlestonCrafted” (also known as N/A) / All Rights Reserved.
Official Website: (Charleston Crafted)
Registered in USA (Co. Reg. No.: 565586)
Address: Charleston, USA 29414, South Carolina
Contact Phone: Not applicable — contact is via email: sean@charlestoncrafted.com

DISCLAIMER: The content on this website is provided for general informational purposes only and is not intended as professional advice. The Charleston Crafted Blog LLC and The Charleston Crafted Blog LLC make no representations or warranties—express or implied—regarding the accuracy, completeness, or suitability of the information contained herein. Any reliance you place on this information is strictly at your own risk. In no event shall The Charleston Crafted Blog LLC or The Charleston Crafted Blog LLC be liable for any loss or damage, including without limitation, indirect or consequential loss or damage, arising from the use or inability to use this website. This website is the official website of The Charleston Crafted Blog LLC.

AFFILIATE DISCLOSURE: This website contains affiliate links. If you click through and make a purchase, we may earn a commission at no extra cost to you.

As an Amazon Associate, I earn from qualifying purchases.

Site Editor: Morgan Smith McBride

Copyright © 2025 Charleston Crafted