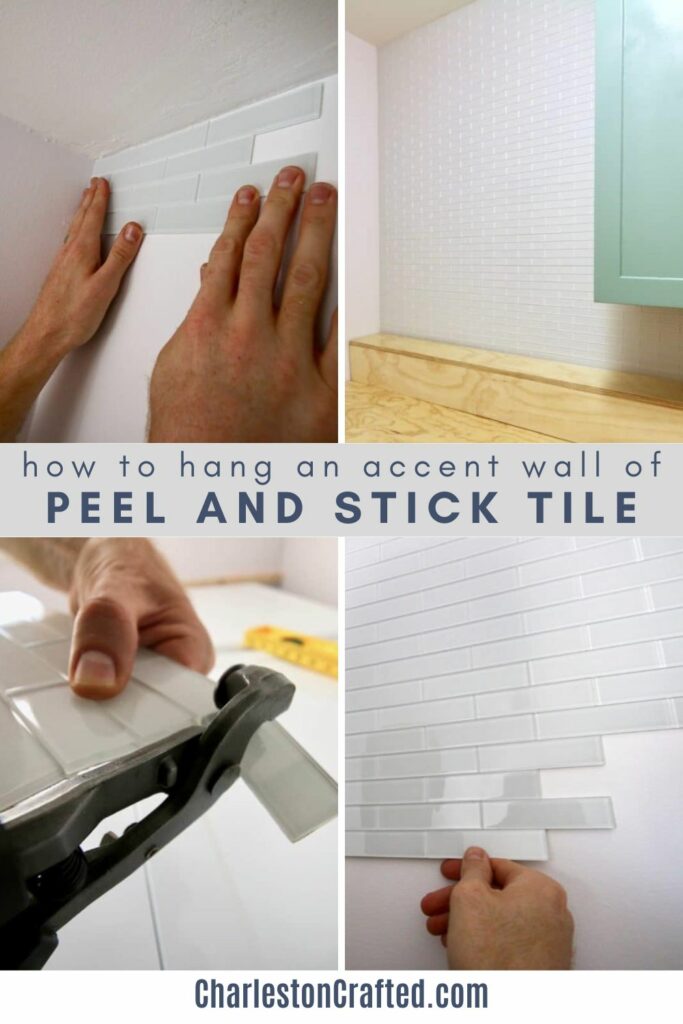
Want to add texture and interest to your room - without grout?! Here's How to Hang a Peel & Stick Tile Accent Wall.
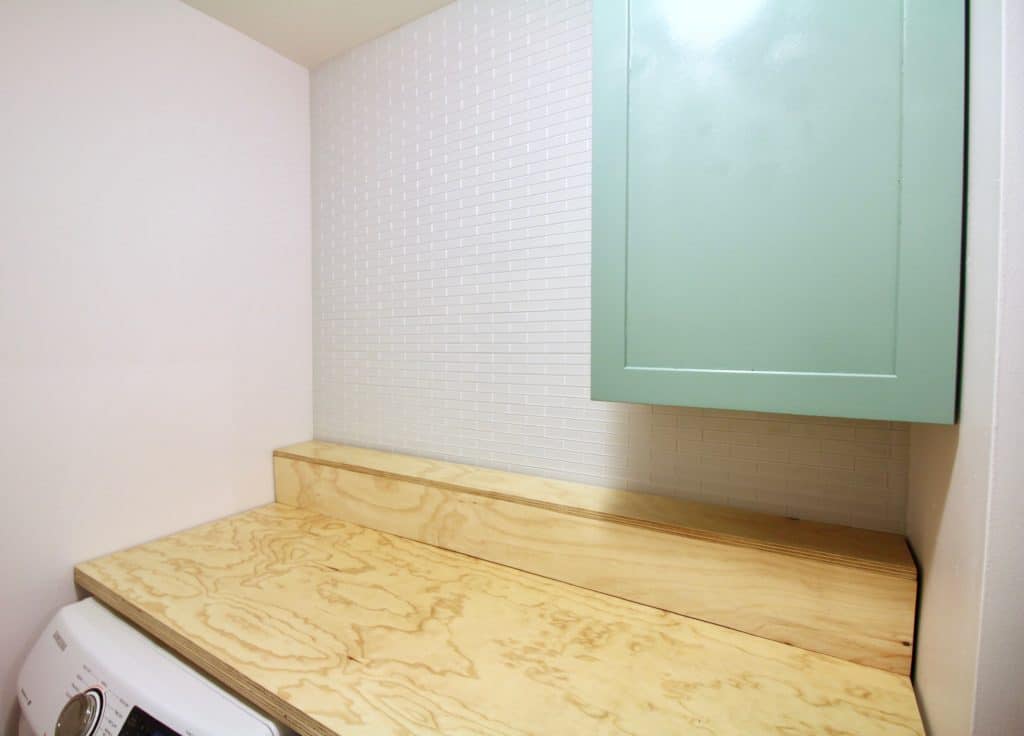
One thing that I really wanted to do in the laundry room is to play with tone on tone texture. I've noticed that pops of texture have really become a trend ahead of pops of color.
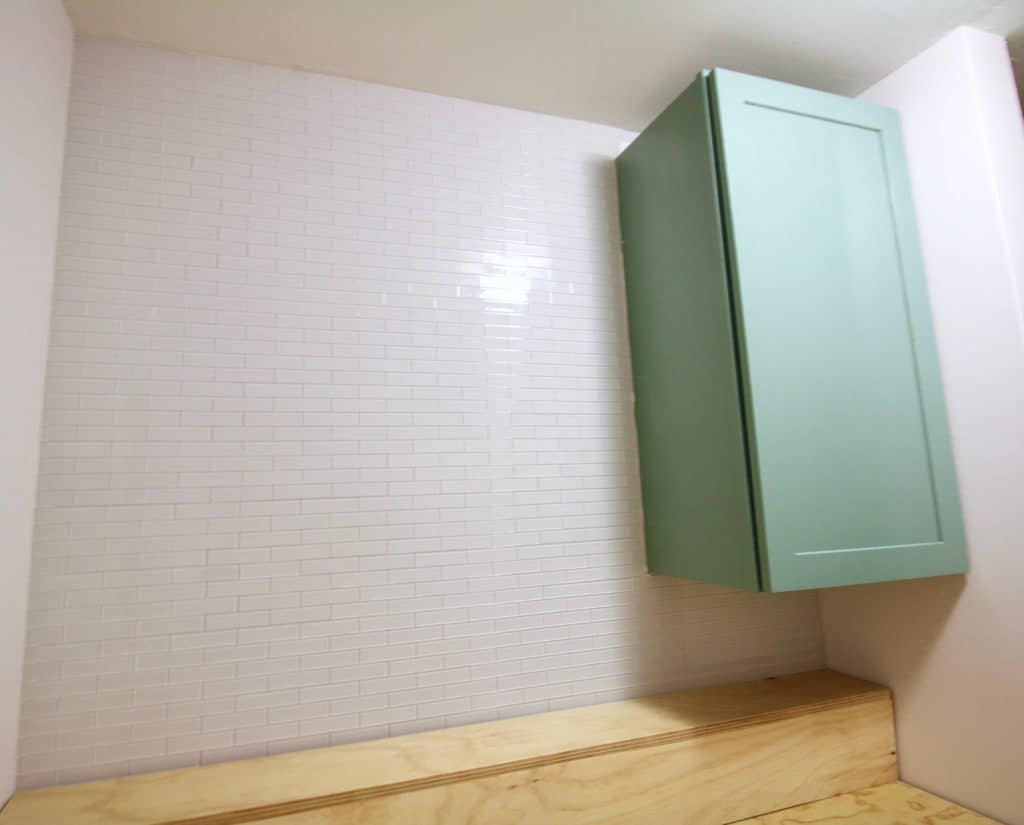
So, I was intrigued by the idea of doing a white tile wall in a room with white paint. The color stays the same, but the texture is what makes it stand out.
I was also really excited to try peel and stick tile.
I have never been impressed by peel and stick tile in the past - I always thought that it looked like a puffy sticker circa 1998. But, then I met Aspect Tile at Haven Conference.
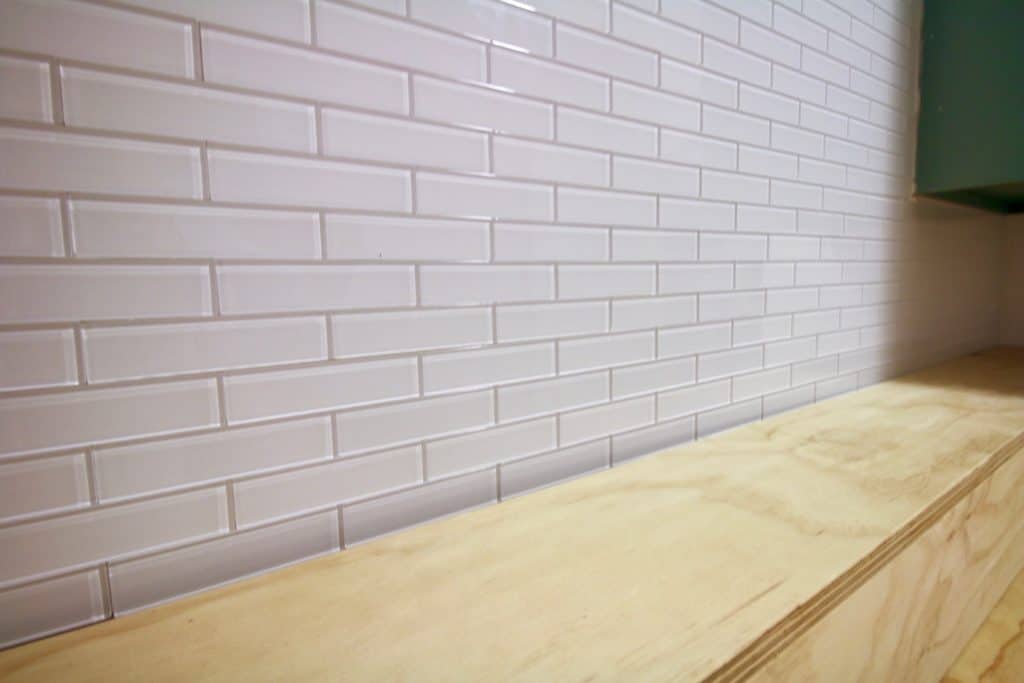
This is legit GLASS tile y'all. Actual glass tiles with a sticker backing.
It's gorgeous and requires no grout and so I had to give it a try. The tiles also come in metal, wood, and stone varieties, as well as lots of colors of glass.
Click here to pin this project to your Pinterest board!
I will preface this with saying that tiling is not that hard and I encourage you to try it. But, if you are scared, this is SO easy!
If you can do a sticker, you can do this. I do recommend using a level to be sure that it is very neat. Also, it looks best if you caulk the edges, which is really simple to do.
In case you've missed it, here are all of the projects so far in our Laundry Room Makeover:
Hanging and painting a reclaimed cabinet
Basket wall hangings
Pros and cons of peel and stick tile
Here are the benefits and negatives of hanging peel and stick tile compared to real tile with mortar and grout.
Pros of peel and stick tile
- Super easy - no grout, no mess
- Goes up quickly once you get in the swing of it
- No wet saw needed - just use tile snips
- Same look as tile
Cons of peel and stick tile
- No wiggle room - the adhesive is strong and can't be adjusted once up
- Limited selections of colors, patterns, designs
- The cheap versions (thin vinyl) can look cheap and fake
- The tiles can be surprisingly expensive
Durability of Peel & Stick Tile
Once applied and fully dried in place, there is no reason that peel and stick tile would be any less durable than regular tile. In fact, since there is no grout, it has a bit more flexibility and is less likely to crack due to small fluctuations in the wall.
Because of this durability, quality peel & stick tiles are completely suitable for high-traffic areas like entryways or kitchens.
How to prevent scratches, fading, and discoloration of tiles
Here are my tips for preventative care of your peel and stick tiles:
- Don't use abrasive cleaners like steel wool - stick to soft cleaning cloths.
- If something spills, wipe it as soon as possible.
- Clean stains with this mixture: a quarter cup white vinegar, a quarter cup baking soda, 1 tablespoon liquid soap, and 2 gallons of warm water.
- Apply a tile sealant top coat to protect the tiles.
Cleaning Peel & Stick Tile
You can clean peel and stick tile with your basic spray cleaner and a soft microfiber cloth, just like you would any other tile. I always suggest wiping up spills as soon as possible to decrease the chances of staining!
Uses for peel and stick tile
You can use peel and stick tile for:
- Accent wall
- Backsplash
- Fireplace surround
Check out my tutorial for how to paint your tile backsplash, too!
How to prepare a wall for peel and stick tile
Your wall should be clean, dry, and smooth prior to applying the tile. If it's textured, you can sand a bit and then wipe clean with a dry cloth.
Steps to prepare a wall for peel and stick tile:
- If you are working over a stove, consider using a degreaser to remove any grease build up from cooking. Follow the bottle's instructions and be sure that the wall is 100% dry before hanging tile!
- Wipe the wall with a lint-free cloth to remove any dust or dirt.
- If your wall is painted a dark color and you are hanging a light or clear glass tile, you might want to consider priming or painting the wall white first. Hold up a sample piece and judge if the color shows through.
- If your wall has existing wallpaper or tile, you will have to decide if you want to tile over them or remove them first. Different tiles have different limitations, so refer to your brand's instructions before making a decision.
How to Hang a Peel & Stick Tile Accent Wall
Supplies to hang a peel and stick tile accent wall:
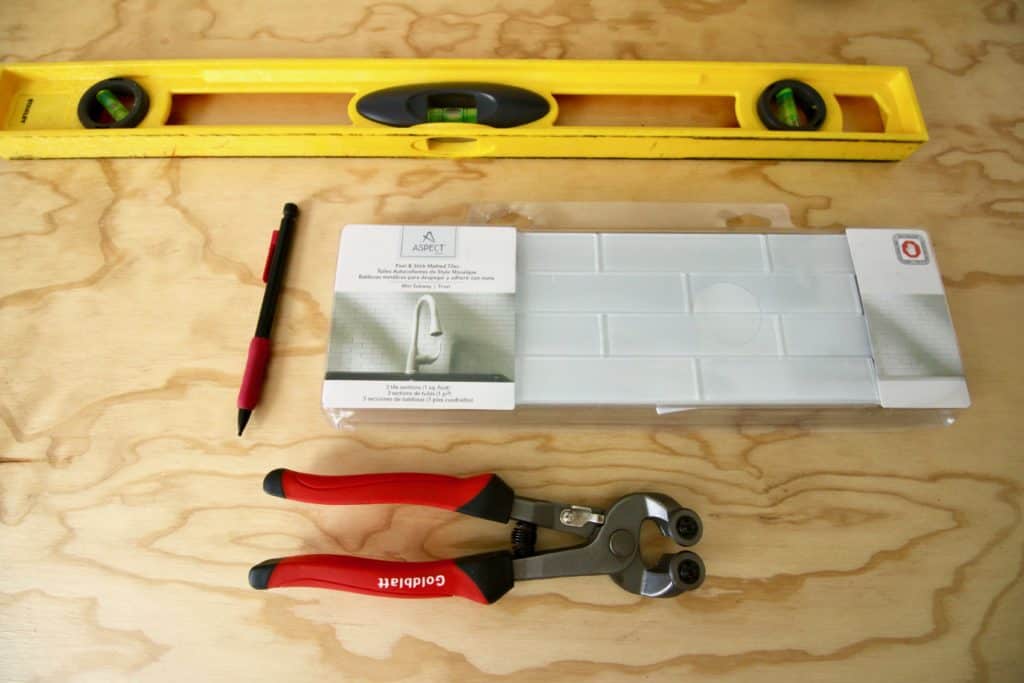
Steps to hang a peel and stick tile accent wall:
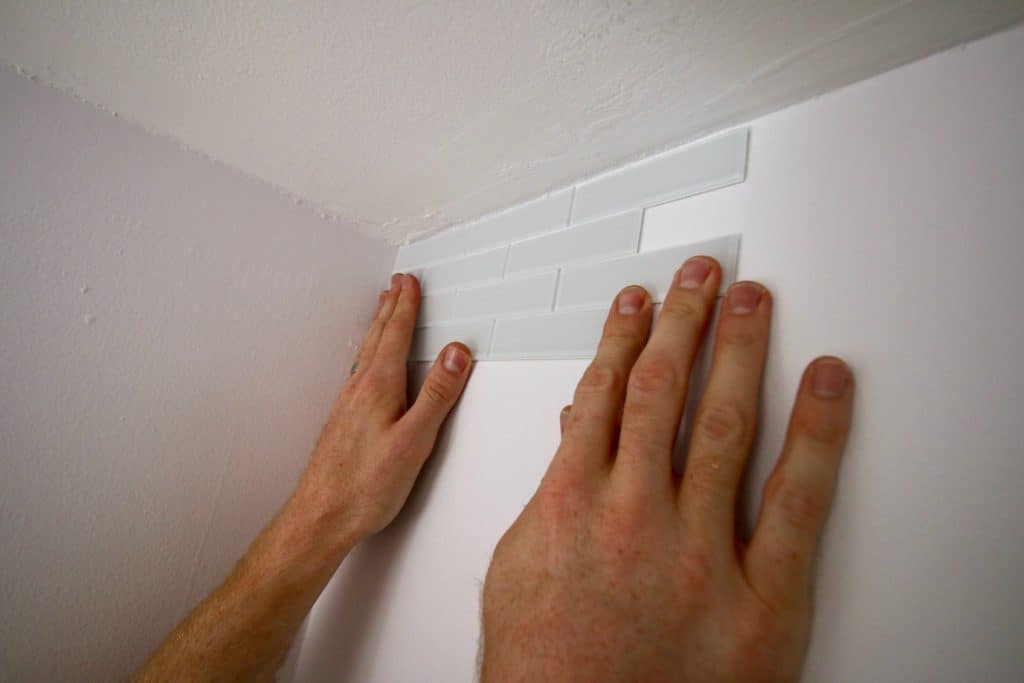
STEP 1: start in a corner
Pick a corner to start in. Pick something with your most straight edges. For us, that is the top left corner. We worked across horizontally and then down in rows.
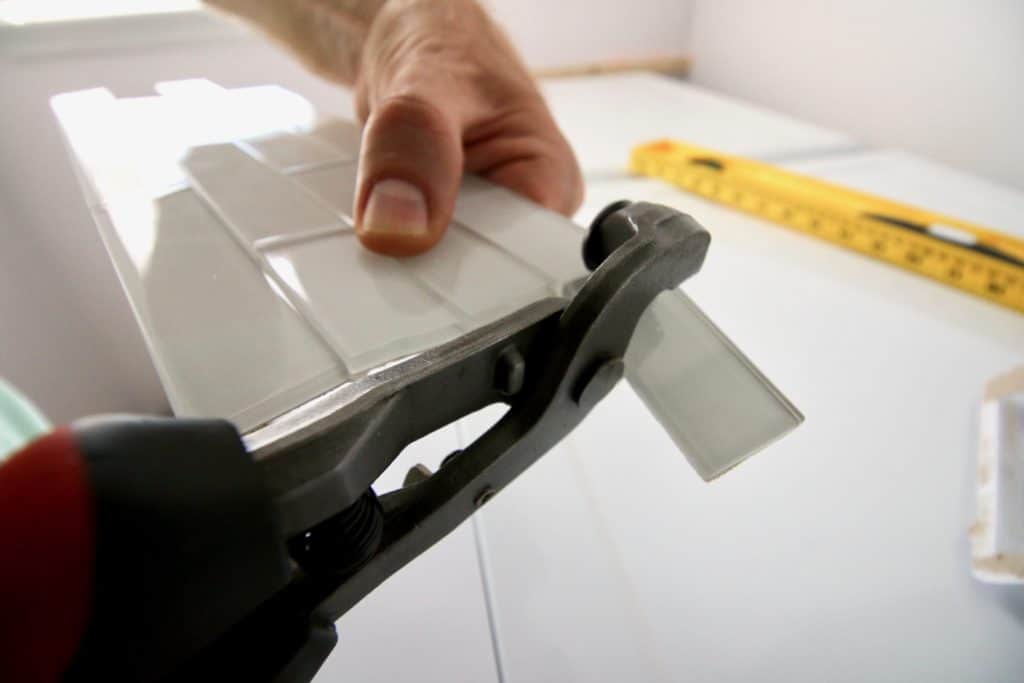
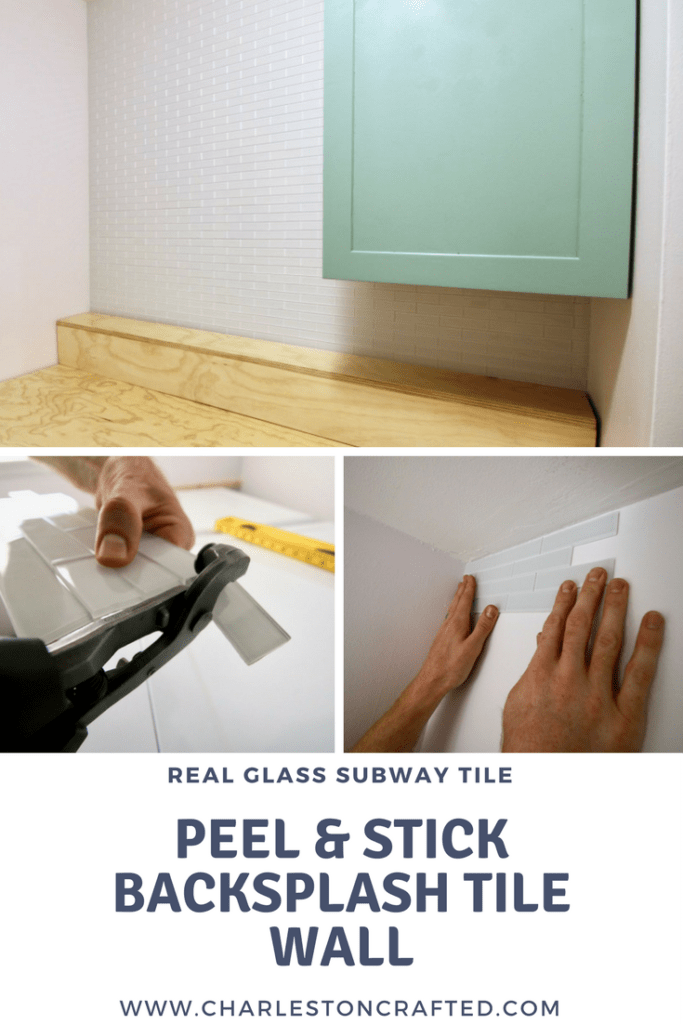
STEP 2: trim the first tile
Your first tile will probably need to be trimmed to create a straight edge. I'm shocked at how easily the tiles snapped in half using really inexpensive tile snips.
STEP 3: peel & stick
Peel the backing and place the tile. Use a level to be sure that it is straight. Press firmly to stick.
The tile is VERY sticky and cannot be re-positioned. We had one piece that we had to remove and we had to use the flat edge of a paint scraper to get it off. It was not sticky any more, so luckily we had extra.
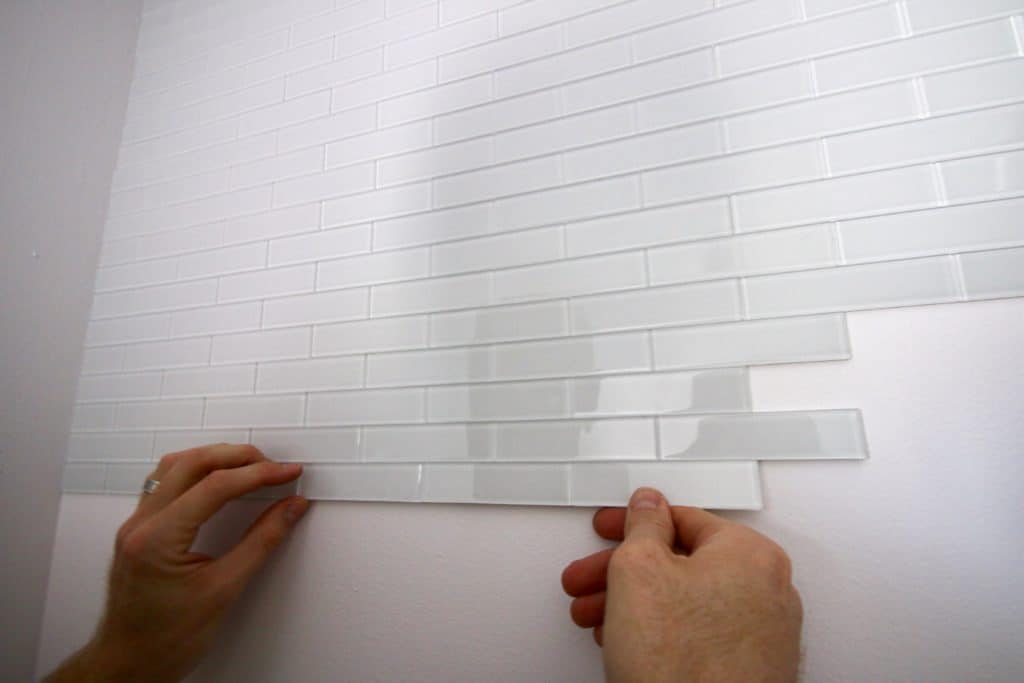
STEP 4: Repeat
Repeat line by line until your wall is complete!
STEP 5: Caulk
In the end, caulk your seams around the edges where you had to make cuts for a clean look.
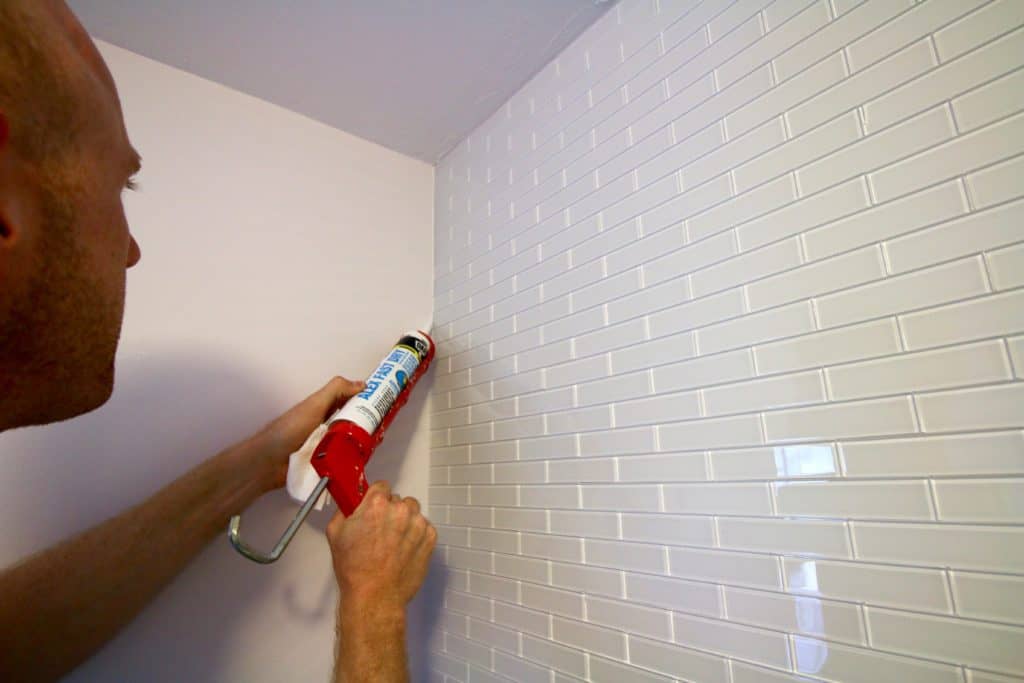
We used 18 packs of tile to do this full wall. And I think that it looks STUNNING.
It is a gorgeous focal point for this room. And it was so easy to hang! I would 100% recommend Aspect Peel & Stick tiles.
How to cut peel and stick tile
If you need to work around electrical outlets, switches, or other obstacles, you will need to cut your tiles. You could use a wet saw, but we had no issue just using inexpensive tile snips.
To get the perfect cut, tile all up to the place where you need to make a cut out. You could consider separating out the tile sheet if you can cut them apart to pull out just the individual tiles that need to be cut.
Hold them up and use a dry erase marker to mark where they need to be cut.
Place in the snips on that line and just squeeze like it's a pair of scissors!
Then, you can peel off the backing and put into place on the wall! Continue and repeat until you have tiled around your obstacle.
How to remove peel and stick tile
Peel and stick tile can generally be removed with a small prybar, though it will damage the drywall. If you've just applied the tile in the last hour, there is a chance it will come off cleanly.
You can also use a heat gun to apply heat and try to gently melt the adhesive holding the tile to the wall. This can be tedious, but will make it more likely that the tile will remove cleanly with minimal drywall damage.
Can you grout peel and stick tile?
I personally did not grout my peel and stick tile. But, if you are installing a real stone or glass peel and stick tile, you can absolutely add grout if that is the look that you prefer.
If you have glass tile, you want unsanded grout - the sand can scratch the tile!
How to grout peel and stick tile
- Spread the grout all over your beautiful new tiles.
- Spread the grout in small areas and try to go over all the lines from multiple directions to try to get the grout into the lines as best as possible.
- Use the edge of the grout float to scrape flat across the surface of your tile to wipe some of it away as best as possible.
- Once you're completely done grouting, use a sponge, dipped in water and wrung out so it's only a little damp, to wipe your tiles clean.
- Try to wipe in just one direction so you aren't spreading the grout back over the areas you just wiped.
- Continuously clean off your sponge and do this over and over again. Once it looks pretty clean, let everything dry for 24 hours.
- Next you want to de-haze the tile to remove the lingering film of grout. We used de-haze gloves. You can also use the spray and a soft cloth.
Read my complete guide on hanging and grouting regular tile here!
Have you ever tried peel and stick tile?
Thanks to Aspect Tile for providing us with the tile for this project. They didn't pay us, and all opinions are true and our own. It is a great product that we love!

Looking for something?
We've been doing this since 2012 so we have a LOT of blog posts!
Search stuff like: Ceiling Projects | DIY Plant Stands | Thrift Flips

Hello, I'm Morgan, half of the creative force behind CharlestonCrafted.com! With a passion for DIY that dates back to 2012, I've transformed three homes and now I'm dedicated to helping others craft their dream spaces. Let's turn your house into a home together!


Tee @ Beauteeful Living says
The tile you chose looks so pretty! This process does seem so easy. I would love to try one of these peel and stick tiles one day. Good luck with next week's progress!
Jeanie says
That tiled wall is stunning! I have used Aspect tiles too and you are right: they are so easy to install.
Michelle James says
This looks so easy & beautiful!!
Angie @ Postcards from the Ridge says
Your tile accent wall looks fabulous. I've seen this brand before and am glad to know how easy it is to use. I might use it for an upcoming project. Thanks for the great tutorial!
Kelly says
Ohhhhh I've always wondered about peel and stick tile - this turned out great!
Best,
Kelly
Jen @Jenron-Designs says
Wow those peel and stick wall tile are super cool. Thanks for the tutorial, it looks pretty easy to do. I must say the color is perfect for your room it brightens that space up so nicely!!! Good job 🙂
Emy says
It looks so good, Morgan! I've never used peel and stick tile. So cool!
Libbie says
I saw these tiles at Haven. I wondered how the finished samples would look and these are beautiful!!!
Sarah says
I've always wondering about these! Thanks for posting about them... you'll have to keep us updated on how it holds up. The laundry room is looking great!
Susanne says
Those tiles look great Morgan!! I am all about easy and I could see me trying this with our kitchen. Can't wait to see what you add next week!!
tim@designmaze says
I have never tried peel and stick tile before but it looks like a real good alternative for a budget friendly solution with DIY! Thanks for the tip and I may just have to try it in my laundry room!
Ashley - The Gold Hive says
What a great upgrade!
mary says
I am gonna have to try this in our bathroom! The glass tile is so beautiful and it looks so easy to install!
Jillian Jusko says
That looks so good and easy to do! Love it!
Susie says
Wow! Those tiles are amazing. The wall is so beautiful. And love the tips in the tutorial. You have a great makeover going over there!! Can't wait to see more. XOXO ~~ Susie from The Chelsea Project
Jen says
Love that tile 🙂 I can't wait to see how this all turns out!
Casey says
The tile looks awesome and SO easy to install! Great job!