Want to make your own quarter round for your next home renovation project? This is a great project to use scrap wood and save money!
Are you a do everything yourself even when it's not technically necessary kind of person like I am? This project fits perfect in that category.
I'm in the middle of my kitchen renovation and just finished building my own custom kitchen island (I have plans for it if you want to do the same thing).
When I got to the trim part of the project, I didn't feel like running to Home Depot to get quarter round molding for the floor, so I decided to make my own. And guess what- it was easy and free.
I'll show you how to make your own quarter round for your next home renovation project and how it's a great way to use scrap wood!

How to make quarter round
So I had a lot of strips of wood left over from making the face frames for my base cabinets for this project. I saved them (of course I did) and found a great use for them here.
Making your own quarter round is an easy DIY project that let's you use up some of that scrap wood and saves you money. Those pre-made quarter round strips aren't cheap when you need a bunch of it!
What do you need to make quarter round?
If you want to make your own quarter round, here's what you need:
- Router (preferably with a router table, but you can make due)
- Roundover router bit
- Strips of ¾" x ¾" wood
- Sandpaper
Then you'll also need a miter saw to cut it to size and a brad nailer to nail it in place.
Step one: set up router
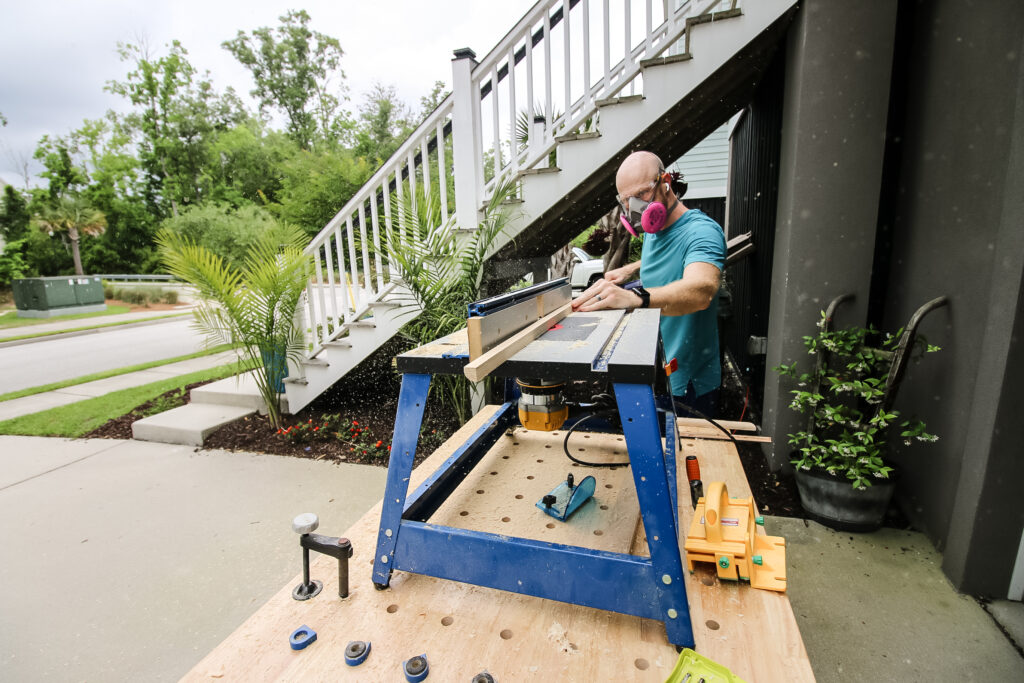
I'm going to go over this the way I did it, which is with a router fixed into my router table. However, if you only have a handheld cordless router, you can still do this project.
For me, I hooked my router into the underside of my router table and locked in my roundover bit into the machine.
Then, I set it up so that the fence was fairly close to the router bit on the table and the router bit was flush with the tabletop. You can adjust the height of your router bit to your preference on how much of a rounded edge you want on your quarter round.

Step two: push wood strips
I used the cutoff wood strips that I mentioned before from my other projects, but since these are fairly thin and small, you want to make sure you are holding it securely in place while you push the wood through the router.
Next, push the wood through the router from right to left and all the way through the end of the strip.
Repeat for all the remaining strips you have or need.
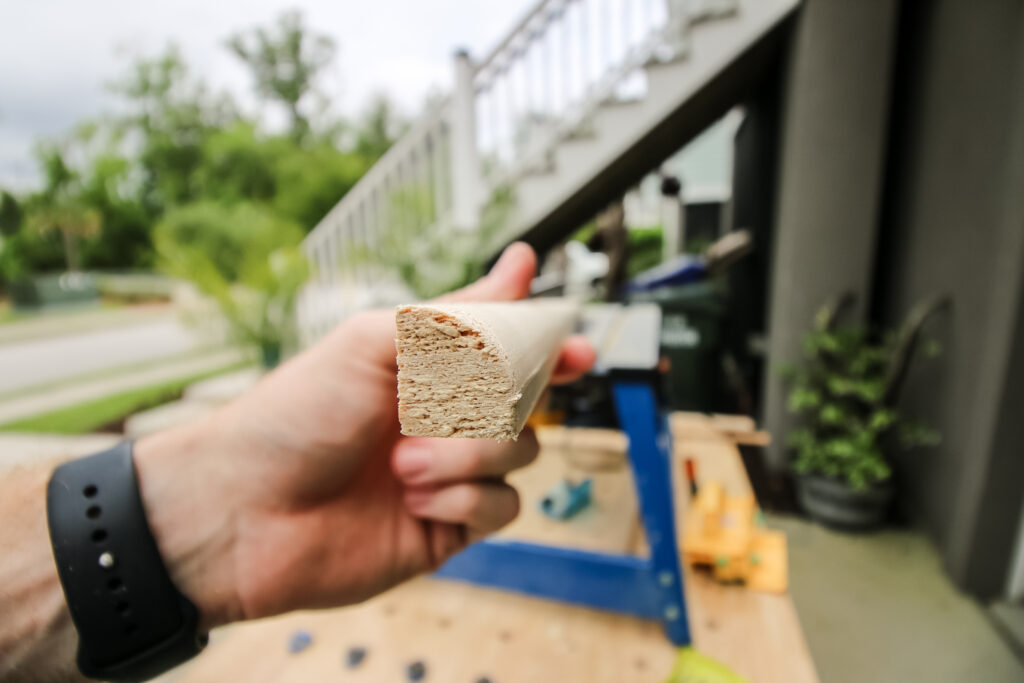
Step three: sand smooth
After it's cut, grab a piece of sandpaper and give a light sanding to the rounded edge of the new quarter round.
Step four: cut to size
Once you have enough quarter round cut, you can start measuring your space and cutting your individual pieces. Quarter round is my favorite of all the trim pieces because it's the easiest to measure and cut.
Just measure your walls or the base of the furniture piece, whatever it may be, and note whether the angles are inside or outside angles and cut them to size.
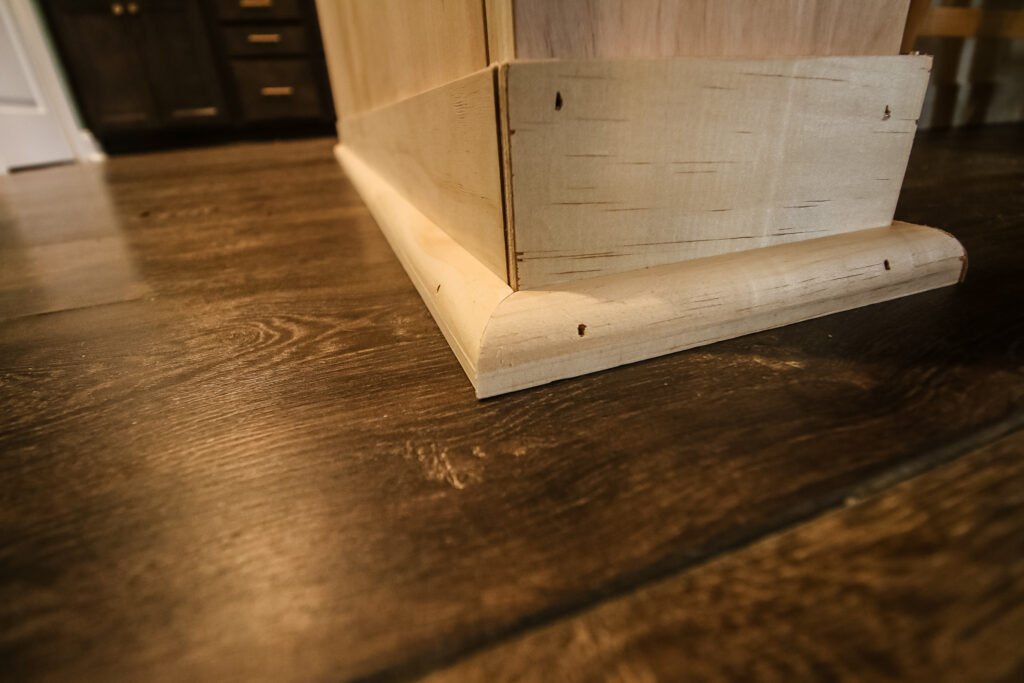
Step five: install
Finally, install all the quarter round where you need it. Line it up against the baseboard or furniture and use 1" brad nails to tack it into place.
Once it's all in place, add a little wood filler to the holes, caulk the seam and then paint over it.
DIY quarter round
It's easy to make your own DIY quarter round shoe molding for your home! This is a great project if you have scrap strips of wood, but you can also rip down a sheet of plywood or board to make this as well.
Either way, it will be cheaper than buying expensive quarter round strips premade at the store. So give yourself a try and try to make your own quarter round!

Looking for something?
We've been doing this since 2012 so we have a LOT of blog posts!
Search stuff like: Ceiling Projects | DIY Plant Stands | Thrift Flips

Hey there, I'm Sean, the woodworking enthusiast and builder behind CharlestonCrafted.com! Since 2012, I've been sharing the magic of turning raw materials into beautiful creations. I love teaching others the art and satisfaction of woodworking and DIY. I try to inspire fellow crafters to make something extraordinary out of nothing at all.


