Want to add nursery shelves to your home? Here's how we added simple shelves to our baby's room!
We already shared our nursery reveal, and I honestly thought that the room was complete! However, after staring at it for a while (I do a lot of sitting & staring while feeding the baby!) I decided that the wall needed something more.
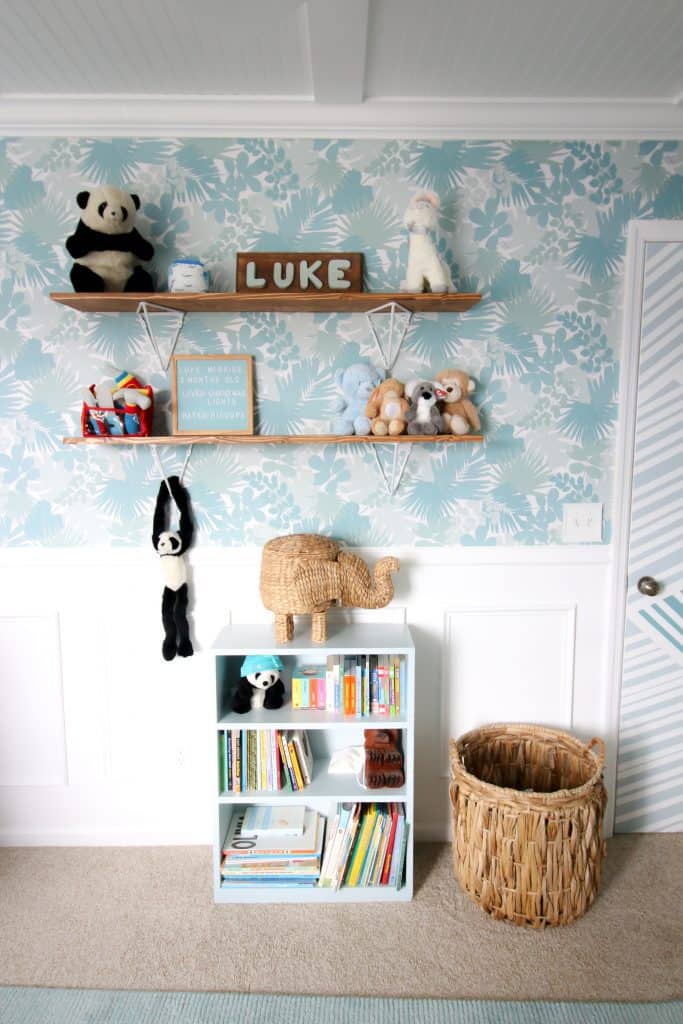
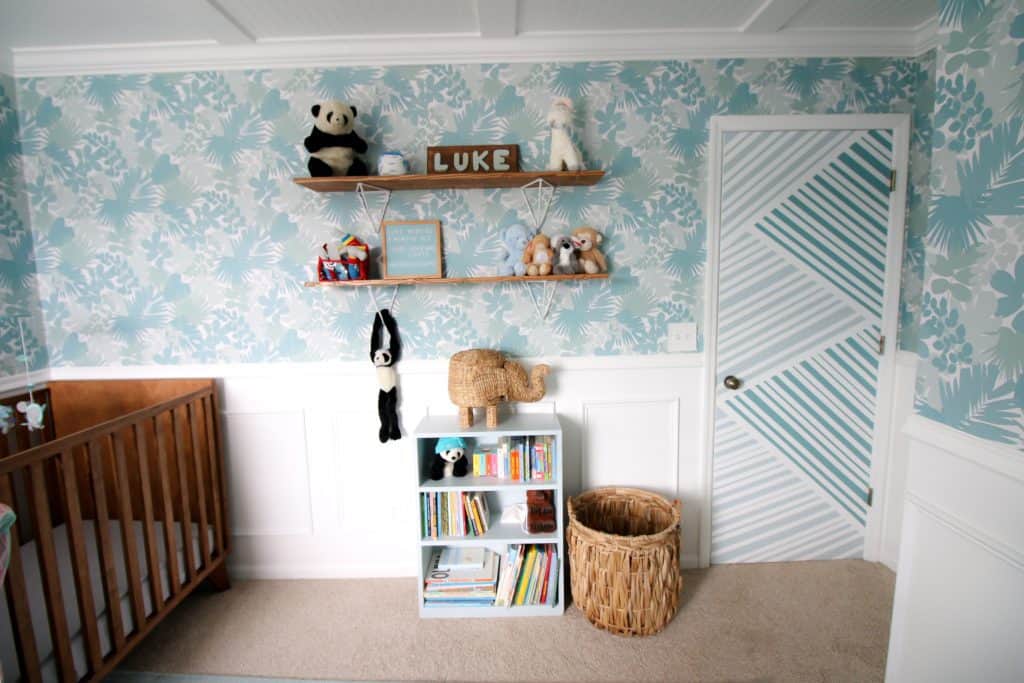
Luke has already accumulated a lot of toys, many of them stuffed animals. A higher shelf would help to keep them up and away from the dog so they stay clean for the baby.
Nursery shelves could also display Luke's letter board and his name puzzle, which were previously just stacked on the bookshelf.
Finally, shelves draw the eye upward. The wallpaper in here already draws your eye quite a bit, but shelves break it up and also make the walls and ceilings feel taller.
Nursery shelves
If you want to add shelves yourself, you will need to do some measuring. Determine the length and width of shelving that would best fit your space.

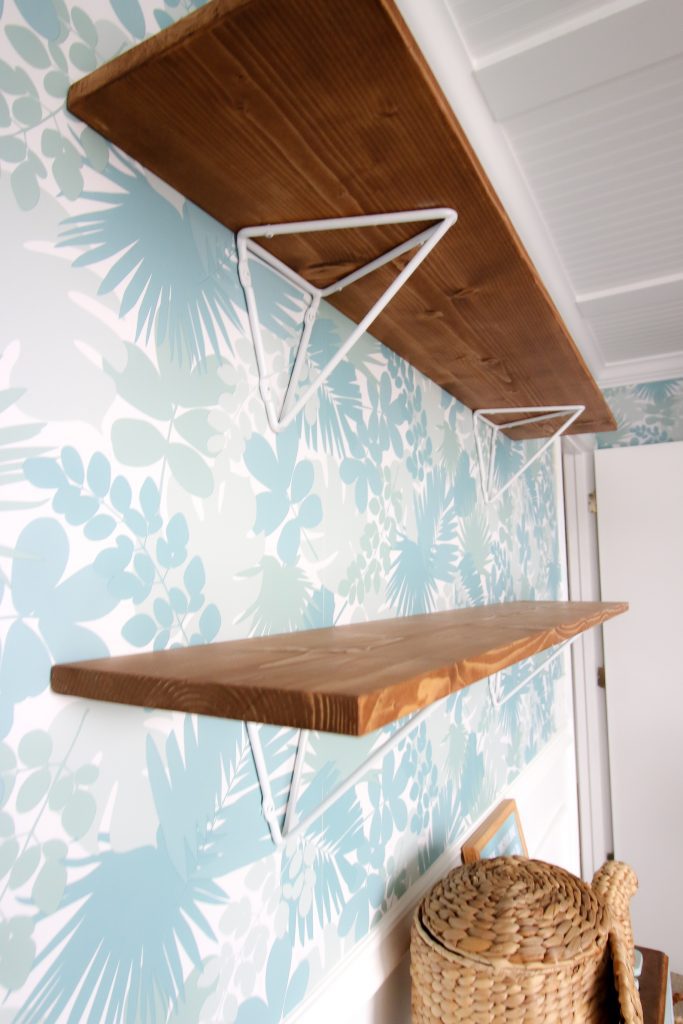
The boards
I decided on shelves that are 10 inches deep.
Boards that size came in 2 main lengths - 6 foot and 8 foot. My plan was to get one board and split it in half - so either 3 feet or 4 feet wide shelves.
I had Sean hold the tape measure up for each size and decided that the 4 foot width would work best for our space.
So, after buying the board, we simply sawed it in half and sanded down all of the edges.
I applied a stain - Early American is the color. I didn't even bother sealing it with polycrylic since it won't get too much action.
Read our full review of Early American wood stain by Varathane!
The Hardware
I spent a lot of time looking for hardware for these shelves. At first, I thought that I wanted invisible floating shelf hardware, but I changed my mind once I saw these geometric brackets. I think they are the perfect amount of whimsy for a kid's space. Plus, I love that they feel open and airy.
However, I wanted white hardware. So, I sprayed them with white spray paint in a satin finish. It took a few coats to get all the angles, but was a simple enough process.
Mounting the shelves
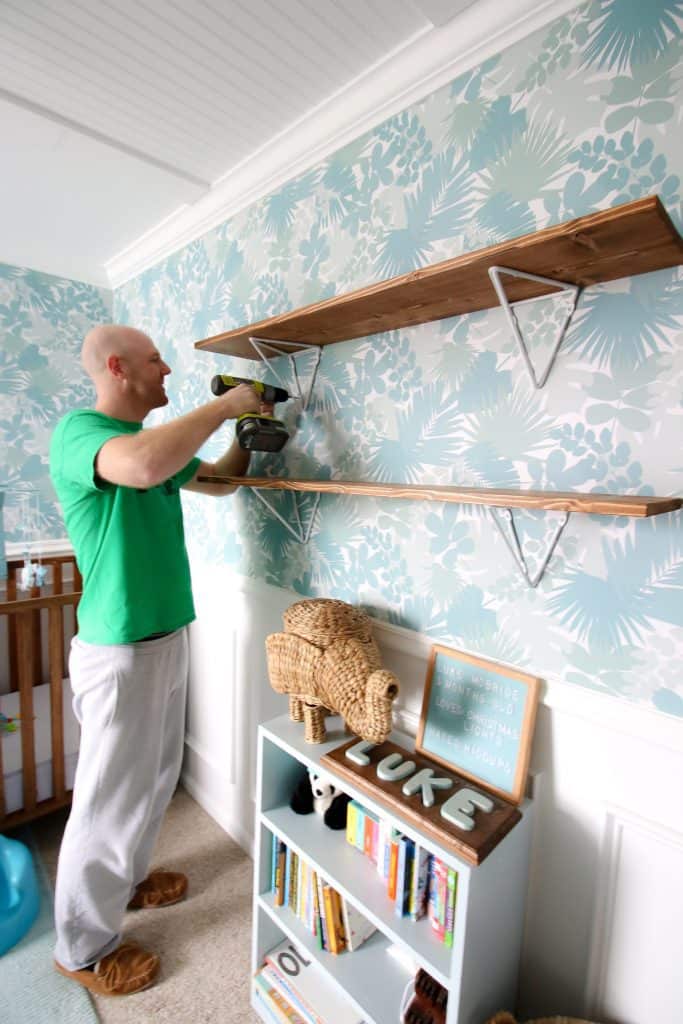
Once that was dry, it was time to hang the shelves.
When hanging shelves, you want to drill into the studs if possible. Use a stud finder to identify where they are located. We were able to line one side of the shelf up with studs.
On the other side, we used anchors in the wall to provide stability. I don't want the heavy shelves ripping out the drywall!
We're so glad that we added these shelves. I was nervous about drilling holes in the wallpaper, but it is so worth it. Not only are they practical, they really draw the eye up and make the ceilings feel taller and the room feel bigger!
Click here to see the full transformation of the nursery!
Love DIY Shelves? Check out some of our other shelf projects:
| |
|||
| |
|
|
|


Hey there, I'm Sean, the woodworking enthusiast and builder behind CharlestonCrafted.com! Since 2012, I've been sharing the magic of turning raw materials into beautiful creations. I love teaching others the art and satisfaction of woodworking and DIY. I try to inspire fellow crafters to make something extraordinary out of nothing at all.