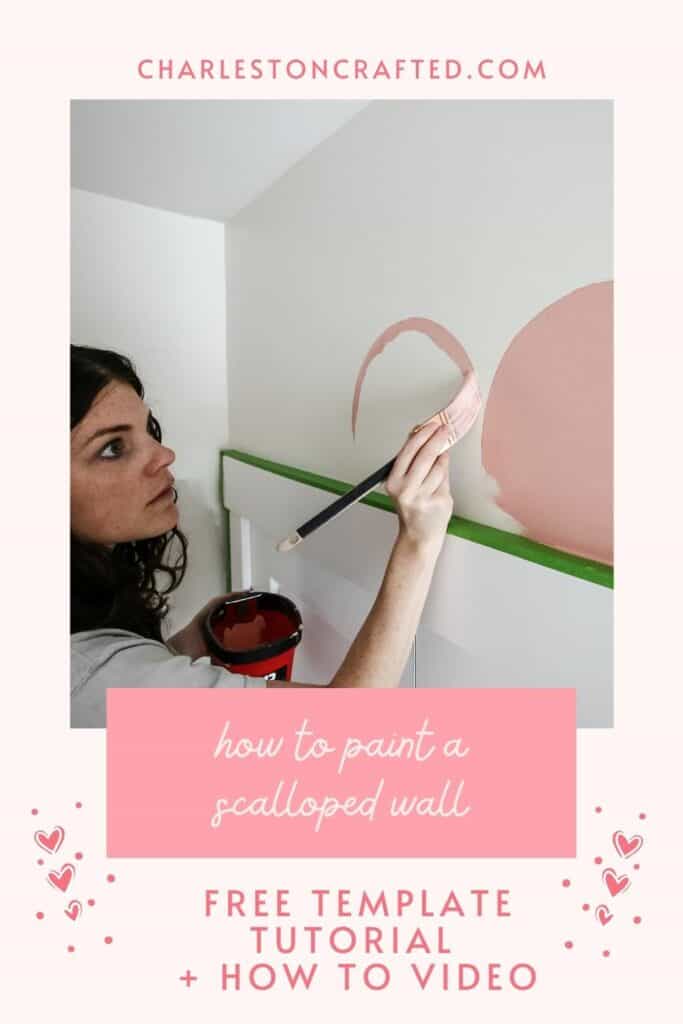
Scalloped trim walls are really having a moment right now! If you want to get this look in your home, here's a step by step guide and video to paint a scallop wall!
I am so excited to be working on Rory's room makeover. It's kind of hilarious to me because Luke's nursery was done well before he was born, but Rory is 6 months old and we are just cracking into her room.
#SecondChildProblems and it didn't help that we moved the week before she was born!
Anyways, I am so excited to decorate her room. I always wanted to do a pink girly room (somehow I never even had a pink room as a kid?!) so here we go!
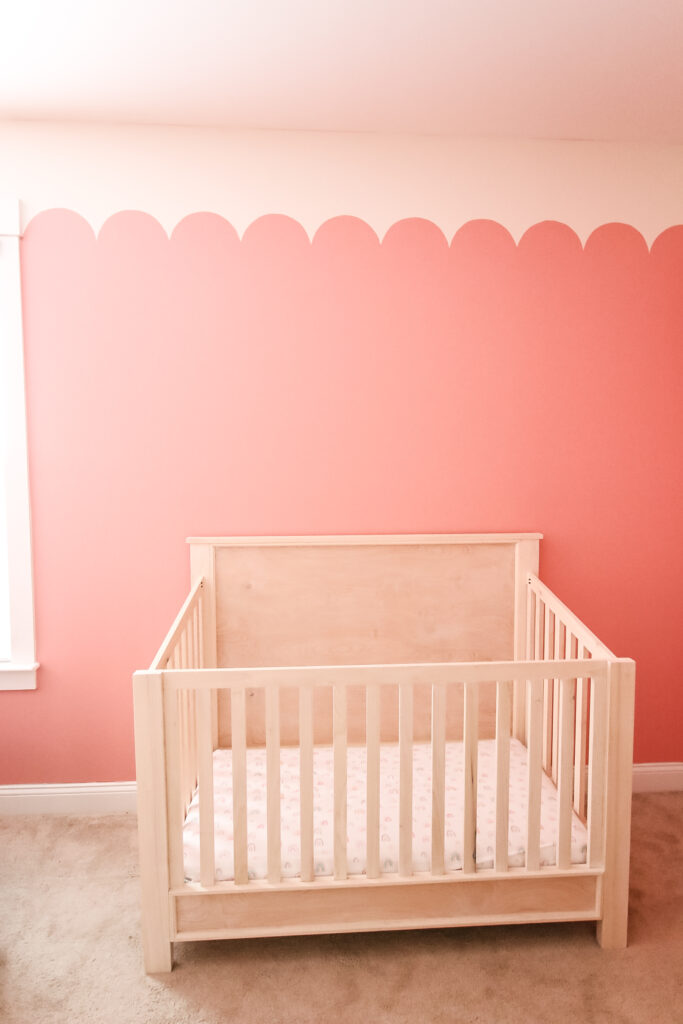
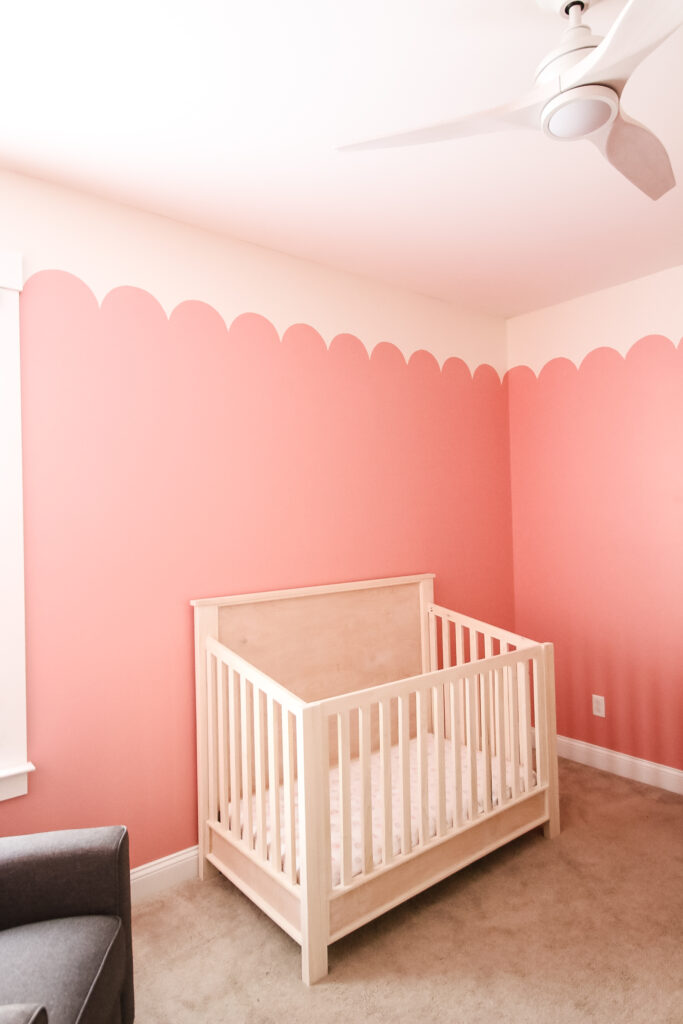
We selected the paint color Coral Fountain by Behr. It's a medium toned coral-y pink that definitely reads much more pink than orange. It's really bright and fun - without being neon.
I wanted to soften up the bright pink by doing a color block of white at the top. This was inspired by the ¾ teal wall in our old guest room.
I decided to do a scallop edge to soften up the color blocking. This is a popular trend right now which you can see examples of another pink one here!
Our daughter's room is large - about 14 foot in each direction - so I went with a large, 11" scallop. A smaller scallop would have felt really busy. Our whole upstairs has 9 foot ceilings which feel really tall, so I made the base of the scallops 18" down from the ceiling.
I absolutely love how these turned out and if you want to do a scallop paint job in your home hope that this tutorial will help you to get beautiful results!
Scallop stencil options
Here's the thing - you really need to use a stencil for this project. I have tried to hand-draw circles before and its not pretty. Luckily, there are options!
How to DIY a scallop stencil
The scallop stencil is intimidating to many people, but they are really easy to make. Whether you make or buy it, you first have to decide the size of your scallop.
I suggest a larger scallop for larger rooms and smaller for smaller spaces or if you want a more delicate look.
I used an 11" scallop which seemed large but looks good in this space. You can also measure your walls and try to find a divisible size if you want all complete scallops!
How to make a scallop stencil by hand
To make a scallop stencil by hand, trace something round. A plate, a bowl, a vase - anything!
Find something the size you want your scallops and trace it onto card stock or poster board.
I used a soda can box. A cereal box would be great too.
Then cut it out! Easy peasy. Cut one side flat so it's a half circle - use a straight edge for this!
How to make a scallop stencil with a Cricut
I made my stencil with a Cricut. I cut it out of a Dr Pepper box using the metallic cardstock setting!
Where to buy a scallop stencil
The best spot to buy a scallop stencil is Etsy!
Check out my tutorial on how to paint a rainbow mural!
How to paint scallops on a wall
Here's what you need to make a scalloped wall paint treatment and how to make it!
Supplies needed to paint a scallop wall:
- Cardboard or poster board or stencil (see above)
- Tape measure
- Laser level (or long level)
- Pencil or chalk
- Paint of choice
- Roller, roller cover, roller tray
- Angled paint brush
- Handy paint pail (makes painting the scallops much easier)
- Ladder or platform
STEP 1: Create your template
Create a stencil or purchase one. See above for full details, but I made mine from a Dr Pepper cardboard box using my Cricut!
STEP 2: Paint the upper half of your wall
Use the paint that you want on the upper (in this case, white, Papier Blanc by Behr) and paint it from the ceiling down to a few inches below where you plan to start your scallops.
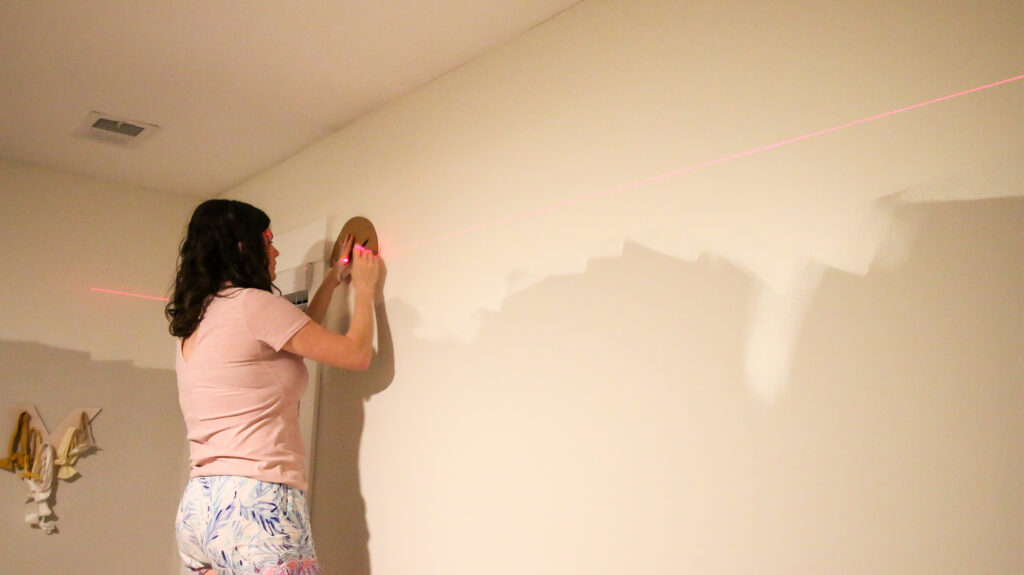
STEP 3: Measure down from the ceiling
Decide the height that you want your scallops at. I held my template up at different heights and stepped back to see where I liked it - 18" down.
Measure down from the ceiling to that height. Use a laser level or long level to mark that height across the wall.
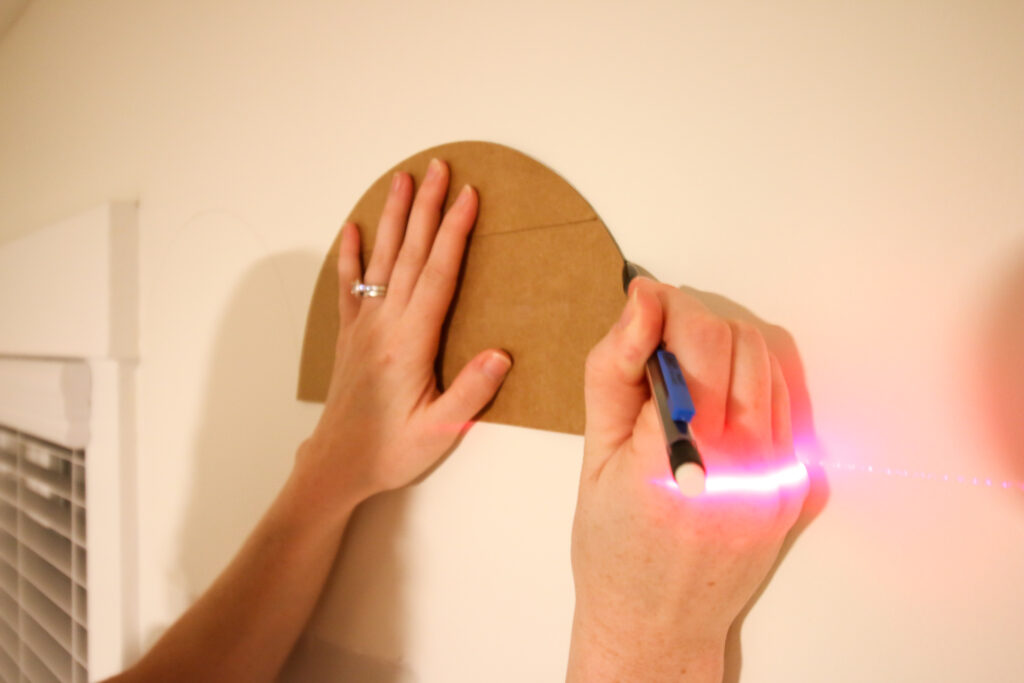
STEP 4: Trace your scallop shapes
Where to start - if you have a window or door that crosses the line where your scallops will go, start there. I started alongside the window which is a good place to start.
Place your flat end of your scallop template along the level line and trace.
I used a pencil but if I were to do it again I would use chalk like I did for my mural. Pencil was a bit hard to cover perfect and hard to erase!
If you use a pencil, make an effort to lightly mark the penciled line.
NOTE: you can do the scallops up like an "n" or down like a "u" both looks are great just a little different!
Repeat this all the way around the room.
When you hit a corner, bend your template and trace it to keep the scallops continuous.
While you are at it be sure to tape off anything else like windows, doors, or outlet covers and generally prepare to paint.
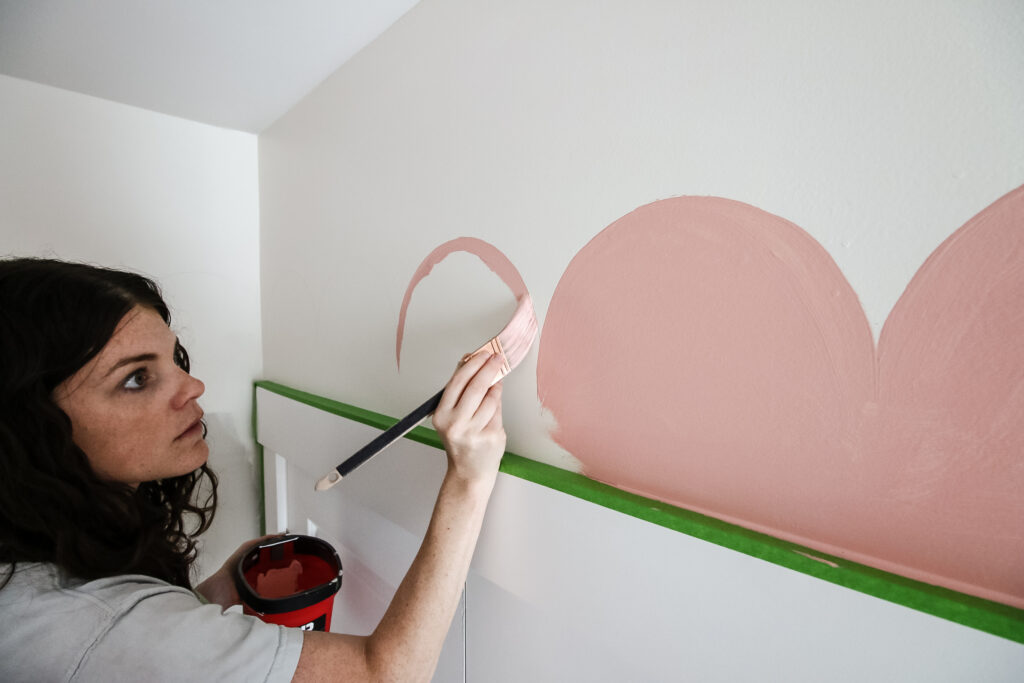
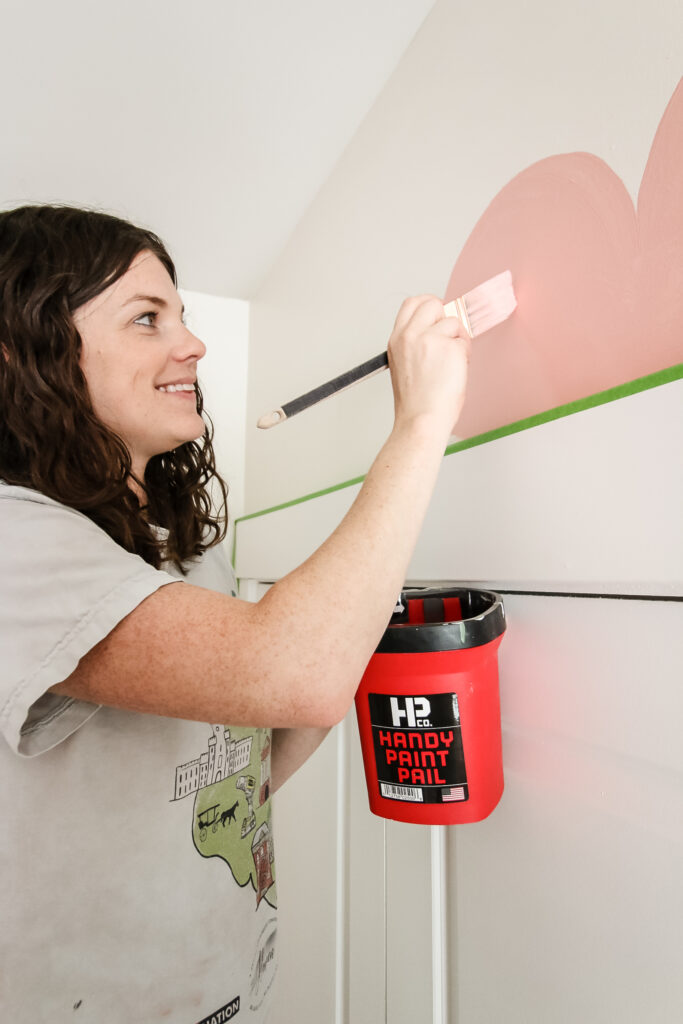
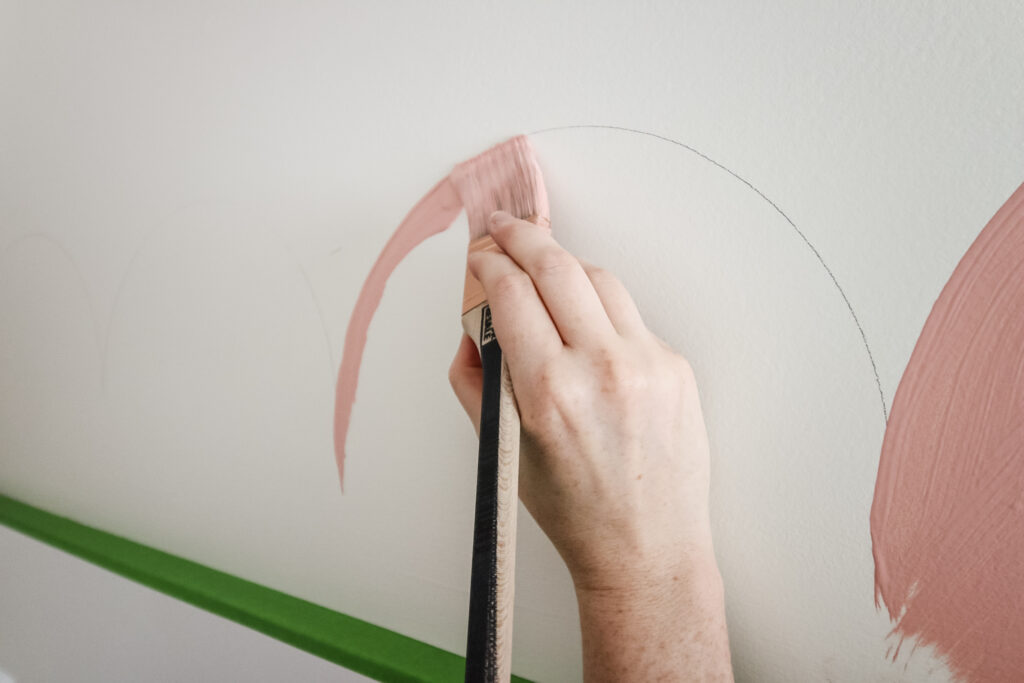
STEP 5: Paint the scallops
Time to start painting! Use an angled brush to paint each scallop. Start below the line (the first place where your brush touches the wall is where you are most likely to err in my experience.)
Brush up into the scallop and complete the whole border, using your brush to fill in the half circle shape.
Paint a bit below so you have space to come up with the roller.
STEP 6: Roll the bottom
Use a roller to paint the lower half of the wall.
STEP 7: Repeat for a second coat
I absolutely love how this turned out and it has me feeling so inspired for the rest of her room makeover!
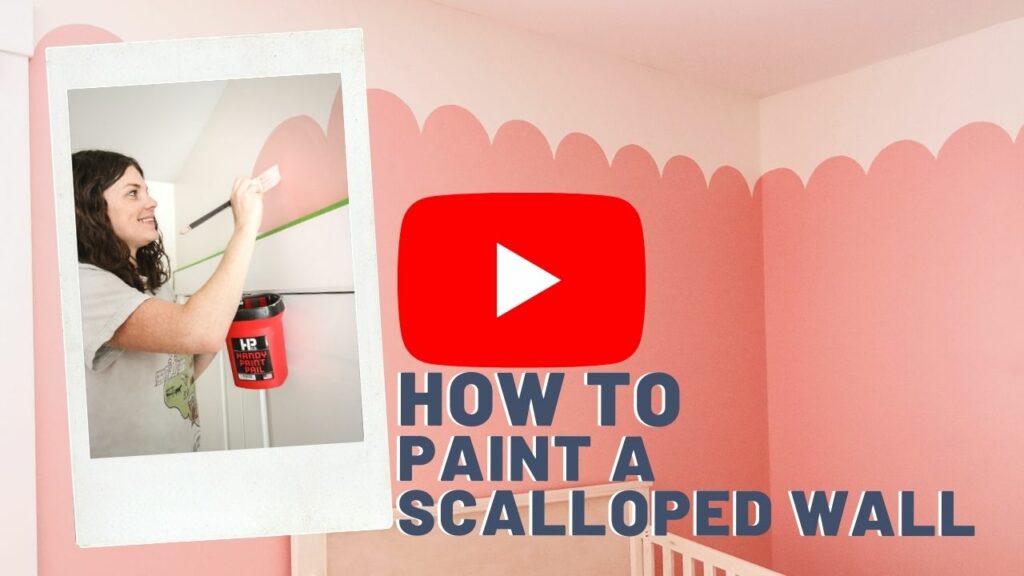
Video demonstration
See me in action painting this scalloped wall in the video!

Get paint samples!
Samplize will send you 12"x12" peel and stick samples of paint colors from many popular brands so you can see exactly how they will look in your home!
Love paint colors? Be sure to check out:
- The Paint Color Formula - my complete guide to picking paint colors!
- My guide to paint sheens
- My guide to paint undertones
Painting for the first time? Check out my video tutorial on the easiest & cleanest way to open a paint can!

Looking for something?
We've been doing this since 2012 so we have a LOT of blog posts!
Search stuff like: Ceiling Projects | DIY Plant Stands | Thrift Flips

Hello, I'm Morgan, half of the creative force behind CharlestonCrafted.com! With a passion for DIY that dates back to 2012, I've transformed three homes and now I'm dedicated to helping others craft their dream spaces. Let's turn your house into a home together!