Staghorn ferns are a very popular houseplant that grow differently that many other plants. Here's how to mount a staghorn fern with a DIY mount to help your fern thrive!
Morgan is a houseplant fanatic, and we have a very large variety of plants in and around our home at all times. For her birthday, we went to her favorite local plant store where she picked out a staghorn fern for one of her birthday presents.
She had been eyeing a staghorn fern for awhile, but they are a different kind of plant than anything we currently have. They don't usually live in pots like most plants and need a mount, so we hadn't ever done one before.
After getting it, we discovered it is very easy to build a DIY staghorn fern mount and hang the fern to the wall.
This is a fun project that can be done with items lying around your house!
See all of my favorite living wall ideas here!
DIY staghorn fern mount
We made out DIY staghorn fern mount in an afternoon with very little trouble. These instructions are for how to build a staghorn fern mount with a board, but you can also use live edge wood, driftwood or anything you can anchor the fern down to.
How does a staghorn fern grow?
The reason people usually mount staghorn ferns is because they naturally grow differently than most plants.
Staghorn ferns are a tropical plant that naturally grow in the crooks and bases of tree branches in areas of high humidity, not in soil in the ground.
They don't require much soil and their roots grow to attach the fern to the tree, not to get their nutrients. Staghorn ferns are like air plants and orchids in that they don't need much water and get most of their nutrients through the air.
So, typically a staghorn fern is mounted to a board or branch in a home to help it mimic what it does in nature.
Make sure you check out our full staghorn fern care guide!
How to build a staghorn fern mount
Here are the materials you need and the steps for how to build a staghorn fern mount.
Materials needed to mount a staghorn fern
- Staghorn fern (duh)
- (1) 6' board, preferably cedar, cypress or another board that is water resistant
- (6) 1 ¼" Kreg pocket hole screws
- (10) 1" long nails
- Moss
- Fishing line
Steps to build a staghorn fern mount
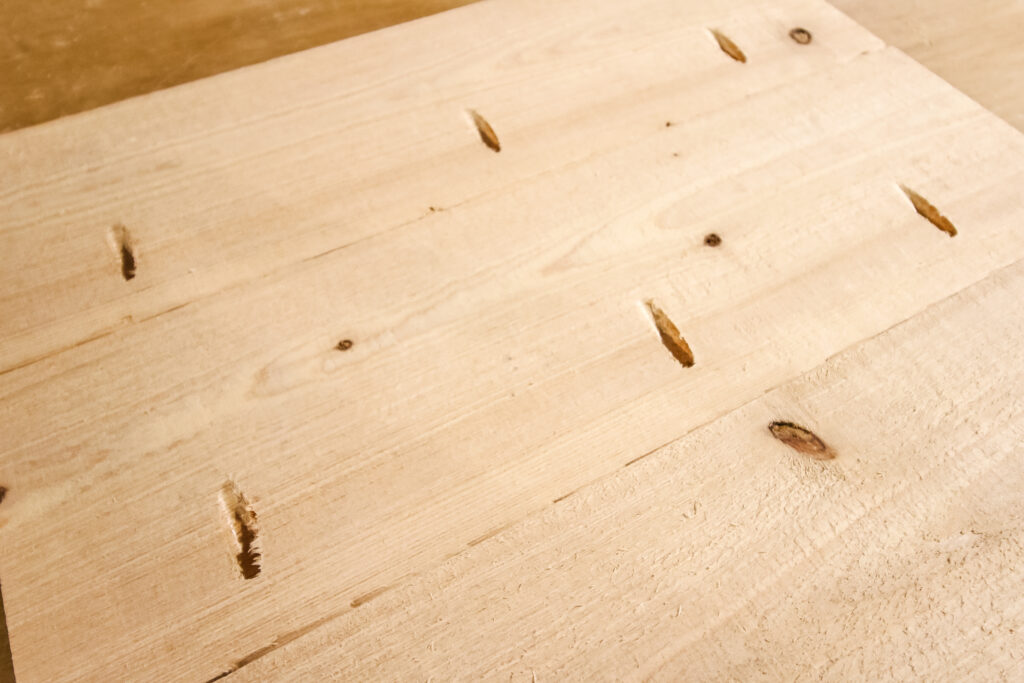
Step 1- Cut boards to length and attach
So the first thing we did was get a 6' cypress board that we had laying around and cut into three equal lengths. Cypress is a good wood for this because it is naturally rot-resistant.
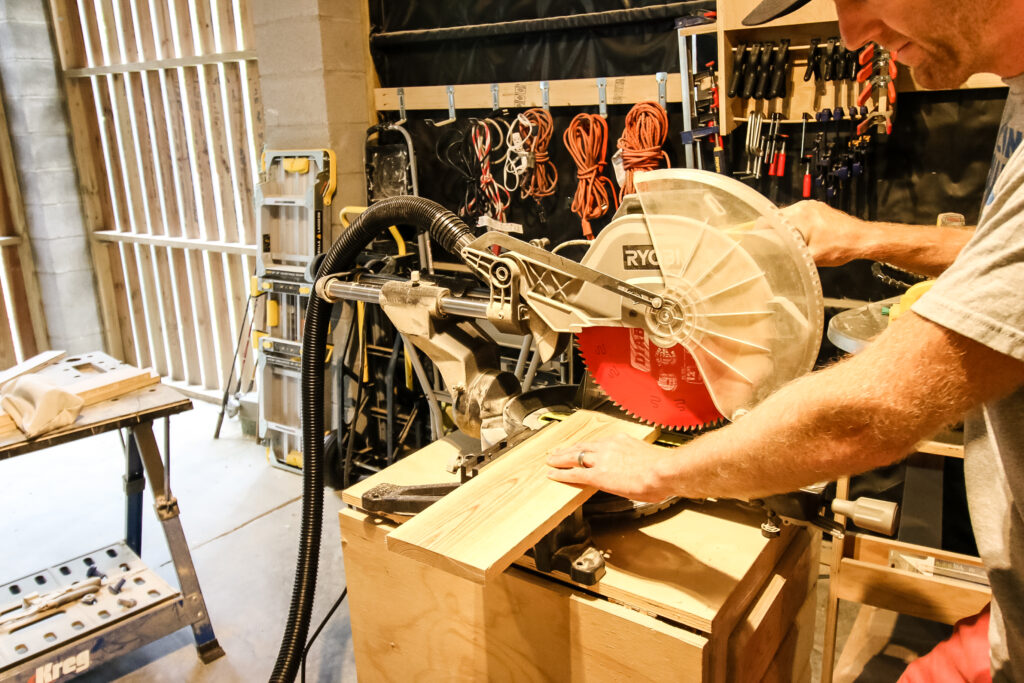
On two of the boards, we drilled three pocket holes with our Kreg 720 Pro pocket hole jig and then attached the boards together stacked on top of each other.
Step 2- Round off corners
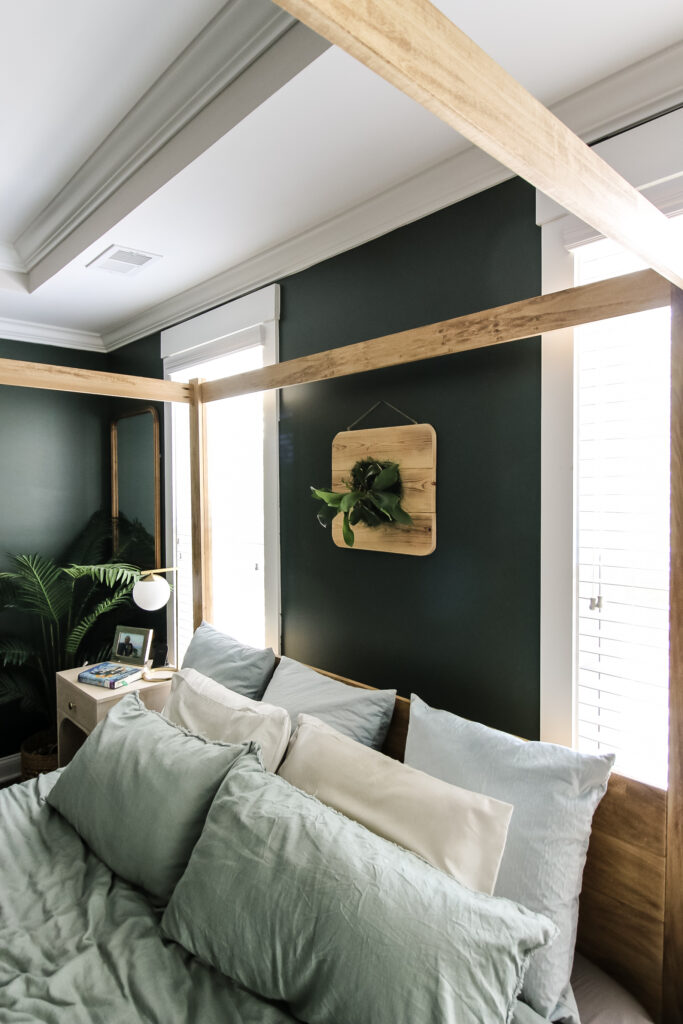
This was a bonus step for us as we didn't want sharp edges. This mount was going to hang over our DIY four poster canopy bed and we wanted soft, round corners to soften the look of the space.

To round these off, we simply drew a curve on each corner and cut them off with a scroll saw. You could also do this with a jig saw or skip the step entirely.
When that was done, we sanded everything nice and smooth.
Step 3- Add hardware for mounting
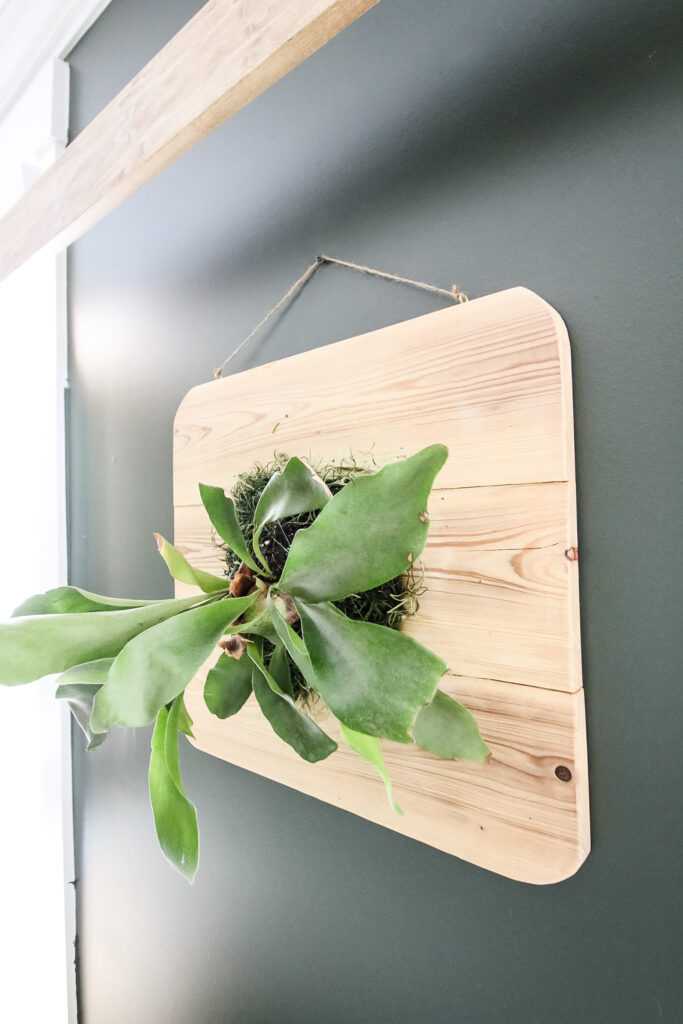
To finish the mount, you need to add nails on the boards and hanging hardware. Choose your own hanging hardware, but we used two eye hooks on the top of the mount to hang from a nail on the wall.
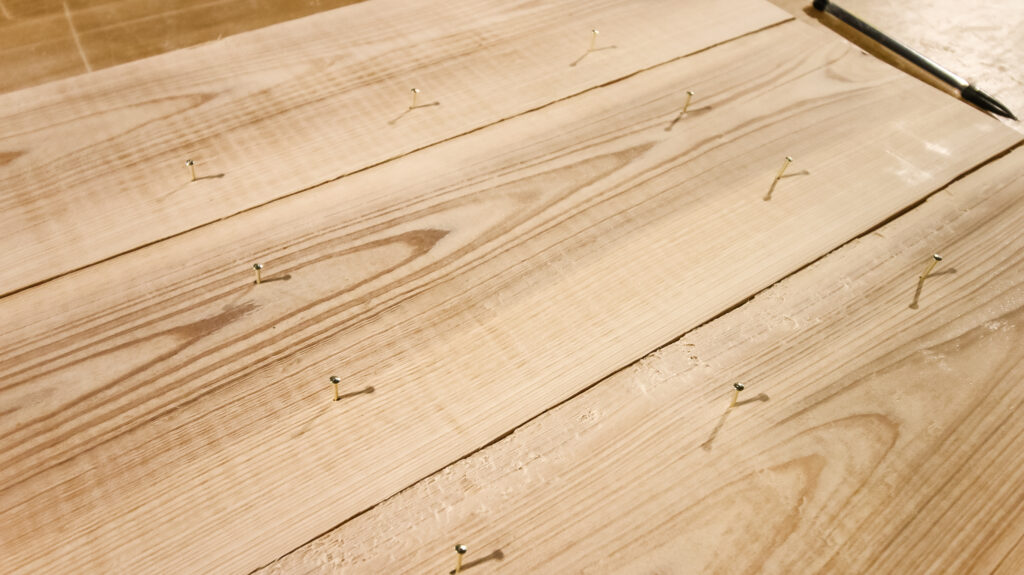
For the nails on the board, we choose a square pattern creating about an 8" x 8" space on the board with four nails on each side and one on the top and bottom.
Tap each nail about halfway into the board, leaving room to tie the line to.
How to mount a staghorn fern to a board
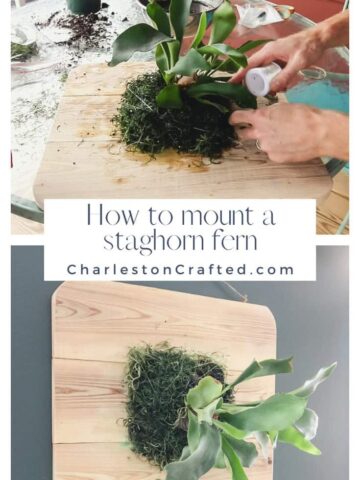
Now it's time to actually mount the staghorn fern to the board.
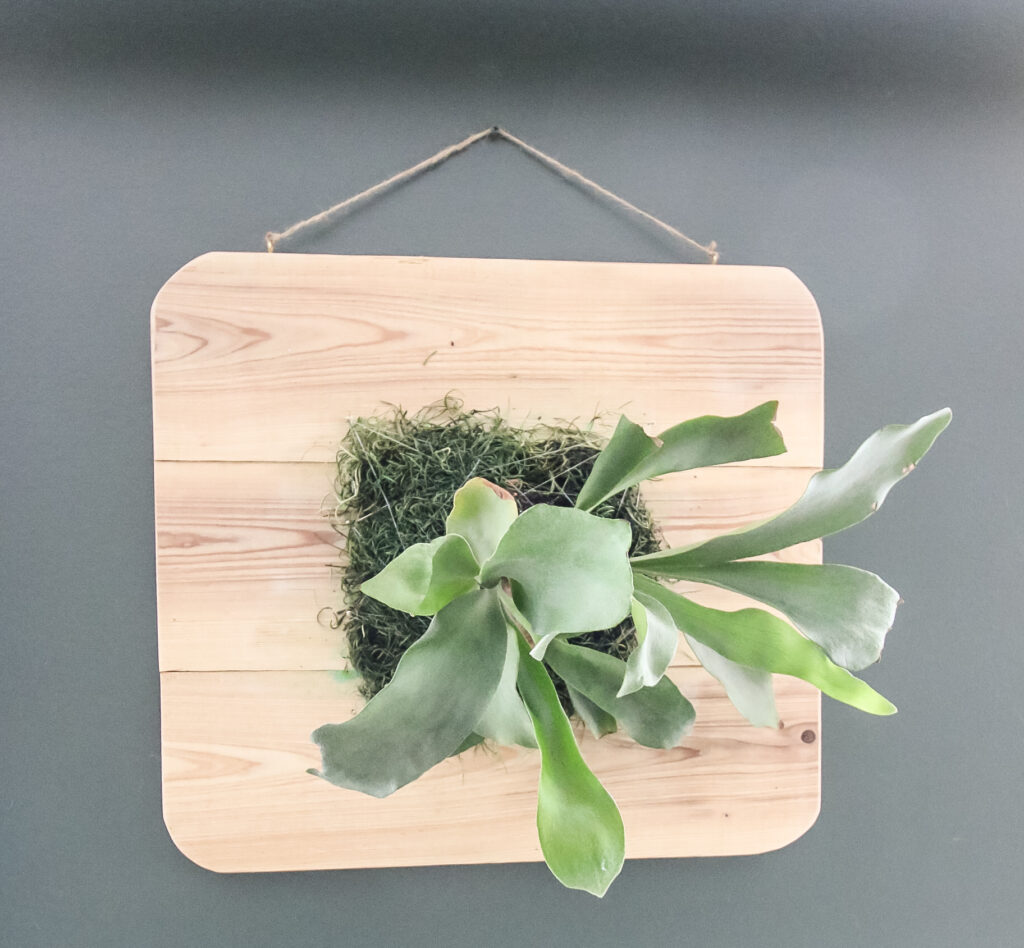
Start by taking a nice handful of sheet moss and getting it wet. After wringing it out, put the layer of sheet moss on the board between the nails.

Next, remove the stag horn fern from the pot and remove all but about an inch of dirt from the root ball. You want the roots to be exposed so that they can attach to the moss.
Quickly drench the root ball and then place it on the layer of moss, ensuring the shield fronds (dead looking brown leaves) are on the bottom and the longer upright fronds are on the top.
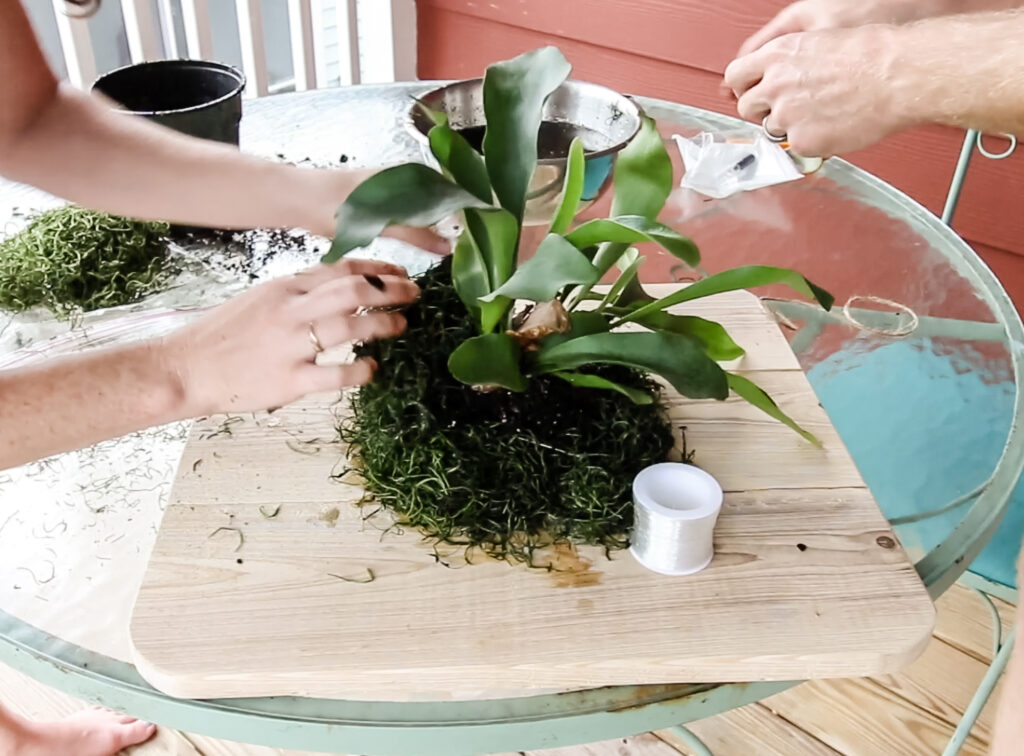
Finally, wrap another layer of moss around the root ball.
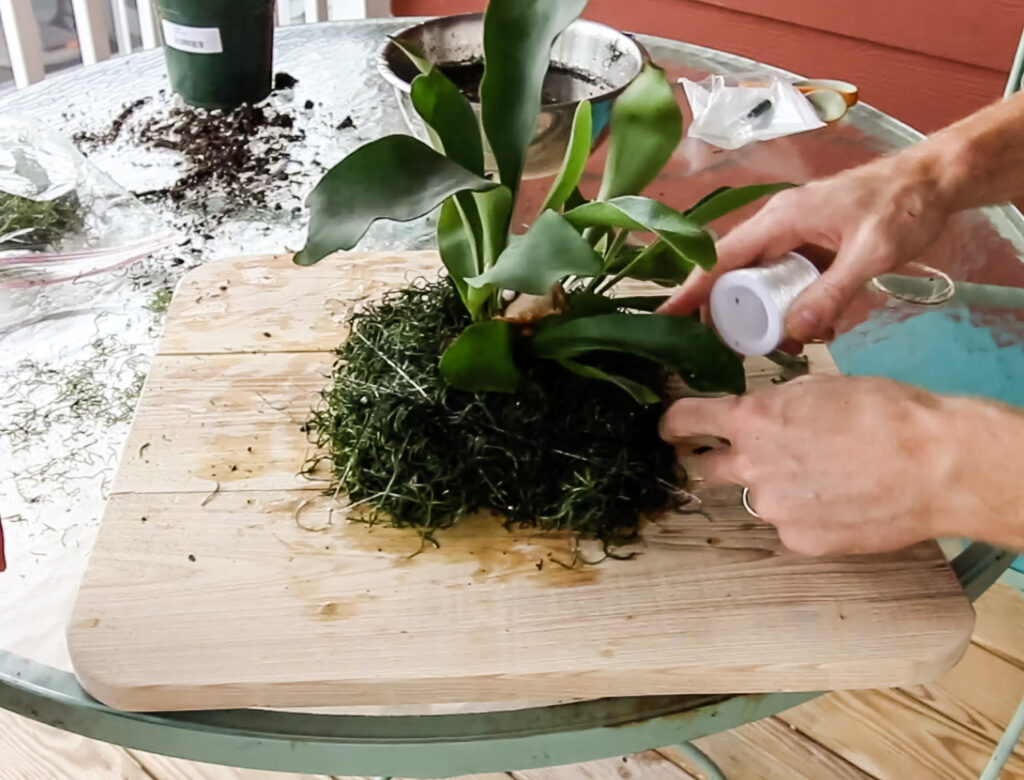
Now, take the fishing line and tie it off on one corner nail. Then, weave a pattern back and forth to the other nails, securing the fern to the board.
The criss cross pattern will help support the staghorn fern to stay in the correct position and help it from falling. When you have done enough, tie off the end on a final nail.
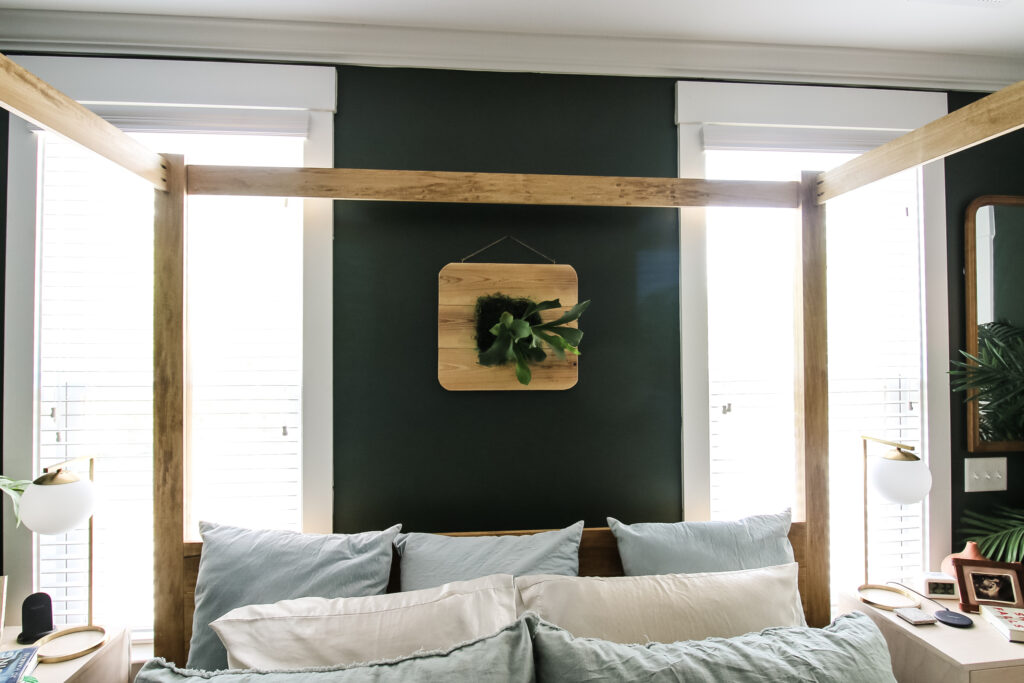
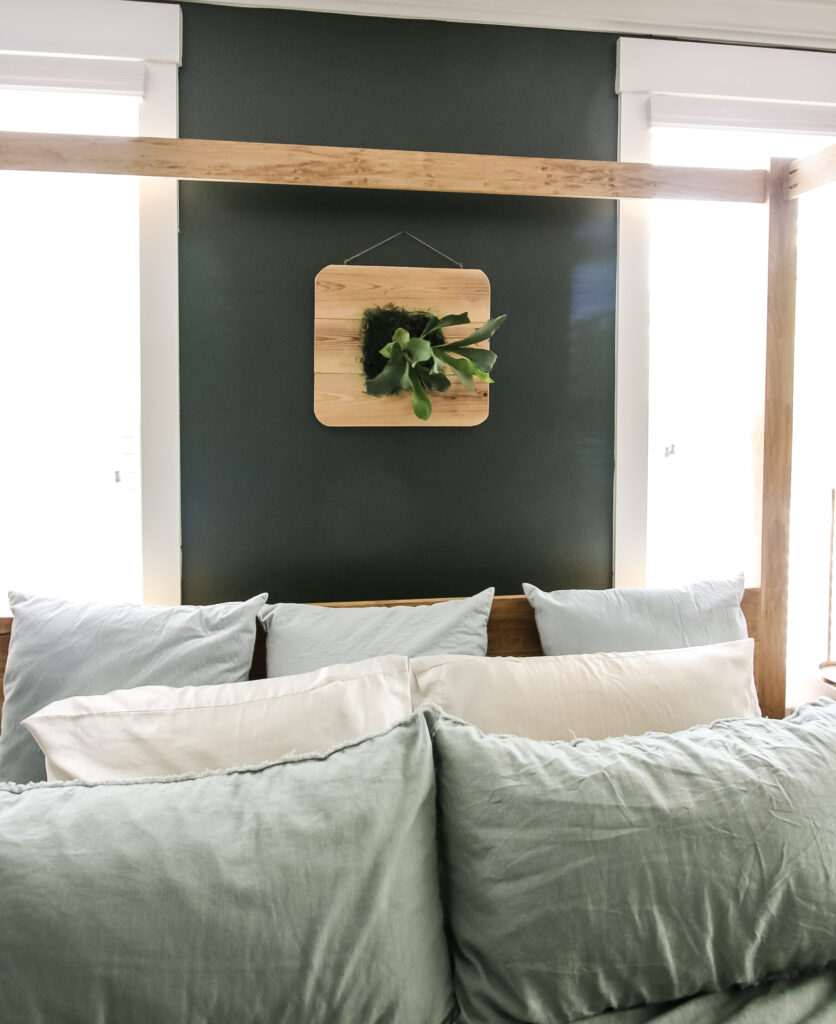
How to hang a staghorn fern
Now that the mount is built, it's time to hang the staghorn fern. Hang the fern using whatever method you used for mounting hardware.
For us, that was hanging the rope on a screw above the bed. Remember that staghorn ferns prefer bright, indirect light because they naturally grow in trees under the protection of the tree's leaves and branches.
How do you water a staghorn fern?
The best way to water a staghorn fern is to place your entire mount and fern in the shower for a few minutes each week. Let the shower run over it and then let it fully drain and dry before rehanging on the wall.
It's best to also use rubber bumpers on the back of your mount to keep the boards off the wall.
You can also mist the fern during the week to mimic natural elements.
Do staghorn ferns need to be mounted?
Technically you don't have to mount a staghorn fern and can let it grown in a pot. However, it will prefer to be mounted as that is more like its natural element.
Video tutorial on how to mount a staghorn fern
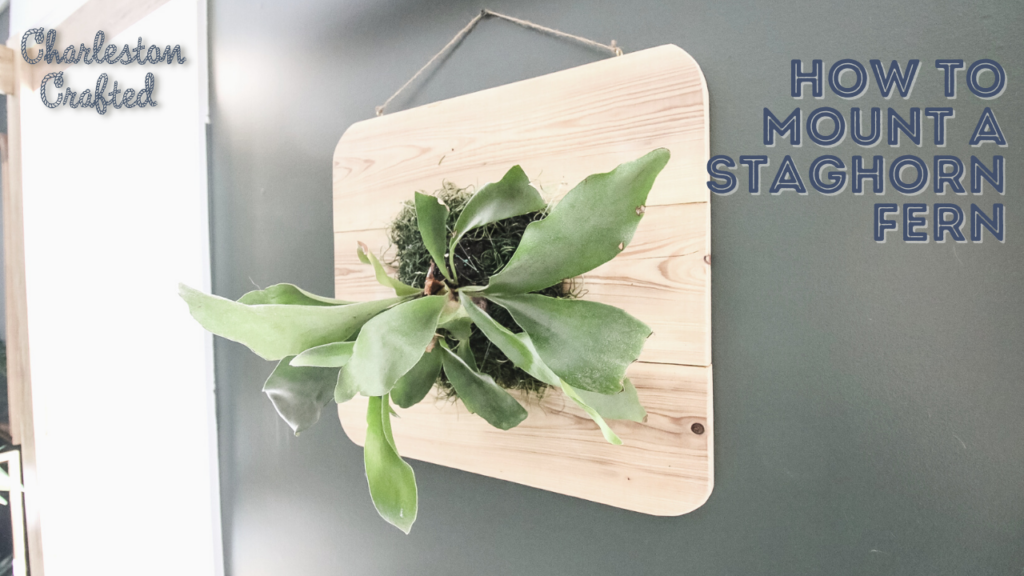
Make sure to watch out video for the full tutorial on how we built a DIY staghorn fern mount, mounted the fern to the board, and hung it over the bed!

Looking for something?
We've been doing this since 2012 so we have a LOT of blog posts!
Search stuff like: Ceiling Projects | DIY Plant Stands | Thrift Flips

Hey there, I'm Sean, the woodworking enthusiast and builder behind CharlestonCrafted.com! Since 2012, I've been sharing the magic of turning raw materials into beautiful creations. I love teaching others the art and satisfaction of woodworking and DIY. I try to inspire fellow crafters to make something extraordinary out of nothing at all.


[…] Here’s my guide on how to mount a staghorn fern! […]