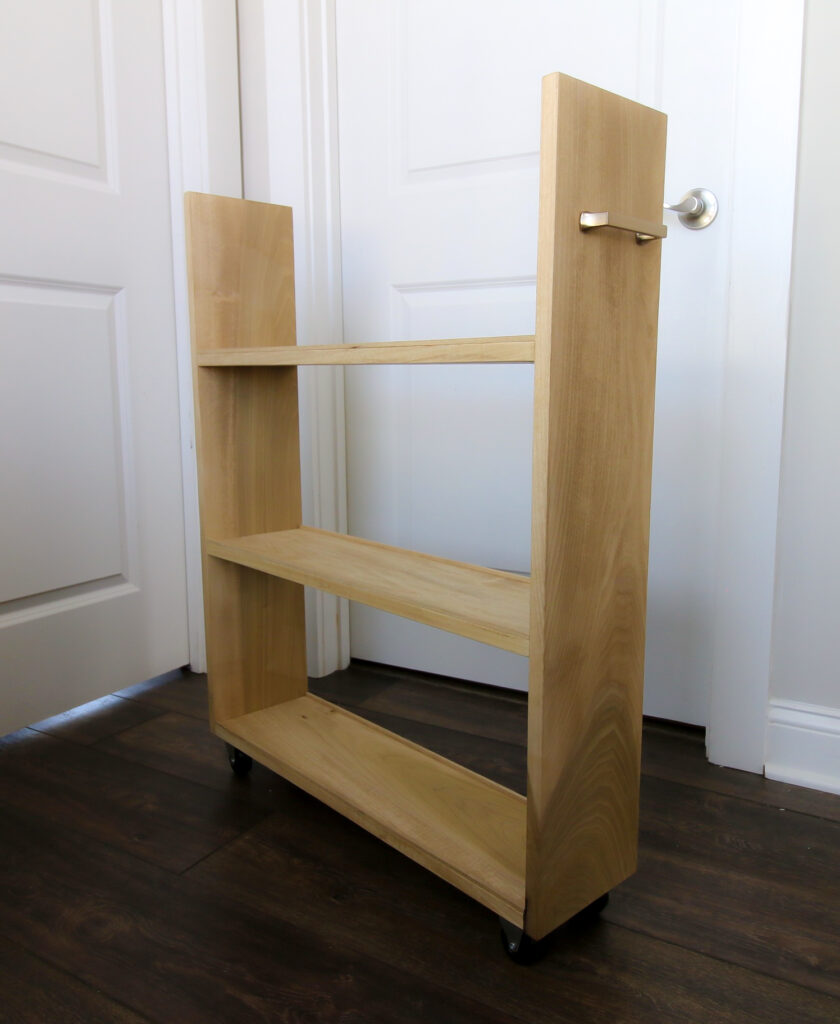
This project is going to show you how to build a slim DIY rolling laundry cart for your laundry room. If you have a space between or next to your washing machines, this cart is perfect for all your laundry essentials!
This post is sponsored by Kreg Tool. All opinions are our own and our opinion is that we love Kreg Tool. Thank you for supporting the brands that make Charleston Crafted possible!
We're working on our laundry room makeover in our new house. It's the second room we've tackled since our son's bedroom.
We worked on the laundry room so early because it was a room that was super unfunctional when we bought it and one we used almost every day. The machines were wedged at weird angles and there was one wire shelf.
Considering we used the laundry room multiple days a week, we needed to tackle it to make it work for us. We built a geometric countertop to fold laundry and added a rod and shelf, all to help with functionality.
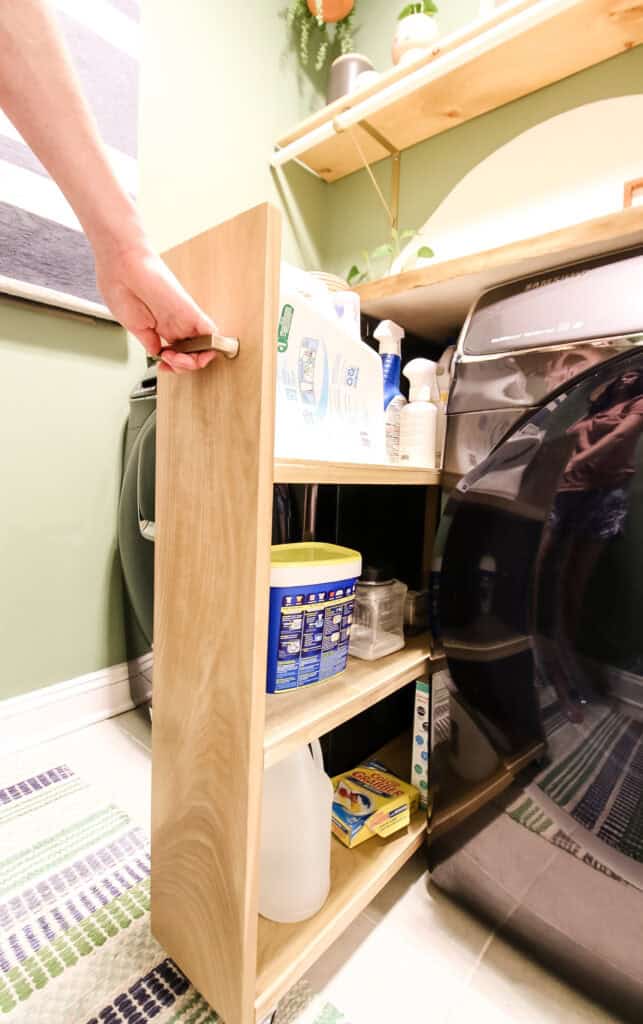
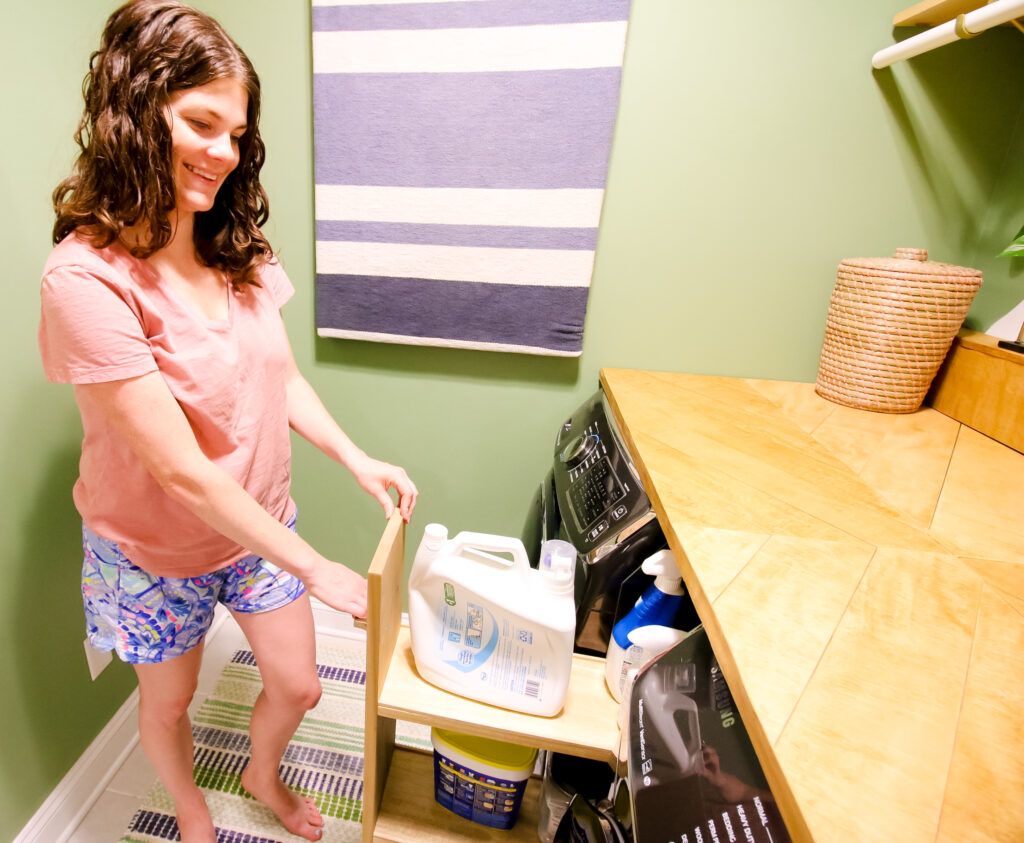
The last thing we did to make this space work for us was building a narrow laundry cart that fits perfectly between our washing machine and dryer to store our supplies!
Click here to check out the laundry room makeover in our old house!
DIY rolling laundry cart
This DIY slim rolling laundry cart is the perfect solution for people who need easy access to their laundry supplies.
If you have a ton of cleaning supplies or have trouble reaching the shelf above your machines (cough Morgan cough), this rolling laundry cart is going to make your life so much easier.
Things to consider when building a rolling laundry cart
Building a rolling laundry cart is perfect for anyone who has space between their machines and wants easy access to supplies.
There are a few things to consider when building it. First, measure the space you have. You'll want the cart to fit pretty snug, but loose enough that it doesn't scrape your machines or wall. Also make sure the shelves can be wide enough for the items you'd want it to hold, like the detergent.
You also need to consider the height of the cart and not have it go above the top of your machines.
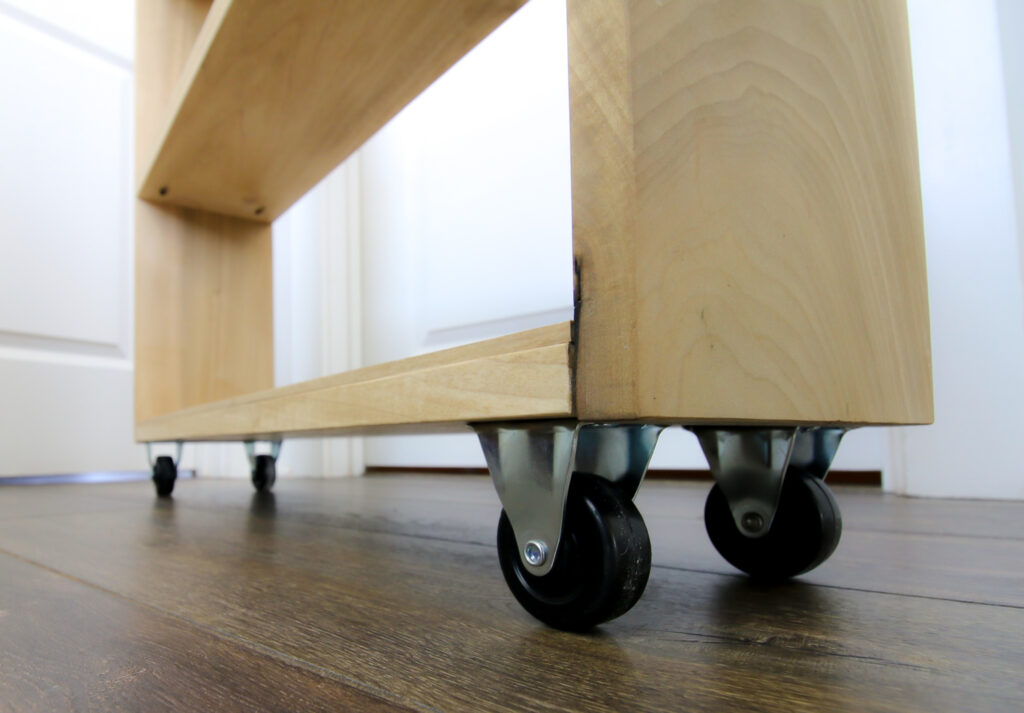
Also, think about the type of flooring you have and what wheels you'll need. We found that plastic casters don't roll on tile, so we bought these rubber ones.
And make sure you're using fixed casters to slide straight in and back and not swivel casters that will turn.
Here are a ton of different over the washer & dryer shelf ideas!
How to build a slim laundry cart
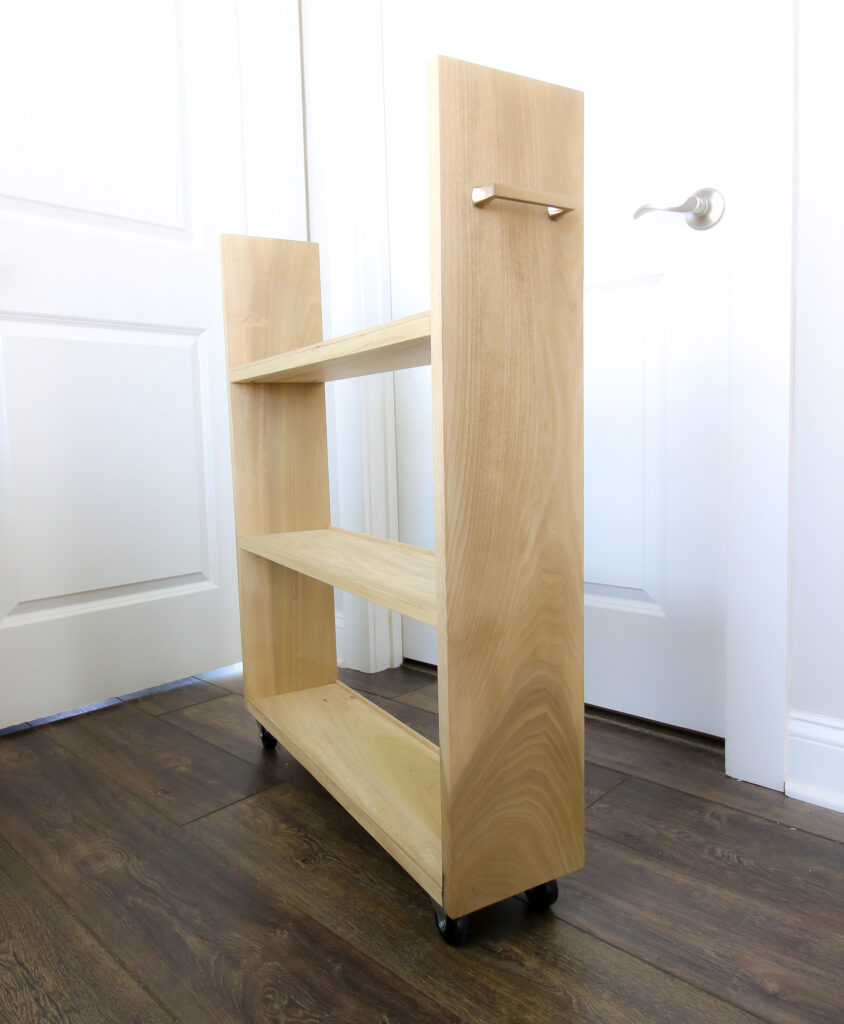
Once we knew the dimensions, this was an easy build. This DIY slim laundry cart consists of five boards and is simple to build.
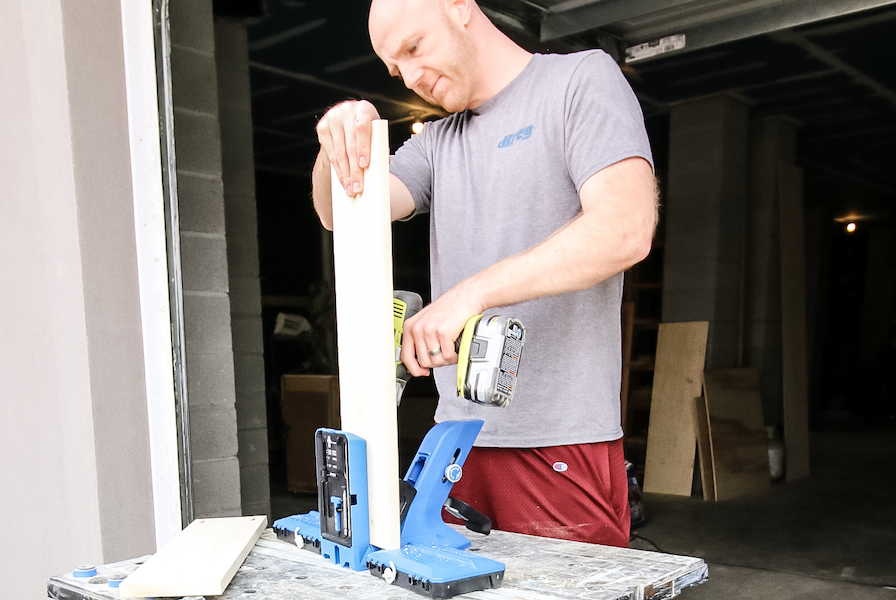
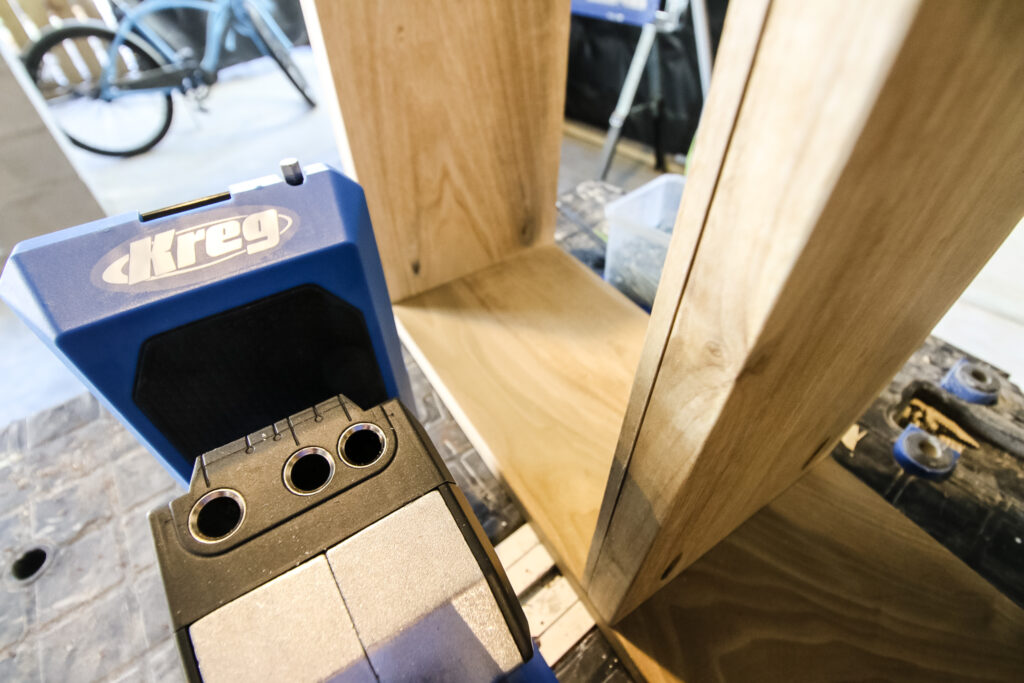
After cutting the boards to length, we used our brand new Kreg Pocket Hole Jig 720 Pro to drill two pocket holes on each end of the shelf boards.
Click here to get our full review and video on the Kreg 720 Pro!
The Kreg 720 Pro has quickly become our go-to tool for joinery. We love how quick and easy the Automaxx clamping system makes it for drilling pocket holes!
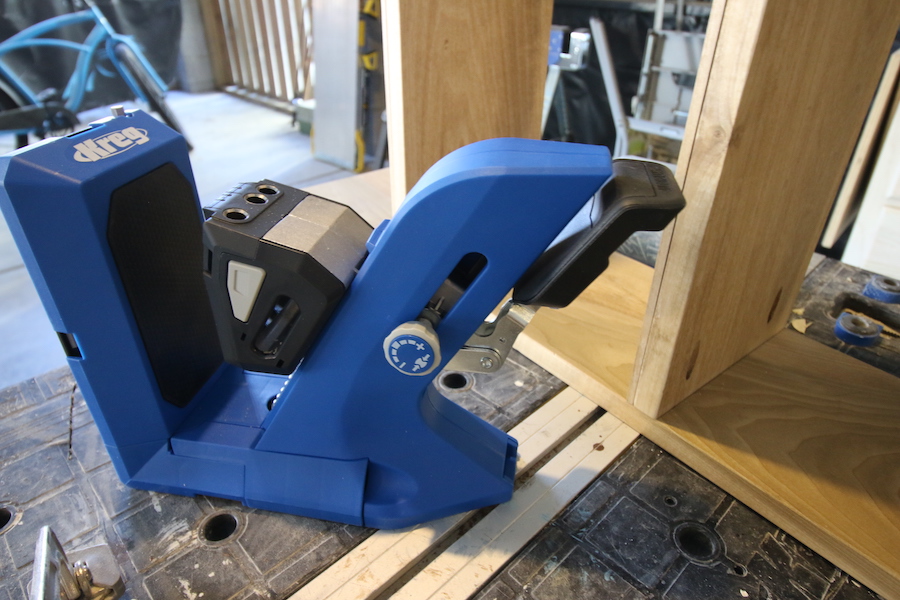
Using the Kreg Pocket Hole Jig 720 Pro to get easy, accurate pocket holes ensures the shelves were sturdy.
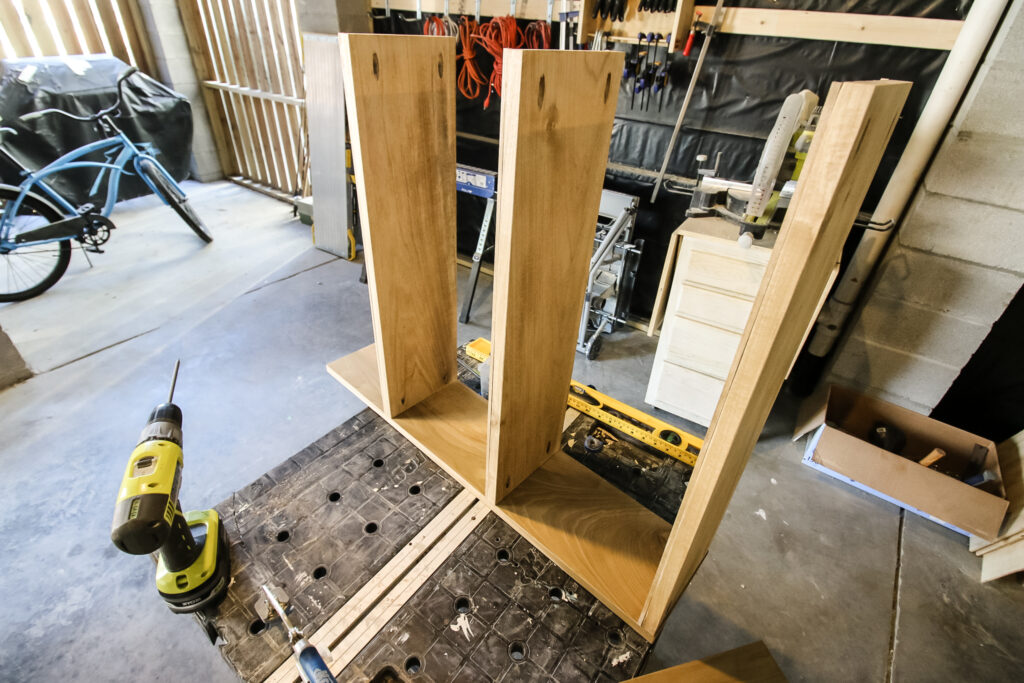
We started by attaching the shelves to the front piece.
It was easiest to align the first one with the bottom edge and then the second and third shelves about a foot apart.
Then we added the back board. We flipped the shelves around to attach them straight into the back.
After they were all in place, we glued on trim pieces to the edges of each shelf to keep items from sliding off.
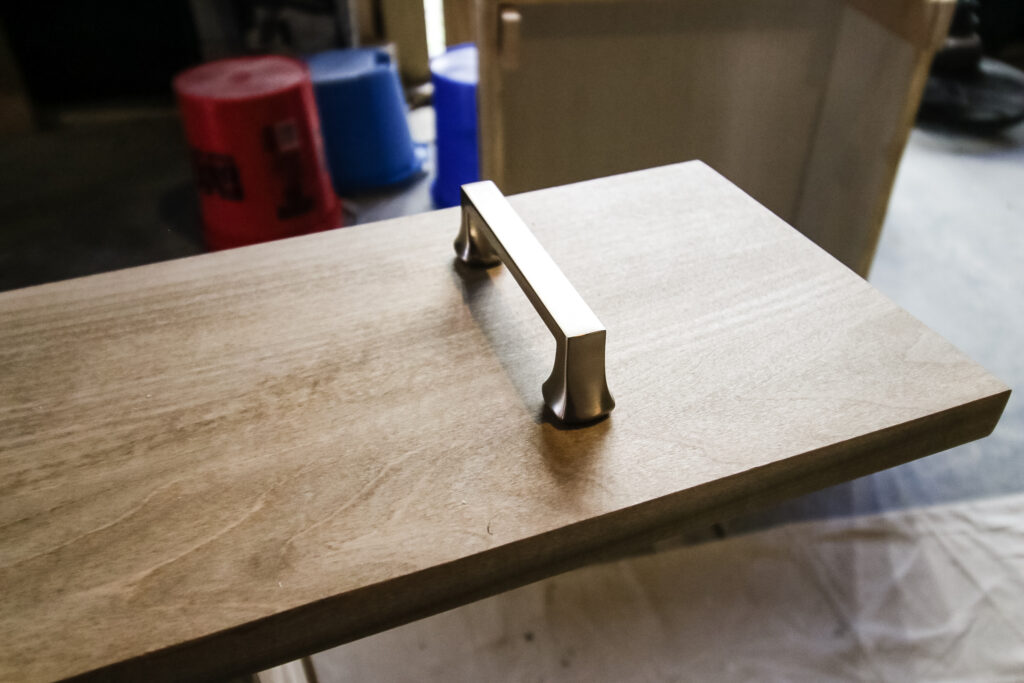
We finished off the cart by adding the fixed rubber casters we mentioned earlier and a brushed gold cabinet pull for moving the cart in and out.
FREE woodworking plans for this slim DIY rolling laundry cart
If you want to build our slim DIY rolling laundry cart, we've got FREE woodworking plans available for you.
Kreg Tool's website now has a great way for your to search for plans on their site and get exactly what you need.
You can download the PDF plans or look at the instructions right there on Kreg's site.
The plan has the full material list, cut list and step-by-step instructions for how to build the cart.
You may need to adjust the depth or width of the cart, depending on your space, but that's easily doable.
Why use a slim laundry cart
Using a narrow laundry cart between your washer and dryer can give you added storage space and convenience for doing laundry.
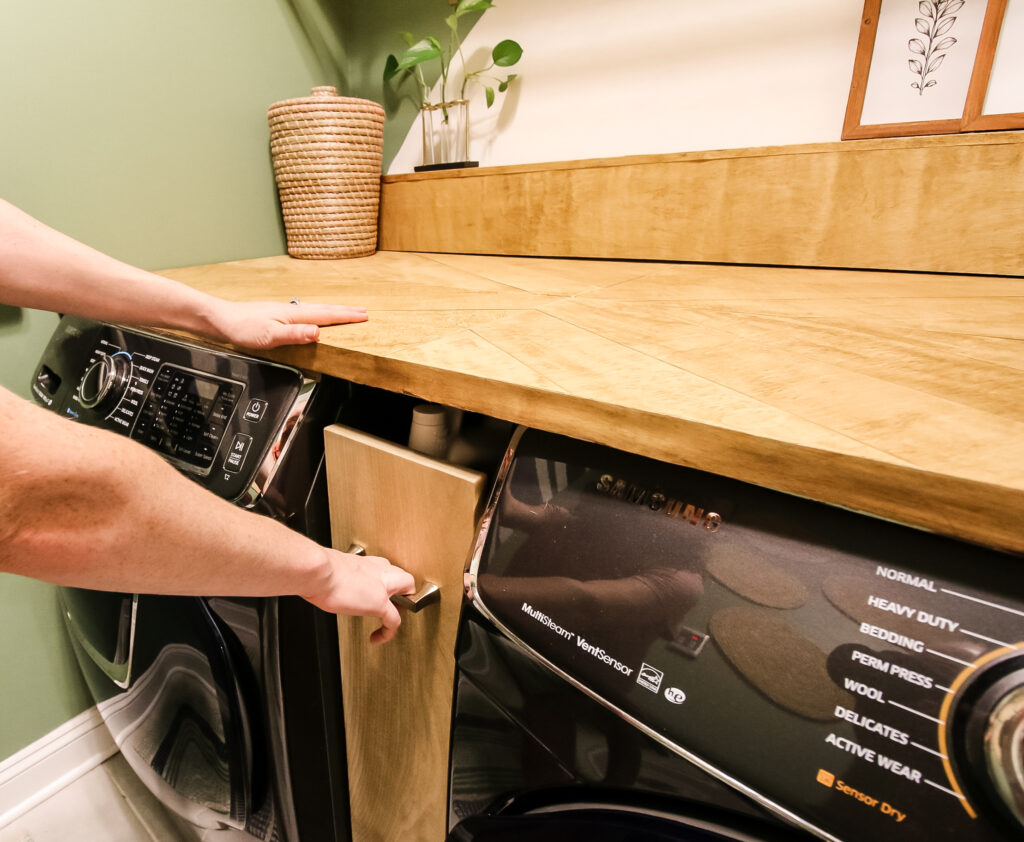
Also, adding a nice stain and matching handle can add an element of "completeness" to your space instead of showing a gap to the water lines behind.
Do remember, however, that if you have small children you should not leave dangerous chemicals easily accessible on the cart.
If your child is at an age where they would pull the cart out and try to open any items on it, use caution with what you put on the cart.
Video tutorial
Check out our video tutorial of how we built this DIY slim rolling laundry cart. It was a simple project to build and we'll show you exactly how we did it here!

Looking for something?
We've been doing this since 2012 so we have a LOT of blog posts!
Search stuff like: Ceiling Projects | DIY Plant Stands | Thrift Flips

Hey there, I'm Sean, the woodworking enthusiast and builder behind CharlestonCrafted.com! Since 2012, I've been sharing the magic of turning raw materials into beautiful creations. I love teaching others the art and satisfaction of woodworking and DIY. I try to inspire fellow crafters to make something extraordinary out of nothing at all.


Ivory says
You nailed this project. It’s so well needed in my home, and/or kitchen. Your projects never stop amazing me. Thank you so much for sharing