Master the art of woodworking finish work with our comprehensive guide on how to apply wood stain flawlessly. Learn the step-by-step process from wood preparation to selecting the right stain, application techniques, and finishing for that perfect, professional touch!
Building or refinishing a piece of wood furniture is a great project. But, the finish work can have the biggest impact on the finial look!
A well-applied wood stain can enhance the natural beauty of the wood, adding depth and character to your projects.
In this guide, we'll walk you through the step-by-step process of how to apply stain to wood for a flawless finish.

How to Prepare Wood for Wood Stain
It is essential to properly prepare your wood surface before sealing and staining the wood. Otherwise, the color might not adhere, or you could have blotchy or uneven results.
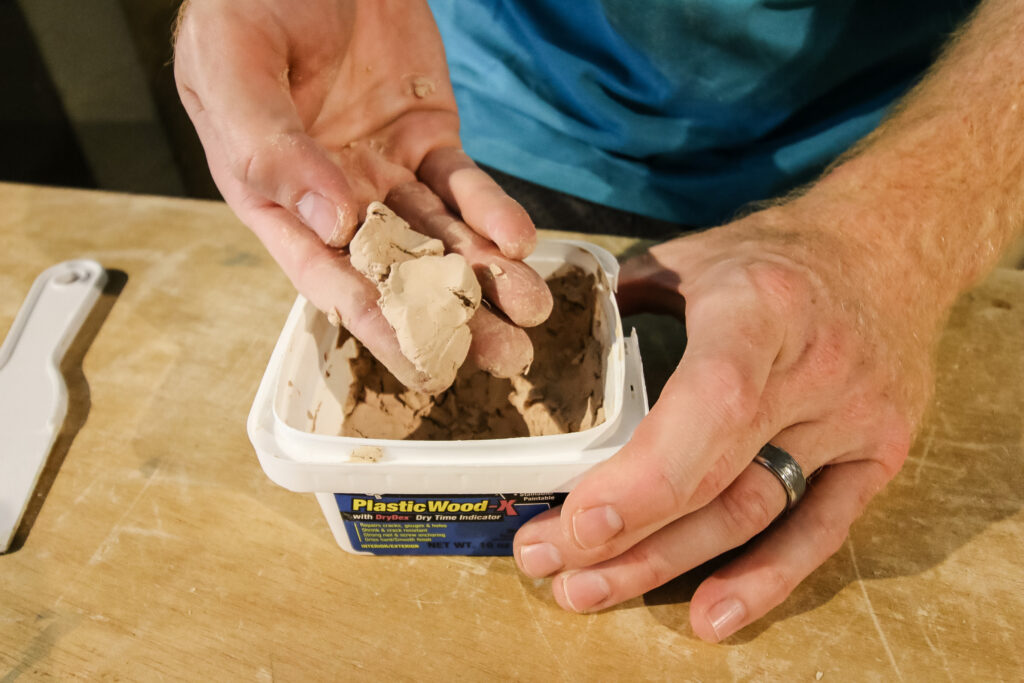
First, assess your project for any holes or damaged areas. This is less so in a new build, but important if you are refurbishing an older piece of furniture. Use wood filler to fill any holes, and sand it smooth. Here are our favorite wood fillers for staining!
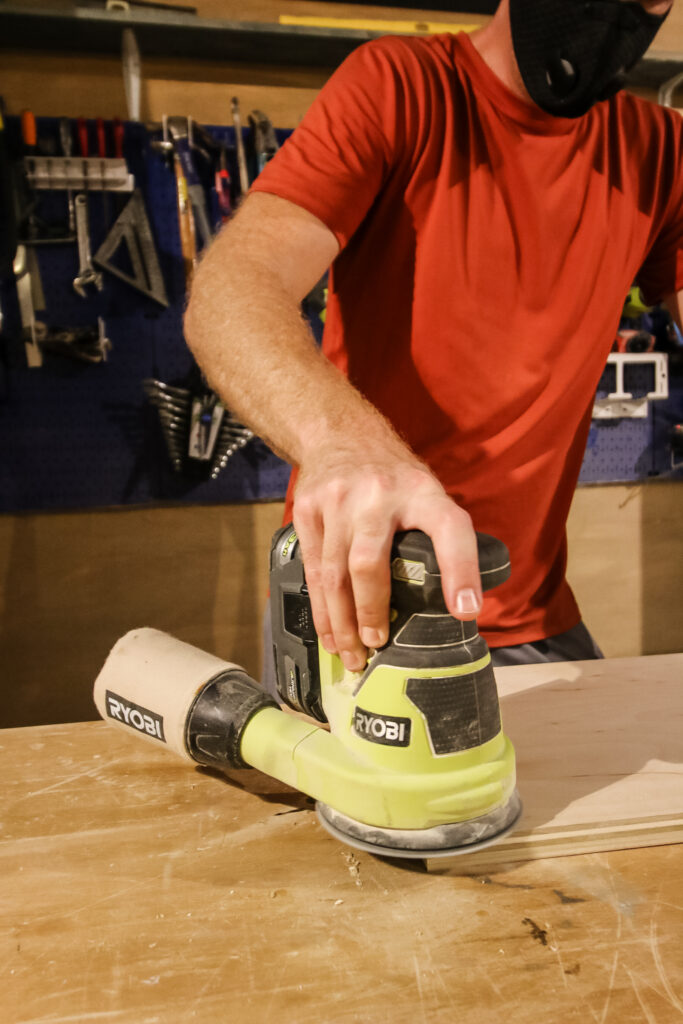
Begin by sanding the wood surface with progressively finer grit sandpaper (starting from 120 grit up to 220 grit) to achieve a smooth finish and open the wood pores for better stain absorption.
Remove any dust and debris by wiping it down thoroughly using a tack cloth or a damp cloth. Make sure the wood is completely clean and dry before moving on to applying the stain.
Staining wood furniture vs. staining wood boards
We often get the question of if you should stain wood before or after building a project and if there are differences between staining boards vs staining wood furniture.
While it seems like it would be easier to stain flat boards and then assemble, we usually do not recommend this. This is because wood projects usually need to be glued and sanded after being assembled for a flush, finished look. Both of these thing would mess up an existing stain.
If your build is very intricate, you might want to consider using a paint sprayer to easily get into the grooves or cracks. Otherwise, just wait until it is assembled to stain and seal it!
How to Pick the Right Wood Stain
Another important step before actually staining your wood project is to pick the best stain for your wood. This means picking the right kind of stain and the right color of stain.
Oil-Based Stain vs. Water-Based Stain
Picking the right type of stain can be overwhelming and confusing. Your choices are oil based stain or water based stain. Let's break down the differences!
Oil-Based Stains: Provide rich, deep color and excellent penetration into the wood. They take longer to dry but offer a durable finish.
Water-Based Stains: Dry faster, have less odor, and are easier to clean up. They may not penetrate as deeply but offer vibrant color options and are more environmentally friendly, due to a lower level of volatile organic compounds (VOCs) compared to oil-based stains.
We generally work with water-based stains just because they are less stinky, easy to clean up, and dry very quickly.

How to pick the right color stain for your project
To pick the right color wood stain for your project, first you are going to want to narrow it down to an aesthetic you are going for. For example, do you want dark brown, light gray, or a natural light wood color? Once you decide on an overall vibe, you might want to pick 2-3 stain samples to test on scrap pieces of wood.
Remember - the same stain color can look very different on different species of wood. The underlying color of the raw wood and the properties of the wood (such as how absorbent it is) make a huge difference int he final look.
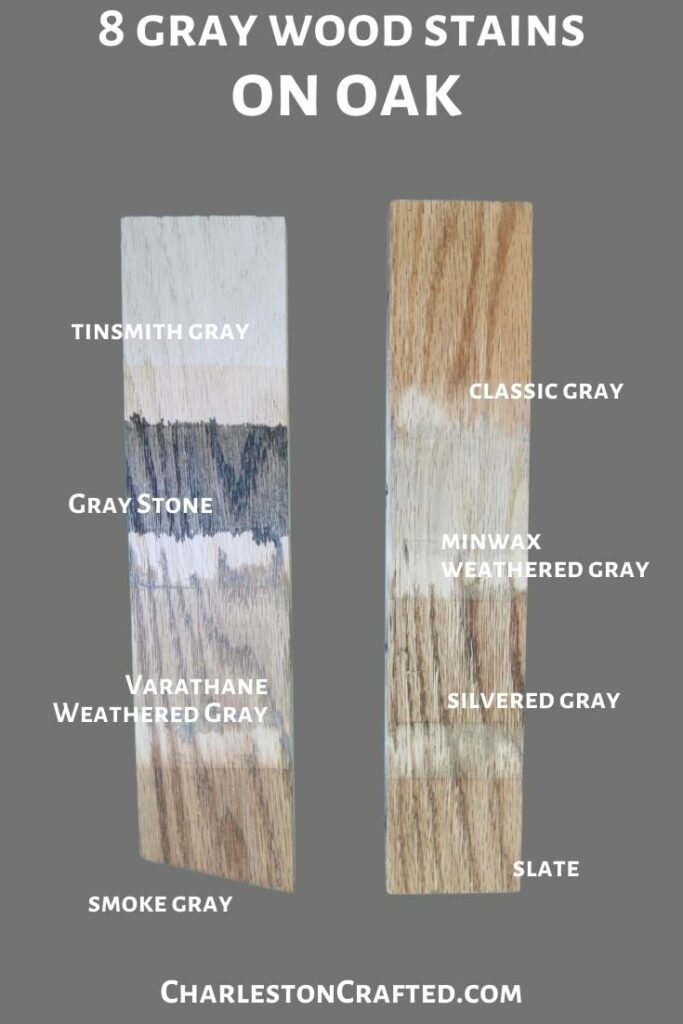
And, even two pieces of the same species can be a different color. That's why it's always best to sample wood on a scrap from the actual boards you are working with whenever possible.
If you don't want to mess with samples, check out our post where we tested 10 popular wood stains on 5 species of wood! It's a great way to visualize how they might look on your project.
Once you choose your wood stain and prep your wood, you are ready to get started staining!
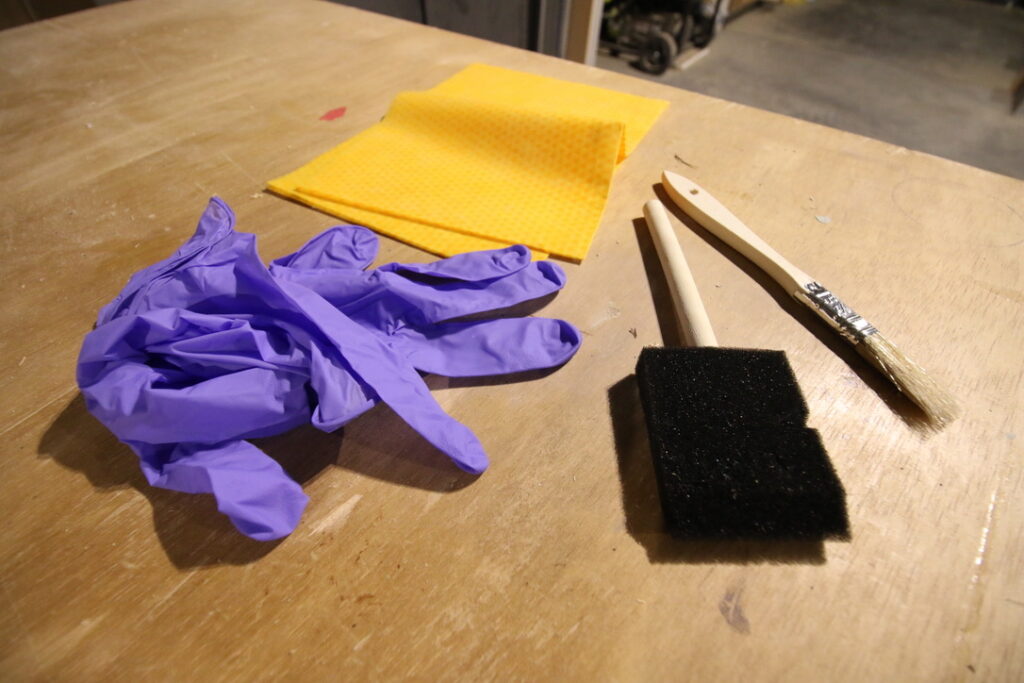
Materials Needed to Stain Wood
Here are the supplies that you need to stain wood.
- Fine grit sandpaper
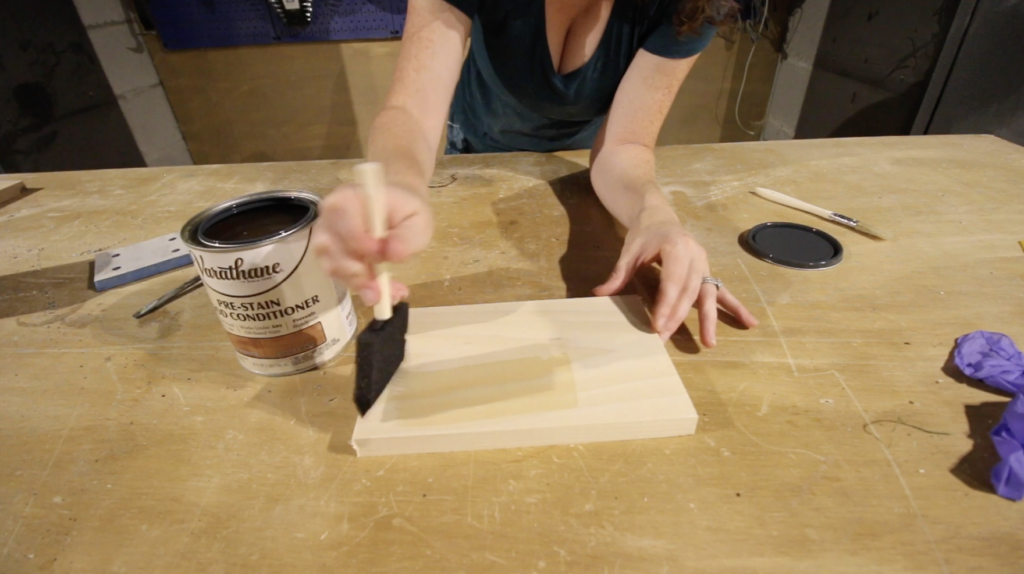
- Optional: Pre-stain wood conditioner for more uniform staining
- Stain of your choice (oil-based or water-based)
- Brushes or cloths for application
- Gloves and safety goggles
- Stir sticks for stirring the stain
- Drop cloths to protect the surrounding area
What to apply stain with
You have a few options as for what tool to use to apply wood stain with. We have tried a few options and here are our favorites:
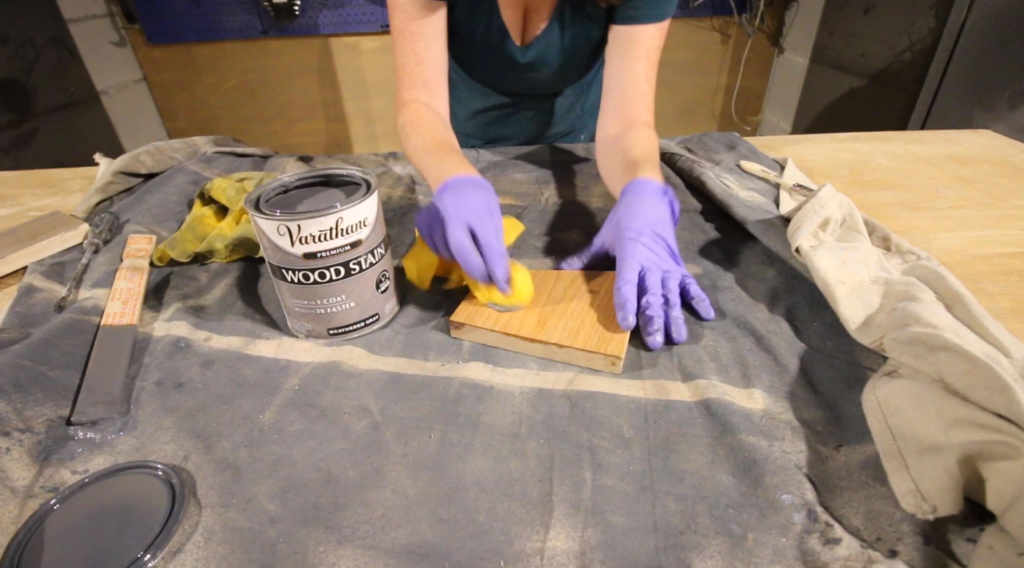
- Lint-free rag - our preferred way to stain is with a tack cloth. Wear gloves while you use these, and you can easily dip them in the stain and wipe on just enough. They are also perfect for wiping off excess. A great bang for your buck, disposable option.
- Paint brush - You can always use a paint brush to apply stain. I prefer an angled brush for getting into inner corners.
- Foam brush - A foam brush is great because it can hold a lot of stain and they are disposable so clean up is easy. However, be careful - since they soak up so much stain, they can lead to pools of splotchy stain if you don't press down evenly!
- Stain glove - these stain gloves are an option if you are staining something with irregular curved lines, like balusters. You can see our test of a stain glove here - it isn't our favorite option for most uses, but it is good for staining long rods.
No matter what you use to apply wood stain, the most important thing is to apply it in the direction of the wood grain and to wipe off excess for the best possible finish.

Safety precautions when working with wood stains
Wood stains are not as obviously dangerous as a power saw, but they can cause skin or eye irritation. Make sure to follow these safety best practices when staining wood:
- Ventilation: Work in a well-ventilated area. Stains can release harmful fumes, so ensure proper airflow by opening windows and using fans. Consider working outdoors if possible to minimize inhalation of potentially harmful vapors.
- Protective Gear: In addition to gloves and safety goggles, wear a mask or respirator designed to filter out chemical fumes. This helps prevent inhalation of harmful particles or vapors while working with stains.
- Skin Protection: Stains can irritate the skin. Wear long sleeves, pants, and closed-toe shoes to minimize skin contact. If stains come into contact with the skin, wash the affected area immediately with soap and water.
- Eye Protection: Safety goggles or glasses with side shields protect eyes from accidental splashes or spills. Chemicals in stains can cause severe irritation or damage to the eyes.
- Read Labels: Familiarize yourself with the specific hazards and safety precautions outlined on the stain's label. Understanding the product's properties and potential risks helps in taking appropriate safety measures.
- Avoid Ingestion: Stains contain chemicals that are harmful if ingested. Never eat, drink, or smoke while working with stains. Wash your hands thoroughly before eating or touching your face.
- Proper Storage: Store stains in their original containers in a secure, cool, and dry place away from children and pets. Ensure lids are tightly sealed to prevent spills or leaks.
- Cleanup: Clean tools and equipment immediately after use. Dispose of used rags, brushes, or applicators properly to prevent spontaneous combustion. Rags soaked in oil-based stains can pose a fire hazard and should be laid flat to dry or stored in an airtight container filled with water before disposal.

How to Stain Wood Step by Step
Here's the best way to stain wood for a perfect finish!
- Test the Stain: Always perform a test on a small, inconspicuous area to ensure you like the desired color before staining the entire piece.
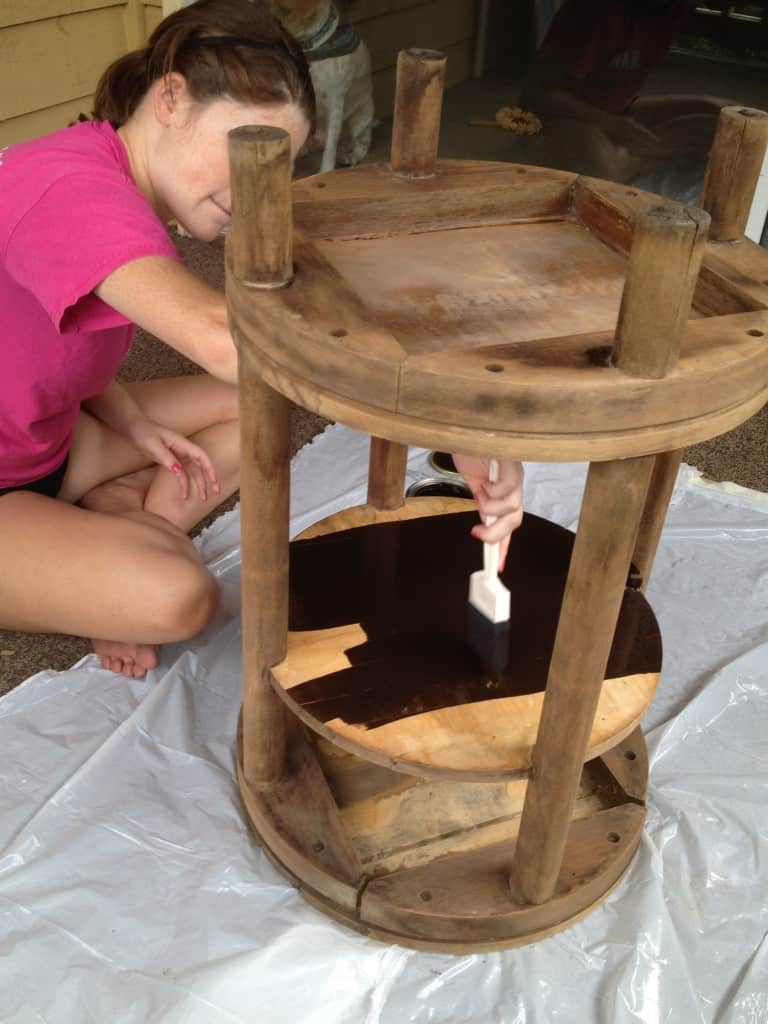
- Apply Stain: Using a brush or clean cloth, apply an even coat of stain following the wood grain. Brush up and down to mimic the direction of the grain and get the stain into all of the grooves and cracks. Work in small sections to avoid drying lines.
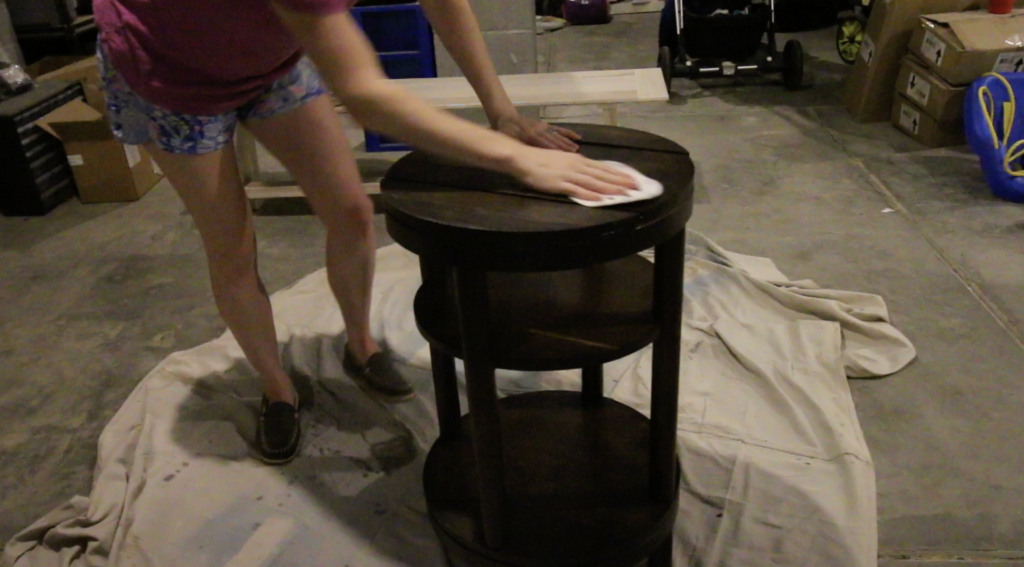
- Wipe Excess: After a few minutes, wipe off any excess stain with a clean cloth. Leaving pooling stain is what leads to a blotchy finish. Assess the color depth and decide if you want to apply a second coat. Allow it to dry according to the manufacturer's instructions.
- Apply Additional Coats (if needed): For a darker shade, apply additional coats after allowing the previous one to dry completely. Ensure each coat is evenly applied and wiped to maintain consistency.
Hot tip - how to apply wood stain evenly
Blotchiness in your wood stain finish is usually due to unevenness in the dryness of the wood. Applying a pre-stain wood conditioner and sanding really well can help to ensure the best possible canvas for your stain.
Also, do not let excess stain sit for too long. Pooling stain can leave behind a ring that will only come off if it's sanded off, setting you back in your staining process.
Troubleshooting common stain problems
It is so frustrating to work on a project and not have the results meet your expectations. Here are the most common stain problems and how to handle them.
Dealing with Streaks
Streaks often occur due to uneven application or excess stain drying without being wiped off.
To avoid streaks, ensure even and consistent application of the stain using smooth, overlapping strokes.
Always wipe off excess stain with a clean cloth to prevent streaking. If streaks appear, lightly sand the surface and reapply the stain evenly.
Addressing Uneven Penetration
Uneven penetration happens when the wood absorbs stain differently in various areas, resulting in patches of light and dark spots.
Preparing the wood surface with a pre-stain wood conditioner helps the stain absorb more uniformly. Additionally, sand the wood evenly to achieve consistent absorption.
Minimizing Blotchiness
Blotchy stains can occur, especially on softwoods or porous woods like pine, due to uneven absorption.
Applying a wood conditioner before staining helps mitigate blotchiness by creating a more uniform surface for stain application.
Alternatively, consider using gel stains that tend to minimize blotching on certain wood types.
Sticky stain finish
Excessive buildup of stain can lead to a gummy or tacky finish. Apply thin coats of stain, ensuring excess is wiped off promptly after application.
If buildup occurs, gently sand the surface using fine-grit sandpaper to remove the excess stain without affecting the color too much. Reapply the stain sparingly if necessary.
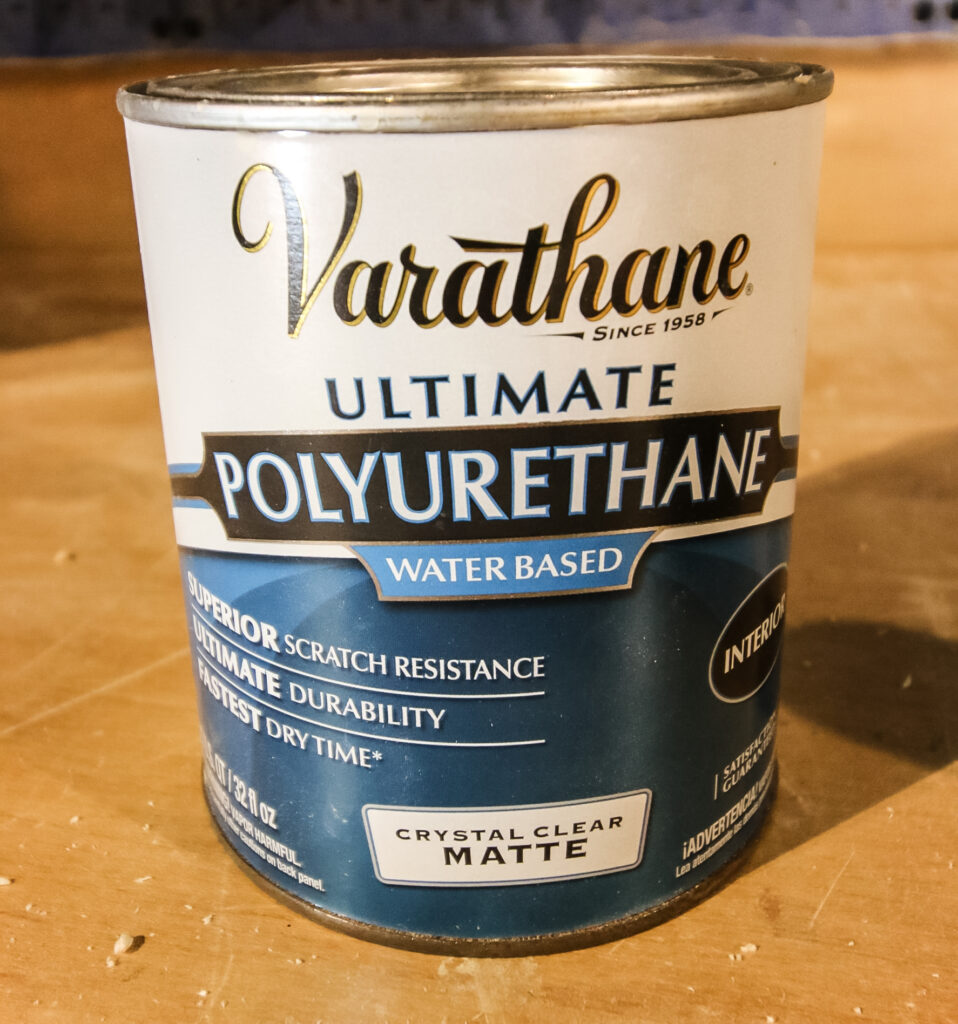
How to Finish Stained Wood
Once your stain has fully dried, you will most likely want to seal your wood project with a topcoat.
Once the stain is fully dry, apply a protective topcoat or sealant to preserve the finish and add durability.
Your options include polyurethane, lacquer, or varnish. Follow the manufacturer's instructions for application and drying times.
For a smoother finish, lightly sand between coats of sealant with fine-grit sandpaper. This will get rid of any tiny bumps or grittiness to the finish.
Let the final coat cure completely before using or placing any objects on the stained wood surface.
Be sure to check out our other DIY wood stain ideas!
Want help getting the perfect wood stain finish?
Be sure to grab our FREE wood stain troubleshooting cheat sheet, with the top staining problems + easy solutions for each!


Looking for something?
We've been doing this since 2012 so we have a LOT of blog posts!
Search stuff like: Ceiling Projects | DIY Plant Stands | Thrift Flips

Hello, I'm Morgan, half of the creative force behind CharlestonCrafted.com! With a passion for DIY that dates back to 2012, I've transformed three homes and now I'm dedicated to helping others craft their dream spaces. Let's turn your house into a home together!