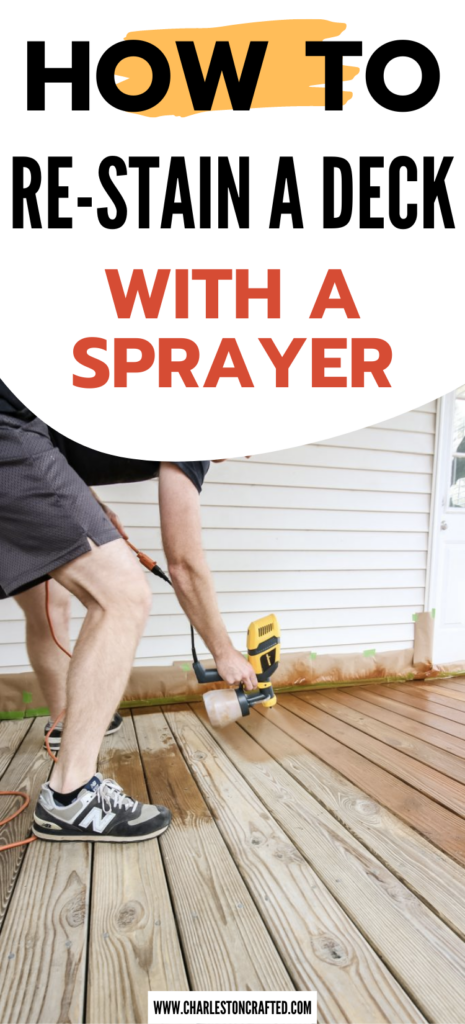
This post will show you how to bring new life back into your deck by adding a fresh stain with a sprayer. Using a sprayer is fast and easy for this process!
This post was sponsored by Wagner Spraytech. We were compensated for our work, but all opinions are our own. Thank you for supporting the brands that make Charleston Crafted possible!
Our porch has been looking pretty worse for the wear lately. In that, I mean it has turned grey and looked like there was no life left.
However, it is structurally totally in great shape. We've needed to do a total makeover on our entire porch situation, so we decided that re-staining the deck surface would be the perfect way to start!
In this post, we're going to share with you the proper way to re-stain a deck using a sprayer, which will save you time and effort!
Re-Staining an old deck or porch with a sprayer
If your old deck or porch is in need of a face lift, follow these steps for giving it new life.
Step one: remove furniture
First, remove everything off the boards that will need to be re-stained. This might seem obvious, but humor me here.
Step two: clean deck
Second, use a paint scraper to get out dirt, hair or other junk from between the cracks of the boards. This is a super important step because you don't want to stain and seal these things into the cracks forever.
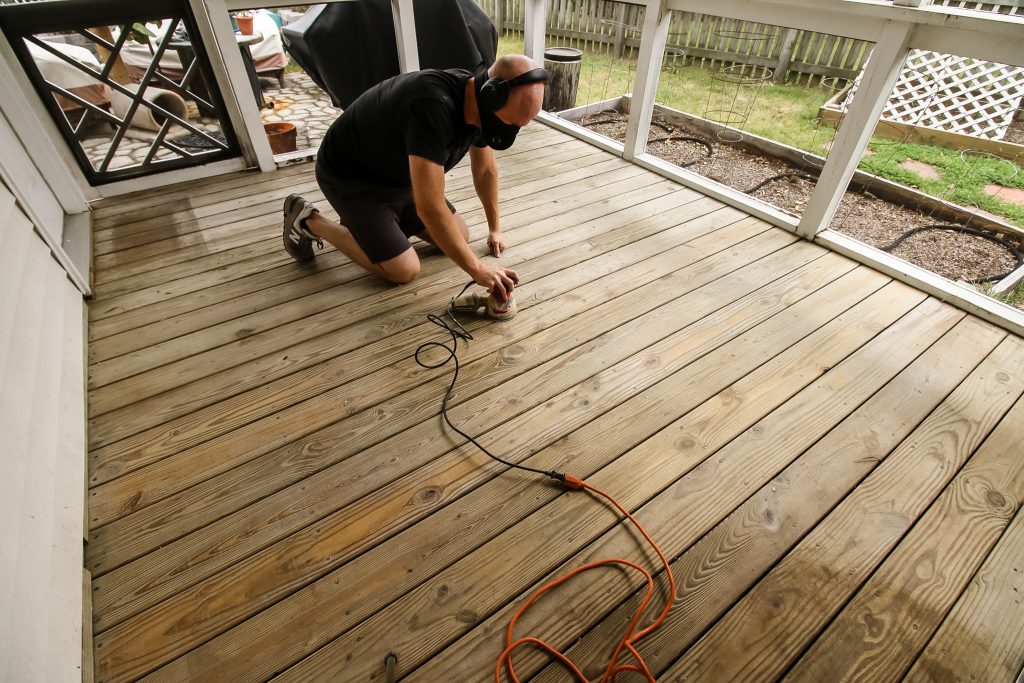
Step three: sand boards
Third, use an orbital sander to sand the boards. You don't need to get them to look completely new, but work to get the built-up grime off the surface.
Use a 60 or 80 grit sandpaper to really get everything up that's stuck on. Then, blow or sweep the deck off of the saw dust.
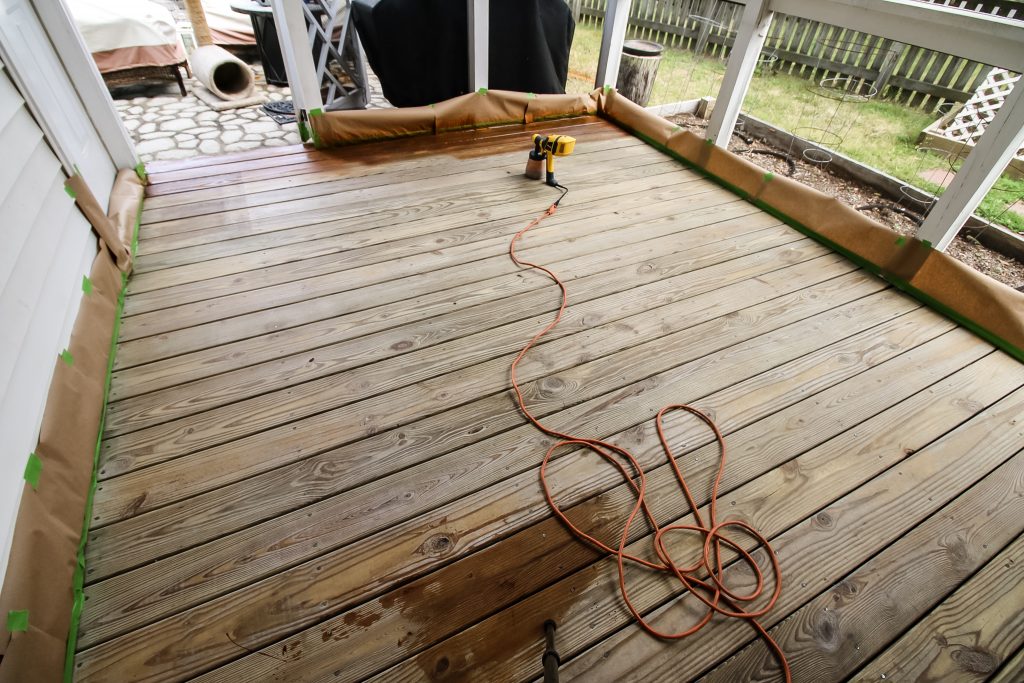
Step four: tape edges
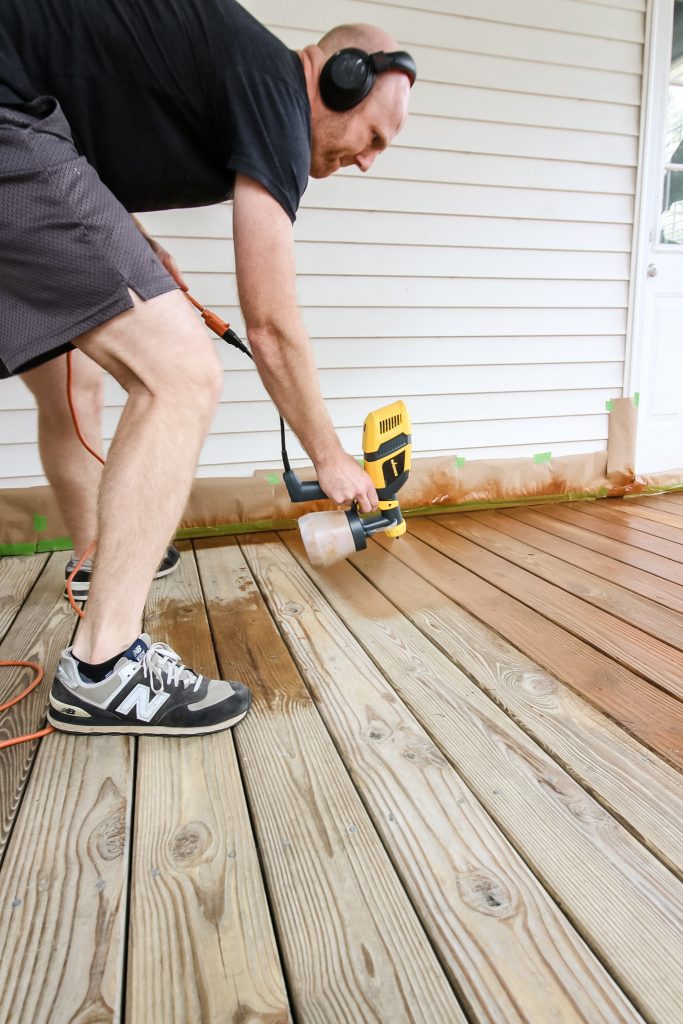
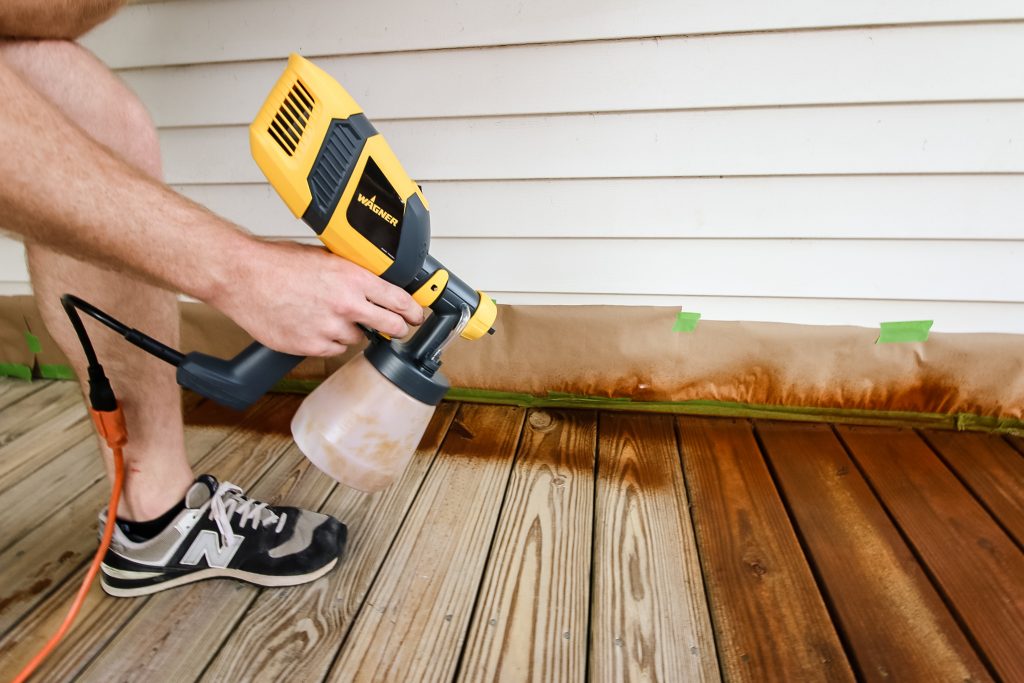
Fourth, tape off any surfaces you don't want to spray stain on. The sprayer is good on control, but you need an area to over-spray on both sides of each pass.
Use painters tape and brown craft paper or newspaper to tape about six inches up on all surfaces. You won't need to tape off any sides of your deck that aren't connected to anything.
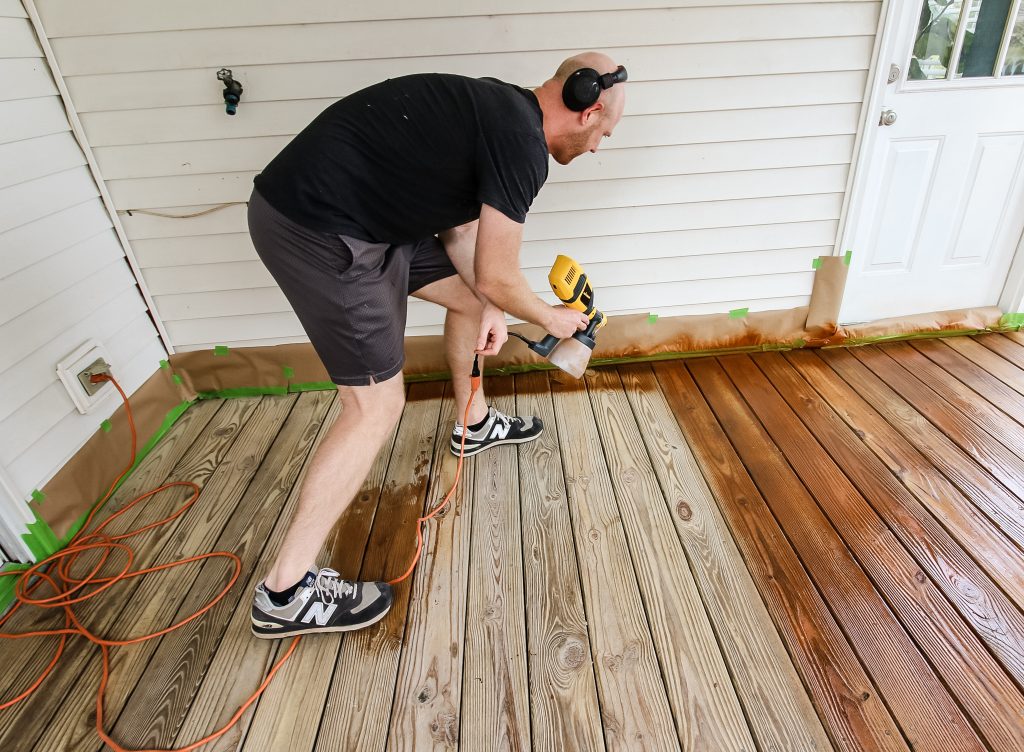
Step five: spray stain
Finally, spray stain and seal on the boards. Use smooth, even motions about six inches from the surface and over-spray out each side to avoid densely sprayed areas. That's a big reason for the paper taped to the sides.
Move slowly but not so slow as to cause build up of spray. Make sure you work the area over each board but also in the cracks to get the stain in there.
Check out all of our favorite ways to upgrade your backyard on a budget!
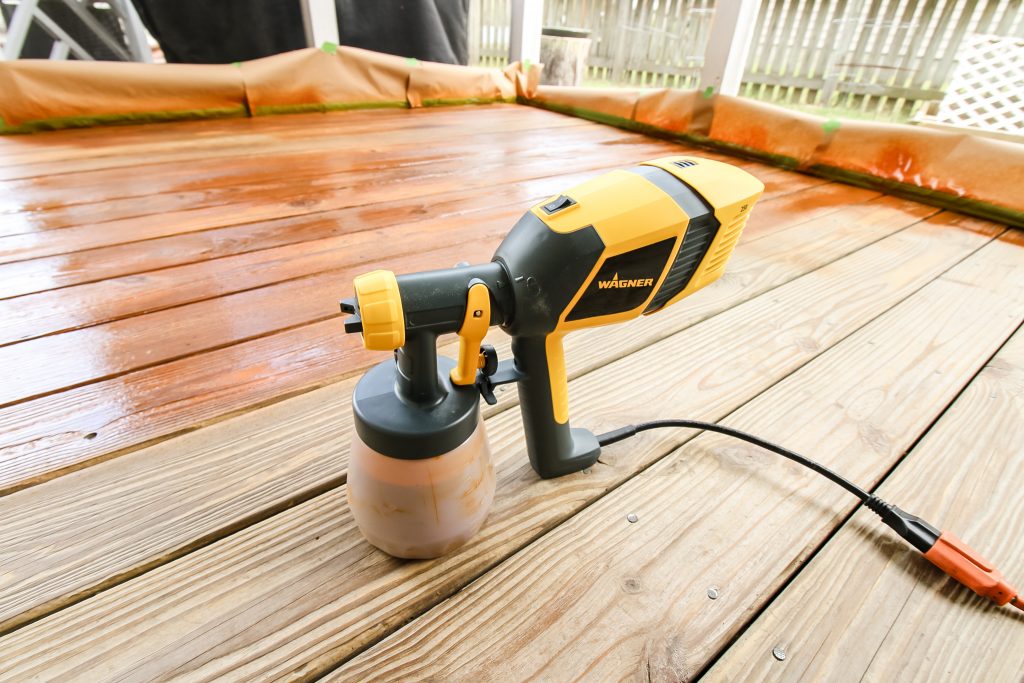
Wagner Control Spray 250
To spray our deck, we used the Wagner Control Spray 250. This is the perfect tool for spraying small or medium sized projects. Our screened porch deck is 10'x12', so this was the right tool for us.
The Wagner Control Spray 250 has the power and control to cut time out of staining projects like porches, fences, railings, furniture and trim while keeping the mess down.
I'm not kidding when I say that the spraying time was the fastest part of our whole re-staining process. It took maybe 5 minutes to spray the whole porch.
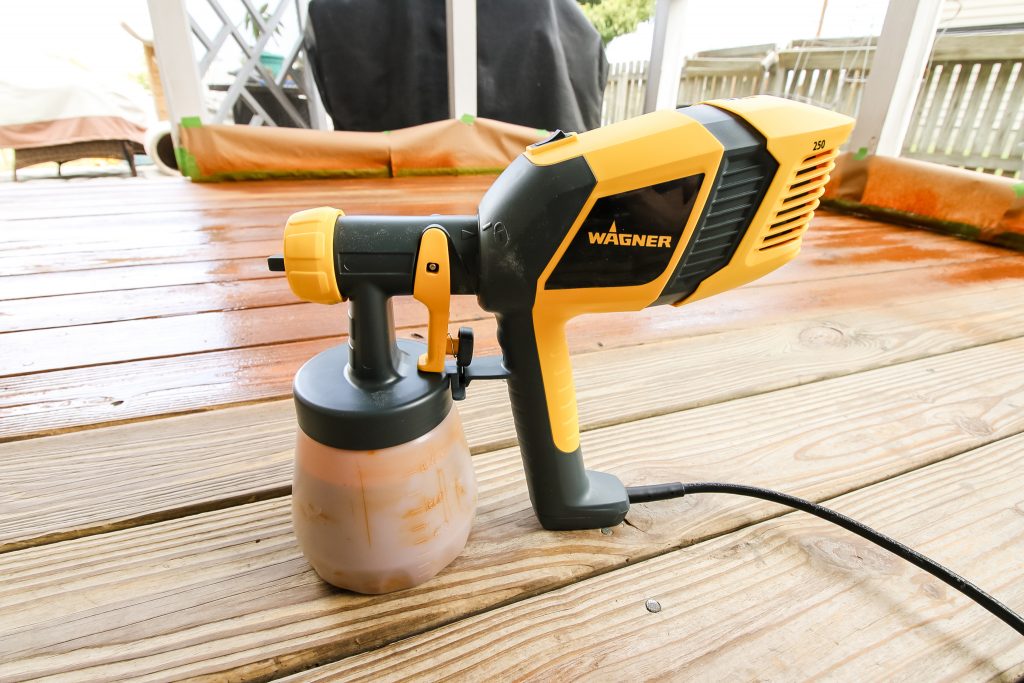
I like how the Wagner Control Spray 250 has variable speed settings that help you make the best choice in spraying capacity for the project you're doing. You can also change the direction of the spray with the twist of the nozzle.
Wagner also has a cool woodburning tool you have to check out!
Step six: clean up
Setup and cleanup of the Wagner Control Spray 250 were also a breeze. The nozzle and tank easily twist off the main motor housing. This eliminated mess when filling the tank with stain.
Then, when it is time to clean up, you twist off the nozzle and tank again and these parts can all be washed with water, eliminating worry of getting water in the motor.
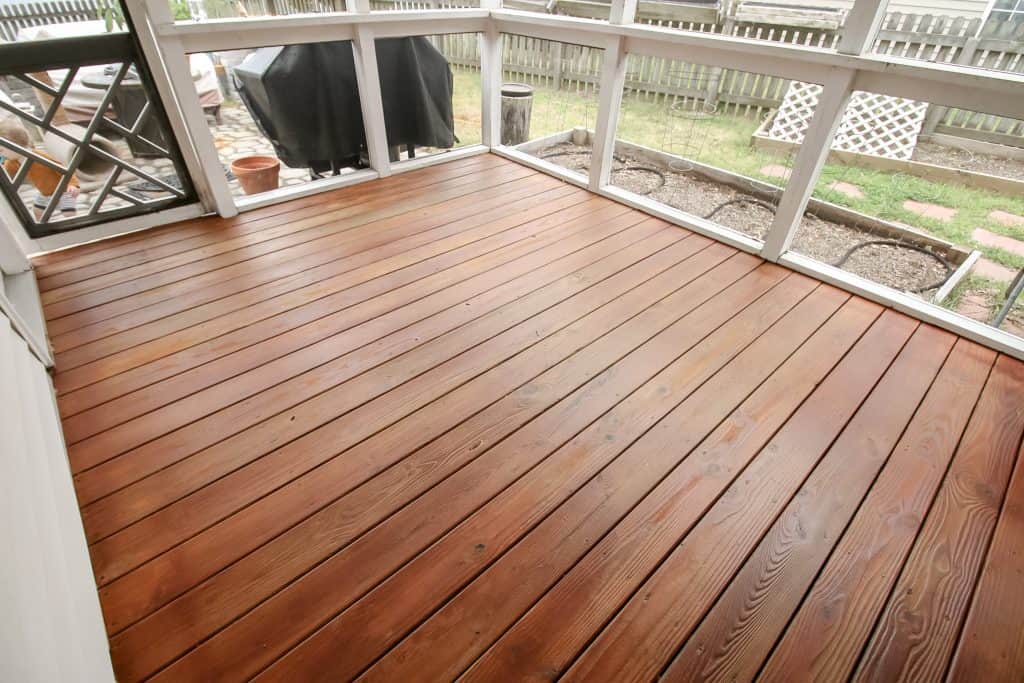
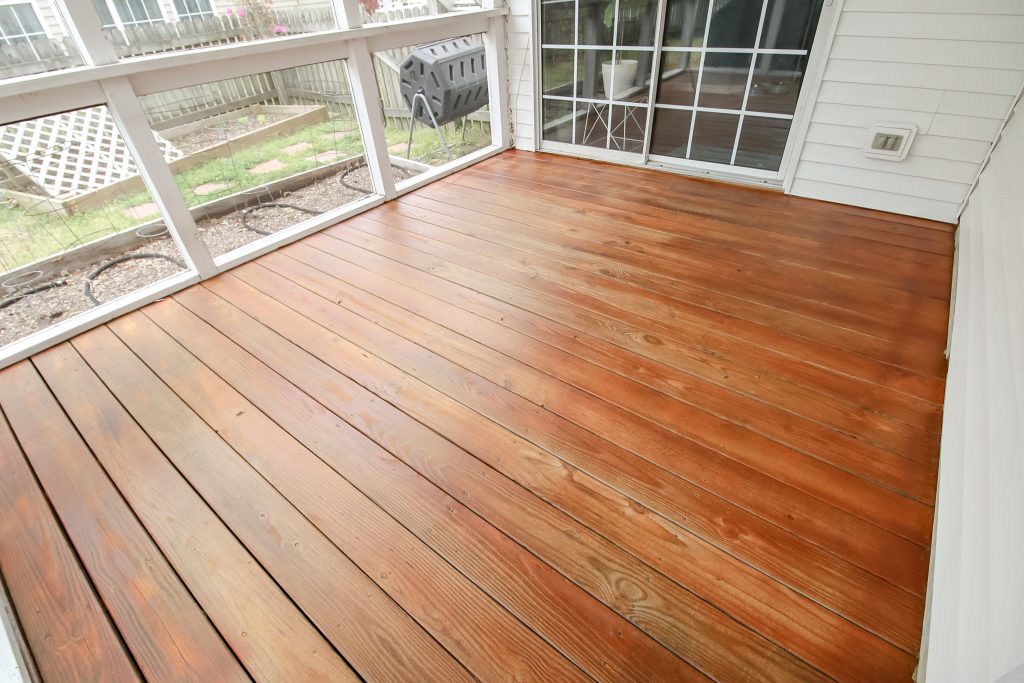
Re-stained deck with stain sprayer
The Wagner Control Spray 250 really helped make re-staining our screened porch deck a breeze. Prep work was the longest and hardest part! If you're looking to stain your deck with a sprayer, this is the way to go.
If your deck railings are looking bad or rotten, here's how to replace them!

Looking for something?
We've been doing this since 2012 so we have a LOT of blog posts!
Search stuff like: Ceiling Projects | DIY Plant Stands | Thrift Flips

Hey there, I'm Sean, the woodworking enthusiast and builder behind CharlestonCrafted.com! Since 2012, I've been sharing the magic of turning raw materials into beautiful creations. I love teaching others the art and satisfaction of woodworking and DIY. I try to inspire fellow crafters to make something extraordinary out of nothing at all.


Trevor says
What’s kind of stain did you use? Really like the color!
Sean says
It's Valspar semi-transparent outdoor stain/sealant in the "cedar" color.
pat says
Was the stain a water based product or oil based?
Morgan says
Hey Pat - I believe that it was a water based stain.