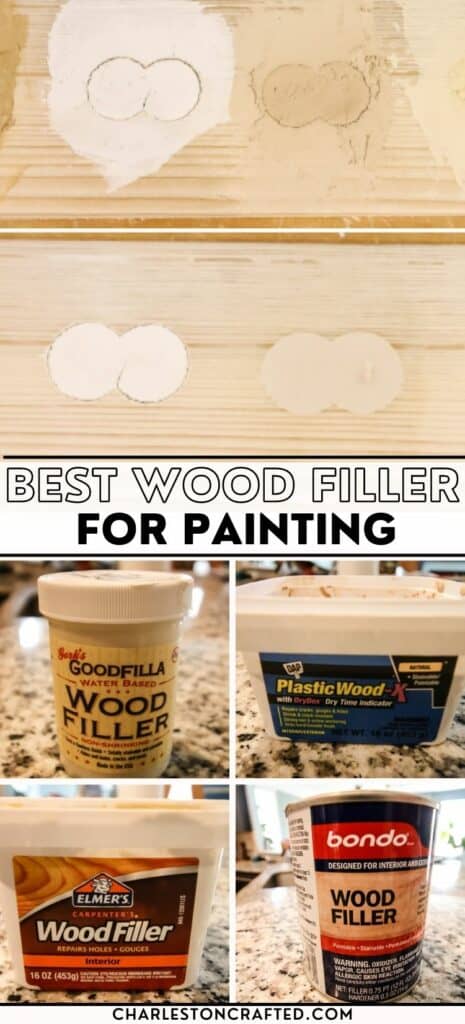
Want to repair and paint a piece of wood furniture? Read this first! Here are the best wood fillers for painting!
Wood filler is an essential tool for repairing damaged wood furniture. Whether you are filling cracks, nail holes, or rotten wood, it can be a huge relief to get it filled.
While a lot of wood filler is stainable, it can be easier to get seamless coverage by painting your repaired wood project.
An important part of this process is using the right wood filler when preparing wood surfaces for painting. This is the best way to ensure a smooth and durable finish.
Today we want to explore key factors to consider and share our favorite wood fillers for painting projects!
Understanding Wood Filler for Painting
Wood filler can be an important part of any wood restoration or build project. Wood filler can be used for filling cracks, holes, and imperfections in wood surfaces.
If you plan to paint your wood project once it is repaired, you are going to want a wood filler that will blend seamlessly with the surrounding wood once painted.
Luckily, painting wood filler makes it a lot easier to hide compared to staining wood filler. But, it still takes a bit of patience and work.
Key Factors to Consider
There are a few essential factors to consider when selecting a wood filler for painting.
Paint Compatibility
Ensure the wood filler is compatible with the type of paint (latex, oil-based, etc.) you plan to use. This varies on a brand by brand and can by can basis, so be sure to read the label!
Sandability
Choose a wood filler that is easy to sand to achieve a smooth and even surface. When painting wood projects, you don't want to notice a raised spot where the filler was applied. It needs to sand exactly flush with the surrounding wood.
Durability
Look for a durable wood filler that resists shrinking, cracking, and peeling. Epoxy-based wood fillers are generally the strongest, but they are not all considered "paintable".
Paintable wood filler is the #1 most important thing!
Color Matching
Consider pre-tinted or stainable wood fillers to match the wood's color or the paint you intend to use.
This can help to cut down on the number of coats of paint needed and is specially important if painting a very light or very dark color, when difference in the base color will be most likely to peek through.
Top Wood Fillers for Painting
Here is a list of paintable wood fillers that we have specifically used and tested.
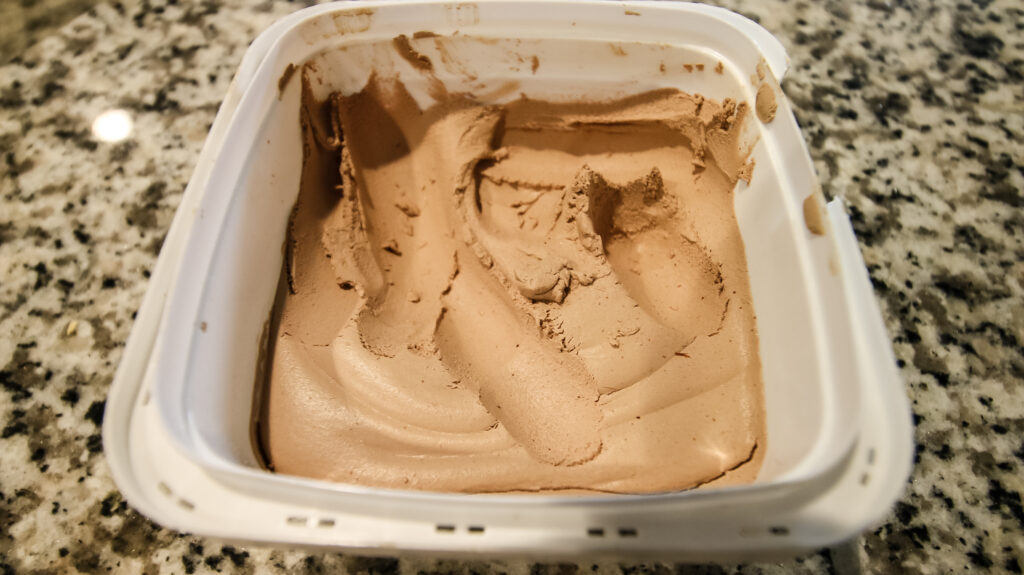
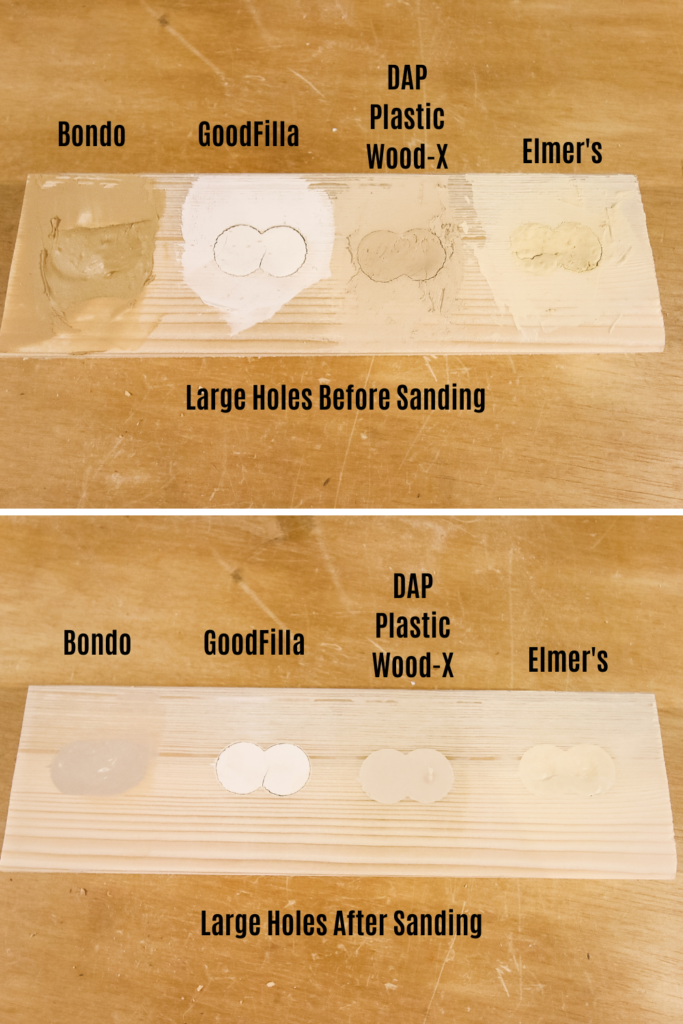
1. DAP Plastic Wood-X
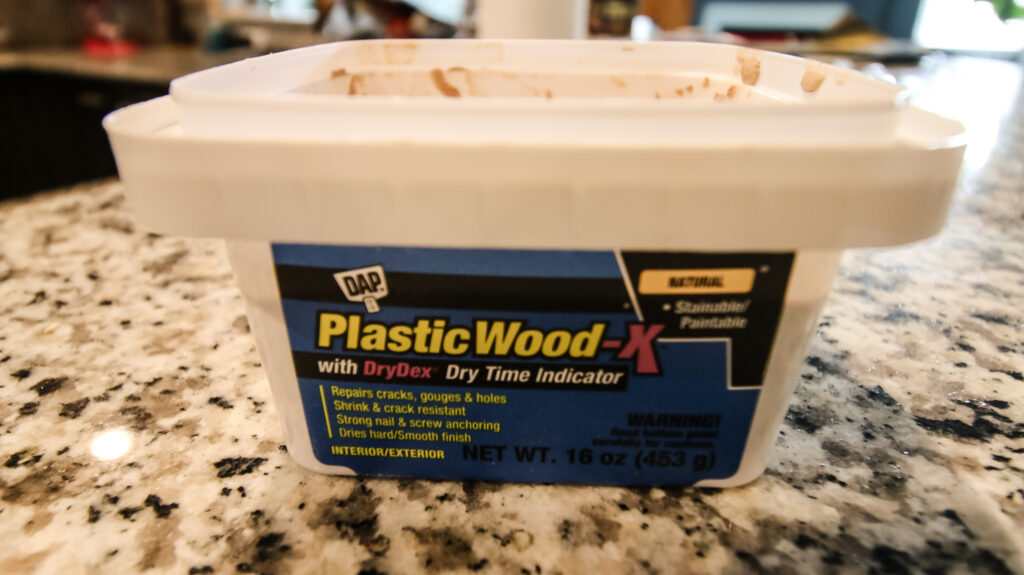
Base: Solvent based
Consistency: Very "putty" like, goes on like thick pancake batter.
Best used for: Rubbing into smaller holes and sanding smooth.
Dry time: One hour
Application: interior/exterior
Color: Goes on pink, turns tan when dry.
Pros: Color change is nice to determine when dry, however it isn't totally necessary. Easy apply with a nice consistency.
Cons: Feels less natural. Says it works on exterior applications, which is ok in small batches, but not on a large hole.
2. GoodFilla Wood Filler
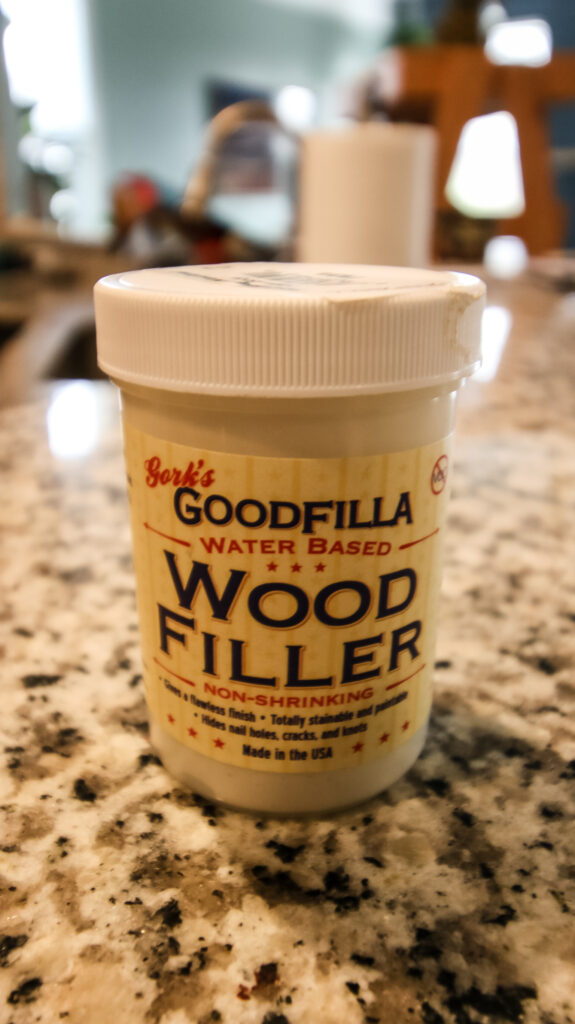
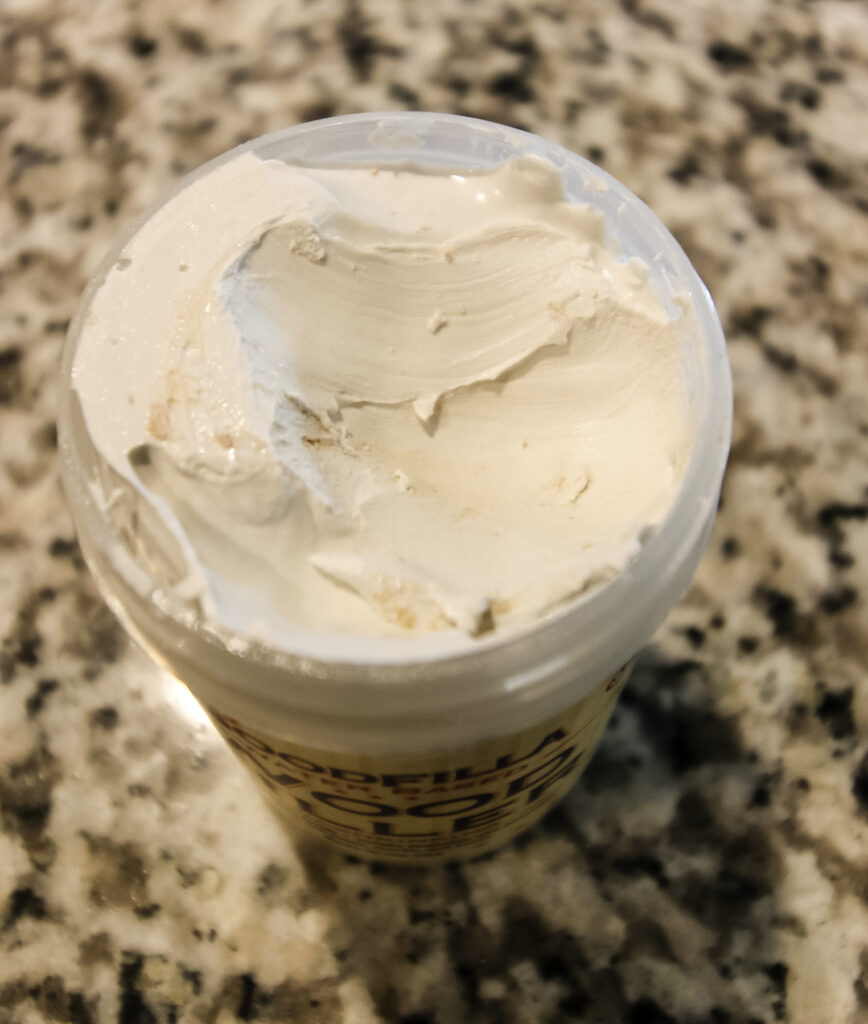
Base: Water based
Consistency: Smooth and tacky
Best used for: Grain filler, shallow hole filler, filling in larger grooves in floors or furniture.
Dry time: 15 minutes to dry, 24 hours to fully cure.
Application: Interior
Color: White for the regular color, but specific colors available to match wood.
Pros: This is a tacky substance, but it spreads very easily and smoothly across surfaces. No shrinks or cracks and easily reconstitutes when dried out. However, twist top container makes it very easy to keep from drying out.
Cons: Smaller package for slightly higher cost per ounce.
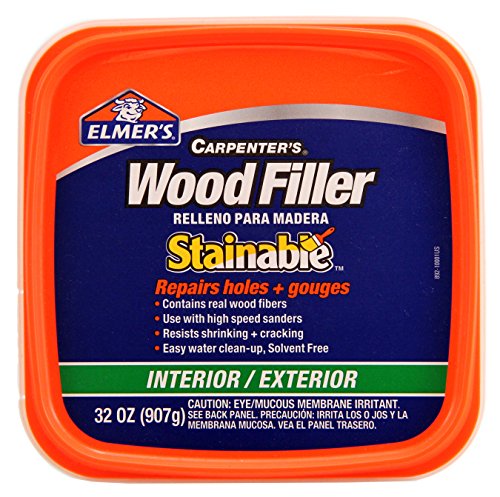
3. Elmer's Carpenter's Wood Filler
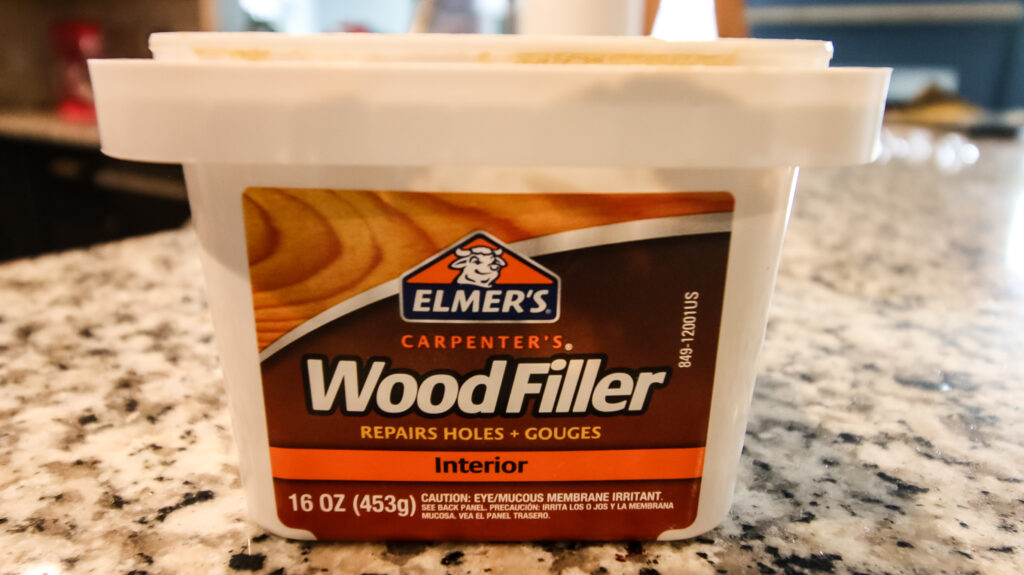
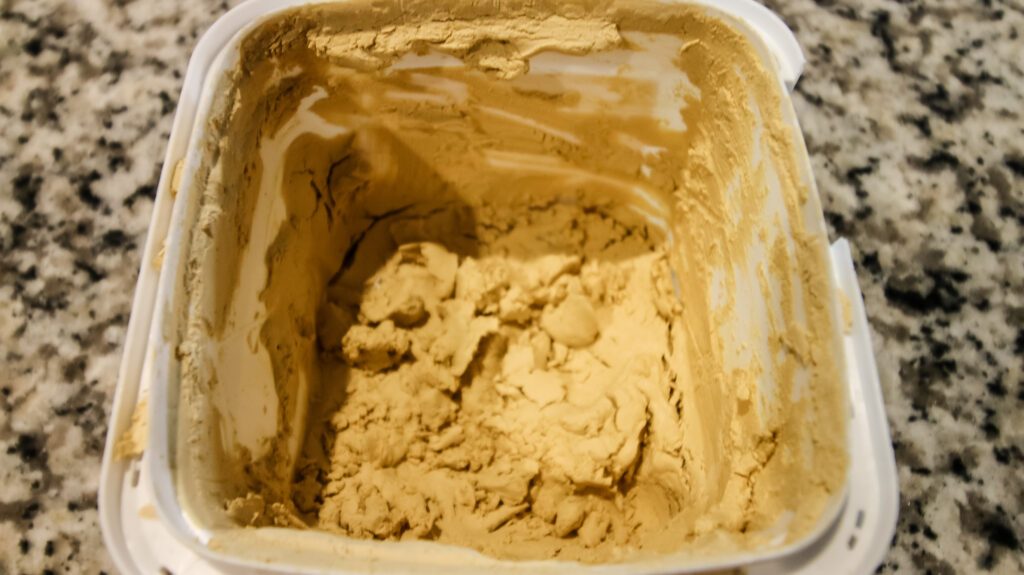
Base: water based
Consistency: Thicker, like grout and more dry
Best used for: Rubbing into smaller holes and sanding smooth.
Dry time: One hour, full in 12-24 hours
Application: Interior
Color: Yellow
Pros: Can be rubbed in smoothly but is a little drier than other applications. Ideal for wiping into small holes but not spreading over large cracks.
Cons: Dries out very easily in packaging, so don't plan to store over a long period of time.
4. Bondo Wood Filler
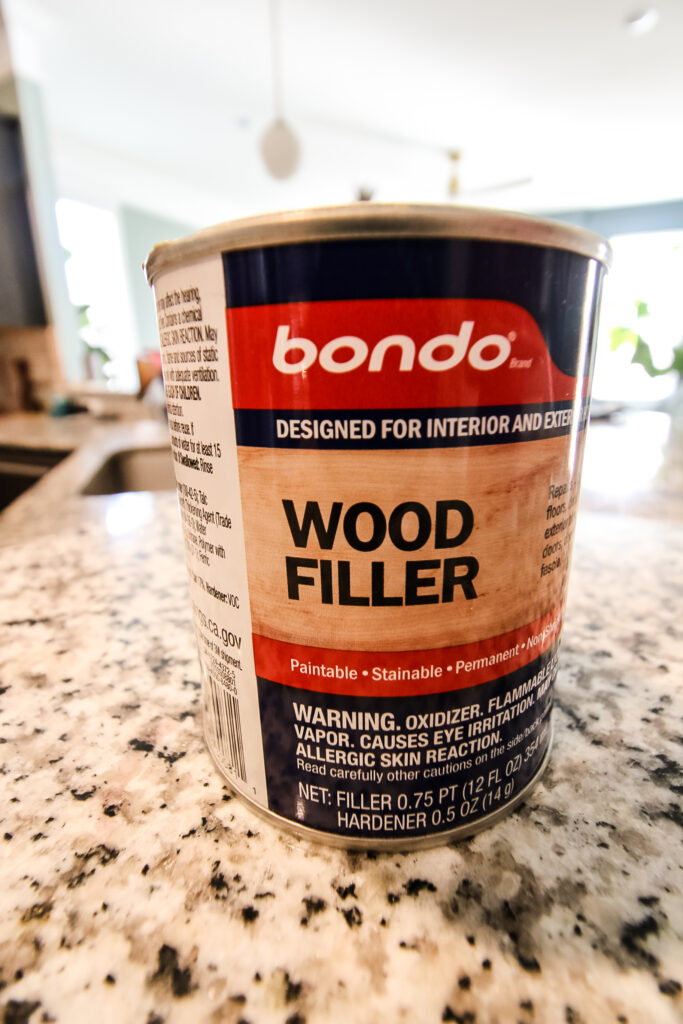

Base: Solvent based
Consistency: Very goopy
Best used for: Outdoor projects
Dry time: 15-30 minutes
Application: Claims interior and exterior, but don't use indoors.
Color: Tan
Pros: Bondo Wood Filler is extremely hard and firms extremely quickly.
Cons: Bondo Wood Filler smells so bad that it is impossible to use indoors, even though it says it can. It also hardens too quickly to use much, which means you have to make the mix several times to do even a fairly small project. Bondo doesn't work into small holes very well due to it's goopy texture and is hard to sand because it is so hard when set.
Application Tips for Paintable Wood Filler
Applying wood filler is pretty simple with the right tools and a little patience.
Supplies needed
- Wood filler
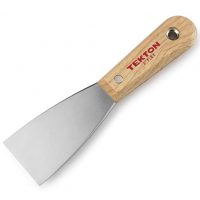
- Putty knife
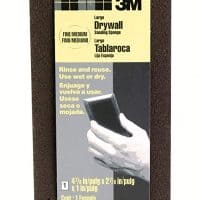
- 220 grit sandpaper
- cloth or rag
Step 1: Preparing the Wood Surface for wood filling
It is super important to prepare the wood surface before applying wood filler for optimal adhesion and a smooth finish.
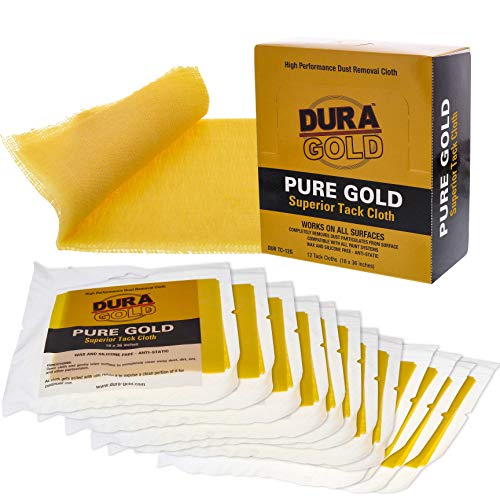
Clean the area thoroughly, removing any dirt, dust, and loose debris. Wipe it clean with a tack cloth or similar lint-free cloth or rag.
Step 2: Mix the wood filler
I suggest wearing gloves starting at this step.
If you are using a 2-part wood filler, mix and combine them in accordance with the instructions on your container.
If you are using traditional one-part wood filler, it might still benefit you to give it a stir or mix. Especially if the container is not new, the top might be a bit crusty or have other consistency issues.
Stirring with a paint stir stick or putty knife for a few seconds is always a good idea!
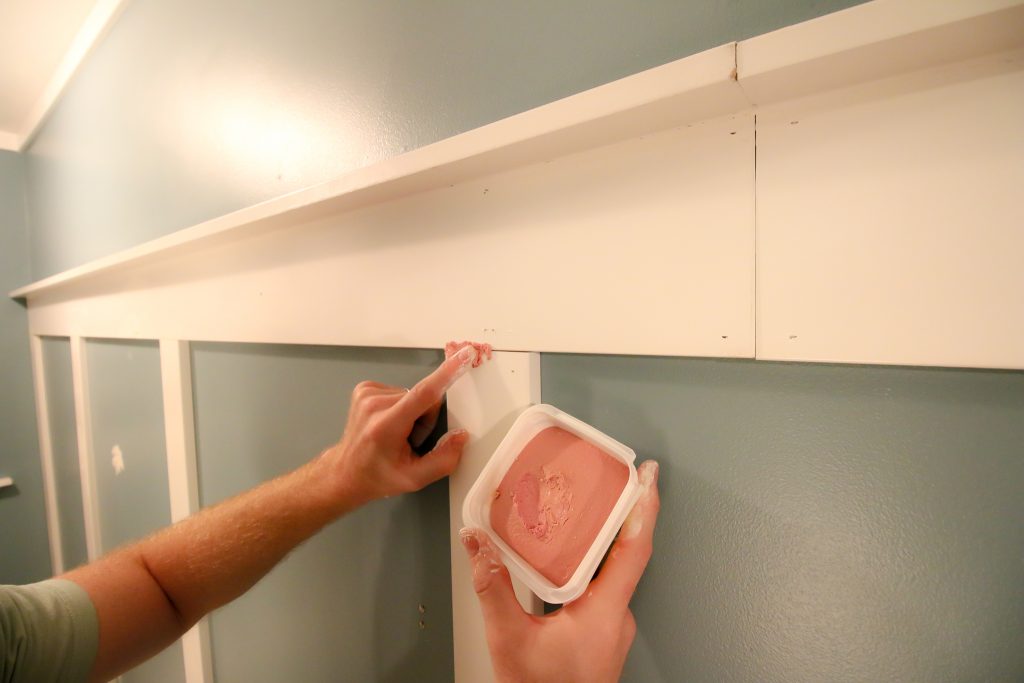
Step 3: Apply the wood filler
Use your putty knife to scoop out a small amount of wood filler and apply it to the damages area. Be sure to press it in to fill holes in the wood - don't just skim the surface.
You want to get it in there deep enough that there is no air bubbles - it is 100% filled with wood filler.
Continue to apply, scraping the putty knife in the direction of the wood grain when you are finished.
Step 4: Smoothing and Leveling
Smooth your putty knife over the top of the layer of wood filler to get a smooth and level finish.
Remember that wood filler shrinks as it dries. If you fill it perfectly flat with the surface, it is likely to shrink a bit. You can of course do this and then add another layer on top once it is dry.
Or, you can overfill very slightly. This will allow you to sand it smooth once dry, without any divot.
Explain the importance of properly leveling the filler to match the surrounding wood, avoiding overfilling or underfilling.
How long does it take for wood filler to dry?
Wood filler dry time varies by brand + specific product - always consult your can or bottle for proper dry time.
In general, water based wood fillers dry quickly, solvent and epoxy based wood fillers dry slower.
Temperature and humidity levels can effect dry time.
Even if the wood filler is dry to the touch, it may not be fully cured. Cure time is how long it takes wood filler to reach it's maximum hardness.
Water based fillers cure in a few hours, while others can take much longer. Check the back of the can and be sure your project is cured before handling it!
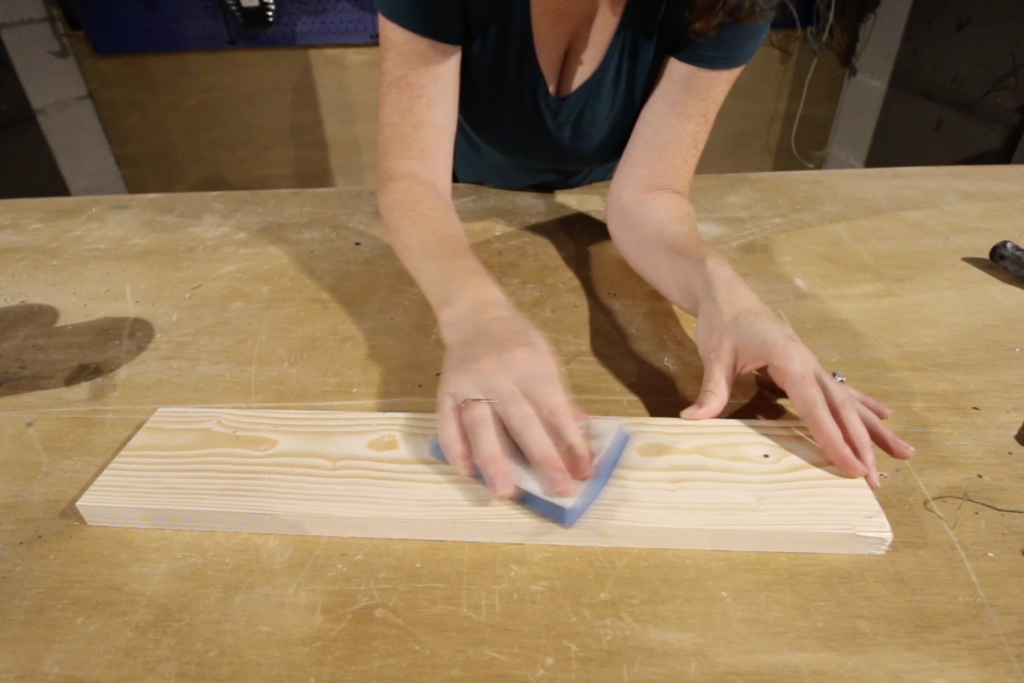
Step 5: How to sand wood filler
It is important to sand the dried wood filler for a seamless finish. Sanding helps level the filler with the surrounding wood, removes any excess material, and creates a surface ready for staining or painting.
Sand in a circular motion until the repair area blends perfectly with the surrounding wood.
If you did thick layers of wood filler or did a large area, you might prefer to use an orbital sander to make it easier on your hands.
What grit sandpaper do I use for wood filler?
I suggest using 220 grit sandpaper for the smoothest possible finish.
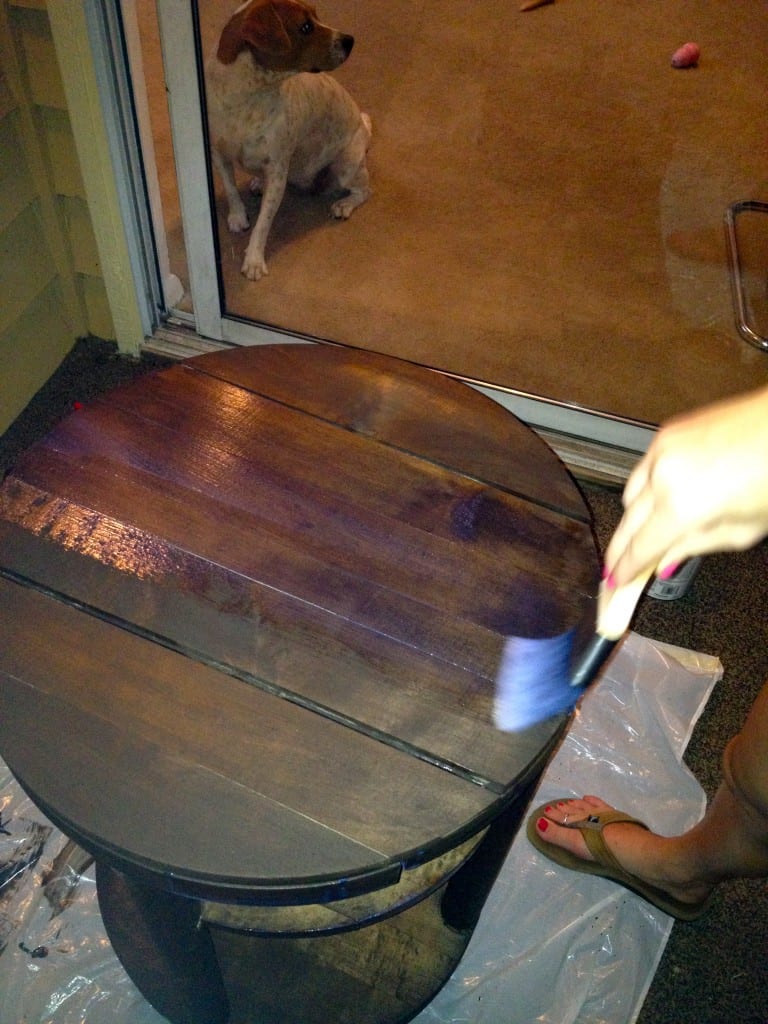
Step 6: How to stain or paint wood filler
One of the best parts of wood filler compared to wood putty is that it could be stained or painted to perfectly match the finished wood around it.
For wood filler that requires staining, you will want to apply your stain with a brush or lint-free cloth.
Be careful about getting wood stain on areas around the wood filler that have already been stained. You can quickly get into this vicious cycle where now those areas look darker because they got double stained.
So you might want to be a little careful around those areas or you could end up with a dark ring.
Apply your stain and then wipe off any excess that does not absorb after 15 minutes. You may need to do multiple coats.
Honestly, I have mixed feelings about stainable wood filler. I know that it is made with wood fibers in it that absorb the stain like regular wood wood.
However, I just think it never really looks right.
If it's a tiny little spot, like a crack or a hole I think you can pull it off. But just know if you were doing a large section of wood filler, and the stain doesn't look like normal wood that you were not doing anything wrong that's just how it is.
For paintable wood filler, once the area is sanded it can be painted just like normal wood.
Assuming that you sanded it perfectly level with the surrounding wood, you should get a pretty flawless finish with paint.
Step 7: Final Touches and Sealing
Be sure to seal the repaired area with an appropriate finish or protective coating to ensure longevity. We like to use polyurethane. Here's our guide on how to seal stained wood!

How to apply wood filler
Here's how easy it is to use wood filler to repair wood projects!
Materials
- Wood filler
- 220 grit sand paper
Tools
- Putty knife
- Sander (optional)
- Cloth or rag
Instructions
- Prepare the surface by sanding, then wiping clean with a cloth. You can use a shop vac to vaccuum first if it's very dusty.
- Put on gloves.
- Mix wood filler according to package instructions.
- Use putty knife to apply to damaged wood. Work it into any holes or cracks so there are no air bubbles.
- Smooth flat across the top with putty knife. Don't make it too flat - it will shrink a tiny bit. Slightly raised is fine.
- Allow to dry according to package instructions.
- Sand with 220 grit sand paper until smooth and flush.
- Wipe clean.
- Stain or paint.
- Apply sealant.
Recommended Products
As an Amazon Associate and member of other affiliate programs, I earn from qualifying purchases.

Sanding Techniques
It is super important to sand the wood filler before painting to create a smooth and even surface. You want to get it exactly flush. If there is any ridge, your paint will draw attention to it and the wood filler will be obvious.
Here are some tips for sanding wood filler:
- Start with a coarse grit sandpaper (e.g., 80 or 100) to quickly remove excess wood filler and level the surface. Then, switch to a finer grit (e.g., 120 or 150) for smoother finishing.
- Sand in the direction of the wood grain to help it blend into the wood.
- Feather the edges of the wood filler outward to help all of the edges better blend into the surrounding wood.
- Use a straight edge across the filler spot to check for levelness as you work.
Preparing for Painting
It is also necessary to prepare the wood surface after applying the wood filler and sanding it smooth.
You can use a shop vac to wipe up any excess sawdust and a tack cloth to wipe it very clean.
A primer can be applied to help getting the paint to adhere to the surface. If your wood filler is a very different color from the surrounding wood, I suggest a primer for helping to blend the two.
Choosing the Right Paint
It is important to select the appropriate paint type (latex, oil-based, etc.) and finish (flat, satin, gloss) for the project.
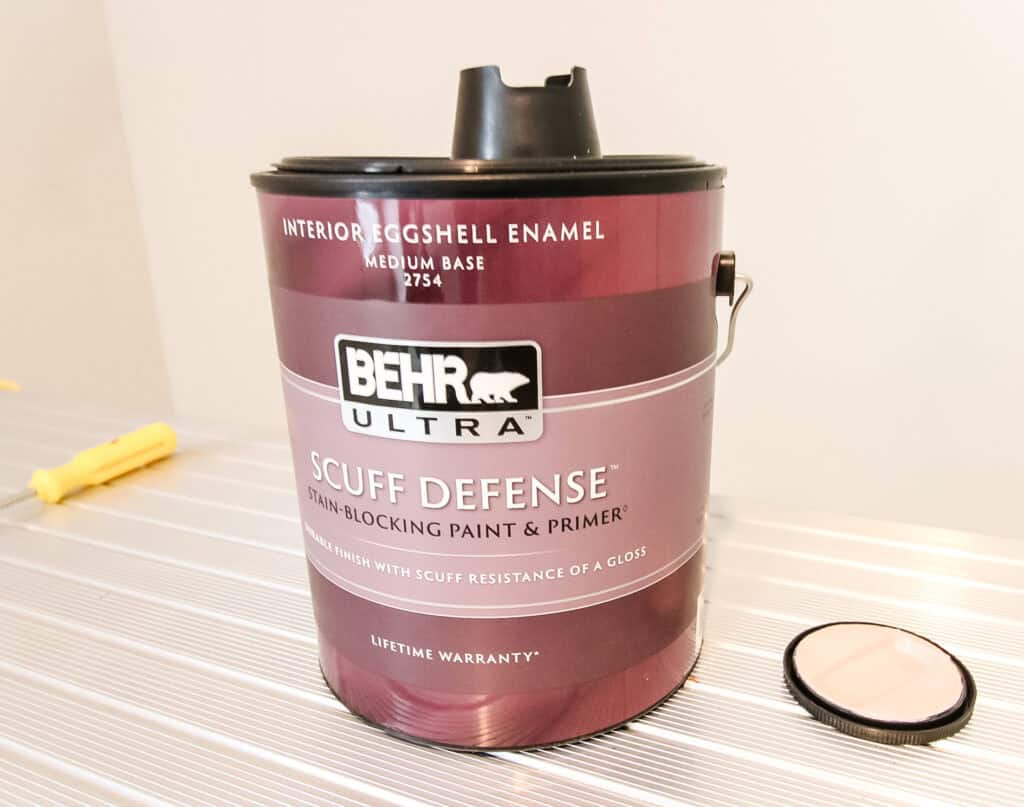
Paint type
You have to choose a paint type that is compatible with your wood filler type or it might not adhere!
| Paint Type | Suitability with Wood Filler | Benefits | Recommended for |
|---|---|---|---|
| Latex Paint | Compatible with water-based fillers | Quick drying, low VOC, easy cleanup | Indoor projects |
| Oil-Based Paint | Compatible with most fillers | Durable, smooth finish, good adhesion | Exterior wood surfaces |
| Acrylic Paint | Compatible with various fillers | Quick drying, low VOC, vibrant colors | Indoor and outdoor projects |
| Chalk Paint | Compatible with most fillers | Matte finish, minimal surface prep | Furniture refinishing, decor |
Latex Paint
Suitability: Latex paint is a popular choice for painting over water-based wood fillers. It adheres well to most surfaces, including dried wood filler.
Benefits: Latex paint is easy to clean up with water, dries relatively quickly, and emits fewer harmful fumes compared to oil-based paint.
Recommended for: Indoor projects, such as furniture, cabinets, and trim, where a quick-drying and low-odor paint is preferred.
Oil-Based Paint
Suitability: Oil-based paint is compatible with most types of wood fillers, including solvent-based and some epoxy-based fillers.
Benefits: Oil-based paint provides a durable and smooth finish with excellent adhesion to wood surfaces, making it ideal for high-traffic areas or outdoor projects.
Recommended for: Exterior wood surfaces, such as doors, windows, decks, and fences, where superior protection against weather and wear is required.
Acrylic Paint
Suitability: Acrylic paint works well with both water-based and solvent-based wood fillers, offering good adhesion and flexibility.
Benefits: Acrylic paint dries quickly, has low VOC levels, and provides vibrant colors, making it suitable for various wood painting projects.
Recommended for: Versatile application, including indoor and outdoor wood surfaces, art projects, and crafts.
Chalk Paint
Suitability: Chalk paint is compatible with most types of wood fillers, particularly water-based fillers that are easily paintable.
Benefits: Chalk paint has a matte, velvety finish and requires minimal surface preparation. It can be sanded and distressed to create a rustic or vintage look.
Recommended for: Furniture refinishing projects and decor where a distressed or shabby chic appearance is desired.
Paint finish
I highly suggest a matte or flat paint when painting over wood filler.
No matter how hard you work, there is likely to be a texture difference between the actual wood and the filler. Any kind of gloss in the paint is going to draw your eye to those differences.
Whenever possible, go flat with the paint AND top coat.
Testing and Color Matching
It is super important to conduct a small test patch to ensure the paint adheres well to the wood filler and matches the surrounding wood color.
I also suggest testing your top coat to be sure it doesn't change the color of the wood - sometimes they can darken paint colors!
Sealant and Topcoat
It is super important to apply a clear sealant or topcoat to protect the paint finish and help keep it nice over time.
We suggest using clear matte polycrylic, applied with a foam brush, and following the instructions on the can for sanding between coats and proper dry/cure time.
Maintenance and Touch-Ups
Here are some tips for how to maintain and touch up the painted wood surfaces over time to keep them looking fresh and flawless.
- Regular Cleaning: Regularly clean painted wood surfaces using soap and water. Avoid harsh chemicals that may damage the paint. Gently wipe the surface with a soft cloth or sponge to remove dust, dirt, and grime.
- Avoid Scratches and Impact: Be cautious when moving furniture or objects on painted wood surfaces. Place protective pads or coasters under heavy items to prevent scratches or dents.
- Protect from Moisture: Protect painted wood surfaces from excessive moisture and humidity, as they can cause paint to peel or warp. Use placemats or tablecloths to shield dining tables and coasters for beverages to avoid water rings.
- Inspect Regularly: Periodically inspect the painted wood surfaces for signs of wear, chipping, or fading. Address any issues promptly to prevent further damage.
- Store Touch-Up Paint: Keep a small container of the original paint or touch-up paint used for the project. Label it so you don't forget what it's for!
- Gentle Touch-Ups: For minor touch-ups, use a small brush or a cotton swab to carefully apply the touch-up paint to small blemishes. Feather the edges to blend with the surrounding paint.
- Larger Damage: For deeper scratches or larger damage, gently sand the affected area with fine-grit (220+) sandpaper until smooth. Repaint the sanded area with the original paint, ensuring proper drying between coats.
Any more questions on the best wood fillers for painting?

Looking for something?
We've been doing this since 2012 so we have a LOT of blog posts!
Search stuff like: Ceiling Projects | DIY Plant Stands | Thrift Flips

Hello, I'm Morgan, half of the creative force behind CharlestonCrafted.com! With a passion for DIY that dates back to 2012, I've transformed three homes and now I'm dedicated to helping others craft their dream spaces. Let's turn your house into a home together!


