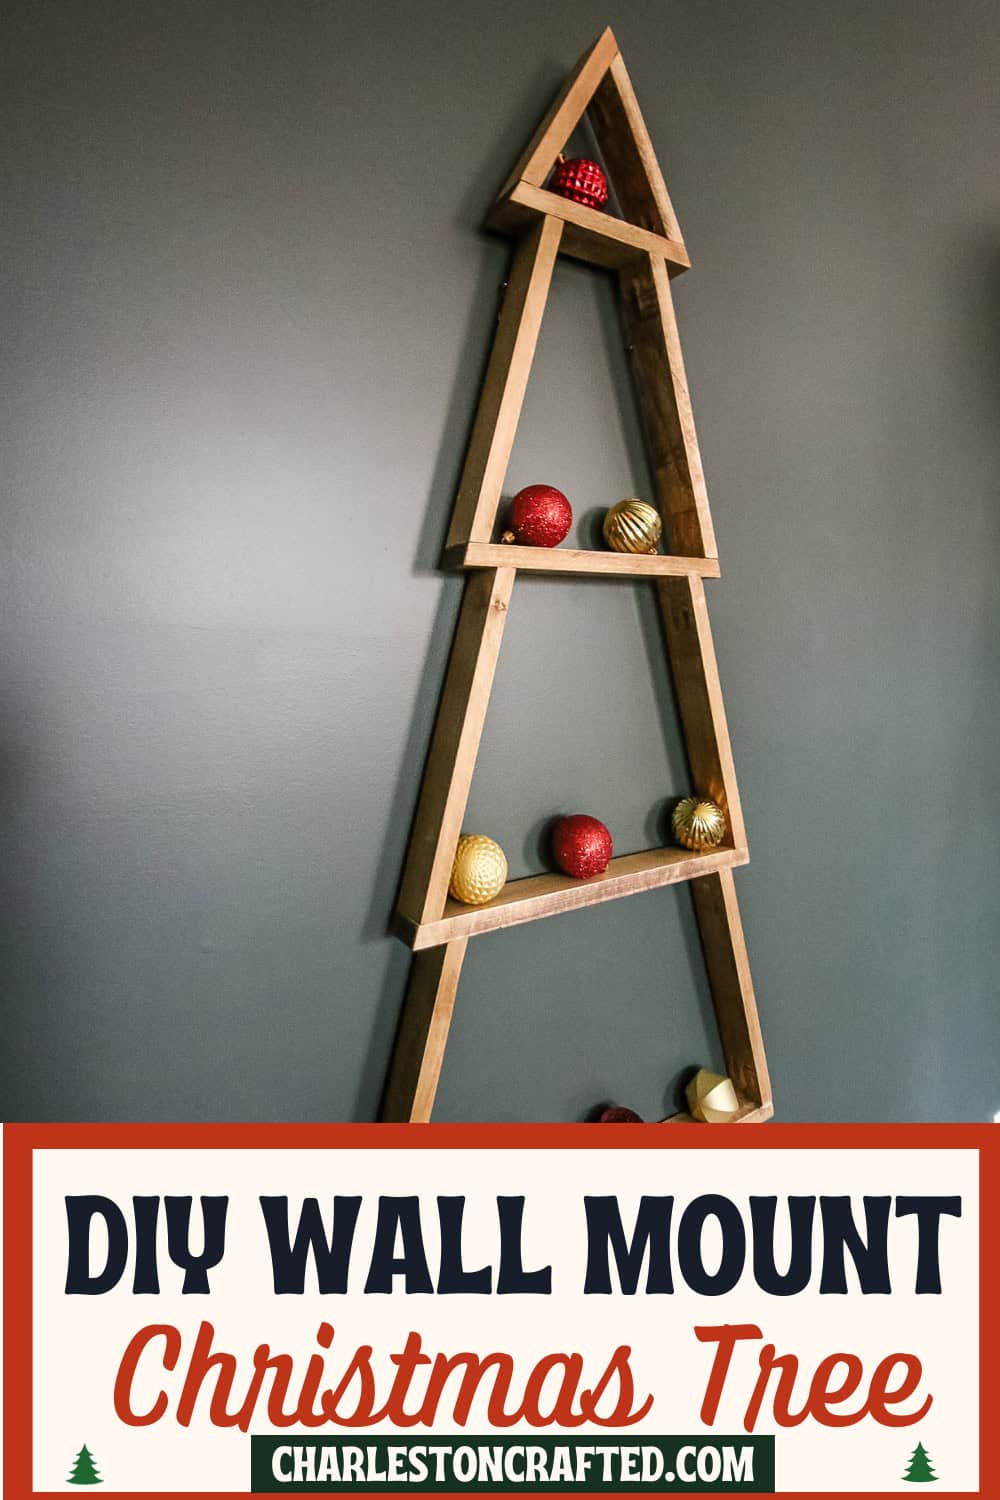
Check out how we made a DIY flush mount wall Christmas tree! This is a perfect option for tight spaces to display ornaments or decor!
This post was sponsored by Kreg Tool. All opinions are our own and our opinion is that we love Kreg products. Thanks for supporting the brands that make Charleston Crafted possible!
We're adding another take on a wooden Christmas tree to our home with this flush mount wall Christmas tree!
This is a great project if you have a small space where you want to add a Christmas decoration this holiday season.
Our hanging Christmas tree is great for mounting at the top or bottom of a staircase, next to the couch, in the entryway or wherever you need it.
Let's show you how we built it and how you can use it!
Wall mounted Christmas tree
There is nothing wrong with adding lots of wood Christmas trees to your holiday decorations and filling your home with Christmas cheer.
Whether you're a real Christmas tree person or an artificial tree person, this is another great alternative Christmas tree if you need one!

Materials needed to make a flush mount Christmas tree
- (1) ¾" x 3 ½" x 8' board (common 1x4)
- 1 ¼" Kreg pocket hole screws
- Kreg pocket hole plugs
- Wood glue
- Stain of choice
- Wall hanging hardware
You'll also need a miter saw, a table saw, a sander, a drill and a Kreg Multi-Mark to get the job done!
How do you make a Christmas tree on the wall
Here's the general steps on how to do this. Make sure you grab our free DIY wall-mounted Christmas tree woodworking plans to get the full details!
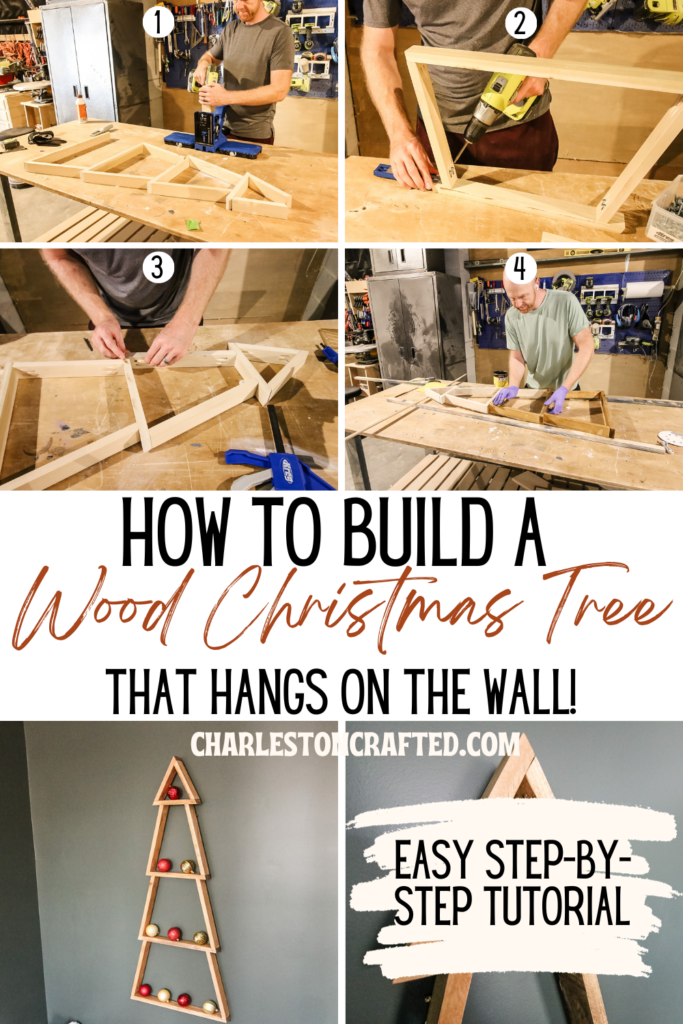
Step one: make cuts and drill pocket holes
Start by making all the cuts. You could make this project with plywood using a circular saw and a Kreg Rip Cut guide, but we used a hardwood board and ran it through the table saw.
Then we cut all the boards down to the lengths and angles specified in our free woodworking plans.
Once all the boards were cut, we drilled pocket holes. It was super fast and easy to drill pocket holes using our Kreg 720 Pro. Make sure you check out our full Kreg 720 Pro tool review here!

Step two: connect bottom of tree
Start assembly by building the bottom part of the tree. Each layer of the tree will be the same assembly.
Take two of the side pieces and attach them on top of the biggest base piece flush against the angled edges using wood glue and pocket hole screws.
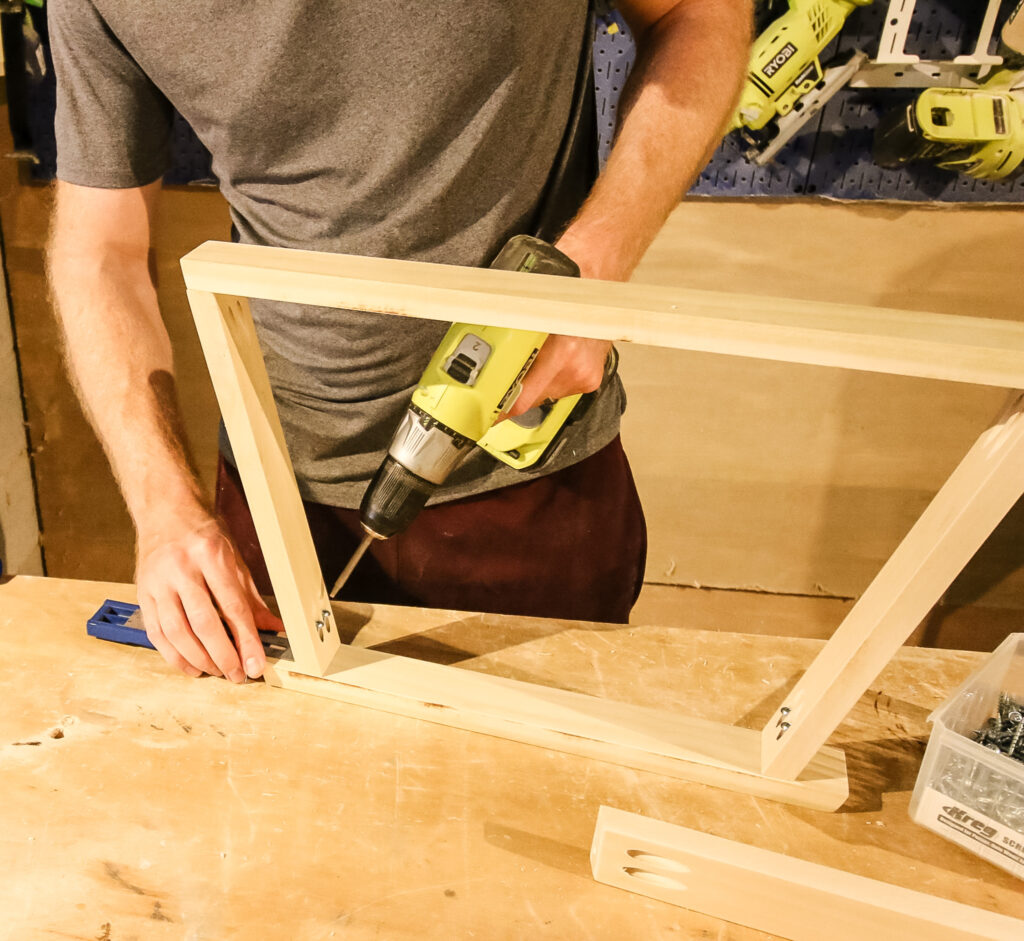
My tip here is to make sure you're clamping down on these boards because you're drilling at an angle and you don't want the boards to slip!
You'll build this base of three pieces and then continue that up the tree next.
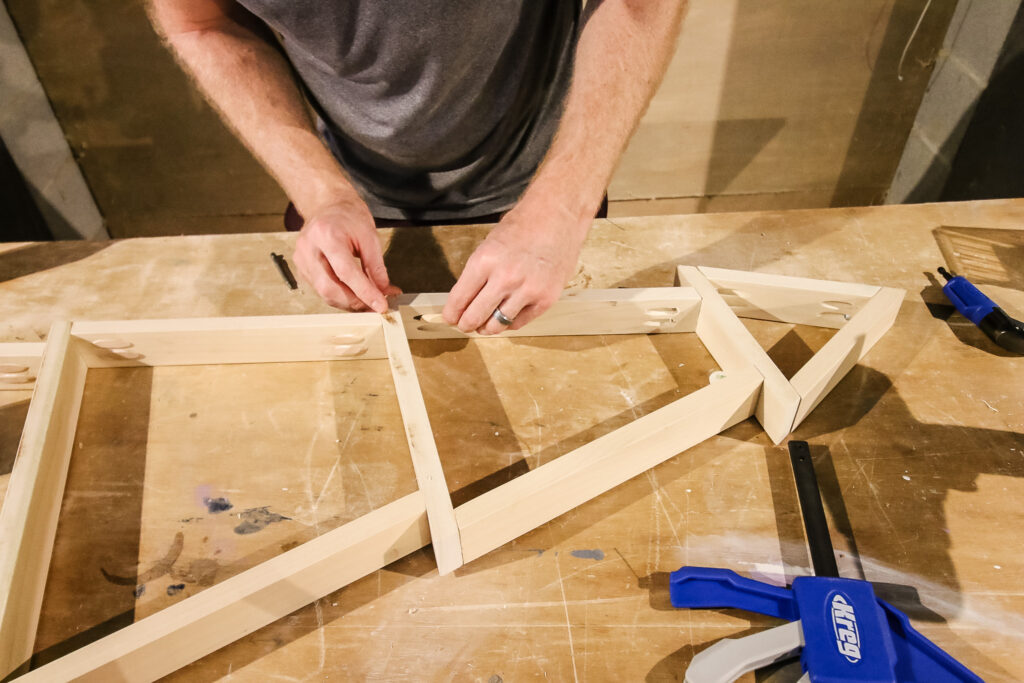
Step three: assemble remaining tree
Make another two layers of tree in this same method with the next two smaller base pieces.
Then, connect the layers together with wood glue and pocket hole screws so that the sides are connecting into the bottoms of the next smaller base.
You'll be attaching the sides 1 ¼" in from the sides of each base layer.
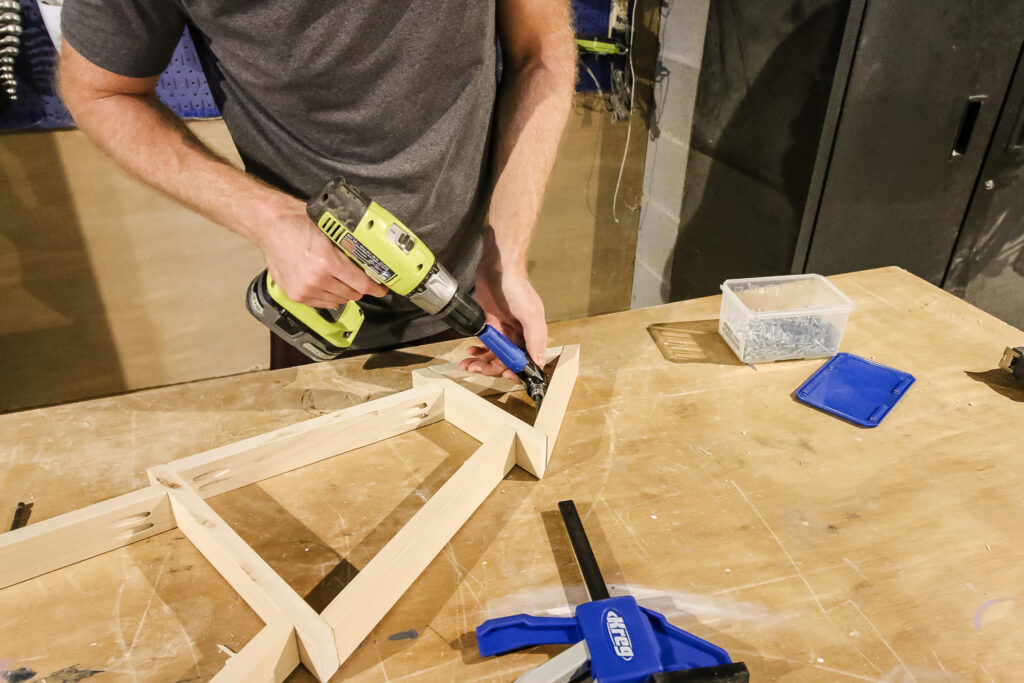
When you get to the top of the tree, connect all three pieces for the top triangle together. You'll need the Kreg 90 degree driver to attach any pocket screws here because it's too tight for the standard bit.
Then you'll attach this triangle on just like the rest of the layers.
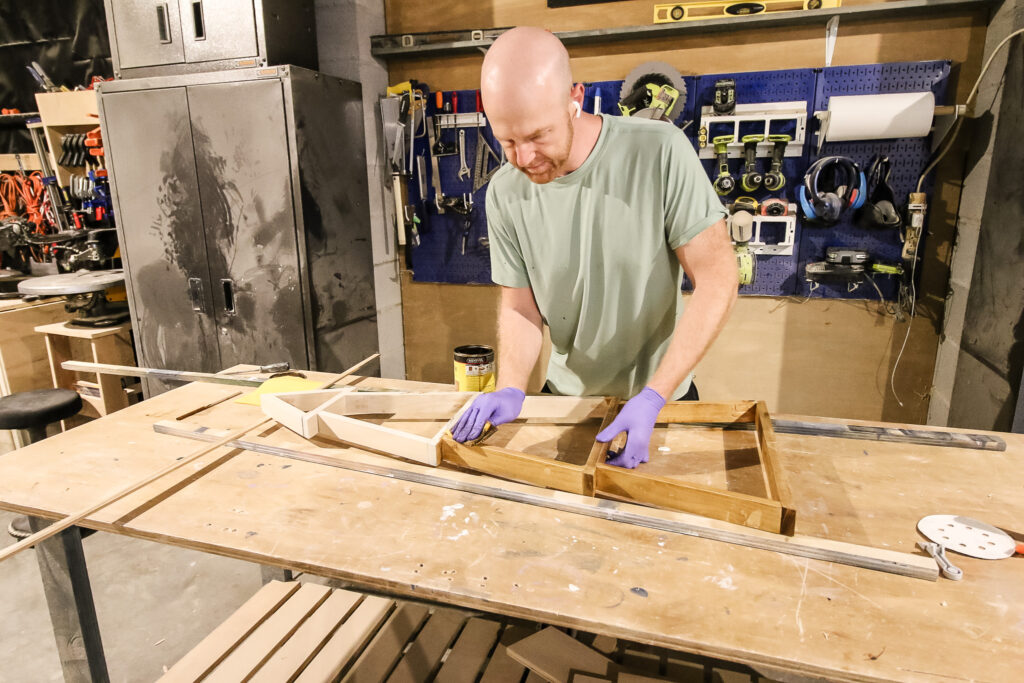
Step four: fill pocket holes
Next we went back and filled all of the pocket holes with wood glue and pocket hole plugs.
When they were dry and in place, we used our flush cut saw to cut them off and then sanded smooth.
Click here to read our article on four ways to fill pocket holes!
Step five: stain
Finally, give your wooden Christmas tree a nice little stain! We chose a light oak stain that we used on our DIY four poster canopy bed that looks really good with the green color in our home.
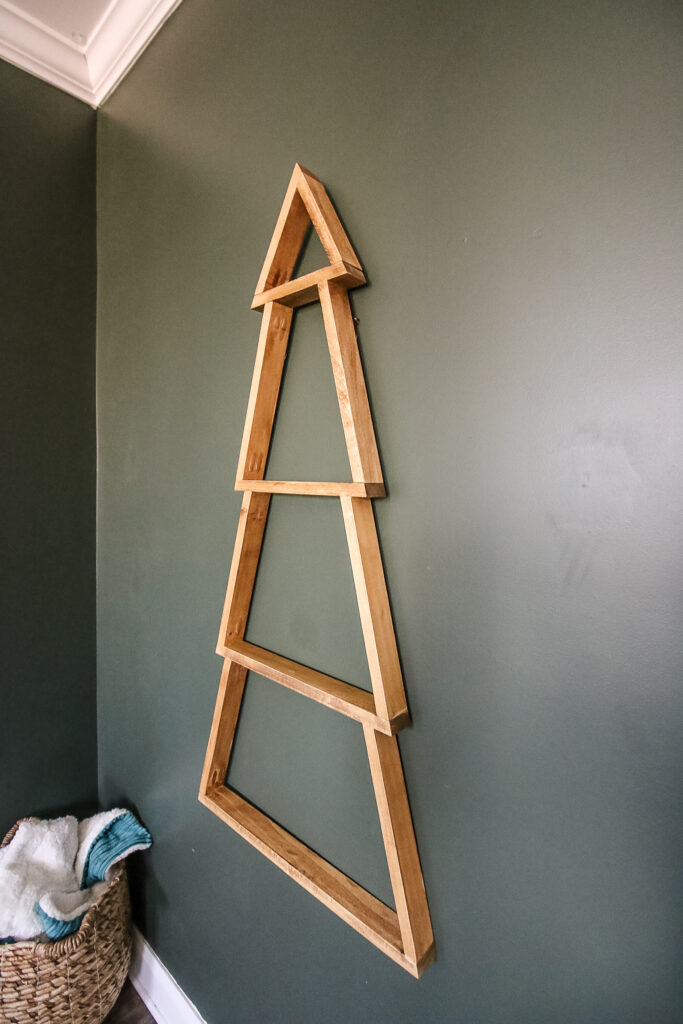
Step six: mount on the wall!
We screwed in flush D-ring hangers on the back of the tree, then tapped some nails into the wall in our room.
This way, the wall mount tree hangs pretty flush on the wall!
We added some red and gold Christmas ornaments on each of the ledges. This is a great place to stand up little holiday figurines!

DIY Christmas tree ledge
This DIY wooden wall mount Christmas tree is a perfect alternative to traditional Christmas trees and can be used anywhere in your home!
It looks great in tight spaces and can be lit up or used as a display for Christmas decorations.
If you're looking for a different DIY Christmas tree idea, give this one a try!

Wall mounted Christmas tree woodworking plans
If you love this project, you can get the woodworking plans for free!

We partnered with our friends at Kreg Tool to bring you the full plans on their website. There, you can download the full cut list, material list and step-by-step instructions with computer model imagery to help you make your own wooden Christmas tree!
Before you go...
Make sure you check out a couple of our other DIY wooden Christmas tree builds!

Looking for something?
We've been doing this since 2012 so we have a LOT of blog posts!
Search stuff like: Ceiling Projects | DIY Plant Stands | Thrift Flips

Hey there, I'm Sean, the woodworking enthusiast and builder behind CharlestonCrafted.com! Since 2012, I've been sharing the magic of turning raw materials into beautiful creations. I love teaching others the art and satisfaction of woodworking and DIY. I try to inspire fellow crafters to make something extraordinary out of nothing at all.


