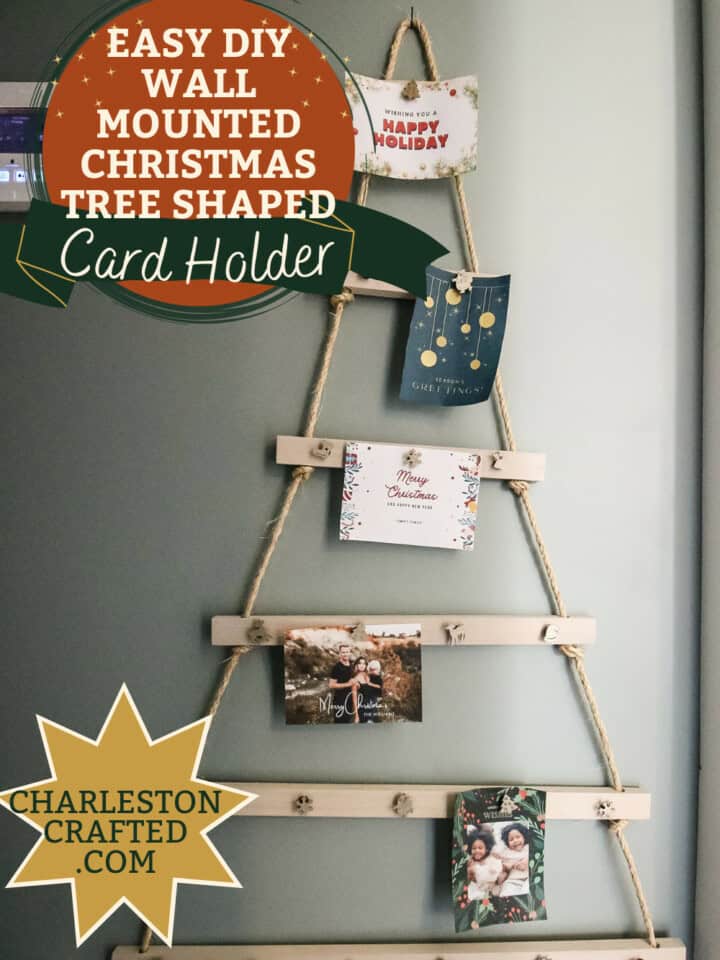
Looking for a great way to display all of the loving Christmas cards that are sent to you? Check out how we made this simple DIY tree-shaped Christmas card holder with a few scraps of wood, rope and magnets!
Merry Christmas! We're getting to that time of year when we are blessed that we have a lot of friends and family sending us their beautiful Christmas and holiday cards to celebrate the end of a wonderful year.
Years ago, we built a simple mountain range out of scrap wood for our cards, but the space got too small and we needed something bigger.
So we designed this wall-hanging DIY Christmas card holder shaped like a Christmas tree! Our Christmas tree card holder fits into what people sometimes call a "Merry Mail" display and is super cute.
This is a simple and fun little project that you can make with scrap wood that will bring your family a lot of joy this holiday season as you fill it up with colorful holiday cards!
Make sure you check out our post for 21 more DIY Christmas card holder ideas!
DIY Christmas card display
There are so many great ideas for hanging or displaying Christmas cards, but we wanted to invoke another traditional element when creating our tree shaped display.
Our Christmas card display holder allows you to hang Christmas cards on the wall to free up space, but also gives them a fun place to go and look cute at the same time.
If you're looking for how you can display a lot of Christmas cards, you've come to the right place. Let's go!
How do you make a Christmas card holder wall hanging
Here's what you need to make a magical Christmas card display and how to do it!
Materials needed to make a DIY wall hanging tree-shaped Christmas card holder:
- 1 ½" strips of wood
- ¼" thick rope
- ½" magnets
- Wooden Christmas cut out ornaments
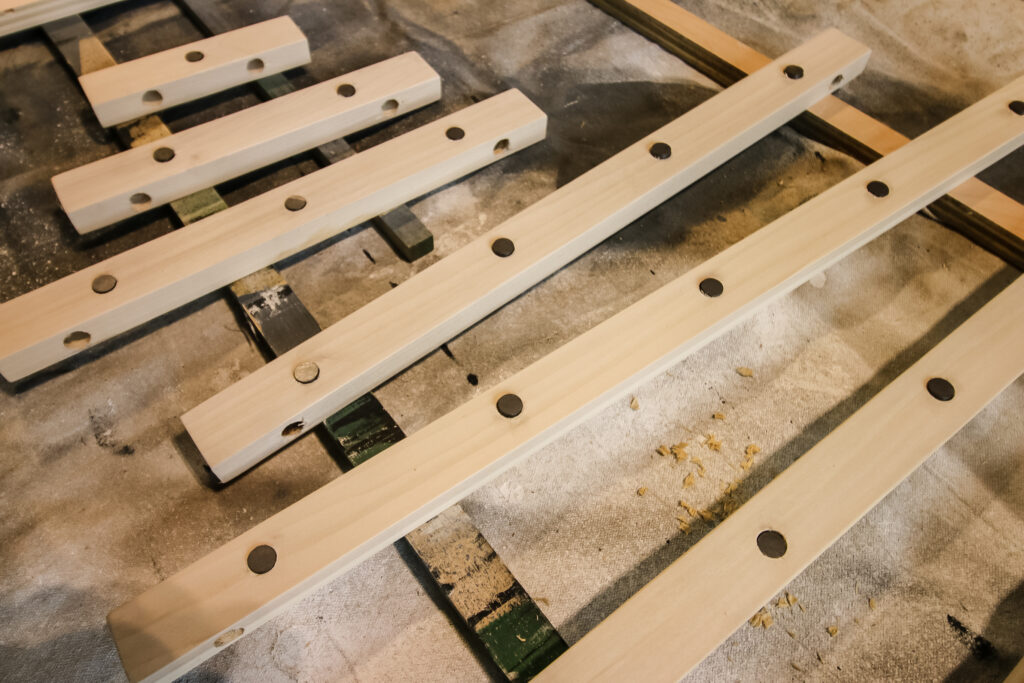
Step one: Cut boards to length
Start by cutting your boards to length. You might have to cut strips of wood for yourself or you might already have scrap wood. For us, we used a bunch of 1 ½" wide ¾" thick scraps of poplar for this project.
To get the exact look we did, cut your boards to lengths of 6", 10", 14", 20", 26" and 30". This worked for our space, but you could continue to add more boards at additional lengths of 6" if you wanted more.
Step two: Drill holes in boards
Next, drill holes in the boards for the rope and the magnets.
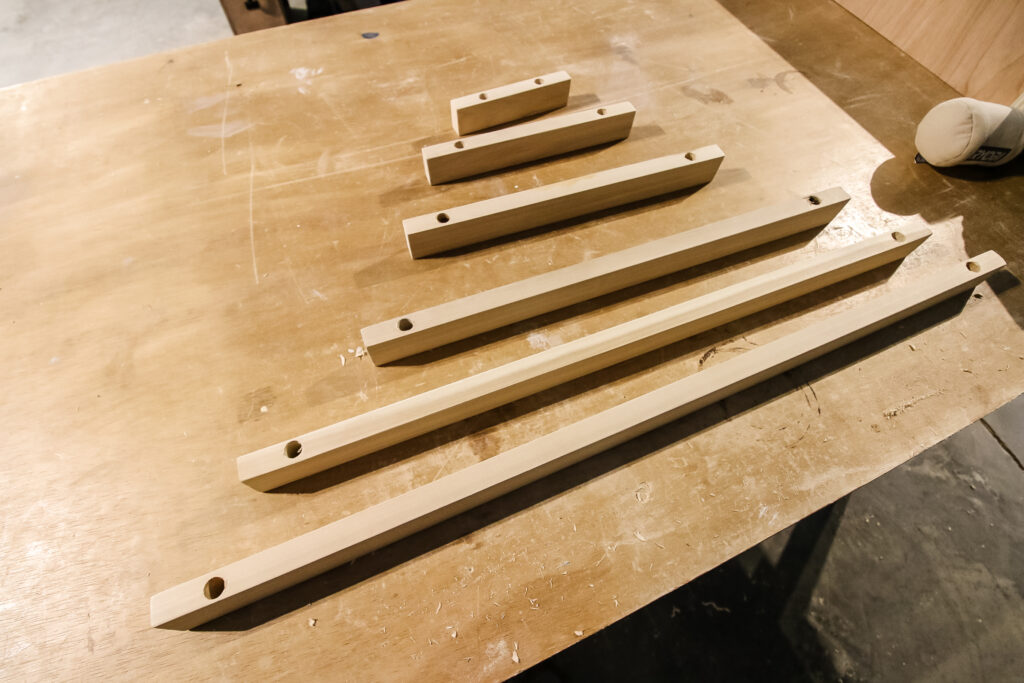
Start by measuring 2" in from the end of each board and marking that on the ¾" thick side. Then, drill a ½" hole through that point.
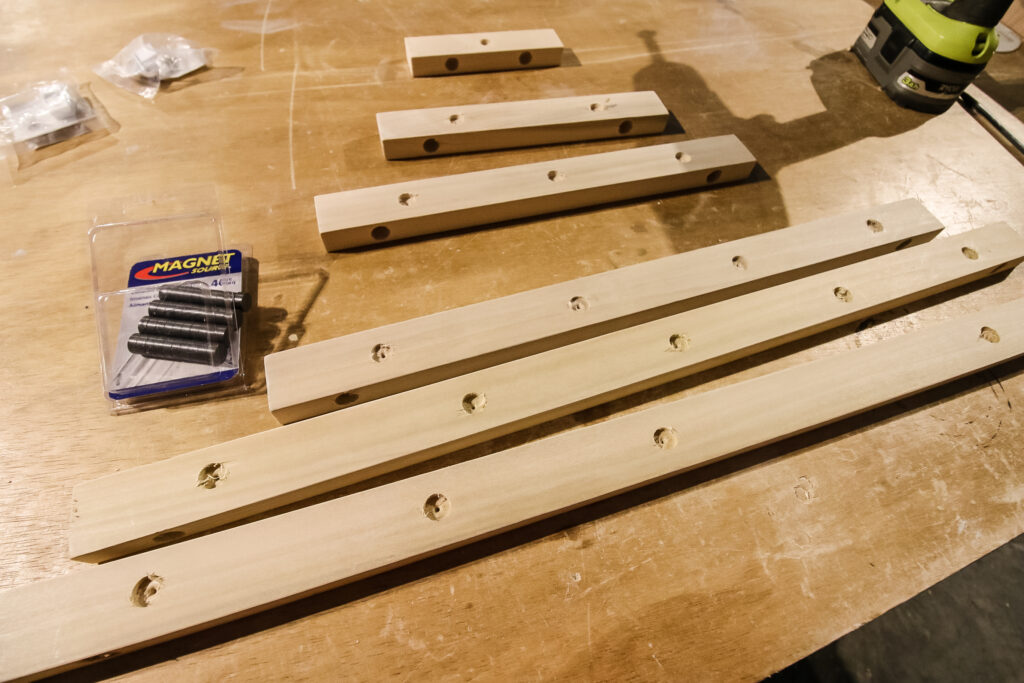
Next, mark holes for your magnet ornaments to go. For these, you'll need to drill shallow ½" holes for the magnets to sit in, but they don't need to be very deep. Just enough to glue them in place.
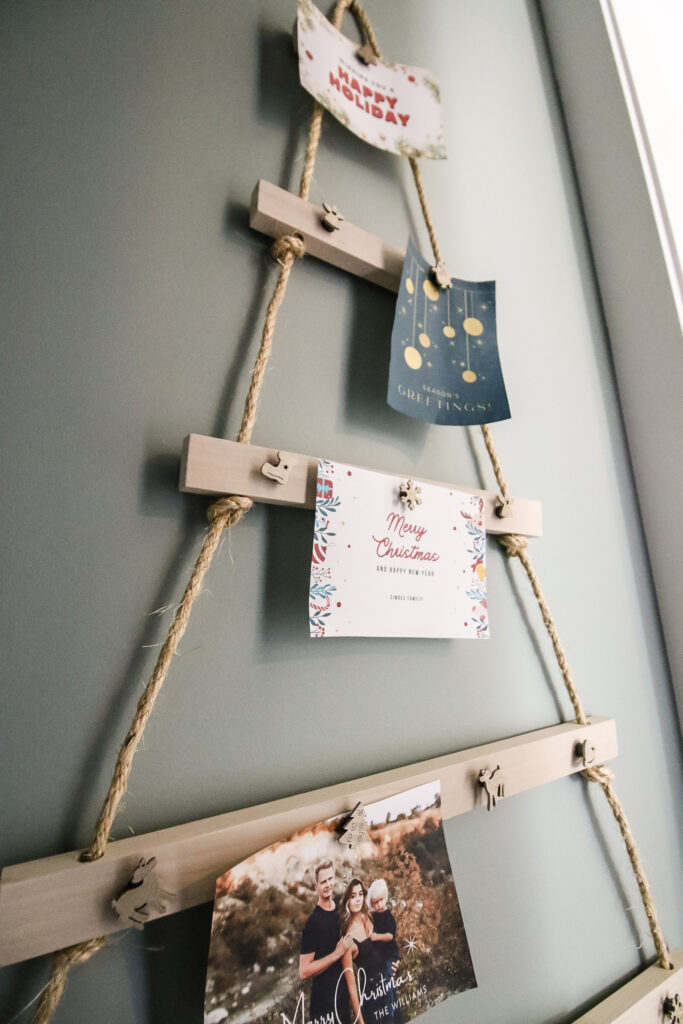
We did one hole on the 6" board, two on the 10" board and so on. This give enough space for cards to sit next to each other. Evenly space the holes across the board for an aligned look to display your cards.
Step three: Glue magnets
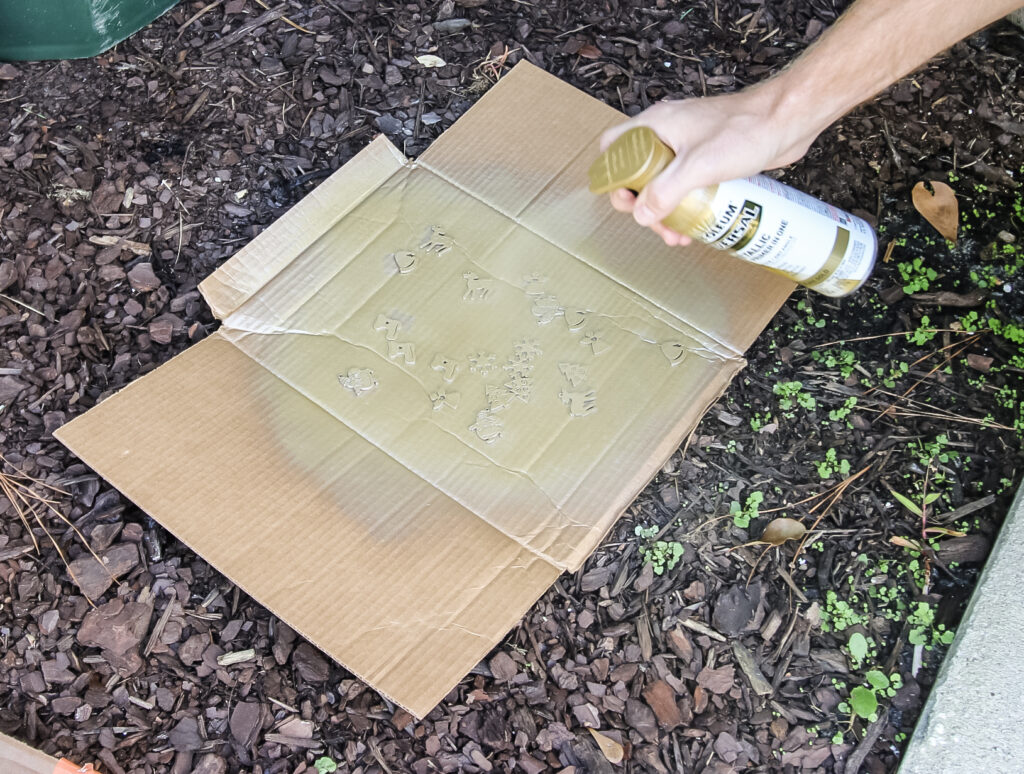
Before starting this step, we actually spray painted the wooden ornaments with a gold spray paint to give them a little shimmer and pop off of the tree and cards.
Next, it's time to glue on the magnets. Here it's very important to make sure that you glue magnets so that the opposing polarization doesn't cause a problem, so glue all the magnets for the ornaments facing the opposite direction from the ones on the tree.
Put a little dab of glue in the holes on the tree boards and insert a magnet disc into each hole.
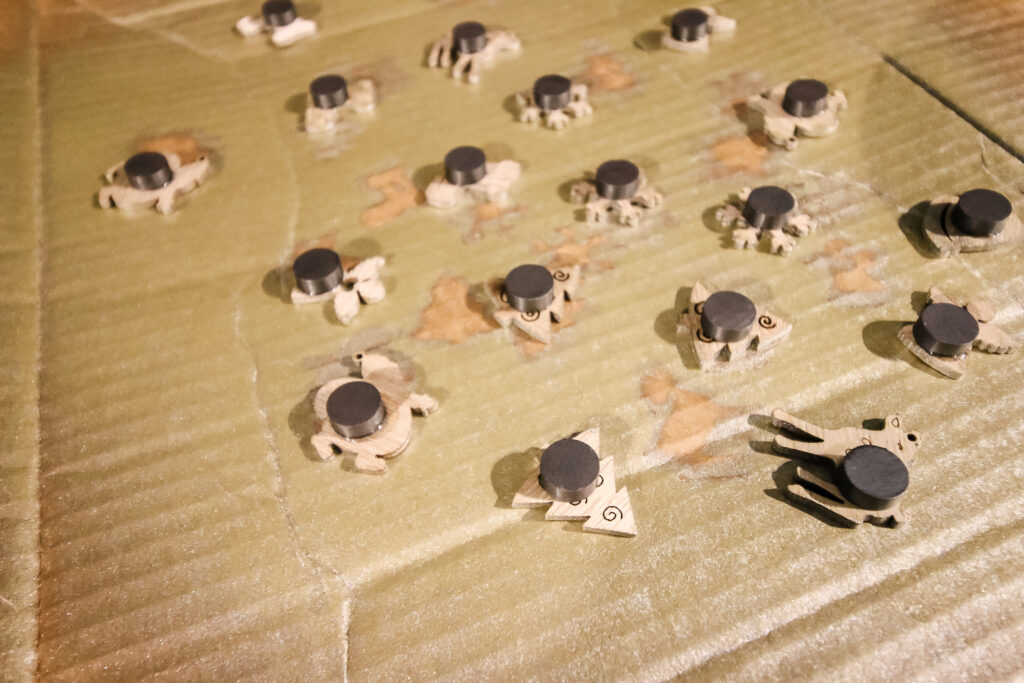
Then, add a little dab of glue to the back side of each of the ornaments and place a disc there as well and then wait for everything to dry.
You might notice that we also spray painted each of the ornaments. We made them a shimmering gold so they would pop off the wood and also off the cards when they have one underneath.
Step four: String rope through boards
Once the magnets are solidly in place, it's time for the trickiest part of this craft- stringing up the boards.
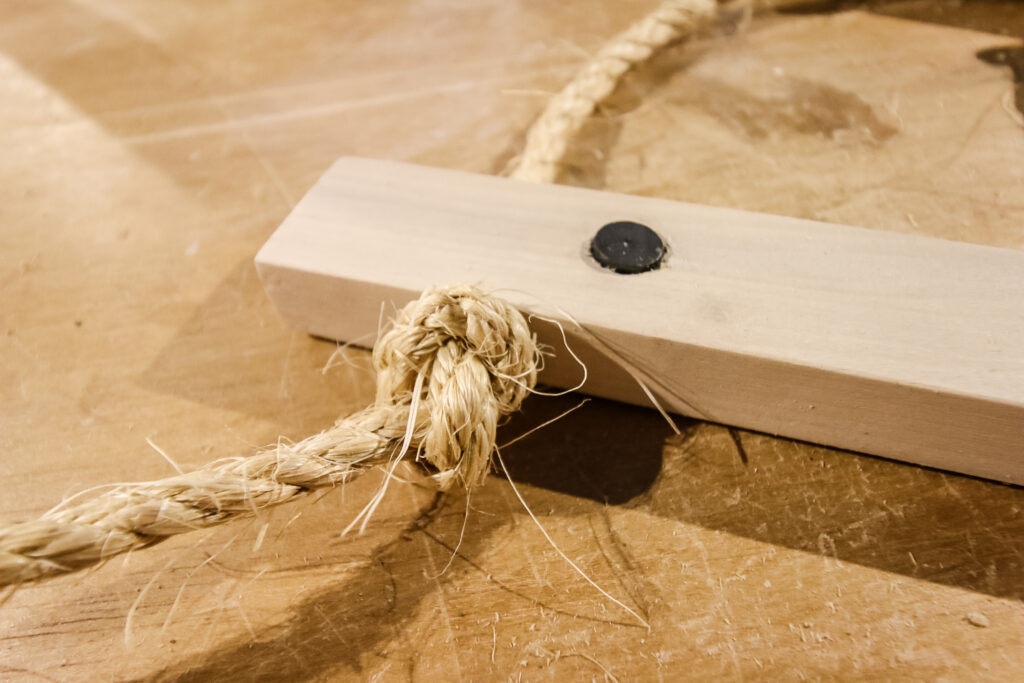
Start by running the rope through one hole of the longest board and tying a knot under it.
Next, run the rope through the same side hole on the next longest board. Measure approximately 7" from the top of the first board to where you tie the knot for the second board. This gives enough space for a standard 5"x7" vertical card to fit.
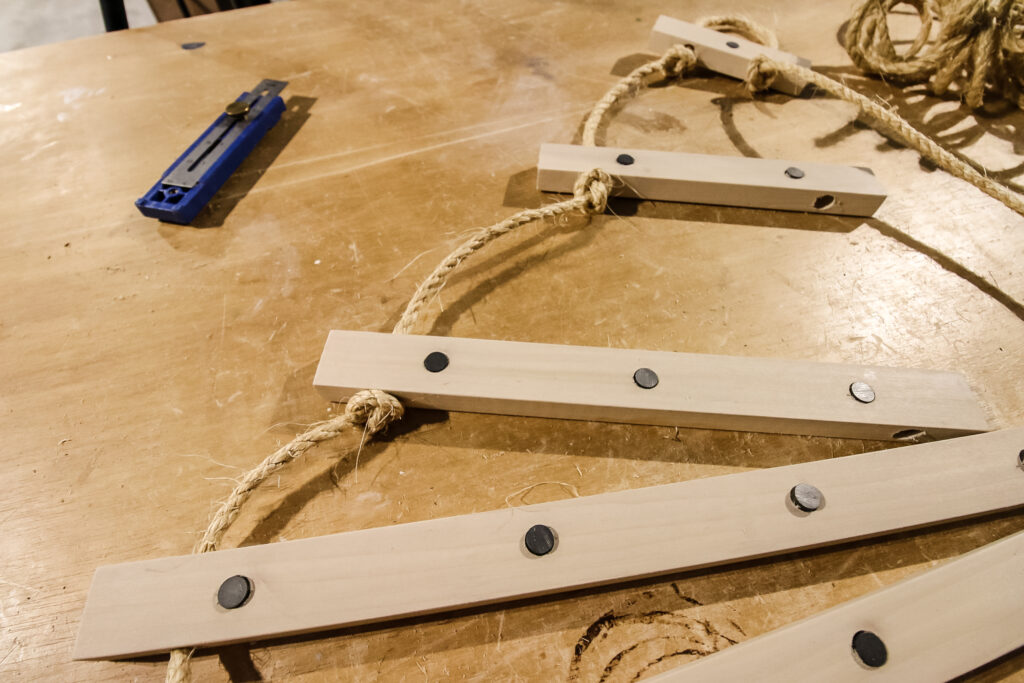
Continue this all the way up the same side with the rest of the boards.
After you reach the shortest board, leave enough rope at the top for the whole thing to hang and then repeat the process all the way down the other side, making sure to keep the boards level.
Step five: Add ornaments and hang for display!
This wall-hanging Christmas card holder is perfect for displaying lots of holiday cards from all your friends and family!
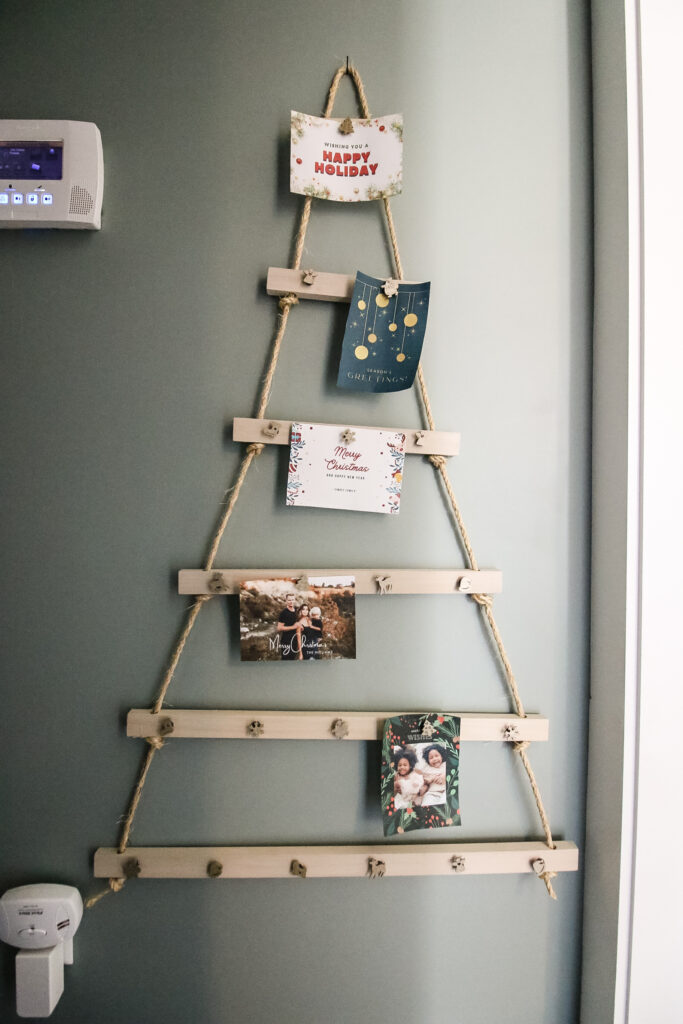
We added a simple nail in the wall at the top and hung the loop on it to make it a wall hanging Christmas card holder. However, you could also hang this Christmas card holder over the door with an over the door hook.
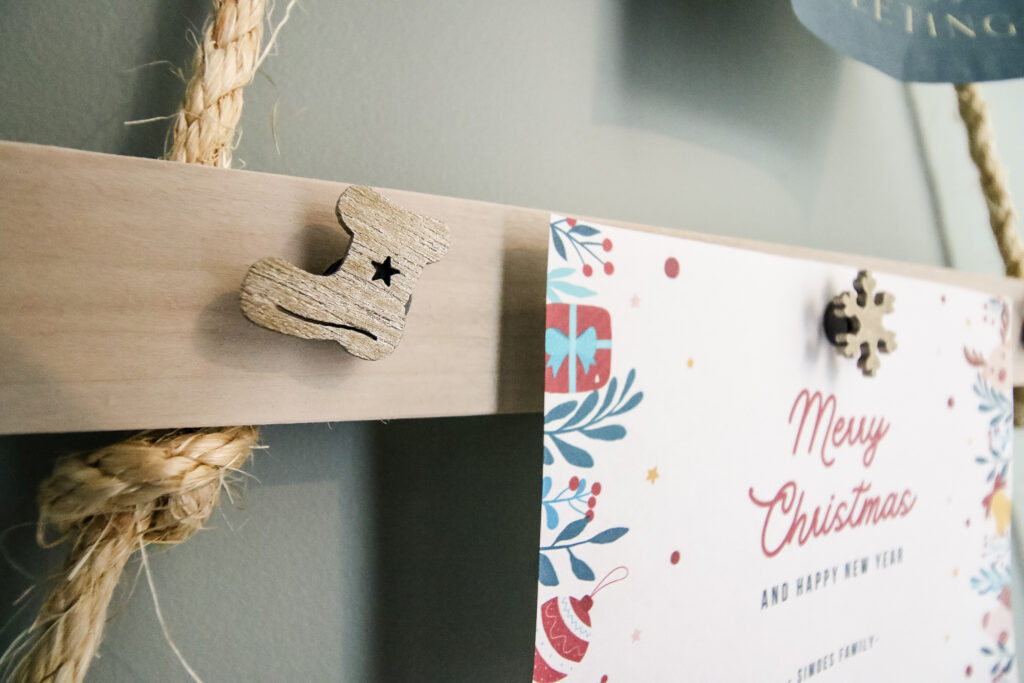
The unique design keeps all of your "ornaments" up on the tree with magnets and then you add new cards as you get them under each ornament. We hang our card at the top as the "star" and then let our kids add the new cards wherever they want as they come in!
This is a great way to have a cool look all along the way as you continue to get more cards!

Other DIY Christmas tree shaped decor ideas
Don't miss some of our other tree-shaped DIY Christmas decor ideas to keep you busy this holiday season!
- DIY wooden tabletop Christmas trees
- DIY outdoor slatted Christmas tree
- DIY dowel Christmas tree
- Boho wall hanging Christmas tree
- DIY Christmas tree poinsettia stand
- DIY Christmas tree shaped card holder

Looking for something?
We've been doing this since 2012 so we have a LOT of blog posts!
Search stuff like: Ceiling Projects | DIY Plant Stands | Thrift Flips

Hey there, I'm Sean, the woodworking enthusiast and builder behind CharlestonCrafted.com! Since 2012, I've been sharing the magic of turning raw materials into beautiful creations. I love teaching others the art and satisfaction of woodworking and DIY. I try to inspire fellow crafters to make something extraordinary out of nothing at all.


