This DIY hanging Christmas card holder is great for hanging over the door and displaying all the cards you get each year. Check out our simple tutorial!
This post was sponsored by Kreg Tool. All opinions are our own and our opinion is that we love Kreg products. Thanks for supporting the brands that make Charleston Crafted possible!
The holidays are a great time to update friends and family with how you are doing and catch up with people you haven't seen.
The easiest way to do that is by sending your loved ones holiday cards.
I'm sure you get tons of Christmas cards as well, but you need a place to showcase them. Don't just tape them to the wall!
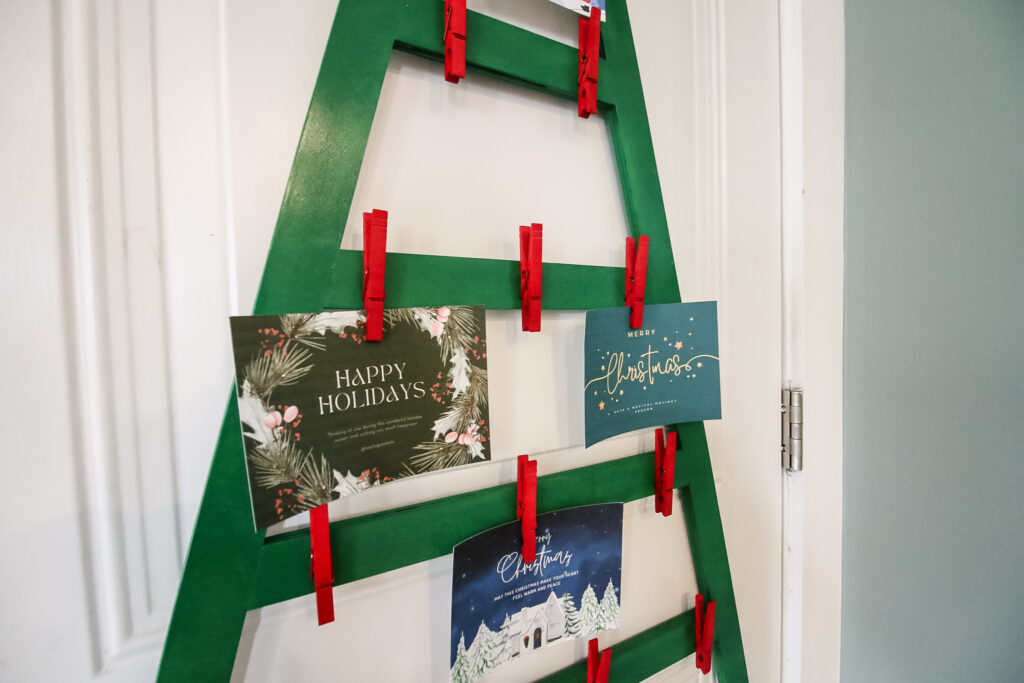
This year, we designed a really cool Christmas card holder that hangs over your door and is shaped like a Christmas tree!
This post will show you how to make a Christmas card holder you can hang on the back of your door with a wreath hanger!
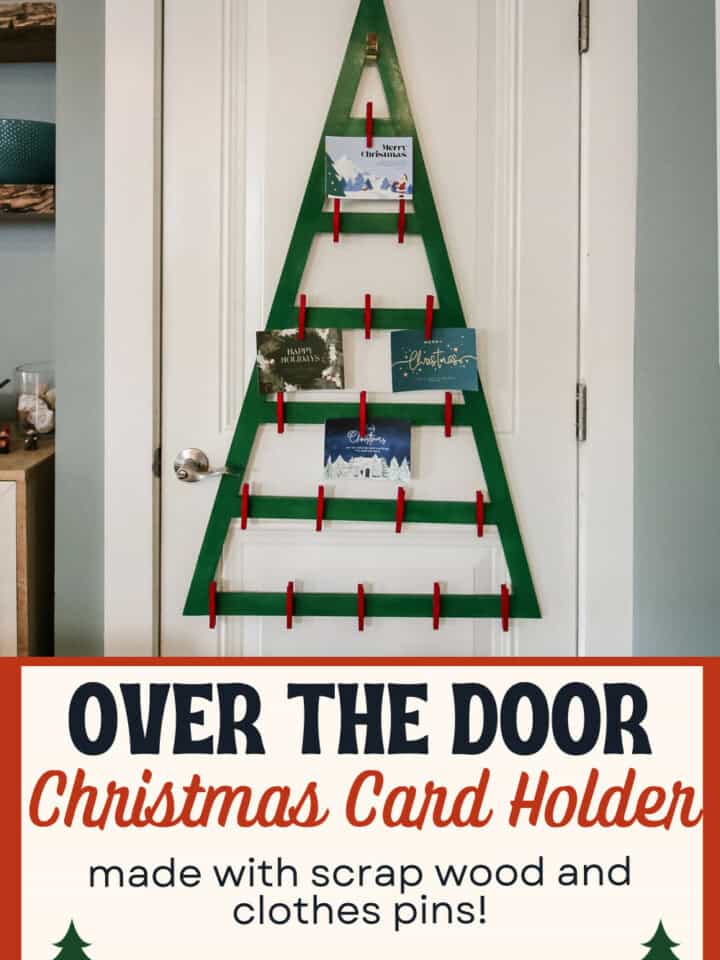
DIY over the door Christmas card holder
If you're wondering how to hang Christmas cards in the doorway, we've got you covered. The best thing to do is make a quick and easy card display that will hold all of your holiday cards on the back of the door.
This is a simple scrap wood project that can be made with simple Kreg pocket holes, making it really easy for anyone to try!
You can also take a look at how we made a Christmas tree shaped card holder with rope and magnets that is another fun twist!
Here's the materials you'll need and the instructions below. To get the full cut list, make sure you grab the FREE woodworking plans here!
Materials needed to build an over the door card holder:
- Wood- you can use scrap ½" or ¾" plywood for this project, or you can grab a single 8' long 1x4 and cut it down to 1 ½" wide strips. We used ½" plywood. Your call!
- 1" Kreg pocket hole screws
- Wood glue
- Spray paint
- Circular saw with Kreg Rip-Cut or table saw
- Clothes pins
Other DIY Christmas tree shaped decor ideas
Don't miss some of our other tree-shaped DIY Christmas decor ideas to keep you busy this holiday season!
- DIY wooden tabletop Christmas trees
- DIY outdoor slatted Christmas tree
- DIY dowel Christmas tree
- Boho wall hanging Christmas tree
- DIY Christmas tree poinsettia stand
- DIY Christmas tree shaped card holder
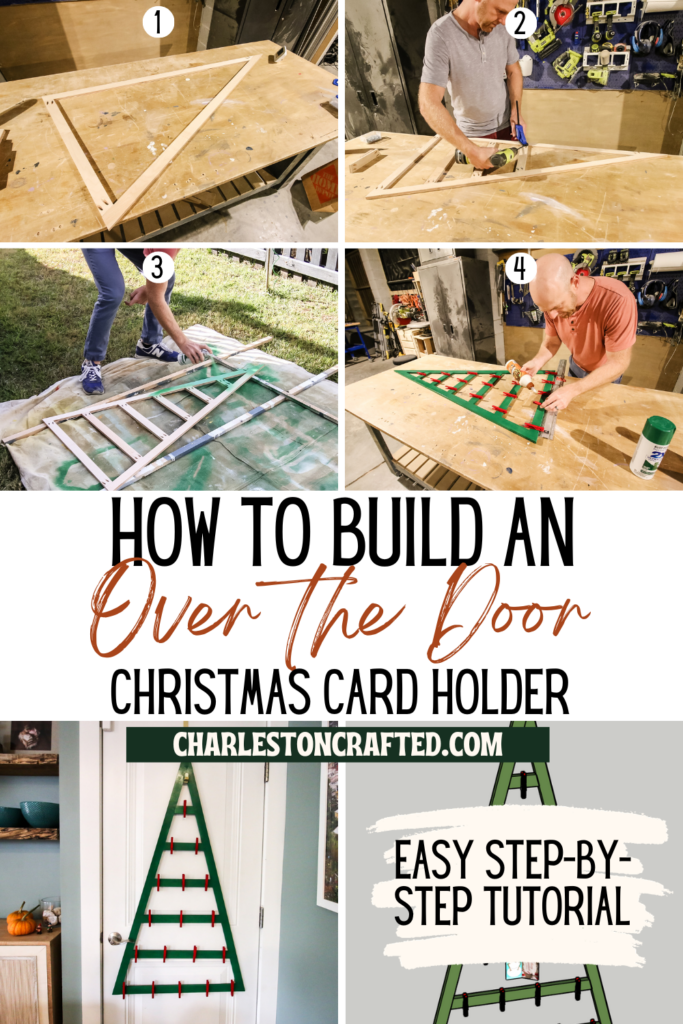
Step one: build frame
Start by building the frame for the whole tree. To do this, you'll use wood glue and pocket hole screws.
We drilled our pocket hole holes with the new Kreg Micro Pocket Hole Jig since we were using ½" plywood. Read how the Micro compares to the standard Kreg jig here!
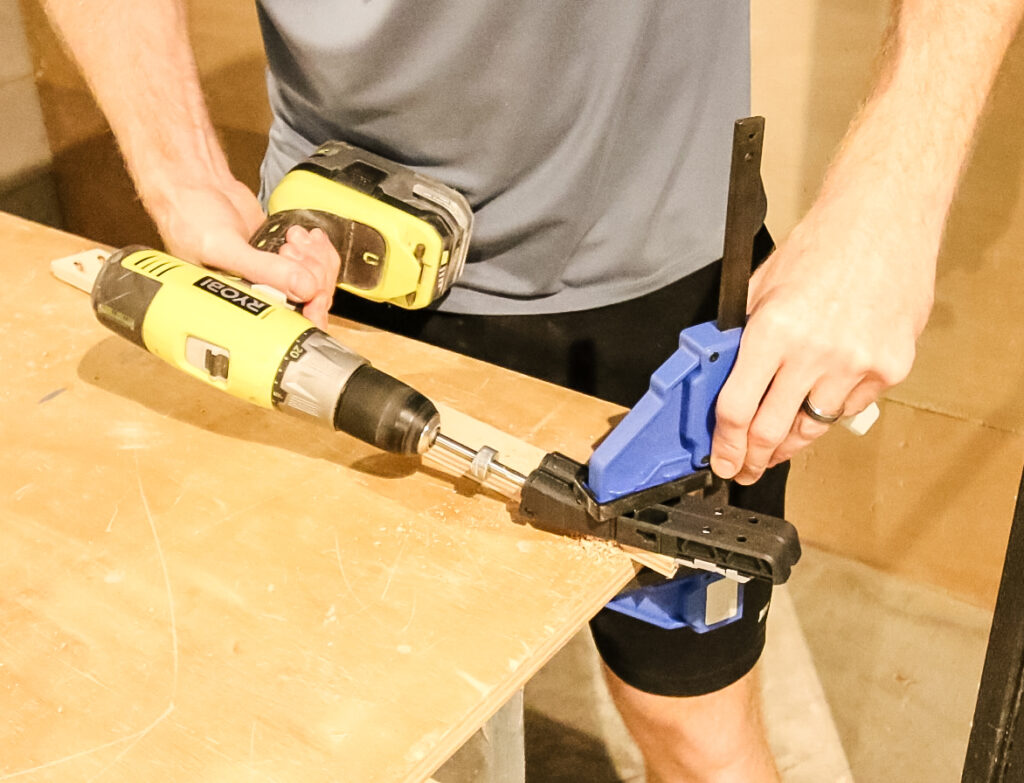
We drilled pocked holes in the ends of all the horizontal strips and one end of one side.
Connect the two sides together at the point and then connect their ends together at the base.
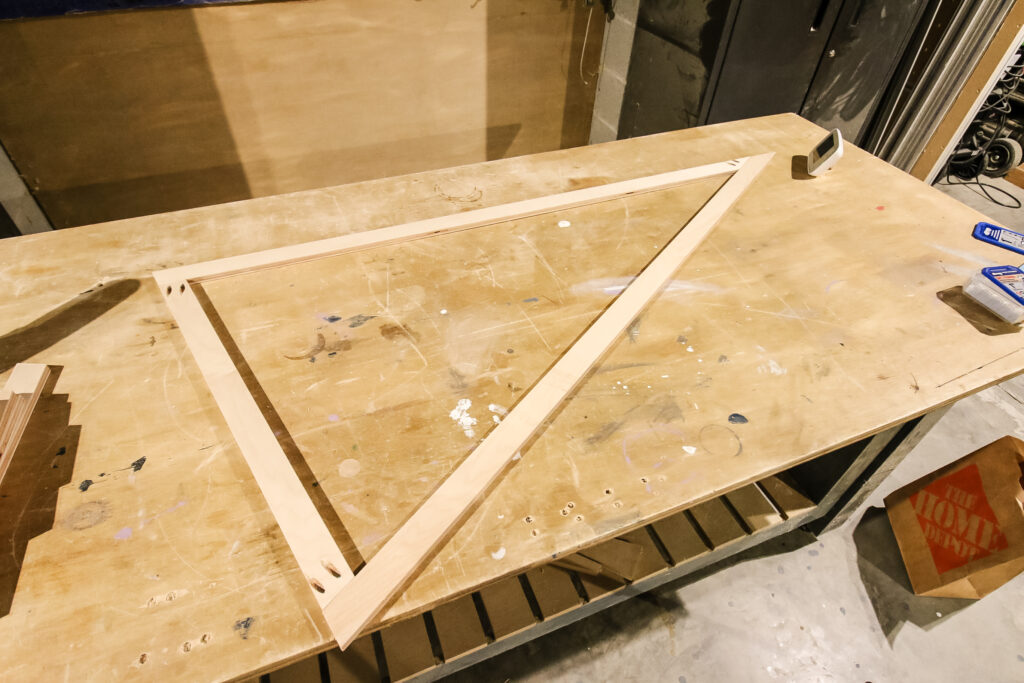
Step two: add inner rows
Next you'll continue to add the other five rows within the frame of the tree.
Again, we used wood glue and pocket screws here and spaced them out about 6" from each other. The more important thing was just attaching them where they spanned across to the two sides.
Remember you can get the full cut list in the FREE woodworking plans here!

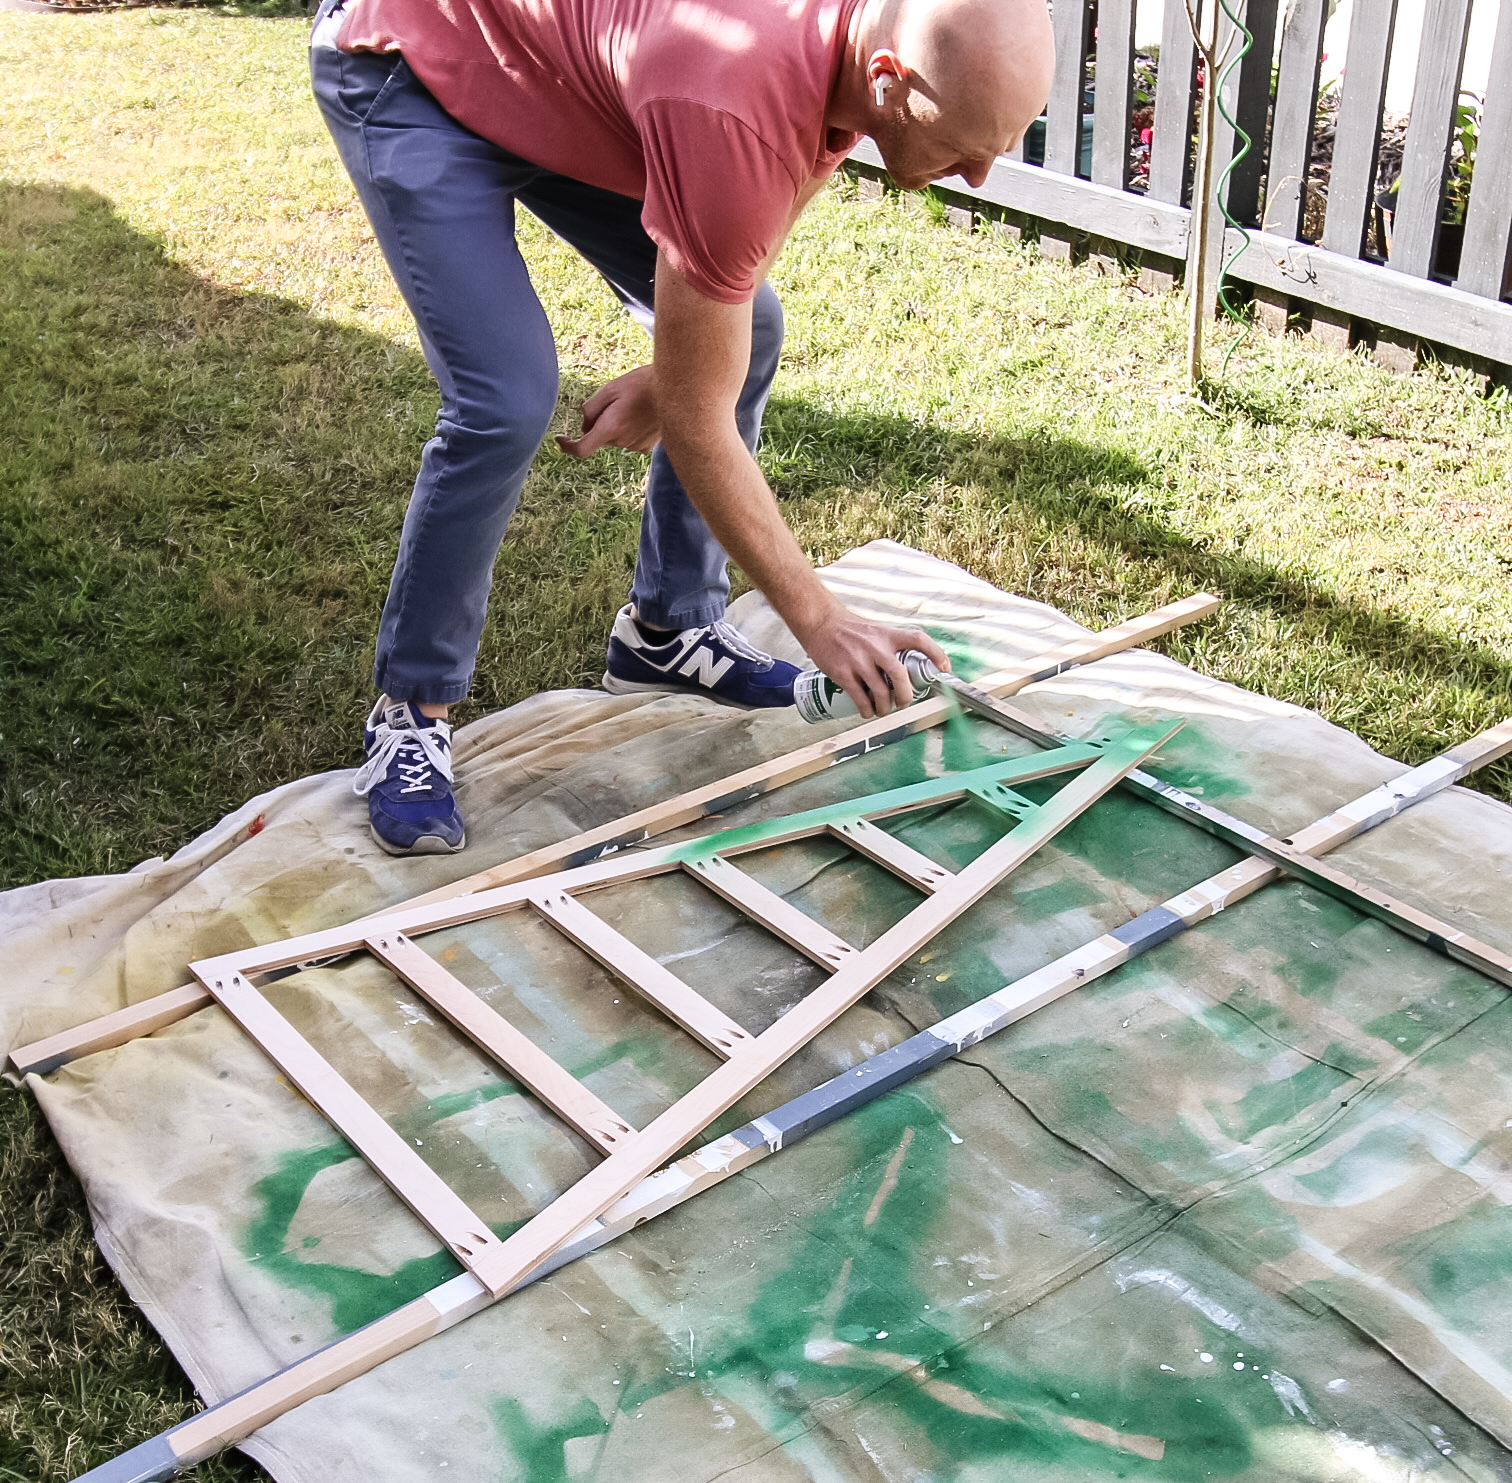
Step three: paint
After the frame was built, we spray painted the entire thing with a Christmas green color.
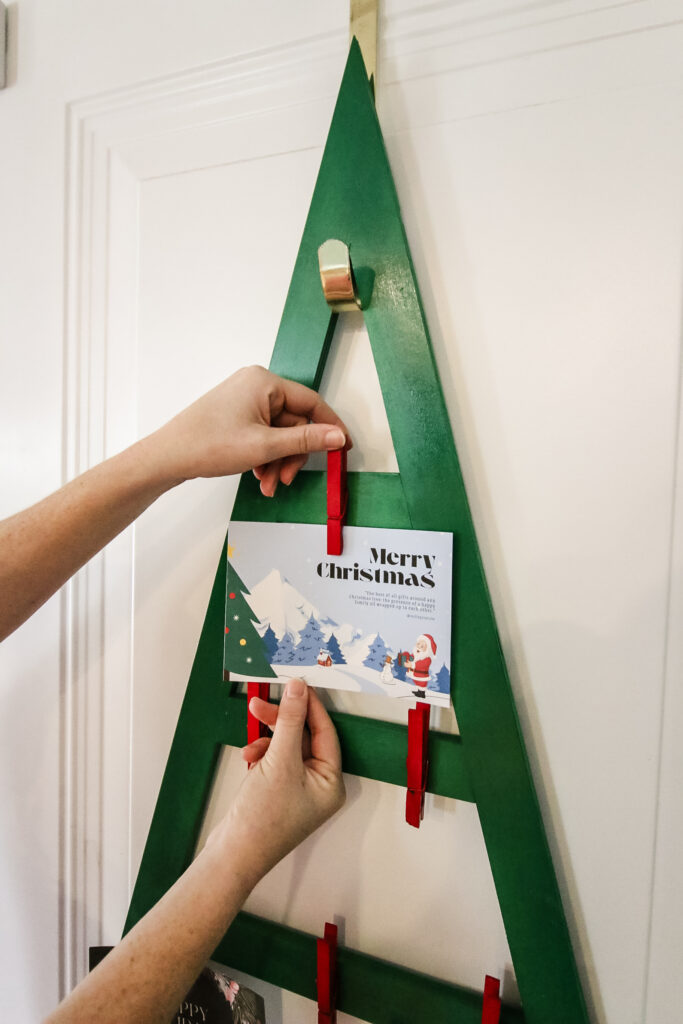
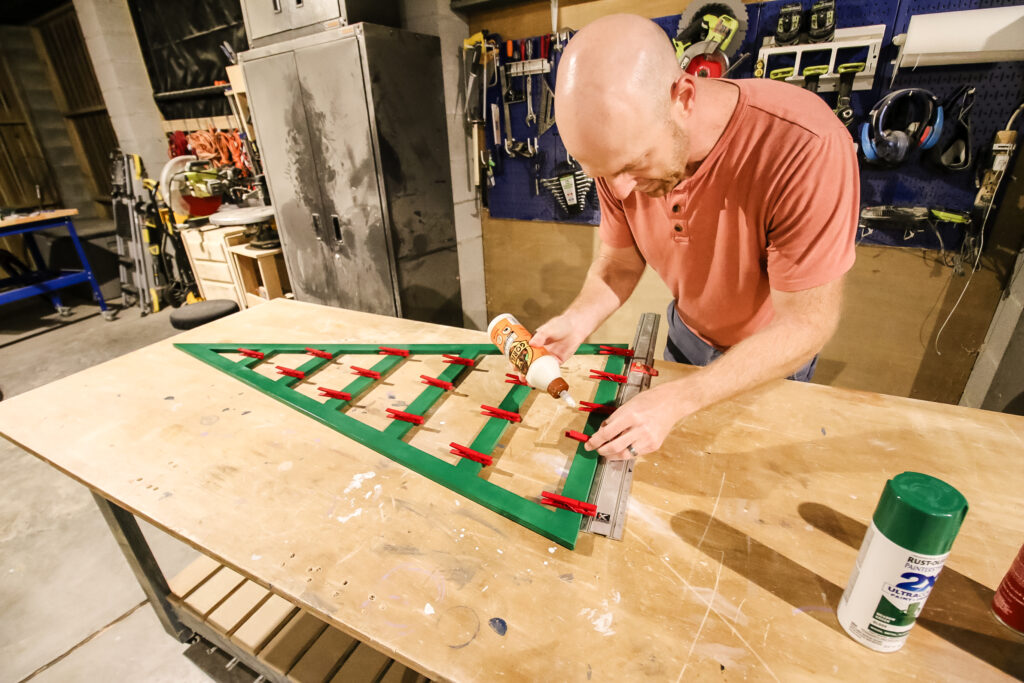
Then, we laid out all of our clothes pins that will hold the Christmas cards and spray painted them red. These will look like nice little ornaments!
Step four: attach clothes pins
After the glue is dry, evenly space the clothes pins out across each horizontal row.
Then, use wood glue on the back of each to attach them to the frame.
These are lightweight and not load bearing, so you can simply press them down lightly onto the tree and then let the glue dry. No need to clamp or tape!
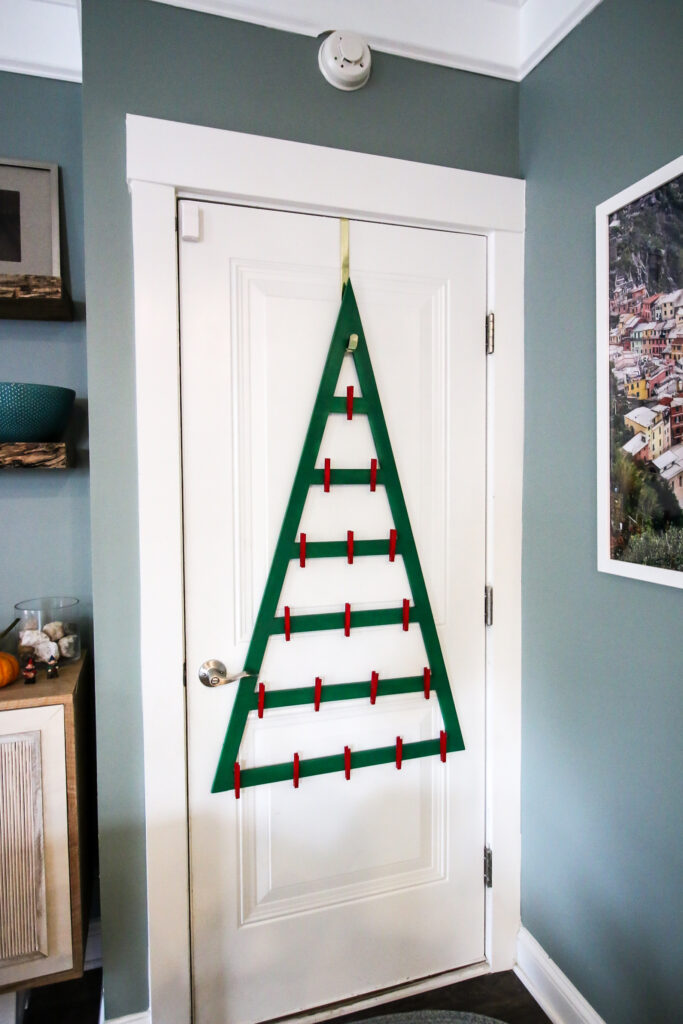
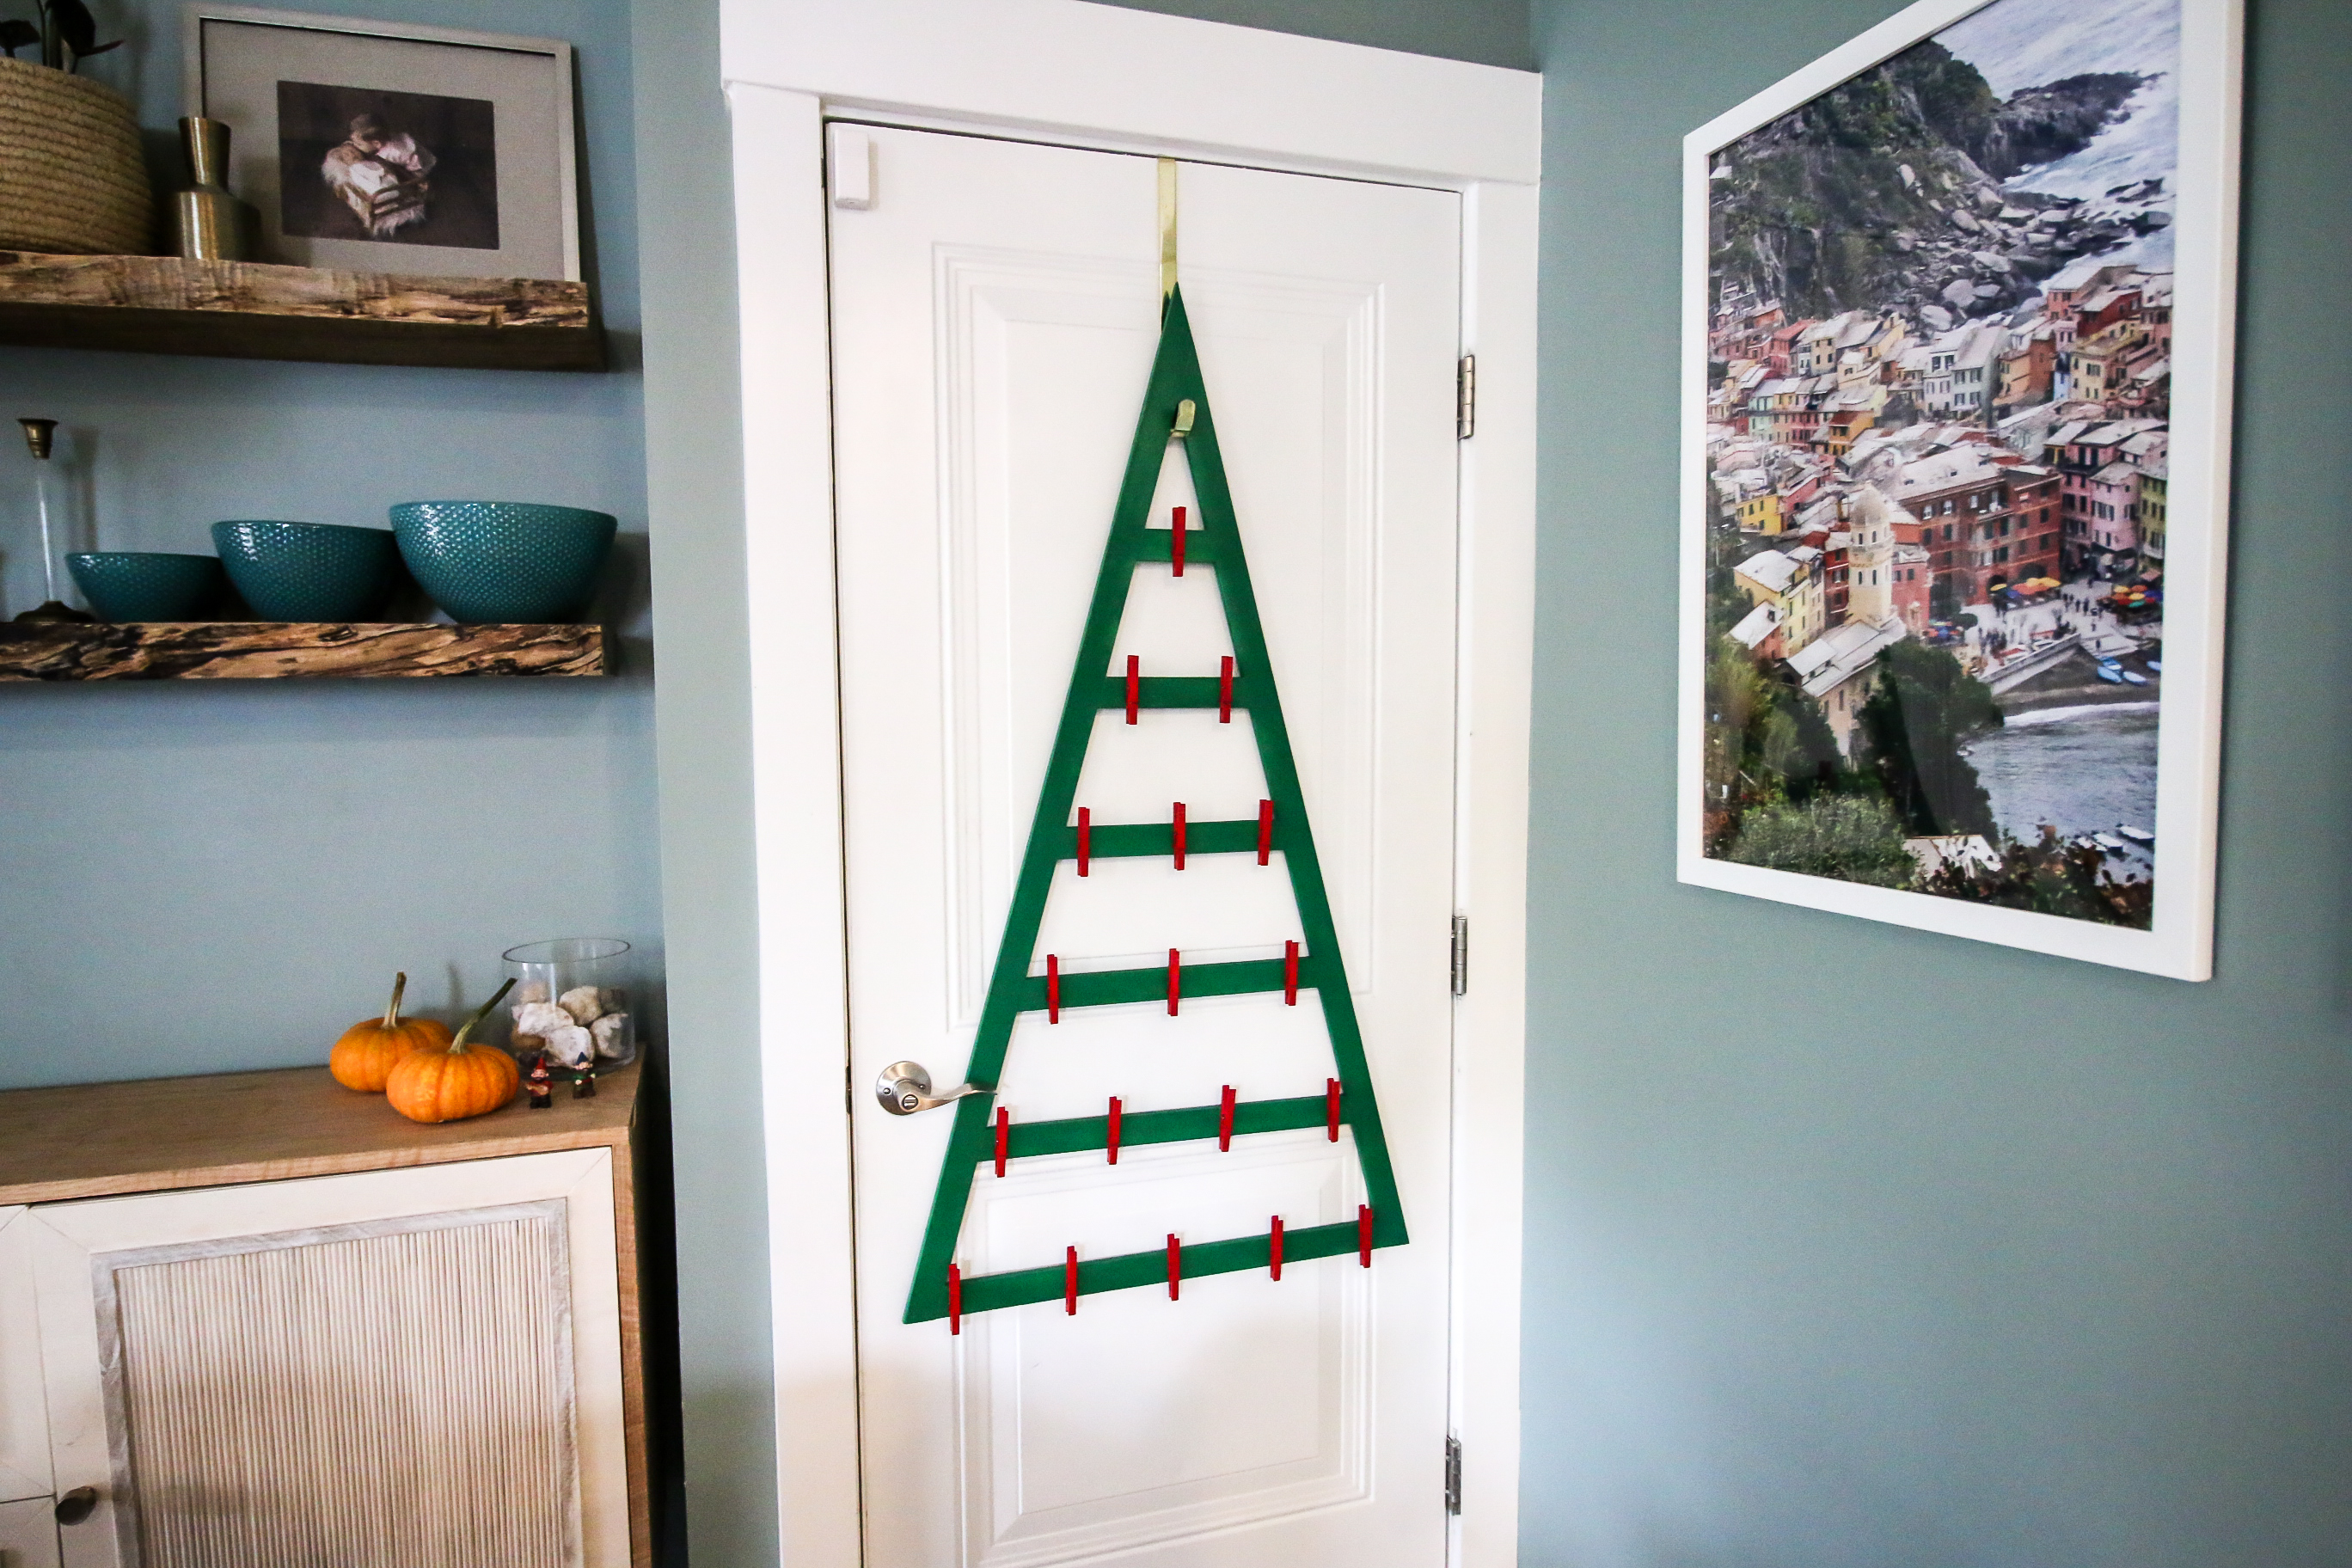
Step five: hang and enjoy!
Once it's done, grab a wreath hanger and hook it over the back of the door. Then attach the top of the Christmas tree card holder on the hanger and step back!
Now you can add your holiday cards as they come in!
DIY Christmas card holder
This DIY holiday card holder is a great project for this year!
It's an easy way to use up some scrap wood and add a new Christmas decoration to your home in a space that might otherwise be blank.
Your friends and family took the time to send you a card, so display it with pride!
Over the door Christmas card holder woodworking plans
If you love this DIY over the door Christmas card holder and want to make one for yourself, we have free plans!
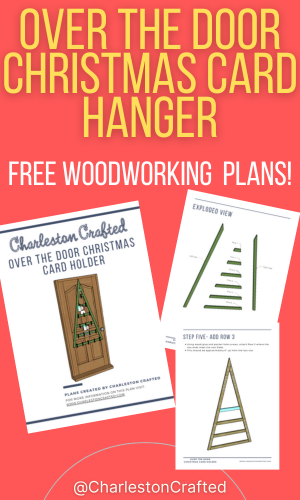
We teamed up with our friends at Kreg Tool to host the plans for free on their website. There, you can get the downloadable PDF with the full material list, cut list and step-by-step instructions with computer model imagery to help you get through the project!
Before you go...
We also made a Christmas card holder that looked like a mountain range back in the day! Check it out if you don't have a great door to hang this on!

Looking for something?
We've been doing this since 2012 so we have a LOT of blog posts!
Search stuff like: Ceiling Projects | DIY Plant Stands | Thrift Flips

Hey there, I'm Sean, the woodworking enthusiast and builder behind CharlestonCrafted.com! Since 2012, I've been sharing the magic of turning raw materials into beautiful creations. I love teaching others the art and satisfaction of woodworking and DIY. I try to inspire fellow crafters to make something extraordinary out of nothing at all.


