This post will show you how to build a potting bench with storage for dirt, pebbles and tools. It's the perfect option for someone who wants a good solution for potting and has printable PDF plans available to help you build it!
This post is sponsored by Waterlox. They make lots of indoor and outdoor tung oils, sealers and finishes. All opinions are our own and our opinion is that we love Waterlox finishes. Thank you for supporting the brands that make Waterlox possible!
We love our new house and have been filling it up with plants since we moved in. There are potted plants everywhere, inside and out!
Check out this ladder style plant stand with hanging bar for when you're done potting!
We've never had a good solution for potting plants and have always had soil over here and pots over there and it has been very disjointed.
We finally have a large outdoor space at our new house and a perfect place to put a potting bench.
Check out all of our favorite ways to upgrade your backyard on a budget!
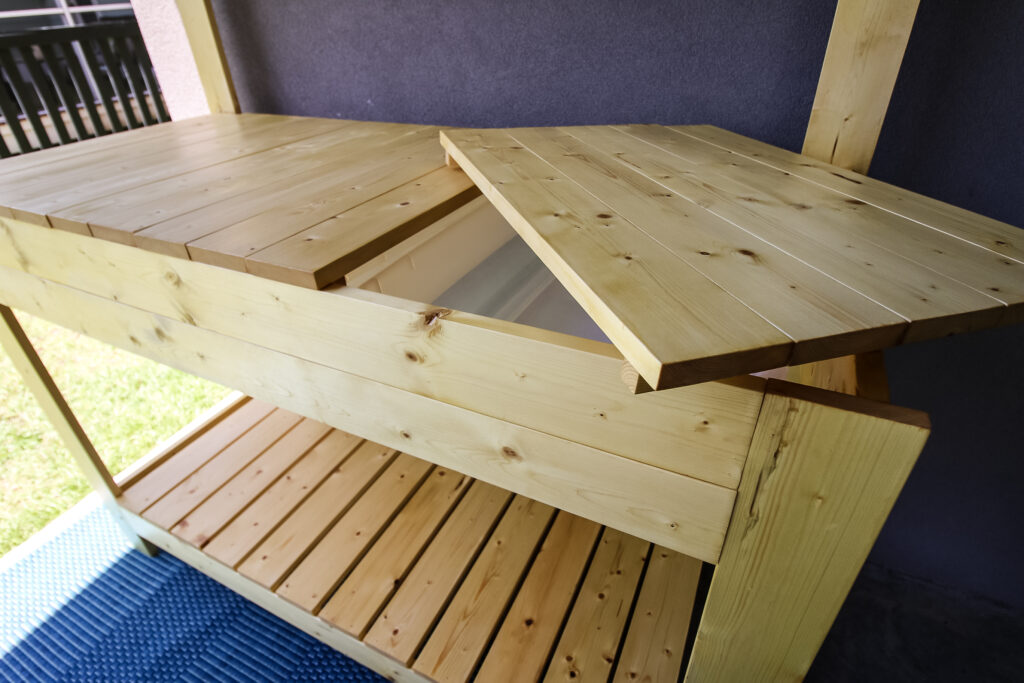
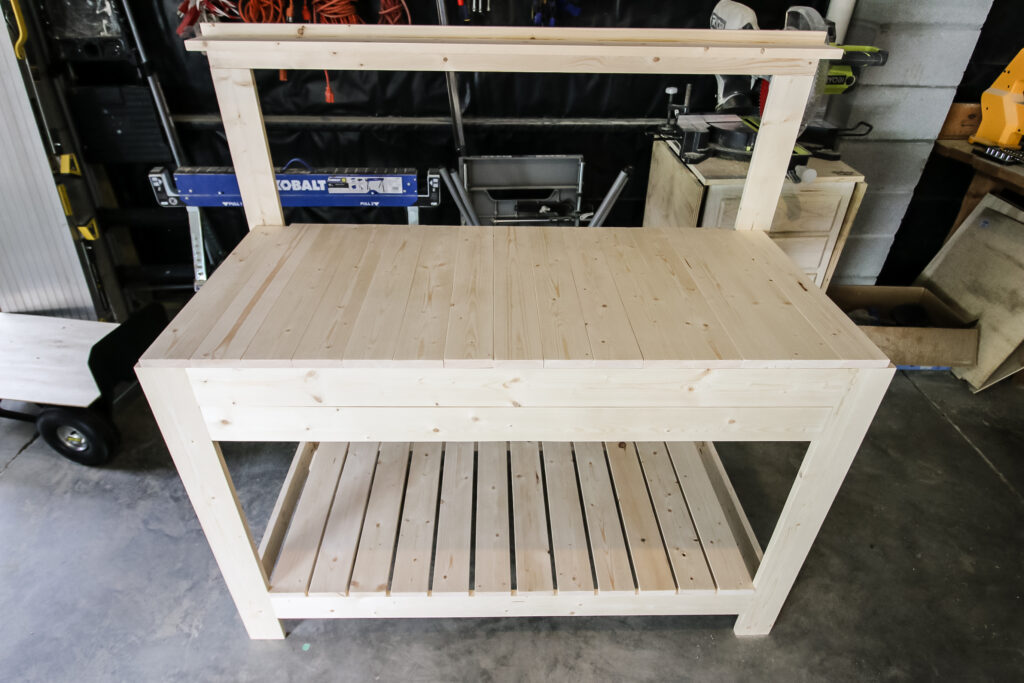
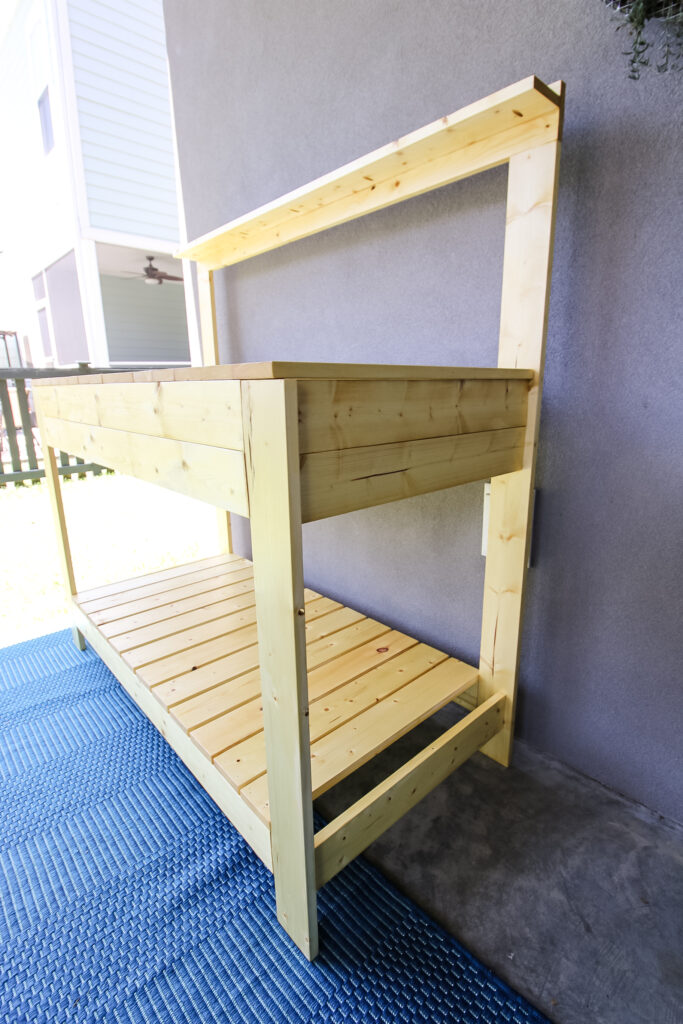
This DIY potting bench is amazing. It has a large work surface on top and slatted pot storage underneath. The best part is that the top lifts up with storage for soil, pebbles and tools!
This DIY potting bench is an amazing addition to our new house and can easily be made for yours too. Here's how!
DIY potting bench
To set the scene, our house is raised, with the garage underneath. There is a screened porch on the main floor with a concrete patio underneath with a door into the garage.
The set of stairs from the porch down to the yard is a switch back and creates a large amount of space underneath.
When we moved in, this space was dirt, weeds and who knows what else. Very unkempt. We actually started this project by having some concrete guys come out and extend our patio under and around the stairs.
This was not really a DIY project as it was a large space and a lot of concrete. It took approximately seven guys a total of six hours to lay. They did a perfect job and this is the type of thing we definitely recommend hiring out.
The patio extension gave us several great options to use under the stairs, including a dedicated place to work on potting plants.

Elements of a potting bench
When designing a potting bench, it's best to know what you need for it.
For this potting bench, we focused on the main goals of having a solid work surface and storage for pots.
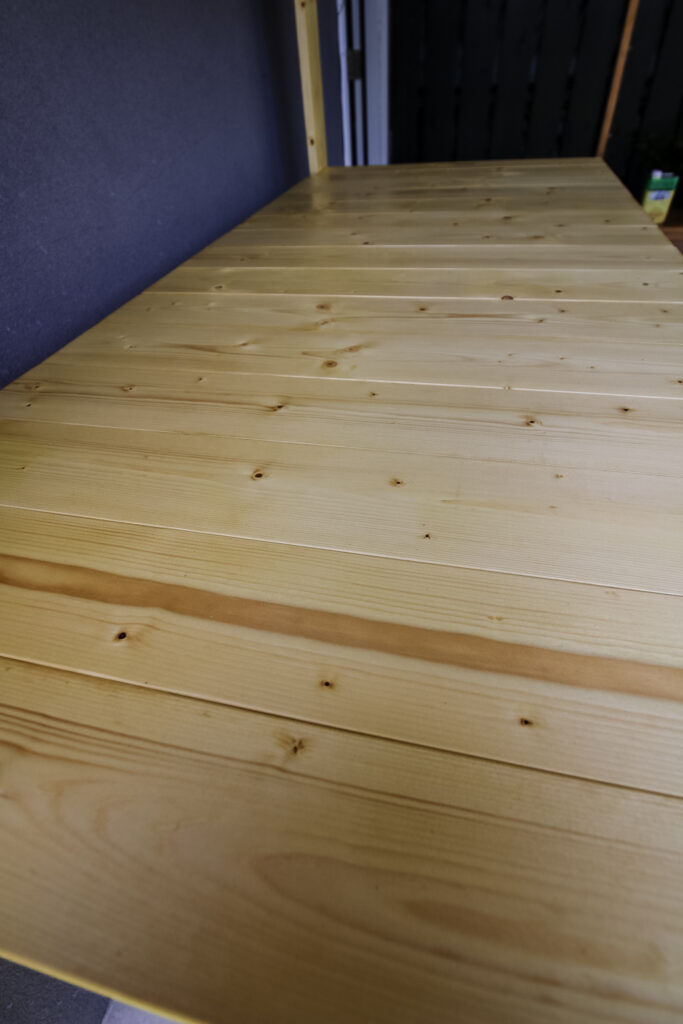
The work surface is smooth and solid because you'll be working with your pots and tools on it. The lower section is slatted to allow for drainage or any dirt to fall through the cracks.
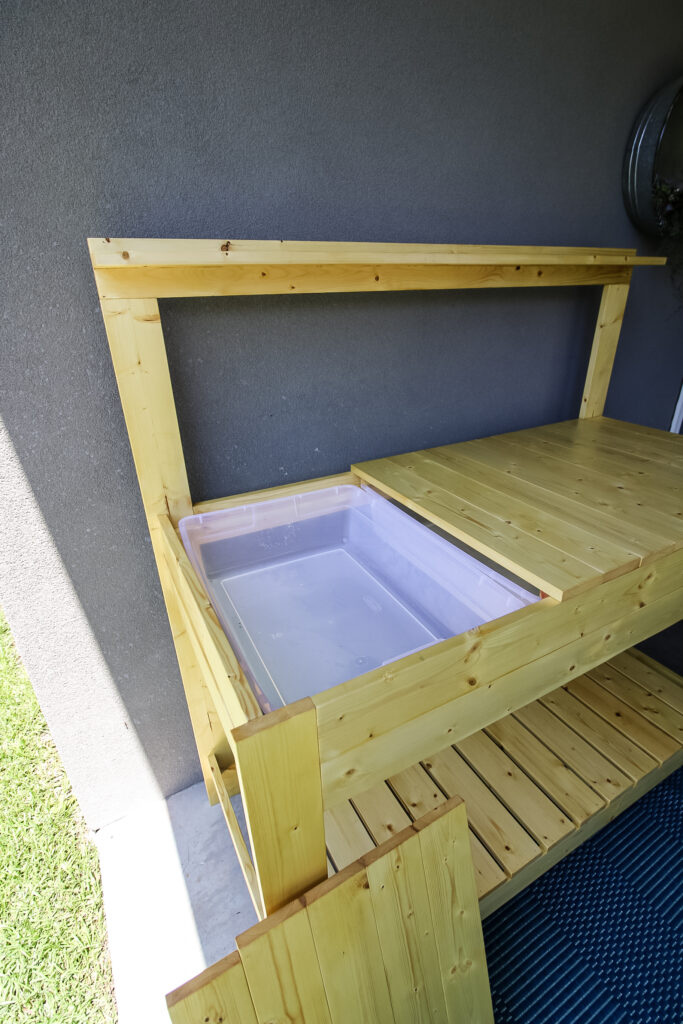
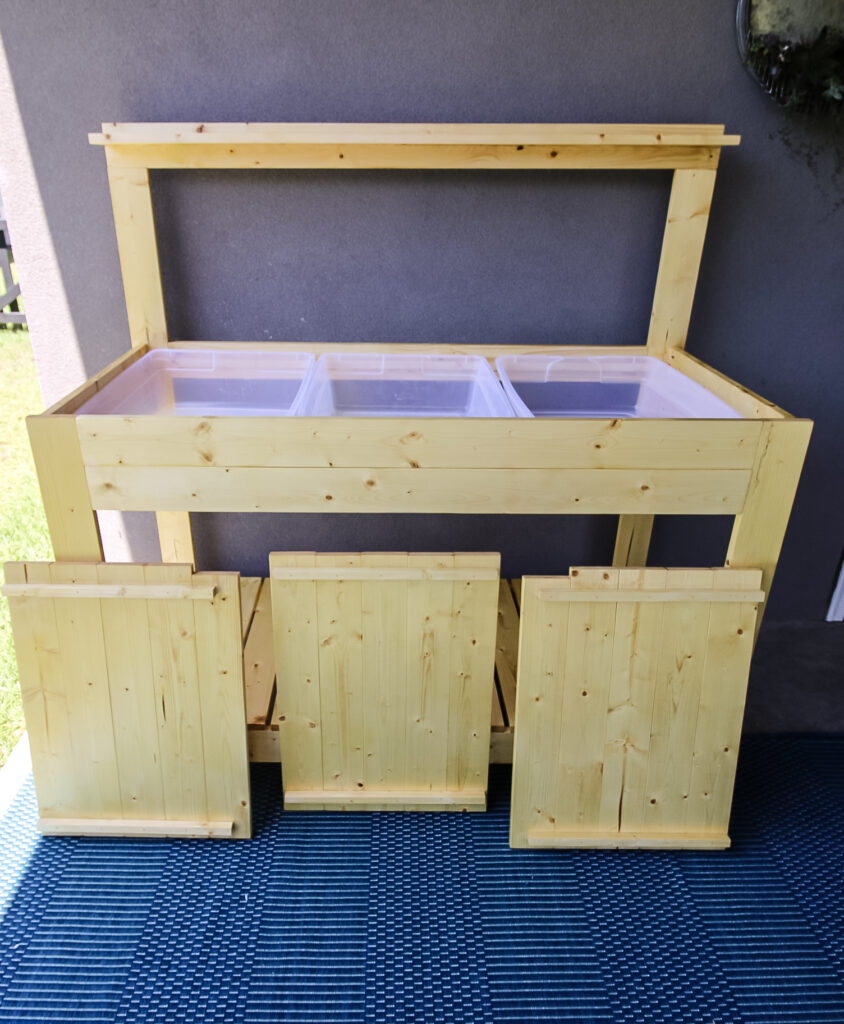
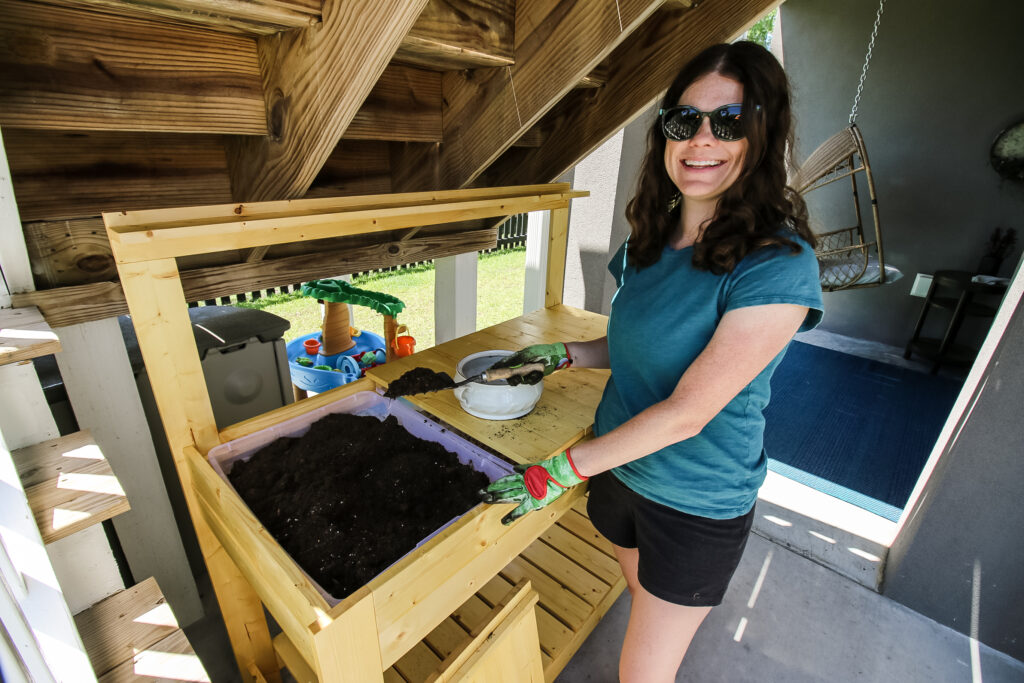
In this potting bench, the best part is the hidden storage for soil, pebbles and tools. The tabletop lifts off in 3 sections to reveal the hidden storage.
You can use these storage areas for whatever suits your needs best, but these are the three we use!
There are three bins (these are the ones we got and work with our plans!) that hang down underneath the work surface to hold each of those items!
The best part is that the top work surface is broken down into three different sections so you can remove the one you need and still have a place to work on.
How to build an easy potting bench
You can find out exactly how to build this heavy duty DIY potting bench by grabbing our printable PDF plans.
Our potting bench plans are very simple to follow and include the material list, cut list, step-by-step plans and computer models.
This potting bench makes a great addition to any home for the garden enthusiast in your life.
But anyways, here's the overview.
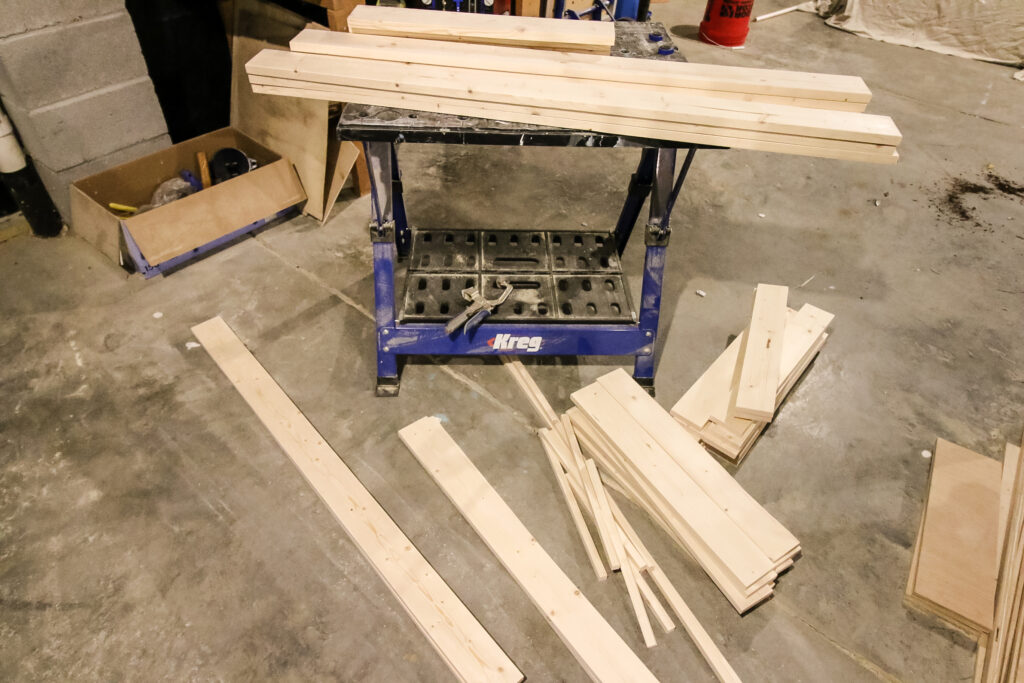
Step one: cut and sand
We started by cutting down all the boards. We had very minimal excess scrap, which is very important during these high-cost lumber times.
Click here to get tips on where to find free and cheap wood right now!
With everything cut and sanded, we started by assembling everything in sections.
Step two: build frame
The first section to build is the front panel, then the back panel, then connect those two with supports on the sides.
This creates the main frame of the entire potting bench.
The entire frame is put together with pocket hole joinery. We drilled holes in all of the connecting boards and joined them with wood glue and pocket hole screws.
Learn more about our favorite pocket hole tool, the Kreg Pocket Hole Jig 720 Pro!
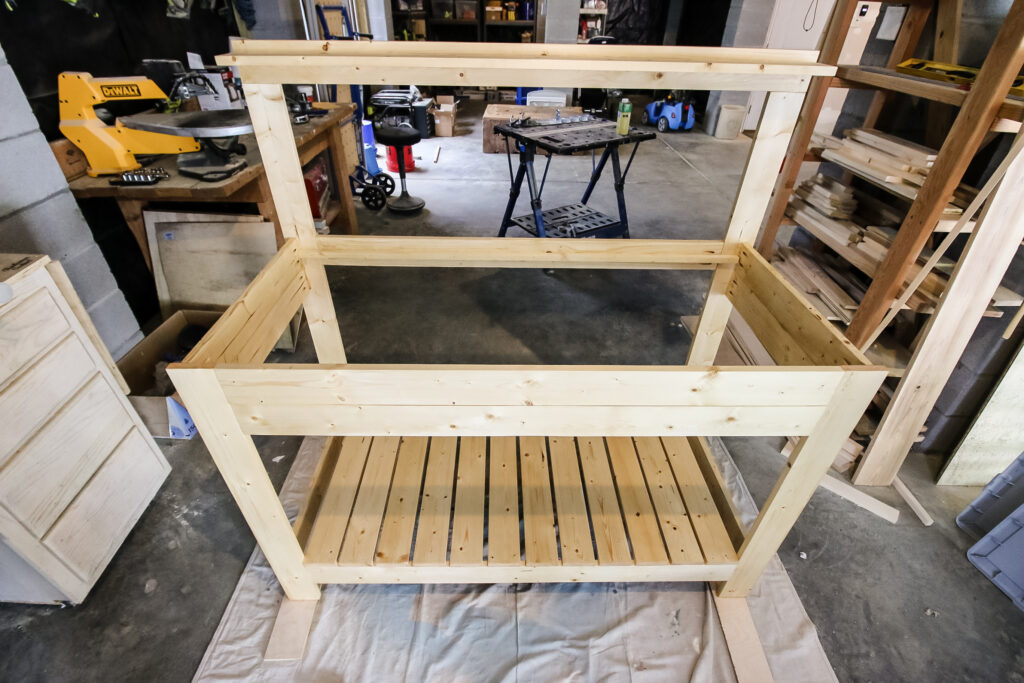
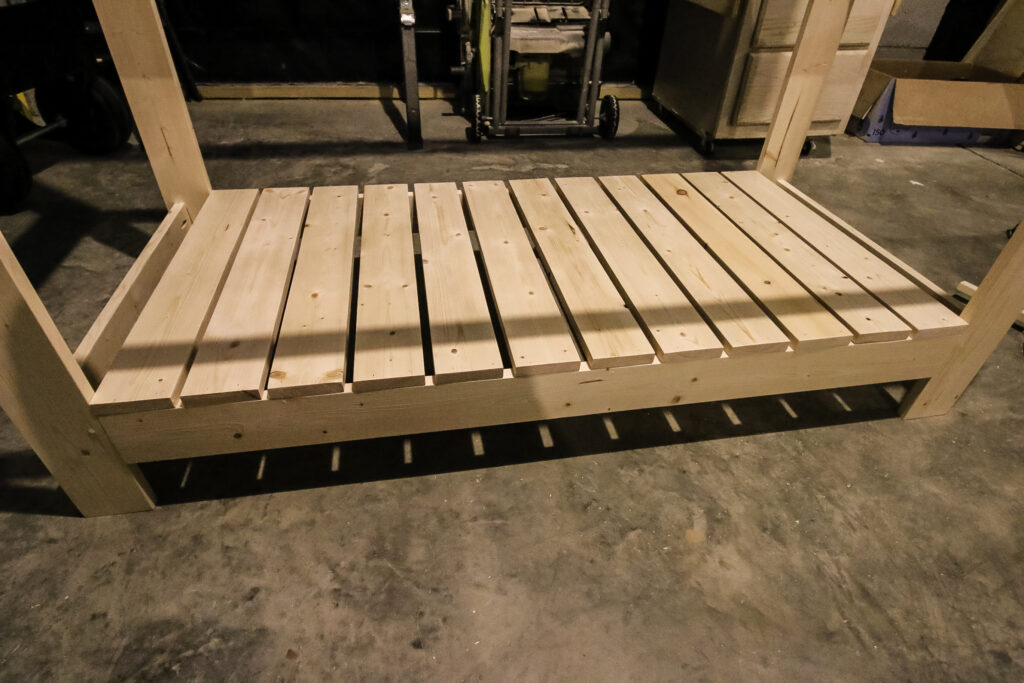
Step three: add lower slats
With the frame built, we added the slats to form the bottom shelf that will be used for storing pots, extra bags or even a coiled up garden hose.
These we attached with just wood glue and brad nails. These need to be secure, but they aren't structurally integral, so they don't need to be screwed in.
The slats are great because excess dirt or water can drain down between the slats and disappear.
Step four: build top
For the counter-height work surface, we assembled three different pieces that come together to be one. It was important for this bench to be at standing height so that you don't hurt your back leaning over while working.
Each of the counter sections is five boards connected by two narrow slats underneath. The supports keep the boards together and also keep the counter section from sliding back and forth off the bench.
Underneath the counter pieces are railings for plastic bins to hang. These plastic bins are perfect for storing potting soil, drainage pebbles, garden tools or whatever you use most frequently for gardening.
Make sure you get these bins from Home Depot for your build!
The bins hang down on the railings and can be accessed individually by removing one counter piece. Then, you still have a large work surface for potting your plant!
What kind of wood is used for potting benches?
If you plan to keep your potting bench outdoors, you will need to use water resistant wood. This could be pressure-treated lumber, naturally rot-resistant wood like cedar, or untreated wood sealed with an outdoor grade finish, like Waterlox.
How to seal a potting bench
Of course, you can't put a potting bench made of raw wood outside and expect it to last without a little help. With lumber prices being so high, we opted for cheaper wood and a better finish.
After assembling all the parts of this potting table, we coated the entire thing in Waterlox Marine Sealer and Marine Finish.
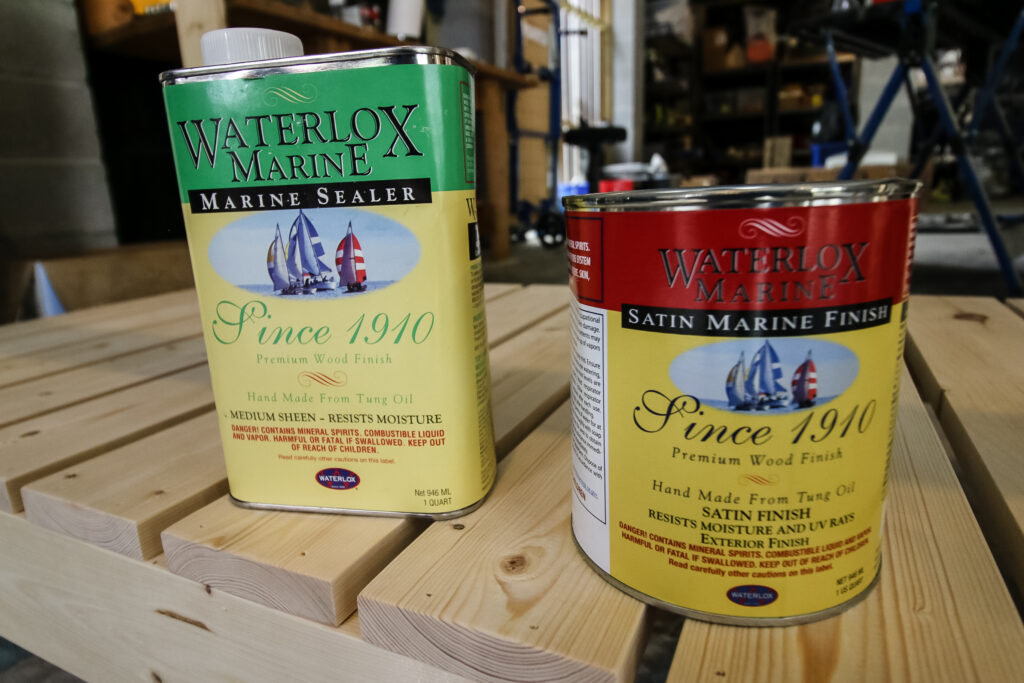
Waterlox's marine formula products are perfect for protecting projects built for outdoors. They are tung oil-based and help your outdoor wood projects stand up against sun exposure, harsh weather and moisture.
This makes Waterlox perfect for a potting bench. Not only is our potting bench outdoors, it is completely exposed to all the elements.
Plus, we're literally getting dirt and water on it every time we pot a plant, so their marine products keep things protected.
Waterlox Marine Sealer and Finish preserve the integrity of wood that is being used outdoors. They form a protective finish against sun exposure, harsh weather conditions and moisture.
Waterlox is easy to apply in a two-step fashion.
You first apply the Waterlox Marine Sealer, using a bristle brush across the entire piece. The sealer locks in the elements of your wood and also gives the wood a nice color.
After 24 hours you can apply Waterlox Marine Finish in the same fashion. This will give your wood an amber look and fully-protect the wood.
We also used Waterlox on this rolling plant three-tiered plant stand!
Thanks to Waterlox, we expect this potting bench to be in good shape for a long time because it will be protected!
Build these DIY deck rail planters next to plant your herbs!
Get the plans for our DIY potting bench with hidden storage
Want to build one of these potting benches for yourself or as a gift? We've got printable PDF plans available for you!
Our plans include a full material list, cut list, step-by-step instructions, and computer models for how to get you from start to finish!
This potting bench is an easy project to make, especially for how large it is. This makes for a great addition to your yard or would be a great gift for a plant enthusiast in your life!
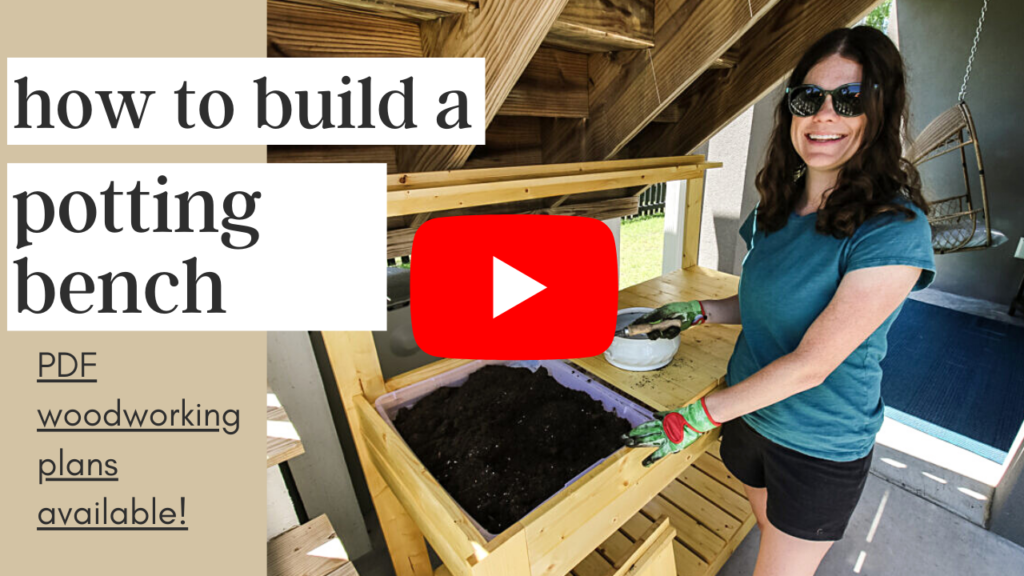
Video Tutorial
If videos are your thing, check out how we built this potting bench in video format!

Looking for something?
We've been doing this since 2012 so we have a LOT of blog posts!
Search stuff like: Ceiling Projects | DIY Plant Stands | Thrift Flips

Hey there, I'm Sean, the woodworking enthusiast and builder behind CharlestonCrafted.com! Since 2012, I've been sharing the magic of turning raw materials into beautiful creations. I love teaching others the art and satisfaction of woodworking and DIY. I try to inspire fellow crafters to make something extraordinary out of nothing at all.