Dramatic flair, high-end gallery vibes, or a welcoming atmosphere—picture lights can add a lot to your framed photos and artworks.
A while ago, I tried them over two family pictures in my hallway and was really impressed with how much they improved the mood.
They were also super easy to install. But the trick is to position them just right to kill glare and unwanted shadows. It doesn’t hurt to factor in the frames’ size and color, either. After all, you want everything to be nice and proportional.
In this post, I’ll share with you a step-by-step guide and offer some tips for choosing stylish yet affordable wall art sconces.
I’ll also go over some alternative approaches in case you get bored of the picture lights.
Free printable project planner
Need help getting organized? Our free printable DIY project planner will help you get it all organized and planned on one page!
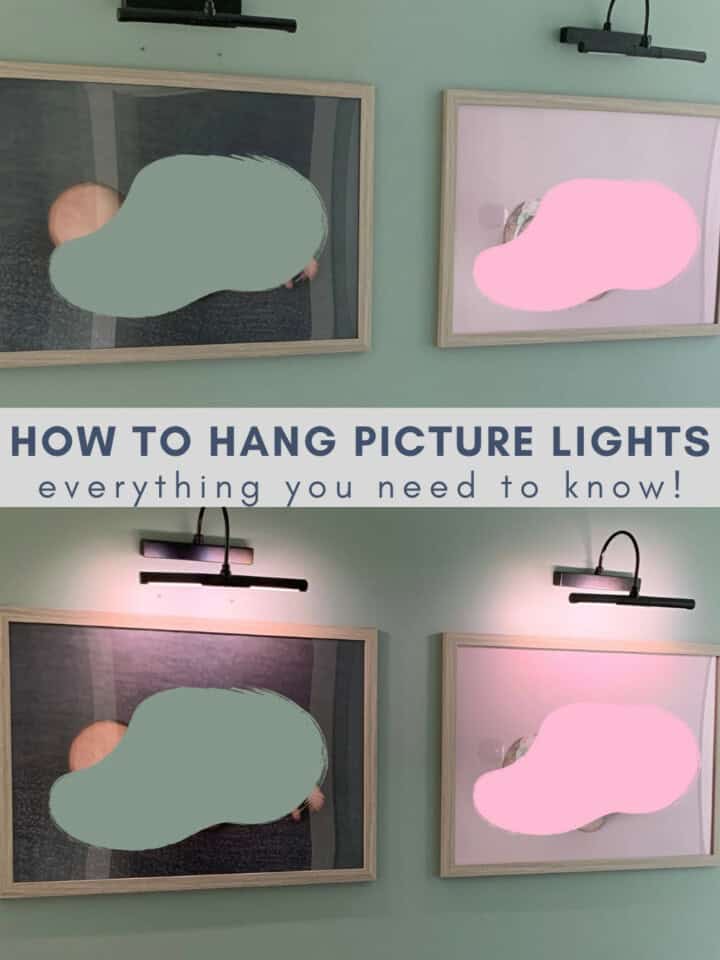
How to hang picture lights in 7 simple steps
It’s actually really simple to hang picture lights.
Here’s what you’ll need:
- Battery-powered LED picture light with adjustable angles (more info about the one I chose later!)
- Measuring tape
- Level
- Pencil
- Drill
- Anchors
Once you have the necessary tools, you can jump in and follow these simple steps:
STEP 1: Find the perfect position for your picture lights
Ideally, you want to hang the lights 5–7 inches above the top of your art.
Why? The base of the light (the bit that the light actually comes out of) needs to be 1 inch above the top of the frame.
STEP 2: Remove the backplate
After determining where the light will go, you can remove the backplate from the light. You should find two holes in the metal.
STEP 3: Mark the anchor spots on the wall
Hold the plate to the wall and make sure your plate is all nice and centered. Use a measuring tape and a level for this part.
Then, grab a pencil and mark the location of the two holes.
STEP 4: Drill the marked spots
Drill two pilot holes the size of your wall anchors, one in each marked spot.
It might be easier to remove the frame during this step. It’s okay if you can’t, but I just like clearing up the area so I can work without worrying about dust falling over my artwork.
STEP 5: Attach your anchors and screws
Take two anchors and press them into the drilled holes.
You’ll then need to drill your screws into the anchors, leaving about a ¼ inch sticking out to catch on the light.
STEP 6: Hang the picture light
If you’ve removed the frame in step four, now’s the time to put it back up. Then, you can go ahead and hang the backplate on the two holes through the screws.
Is the backplate snug in place? If so, you can slide the lamp onto the plate and admire how the light falls over your picture.
STEP 7: Adjust the angles (if needed)
Don’t fret if you notice that the picture light hangs at an angle. Simply tightening the screws closer to the wall could fix it.
All that’s left to do now is to adjust the angles of the lamp bit itself.
If you go for a narrow angle, you’ll end up with a long shadow under the frame—no bueno. But if you set the light too far back, say at 45°, you’ll create reflective glare.
The picture light rule of thumb is to have the lamp at 30°. This angle just hits the sweet spot!
Picture lights 101: All you need to know
Now that I’ve covered the installation steps, I think it’s time to cover some basics about picture lights. What’s the point of using them? How bright and big should they be?
Let’s tackle some questions right away!
What are picture hanging lights?
When people say “picture hanging lights,” they’re often talking about a type of wall-mounted wall sconces that project light at a piece of artwork.
Some pros would use track lighting for this job. In fact, track lighting systems are sometimes considered a standard choice for museums and exhibitions.
However, picture frame lights actually serve as an additional piece of decor around the art. That’s a double-win in my book, but some folks like more subtle lighting options.
Why should I use picture lights to illuminate my art?
Picture lights can add a sense of drama to any artwork. Whether you have one large painting or a grid-style gallery wall of 6 or 8 large black-and-white photos, the lights can make art look museum-worthy.
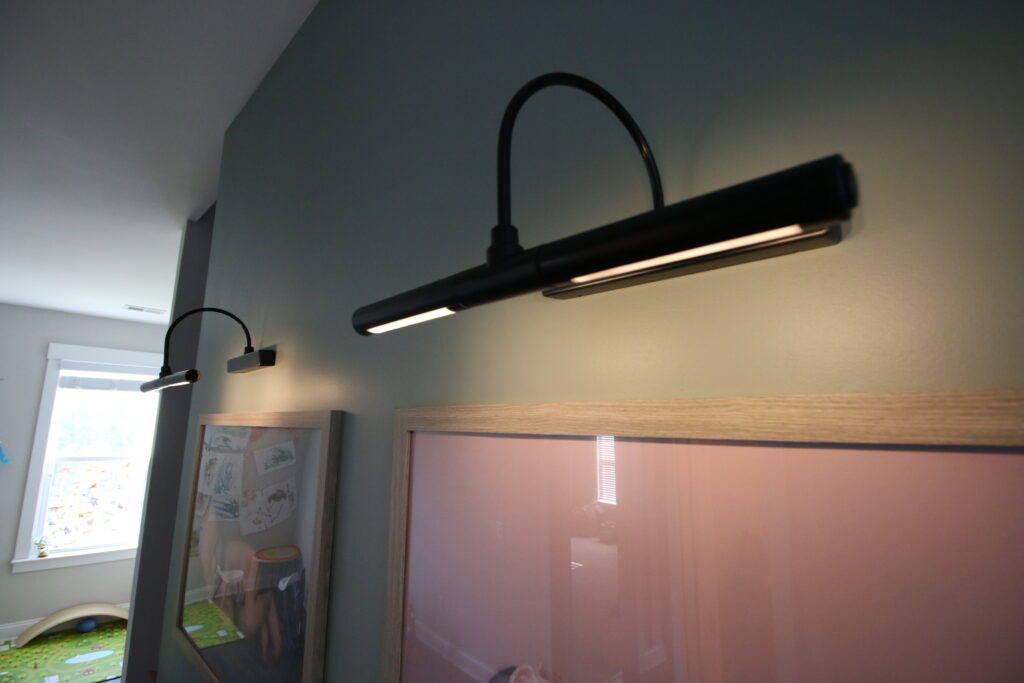
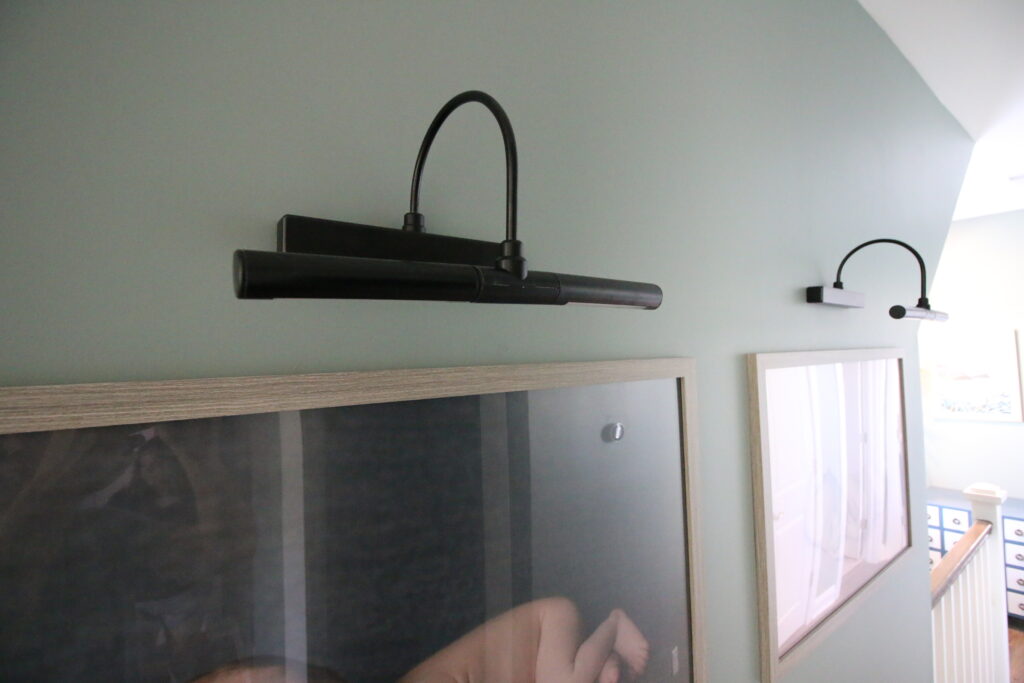
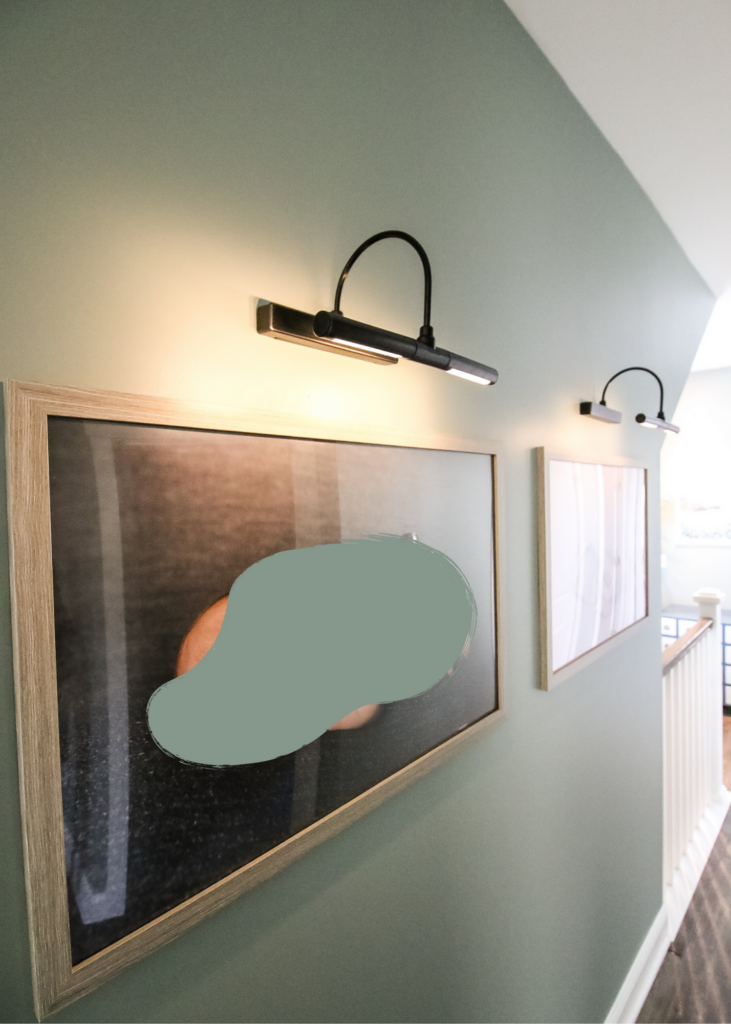
I decided to add lights over the two large photos in our upstairs hallway, which is too narrow for any furniture (yes, even a slim console table). The art is big enough to stand alone, but it felt a little ‘meh’ to me.
Adding lighting above the frames was just the perfect final touch to make the pictures feel special and interesting.
They are also a great ambient light source and a bit of a hallway night light when I have to go check on the kids!
Where do I get picture light sconces?
I got my lights on Amazon. Honestly, these LEDs were the cheapest I could find. They are lightweight and not super high quality, but they get the job done.
Of course, you can always get proper hardwired fixtures. However, I decided it’s more convenient to get battery-operated ones.
Bonus point: These are remote-controlled, which can be handy if you hang the lights way too high to be able to comfortably reach the on/off button on the side.
But there’s still the matter of style and color-matching, though.
What color picture light should I get?
The LEDs I picked come in black, gold, and silver.
Initially, I ordered the gold ones but didn’t fall in love with them at all. The two tones of gold (body vs. neck) didn’t match. Plus, the gold was very orange. So, I just traded in for black and was much happier with the overall look.
I think that, when possible, you should match the color of the light to the frame color. Unfortunately, I couldn’t do this because my frame is wood.
How bright should the light be?
First of all, definitely stick to LED lighting, which won’t get too hot to the touch or fade your photos or art.
As for the brightness level, you want your art to be three times as lit up as the rest of your room.
I know this is arbitrary and hard for the average person to measure. But if it helps, imagine a bright, focused spotlight—that’s the brightness level you need.
What size picture light wall lamps do I need for my piece of art?
I love the rule of thirds—things in 3s look pleasing to the eye!
So, with that in mind, I always aim to have the width of the light equal to about ⅓ of the total width of the wall art, including the frame.
Some people prefer going for half the frame width, though. So, it’s mostly a matter of preference.
How to light artwork on a wall: 5 alternatives to traditional picture lights
As I’ve said earlier, you can find affordable picture lights on Amazon, and they’ll do the job just fine.
But maybe you want to consider all your options first. That’s totally valid, so here are some alternative ideas to check out:
1. DIY picture lights
Years ago, I managed to turn desk lamps into wall-mounted sconces. The main goal was to use them as reading lights, but you can try using them as DIY picture lights, too.
It may or may not be cheaper to buy inexpensive LED picture lights, though. Still, it’s a fun project to try, and it should only take 30 minutes or so.
2. Recessed ceiling accents
Rather than mount the lights directly above the frame, why not put them high up on the ceiling?
It’s a harder project to tackle. But on the flip side, all the focus will go to the art—not the light source.
Of course, you still need to work on the angles to reduce glare and shadows just as you would with regular wall-mounted picture lights.
3. Track lights
Track lighting fixtures are a good deal more flexible than recessed ceiling accents. So, if you plan on rearranging the frames later, this approach could be the way to go.
Just try to get one of those models with swivel/foldable bars for maximum flexibility.
4. Wall washers
Wall washer strips are great for covering large spaces. I mean, it’s all in the name—they “wash” the wall with light rather than just focus on a couple of frames.
You could even light the wall from the floor upwards if it creates a better vibe.
The catch? This technique works best for frames that are nearly flush with the wall. Otherwise, you’ll end up with ugly shadows.
I’d recommend this option if the wall itself is the artwork, as in an indoor mural or accent wall. Maybe in your kid’s room?
5. Picture lightbox
If you have some time (and a couple of 2x4s) on your hand, you could make your own lightbox.
The idea is to create a sort of “backlit” display for a few photos all at once without having any visible fixtures or lamps. So, this could be the perfect approach if you want to spice up your linear gallery wall.
That said, the box is nowhere as flush as a regular frame, making it less ideal for narrow hallways. But for an office or a living room? It’s just perfect.
Still have questions about illuminating your photos and wall art? Drop a comment!
Any more questions about how to install picture lights?

Looking for something?
We've been doing this since 2012 so we have a LOT of blog posts!
Search stuff like: Ceiling Projects | DIY Plant Stands | Thrift Flips

Hello, I'm Morgan, half of the creative force behind CharlestonCrafted.com! With a passion for DIY that dates back to 2012, I've transformed three homes and now I'm dedicated to helping others craft their dream spaces. Let's turn your house into a home together!