If you have a trailing plant in your yard, it's popular to build a trellis for the plant to climb. Read this post to figure out how to build a simple wooden wire trellis that has a wood frame and crossing wires. Your plants will thank you!
This post was sponsored by National Hardware. All opinions are our own. Thank you for supporting the brands that make Charleston Crafted possible.
In the first year of our house, we didn't focus too much on the backyard landscaping. It's a blank slate, but it wasn't our priority.
We focused on making our front yard a tropical landscape and removed all the old plants, but all we did in the backyard was build a simple raised bed garden.
Our goal with the garden was to get our toddler involved in the process of growing veggies, and he had a blast.
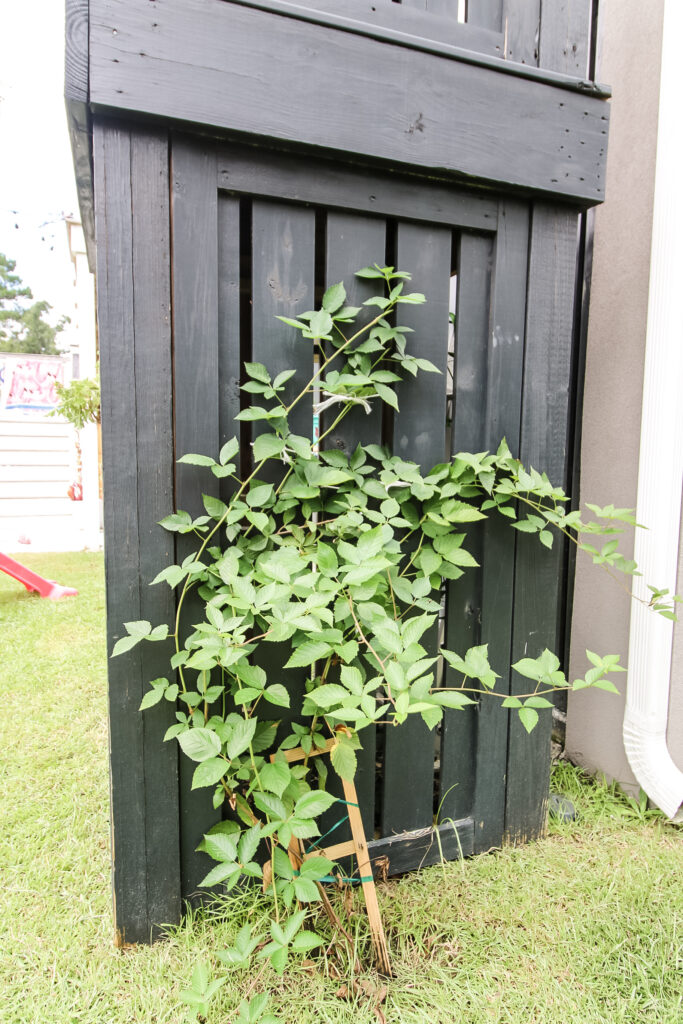
Right next to the garden, we did plant a blackberry bush on the side of our air conditioning unit. We didn't know, however, that it would start growing to be huge.
So, we whipped up this simple wooden wire trellis that is easy to build for your own home!
DIY wooden wire trellis
There are lots of ways to design and build a trellis for vine plants, but this simple DIY trellis can attach to your home or fence and serve as a great place for vines to grow.
Check out our storage bench planter with wire trellis and get the plans!
This is an easy project that doesn't require difficult skills or fancy tools. You can have this up in a day, no problem!
Check out this easy DIY trellis design and build a space for your climbing plant to thrive!
How to build a wooden trellis
Trailing vine plants aren't typically going to climb on wood, but the frame of the trellis needs to be wood to give the best structure for your climbing plants.
The first step is to find a suitable location.
Things to take into consideration are sunlight, access to water and aesthetics.
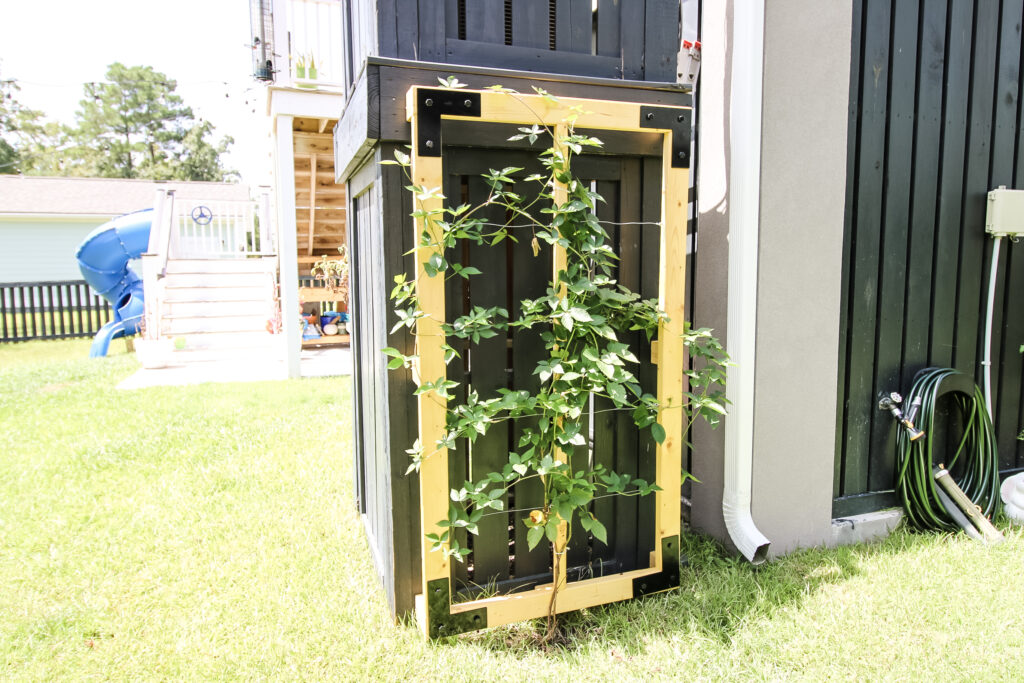
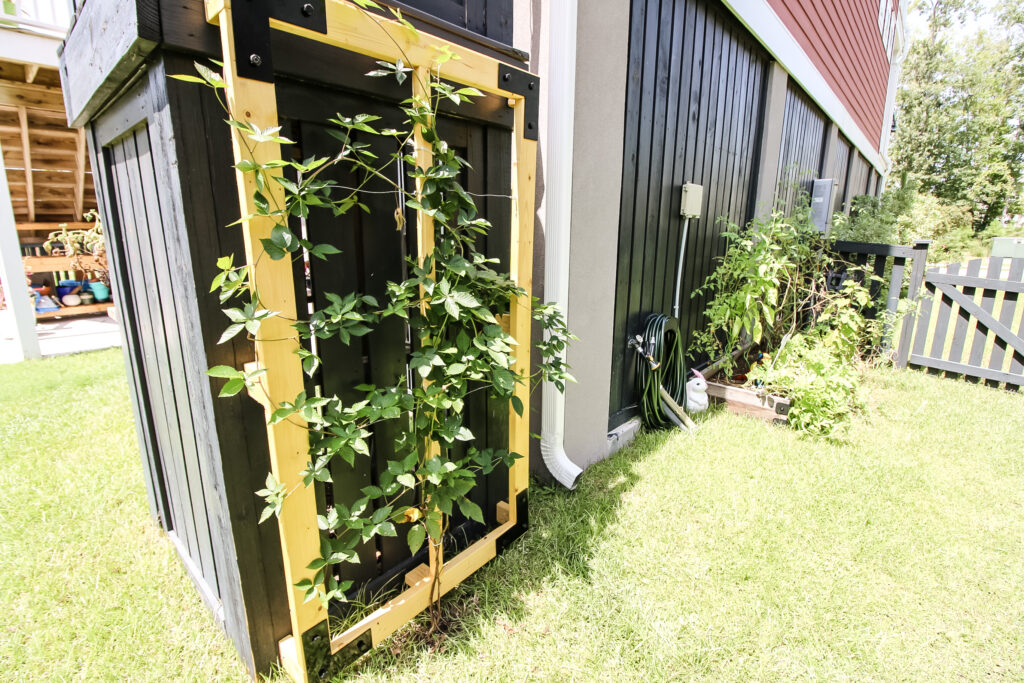
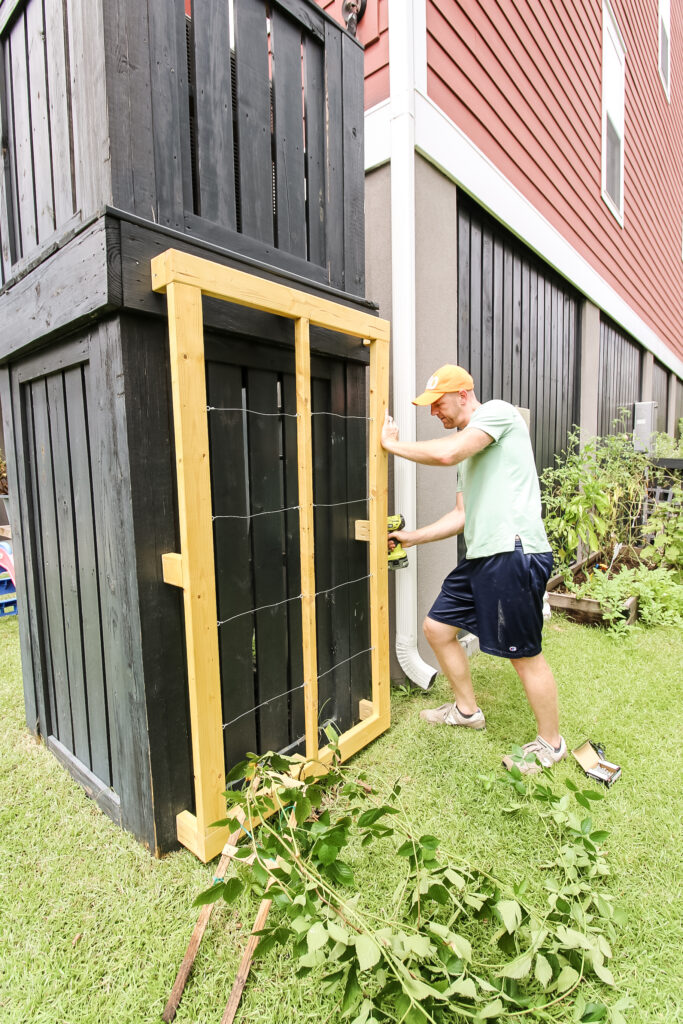
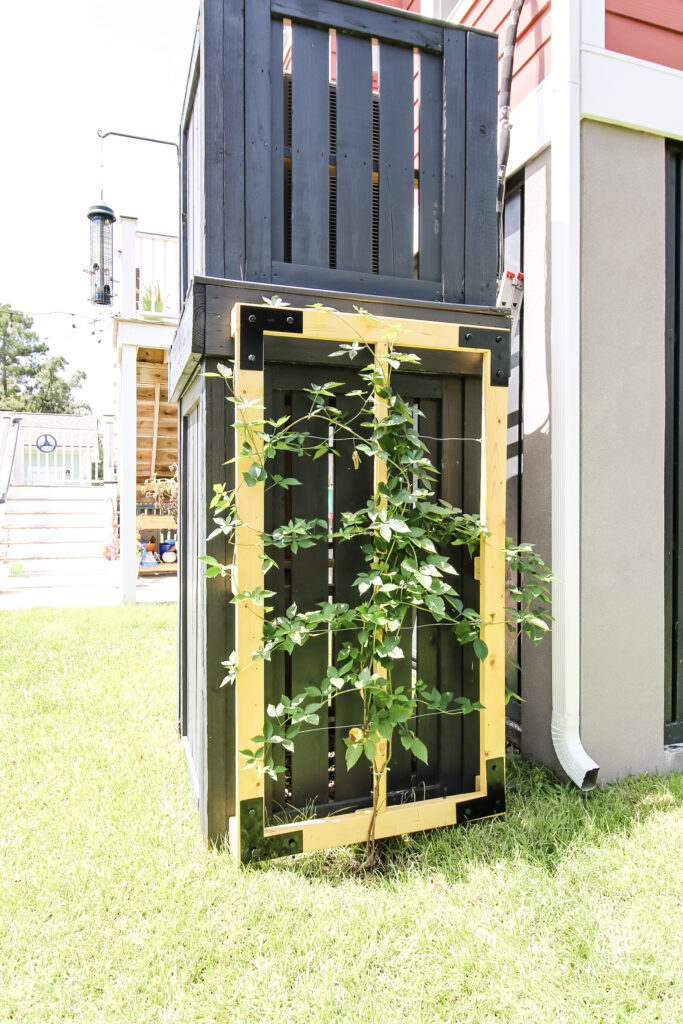
We opted to attach our garden trellis along the elevated air conditioning unit, right next to our vegetable garden.
Here, our plant will get tons of sunlight in the morning and early afternoon, then recover in the afternoon. Plus, it's right next to all our other plants and a hose.
Next, measure your space.
We won't share measurements here, because it's unlikely your space will match ours, but make sure it is tall enough for the plants to grow, and wide enough to make sense.
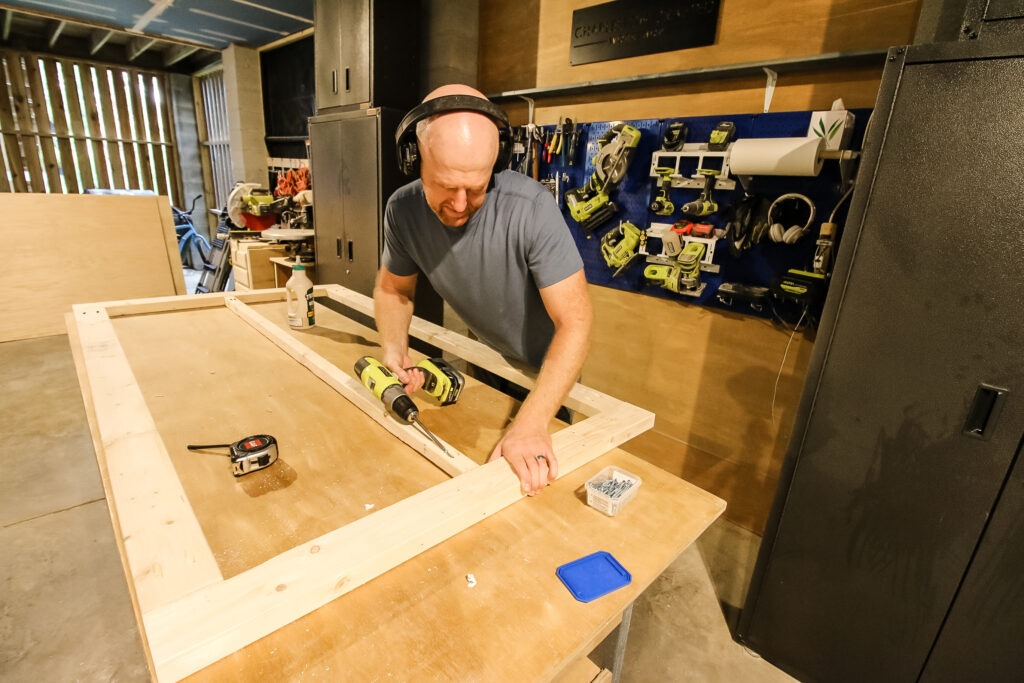
This DIY trellis is a rectangular frame made up of 2x4 lumber, with a 2x2 board vertically down the middle.
We also added 3" cut offs to the back of the frame to attach the trellis to the air conditioning unit and that was it.
For ours, we used a pocket hole jig to drill holes to attach all the boards together, but you could simply drill wood screws through the outside of the boards if that was all you had.
Once it was all put together, we stained the entire thing with the same outdoor finish we used on our garden potting bench.
How to add climbing wire to a trellis
Once the frame was ready, it was time to hang the wire.
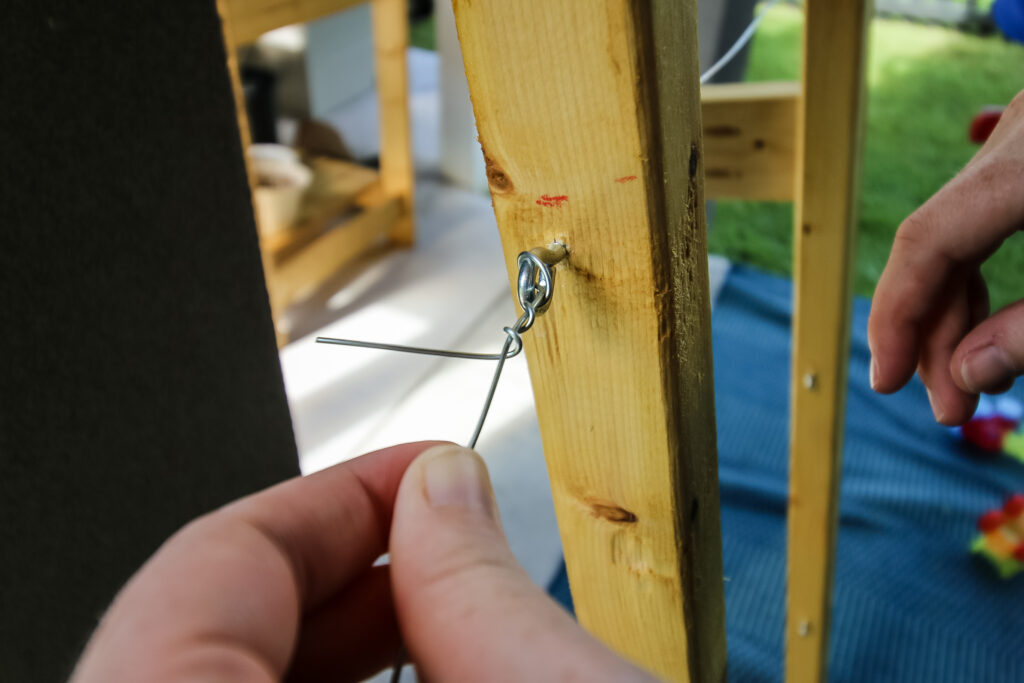
We ordered eye hooks and 18 gauge wire from National Hardware to create our look.
These eye hooks are easy to attach into the inside edge of the 2x4 after drilling a small pilot hole.
There are a number of different options you can do with the wire, from criss cross to diamond or anything in between.
We opted for a modern look for this trellis and decided to align the eye hooks straight across from each other and string the wire horizontally.
We put two eye hooks directly across from each other up and down both sections of the trellis.
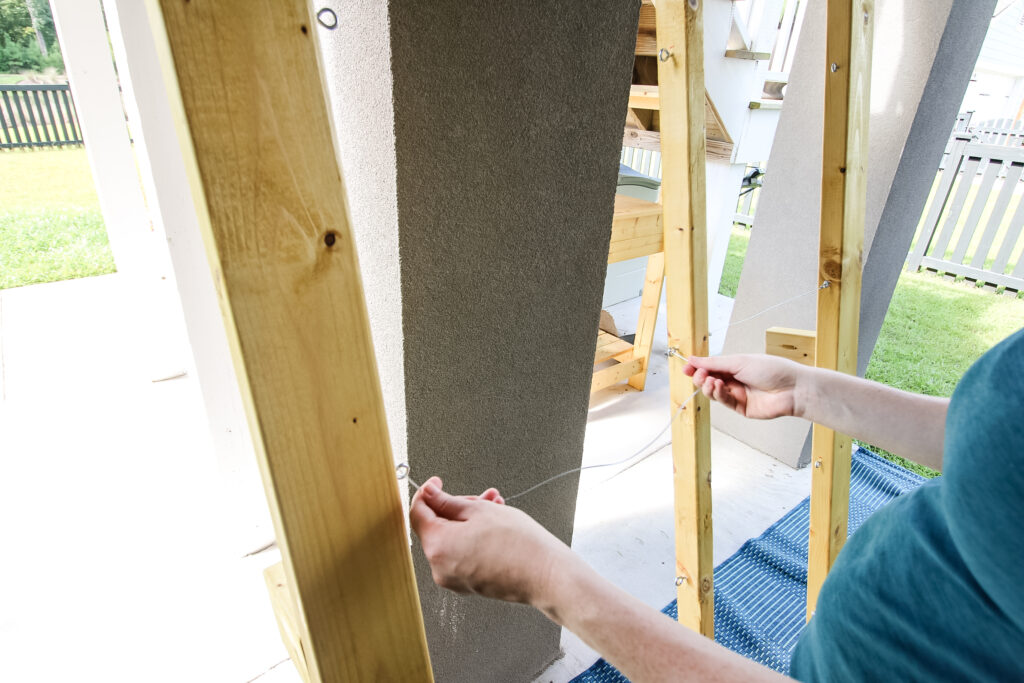
Then, we cut the 18 gauge wire to length, tied one end around one eye hook, then tied the other end to the opposing eye hook.
We repeated this pattern for all the other hooks.
With the frame built and the wire in place, we attached the trellis to the air conditioning framework with screws and began threading our plant.
Our blackberry bush was out of control here and we had just been tying it to the fence posts with string.
We worked the vines around the trellis wires and gave it the best conditions for growth.
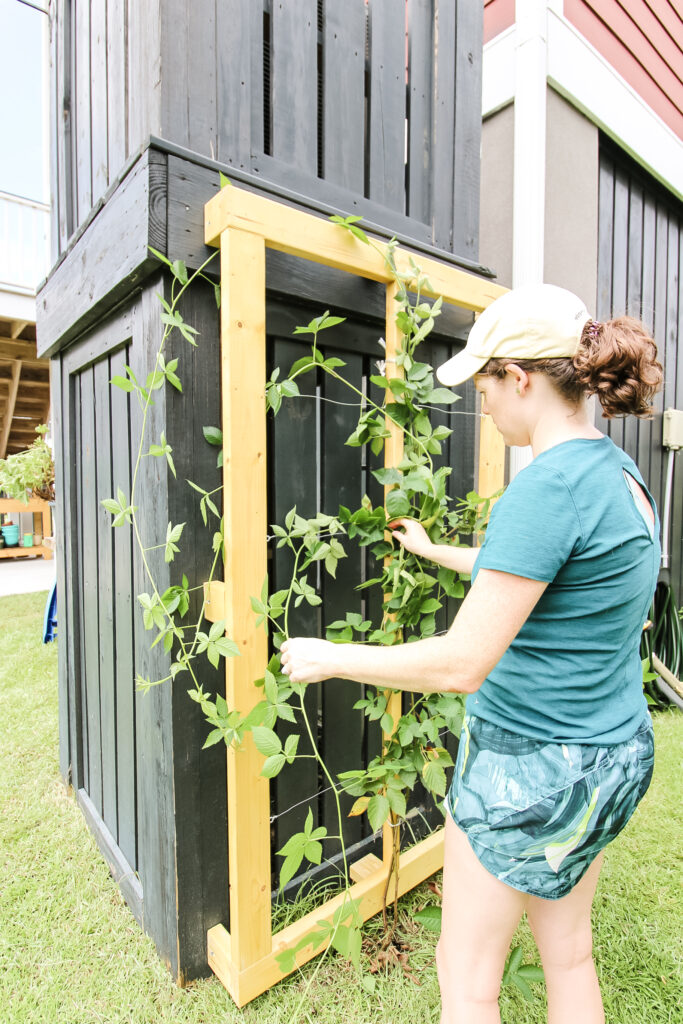
Since installing this, the blackberry bush has begun to naturally wind its way through the wire and is no longer unruly.

Now we just need some blackberries to eat!
This project looks great under our new hanging string lights!
Adding decorative hardware
Once everything was in place and looked good, we wrapped up the look by adding some decorative hardware.
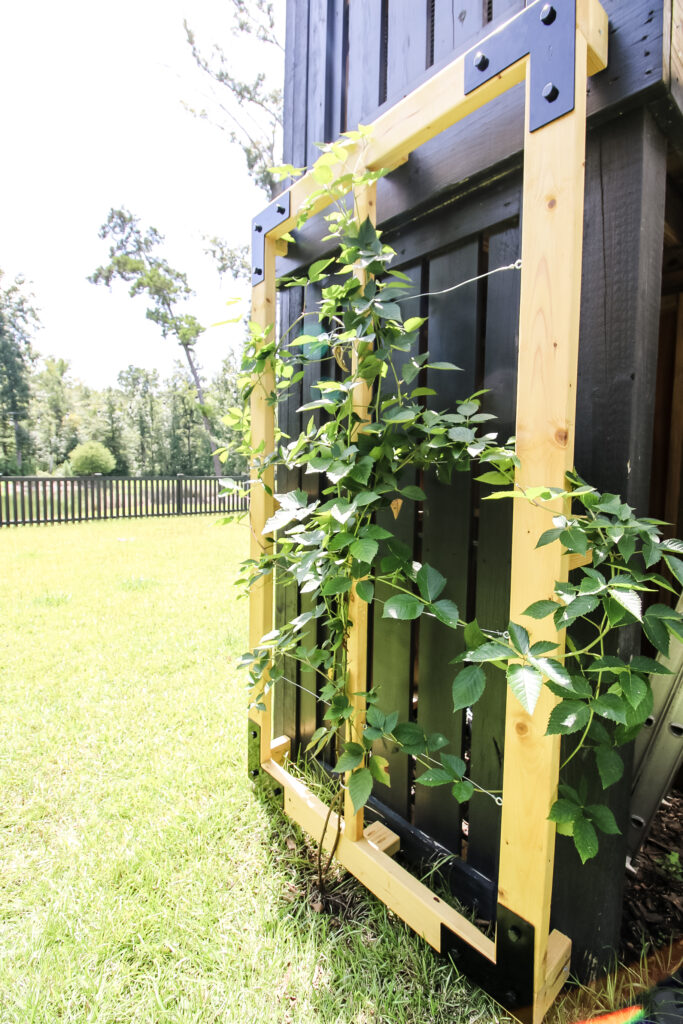
We used an 8" L strap bracket in each corner of the trellis to give it a nice look.
Adding the decorative hardware does nothing for the structural integrity of the trellis, but it looks modern and clean and nice.
We absolutely love how this trellis looks in our yard and how functional it is for helping with our blackberry bush.
This simple wooden wire trellis is easy to recreate for your yard as well!

Looking for something?
We've been doing this since 2012 so we have a LOT of blog posts!
Search stuff like: Ceiling Projects | DIY Plant Stands | Thrift Flips

Hello, I'm Morgan, half of the creative force behind CharlestonCrafted.com! With a passion for DIY that dates back to 2012, I've transformed three homes and now I'm dedicated to helping others craft their dream spaces. Let's turn your house into a home together!