• Skip to primary navigation
  • Skip to main content
  • Skip to primary sidebar
Charleston Crafted
  • DIY
  • Woodworking
  • Popular Posts
  • Blog
  • About
  • Shop
menu icon
go to homepage
  • DIY
  • Woodworking
  • Popular Posts
  • Blog
  • About
  • Shop
search icon
Homepage link
  • DIY
  • Woodworking
  • Popular Posts
  • Blog
  • About
  • Shop
×
Home » Building

DIY Men's Watch Holder

Published: Nov 11, 2019 · Modified: Feb 5, 2024 by Sean · As an Amazon Associate, we earn from qualifying purchases. This site contains affiliate links. ·

Looking for a present for dad for the holidays? How about making him this DIY watch and accessories display? He'll love it!

Everyone needs a gift for dad this holiday season. Men are notoriously difficult to shop for because we usually say we don't need anything.

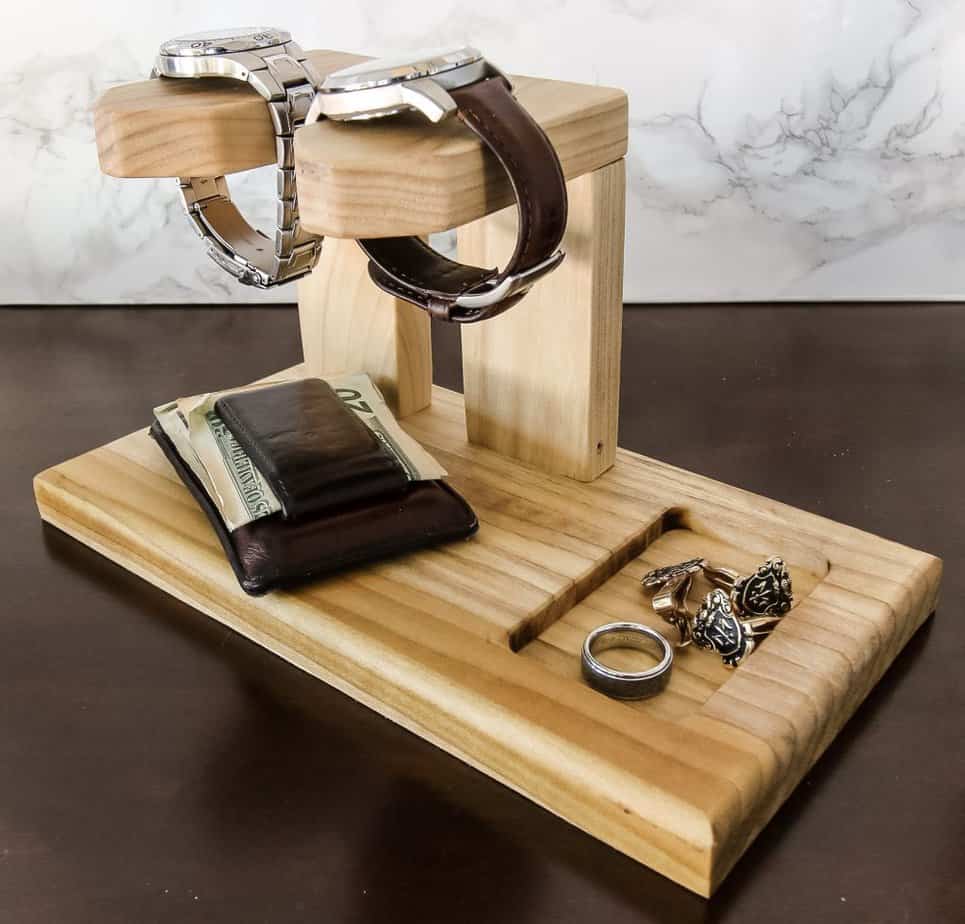
Guys are also notorious for just dropping their keys and wallet and watch all in a pile by the front door. This DIY watch and accessory holder will solve these problems for the man in your life!

DIY Watch Holder - Charleston Crafted

DIY Watch and Accessory Holder

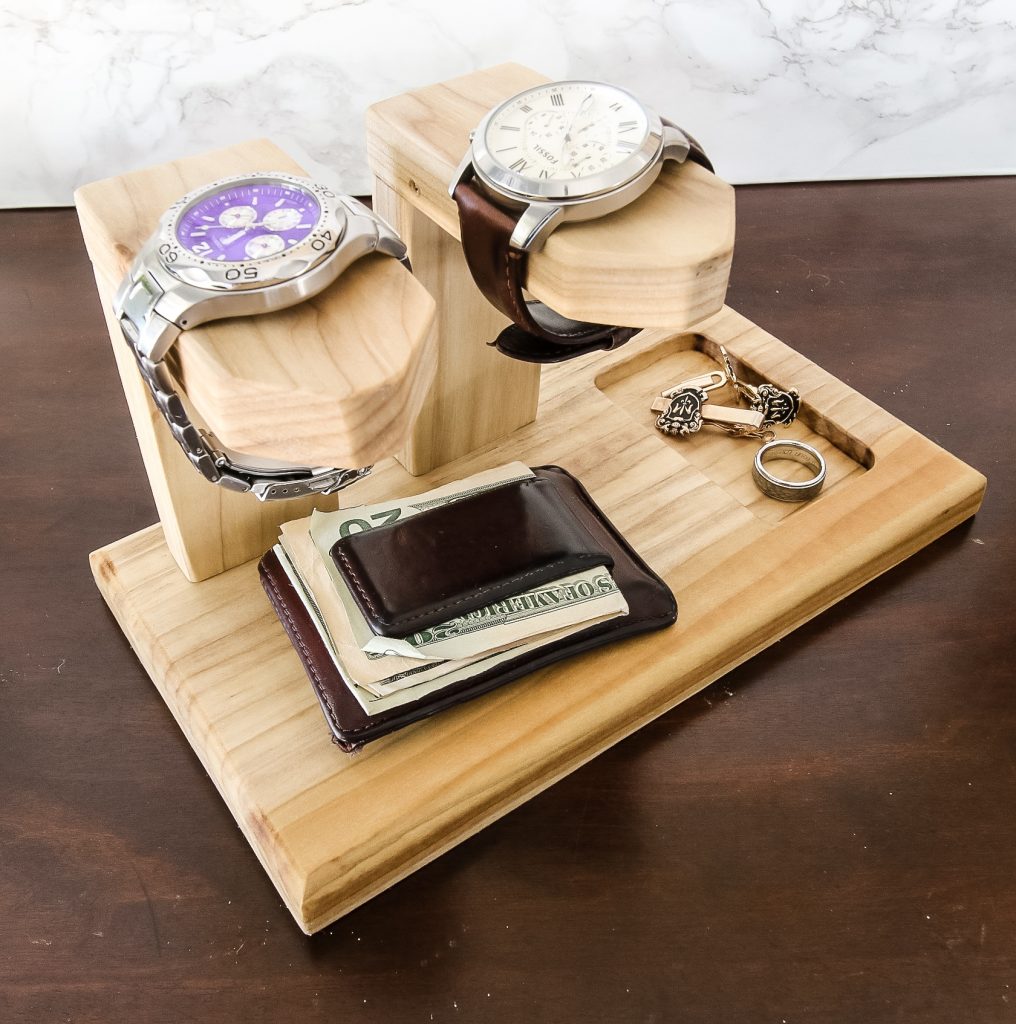
This is a great simple build project that you can do pretty quickly and have wrapped before the next holiday! This organizer is perfect for holding a couple of watches, rings, cufflinks and a wallet.

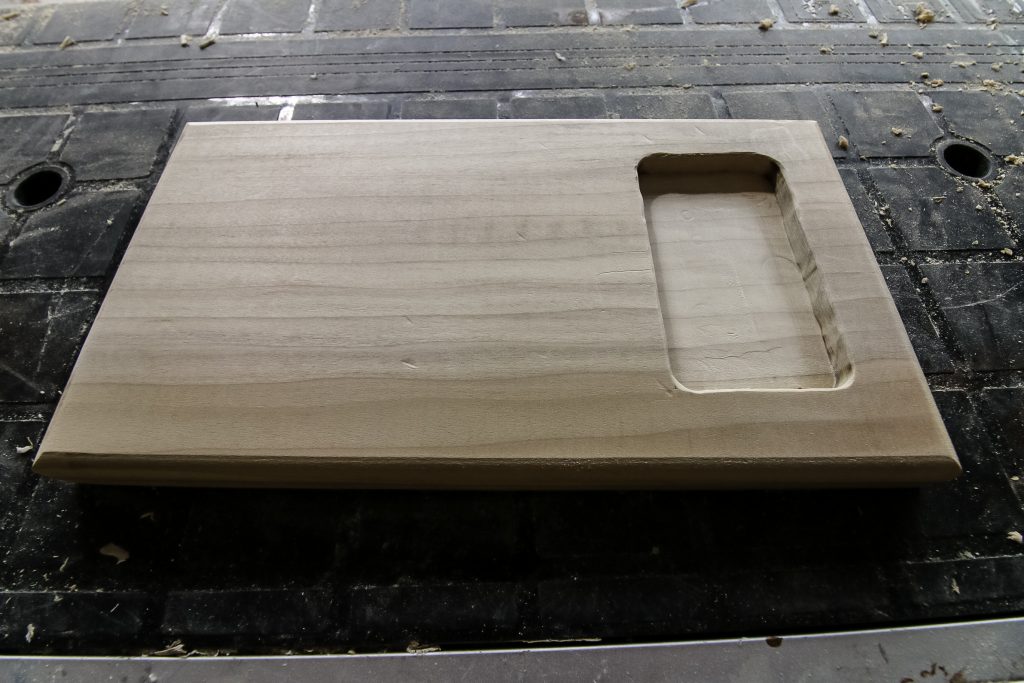
Step one: route base

It's built starting with a base that has a routed out section for jewelry. You can also route around the exterior to give a finished look.

You can customize a little bit how big you want this indented portion to be, but our measurements are in the plans.

Base of watch holder with dish

Step two: pocket holes

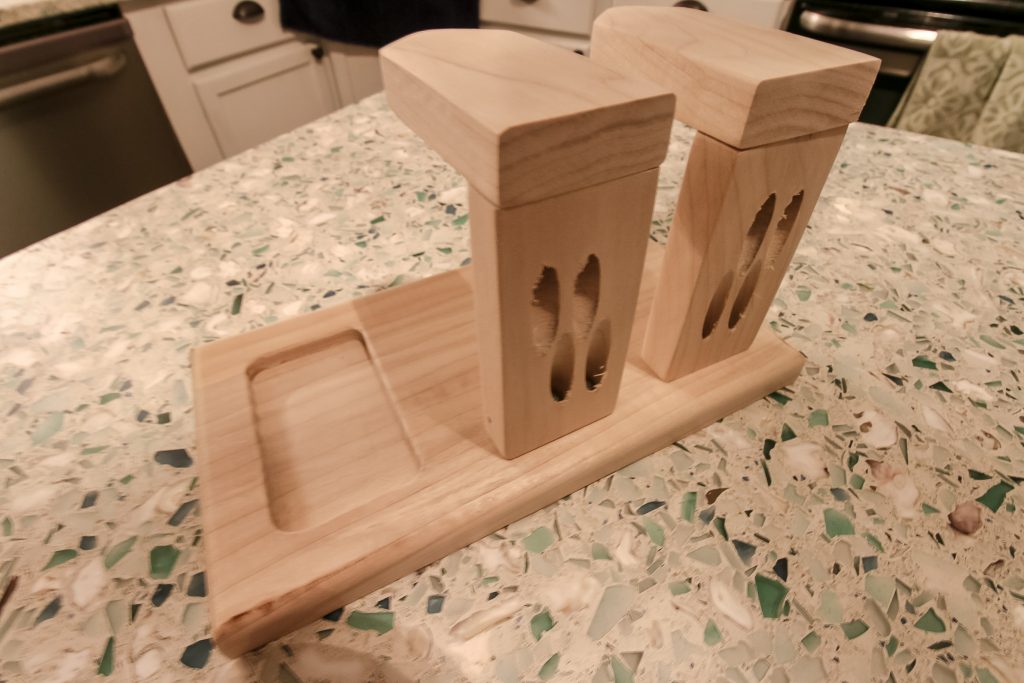
This organizer also has two specific racks for watches. These holders are made using Kreg pocket hole joinery.

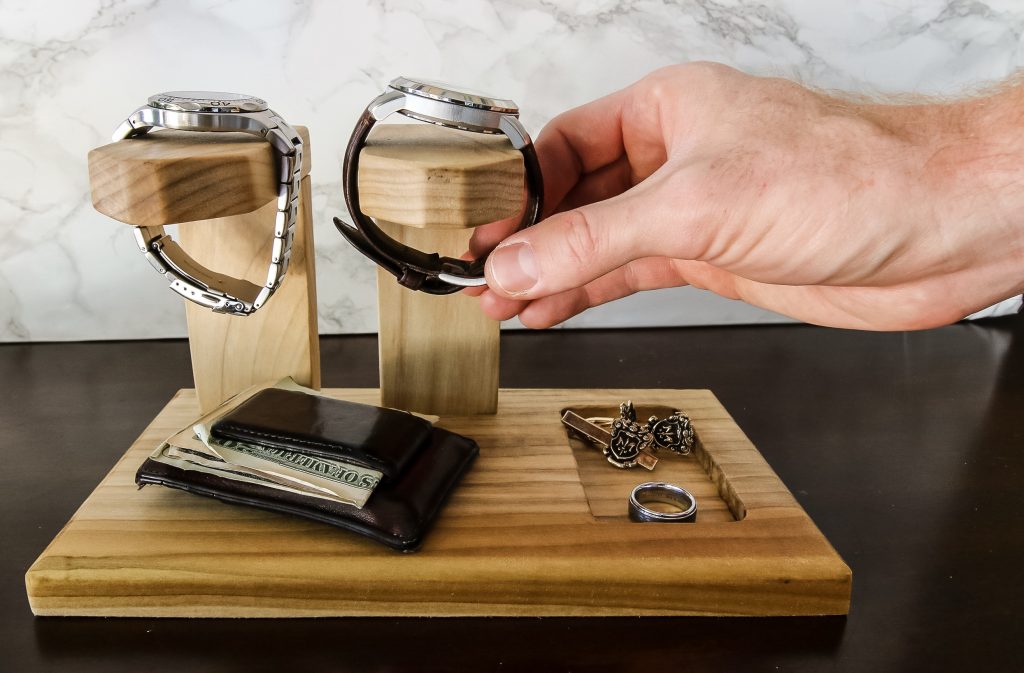
We constructed it by drilling pocket holes with our Kreg 720 Pro pocket hole jig. The watch holders are upside down L's, attached to the base.

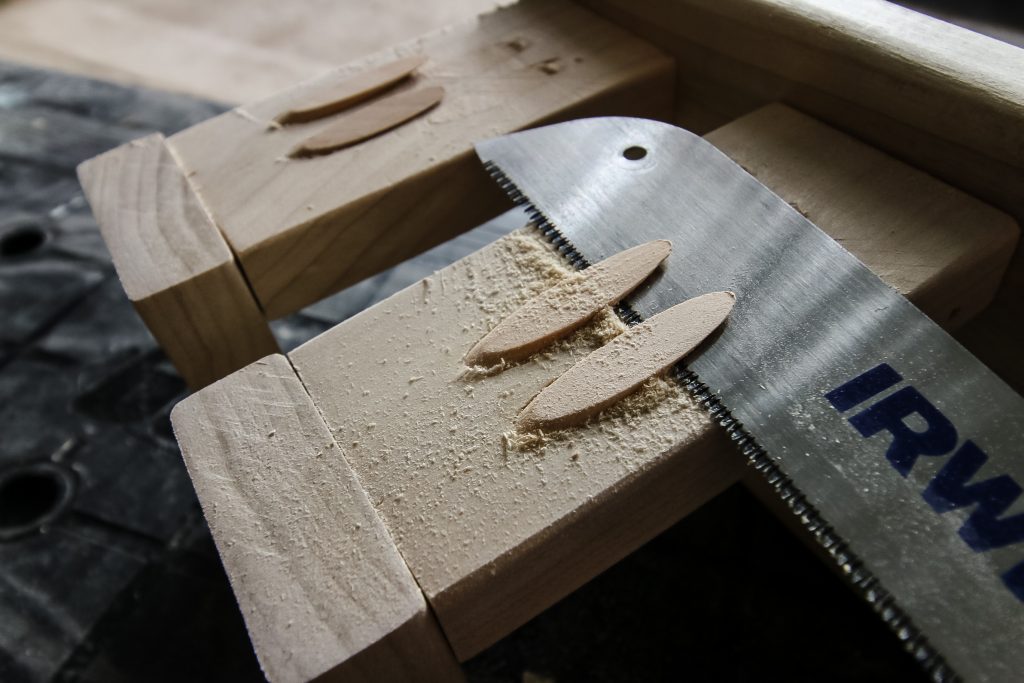
We cut the pieces to be the width of a standard watch face and then formed a right angle. Each top piece also has an angle cut on it to give it a more finished look.

Since this watch holder is a gift and will be prominently displayed in a home, we filled the holes using Kreg pocket hole plugs. They fill the holes perfectly and look so much more finished than an open hole.

Watch racks attached to base of watch holder
Cutting pocket hole plugs

Step three: oil finish

When the whole thing was complete, we oiled it down and it looks beautiful!

Finished watch holder

Interested in the Kreg Jig? Click here to read our full Kreg Jig review and to see all of our Kreg Jig projects.

New to the Kreg Jig? Here is a step by step guide on how to use a Kreg Jig!

OR grab our FREE Kreg Jig Cheat Sheet here! Download the cheat sheet!

DIY mens watch and accessory holder Woodworking Plans

We partnered with our good friends at Kreg to bring you the full plans for this men's accessory holder gift idea. Using Kreg pocket holes makes this project sturdy and no one's watch is falling down.

You can use a Kreg 720 Pro and 1 ¼" Kreg screws to make this project. We also did the entire project on our Kreg Mobile Project Center, which allowed us to clamp everything while we were working and have an easy work surface.

The uniformity and precision of using Kreg systems for a project like this makes it so much easier.

Watches and accessories on holder
Close up of accessories dish

We put the entire set of project plans for this men's accessory holder KregTool.com where you can get our step-by-step cuts, measurements and pocket hole placements.

So head over to Kreg’s BuildSomething.com to get the free plans for how to build this DIY watch and accessory holder for a man in your life. Their website is full of easy, helpful plans from lots of amazing builders. 

We’ve got lots of other plans on there (like our waterfall edge cheese board, geometric coffee table, quick and easy ottoman, under bed storage, plywood desk and many more), so be sure to check them out.

Reaching for watch

Interested in the Kreg Jig? Click here to read our full Kreg Jig review and to see all of our Kreg Jig projects.

Charleston Crafted Signature

Follow us on:
Pinterest | Instagram | TikTok | YouTube | Facebook | Amazon Storefront | LTK Shop

Looking for something?

We've been doing this since 2012 so we have a LOT of blog posts!
Search stuff like: Ceiling Projects | DIY Plant Stands | Thrift Flips

Charleston Crafted logo banner
Sean headshot cropped
Sean

Hey there, I'm Sean, the woodworking enthusiast and builder behind CharlestonCrafted.com! Since 2012, I've been sharing the magic of turning raw materials into beautiful creations. I love teaching others the art and satisfaction of woodworking and DIY. I try to inspire fellow crafters to make something extraordinary out of nothing at all.

More Building

  • How to build a DIY gate pergola- Charleston Crafted
    How to build a DIY gate pergola
  • DIY modern rolling storage table - Charleston Crafted
    DIY modern rolling storage table
  • DIY folding desk for walking pad - Charleston Crafted
    DIY folding desk for walking pads
  • DIY cube storage console table - Charleston Crafted
    DIY cube storage console table

Reader Interactions

Comments

  1. Matt Taylor says

    October 23, 2020 at 6:46 am

    How do you route the tray. Do you just freehand it or can you build a frame for your router. Also, if I want to add a round charging pad, how would I route that out?

    • Sean says

      October 23, 2020 at 3:01 pm

      I marked out the space I wanted with a pencil and then freehanded it with a steady hand. If you wanted a round charging pad there, I would trace the charging pad and the wire and then route that out at the exact depth of the charging pad.

Trackbacks

  1. 34 Affordable DIY Christmas Gift Ideas | Sunny Side Design says:
    November 14, 2020 at 12:44 am

    […] The tutorial and plans are available from Morgan & Sean over at CharlestonCrafted.com […]

Primary Sidebar

Charleston Crafted about us image

Hey y'all!

We are Morgan & Sean McBride and we are crafting our home together in Charleston, South Carolina.

More about us

Popular Posts

  • DIY Coffered Ceiling
    DIY Coffered Ceiling
  • How to Make DIY Concrete Pumpkins via Charleston Crafted
    How to Make DIY Concrete Pumpkins
  • How to Make a Cupid's Arrow Valentine's Day Wall Hanging with felt on the Cricut
    How to make a Cupid's Arrow Valentine's Day Wall Hanging
  • Our Tropical Oasis - A backyard Hammock area - Charleston Crafted
    Our Tropical Oasis

Recent Posts

  • fisherman aesthetic home inspiration
    Fisherman Aesthetic Decor for Your Home
  • Senix Tools Review- Charleston Crafted
    Are Senix power tools any good?
  • Your Weekend To-Do List: 15 Things to Do for Summer Home Upkeep
    Your Weekend To-Do List: 15 Things to Do for Summer Home Upkeep
  • How to stain wood with RIT dye - step by step instructions
    How to stain wood with RIT dye

Privacy Policy

Footer

↑ back to top

Navigation

  • Home
  • Blog
  • Contact Us
  • Terms of Use
  • Disclaimer

Newsletter

  • Sign up for emails and updates
  • Follow us on Instagram
  • Work with Us

Browse by Category

  • Woodworking
  • Home Projects
  • Paint Colors
  • Room Reveals

© 2025 The Charleston Crafted Blog LLC DBA “Charleston Crafted” and “CharlestonCrafted” (also known as N/A) / All Rights Reserved.
Official Website: (Charleston Crafted)
Registered in USA (Co. Reg. No.: 565586)
Address: Charleston, USA 29414, South Carolina
Contact Phone: Not applicable — contact is via email: sean@charlestoncrafted.com

DISCLAIMER: The content on this website is provided for general informational purposes only and is not intended as professional advice. The Charleston Crafted Blog LLC and The Charleston Crafted Blog LLC make no representations or warranties—express or implied—regarding the accuracy, completeness, or suitability of the information contained herein. Any reliance you place on this information is strictly at your own risk. In no event shall The Charleston Crafted Blog LLC or The Charleston Crafted Blog LLC be liable for any loss or damage, including without limitation, indirect or consequential loss or damage, arising from the use or inability to use this website. This website is the official website of The Charleston Crafted Blog LLC.

AFFILIATE DISCLOSURE: This website contains affiliate links. If you click through and make a purchase, we may earn a commission at no extra cost to you.

As an Amazon Associate, I earn from qualifying purchases.

Site Editor: Morgan Smith McBride

Copyright © 2025 Charleston Crafted