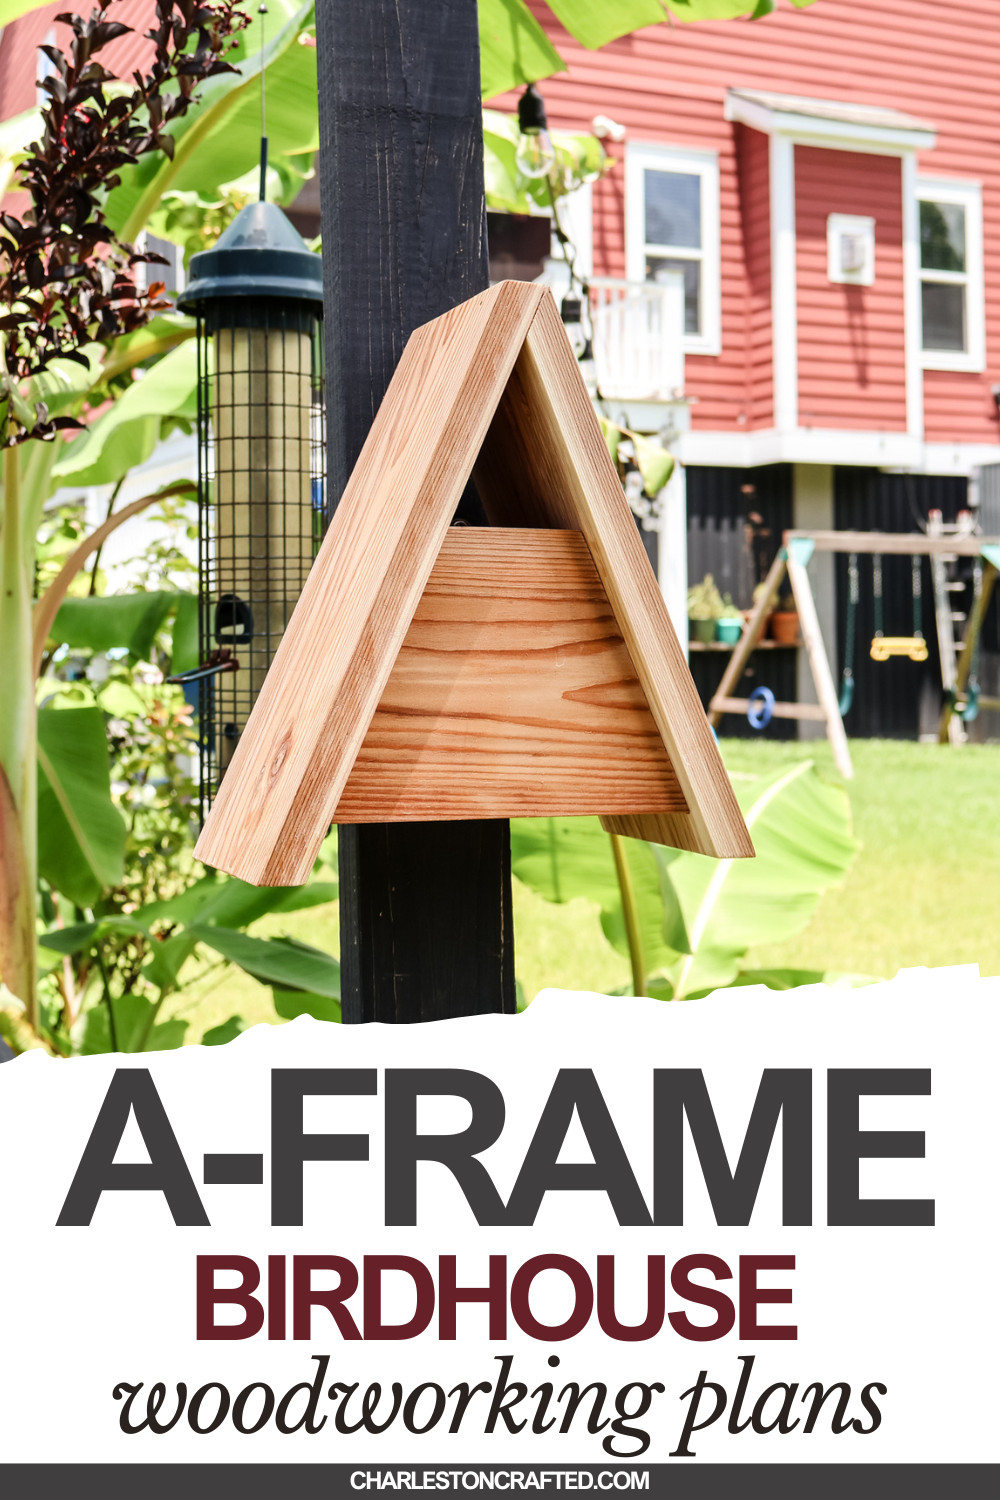
This modern A-frame birdhouse is the perfect addition to any yard or garden! It’s easy to build, looks sleek in your yard and you’ll have a new family of birds moving in in no time!
This post is sponsored by Kreg Tool. All opinions are our own and our opinion is that we love Kreg products. Thank you for supporting the brands that make Charleston Crafted possible!
We've really been getting our yard to start looking how we want it after four years of being in this house. Sometimes, nature takes time!
We've finally got a bunch of trees and plans growing in enough that they look established, our gardens are thriving, and we've been adding some new structures like this DIY gate pergola to add dimension.
One thing we love about our house is that we live next to the woods, so we get all kinds of animals in our yard. Obviously, that means lots and lots of birds, who have been making nests in our trees.
So, I wanted to build them a modern looking birdhouse to start setting up their families!
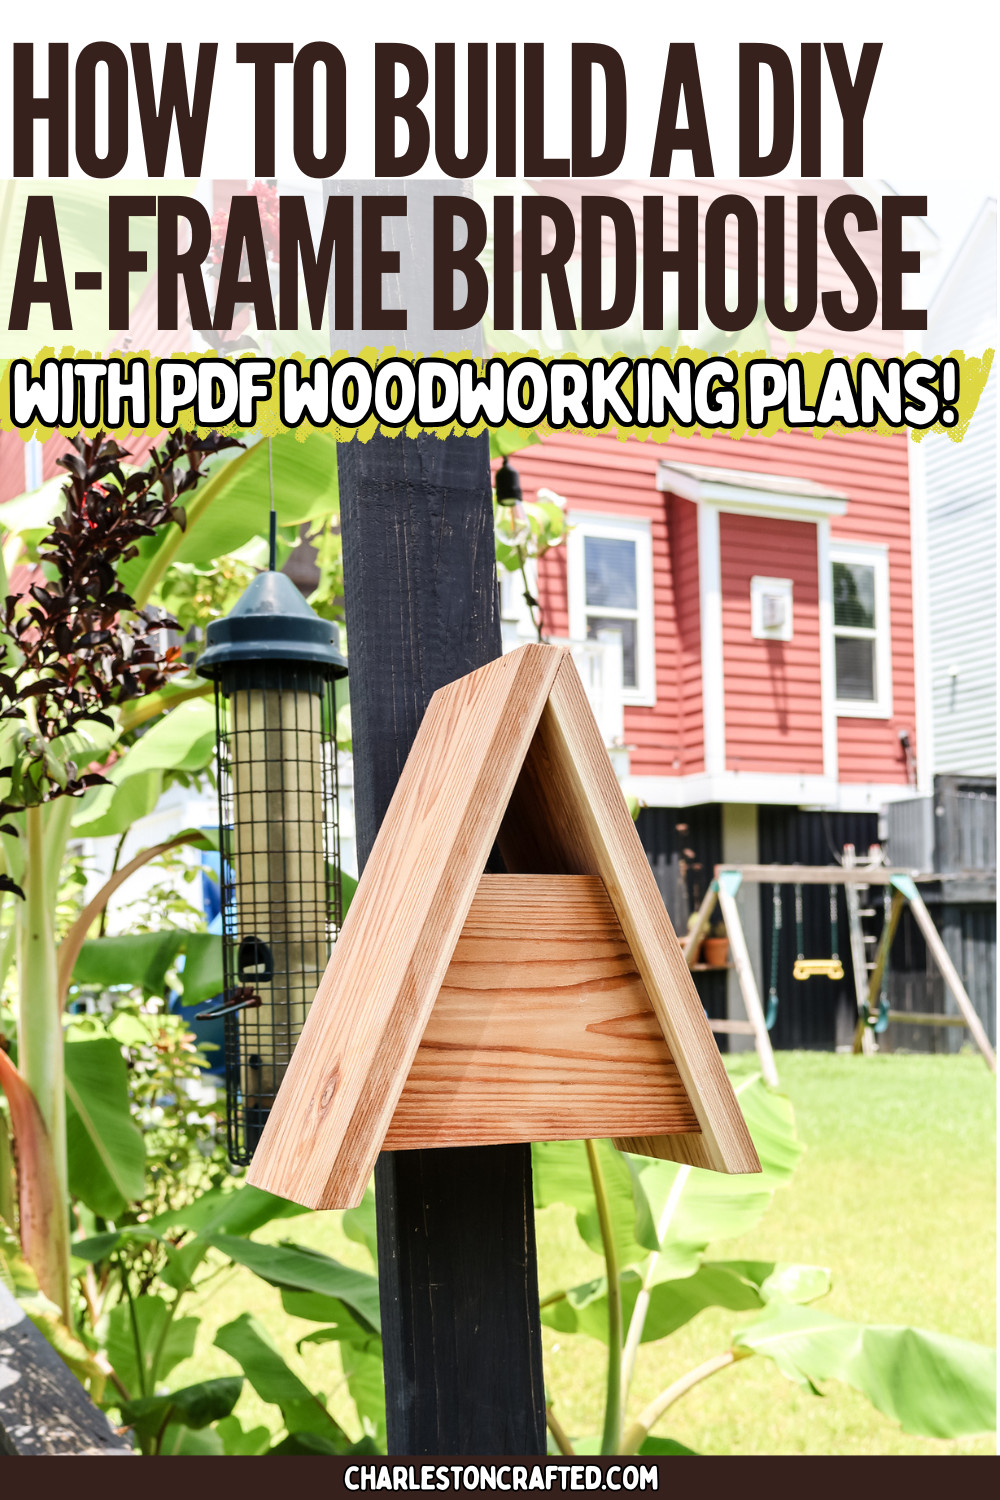
How to build an A-frame birdhouse
One of our most viral projects of all time was our DIY squirrel picnic table, which we built during the pandemic and people went "nuts" for. We've always loved it and I wanted to start making some new animal projects.
This is going to be the first birdhouse in a series of simple, modern birdhouse tutorials that I'm going to bring to you over the course of this summer!
Be sure to check out our DIY bug hotel too!
Materials needed:
Here's the materials you'll need to build this birdhouse. To get the full list of materials and the cut list and instructions, make sure you download my FREE woodworking plans for this A-frame birdhouse!
- 1x6 cedar board
- 1 ¼" Kreg pocket hole screws
- Keyhole hangers
- Wood glue
- Stain or paint
- Kreg 720 pocket hole jig
- Kreg 90 degree driver

Step one: make cuts and drill pocket holes
I always start every project by making all the cuts first. I find it easier to make my woodworking plan and know all the cuts I need, then do them all in a bunch.
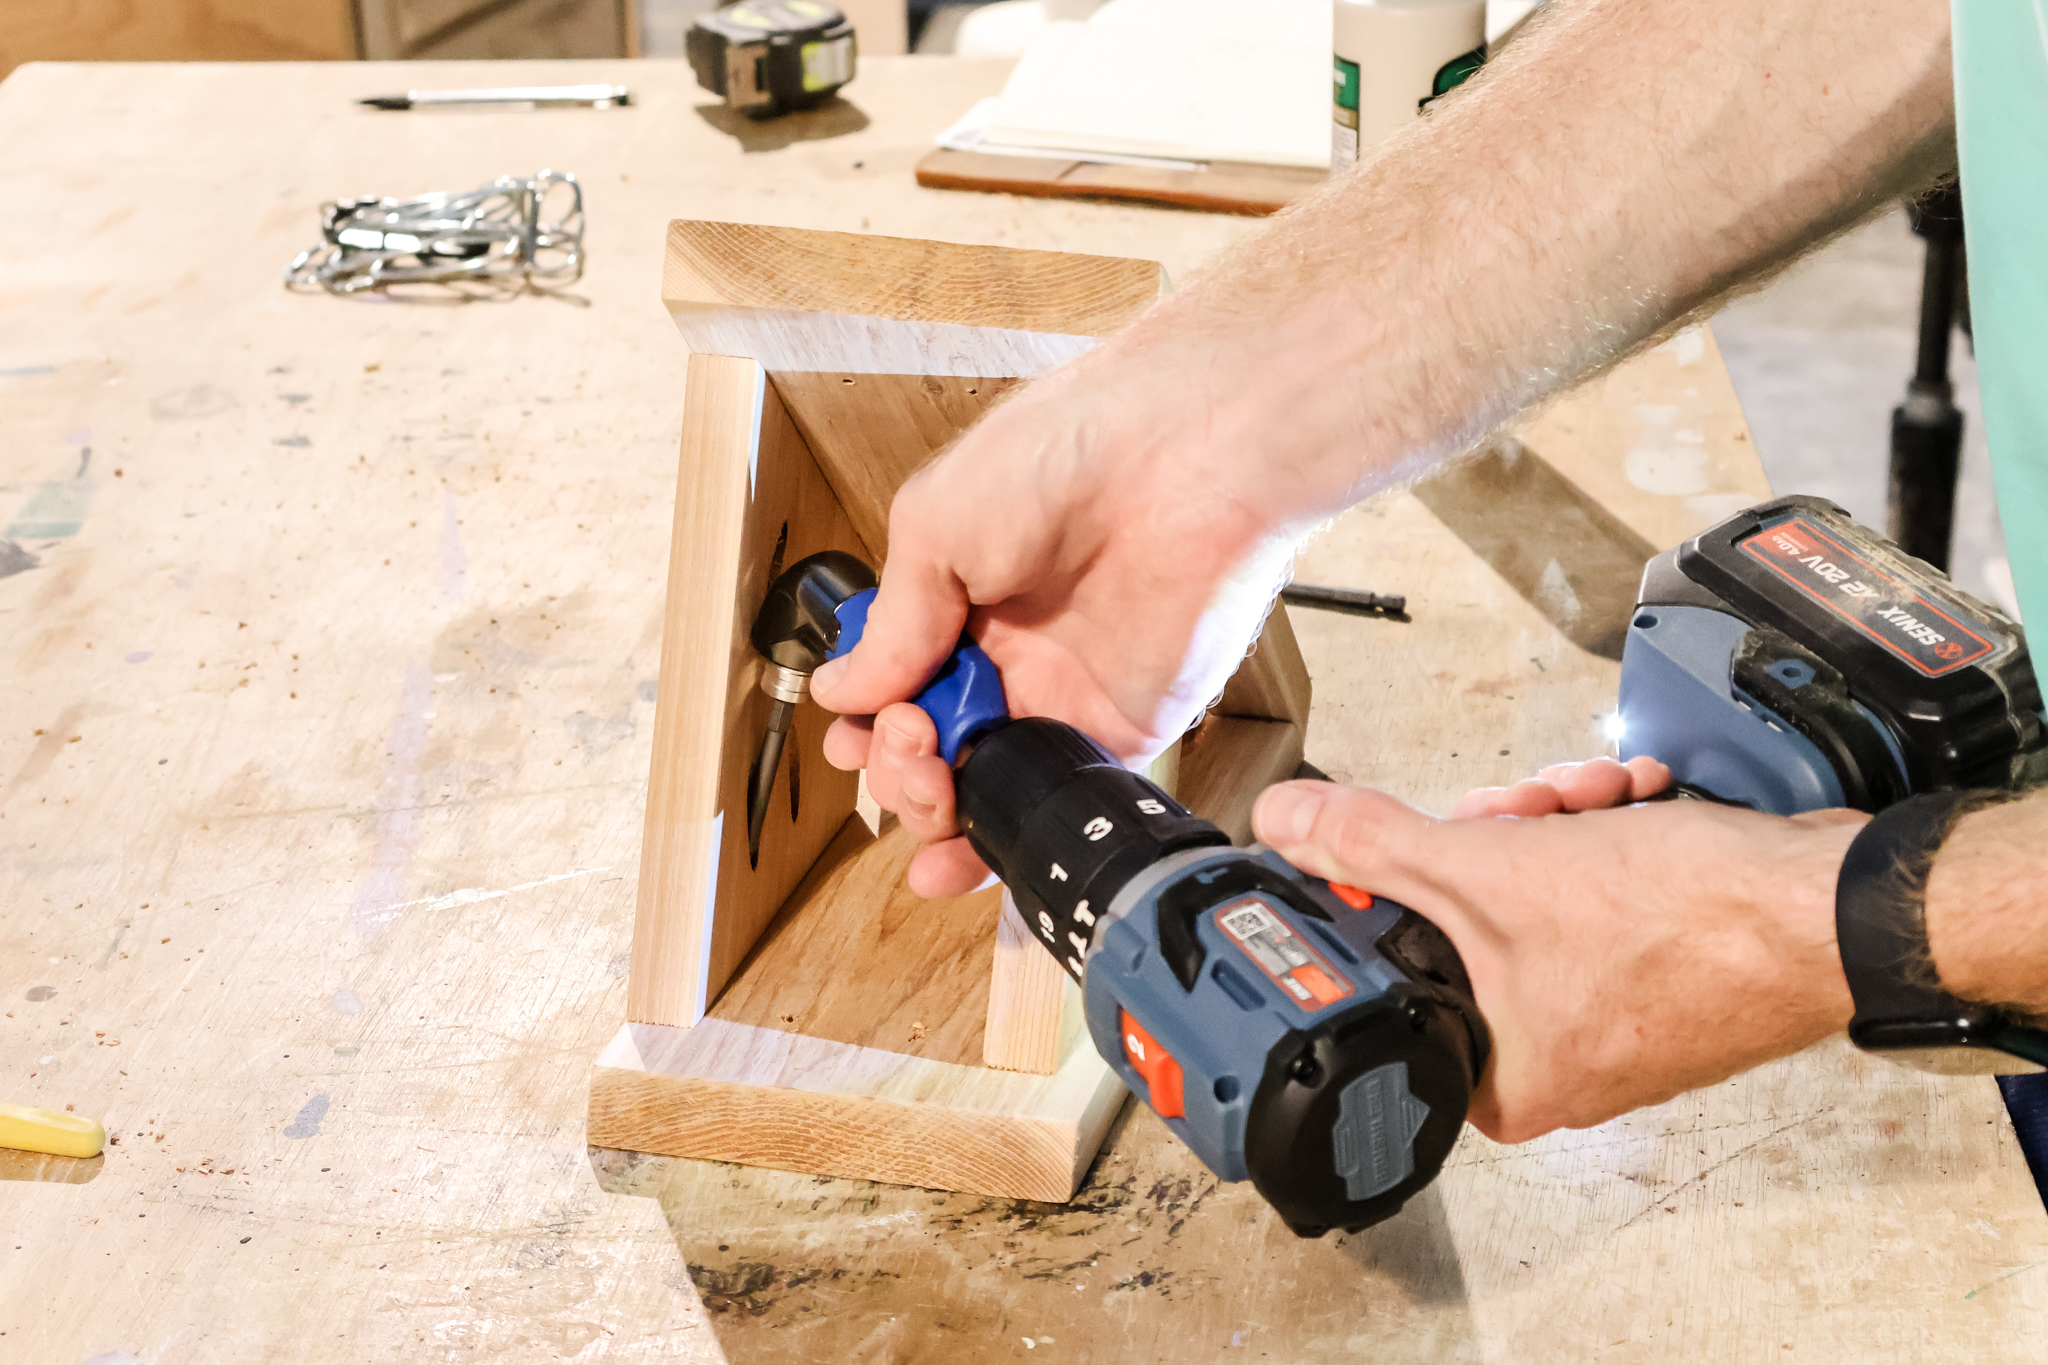
After the cuts are made, I make all my pocket holes next. For this project, I used my Kreg 720 Pro Pocket Hole Jig. It's my go to jig for standard projects, especially when working with smaller pieces like this project.
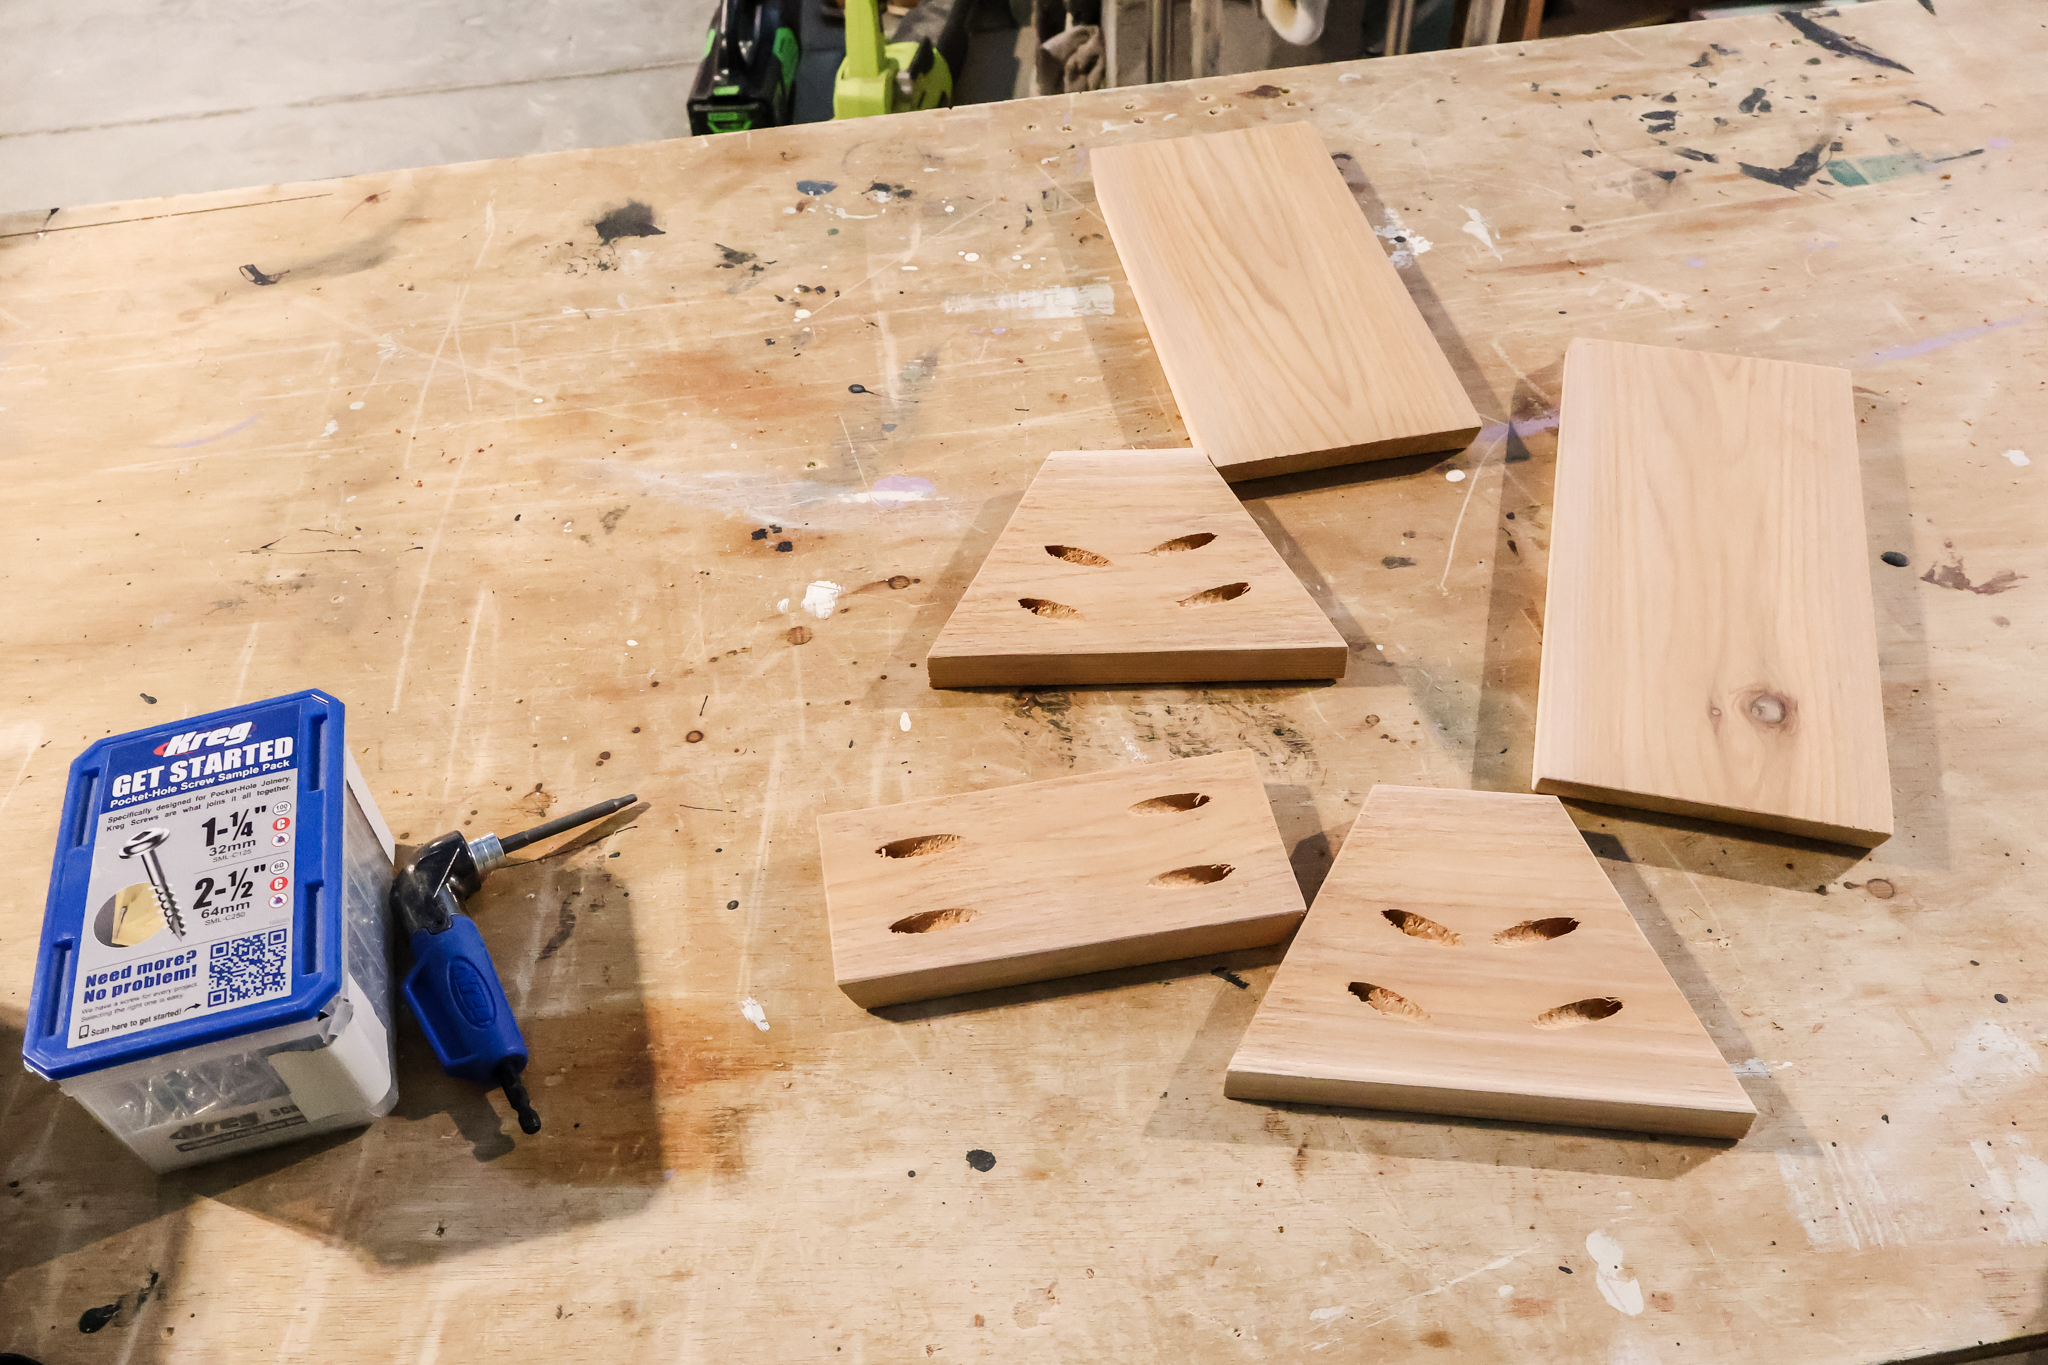
The Kreg 720 Pro clamps to my workbench and then provides a big work surface for drilling. I love the AutoMaxx clamp system and how it adjust to different wood thicknesses automatically.
I have all of the pocket hole locations marked out in my woodworking plans for this project for you to copy. One note is that it's possible to drill pocket holes on angled cuts, but I find it better to set the collar thickness on the drill be to ½" on ¾" wood when drilling on an angle so it doesn't blow out the edge.
Step two: assemble body of birdhouse
After everything is sanded and ready, I assembled the birdhouse. I've got full step-by-step instructions with computer imagery in my A-frame birdhouse woodworking plans for you to see, but here's the overview!
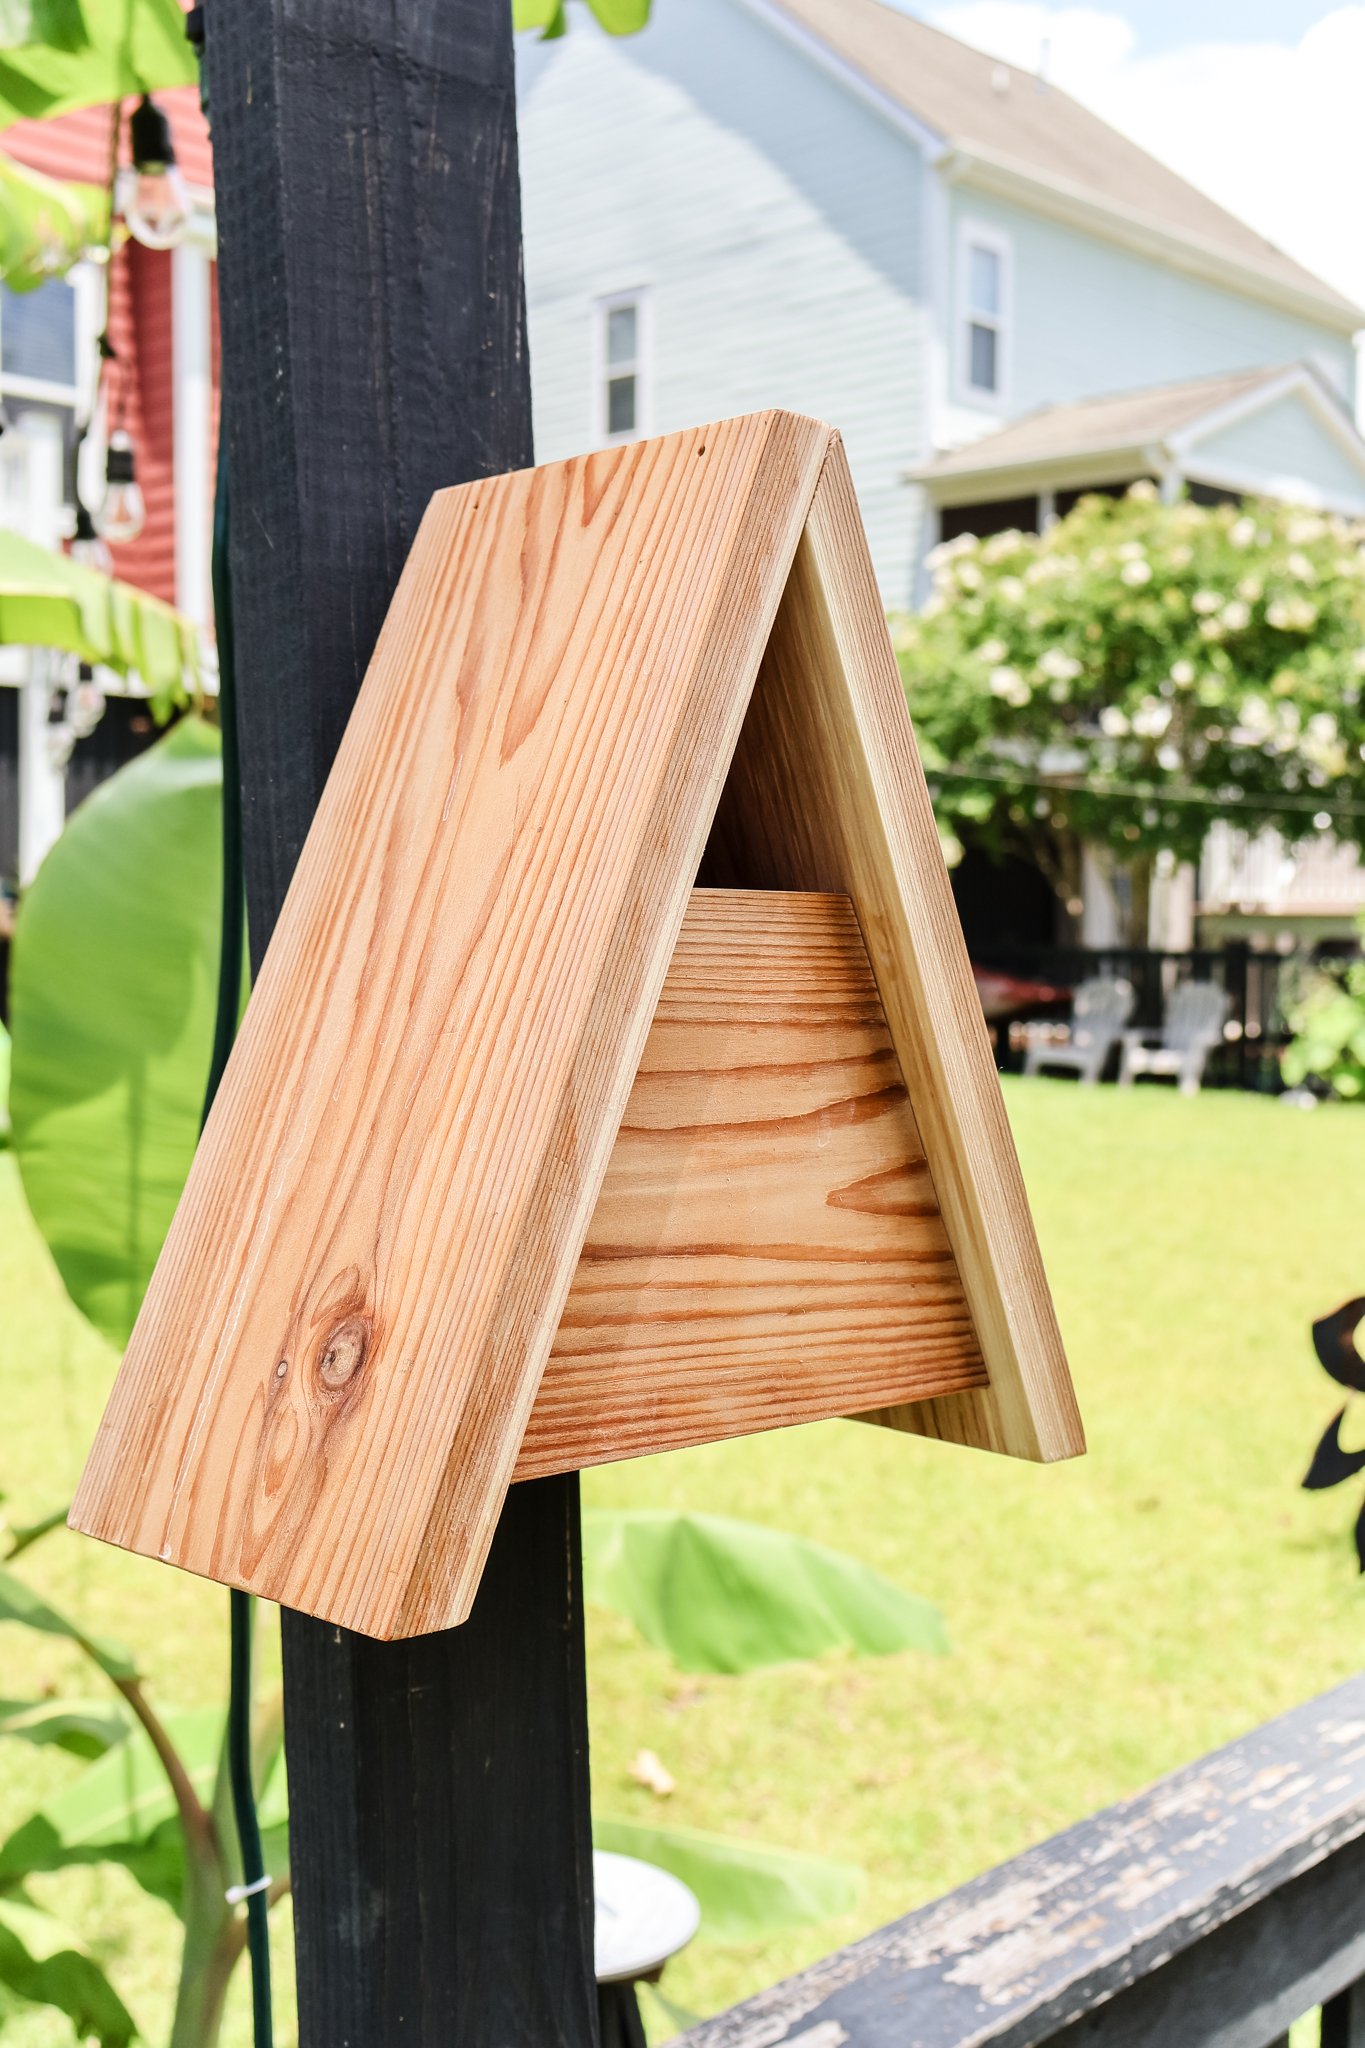
Start by attaching the two sides together and then adding the front and back pieces. Since this is a tight spot, I used my Kreg 90 degree pocket hole driver to get all the screws driven in. I love how this works for those tight spots!
Finally, I added a bottom, but didn't glue that in. That's so that I can unscrew the bottom and drop it out to clean the birdhouse out in between families!

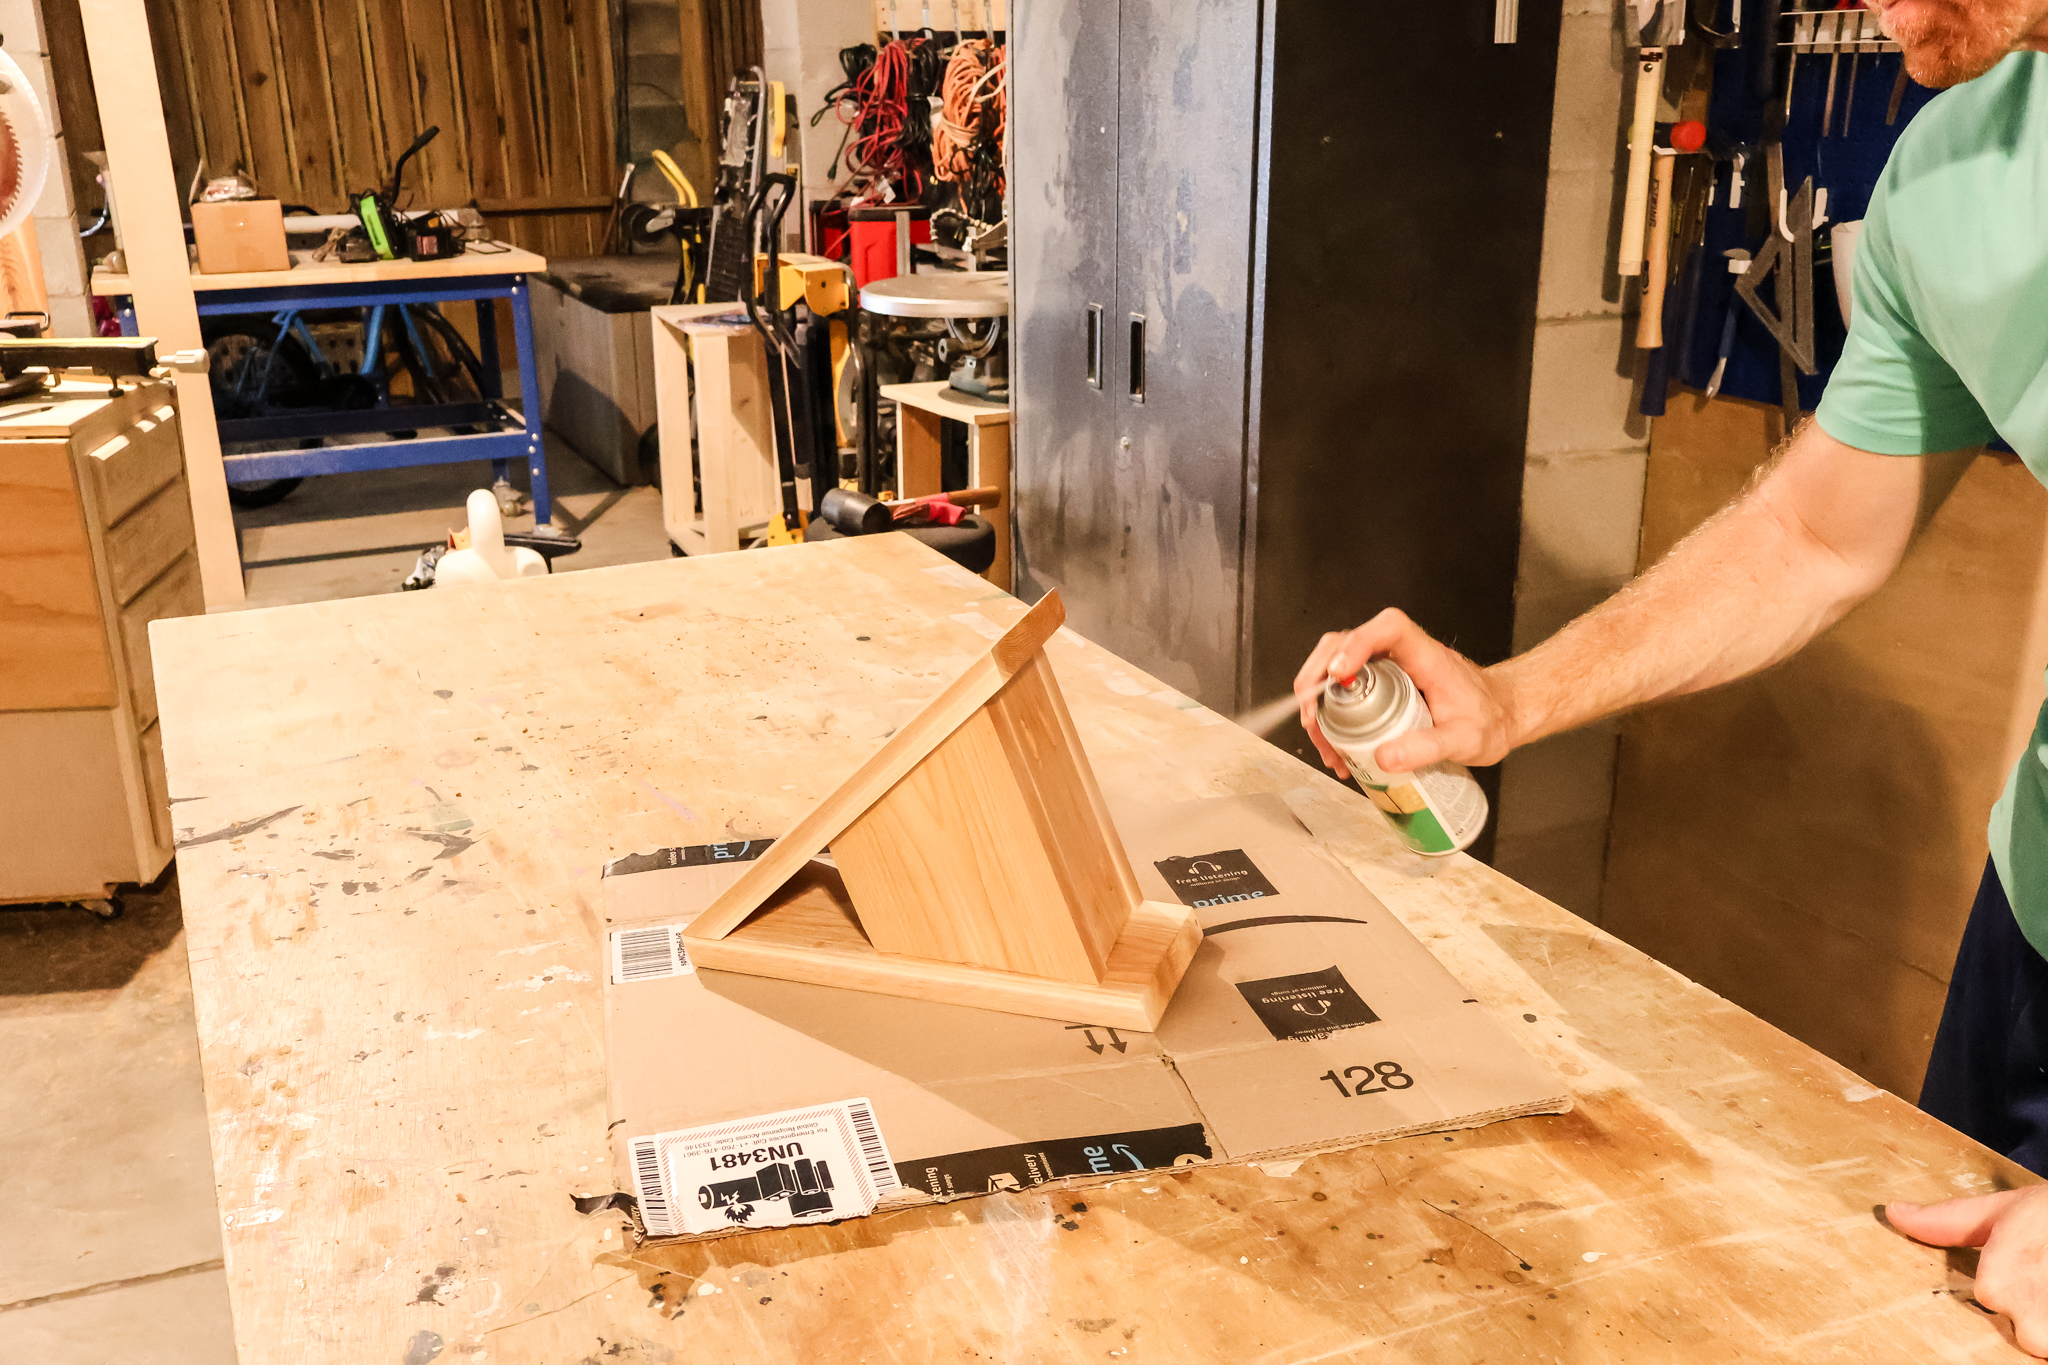
Step three: stain/seal/paint
After the house is built, you can stain, seal or paint it. I used cedar boards for this so that it was naturally rot-resistant and wouldn't technically need anything.
I did add an outdoor sealant spray to the outside of the birdhouse so that it would add a richer color and provide a little more protection long term.
Step four: hang
To hang the birdhouse, I added two screws to the back piece. Then, I installed two keyhole hangers onto a post in our yard holding up our string lights.
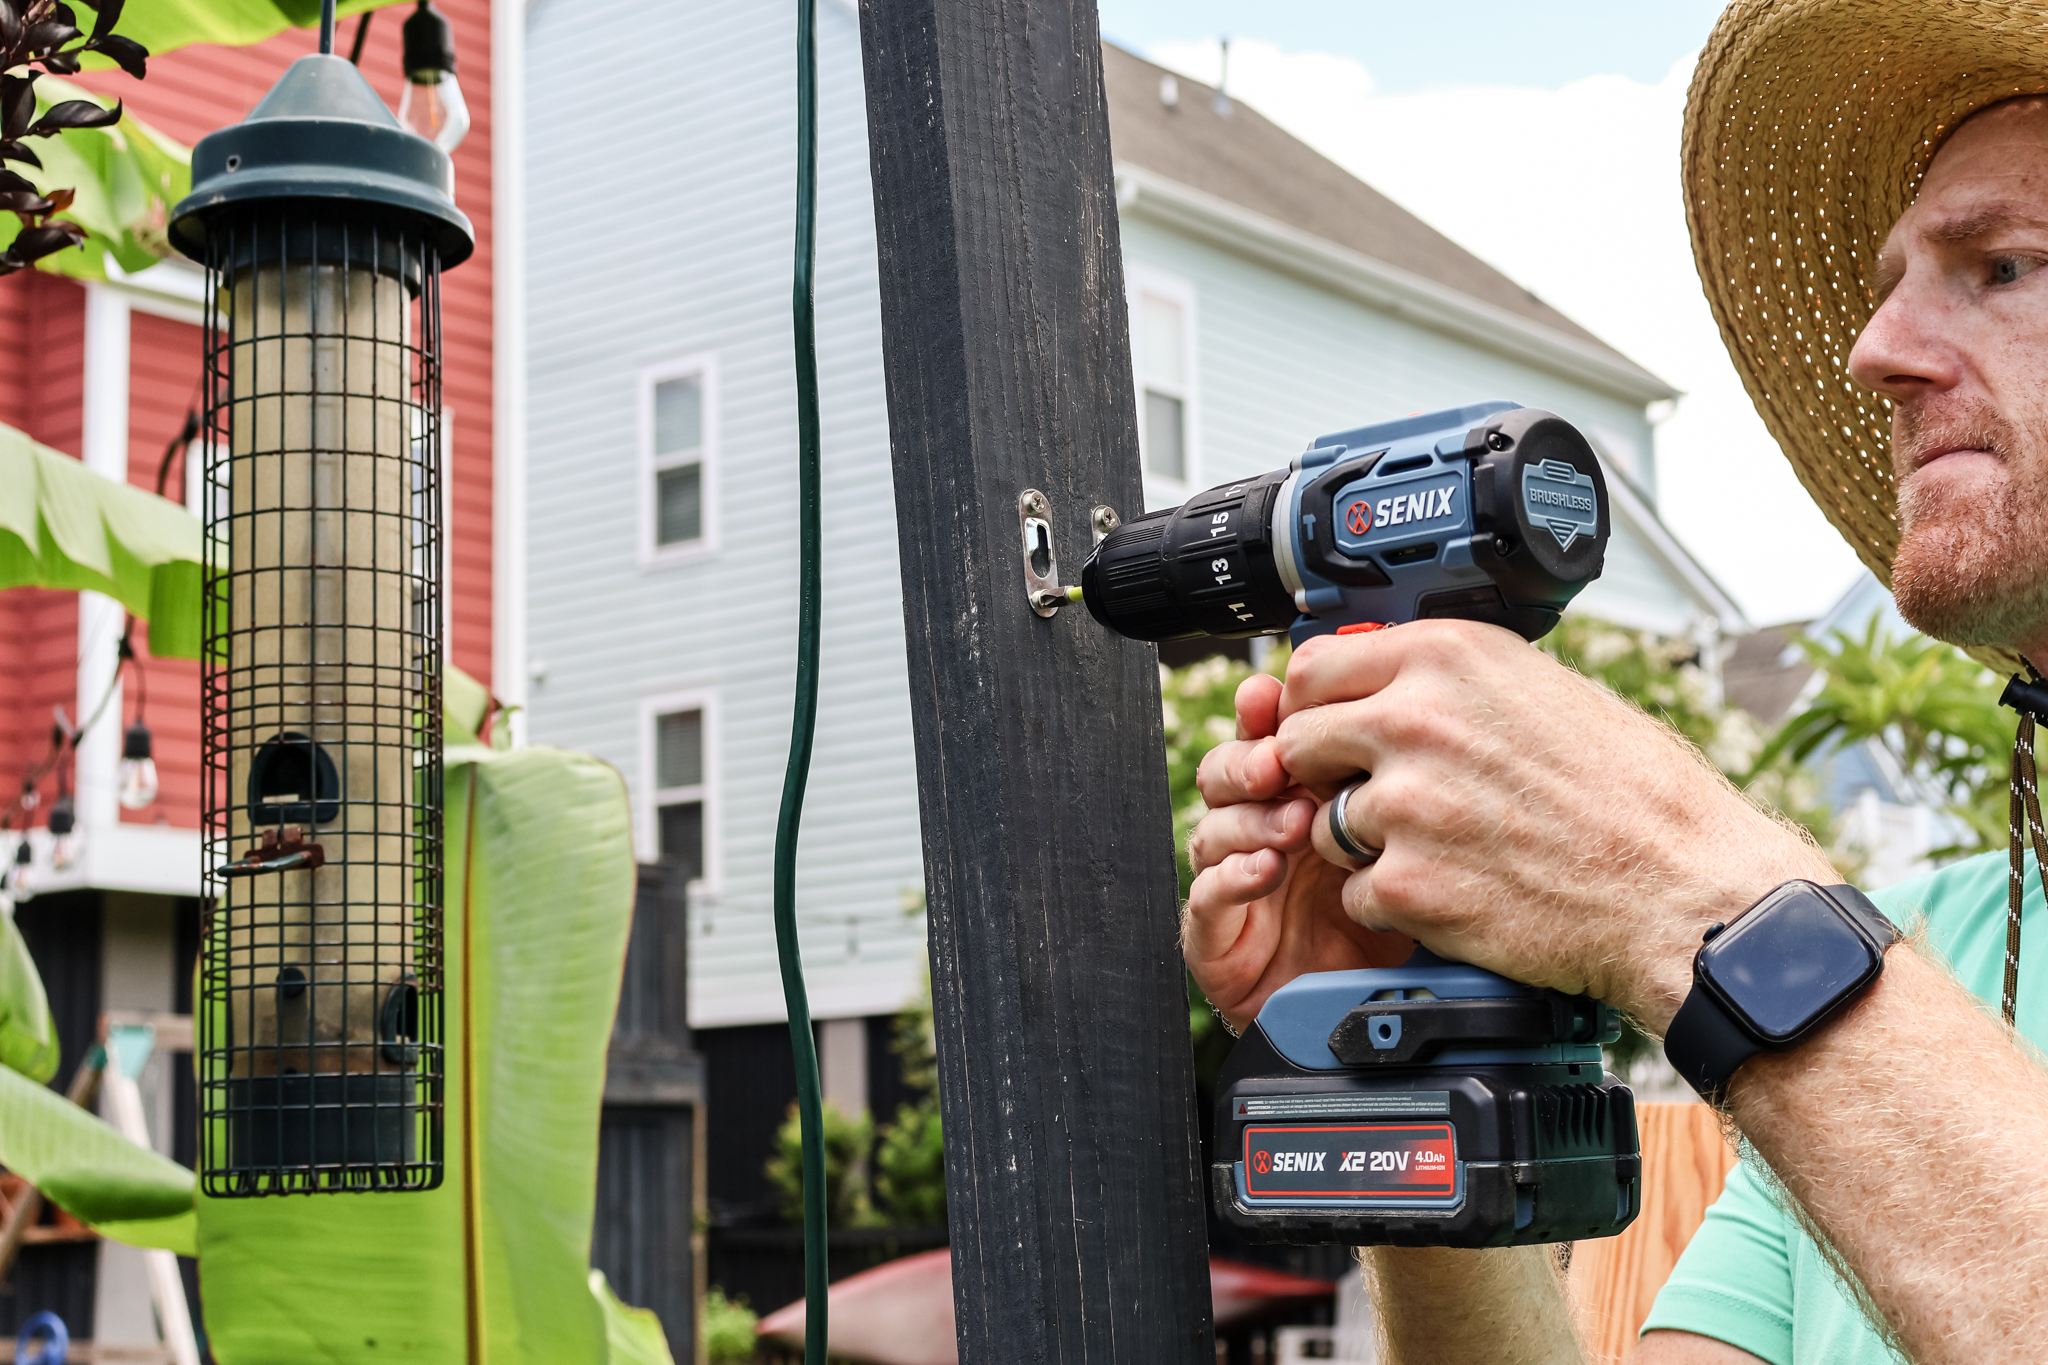
You can hang a birdhouse from a post, tree, fence or wall. Using the keyhole hangers allows you to easily take it up and down as needed.
DIY A-frame birdhouse woodworking plans
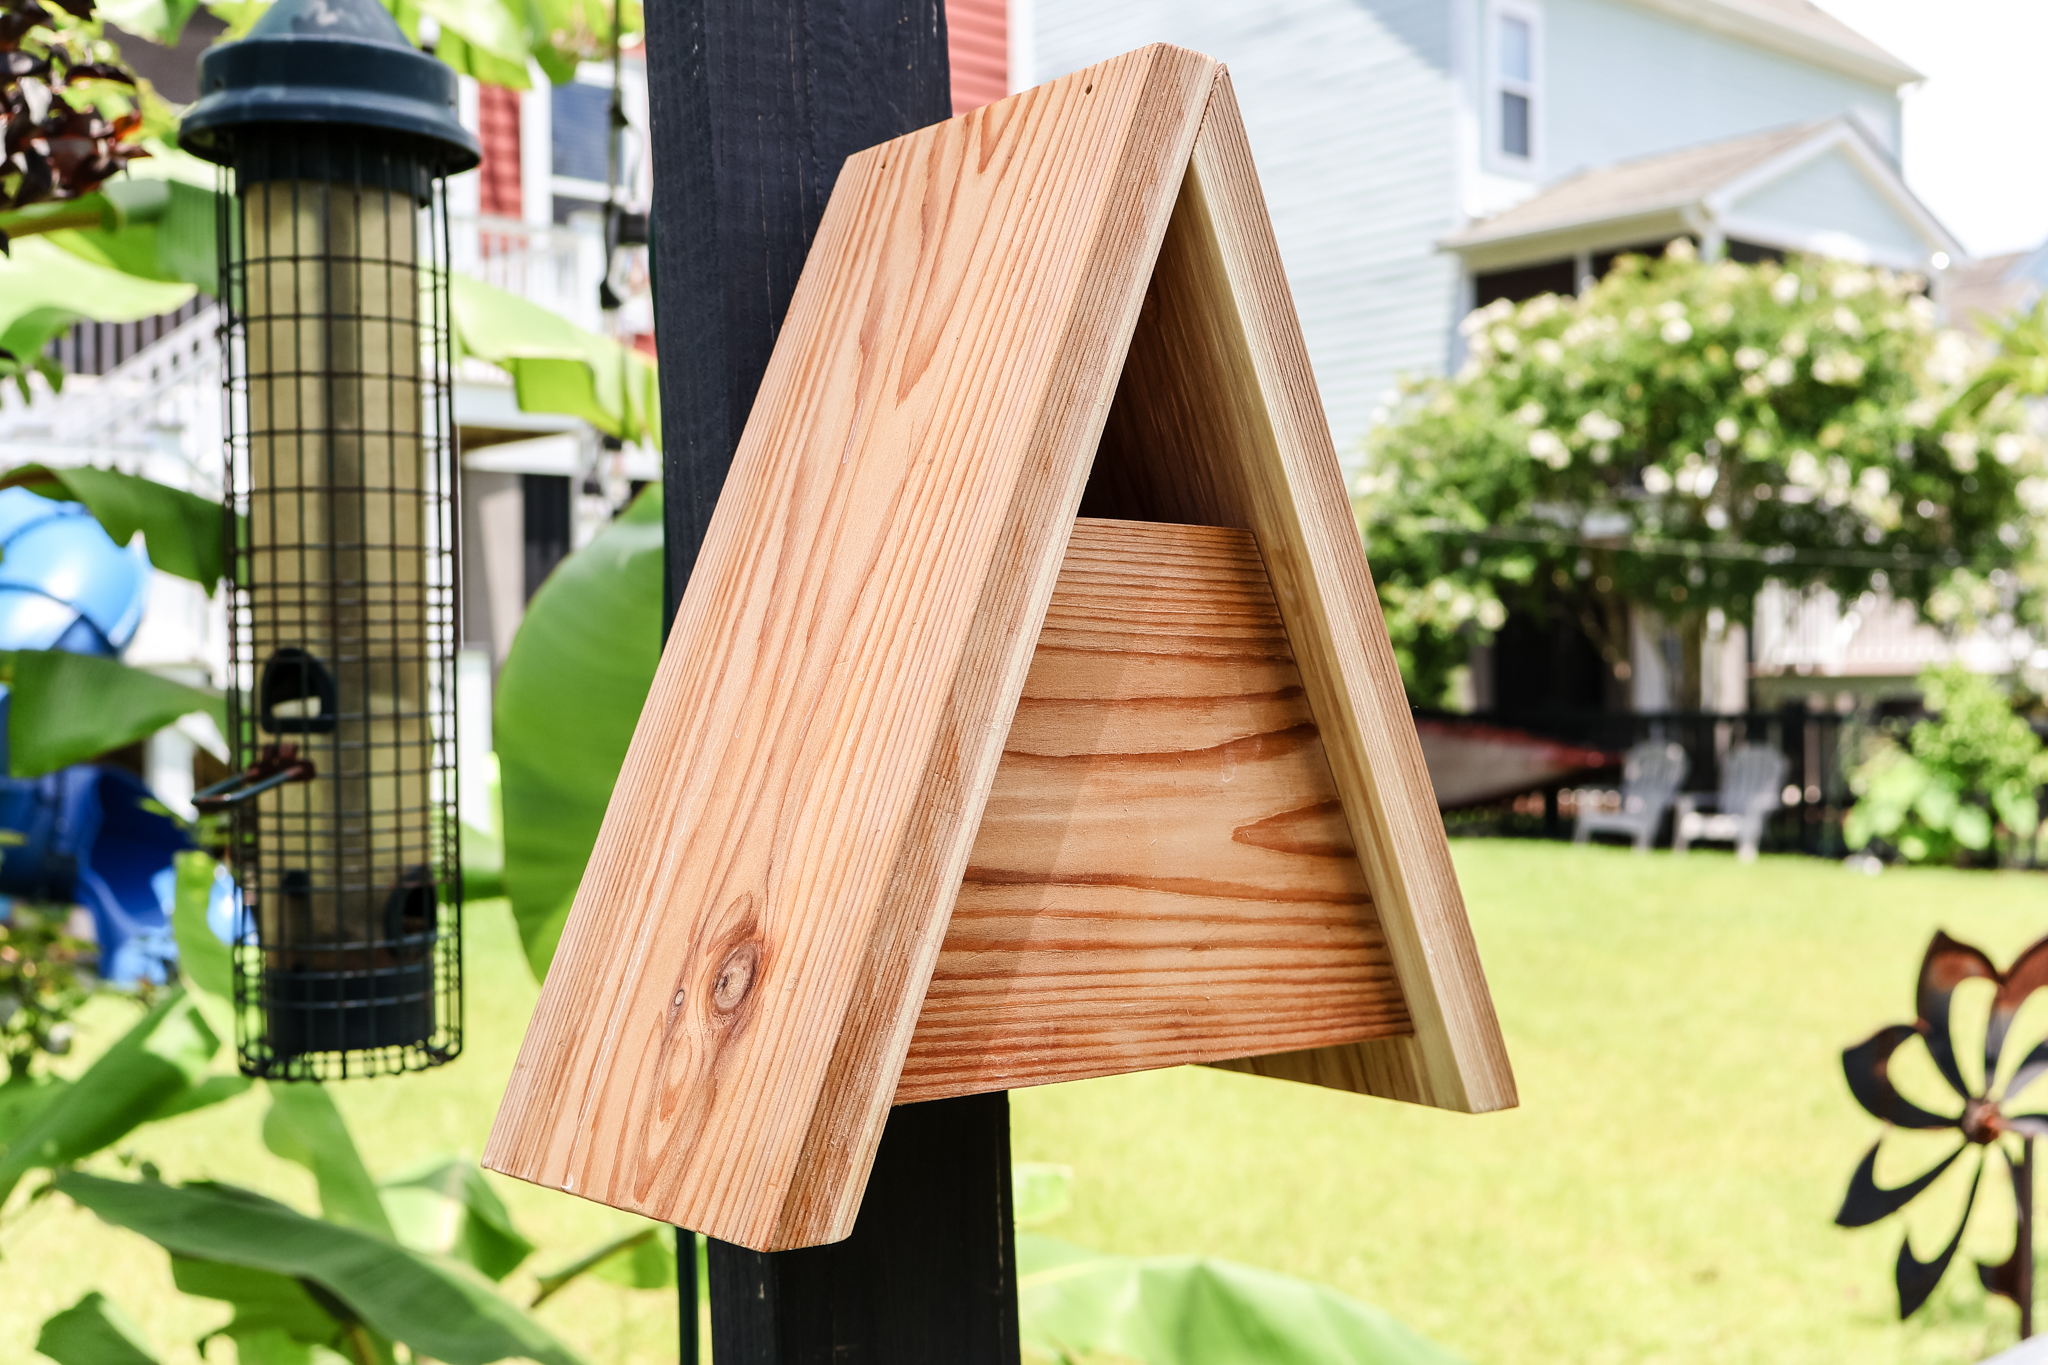
I love how this modern a-frame birdhouse turned out. It looks sleek and cool, even if the birds don't appreciate it as much.
If you like the look of it, grab my FREE DIY A-frame birdhouse woodworking plans to build it yourself!
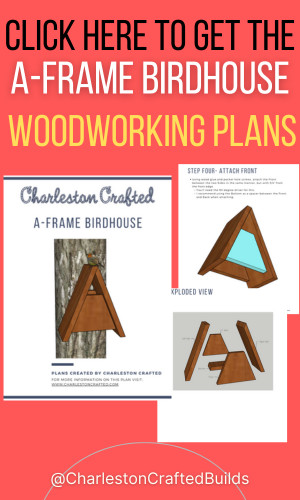
I've got these plans for free on Kreg's Projects and Plans site, along with lots of my other free plans and some other great ones for you to enjoy. My plans include the full material list, cut list and step-by-step instructions for you to follow!
I hope you love this project as much as I do and come back for the rest of the series!

Looking for something?
We've been doing this since 2012 so we have a LOT of blog posts!
Search stuff like: Ceiling Projects | DIY Plant Stands | Thrift Flips

Hey there, I'm Sean, the woodworking enthusiast and builder behind CharlestonCrafted.com! Since 2012, I've been sharing the magic of turning raw materials into beautiful creations. I love teaching others the art and satisfaction of woodworking and DIY. I try to inspire fellow crafters to make something extraordinary out of nothing at all.