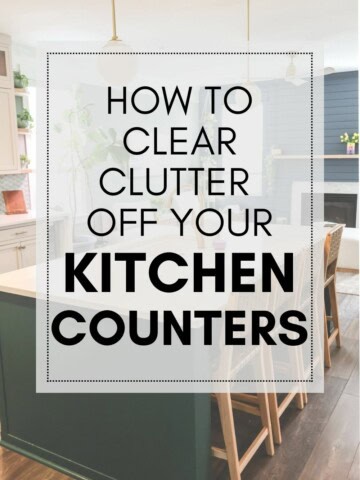
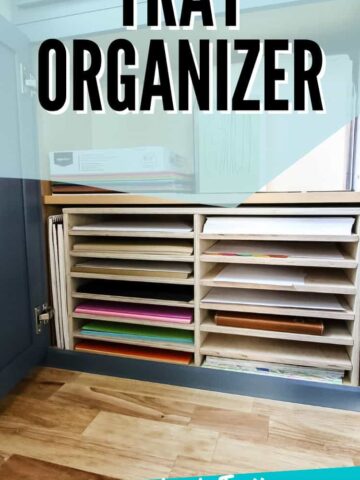
If you have a lot of different types of paper that you want to keep separated, try making this DIY paper tray organizer! This is a quick plywood build to help organize your office or craft space!
As we were wrapping up the construction of our DIY home office built-ins, we started thinking about storage and organization.
The best part of our office is that it has a ton of cabinets and drawers, so there is plenty of space to store everything. We are even storing our laptops inside a drawer where we installed a Docking Drawer for power!
One item we have a lot of with a lot of variation is paper. Computer paper, construction paper, Cricut paper, etc. We needed a place to store it.
We wanted to be able to store all of our paper types in one area, but not have to dig around to find the type and color of paper we wanted.
So, we decided to whip together a quick and easy DIY paper tray to fit inside on of our cabinets!
This is a great project for being able to sort and organize paper in any home office. This DIY paper organizer can also be used in a kids craft space to help your kids with all their construction paper crafts.
Let's dive into how we reduced our paper clutter with this DIY paper tray organizer and show you how to build one!
DIY paper tray organizer
You're going to love looking at color coded paper in your home office after you make this super easy paper organization system.
A few years ago, I made this DIY desktop organizer for my brother for Christmas to hold a few files and standard office equipment. It's cool what plywood can do!
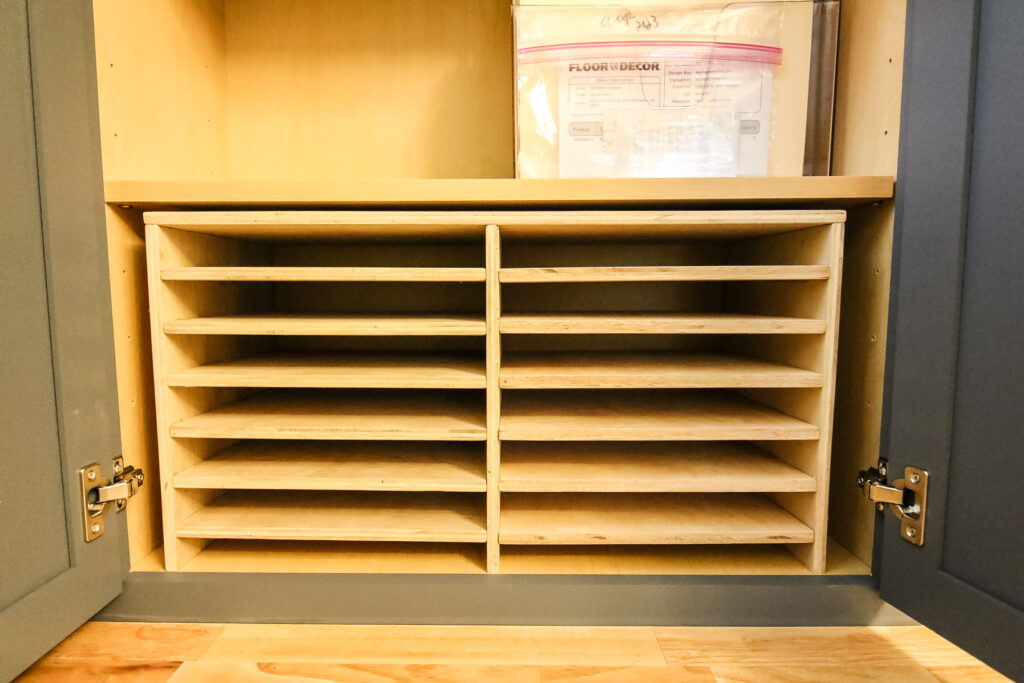
So, we carried over that idea and made this tiered paper tray that can hold 14 different paper types at one time. Plus, you can modify it to fit more or less paper depending on how you want to use it!
If you need a desk, check out some of these DIY desks you can make with a Kreg jig!
How to make a desktop paper organizer
Here's the overview of how you make a DIY paper tray organizer that can sit on your desk or in a cabinet.
Our organizer is designed to fit paper that is standard 8 ½" x 11". Each of the paper cubbies is 10" deep and 11 ¾" wide.
Materials and tools needed:
- (1) sheet of ½" plywood (this is a great project for scrap wood if you have leftovers from other plywood projects!)
- Wood glue
- Brad nailer
- Long clamps
- Scrap piece of 2x4
Cuts needed for this build:
- (3) Sides- 10" x 13"
- (1) Top- 10" x 25"
- (12) Inserts- 10" x 11 ¾"
Step one: Assemble left side
We're going to start by assembling the left hand side (or the right if you're feeling spicy) and then add the other side to this.
Start by setting one of your 13" long edges of one of your Sides on your work surface. Then, grab a scrap piece of 2x4 and place it flush against the top edge.
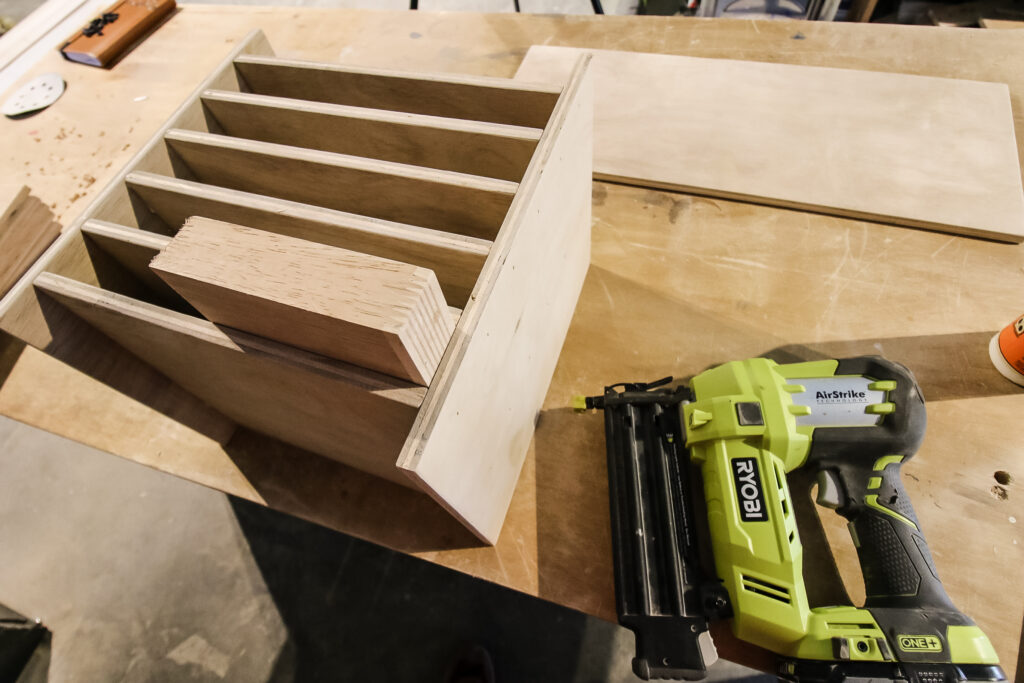
Using wood glue and a brad nailer with 1" nails, attach an Insert flush against the 2x4.
Move the 2x4 to underneath that Insert and attach a second Insert in the same way. Repeat until there are 6 Inserts attach to the left Side.
Then, add a bit of glue to the other edge of all those Inserts and put another Side piece up against them. Using the same 2x4 spacer, attach each of the Inserts to that Side.
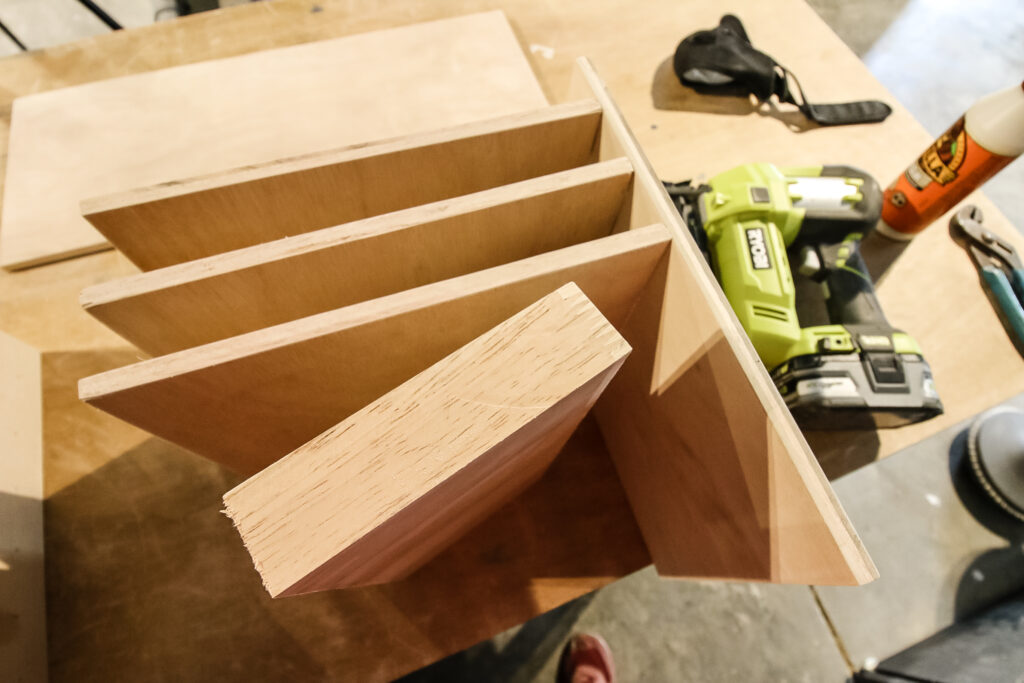
Step two: Assemble right side
Next, add six Inserts to the remaining Side piece the same way you did in step one. Then add wood glue to the opposite edge of the Inserts.
Step three: Connect with top and clamp
Next, attach the Top to the three Sides using wood glue and 1" brad nails.
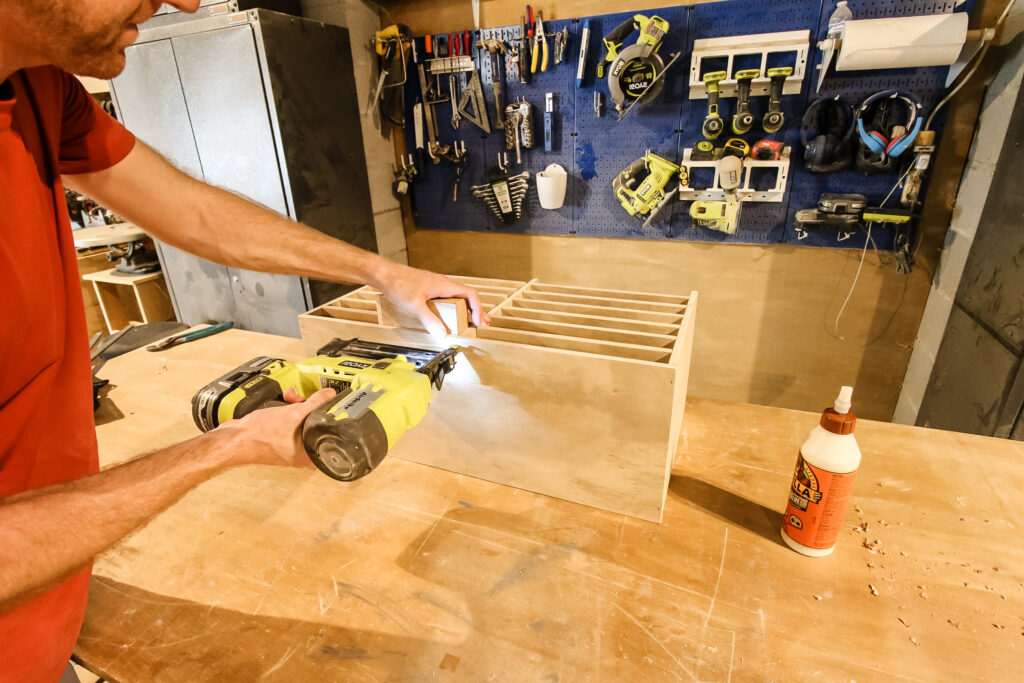
Now, using the 2x4 spacer, space the Inserts out on the middle Side piece. Then use long bar clamps to pull the Sides together and let the glue set on the middle.
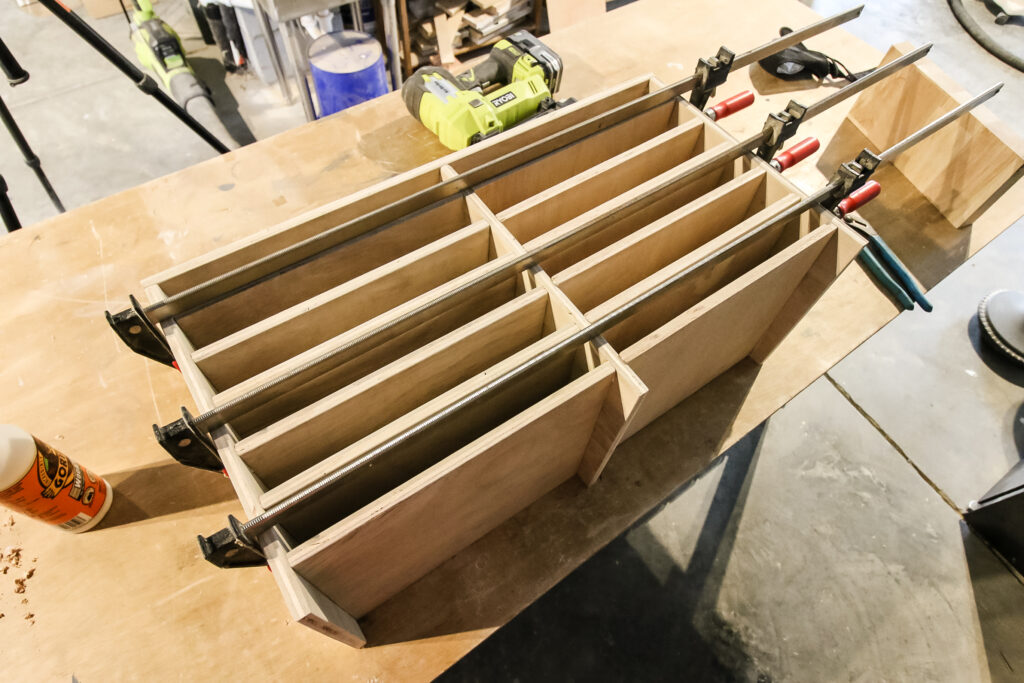
Let the glue dry for 24 hours and then remove the clamps. If you have any rough edges or joints, sand smooth.
You can choose to paint or stain this paper tray if you'd like, but we left ours natural since it will stay in a drawer.
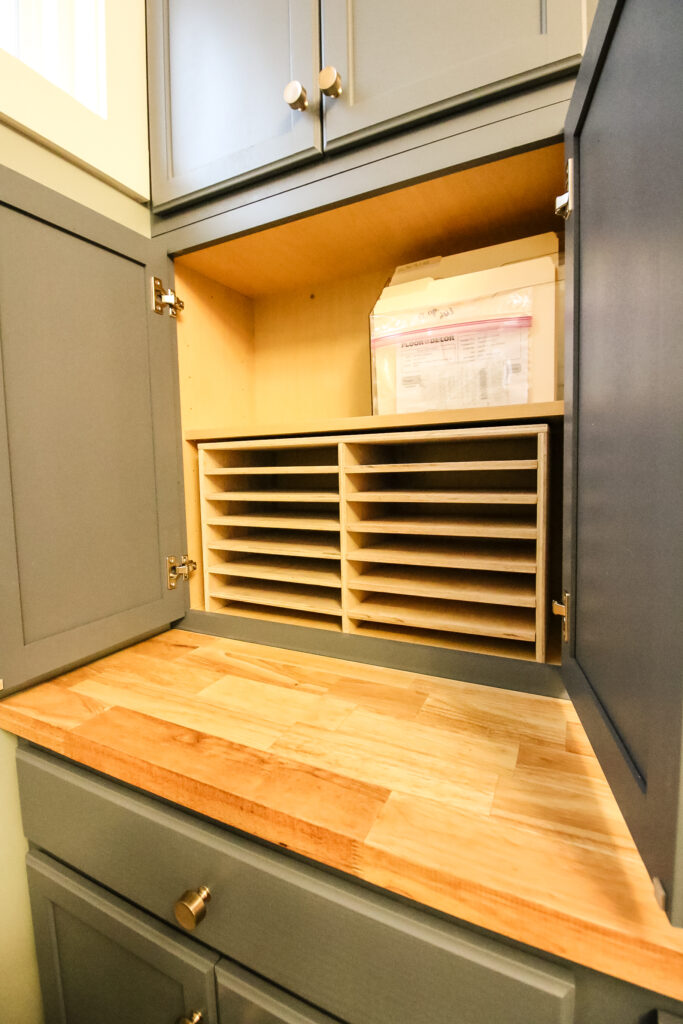
Step four: Sort paper
Finally, sort your paper! This is a great way to separate paper by color or type.
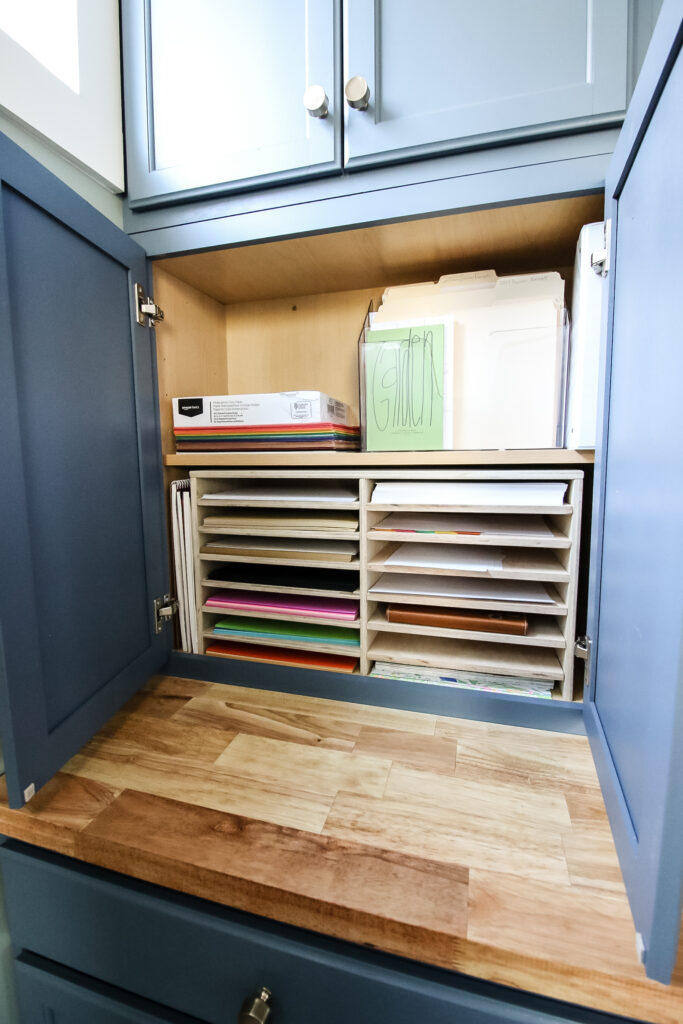
You can also use this DIY desk organizer as a way to sort important documents or put file folders that need to be moved around.
Sorting your paper will make your office space so much more organized and help you stay sane!

Looking for something?
We've been doing this since 2012 so we have a LOT of blog posts!
Search stuff like: Ceiling Projects | DIY Plant Stands | Thrift Flips

Hey there, I'm Sean, the woodworking enthusiast and builder behind CharlestonCrafted.com! Since 2012, I've been sharing the magic of turning raw materials into beautiful creations. I love teaching others the art and satisfaction of woodworking and DIY. I try to inspire fellow crafters to make something extraordinary out of nothing at all.