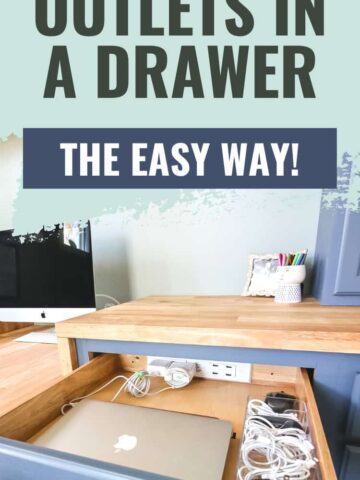
Here's how you can install outlets in drawers to charge devices and keep your desk or countertop surface more clean and organized!
We are always looking for ways to organize and declutter our lives. Bonus points if there's an interesting and modern way to do it.
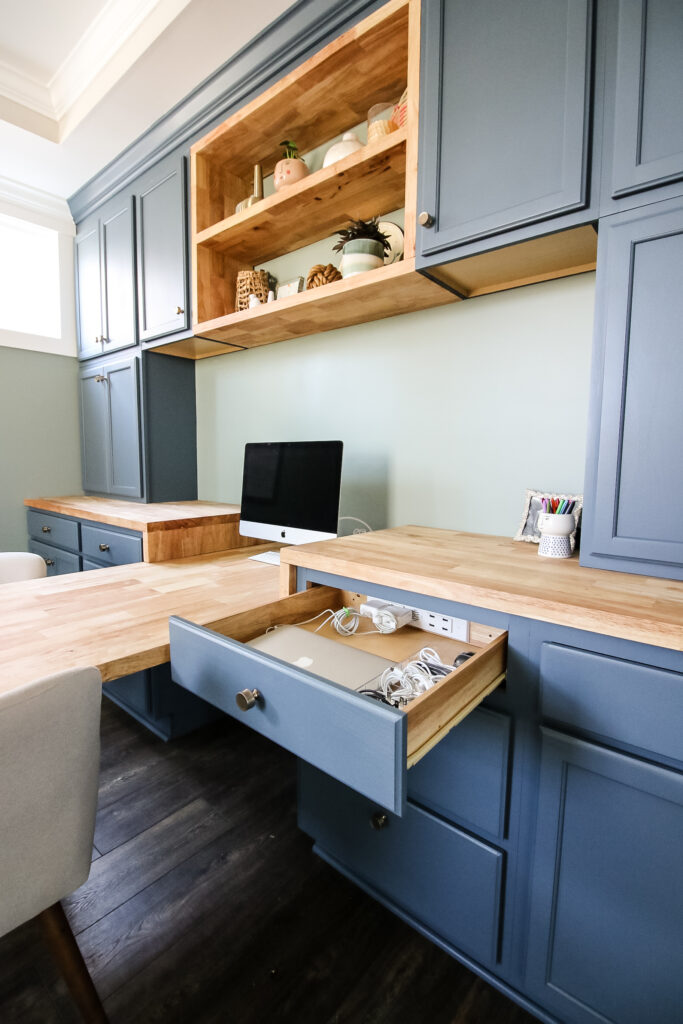
When building our our DIY home office built-ins, we wanted to make sure that the work surface of our desk area was always neat and tidy.
This is the first thing you see when you walk into our home and we didn't want to have a bunch of computers and cords out everywhere.
Our first thought was to build some sort of DIY charging station, similar to a file organizer that would sit on the desk, but again, didn't like having the cords. We use MacBook laptops for most of our work and they come with extremely bulky charging cords that would really mess up how our space looked.
So, we decided to add outlets in a drawer and charge our devices out of sight and out of mind!
Check out some of our favorite ways to organize different drawers!
How to put an outlet in a drawer
If you want to put an outlet into a drawer, you will need to have power access to a wall outlet. If there aren't electrical outlets accessible, you will need to hire an electrician to connect to a power source and ensure it's up to electrical code.
When we built our home office built-ins, we cut holes in the back of the cabinets where there were outlets on the wall. This way, we'd have access to that power.
If you are building your drawers from scratch, be sure to check out this tutorial on how to build and install drawers!
After doing some research, we settled on purchasing a Docking Drawer Blade Duo for our charging and powering.
Docking Drawer has a line of products that you attach to the back of your drawer and the back of your cabinet and plugs into an outlet inside of your cabinet so you can have easy access to power.
Each of their options comes with different configurations of 15 amp outlets and USB plugs, depending on what your needs are.
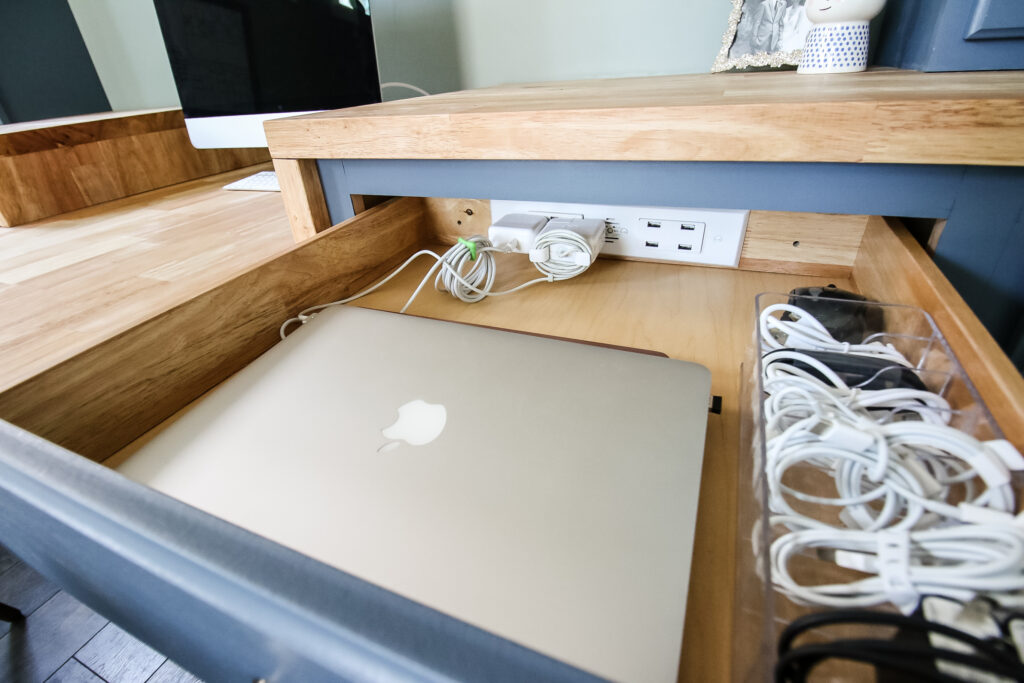
We opted for a Docking Drawer Blade Duo with the configuration of two standard outlets and four USB plugs. This way we can charge our computers and then also charge devices like phones and tablets.
There are several options Docking Drawer options that might be better for you:
- Docking Drawer Blade with 2 outlets and 2 USB plugs
- Docking Drawer Blade with 2 outlets
- Docking Drawer Blade Duo with 4 outlets
- Docking Drawer Blade Duo with 8 USB plugs
Docking Drawer installation is super easy and only takes about 30 minutes. It does require you to have a few tools on hand, but they are pretty basic.
Here are the tools you'll need to install a Docking Drawer:
- Cordless drill
- Jigsaw
- Measuring tape
How to install a Docking Drawer
Installing a Docking Drawer is easy and will take just a little bit of time. Their drawer outlet kit comes with everything you need to install it, minus the tools. Here are the quick and easy steps to install!
Step one- Cut a hole in the back of the drawer


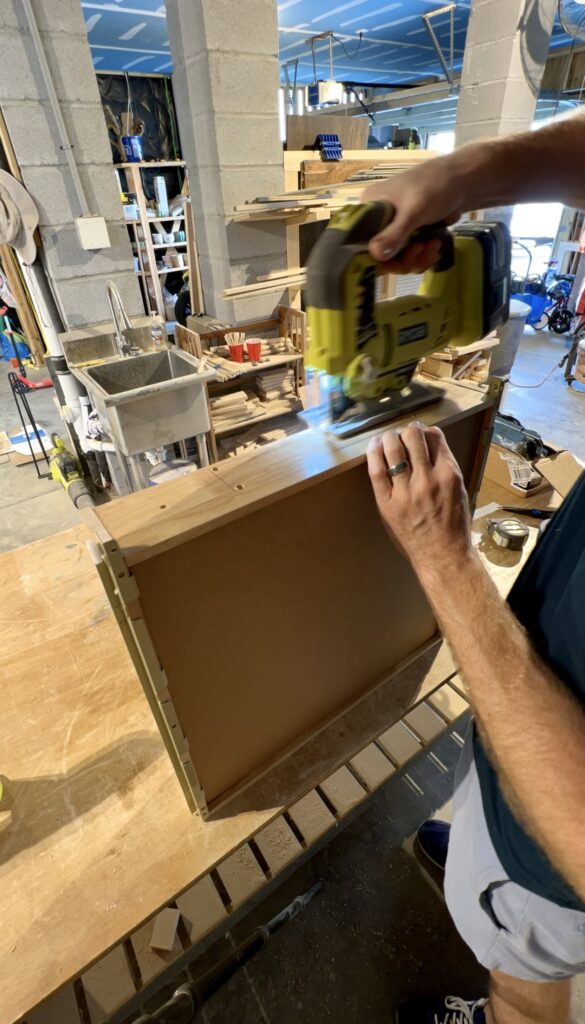
Docking Drawer products come with a template for cutting the exact size hole you need for your outlet box.
Simply align the template with the center of the drawer and drill holes in the four corners as marked.
Then, use a jigsaw to cut out the rectangle for the Docking Drawer to slide into.
Step two- Secure Docking Drawer to drawer
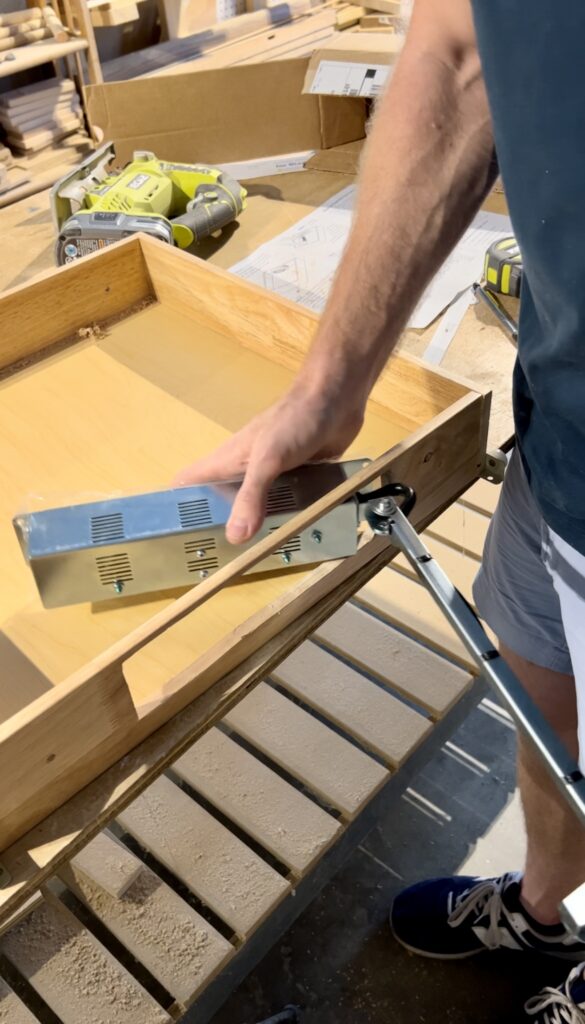
Once the hole is cut, slide the arm of the Docking Drawer in first (from inside the drawer to outside), then use the provided screws to attach the outlet box to the drawer back.
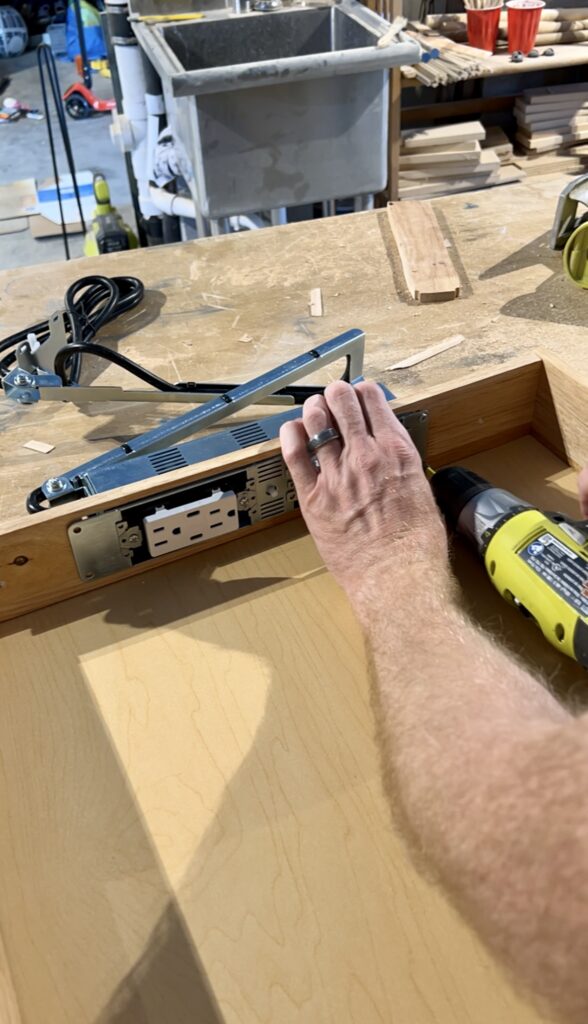
Step three- Attach arm to back of cabinet
Realign your drawer on the drawer slides and then remove any drawers or obstacles in the cabinet below.
Close the drawer most of the way and align the mounting bracket on the back cabinet wall. Grab a friend and have them test that the drawer opens and closes properly while you hold the bracket in place.
Once it's ready, mark the holes and then attach the bracket with screws.
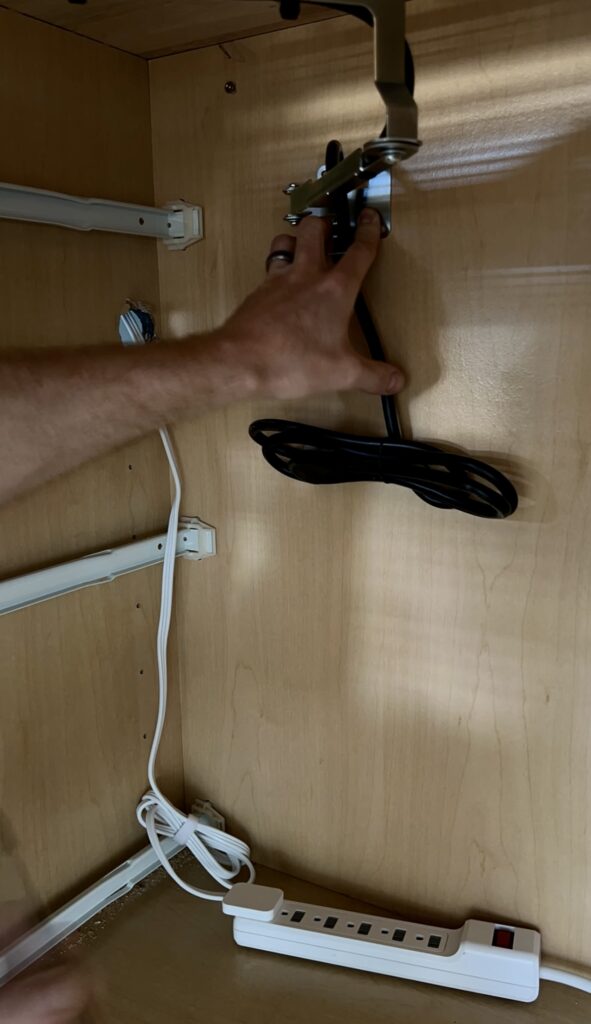
Step four- Add cover and plug in
Finally, add the cover plate to the Docking Drawer face with the provided screws. Then, connect the power cord to the power outlet on the wall and you are good to go!
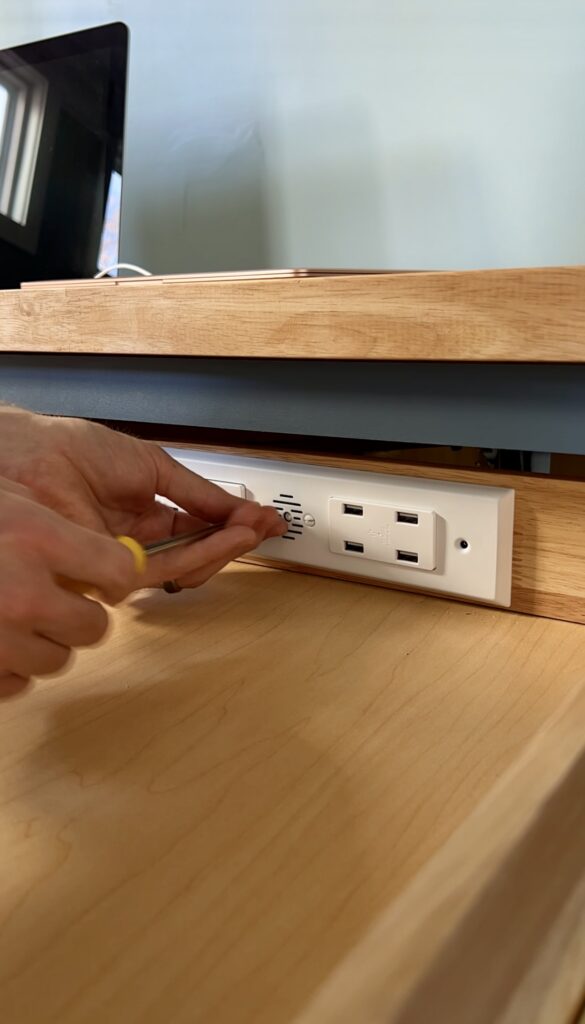
We did need to press the reset button in the middle of the Docking Drawer when we first installed it, so you may need to do that too.
Once it was all in place and ready to go, we added the power supplies for our computers to the outlets of the Docking Drawer Blade Duo and it worked perfectly!
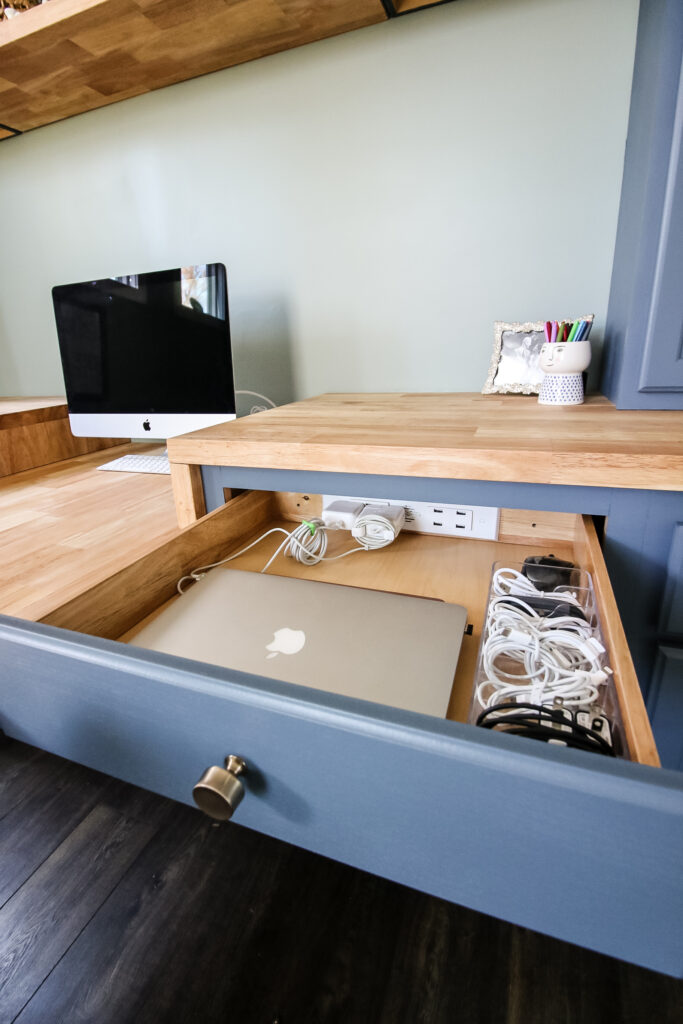
Now we leave our computers in the drawer to charge and it doesn't clutter our work surface. We can also plug in four devices with a USB charger too!
We love how easy this was and that it brings organization to our beautiful space.
Where can you install install drawer outlets?
There are a lot of places you can use in-drawer outlets. We used ours for our home office, but you can also install a Docking Drawer outlet in a bathroom vanity for your hair dryer or beard trimmer, or in a kitchen drawer box for charging devices and appliances!
Are in-drawer outlets safe?
In-drawer outlets are a great option for charging your devices out of sight and keeping your surfaces clear. However, you need to make sure you are safe about it.
Charging devices in a drawer can lead to heat build up. You don't want it to get too hot in the drawer. Docking Drawer devices come with an "interlocking thermostat" that automatically cuts off power to the outlet if the surrounding space reaches 120 degrees. This will keep the drawer and device safe from overheating.

Can you put a charging station in a drawer?
Yes, you can put a charging station in a drawer very easily. You will need access to an electrical source on the wall and can attach a power strip, like the Docking Drawer Blade Duo, to the outlet to have a charging station in a drawer.
Can you put a power strip in a drawer?
Yes, you can put a power strip in a drawer, as long as you have access to a wall outlet. However, putting a regular power strip in a drawer needs to be secured so it doesn't move around when you open and close the drawer.

Looking for something?
We've been doing this since 2012 so we have a LOT of blog posts!
Search stuff like: Ceiling Projects | DIY Plant Stands | Thrift Flips

Hey there, I'm Sean, the woodworking enthusiast and builder behind CharlestonCrafted.com! Since 2012, I've been sharing the magic of turning raw materials into beautiful creations. I love teaching others the art and satisfaction of woodworking and DIY. I try to inspire fellow crafters to make something extraordinary out of nothing at all.