We recently tore open our existing pantry and filled in a doorway to create a massive pantry expansion. Here's the entire process and budget breakdown for this DIY pantry idea!
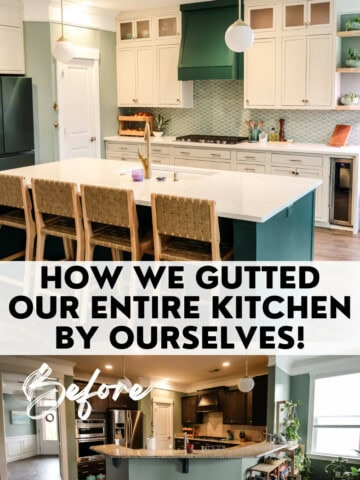
We started the year off with a huge project to expand our existing pantry and we are absolutely thrilled with the results!
In anticipation of an upcoming office makeover, we needed to fill the doorway in between our office (the official formal dining room) and the kitchen. But if we were going to fill the doorway, we decided to take the opportunity to do our pantry expansion first.
This project required demolition of the existing wall for the pantry door, filling in the pass through doorway, building new walls for the pantry, and adding a ton of shelving and storage.
This is the biggest project we've taken on in this house to date (previously it was either our mudroom built-in lockers or the fireplace build-out) and it was quite the process. Each step was huge!
We also have never built walls before, so a lot of this was a learning process for us as we went along. That's the beauty of DIY- you learn new skills with each new project!
We're going to walk you through the entire process of our DIY pantry expansion and show you the transformation that is possible in your home!
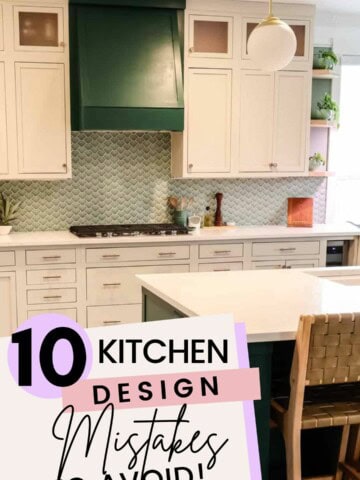
Our kitchen pantry expansion remodel
Our complete kitchen pantry expansion project took about two weeks from start to finish, but this included visitors in town, Morgan being out of town and illness. It could be done quicker if you had the time.

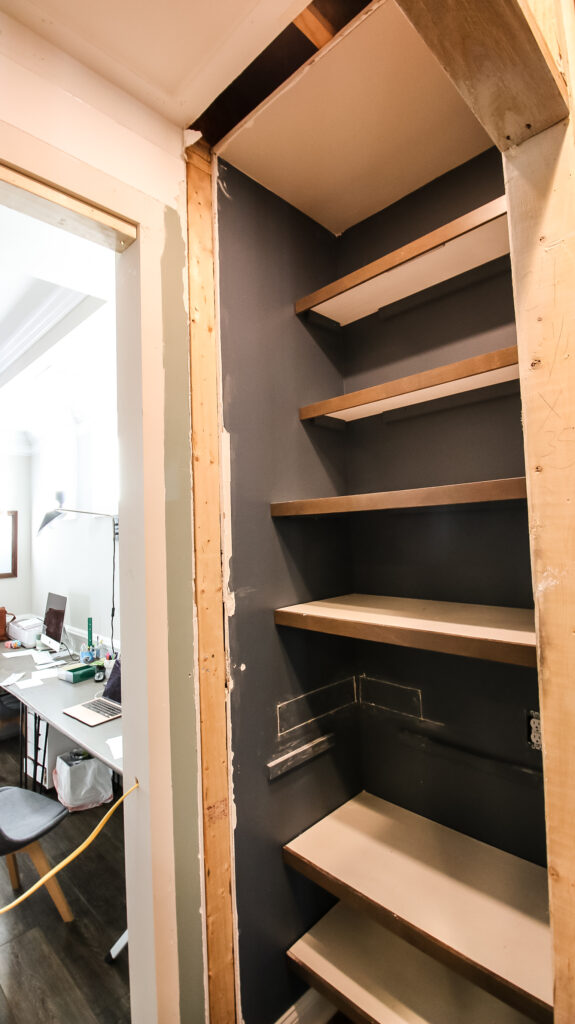
This pantry remodel more than doubled our existing pantry storage and also made our old storage more accessible.
Last year, we tore out the wire shelves in the pantry and replaced them with custom wood shelves, but it was difficult to access the ones all the way at the top.
Now, we can easily get to everything up top with a step stool because we can walk into the pantry and move around.
This walk-in pantry is a dream, so let's show you how we made it!
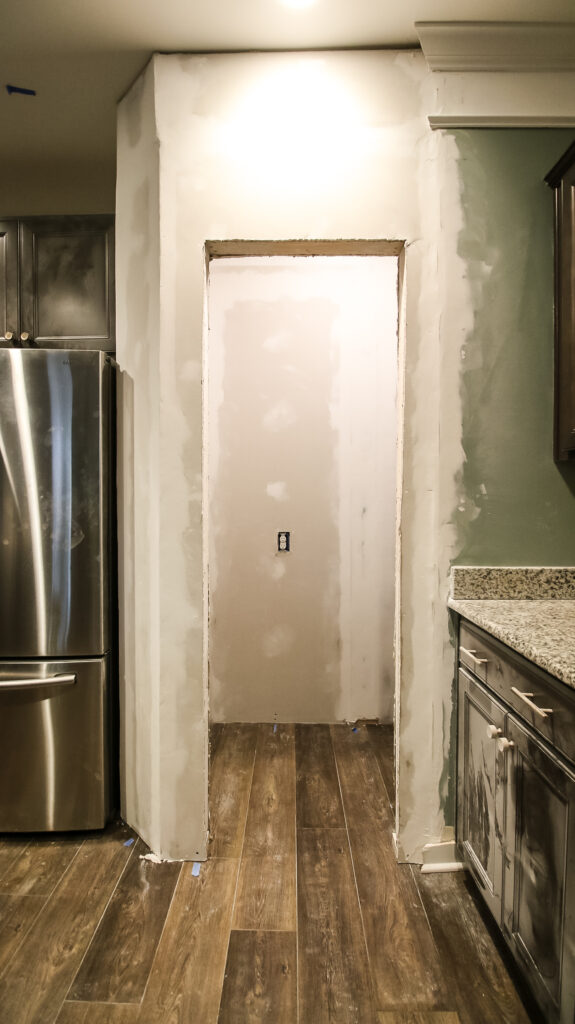
Demolition of existing wall
We started with demolition of the existing wall around the pantry door.
This included using a trim puller to remove the existing molding around the door, the crown and then all the drywall and studs.
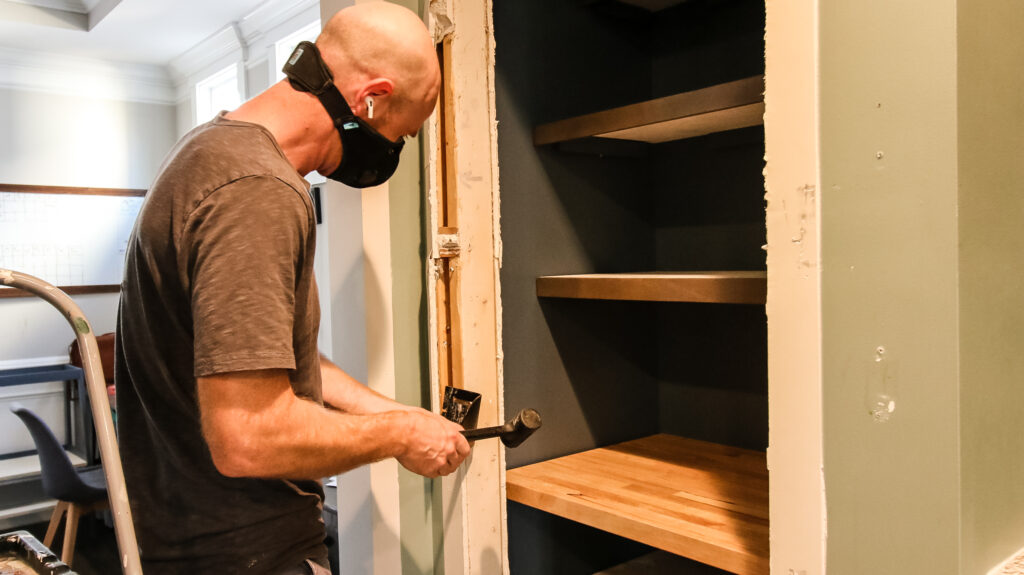
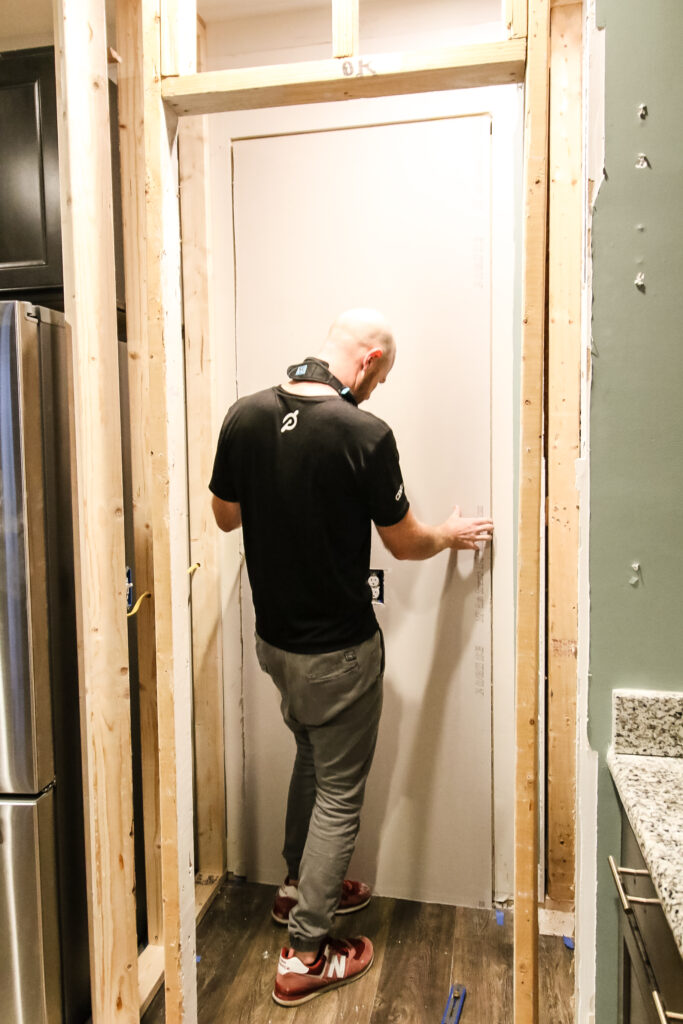
This was not a load-bearing wall, making this much easier. We ripped off all the drywall and then cut the nails holding the door in place.
With the door removed, we cut out the old studs, keeping the door frame ones intact so we could reuse when putting the door back on.
Finally, we were left with a big gaping hole and moved on to construction.
Framing new walls
We started by putting up new framing for the new walls. This included top and base plates and vertical studs.
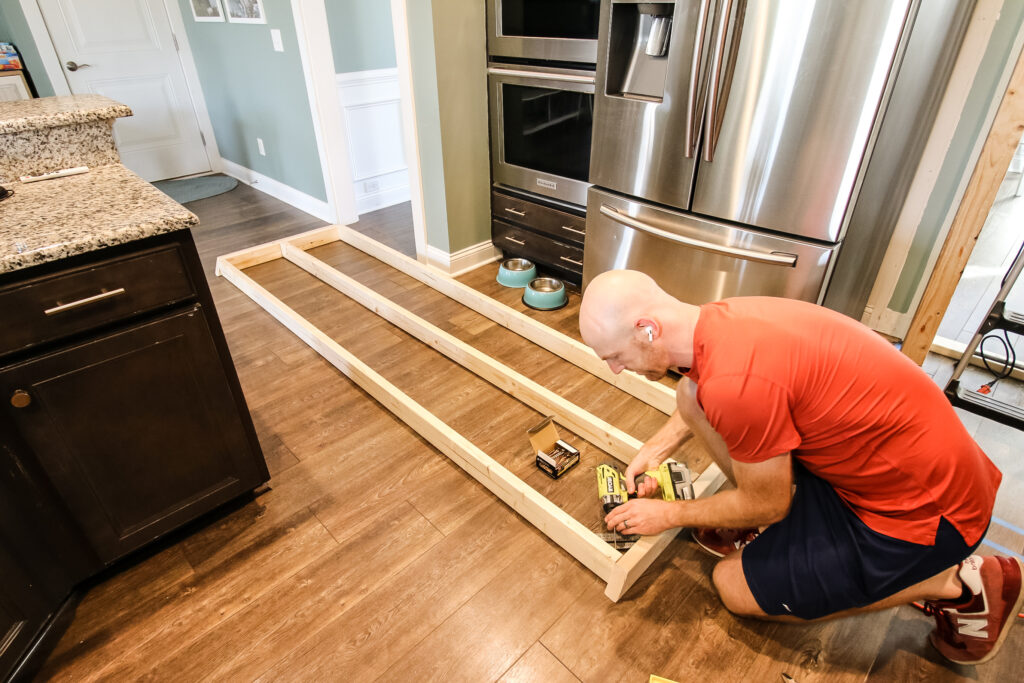
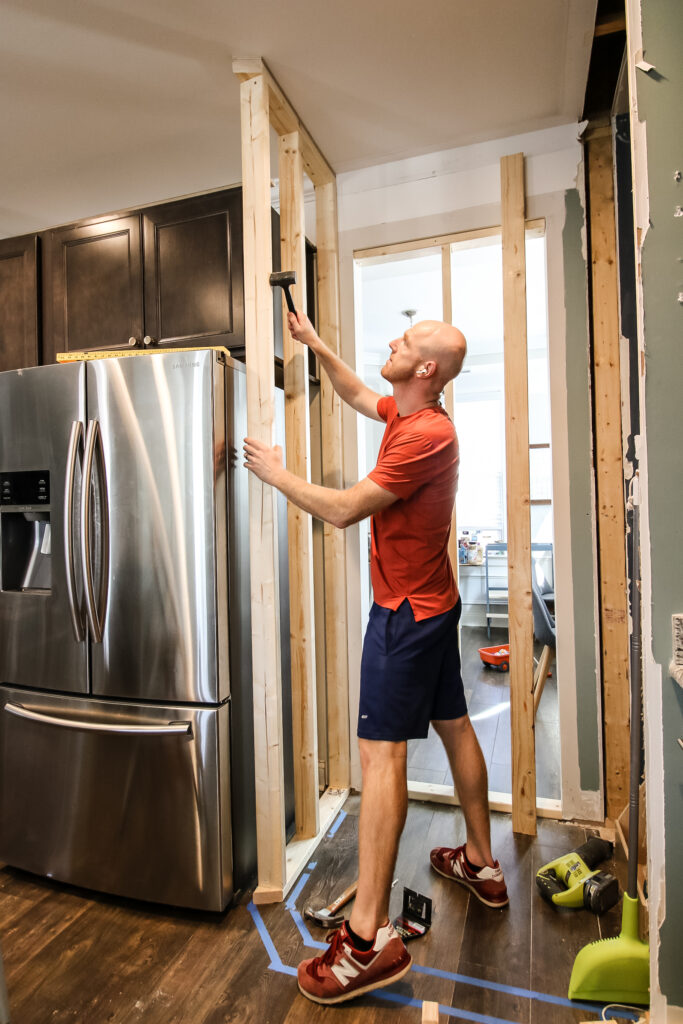
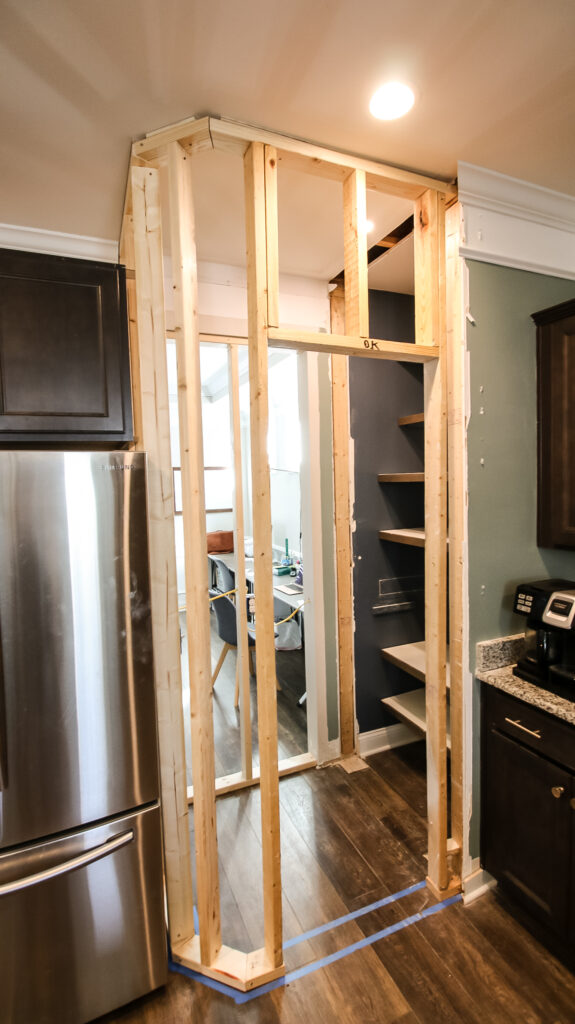
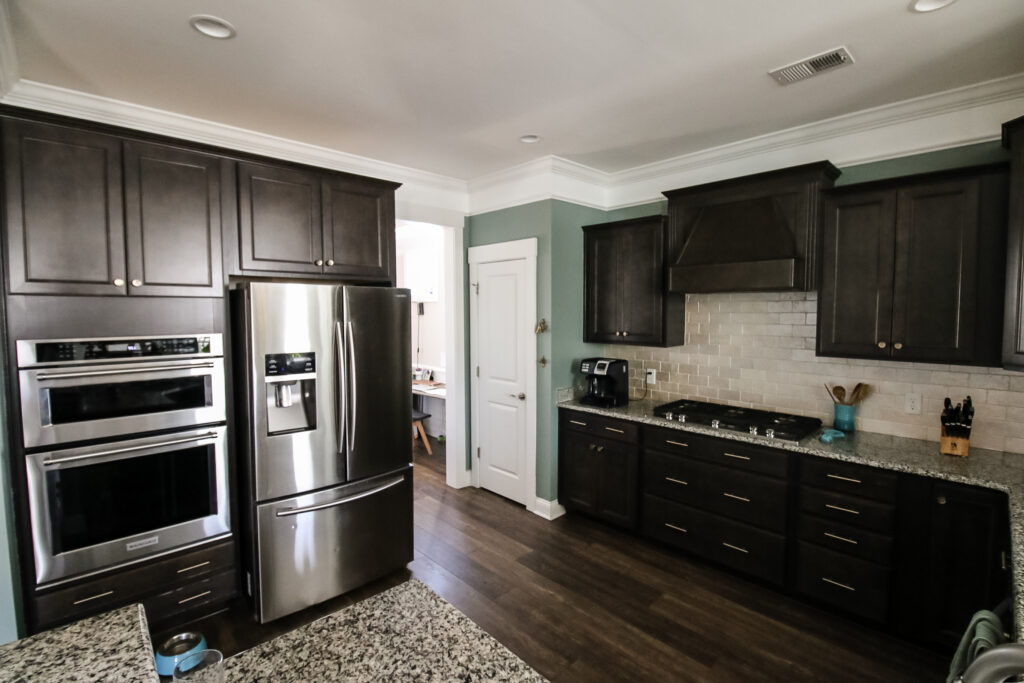
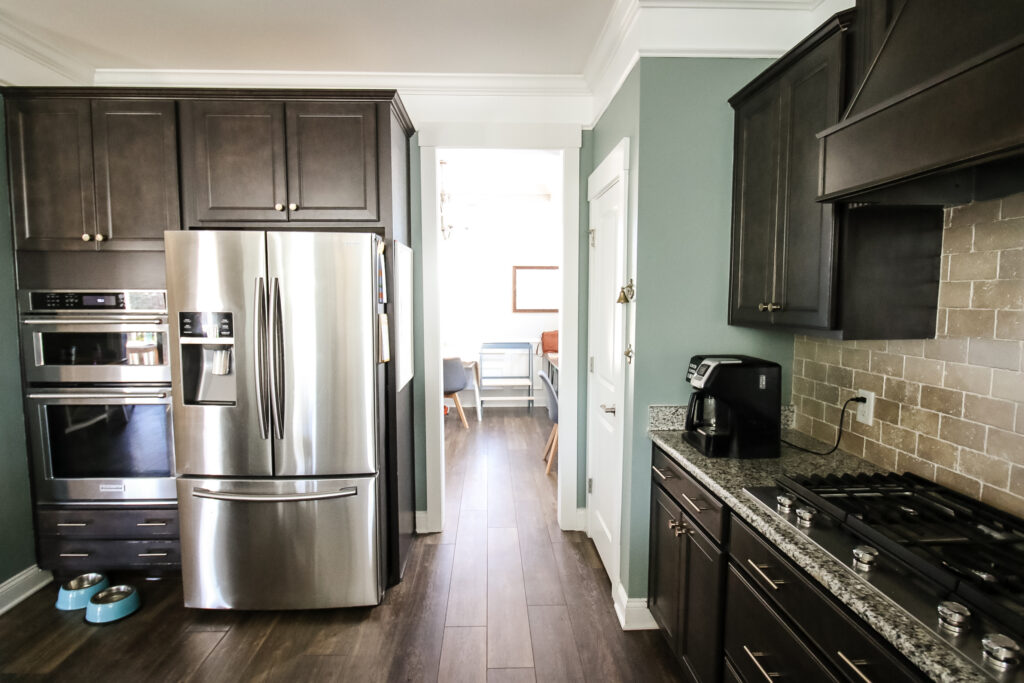
The refrigerator is right next to one of the new walls, so we needed to angle the wall in the corner to make sure the door could open cleanly.
We marked off the new layout with painter's tape and then built up the new walls.
Click here to read all about our process building the pantry walls!
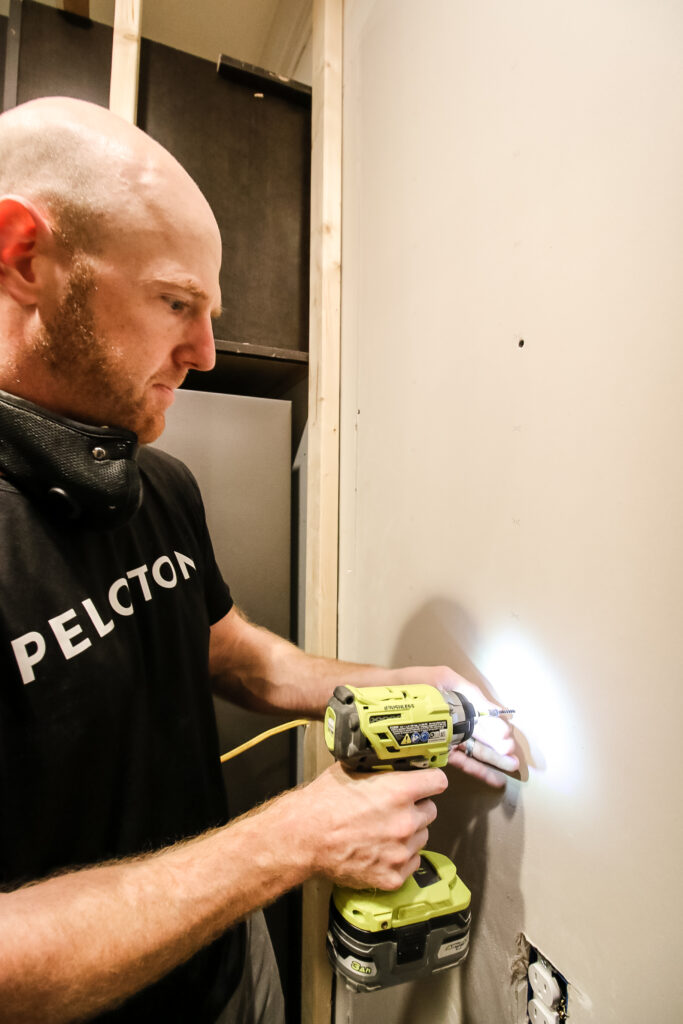
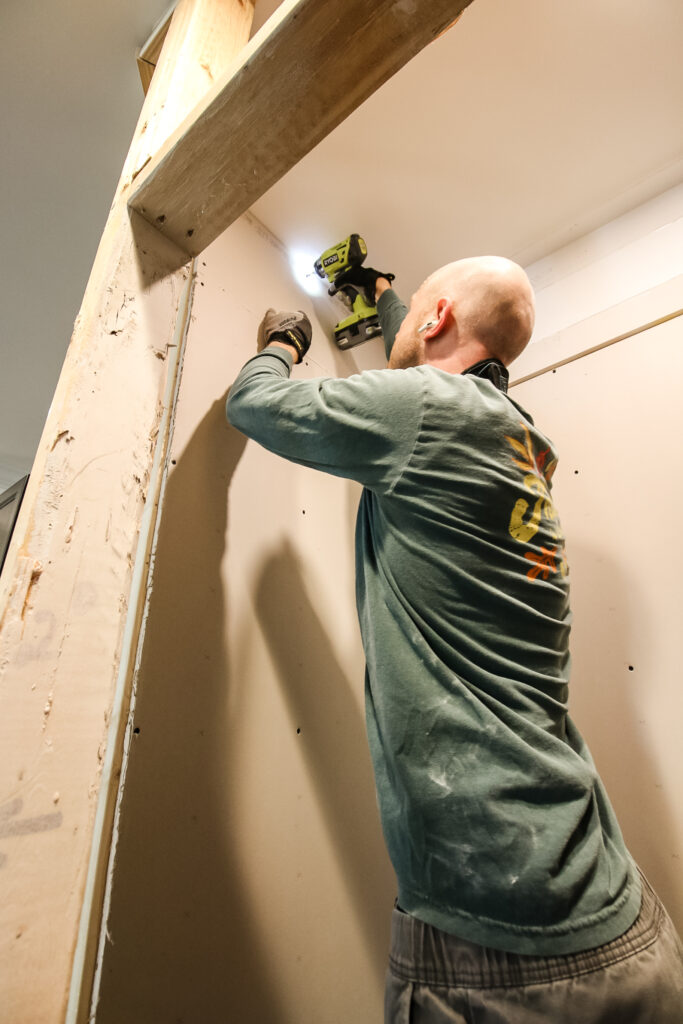
Installing drywall
Then we cut and installed new drywall. We started by filling in the old doorway between the formal dining room and our kitchen.
Read more about how to fill an existing doorway with drywall here!
Then we added drywall around the studs and patched all the gaps.
After adding joint compound and sanding, we started assembling the pantry!
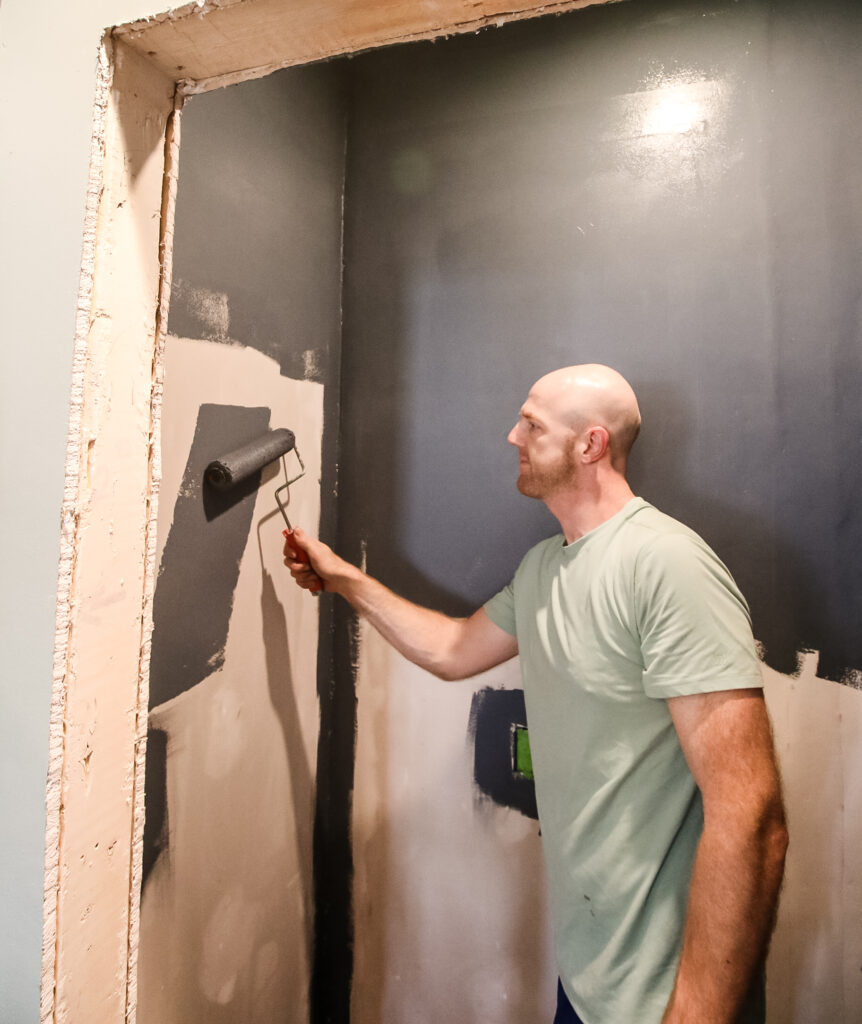
Painting
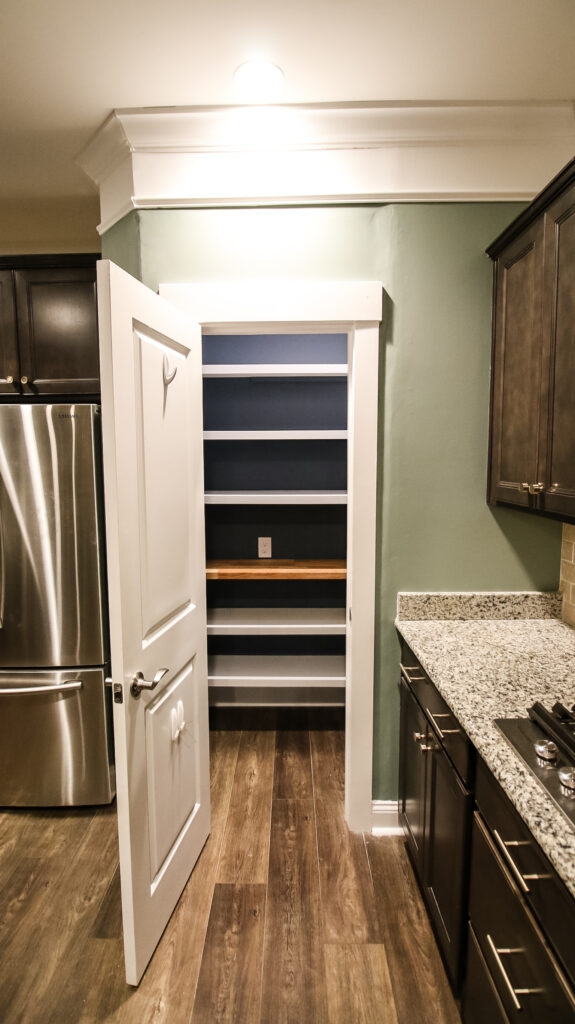
We already had an existing color inside the pantry from our original makeover, so we just carried that into the rest of the new area. The interior of the pantry is Behr's "NYPD" color (check out the full color review on our sister site), which is a dark blue with gray undertones.
We've used this color for other accents in our downstairs, including our shiplap fireplace and our mudroom lockers, so this is a great way to connect different areas.
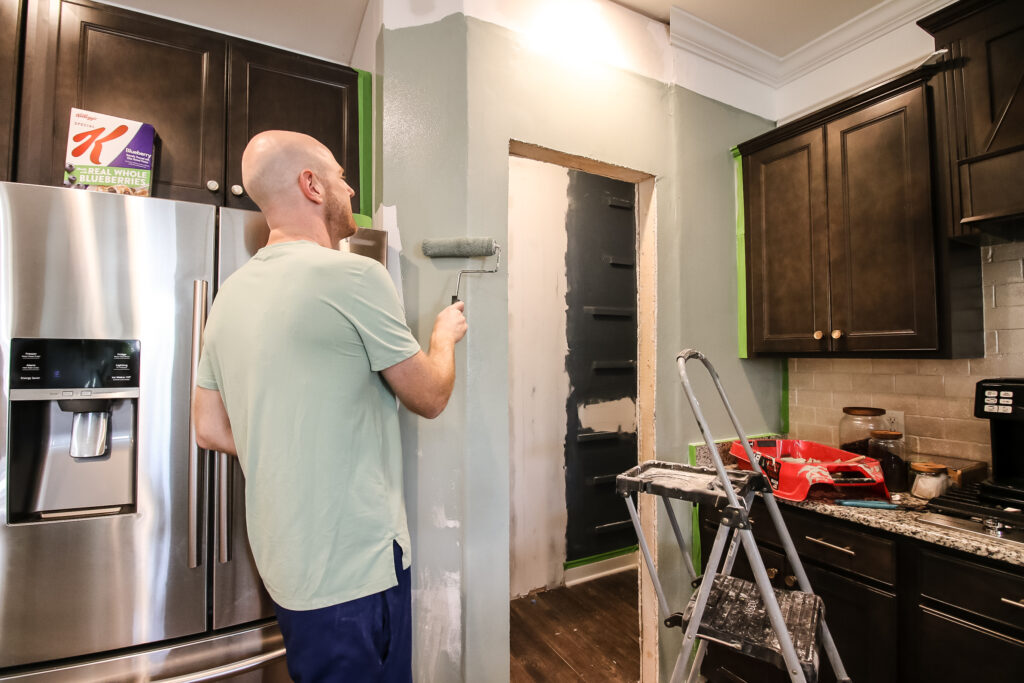
Outside the pantry, we just carried over our Behr's "Nature's Gift" (check out the full color review on our sister site) that we have on the rest of the walls in our downstairs.
Finally, we added new crown molding, base molding and trim to the entire space, inside and out.
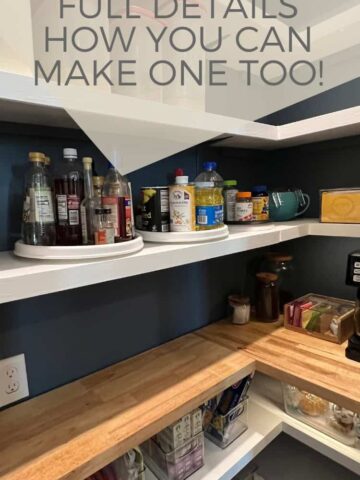
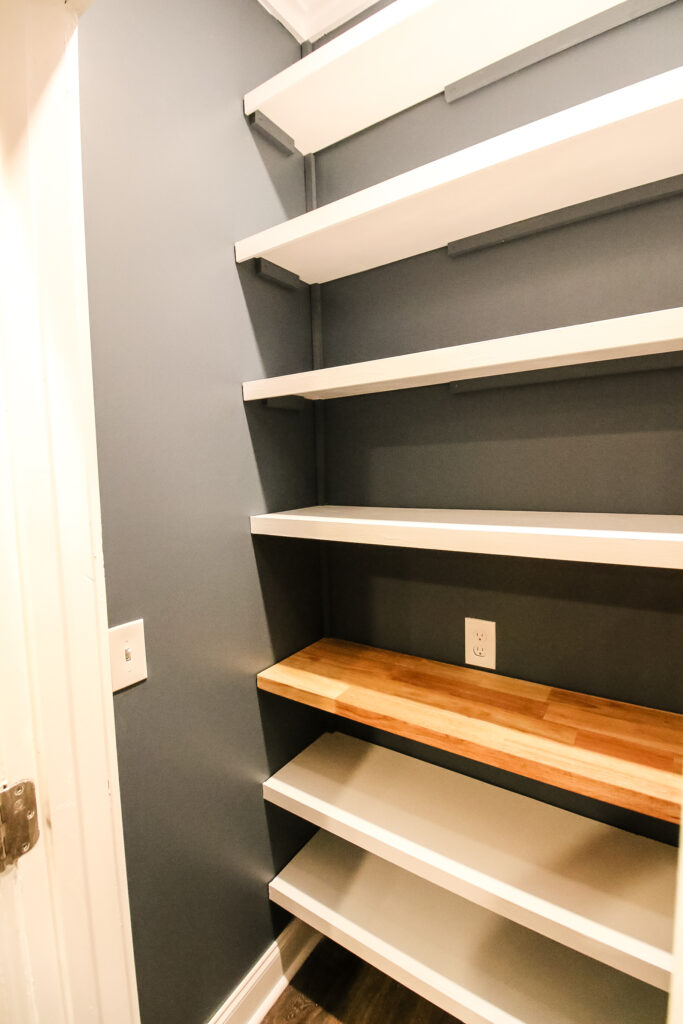
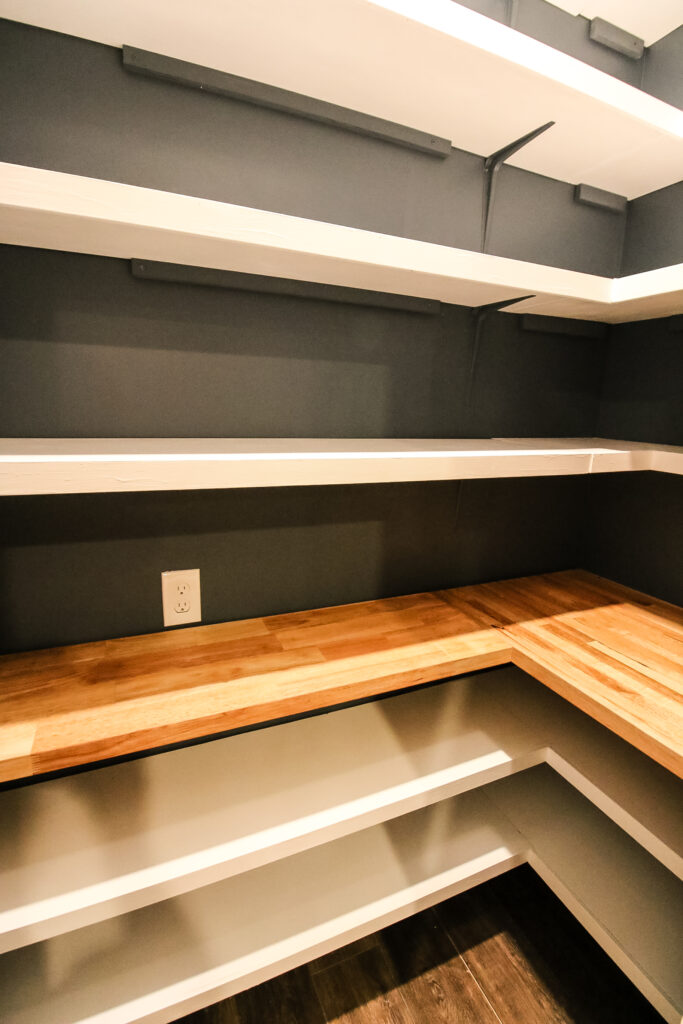
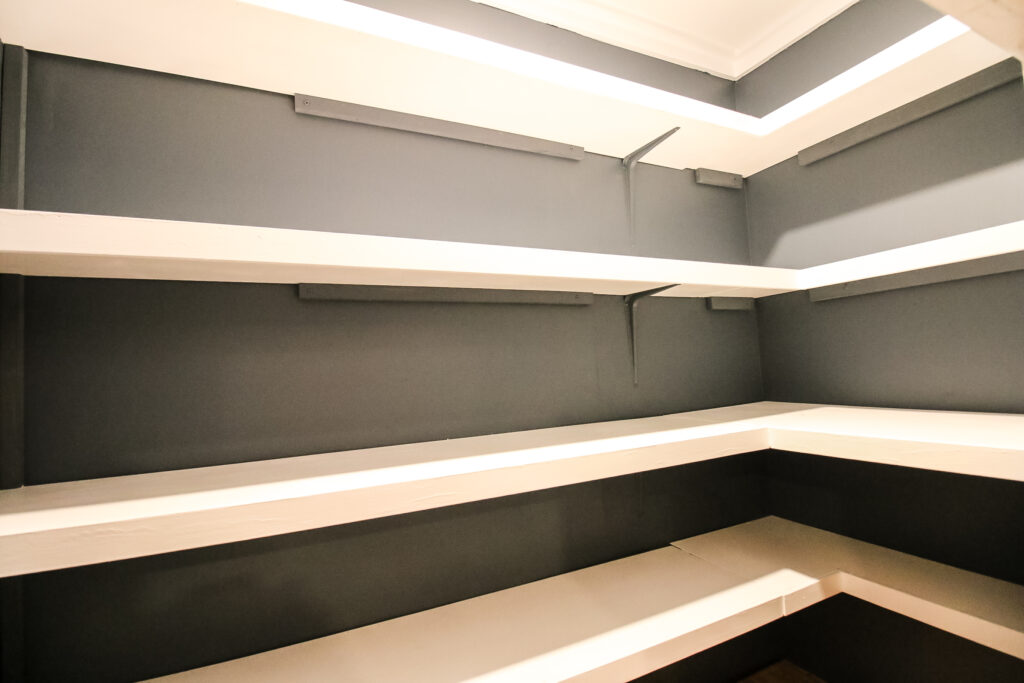
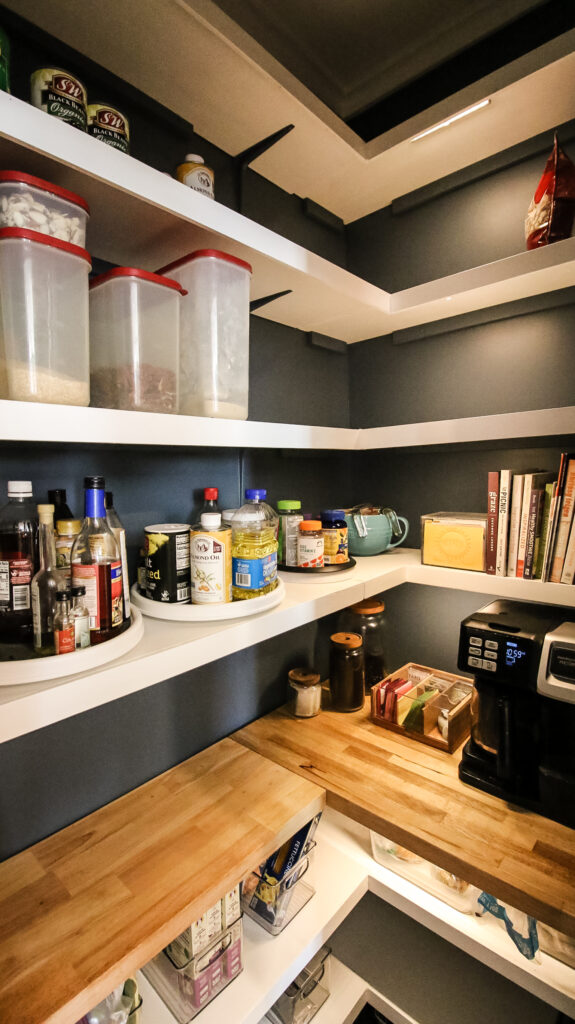
Installing new shelving
We decided to just carry over the existing shelving, but expand it into an L-shape along the new back wall.
The shelves we had in place from the old makeover worked well and were very deep, but we could bring these along the new wall a little more shallow.
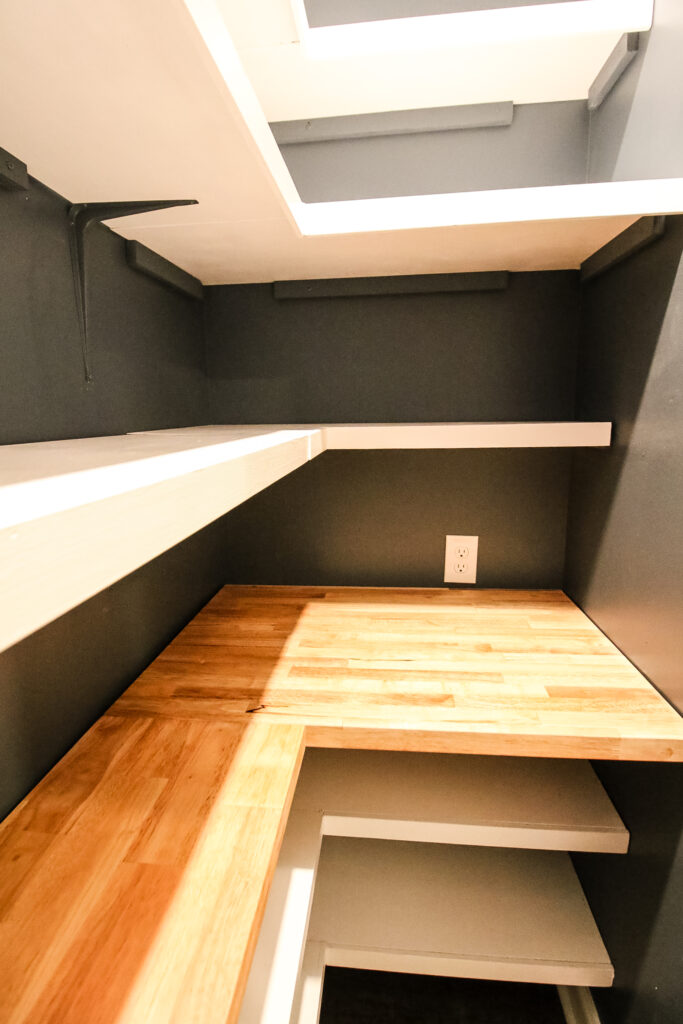
We wanted to make sure we had space to add new organization, but also pull in a couple of the appliances from our kitchen counters into the pantry, like our coffee maker.
We used simple shelves made from plywood for most of the levels, and had a counter level shelf made of butcherblock that we had before.
Since these shelves can't rest on two walls, we did need to add support braces on one end, but now they can hold lots of supplies.
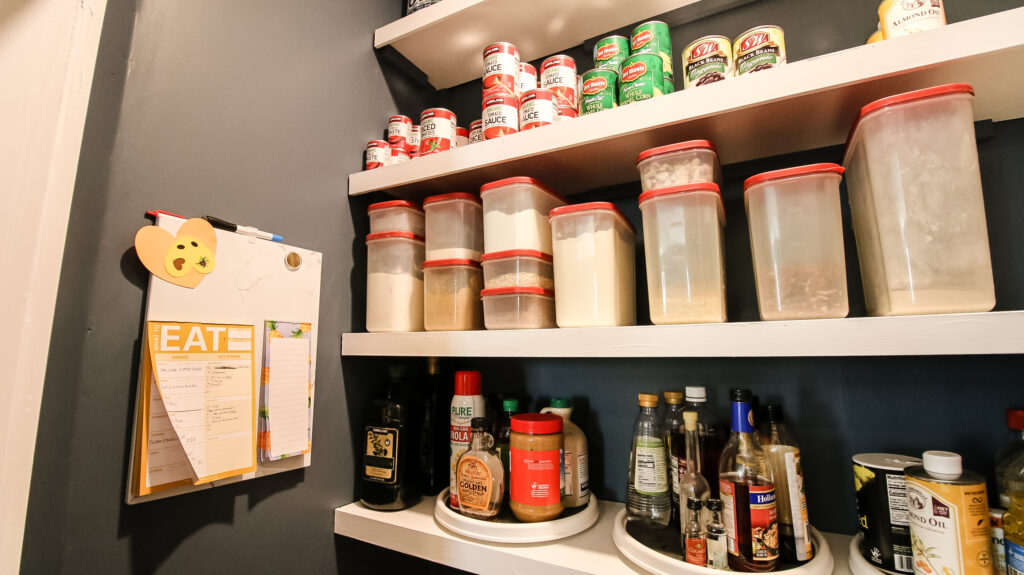
Pantry organization
Once all the shelves were in place, we started with organization! It was nice to finally bring all the food back from the table in the office...
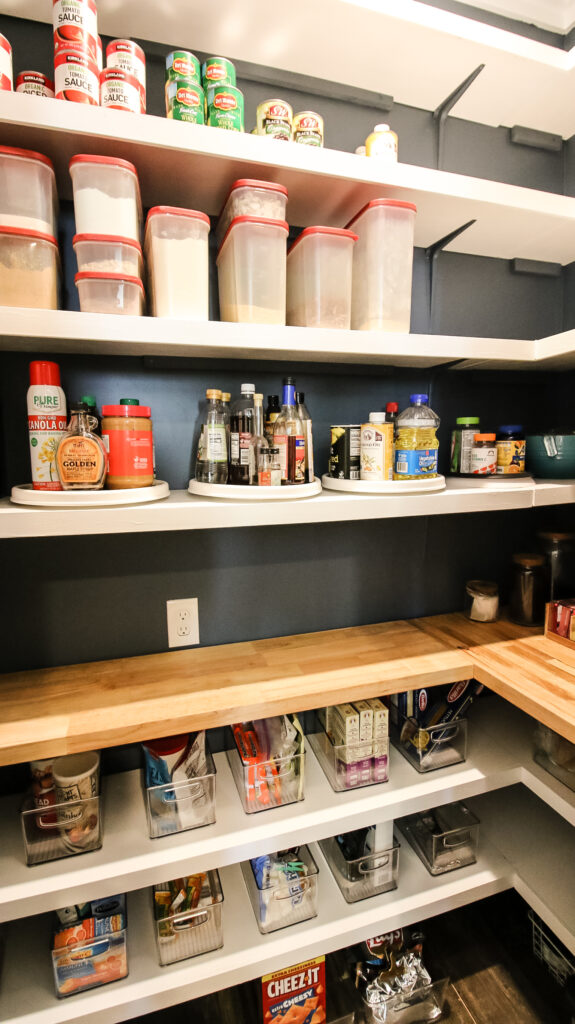
We bought a lot of clear bins to group similar items together and focused on putting things at the right height for how often we would need to access them.
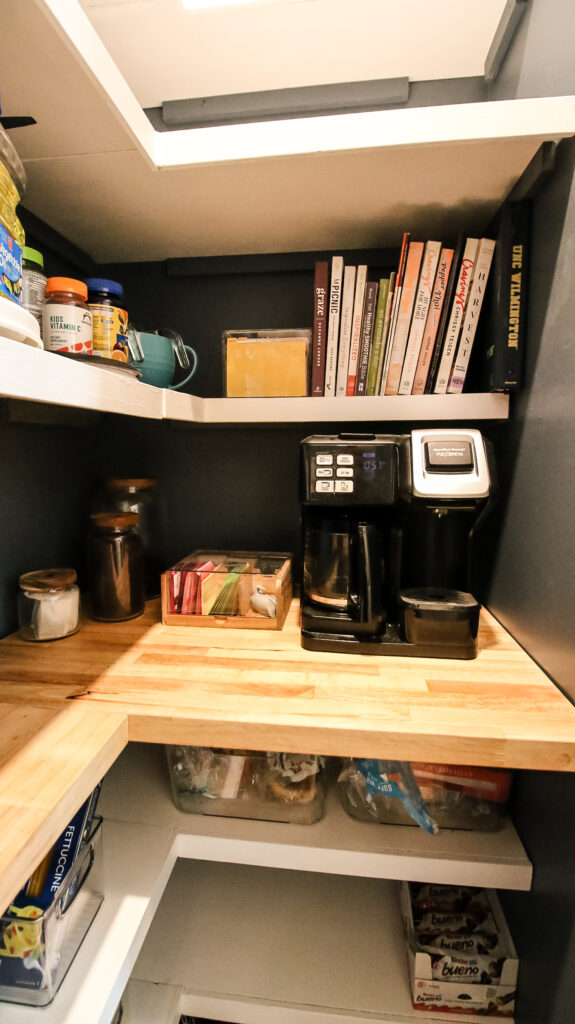
Our coffee station is really nice and clears up a whole section of counter out in the kitchen.
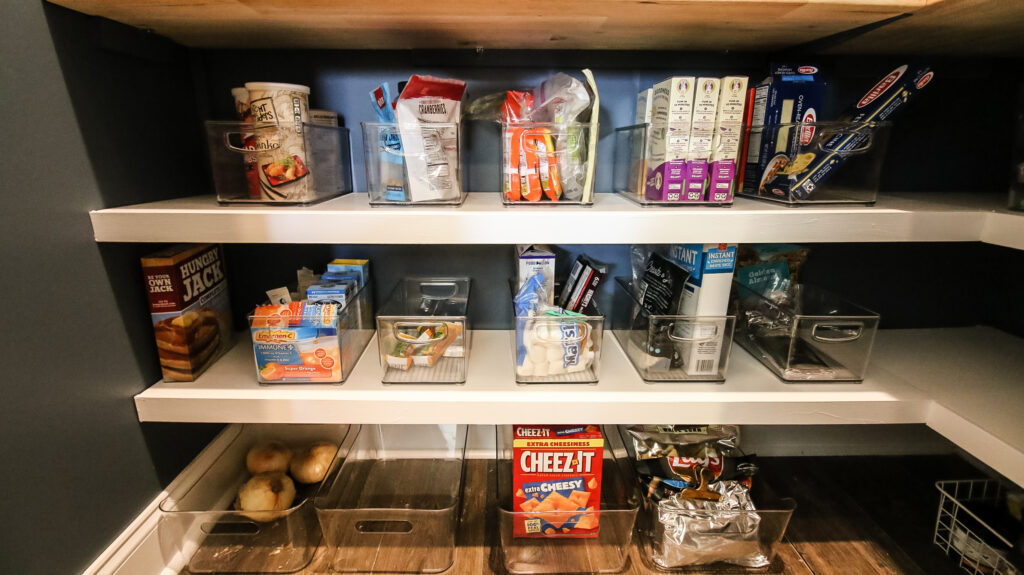
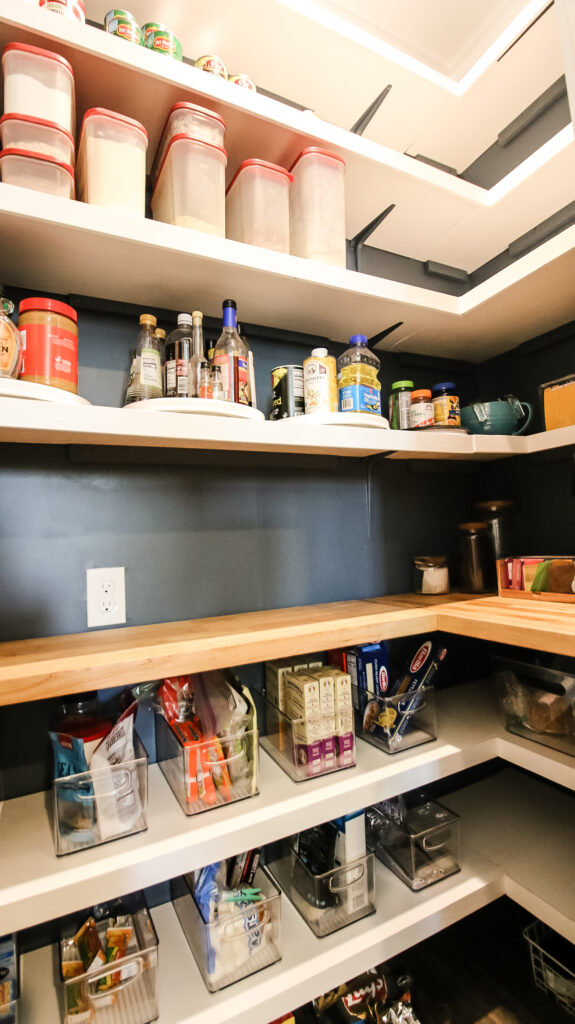
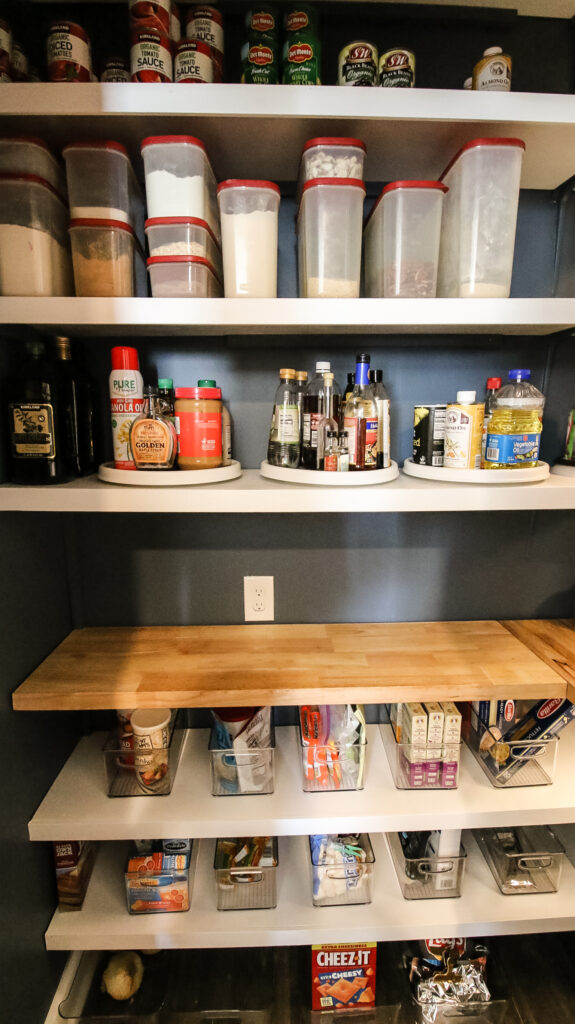
All the organization ended up resulting in the fact that we have so much space now that we can't even fill it (although I'm sure that won't last). But now we have great room to grow!
Over time, we'll probably bring up some stuff that we store in the garage and store it here for easier access, but this pantry is now a dream!
Pantry expansion budget breakdown
The cost of expanding the pantry was shockingly inexpensive, considering we essentially added a room to our home that wasn't there before.
Obviously, something being "inexpensive" or "expensive" is totally subjective, but we thought this turned out a lot more approachable than you would think.
We chose to hire an electrician to install the new light switch, overhead can light and two outlets because we didn't want to do that ourselves. If you know how to do something like that, it will save you a lot of money.
Here's our complete budget breakdown to give you an idea of how much it costs to expand an existing pantry!
- (7) 105" 2x4s @ $5.68= $56.80
- (1) Box of 3" construction screws= $9.97
- (6) ½"x4'x8' drywall sheets @ $14.40= $86.40
- (1) Spiral Mixer= $8.98
- (1) Box of 1 ¼" drywall screws= $7.98
- (1) Roll of joint tape= $12.30
- (1) Jab saw= $13.98
- (1) Compound spreader= $10.48
- (1) 3lb bucket of joint compound= $20.70
- (2) Buckets of paint= $85.97
- (1) 41' of crown/baseboard/quarter round= $95.91
- (1) ½"x4'x8' plywood= $49.55
- (1) butcher block= $149
- (7) Shelf brackets @ $2.47= $17.92
- (1) Electrical supply costs= $200
- FULL MATERIAL COST= $825.94
- ELECTRICIAN LABOR COST= $375
- GRAND TOTAL= $1,200.94
This might seem like a lot or a little to you. Another thing to remember is that the tools we bought we will be able to use for other projects and we barely used any of the paint, so we'll be carrying that over to our upcoming office renovation.
We also have lots of extra joint compound and a huge slab of butcher block we'll use elsewhere as well. So, while the costs came up in this project, they won't in the next one, so they are spread evenly.
Additionally, here's the tools we used to do this project. We had everything on hand already (aside from needing some new saw blades), so none of this cost would impact us. If you did need to buy any or all of these tools, it would add to your cost significantly.
Tools needed:
- Reciprocating saw
- Trim puller
- Mallet
- Shop vac
- Drill
- Orbital sander
- Brad nailer
- Level
Pantry expansion video tutorial!
If you want to see a video of the entire process for building this pantry, make sure you click over and check out our YouTube video!


Looking for something?
We've been doing this since 2012 so we have a LOT of blog posts!
Search stuff like: Ceiling Projects | DIY Plant Stands | Thrift Flips

Hey there, I'm Sean, the woodworking enthusiast and builder behind CharlestonCrafted.com! Since 2012, I've been sharing the magic of turning raw materials into beautiful creations. I love teaching others the art and satisfaction of woodworking and DIY. I try to inspire fellow crafters to make something extraordinary out of nothing at all.