• Skip to primary navigation
  • Skip to main content
  • Skip to primary sidebar
Charleston Crafted
  • DIY
  • Woodworking
  • Popular Posts
  • Blog
  • About
  • Shop
menu icon
go to homepage
  • DIY
  • Woodworking
  • Popular Posts
  • Blog
  • About
  • Shop
search icon
Homepage link
  • DIY
  • Woodworking
  • Popular Posts
  • Blog
  • About
  • Shop
×
Home » Building

DIY Pikler Climbing Arch - with printable PDF plans!

Published: May 26, 2020 · Modified: Feb 9, 2024 by Sean · As an Amazon Associate, we earn from qualifying purchases. This site contains affiliate links. ·

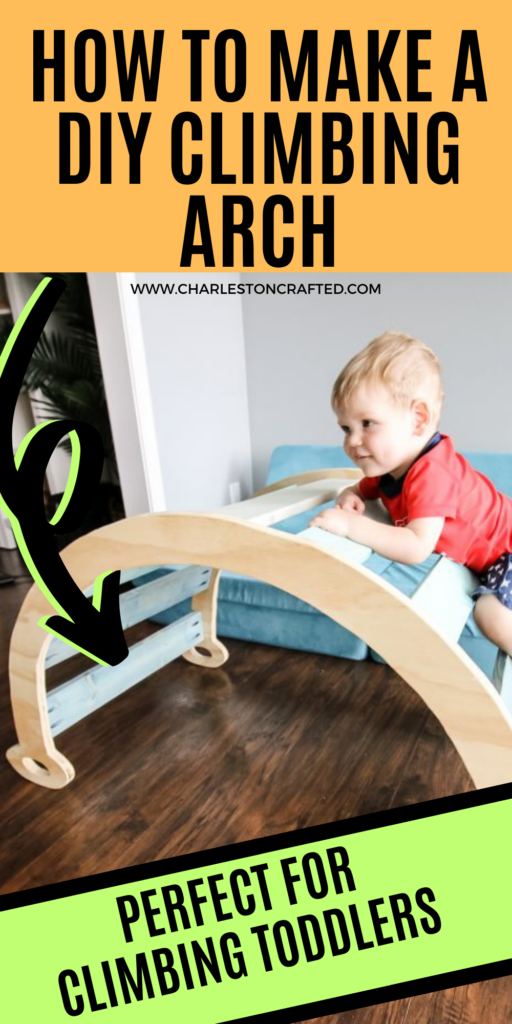
We built this DIY Pikler Climbing Arch and Rocker for our 18 month old and it has been a huge hit! Here is a tutorial for how we built it AND printable PDF woodworking plans so you can build your own.

The Pikler Triangle was invented by a pediatrician in the early 20th century as a means to help children learn how to move their bodies on their own.

The concept is simple- create a ladder that is adjustable that your young child can climb on and gradually become more comfortable with the way their body moves. Check out this article about the benefits of a pikler triangle!

Here are all of my favorite indoor toddler climber toys!

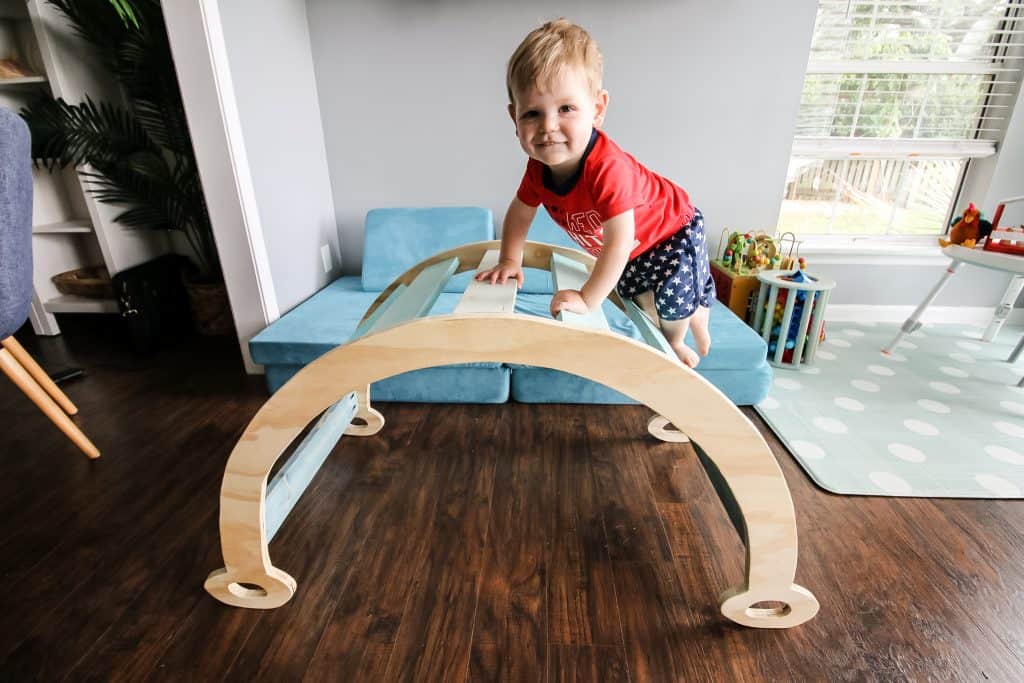
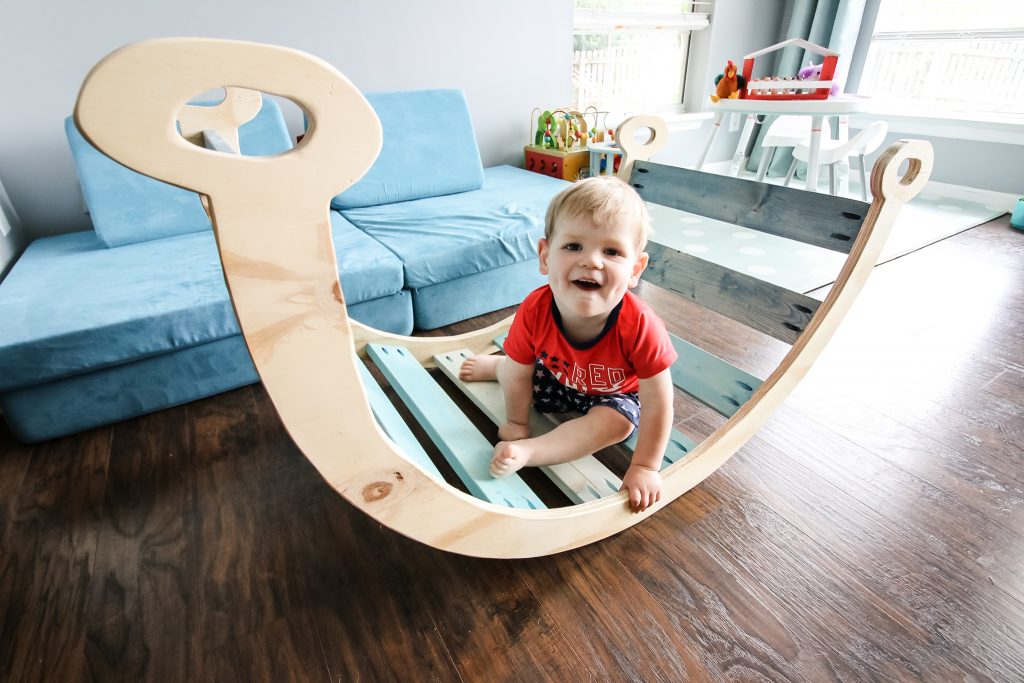
We built a Pikler Triangle for our son for his first birthday. He is now 18 months old and we decided to expand his Pikler collection to include a Pikler Climbing Arch Rocker!

How to make a DIY climbing arch - Charleston Crafted

What is the difference between a Pikler Triangle and a Climbing Arch?

The Climbing Arch is different from the Pikler Triangle in design but not in purpose. They both have been widely accepted by lovers of Montessori style wooden toys because they lend themselves to a lot of open ended play.

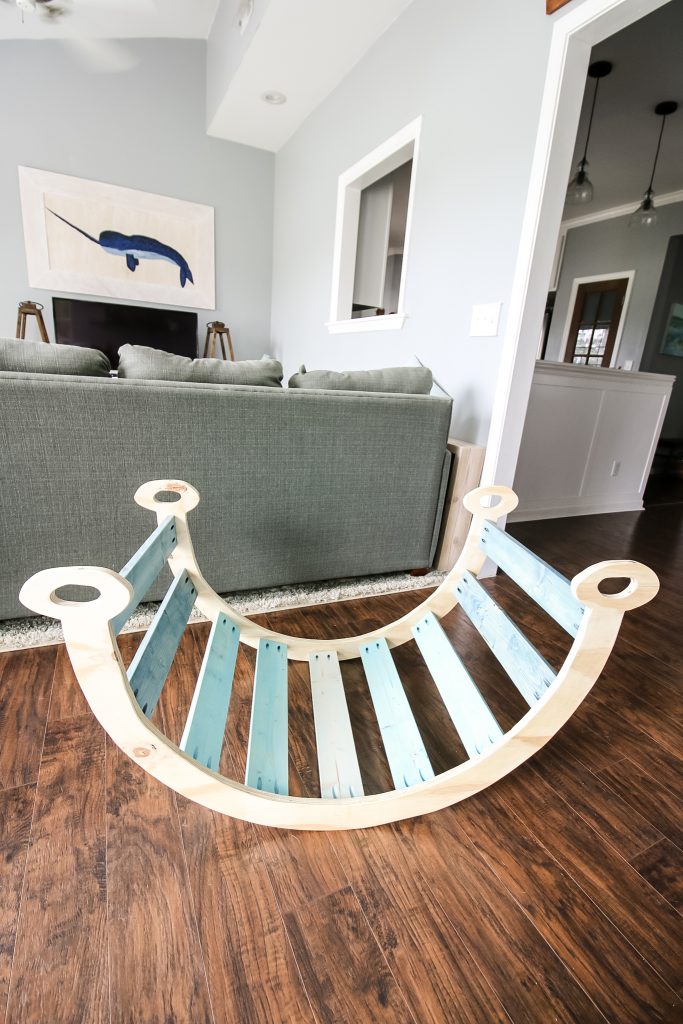
Most obviously, the climbing arch is arched like a rainbow, while the Pikler Triangle is triangular.

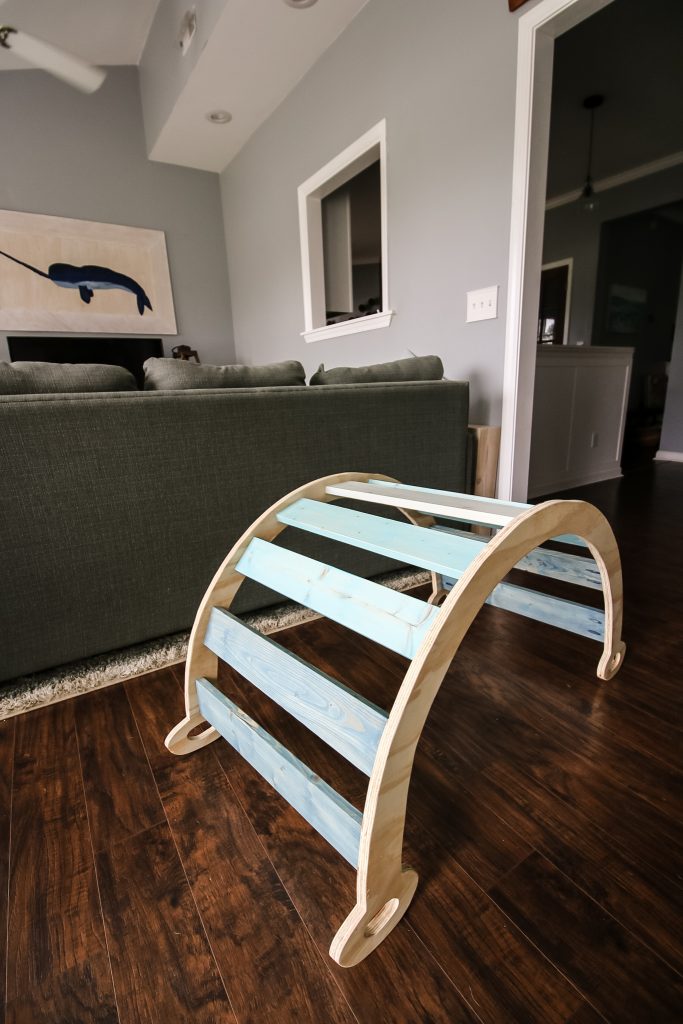
The arch is also reversible, so you can flip it upside down and use it like a rocker. Our son loves the rocking!

This climbing arch does not fold, so it takes up a lot more floor space compared to a folding Pikler triangle when not in use. Just something to keep in mind!

You can make either one with slats or round dowels as climbing rods. We used dowels on our Pikler triangle and used slats on this one. The slats are cheaper to buy, and feel more sturdy than the dowels so I would definitely recommend taking this route!

Climbing arch right side up
Pikler rocking arch

Uses for a Climbing Arch

There are 3 main uses for a Pikler climbing arch:

  1. Climbing like a ladder
  2. Rocking when upside down (U shape)
  3. Cover with a blanket and use as a cave to play in!

The cave is a surprisingly big hit, considering our son is not really into forts/having a blanket over him. He loves sticking little toys between the slats of the climbing arch and the blanket!

The climbing arch also pairs really well with a DIY climbing ramp!

Climbing on Pikler climbing arch

Click here to get the PDF printable woodworking plans on how to build a Pikler Climbing Arch + Rocker!

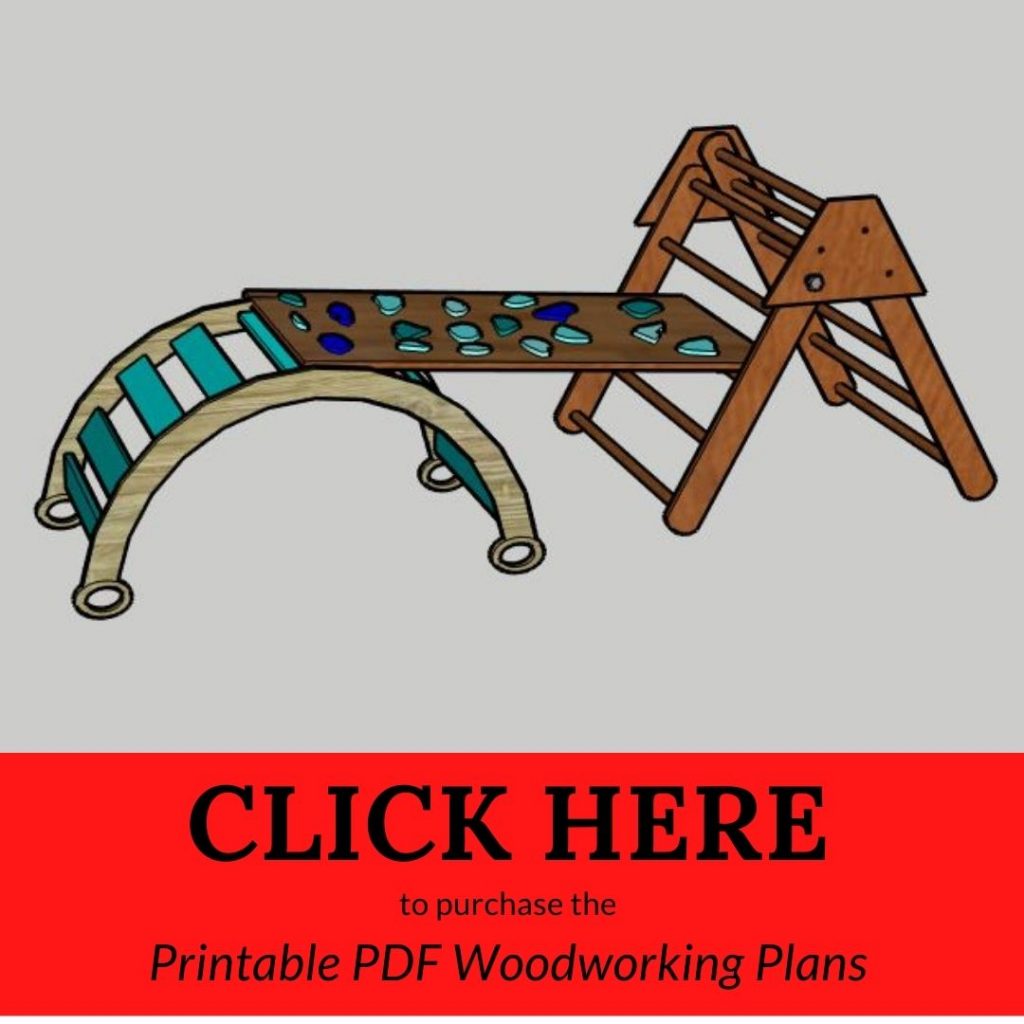
Click here to buy a bundle of plans to build a Pikler Triangle AND a Pikler Climbing Arch/Rocker!

Sitting in rocking arch

Supplies

You need a few supplies to build a pikler climbing arch rocker. Get the full cut list in our printable PDF plans!

  • (2) 2'x4' ¾" plywood
  • (2) 1" x 4" x ¾" boards
  • (36) 1 ¼" Kreg Screws
  • Wood Glue
  • Stain/sealant of choice - outdoor if you will keep it outside

Tools

You don't need many tools to build this Pikler climbing arch! You need:

  • Jigsaw/Scroll saw
  • Miter saw
  • Sander
  • Drill
  • Kreg Jig Pocket Hole Jig

How to build a Pikler Climbing Arch Rocker

Here's a really quick overview on how to build the climbing arch, but the full details with dimensions can be found in our downloadable PDF woodworking plans here.

Step one: cut out arch

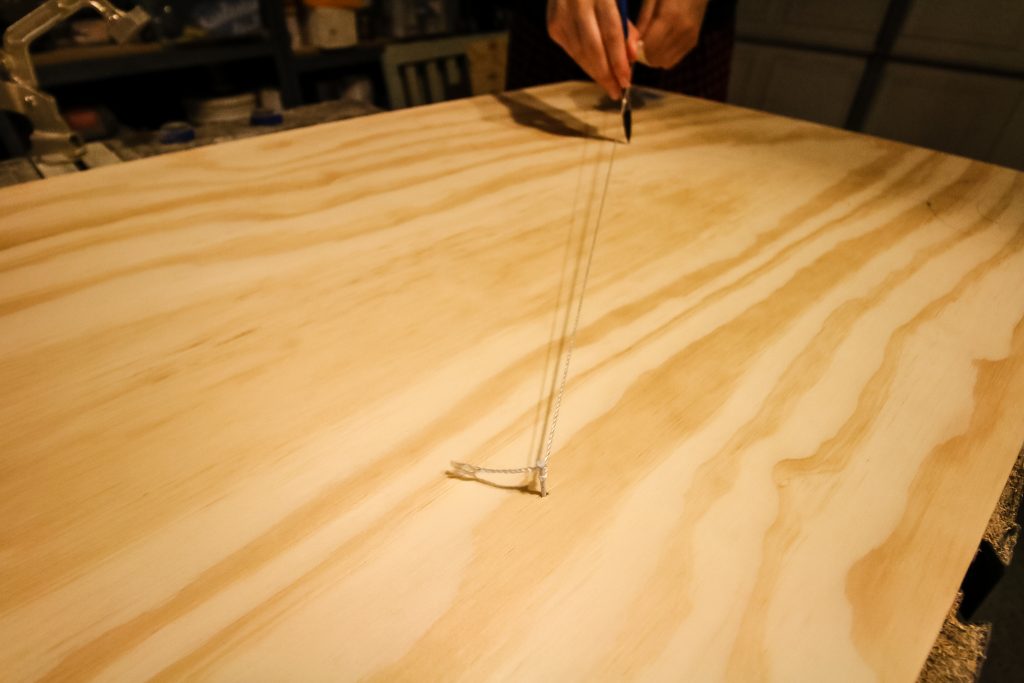
The arch is fairly simple to build. The general idea is that you cut out two curved arches with handles from two pieces of plywood.

The arches are cut from plywood by drawing two exactly-matching curves and handles. You'll use a pencil and a string attached to a nail to get the curve perfect and to match.
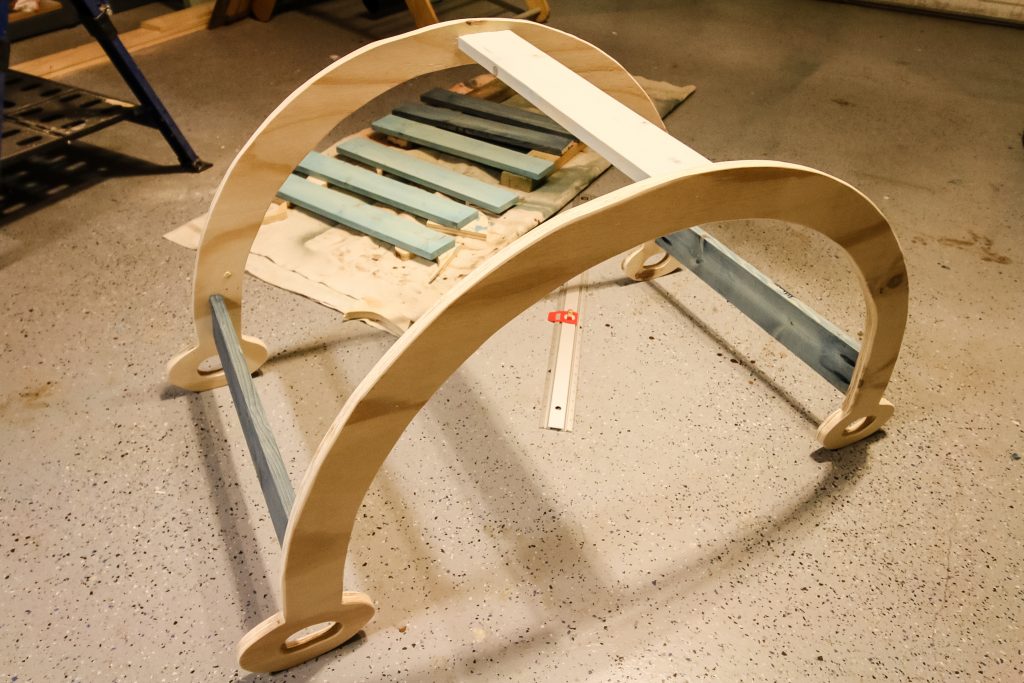
Drawing arch for Pikler climbing arch

Step two: add slats

Once you have the arches, you cut the slats to go across the middle to connect them together. These slats are all the same length, so they are easily replicable.

The slats connect with wood glue and pocket holes for a double sturdy effect. The slats can be stained all one color or as a rainbow.

We opted for an hombre of blue stains. Check out our post about the best blue wood stains!

Connecting sides of Pikler climbing arch

Another great project for kids is our tutorial on how to build a balance beam for kids!

PDF Printable Woodworking Plans

To make it simple for you, we've done all the leg work. We created printable PDF plans for you that give you the full materials list, cut list and step-by-step instructions for how to build your own Pikler climbing arch and rocker.

These plans are easy to follow. We also have the option for you to pick up both plans for the Pikler Triangle and the climbing arch to make a full Pikler playground in your house!

CLICK HERE to purchase the Printable PDF Woodworking Plans Pikler Arch
CLICK HERE to purchase the Printable PDF Woodworking Plans Pikler Bundle

Check out our tutorial + woodworking plans for how to build a kids learning tower!

Montessori Kid's woodworking plans bundle

Love building for your kids? Click here to get our bundle of Montessori inspired woodworking plans for:

  • Front facing bookshelf
  • Montessori toy self
  • Climbing triangle + ramp
  • Climbing arch
  • Toddler workbench

Get the bundle (valued at $55 individually) for only $44.99 together! That's a FREE plan!

Mother and son in Pikler climbing arch
Charleston Crafted Signature

Follow us on:
Pinterest | Instagram | TikTok | YouTube | Facebook | Amazon Storefront | LTK Shop

Looking for something?

We've been doing this since 2012 so we have a LOT of blog posts!
Search stuff like: Ceiling Projects | DIY Plant Stands | Thrift Flips

Charleston Crafted logo banner
Sean headshot cropped
Sean

Hey there, I'm Sean, the woodworking enthusiast and builder behind CharlestonCrafted.com! Since 2012, I've been sharing the magic of turning raw materials into beautiful creations. I love teaching others the art and satisfaction of woodworking and DIY. I try to inspire fellow crafters to make something extraordinary out of nothing at all.

More Building

  • How to build a DIY gate pergola- Charleston Crafted
    How to build a DIY gate pergola
  • DIY modern rolling storage table - Charleston Crafted
    DIY modern rolling storage table
  • DIY folding desk for walking pad - Charleston Crafted
    DIY folding desk for walking pads
  • DIY cube storage console table - Charleston Crafted
    DIY cube storage console table

Reader Interactions

Comments

  1. Meir says

    October 14, 2020 at 4:14 am

    hi,
    Q. the boards for the climbing arc. made of plywood or a wood ?
    I just bought the plan.
    Thank you
    Meir

    • Sean says

      October 14, 2020 at 1:04 pm

      The arches are made out of plywood. The slats between the arches are made from wood boards.

  2. Annalee says

    January 24, 2021 at 10:03 am

    Beautiful arch!! How did you paint your arch? I'm looking for baby-safe paints/stains.

    • Morgan says

      January 24, 2021 at 8:46 pm

      We used some blue stains for the boards and left the arch pieces natural.

Trackbacks

  1. The 12 best indoor climbing toys for toddlers in 2021 - Celebrating with kids says:
    May 14, 2021 at 2:51 pm

    […] If you are a DIY-lover, you can definitely DIY your own kid’s climbing toys. The easiest to build is the pikler climbing arch – here’s a great tutorial! […]

  2. The 10 Best Pikler Triangle Alternatives for Busy Toddlers - Celebrating with kids says:
    June 15, 2021 at 4:24 pm

    […] Pikler climbing arch […]

  3. Everything you need to know about Pikler Triangles - Celebrating with kids says:
    June 16, 2021 at 3:50 pm

    […] We built our pikler triangle + climbing arch. Here are the pikler triangle plans and here are the pikler arch plans. […]

Primary Sidebar

Charleston Crafted about us image

Hey y'all!

We are Morgan & Sean McBride and we are crafting our home together in Charleston, South Carolina.

More about us

Popular Posts

  • DIY Coffered Ceiling
    DIY Coffered Ceiling
  • How to Make DIY Concrete Pumpkins via Charleston Crafted
    How to Make DIY Concrete Pumpkins
  • How to Make a Cupid's Arrow Valentine's Day Wall Hanging with felt on the Cricut
    How to make a Cupid's Arrow Valentine's Day Wall Hanging
  • Our Tropical Oasis - A backyard Hammock area - Charleston Crafted
    Our Tropical Oasis

Recent Posts

  • fisherman aesthetic home inspiration
    Fisherman Aesthetic Decor for Your Home
  • Senix Tools Review- Charleston Crafted
    Are Senix power tools any good?
  • Your Weekend To-Do List: 15 Things to Do for Summer Home Upkeep
    Your Weekend To-Do List: 15 Things to Do for Summer Home Upkeep
  • How to stain wood with RIT dye - step by step instructions
    How to stain wood with RIT dye

Privacy Policy

Footer

↑ back to top

Navigation

  • Home
  • Blog
  • Contact Us
  • Terms of Use
  • Disclaimer

Newsletter

  • Sign up for emails and updates
  • Follow us on Instagram
  • Work with Us

Browse by Category

  • Woodworking
  • Home Projects
  • Paint Colors
  • Room Reveals

© 2025 The Charleston Crafted Blog LLC DBA “Charleston Crafted” and “CharlestonCrafted” (also known as N/A) / All Rights Reserved.
Official Website: (Charleston Crafted)
Registered in USA (Co. Reg. No.: 565586)
Address: Charleston, USA 29414, South Carolina
Contact Phone: Not applicable — contact is via email: sean@charlestoncrafted.com

DISCLAIMER: The content on this website is provided for general informational purposes only and is not intended as professional advice. The Charleston Crafted Blog LLC and The Charleston Crafted Blog LLC make no representations or warranties—express or implied—regarding the accuracy, completeness, or suitability of the information contained herein. Any reliance you place on this information is strictly at your own risk. In no event shall The Charleston Crafted Blog LLC or The Charleston Crafted Blog LLC be liable for any loss or damage, including without limitation, indirect or consequential loss or damage, arising from the use or inability to use this website. This website is the official website of The Charleston Crafted Blog LLC.

AFFILIATE DISCLOSURE: This website contains affiliate links. If you click through and make a purchase, we may earn a commission at no extra cost to you.

As an Amazon Associate, I earn from qualifying purchases.

Site Editor: Morgan Smith McBride

Copyright © 2025 Charleston Crafted