• Skip to primary navigation
  • Skip to main content
  • Skip to primary sidebar
Charleston Crafted
  • DIY
  • Woodworking
  • Popular Posts
  • Blog
  • About
  • Shop
menu icon
go to homepage
  • DIY
  • Woodworking
  • Popular Posts
  • Blog
  • About
  • Shop
search icon
Homepage link
  • DIY
  • Woodworking
  • Popular Posts
  • Blog
  • About
  • Shop
×
Home » Bathroom Projects

How to Make a Tub Bench

Published: Feb 4, 2019 · Modified: Feb 4, 2024 by Sean · As an Amazon Associate, we earn from qualifying purchases. This site contains affiliate links. ·

Check out how to make a simple DIY cedar bathtub bench that comes in handy for parents bathing their children, or as a foot rest for shaving your legs. It's a simple build and we have free woodworking plans available!

There are a lot of things that you don't realize are problems until you have children.

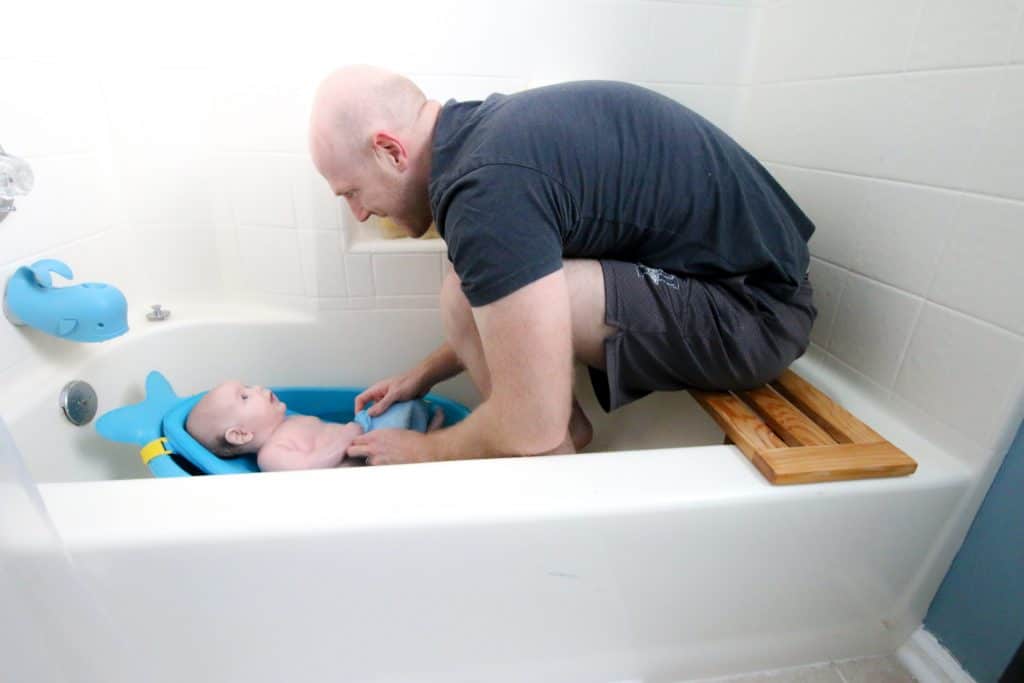
We recently built a simple DIY tub bench for using while bathing our son. We were squatting or kneeling in the guest bathroom tub and it was uncomfortable.

By adding a tub bench, we can sit and take pressure off our joints. It's easy to sit on and lean into the tub to help bathe the children.

This tub seat is based on our standard insert tub, but is customizable if your tub is not standard width. If you need your own shower seat, this will work as well as long as you have two sides to prop the seat on.

Click here to get the plans for our stand-alone shower stool!

Tub Bench - Charleston Crafted

How to build a simple tub bench

I started by measuring the tub. It's a fairly standard shower/tub combo, but make sure to measure for your tub bench first.

I measured from the edge of the tub to the wall, being careful to take any curved areas into consideration.

My whole bench is 28" wide. I used ¾" thick cedar for this project because cedar holds up well in areas of high moisture. Makes a lot of sense for a tub seat.

Check out all of our DIY woodworking projects for the bathroom!

Making cuts for a tub bench

We like to start by making all the cuts, drilling holes and sanding before assembling. This makes it easy to build when ready.

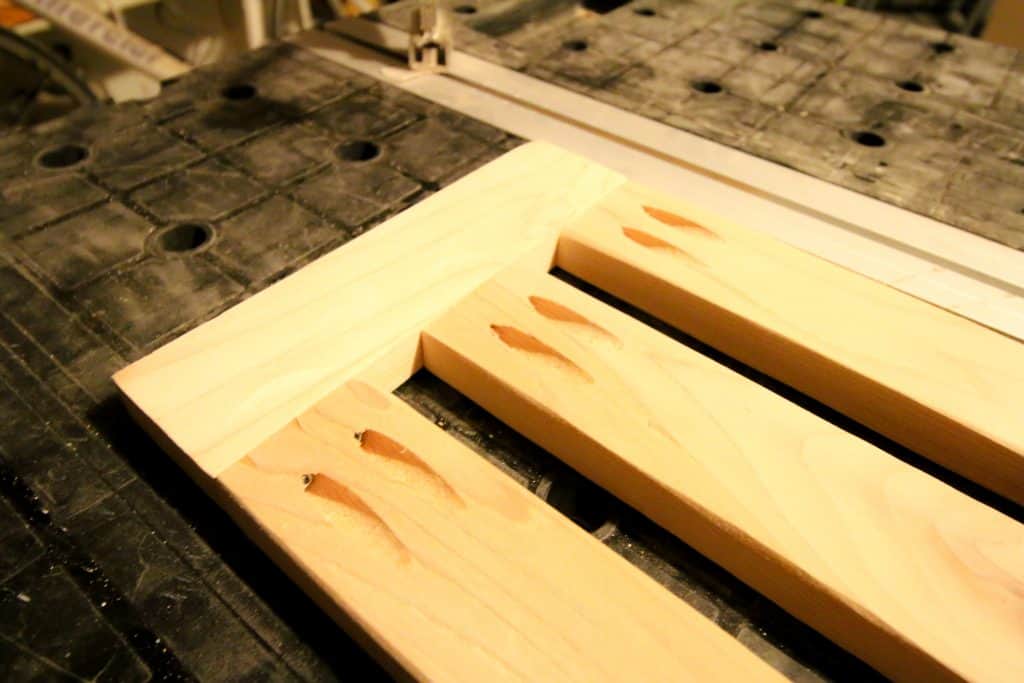
First cut two 8"x2" pieces for the sides.

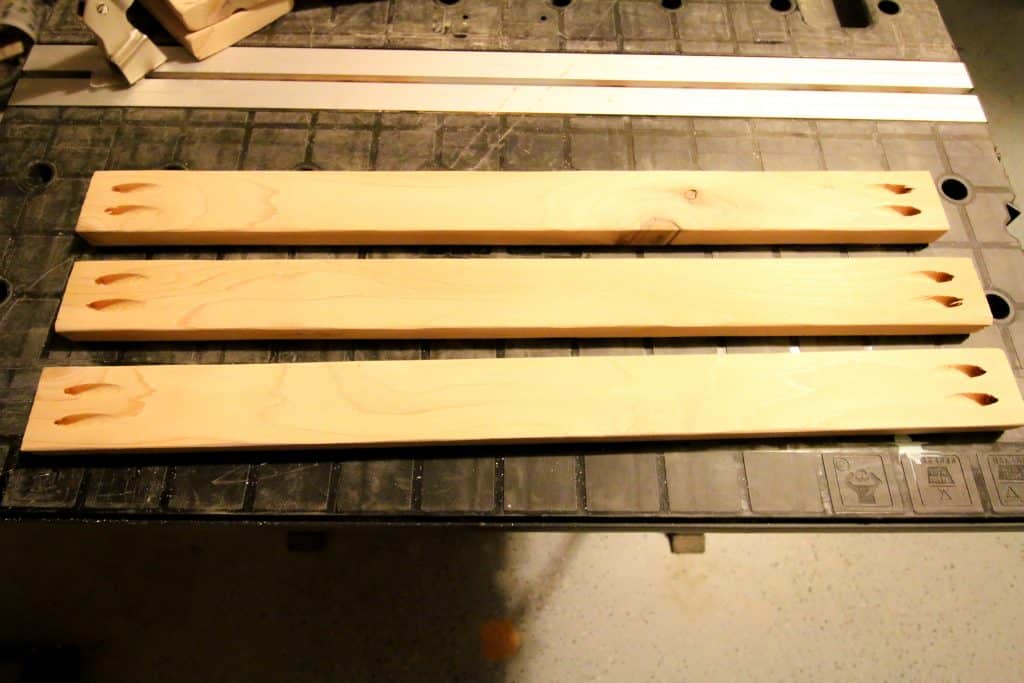
Then, cut three 24"x2" pieces for the slats. Add two pocket holes to each end.

Tub Bench - Charleston Crafted

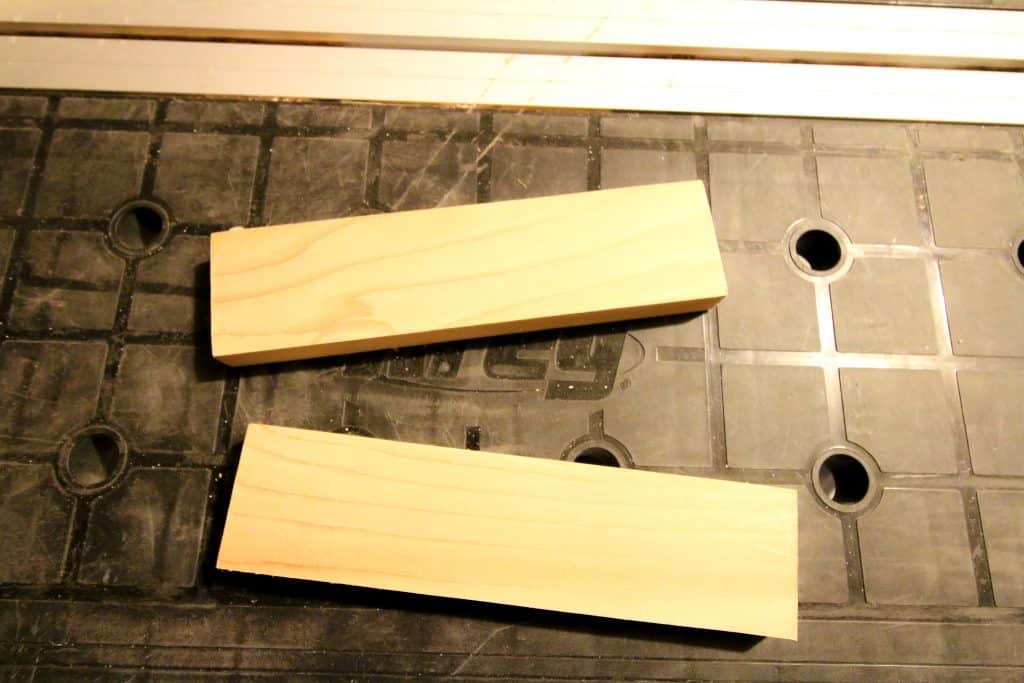
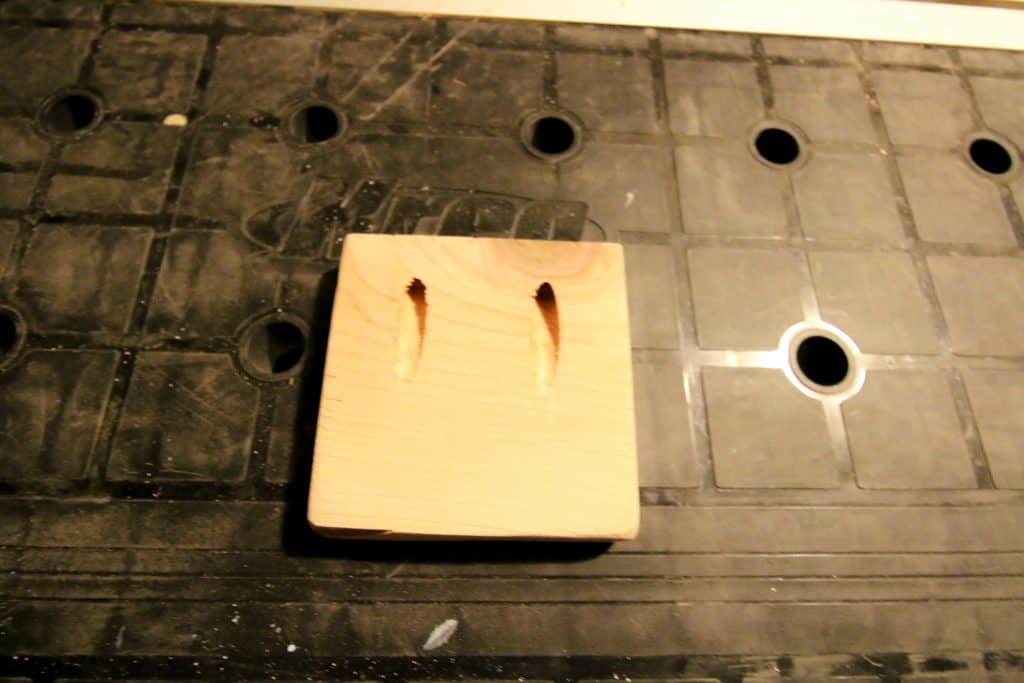
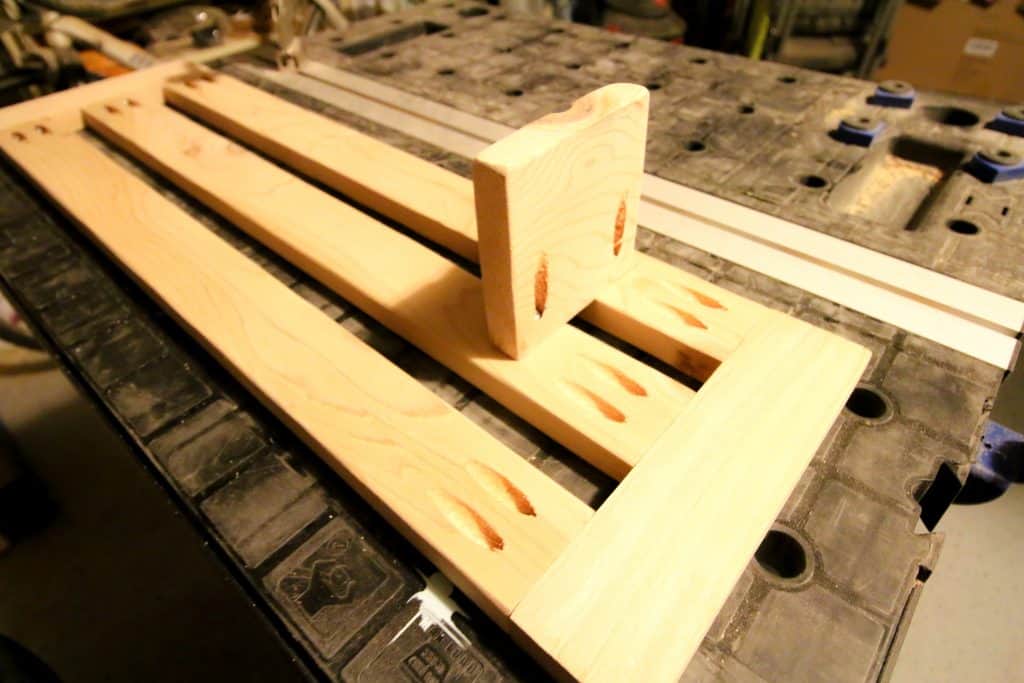
Finally, cut one 4"x4" support piece to hold the seat in place against the wall of the tub. Add two pocket holes to one side.

Tub Bench - Charleston Crafted

Assembly

Start by attaching a slat flush with each end of the side pieces. I used Kreg Jig pocket holes to attach them to make sure it was secure since I'd be sitting on it. 

I then added another slat in the middle with a one inch gap.

Tub Bench - Charleston Crafted

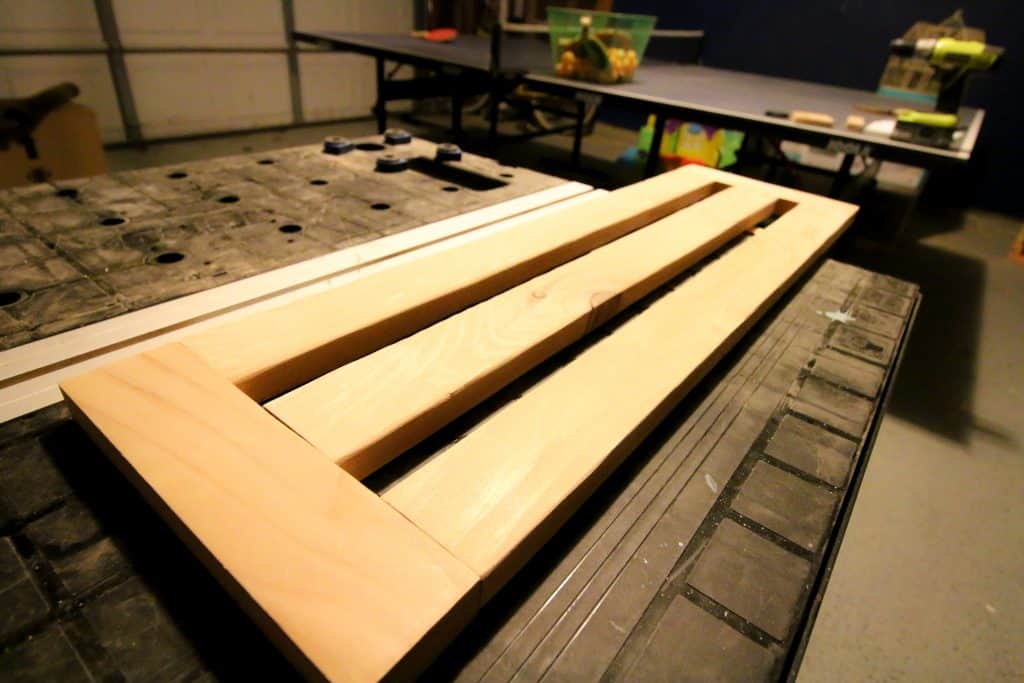
Once the top was built, I took it up to the tub to verify the placement of the support piece. I again used pocket holes to firmly attach this piece to the underside of the bench.

Tub Bench - Charleston Crafted

Even though it was cedar, I decided to finish off the whole thing with a coat of spar urethane for added protection.
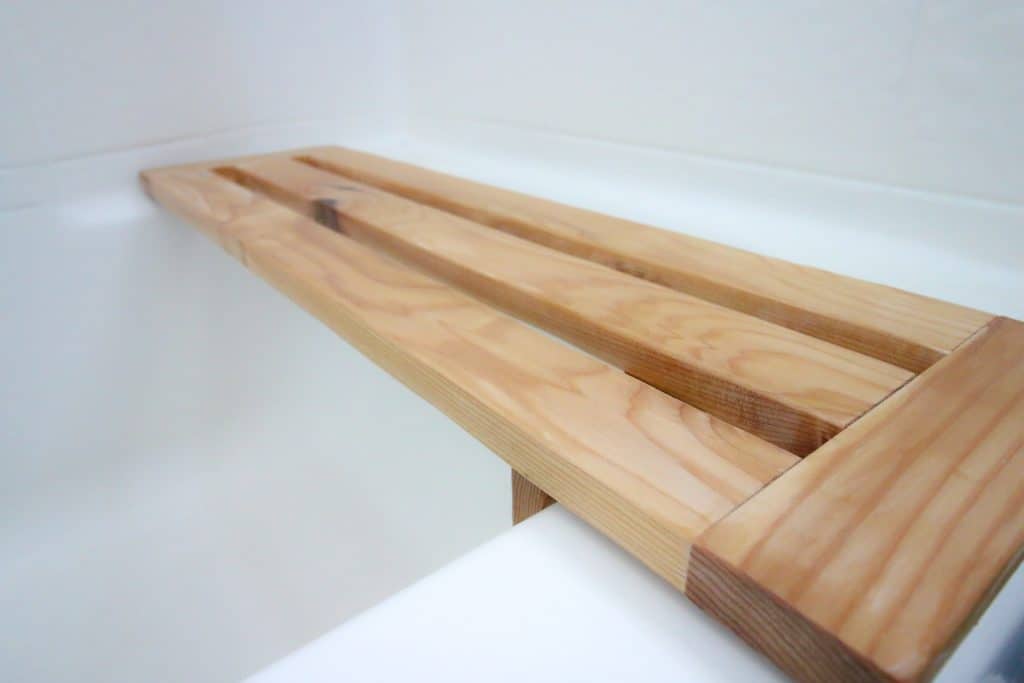
Finished Product

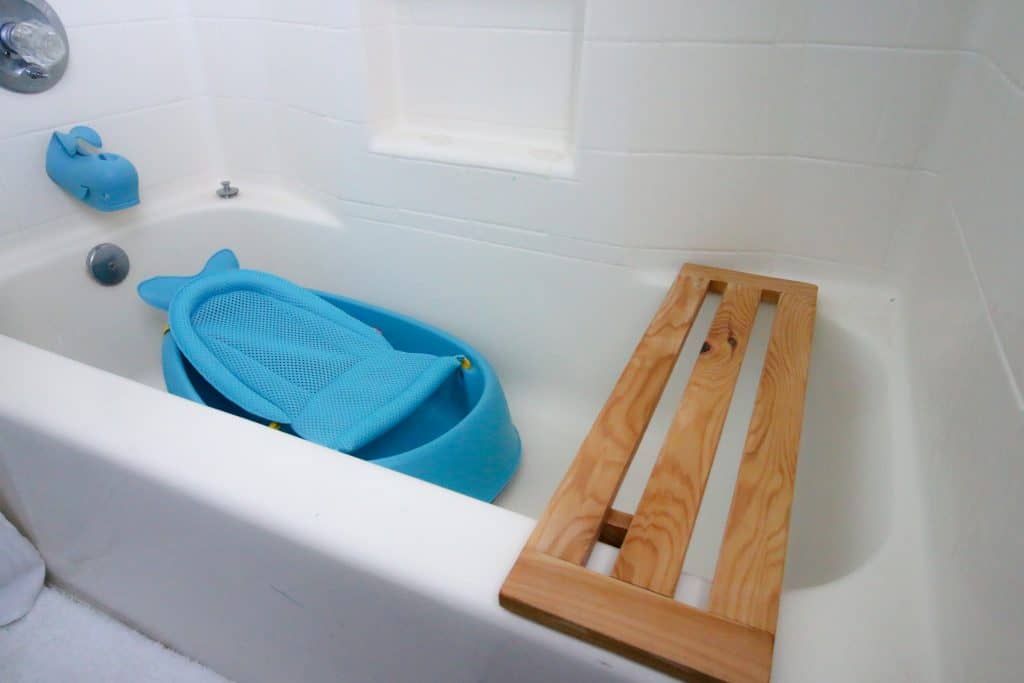
The bathtub bench turned out great!

I love that this is a removable tub seat that we can take out when guests use the shower. For us, this tub bench is perfect for sitting on when bathing our child in his baby tub.

Tub Bench - Charleston Crafted

Want to build a free standing seat for a shower? Get our free plans to build a DIY shower stool!

Tub Bench - Charleston Crafted

Interested in the Kreg Jig? Click here to read our full Kreg Jig review and to see all of our Kreg Jig projects.

New to the Kreg Jig? Here is a step by step guide on how to use a Kreg Jig!

OR grab our FREE Kreg Jig Cheat Sheet here! Download the cheat sheet!

Charleston Crafted Signature

Follow us on:
Pinterest | Instagram | TikTok | YouTube | Facebook | Amazon Storefront | LTK Shop

Looking for something?

We've been doing this since 2012 so we have a LOT of blog posts!
Search stuff like: Ceiling Projects | DIY Plant Stands | Thrift Flips

Charleston Crafted logo banner
Sean headshot cropped
Sean

Hey there, I'm Sean, the woodworking enthusiast and builder behind CharlestonCrafted.com! Since 2012, I've been sharing the magic of turning raw materials into beautiful creations. I love teaching others the art and satisfaction of woodworking and DIY. I try to inspire fellow crafters to make something extraordinary out of nothing at all.

More Bathroom Projects

  • bathroom maintenance checklist
    Bathroom Maintenance Checklist
  • DIY kids step stool - Charleston Crafted
    DIY kids step stool
  • How to choose tile spacer size- Charleston Crafted
    How to Choose the Perfect Tile Spacer Size for Flawless Installation
  • 8 best paint colors for a beachy bathroom

Reader Interactions

Comments

  1. Penny says

    February 04, 2019 at 11:23 pm

    Wow Great idea, some of the best things in life are the simple things that are right under our noses, but we just don't see it. Good on you for thinking this one up, and sharing with us all

  2. Scott says

    April 16, 2020 at 11:33 pm

    I like this idea but your measurements are a bit confusing to me. 24"x4" I'm assuming 3 1x4 x 28", 4"x4" to me is a post. I'm also assuming 1 1x4x4"? Can someone clarify measurements? I guess I can figure this out but for new readers this might be very confusing.

    • Sean says

      April 17, 2020 at 2:30 pm

      Sorry if you didn't think it was clear, Scott. Everything was made with common 1" boards, so actually 3/4" thick. When 4"x4", that was referring to the two sides, with the implication that the third length is the thickness, which is 3/4".

  3. Ivory says

    February 07, 2021 at 2:45 pm

    Amazing project. Amazing idea. This would have sooooo helped my knees when I would bath my kids when they were babies. Excellent idea. Thanks for sharing

Trackbacks

  1. Bathtub Bench – Free Woodworking Plan.com says:
    May 3, 2019 at 6:00 am

    […] project is genius! A bathtub bench! Build this quick and easy project using the free tutorial at the […]

Primary Sidebar

Charleston Crafted about us image

Hey y'all!

We are Morgan & Sean McBride and we are crafting our home together in Charleston, South Carolina.

More about us

Popular Posts

  • DIY Coffered Ceiling
    DIY Coffered Ceiling
  • How to Make DIY Concrete Pumpkins via Charleston Crafted
    How to Make DIY Concrete Pumpkins
  • How to Make a Cupid's Arrow Valentine's Day Wall Hanging with felt on the Cricut
    How to make a Cupid's Arrow Valentine's Day Wall Hanging
  • Our Tropical Oasis - A backyard Hammock area - Charleston Crafted
    Our Tropical Oasis

Recent Posts

  • how to organize a pantry with zones
    How to Organize Your Pantry in Zones (And Why It’s a Game Changer)
  • Keep outdoor rug from blowing up - Charleston Crafted
    How to keep your outdoor rug in place
  • kitchen design mistakes to avoid
    Kitchen design mistakes to avoid
  • DIY Faux Tropical Window Box That Looks Real (But Won’t Die!)

Privacy Policy

Footer

↑ back to top

Navigation

  • Home
  • Blog
  • Contact Us
  • Terms of Use
  • Disclaimer

Newsletter

  • Sign up for emails and updates
  • Follow us on Instagram
  • Work with Us

Browse by Category

  • Woodworking
  • Home Projects
  • Paint Colors
  • Room Reveals

© 2025 The Charleston Crafted Blog LLC DBA “Charleston Crafted” and “CharlestonCrafted” (also known as N/A) / All Rights Reserved.
Official Website: (Charleston Crafted)
Registered in USA (Co. Reg. No.: 565586)
Address: Charleston, USA 29414, South Carolina
Contact Phone: Not applicable — contact is via email: sean@charlestoncrafted.com

DISCLAIMER: The content on this website is provided for general informational purposes only and is not intended as professional advice. The Charleston Crafted Blog LLC and The Charleston Crafted Blog LLC make no representations or warranties—express or implied—regarding the accuracy, completeness, or suitability of the information contained herein. Any reliance you place on this information is strictly at your own risk. In no event shall The Charleston Crafted Blog LLC or The Charleston Crafted Blog LLC be liable for any loss or damage, including without limitation, indirect or consequential loss or damage, arising from the use or inability to use this website. This website is the official website of The Charleston Crafted Blog LLC.

AFFILIATE DISCLOSURE: This website contains affiliate links. If you click through and make a purchase, we may earn a commission at no extra cost to you.

As an Amazon Associate, I earn from qualifying purchases.

Site Editor: Morgan Smith McBride

Copyright © 2025 Charleston Crafted