• Skip to primary navigation
  • Skip to main content
  • Skip to primary sidebar
Charleston Crafted
  • DIY
  • Woodworking
  • Popular Posts
  • Blog
  • About
  • Shop
menu icon
go to homepage
  • DIY
  • Woodworking
  • Popular Posts
  • Blog
  • About
  • Shop
search icon
Homepage link
  • DIY
  • Woodworking
  • Popular Posts
  • Blog
  • About
  • Shop
×
Holidays » Christmas!

Wood Bead Garland

Published: Nov 27, 2019 · Modified: Nov 30, 2023 by Morgan · As an Amazon Associate, we earn from qualifying purchases. This site contains affiliate links. ·

Learn how to make a DIY wood bead garland that is perfect for a boho aesthetic! This is great for on the Christmas tree or spread on a shelf year round!

We love Christmas and how every family can have their own theme.

With each theme comes new decor and this year we decided to add some natural tones with this wood bead garland!

This wood burned bead garland also works as home decor all year round - check out this simple DIY project!

how to make a wood bead garland - Charleston Crafted

How to Make a DIY Wood Bead Garland

This wood bead garland is a really simple DIY, but you'll see later on that it requires patience.

You don't need many supplies and you can make this while watching a holiday movie!

Here's what you need to do!

DIY Wood burned bead garland

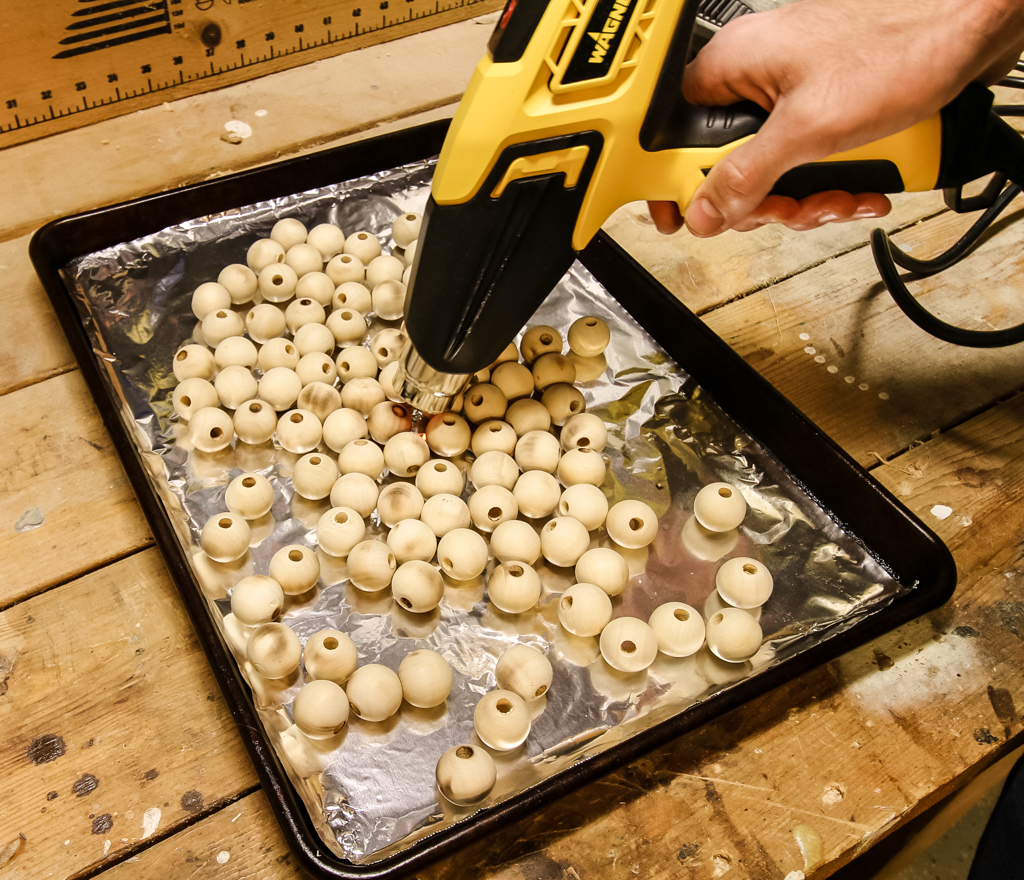
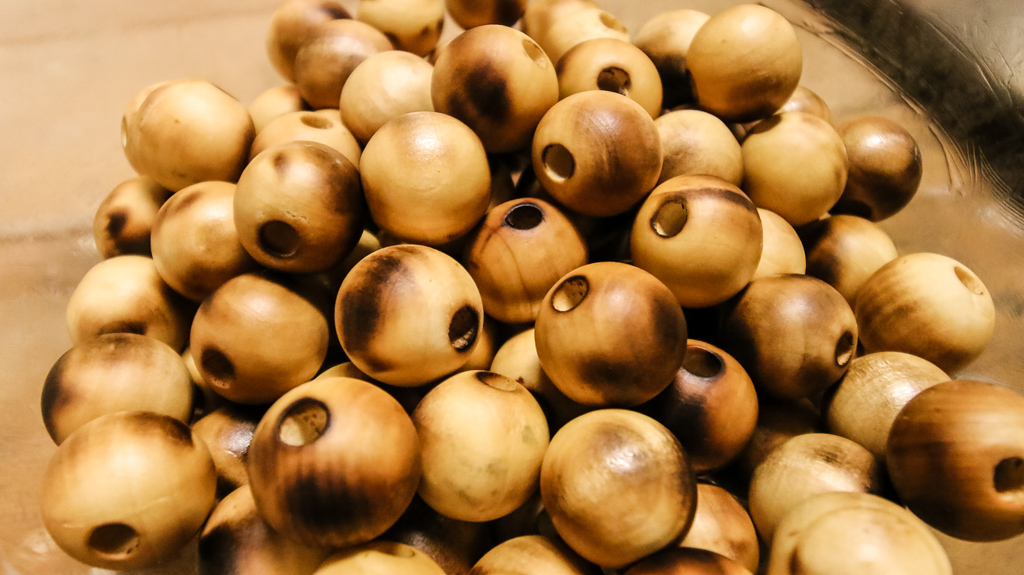
Step one: Toast the Beads

We started by purchasing some plain wood beads with pre-drilled holes.

There was nothing to these and they needed sprucing up. To do that, we decided to "roast" them like chestnuts!

Beads on sheet pan

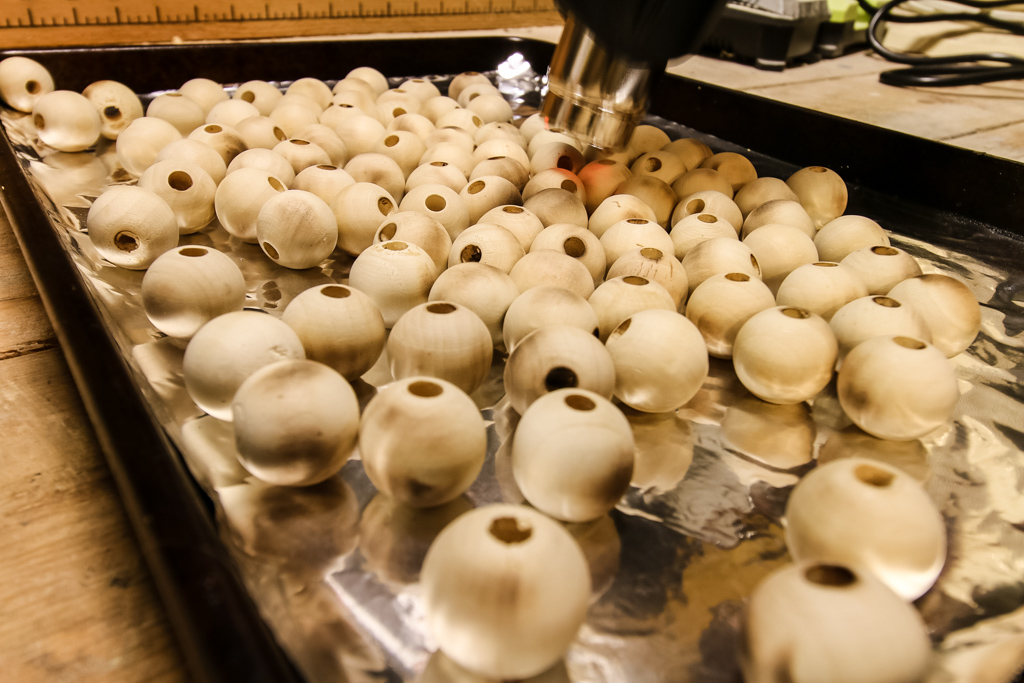
We laid out a piece of aluminum foil on a sheet pan and spread all the wood beads out.

Then, we fired up our heat gun and started to slowly and lightly burn all the beads, just like we did with this wooden trough centerpiece.

This was harder than I thought because the fan from the gun kept moving the beads around!

Burning wood beads

Step two- oil the beads

When they were all at their desired level of toastiness, we put them in a bowl and dribbled Walrus Oil all over them.

Be sure to check out our full Walrus Oil cutting board oil review.

Oiling beads

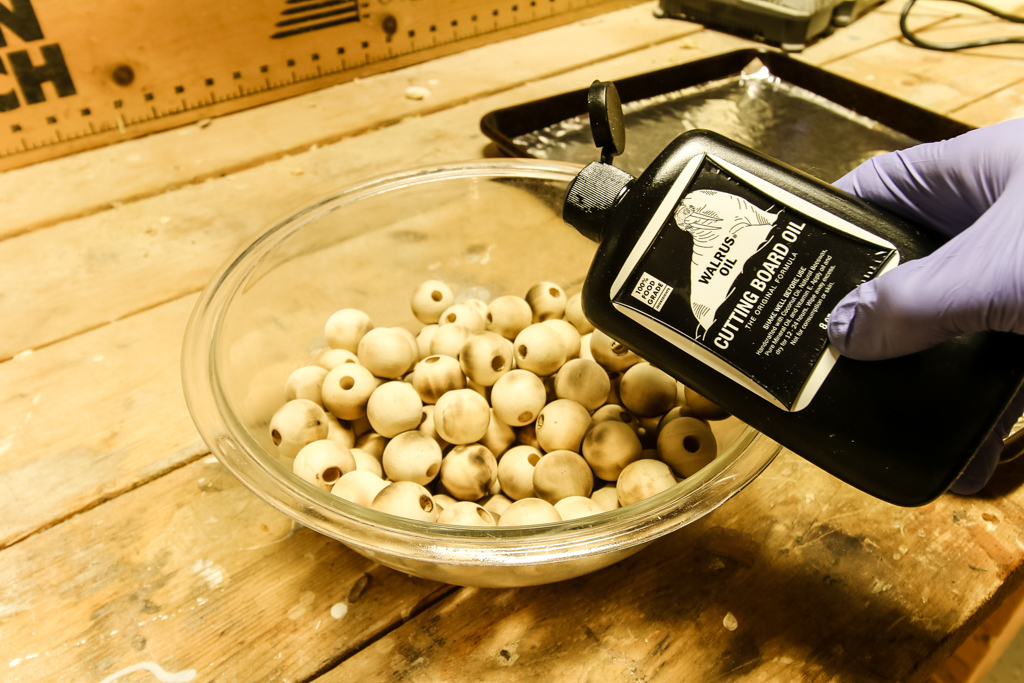
We popped on a pair of latex gloves and dug in, rubbing the oil all over each bead and then putting them back on the sheet pan to dry.

Finished wood beads

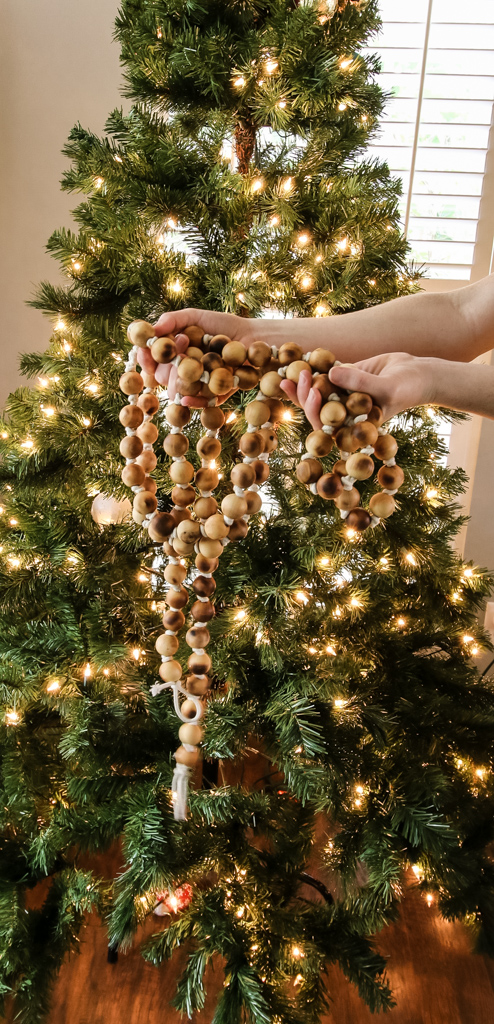
Step three: Stringing the Garland

Here's where the patience comes into play. We knotted off one end of macrame rope and then slid a bead down to the knot. Then we tied another knot right on the other side of the bead. Then we did that again.

And again. And again.

We finished off the garland by continuing this process all the way down the rope and tying off a knot on the far side.

The great thing about this project is that you can make this garland as long as you want based on how many beads you buy and how much rope you get!

DIY Wood burned bead garland

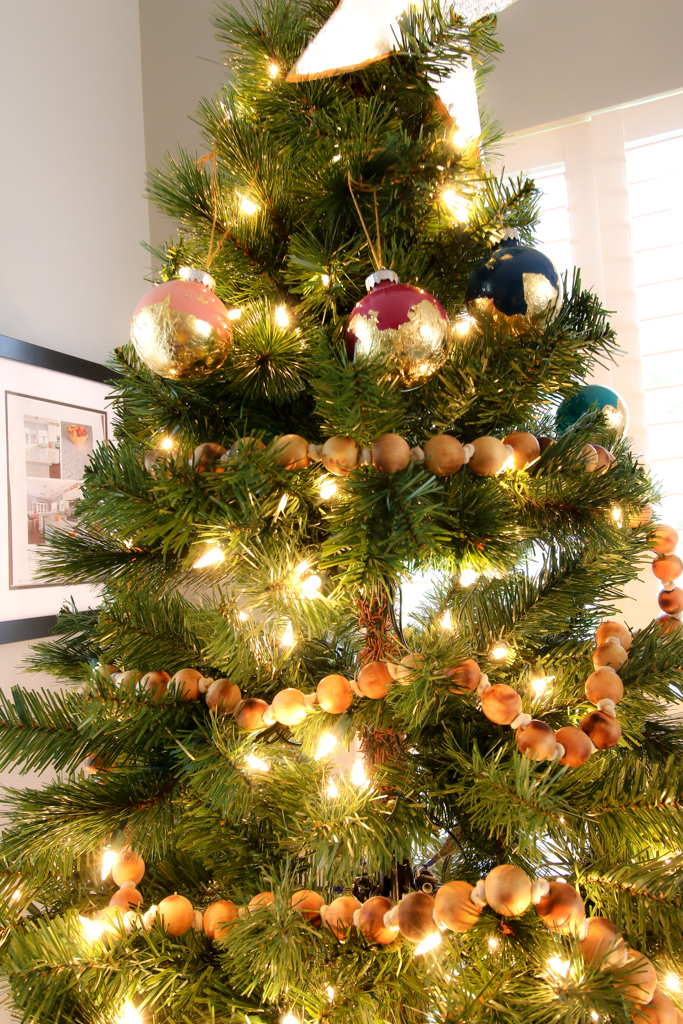
Ways to Display Wood Bead Garland

We found there are several ways to display wood bead garland as home decor.

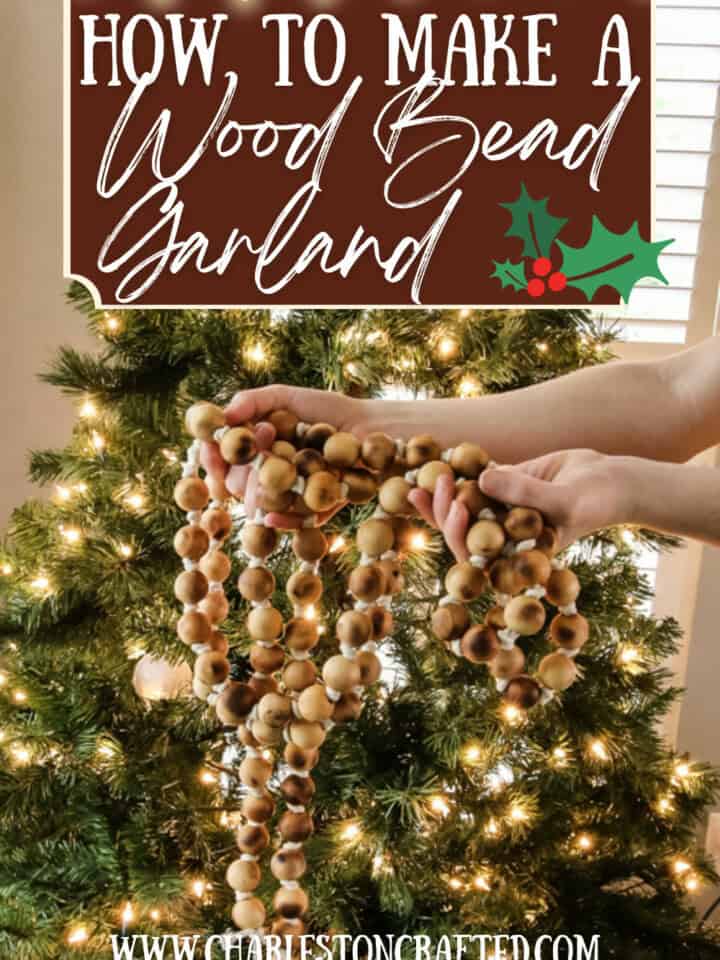
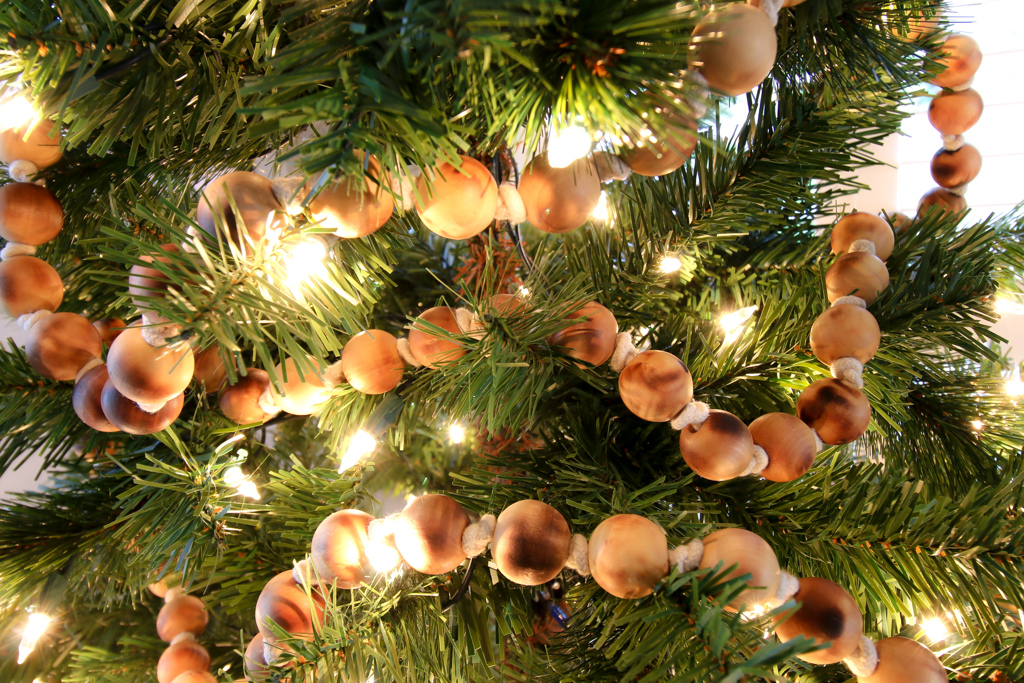
The obvious answer is wrapped around your Christmas tree to give an elegant, rustic feel.

Wood Bead Garland Christmas Tree

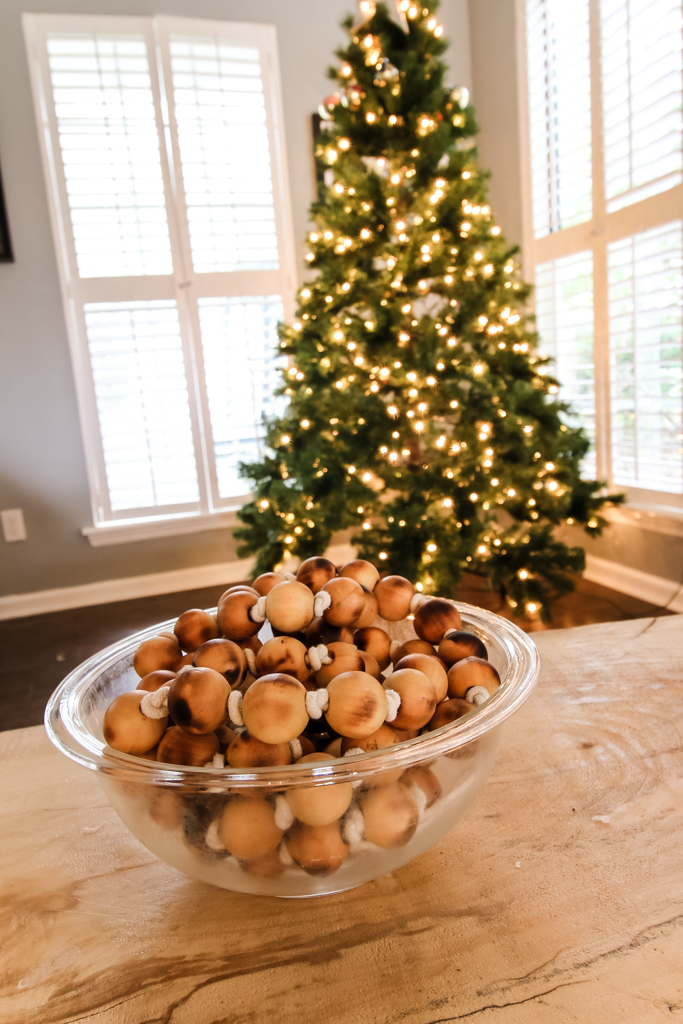
We also found that the garland looks great strung over a door knob or in a bowl. Just adjust the length of your garland accordingly!

Wood Bead Garland In a bowl

You can also add a tassel! If you are interested in making a wood bead garland with tassels, here is how I like to make tassels from embroidery floss.

Wood Bead Garland door knob

If you want a different look, you could mix it up by using large beads or small beads. You could also try different colors of bead string for a unique look!

Love Christmas? Click here to get FREE printable funny gift tags sent to your inbox!

These are perfect ways to keep the garland out all year long. This piece is especially perfect with a boho style of home.

This wooden bead garland is easy to customize and use in your holiday decor and we hope you love it. Happy Holidays!

Before you go...

Here's a couple more rustic boho Christmas decor ideas you can make this holiday season!

  • How to make a rope Christmas tree
  • How to make DIY wooden tabletop Christmas trees
  • How to make rustic Santa logs
Charleston Crafted Signature

Follow us on:
Pinterest | Instagram | TikTok | YouTube | Facebook | Amazon Storefront | LTK Shop

Looking for something?

We've been doing this since 2012 so we have a LOT of blog posts!
Search stuff like: Ceiling Projects | DIY Plant Stands | Thrift Flips

Charleston Crafted logo banner
Morgan headshot cropped
Morgan

Hello, I'm Morgan, half of the creative force behind CharlestonCrafted.com! With a passion for DIY that dates back to 2012, I've transformed three homes and now I'm dedicated to helping others craft their dream spaces. Let's turn your house into a home together!

More Christmas!

  • how to make a year of books keepsake ornament
    How to make a year of books Christmas ornament
  • 2024 Christmas Decor Tour - Charleston Crafted
    Our 2024 Christmas Decor Tour
  • DIY oversized Christmas decorations - Charleston Crafted
    7 DIY Oversized Christmas Decorations to Transform Your Holiday Décor
  • oversized christmas decor pin images (1)
    How to make an outdoor Christmas present topiary

Primary Sidebar

Charleston Crafted about us image

Hey y'all!

We are Morgan & Sean McBride and we are crafting our home together in Charleston, South Carolina.

More about us

Popular Posts

  • DIY Coffered Ceiling
    DIY Coffered Ceiling
  • How to Make DIY Concrete Pumpkins via Charleston Crafted
    How to Make DIY Concrete Pumpkins
  • How to Make a Cupid's Arrow Valentine's Day Wall Hanging with felt on the Cricut
    How to make a Cupid's Arrow Valentine's Day Wall Hanging
  • Our Tropical Oasis - A backyard Hammock area - Charleston Crafted
    Our Tropical Oasis

Recent Posts

  • fisherman aesthetic home inspiration
    Fisherman Aesthetic Decor for Your Home
  • Senix Tools Review- Charleston Crafted
    Are Senix power tools any good?
  • Your Weekend To-Do List: 15 Things to Do for Summer Home Upkeep
    Your Weekend To-Do List: 15 Things to Do for Summer Home Upkeep
  • How to build a DIY gate pergola- Charleston Crafted
    How to build a DIY gate pergola

Privacy Policy

Footer

↑ back to top

Navigation

  • Home
  • Blog
  • Contact Us
  • Terms of Use
  • Disclaimer

Newsletter

  • Sign up for emails and updates
  • Follow us on Instagram
  • Work with Us

Browse by Category

  • Woodworking
  • Home Projects
  • Paint Colors
  • Room Reveals

© 2025 The Charleston Crafted Blog LLC DBA “Charleston Crafted” and “CharlestonCrafted” (also known as N/A) / All Rights Reserved.
Official Website: (Charleston Crafted)
Registered in USA (Co. Reg. No.: 565586)
Address: Charleston, USA 29414, South Carolina
Contact Phone: Not applicable — contact is via email: sean@charlestoncrafted.com

DISCLAIMER: The content on this website is provided for general informational purposes only and is not intended as professional advice. The Charleston Crafted Blog LLC and The Charleston Crafted Blog LLC make no representations or warranties—express or implied—regarding the accuracy, completeness, or suitability of the information contained herein. Any reliance you place on this information is strictly at your own risk. In no event shall The Charleston Crafted Blog LLC or The Charleston Crafted Blog LLC be liable for any loss or damage, including without limitation, indirect or consequential loss or damage, arising from the use or inability to use this website. This website is the official website of The Charleston Crafted Blog LLC.

AFFILIATE DISCLOSURE: This website contains affiliate links. If you click through and make a purchase, we may earn a commission at no extra cost to you.

As an Amazon Associate, I earn from qualifying purchases.

Site Editor: Morgan Smith McBride

Copyright © 2025 Charleston Crafted