Tic-Tac-Toe is a great way to get started using your laser cutter! This is a simple game to make and always fun to play! Here's how to make it!
I recently got an xTool P2 laser cutter and have been playing around with it a lot. I mean, I spent all that time setting it up, I wanted to dive in!
I learned about the existing xTool Creative Space where you can find all sorts of pre-made files to build tons of amazing crafts and projects.
But, I wanted to see how difficult it would be to create my own file in the system to learn how all the settings work.
I was actually scrolling TikTok when an advertisement of a version of "Big Eats Small" tic-tac-toe popped up and it gave me my first idea for a cut file!
I'm going to walk you through how I made this file in xTool Creative Space and then built my two tic-tac-toe games!
See my full review of the xTool P2 here and if it's right for you!

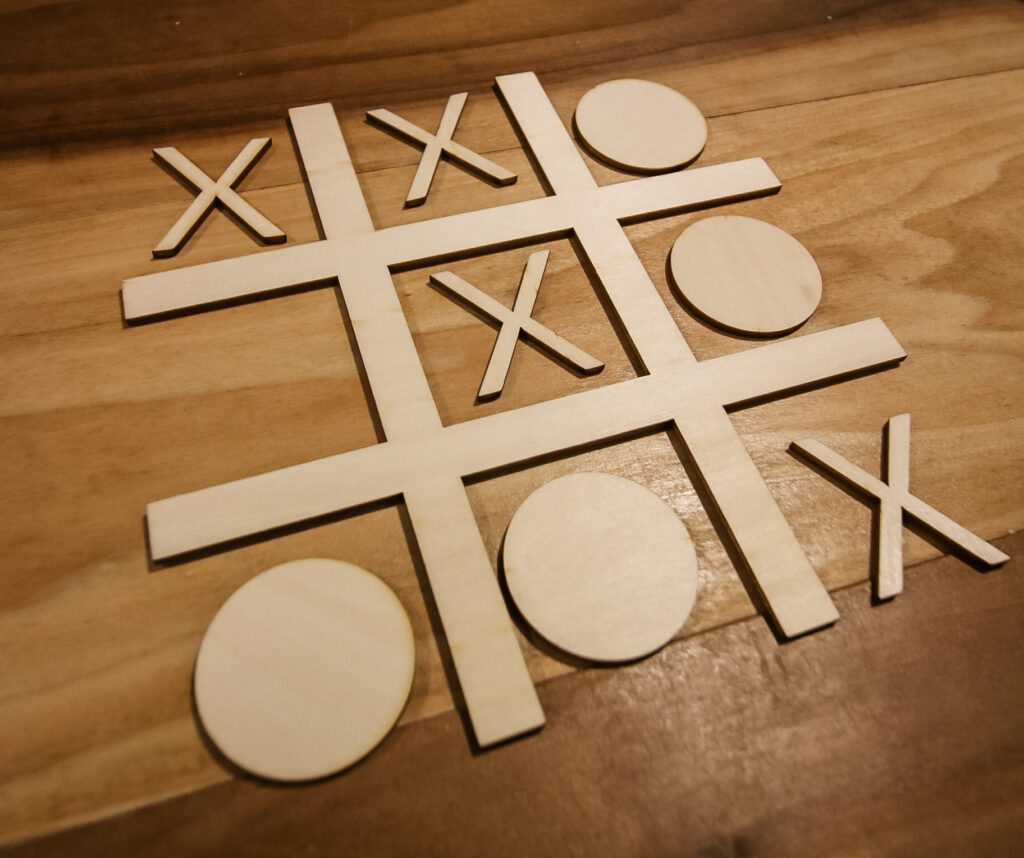
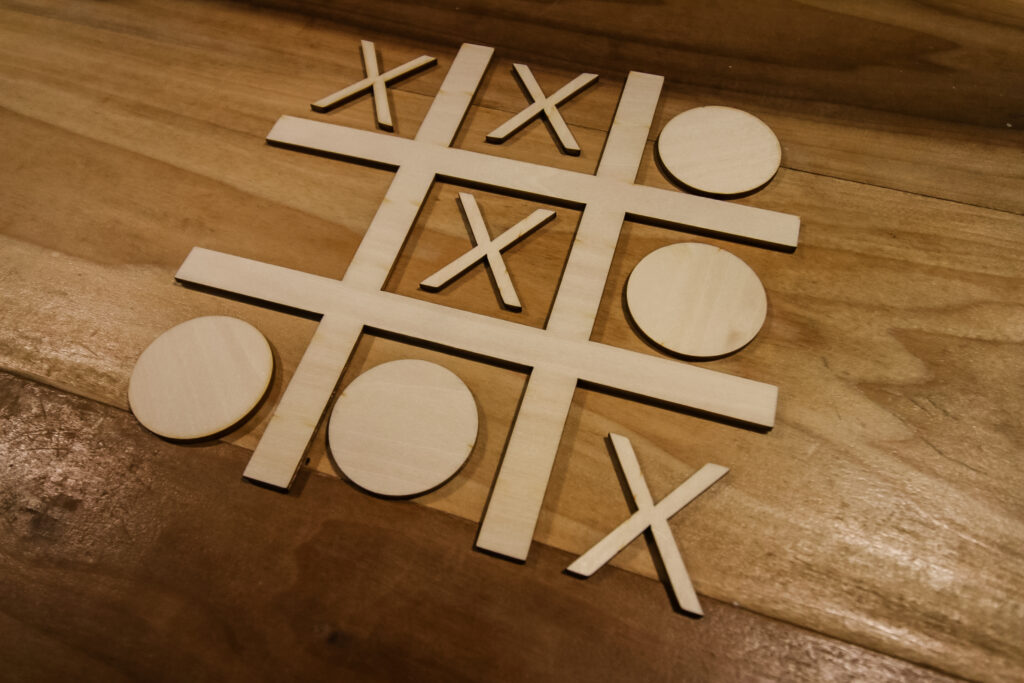
Tic-Tac-Toe board with xTool P2
This tic-tac-toe board was a pretty straightforward setup for working with an xTool laser cutter for the first time. Honestly, you can download my file for it, but you might want to use this post as a great way to try to create your own design if you're a beginner just like I did!

I made this entire project from one sheet of 3mm basswood and a piece of scrap ¼" plywood I had in my shop, but you could use two pieces of basswood. I included all of the pieces to play both standard tic-tac-toe and "big eats small."
Let me show you how I did it!
Materials needed for this project:
Here's the tools and materials I used to make this tic-tac-toe board!
- xTool P2 laser cutter
- 3mm basswood
- ¼" plywood
- Instant wood glue and activator
- Marker or paint
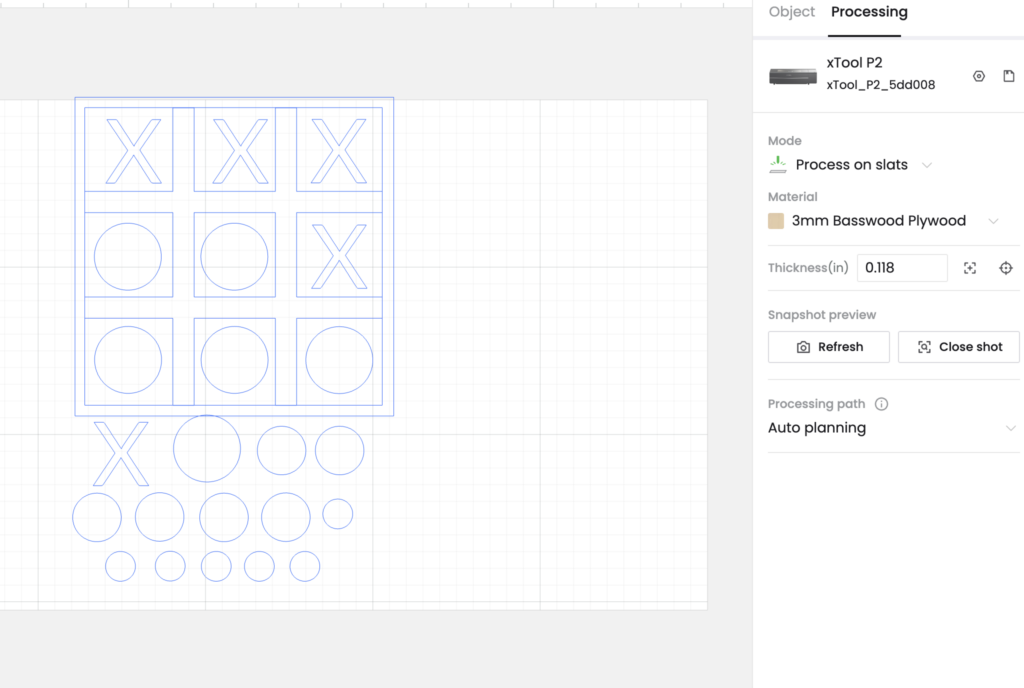
Step one: design the board and pieces
So like I said, this was literally my first attempt at making a custom design in xTool Creative Space. I liked the idea that I could make something with lines and simple shapes easily.
I started by knowing I wanted it to fit on one sheet of basswood, so I needed to make the board less than 8" wide to make that happen.
I drew out a rectangle that would span the width I wanted and then copied it once for another horizontal line and two more times as a vertical line. Then I spaced them all out so that each of the squares would be equal in size.
In order to have the machine cut these shapes as one piece and not criss cross over themselves and turn it into a bunch of pieces, you have to group the pieces together. I selected all the pieces and clicked the "group" button that united them all at their intersections and deleted the parts that cross over each other.
Then I pulled out a square around the outside edge of the board and made that ¼" wide so that it could serve as a frame for the board later.
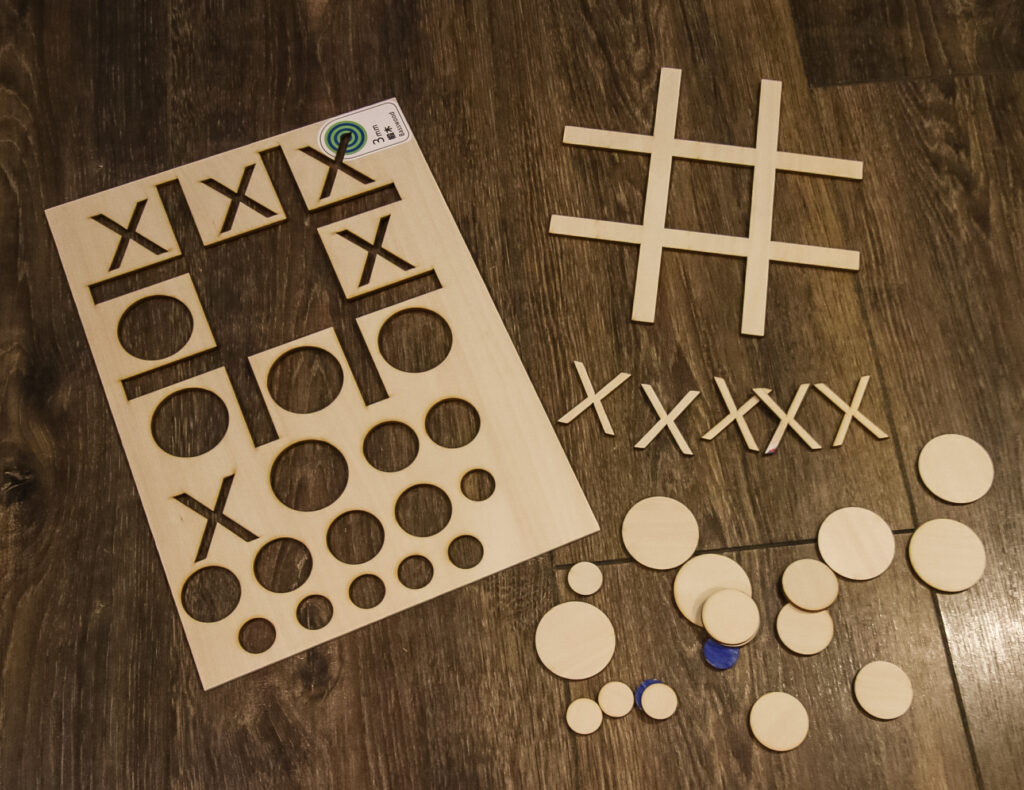
Finally, I added a bunch of X's and O's to the file as well. You need 5 X's and 5 O's to play tic-tac-toe, but I added some additional smaller O's for playing Big Eats Small tic-tac-toe (more on how to do that later).
All the shapes fit on the board and I was ready to go.
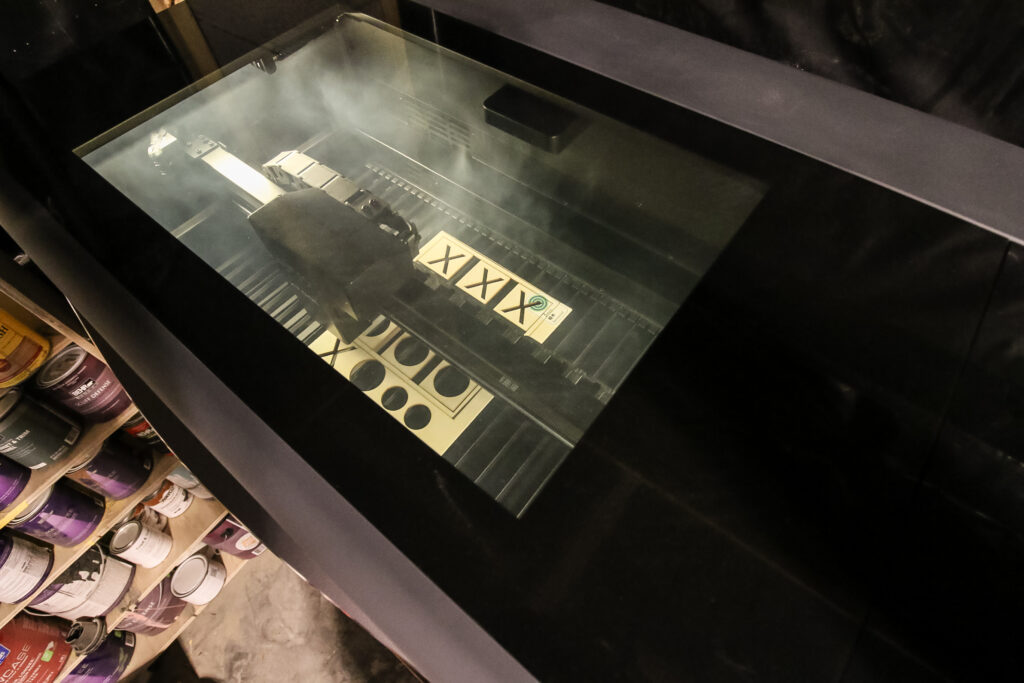
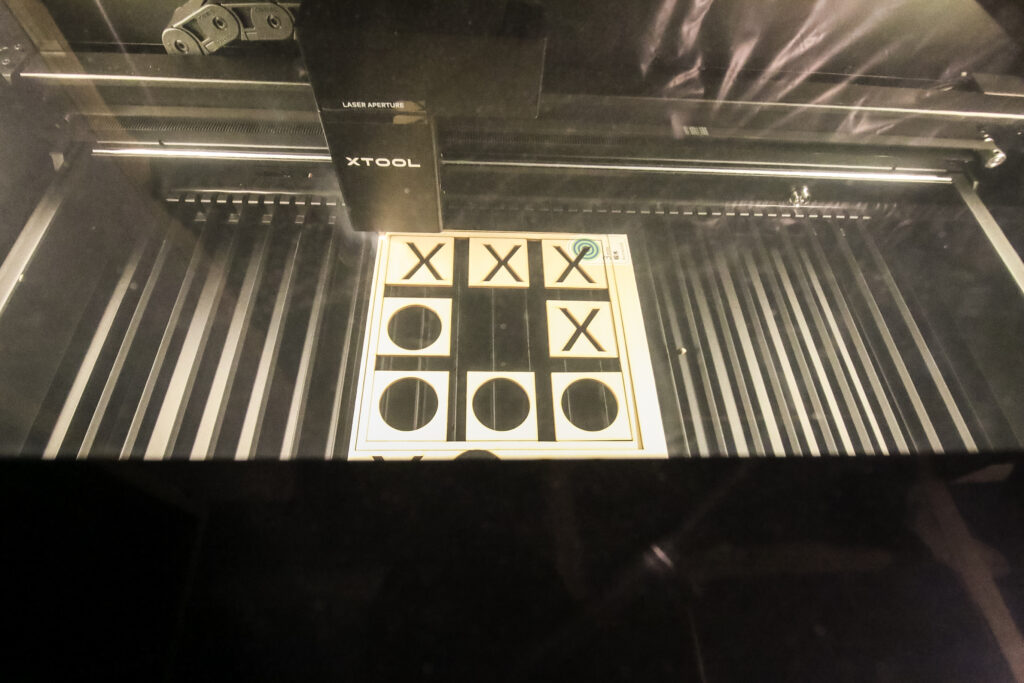
Step two: process the cut file
I turned on my xTool P2 and put a piece of 3mm basswood onto the slats. Then, on Creative Space, I opened up a camera view of inside the machine. The xTool P2 has dual HD cameras that literally shows you the wood in the machine.
So, then I lined up my file onto the photo image of the wood and hit process. It showed the path the machine would take and everything.
It was really cool watching the laser work. I don't know why, but I was shocked at how precise the cutting was. It sliced right through the wood so fast and moved from spot to spot with no issue.
This was my first chance to see how much smoke there was. It wasn't bad, but I'm glad that I have the xTool Smoke Purifier hooked up to mine because I wouldn't want the P2 pumping that pure smoke straight into my shop.
Step three: glue border to back
I also cut out a ¼" plywood backer to be the size of the square frame I cut in the xTool. Then, I used my favorite glue activator to attach the frame to the plywood backer. You can also attach the criss cross of the tic-tac-toe board to the backer as well, but I decided to leave it removable for right now.
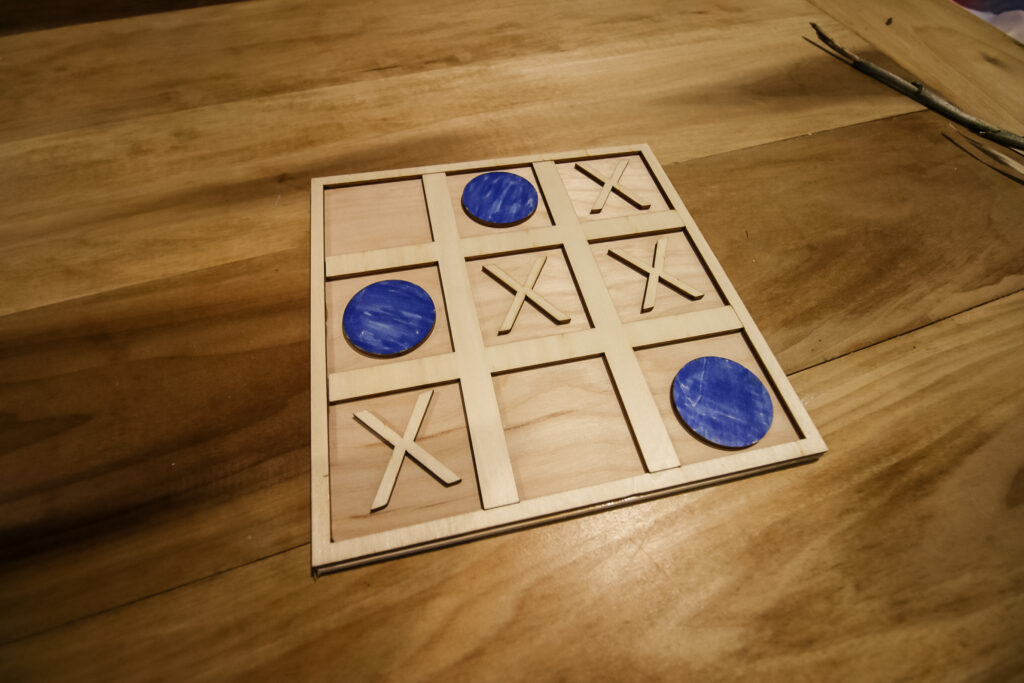
Step four: play!
Now you can enjoy playing tic-tac-toe! The small wooden pieces are great for my kids who like playing the game but aren't great drawing X's and O's on paper. Moving the pieces makes it easy for them.
You can also change your X's and O's to be any pre-designed shapes inside of the xTool Creative Space as well, just make sure you cut out 5 of each.
How to play "Big Eats Small Tic-Tac-Toe"
If you're ready to step up your tic-tac-toe game, try playing the "Big Eats Small" version. In this version of the game, everyone uses the same shape piece, but you have three different sizes.
For my file, I made three different sized O's. With three pieces each of three different sized O's, you can play any of your pieces to start. You can place a piece in a free square, but you can also cover up your opponent's smaller circle with one of your bigger circles.
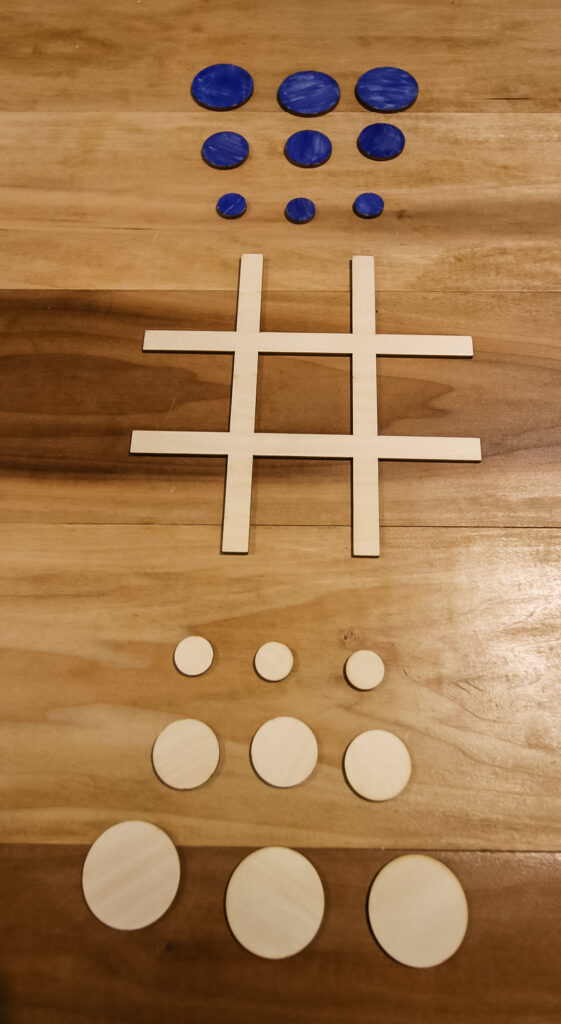
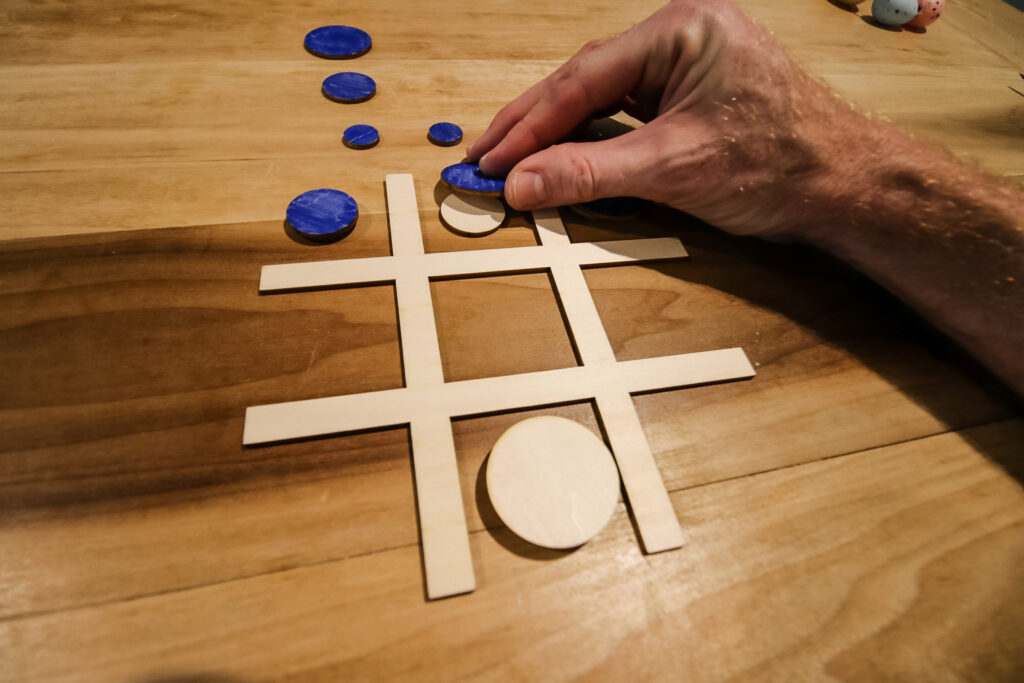
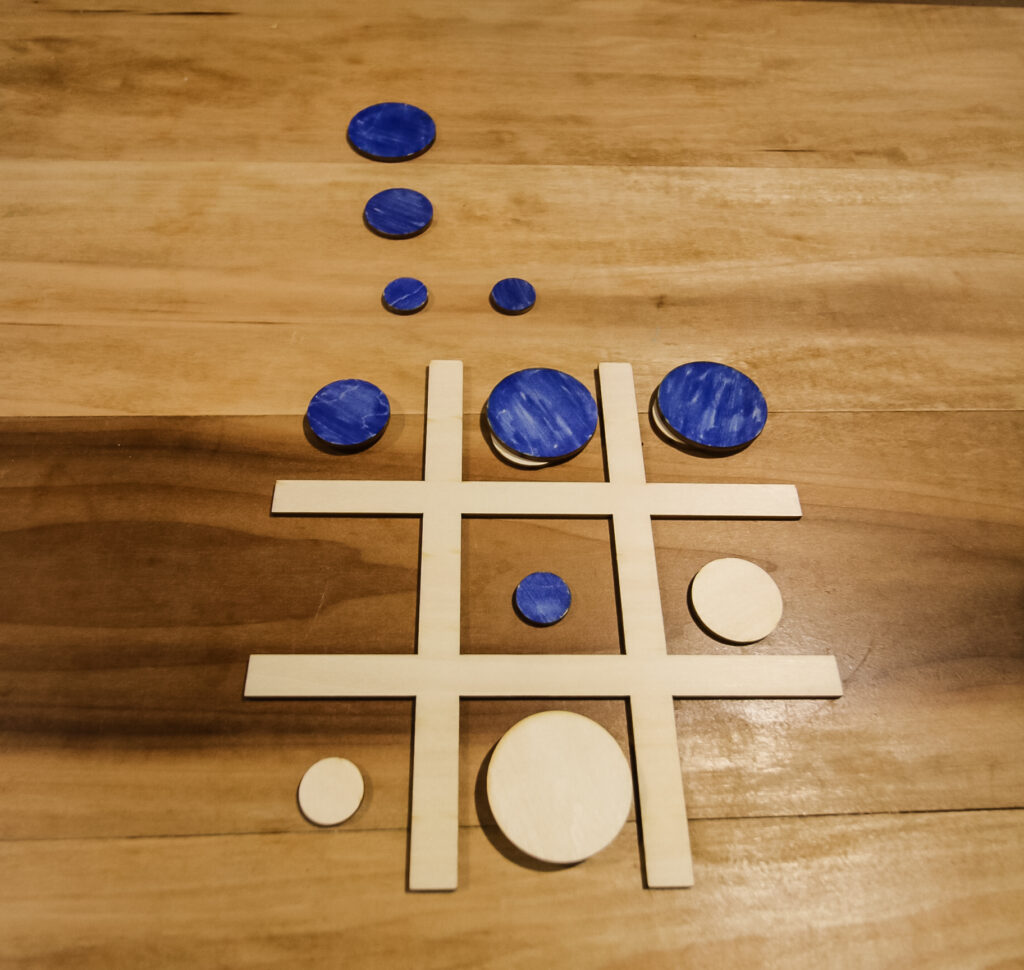
To differentiate the circles, I colored half of them blue with a marker, but you could paint them or use the xTool to engrave something on each of the pieces.
This game adds a different element to the game and makes it a little more fun and challenging. Tic-tac-toe ends up in a stalemate tie so often, but not very often in this version. Give it a try!


Looking for something?
We've been doing this since 2012 so we have a LOT of blog posts!
Search stuff like: Ceiling Projects | DIY Plant Stands | Thrift Flips

Hey there, I'm Sean, the woodworking enthusiast and builder behind CharlestonCrafted.com! Since 2012, I've been sharing the magic of turning raw materials into beautiful creations. I love teaching others the art and satisfaction of woodworking and DIY. I try to inspire fellow crafters to make something extraordinary out of nothing at all.