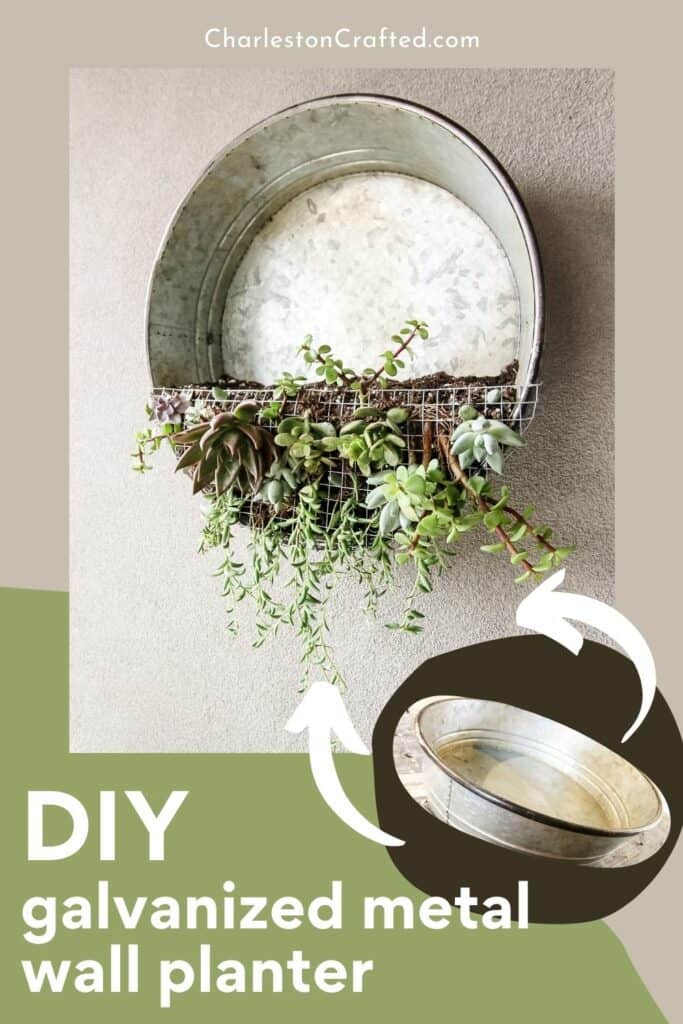
Want to make a unique DIY wall planter? Here's a tutorial for how to turn a galvanized bucket or tray into a wall hanging planter!
When we decided to create a little hang zone on our covered patio, I knew that I wanted to hang something on the big, blank wall.
Since this space is outdoors, it didn't make too much sense to me to hang a canvas or any kind of framed art.
Instead, I wanted to hang a wall hanging planter!
Be sure to check out my round up of a ton of DIY planter ideas!
I contemplated hanging another living plant wall with terra cotta pots, but Sean didn't want to put that many screws in this textured wall.
So, I decided to focus on one, large hanging planter instead.
See all of my favorite living wall ideas here!
I headed to the thrift store and looks for anything that might work.
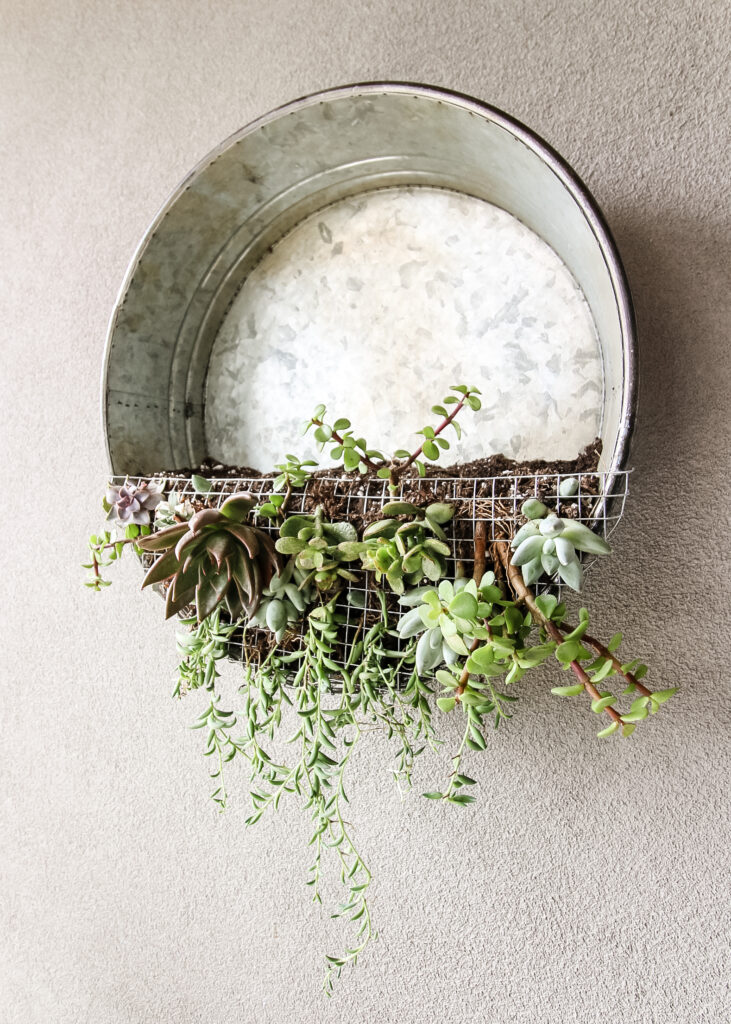
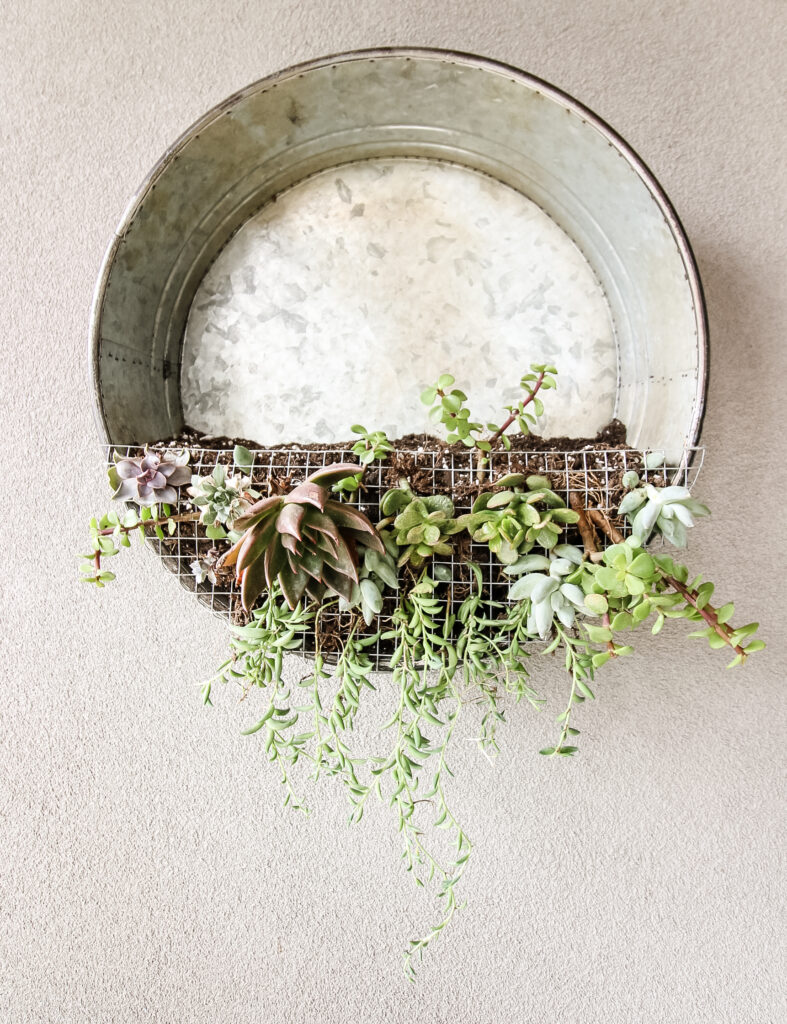
I was so excited to find this 17" diameter, 5" deep galvanized metal tray for $1.99!
I decided to turn this tray into a DIY hanging planter. I really love how it turned out.
Check out how we made DIY wooden hoop hanging planters!
Spray paint that looks like galvanized metal
If you don't have or can't find a galvanized bucket of your own, you can always spray paint a tray that you do have with hammered silver spray paint for a similar look!
This is a cool project that could go with many home decor styles - farmhouse, rustic, or even traditional.
How to make a DIY wall planter from a galvanized bucket
Here's how easy it is to upcycle a galvanized metal tray or bucket into a hanging wall planter!
Supplies needed:
- Galvanized metal bucket or tray
- Hanging hardware - I used D-hooks
- Super glue or gorilla glue
- Level or tape measure
- Wire mesh
- Metal working gloves (optional)
- Metal snips or scissors that can cut metal
- Plants of choice
- Potting soil
Steps to make a DIY galvanized planter to hang on the wall:
STEP 1: Aquire a galvanized bucket or tray

I got my tray at the thrift store for $1.99. They had several galvanized buckets, though thrift stores are always hit or miss.
You can also purchase a new galvanized tray.
Or, use any tray that you already own and paint it with hammered silver spray paint.
STEP 2: Add hanging hardware
Next you want to add hanging hardware onto the back of your tray. I measured ⅓ of the way down and used a level to create a straight line.
I placed 2 D-hooks, each ⅓ of the way in from left and right.
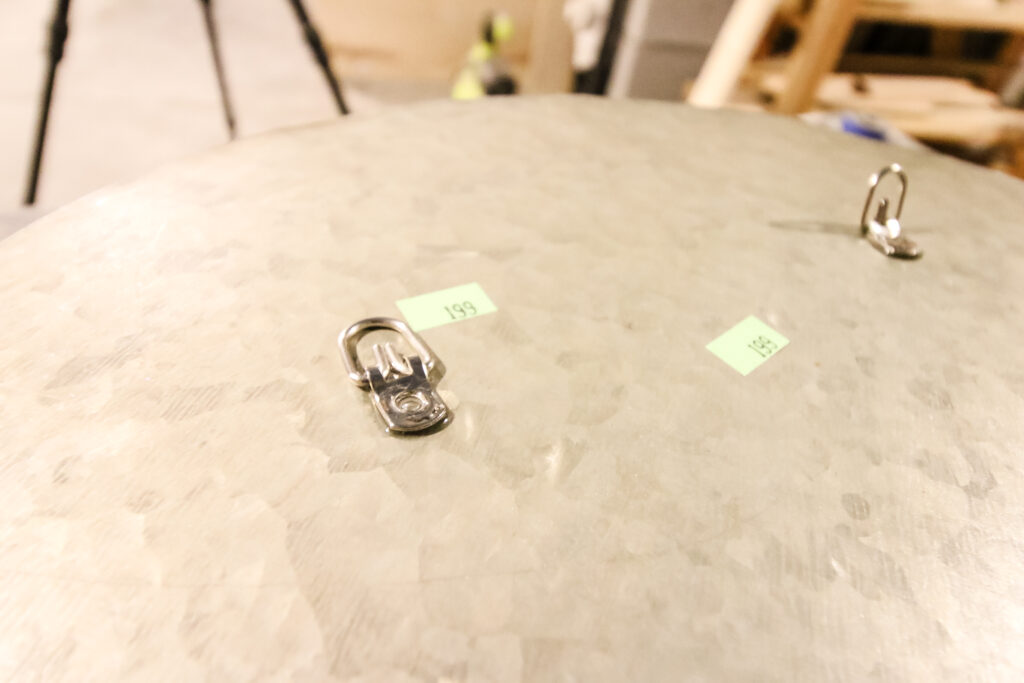
Apply gorilla glue to each spot and press on a D-hook. Be sure they are oriented so the round side of the D points upwards - this is where it will hang on a screw.
Use the tip of the glue applicator to press the hook into the back of the tray to be sure it is secure.
Allow to dry completely, preferably over night.
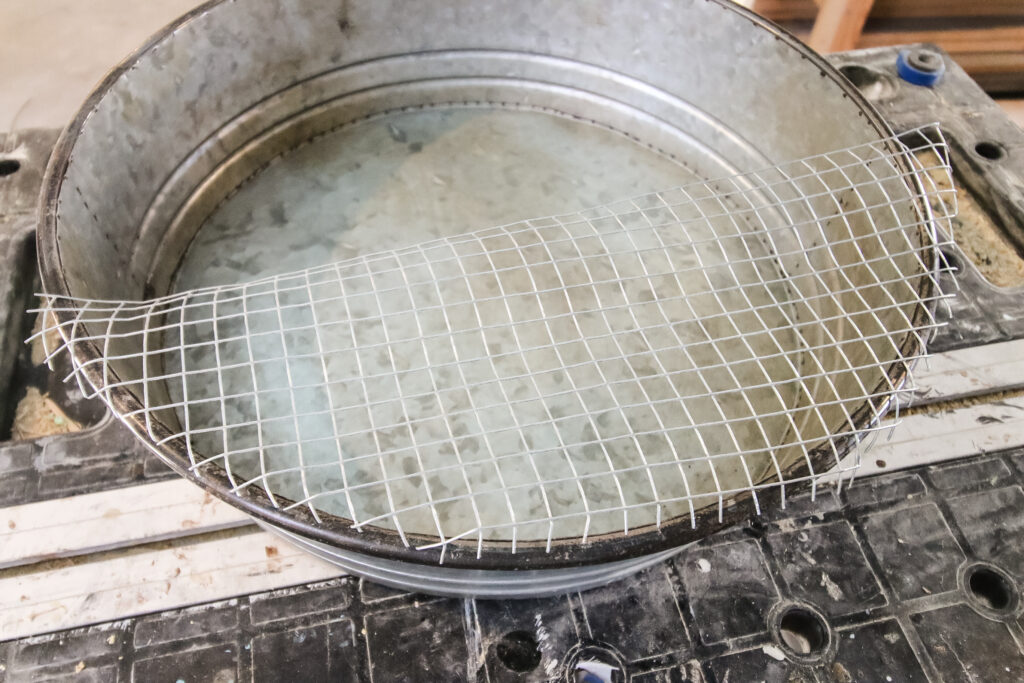
STEP 3: Cut your mesh
Unroll your metal mesh and lay it across your tray.
I decided that I wanted mine to cover about ⅓ of the face of the tray, and then cut a rectangle of mesh out that would cover that space.
Then, use your hands (gloves help when working with sharp metal) to bend the mesh over the curve of your tray.
Pull it off and cut off any excess.
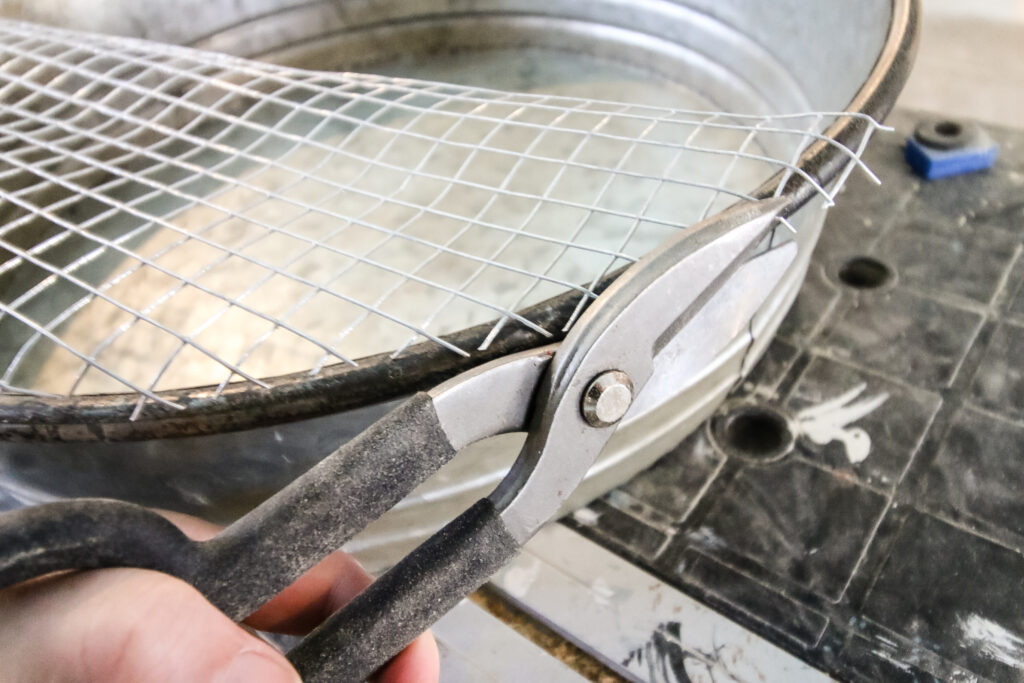
STEP 4: Attach your Mesh
Place your mesh back over the tray. Ensure that it's a good fit and trim if necessary.
Apply glue along the rim of the tray and press into place.
NOTE: If this will be an indoor planter for your living room and you plan to use faux house plants, you could use hot glue. I wanted an invisible look that was outdoor safe, so I used gorilla glue.
I tried a variety of clamping and had best results just placing something heavy on top to hold the mesh down and in place while it dried.
Let dry completely, preferably over night.
STEP 5: Add your plants
I decided to make my vertical planter into a succulent garden.
My hot tip for getting good deals on succulents is to purchase a pot arranged with a bunch of succulents already - it's usually a better price than buying succulents individually and you get a pot, too.
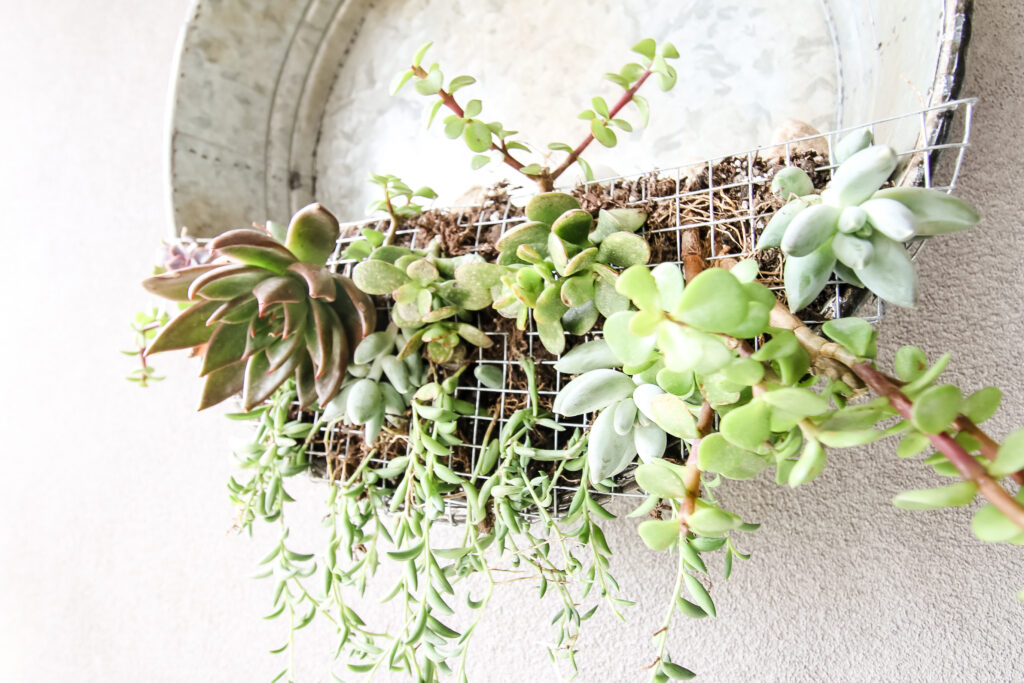
I separated my plants and gently removed the soil from the roots.
Press the stems of the plants through the holes in the mesh.
Repeat until you are satisfied with the look.
Heavier plants you can add a little floral wire wrap around them and twist that to the mesh.
STEP 6: Add soil
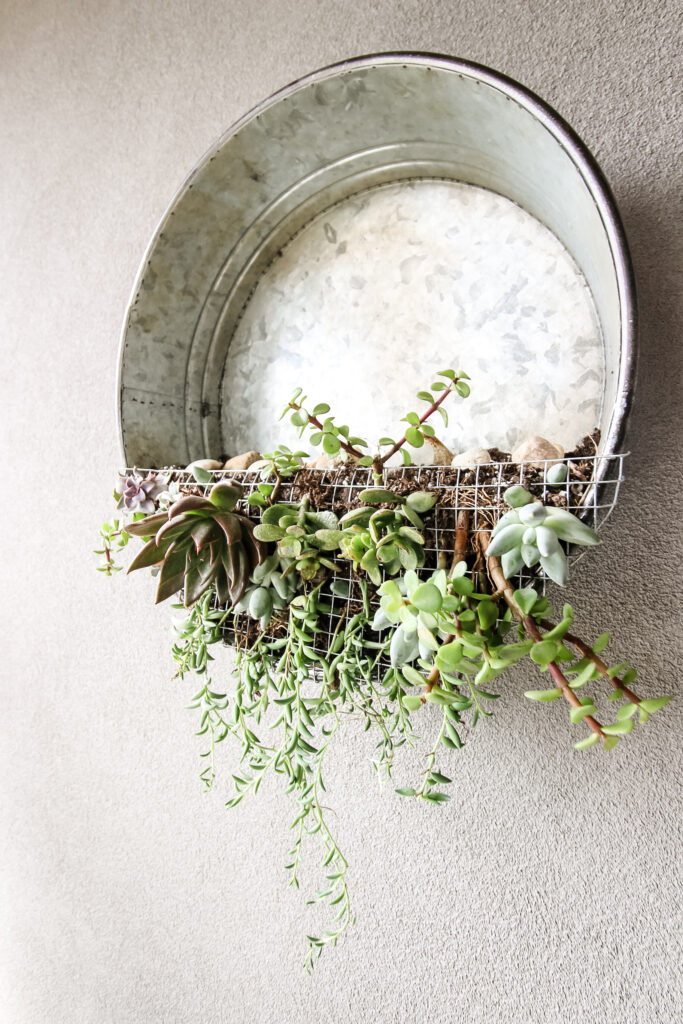
Add soil behind the plants and compact to be sure it's full.
I added a few stones on top of the soil to help keep it from blowing away and because I liked the look.
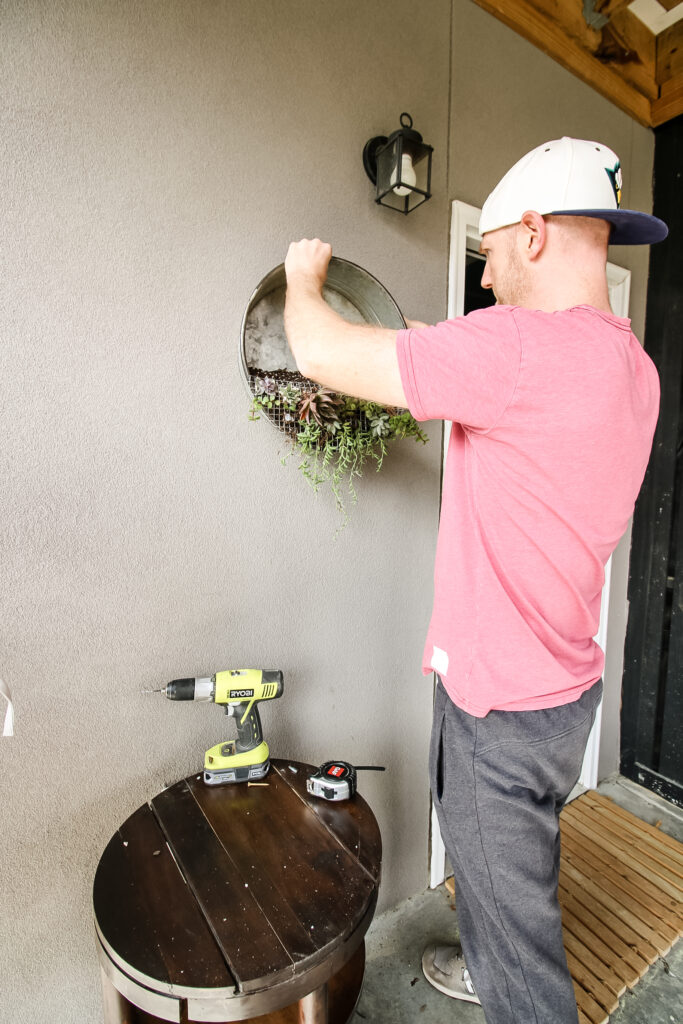
STEP 7: Hang the planter
Add screws to your wall for each D-hook.
It's usually easiest to hold it up, mark where the first screw goes, then measure the distance between the two d-hooks and place a screw that distance away on the wall.
You can then use a spray bottle to easily water without soaking the plants.
What to put in a galvanized wall planter
The easiest thing to put in a wall planter is succulents or air plants. They don't require too much water, which is ideal for the metal wall planter.
I love the look of drippy plants hanging over the bottom, so try to get something trailing if you can!
Lining a galvanized wall planter
If you plan to put your planter in direct sunlight, the metal can get very hot and could potentially cook or burn your plants.
Your best bet in this case is to add a liner between your soil and the galvanized pan. Liner options can include:
- Landscape fabric
- Coconut hanging basket liner
- Bubble wrap
How to care for your wall planter
How often and how much to water your plants will depend on what type of plants you select.
You can water with a watering can or use a spray bottle to spritz the plants directly.
Video demonstration
Be sure to check out the video that shows exactly how I made and filled this wall planter!
Any questions about my galvanized metal wall planter DIY project?!

Looking for something?
We've been doing this since 2012 so we have a LOT of blog posts!
Search stuff like: Ceiling Projects | DIY Plant Stands | Thrift Flips

Hello, I'm Morgan, half of the creative force behind CharlestonCrafted.com! With a passion for DIY that dates back to 2012, I've transformed three homes and now I'm dedicated to helping others craft their dream spaces. Let's turn your house into a home together!