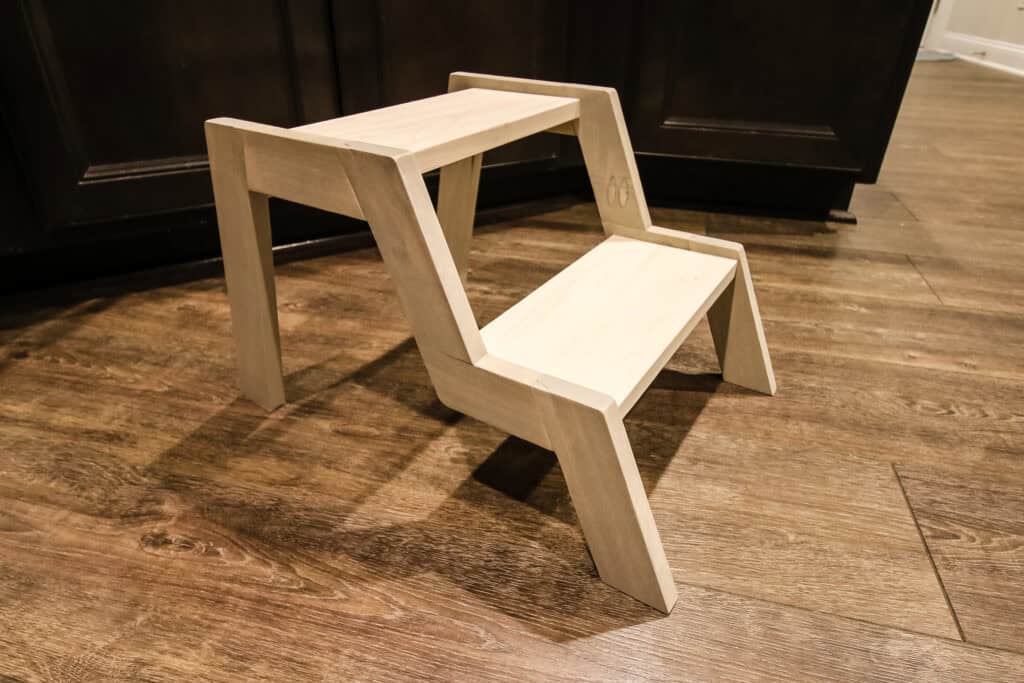
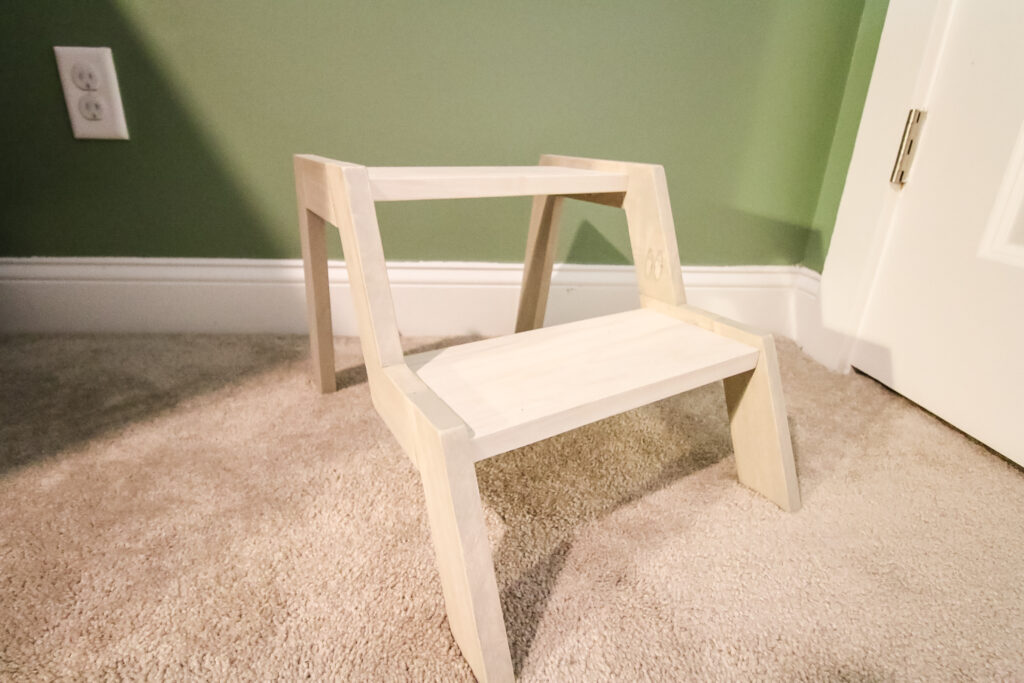
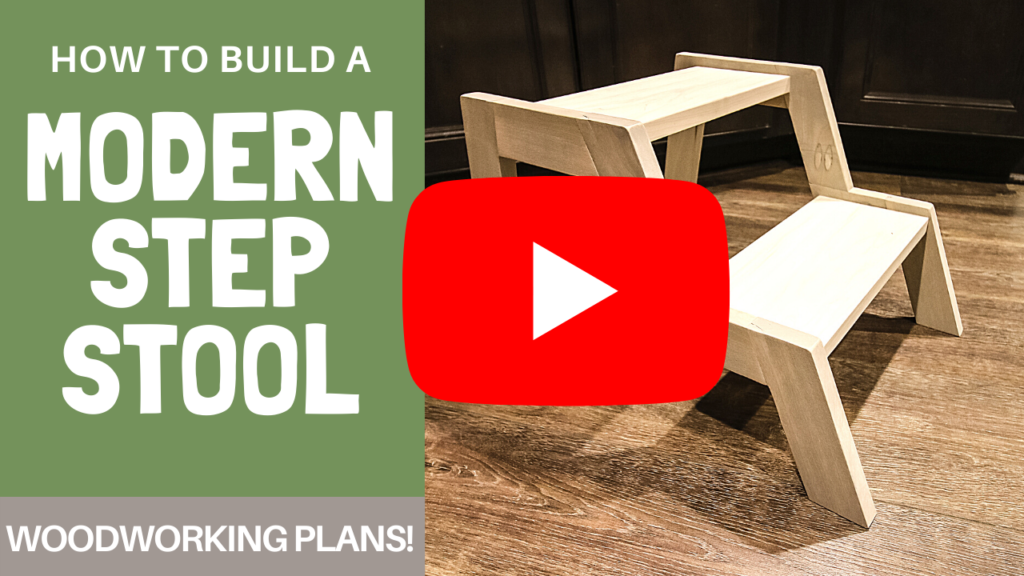
If you need a step stool for your children or to reach the top shelf, check out the plans for this super simple geometric, modern step stool. This stool is built from one board and uses easy pocket hole joinery to construct. Scroll down to grab the free plans for how to build a modern step stool!
This post is sponsored by Kreg Tool. All opinions are our own and our opinion is that we love Kreg Tool. Thank you for supporting the brands that make Charleston Crafted possible!
We recently started potty training our two year old and he has shockingly loved the whole process. One thing he really loves is washing his hands.
However, he's a heavy little dude, and holding him up for his elaborate hand washing routine was getting old. So, we decided to build him a simple wooden step stool.
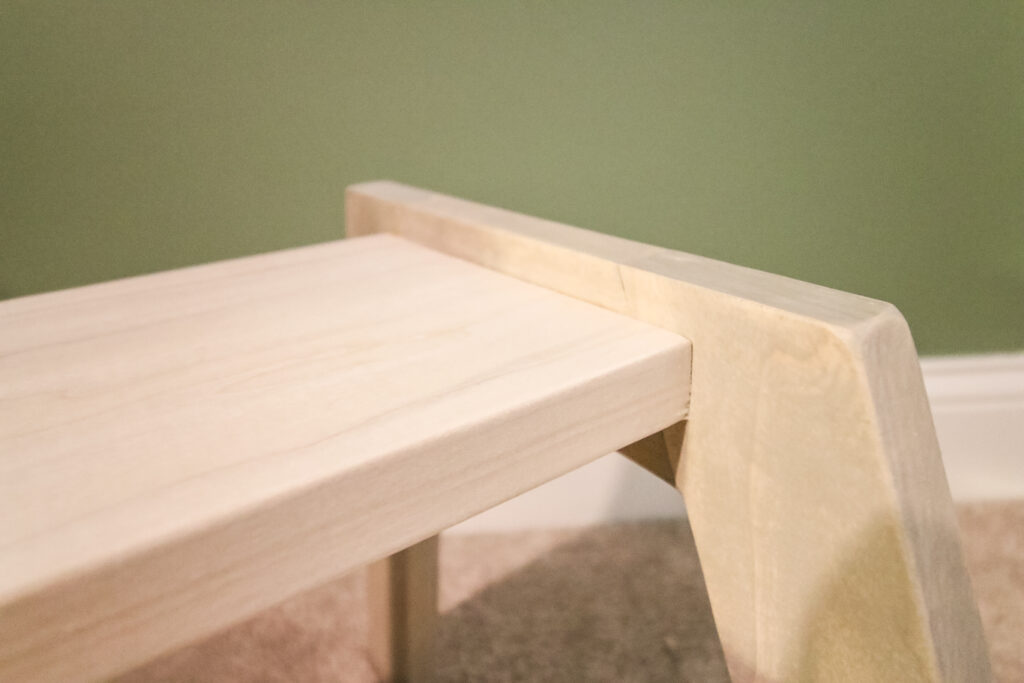
This DIY step stool has a sleek, modern design with interesting geometric angles on the side pieces.
However, it's a really easy project thanks to pocket hole joinery and our new Kreg 720 Pro pocket hole jig.
This simple step stool would work for a kid or toddler. Make sure kids are well supervised whenever using a stool!
How to build a step stool
Building a step stool is as easy as cutting a few pieces and screwing them back together. You can build an entire step stool from one board!
Below is an overview of the process for how to build a modern step stool, but we have the entire FREE plan below. You can also grab plans just like this on Kreg Tool's website. There, they have a long list of projects with the full material list, cut list and step-by-step instructions for anything you could need.
While you're there, be sure to check out their brand new 720 Pro pocket hole jig. It's the newest jig in their innovative lineup of new tools and it makes a project like this so simple.
We've got a full review of the Kreg Jig 720 Pro and video to check out all the features!
Materials used:
- 8' 1x6 board
- Pocket hole screws
- Wood glue
- 220 grit sandpaper
- Paint or wood stain
Tools used:
- Kreg 720 Pro pocket hole jig
- Table saw
- Miter saw
- Drill
- Orbital sander
Steps to build this wood step stool:
Here's what you need to do to build the step stool!
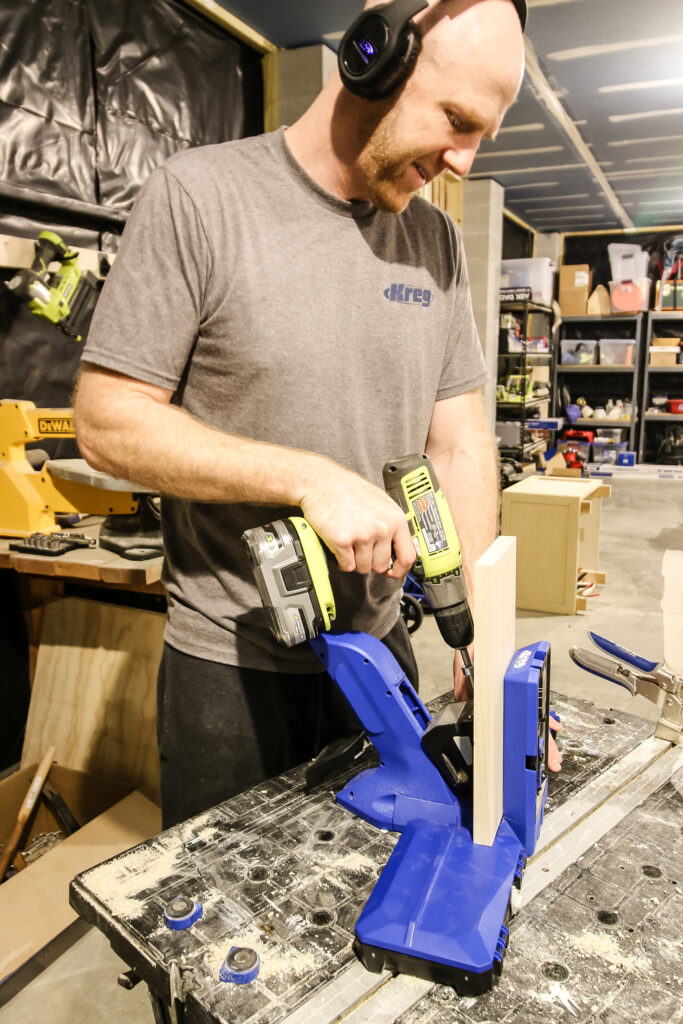
STEP 1: Make all cuts according to cut list and drill pocket holes
It's easiest to make all the cuts first and then drill pocket holes. This way, you can work on assembly all at once.
When making initial cuts, the cut list has boards a little long because the pieces are cut at angles next. If you read ahead and are confident in your skills, you can make the angled cuts at the beginning.
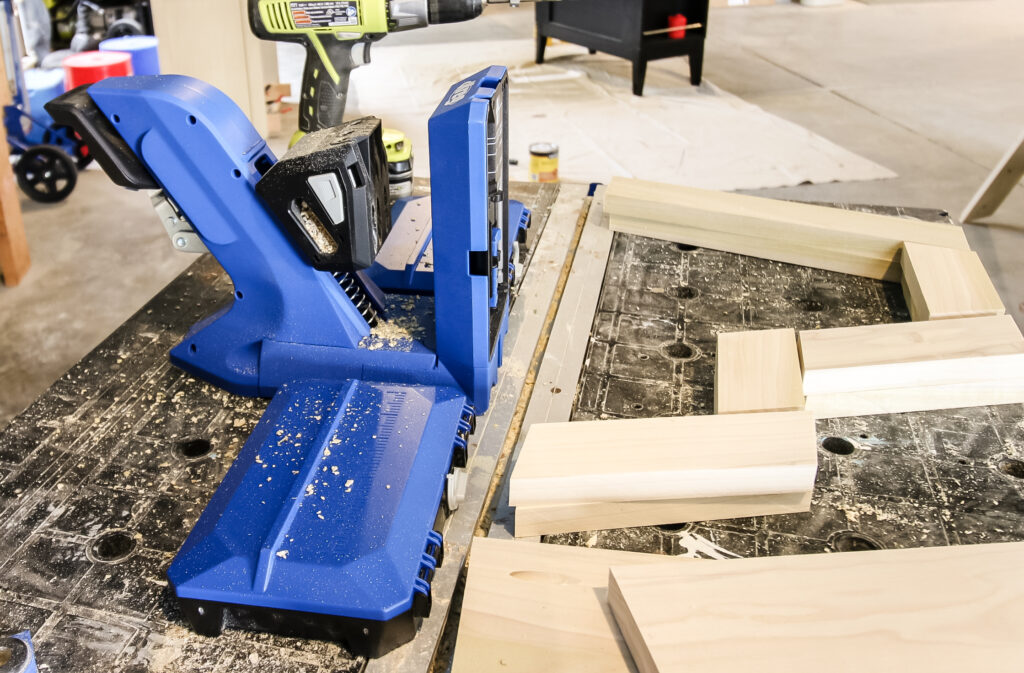
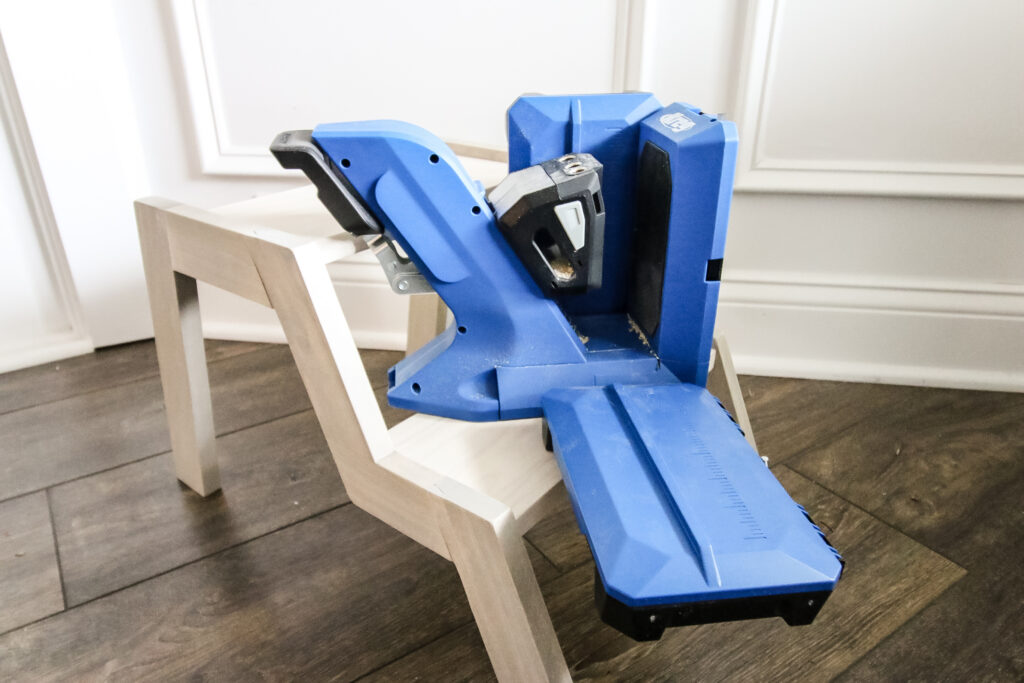
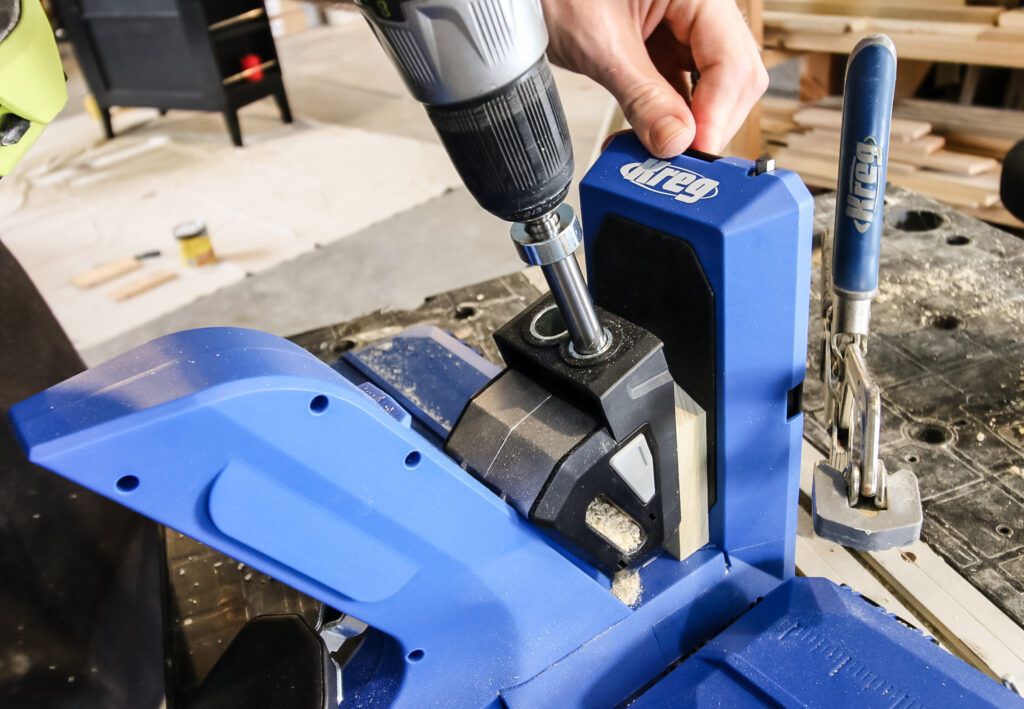
We drilled all the pocket holes with the new Kreg 720 Pro pocket hole jig.
This modern step stool is a great project for the Kreg 720 Pro. The 720 Pro makes drilling pocket holes easier than ever before.
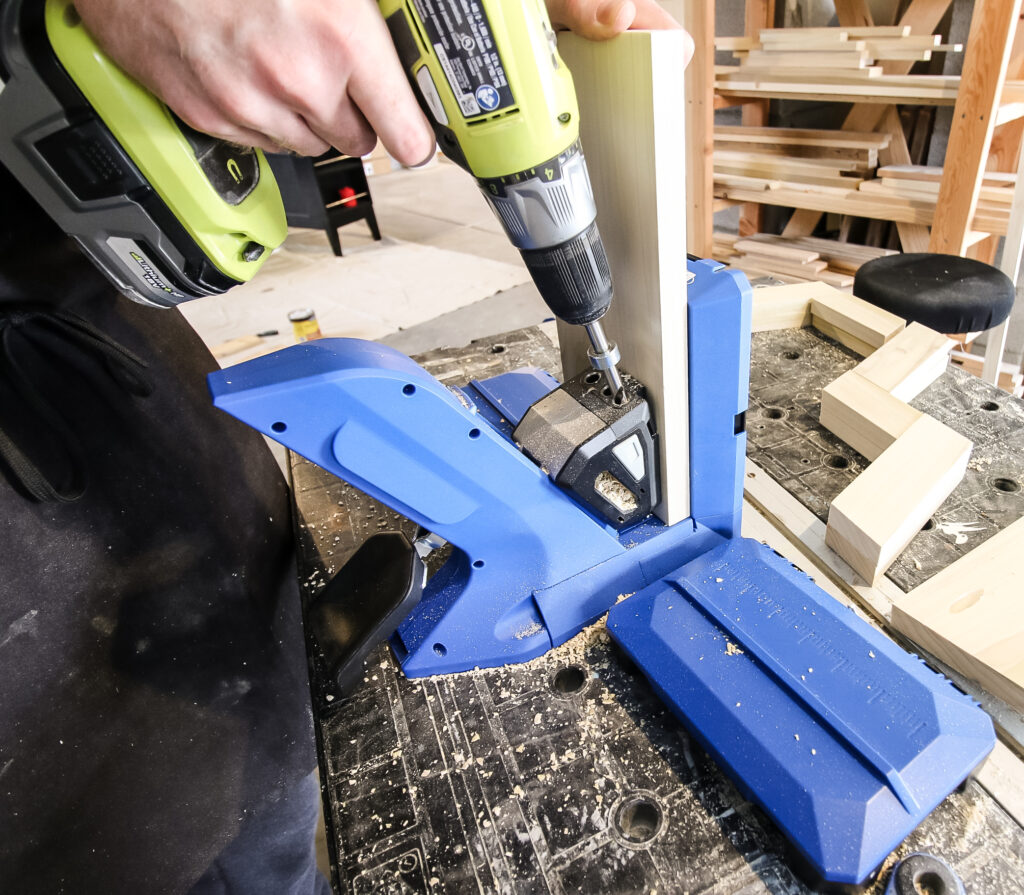
The Kreg 720 Pro uses their AutoMaxx clamping system, so popping new boards in and out for drilling holes is so simple and quick.
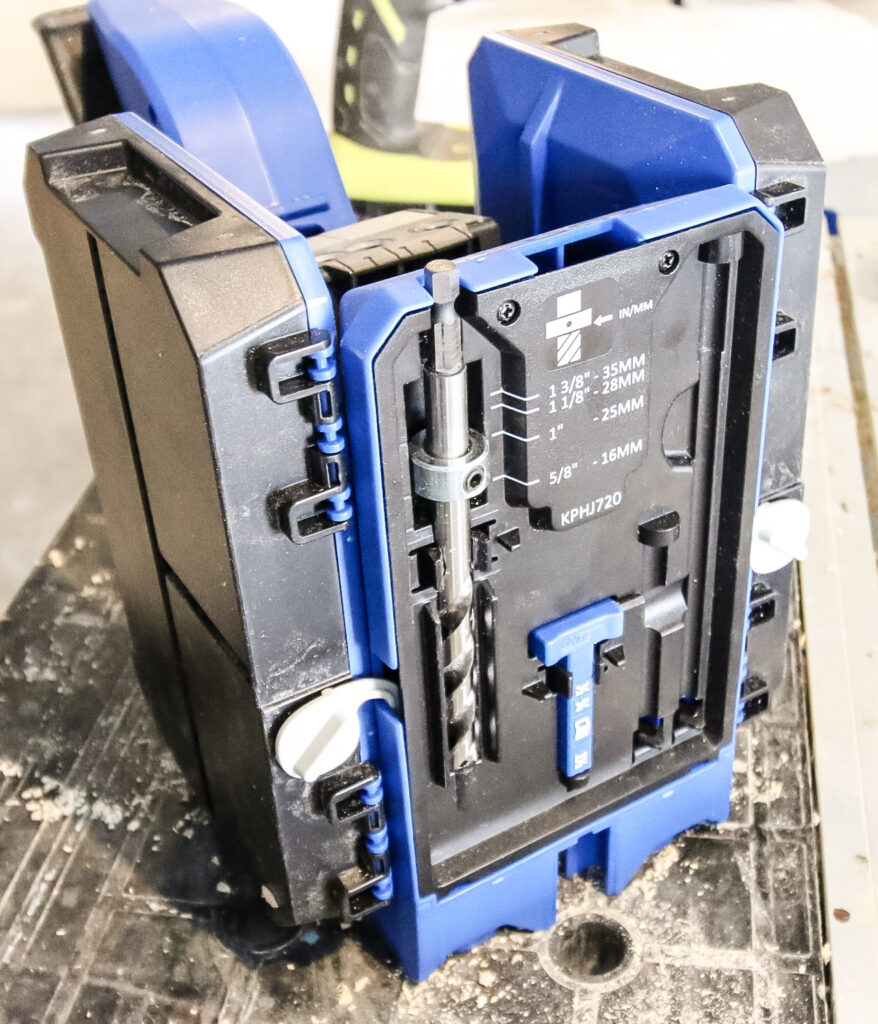
Also, all the pieces are stored on board the jig, either clipped into the bottom or in the attached docking stations.
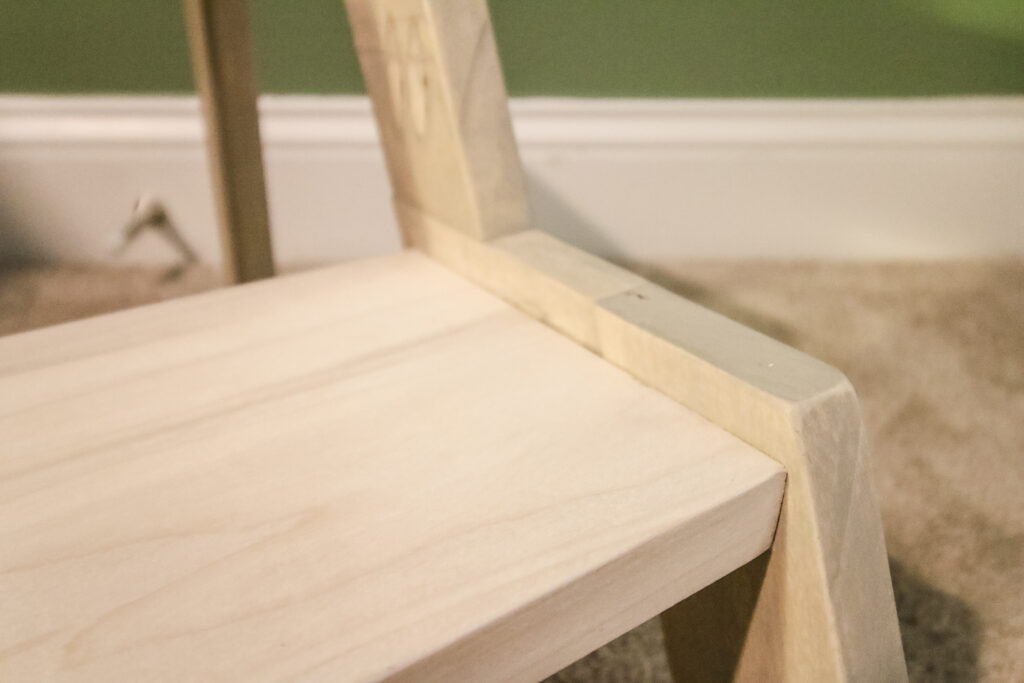
STEP 2: Connect all leg pieces for each side
All the leg pieces are connected with pocket screws and wood glue.
It's critical to include wood glue in these joints since they will be taking on weight of someone standing on the stool.
Once the leg sets are completed, sand them flush and round off the edges and corners.
Once we had all the leg pieces put together, we wanted to fill the pocket holes so they wouldn't be quite so obvious. For that, we popped in the new Kreg Plug Cutter Drill Guide.
The Plug Cutter Drill Guide slides right into the 720 Pro where the regular drill guide usually goes.
Then, using the plug cutter drill bit, we were able to cut beautiful plugs from the cut off scraps from the wood we were using.
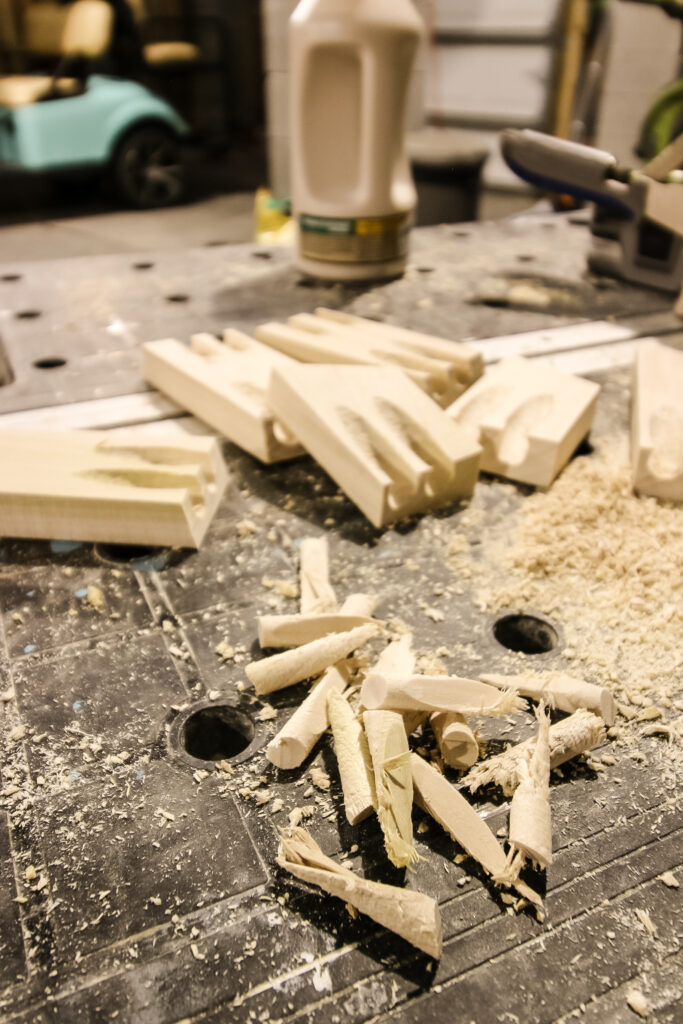
The Plug Cutter Drill Guide makes it super simple to make custom plugs that work perfectly with your wood type.
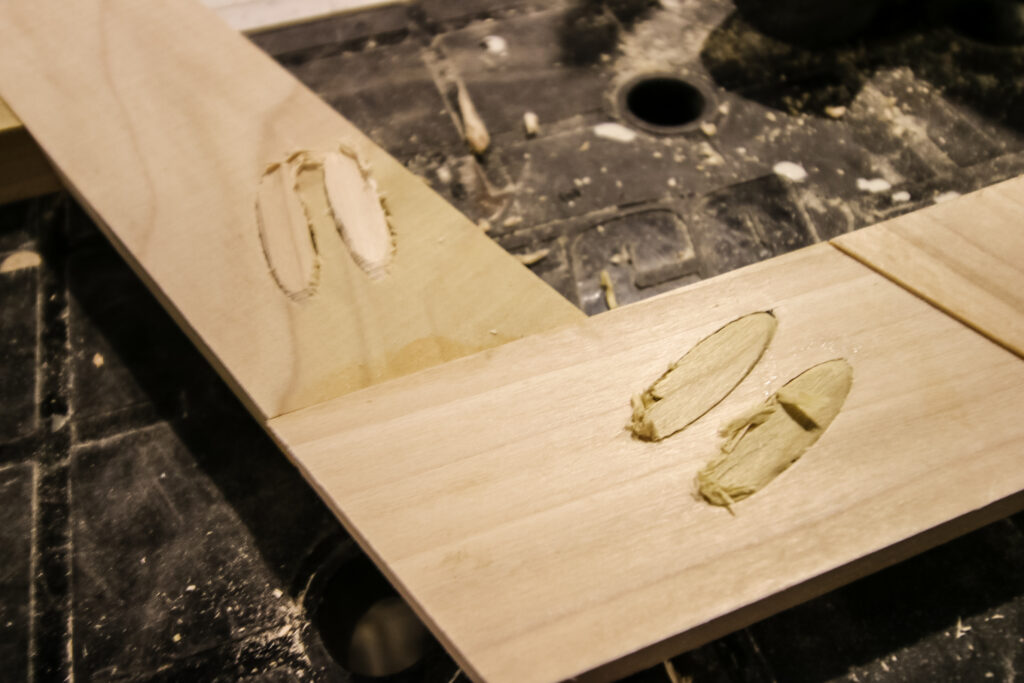
Then we put wood glue into the pocket holes and slid in the plugs we just cut. When they were dry, we sanded them smooth and they were perfect.
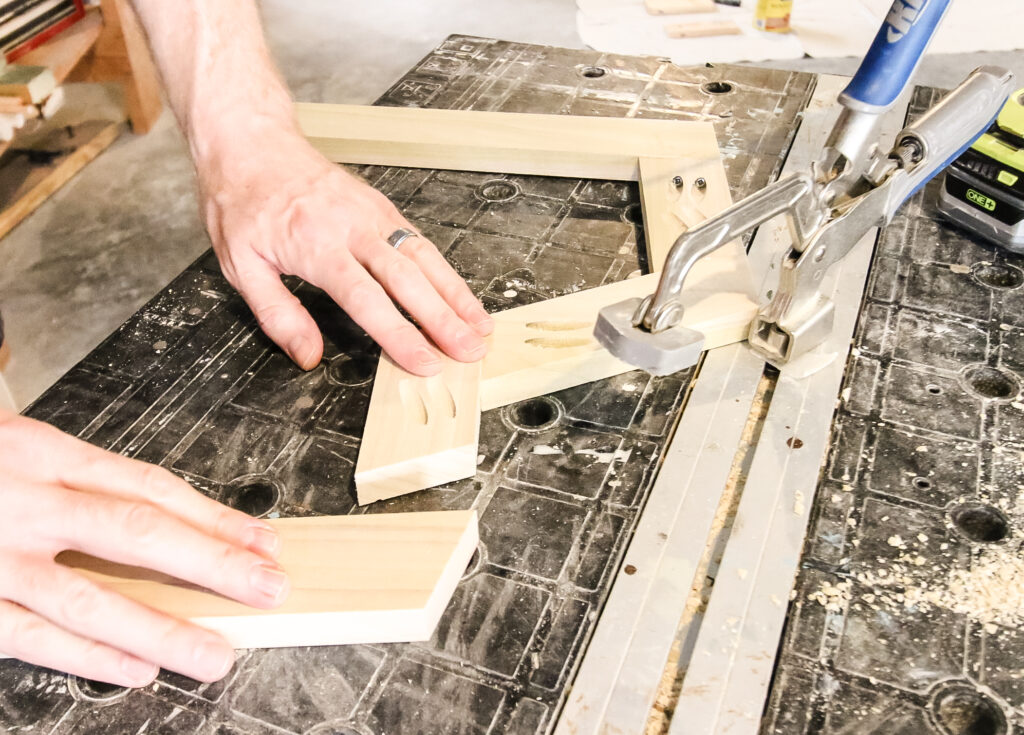
STEP 3: Attach two sets of legs with two step pieces
If you want a two-toned color look to your step stool, take the opportunity now to do that.
It's much easier to stain or paint something two different colors before you connect them.
Then, attach the two leg sets with the two steps, again with pocket screws and wood glue.
STEP 4: Stain or paint and seal
If you are just going with one color, do that now. Then seal the entire step stool to keep it protected. Especially if you are using this step stool in the bathroom or kitchen, it could get wet.
Check out our tutorial + woodworking plans for how to build a kids learning tower!
Step Stool Woodworking Plans
We have partnered with Kreg Tool to create woodworking plans for this project. These stool plans include a material list, cut list, and step-by-step instructions.
Be sure to also check out their new Projects and Plans website, which is full of free and easy plans that will help you make cool furniture and other projects for your home.
Wooden step stool video tutorial
Also be sure to check out our video tutorial showing the build process!
The video tutorial will give you a better look at how everything came together in order.
Any questions about how to make a simple step stool?
Be sure to check out our other DIY projects and woodworking projects!
Interested in the Kreg Jig? Click here to read our full Kreg Jig review and to see all of our Kreg Jig projects.
New to the Kreg Jig? Here is a step by step guide on how to use a Kreg Jig!
OR grab our FREE Kreg Jig Cheat Sheet here! Download the cheat sheet!

Looking for something?
We've been doing this since 2012 so we have a LOT of blog posts!
Search stuff like: Ceiling Projects | DIY Plant Stands | Thrift Flips

Hello, I'm Morgan, half of the creative force behind CharlestonCrafted.com! With a passion for DIY that dates back to 2012, I've transformed three homes and now I'm dedicated to helping others craft their dream spaces. Let's turn your house into a home together!


Ivory says
I simply adore this diy. I got to put this on my diy list for this summer. Thanks for sharing
Kevin says
Any chance to share the 3D files? Looks like it was from Sketchup?
Sean says
Hey Kevin, could you email me at Sean@CharlestonCrafted.com and we can talk about what you need. Thanks!