I recognize that Luke was two months old on Christmas day, but I decided I wanted to make him something for Christmas. I settled on this DIY wooden name puzzle.
He'll be able to use it in stages of development and it will be a cool personalized toy to have around. Plus, it doesn't get any more Made in the USA than a handmade wooden toy!
If you are interested in making a custom wooden name puzzle for a toddler or child in your life, you will love this simple tutorial.
Click here to pin this project to your Pinterest board!

DIY Wooden Name Puzzle
Making the Letters
I started out by drawing out the letters of LUKE onto a board and then used a jigsaw to cut each letter out.

I then sanded down each letter and rounded off the edges.
Making the Board
Next, I got a piece of wood slightly bigger than the letters and traced the letters onto the board.
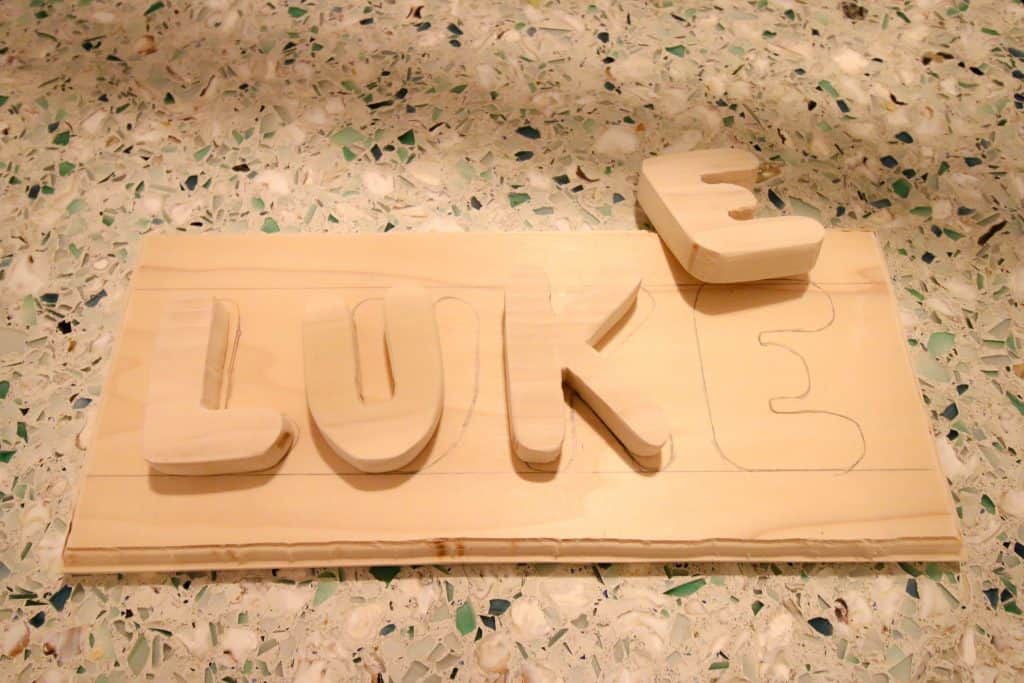
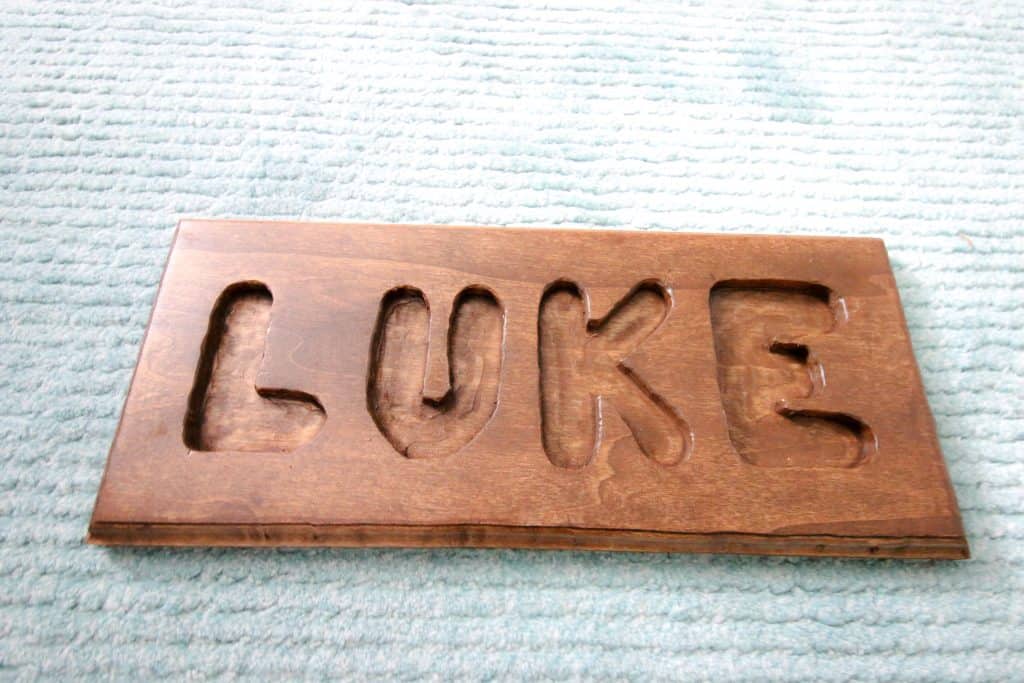
I used a router to carve out each letter about a quarter inch into the board, then sanded out each letter.
Finish
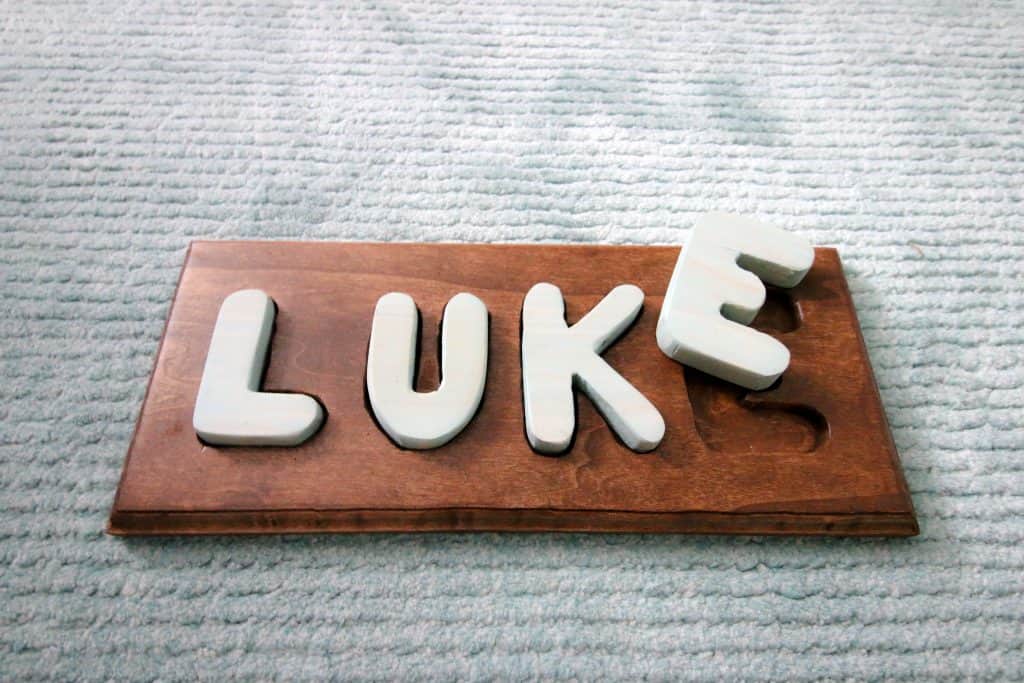
We used Rust-oleum Varathane stains to make this project pop. We used their Early American classic color to stain the board. Then we used their new Bleached Blue stain for the letters. I loved the way the light blue would contrast off the dark brown of the board. The Bleached Blue brought out really cool grain and looks super unique.
Read our full review of Early American wood stain by Varathane!
I love the way this simple DIY wooden name puzzle came out. Luke will be able to use it in a variety of stages. He can play with the letters at first, then he'll learn to put them in the holes.
Eventually he'll learn that it's his name. When he gets too big to play with a little kid puzzle like this, maybe I can glue the letters into place and hang it up as a sign.
Let's just say, for this project, I'm glad his name wasn't something like Bartholemew...
Want to build more kid's projects? Here's how to make a DIY Pikler Triangle!
This post contains affiliate links, so if you purchase anything through them, we get a small percentage of the sale. Thank you for supporting our brand and the brands that make Charleston Crafted possible!

Looking for something?
We've been doing this since 2012 so we have a LOT of blog posts!
Search stuff like: Ceiling Projects | DIY Plant Stands | Thrift Flips

Hey there, I'm Sean, the woodworking enthusiast and builder behind CharlestonCrafted.com! Since 2012, I've been sharing the magic of turning raw materials into beautiful creations. I love teaching others the art and satisfaction of woodworking and DIY. I try to inspire fellow crafters to make something extraordinary out of nothing at all.

Lauren says
This is so great! Can you be more specific on the method of using the router? I’m trying to do some research/watch YouTube videos and am coming up short!
Sean says
Yeah, so after we traced the already-cut letters onto the board, I set my palm router to about a quarter of an inch and used it to carve out inside where we traced the letters. This way, the letters could fit inside the routed out letters and wouldn't move around. Does that help?
Kathy says
What was the router bit that you used?
Sean says
Hey Kathy! Just a simple 1/4" straight router bit. THanks for stopping by!