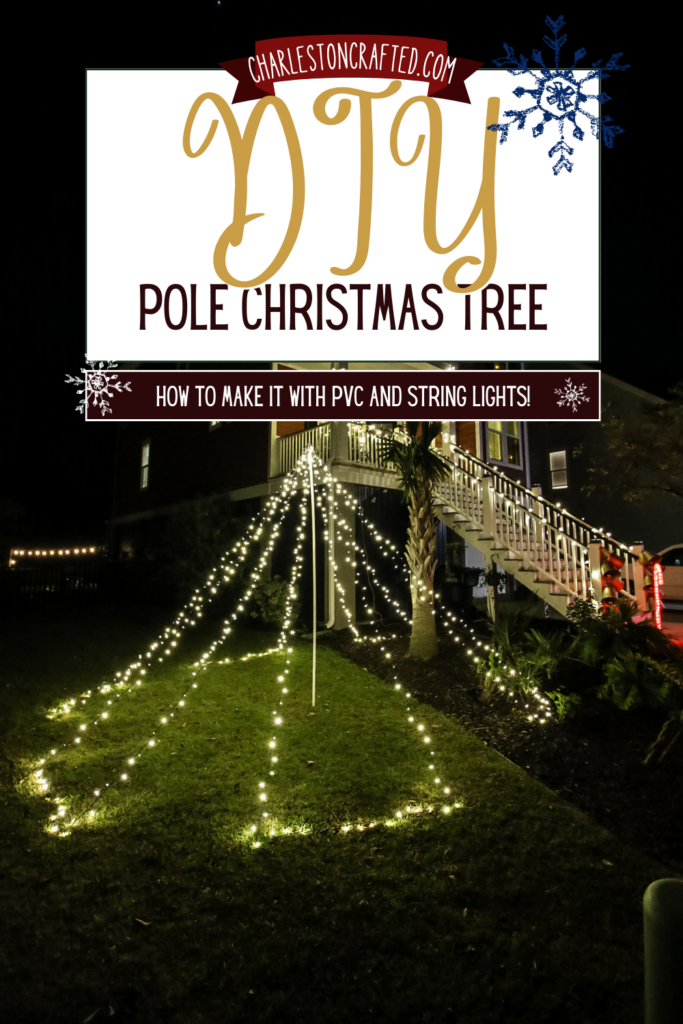
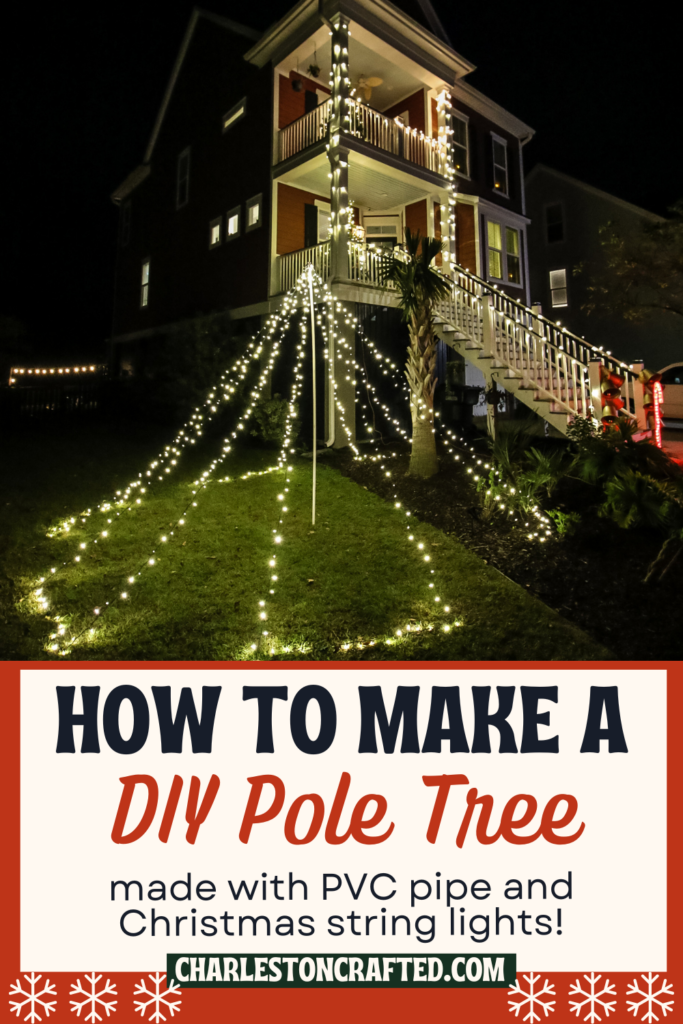
This post will teach you how to make a DIY pole Christmas tree using a PVC pipe, hardware and Christmas string lights. Get the tutorial below and make one today!
This post was sponsored by National Hardware. All opinions are our own. Thank you for supporting the brands that make Charleston Crafted possible!
Since our house is elevated with the garage underneath, we always have to go BIG for holiday decorations. Anything small or short just looks small next to the tall house.
That's why this year we wanted to add some real height to our yard decor. Last year, we strung string lights all the way up the stair railings and columns to bring the eye up, but the ground level was still lacking.
This year, we decided to make a DIY outdoor Christmas tree out of PVC and string lights that would add vertical height to our yard!
This DIY outdoor wire Christmas tree is a relatively simple and inexpensive project that will have a huge impact on your overall holiday decor, no matter what size yard you have.
Let's show you what you need to make this tree and how to do it!
Check out all of our DIY Christmas decor from last year!
DIY outdoor Christmas light tree
A DIY outdoor Christmas tree made of lights is an easy DIY project that doesn't require any tools or for you to make anything. It's simply putting the tree together and letting it shine... literally!
Here's what you need to make the project.
Materials needed to make a DIY pole Christmas tree:
- (6) 28' 100 light Christmas string lights
- (1) 10' x ¾" PVC pipe
- (1) Rebar pole
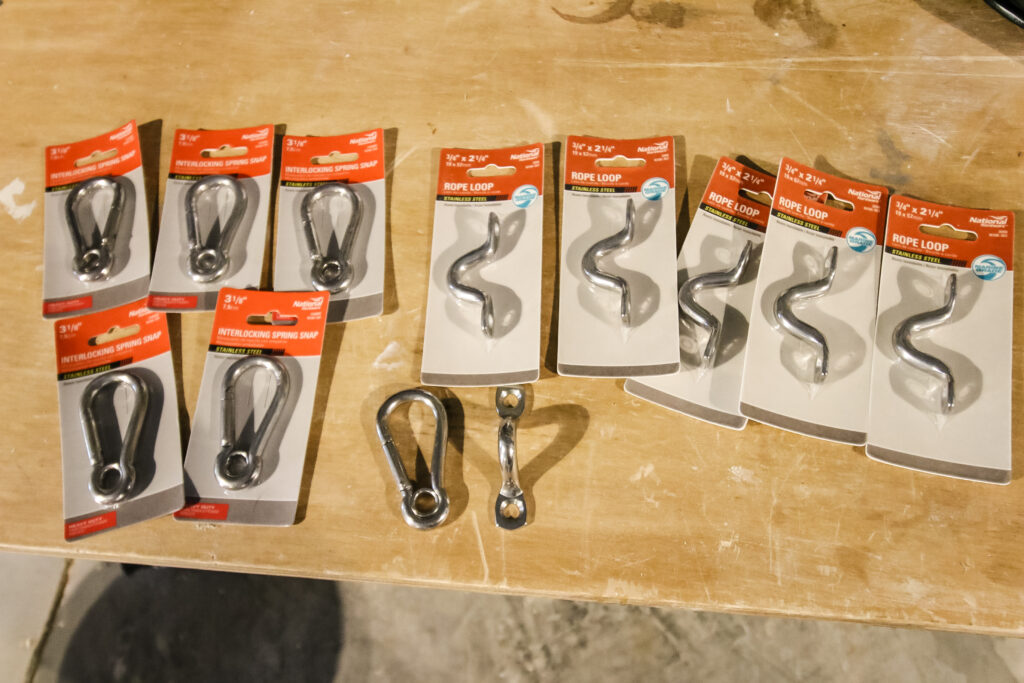
- (6) 2 ¼" rope loops
- (6) 3 ⅛" interlocking spring snaps
- Glue
- Landscaping stakes
- Outdoor extension cord
How to make a DIY outdoor Christmas tree with PVC and lights
Here's the overall steps you need to make a DIY outdoor Christmas light tree with PVC and Christmas lights!
Make sure you check out how we made an outdoor wood slat Christmas tree with lights!
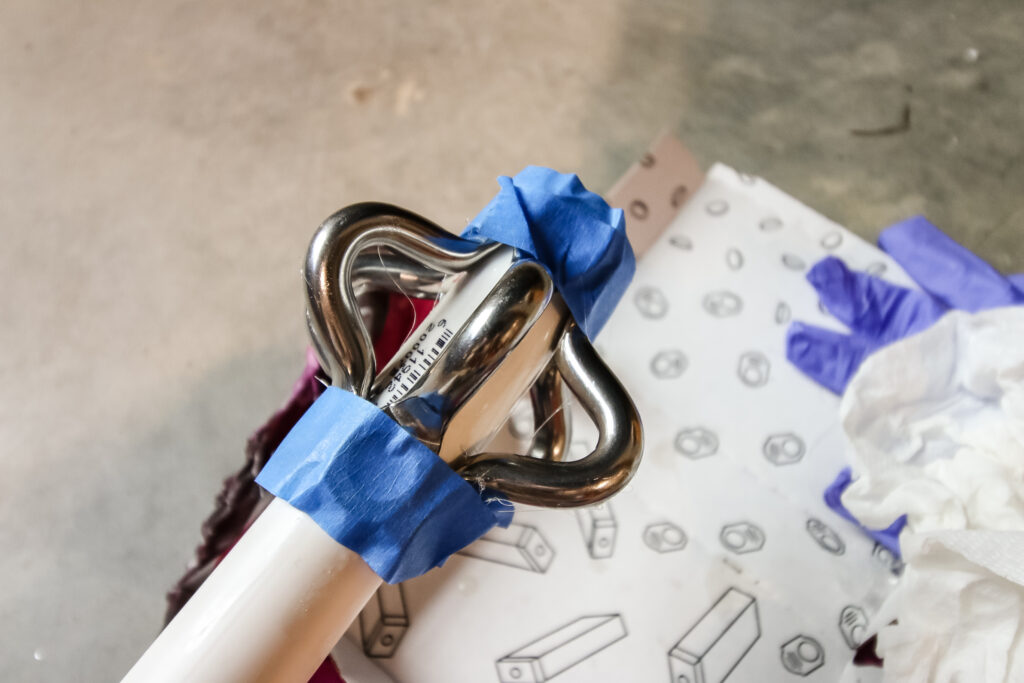
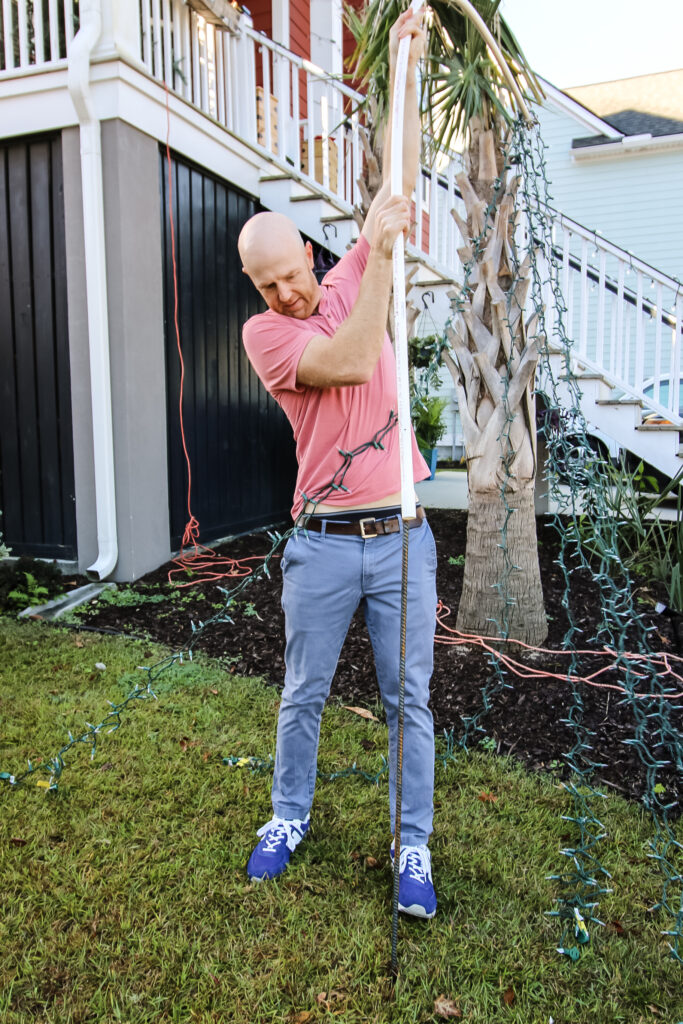
Step one: attach rope loops to PVC
The first step is to add loops to the end of a piece of PVC. We chose a 10' tall, ¾" thick piece of PVC tube that you can get from any home improvement store.
We used six 2 ¼" rope loops from National Hardware to attach to the end of the PVC. These loops are super sturdy and secure and can handle the weight of the lights.
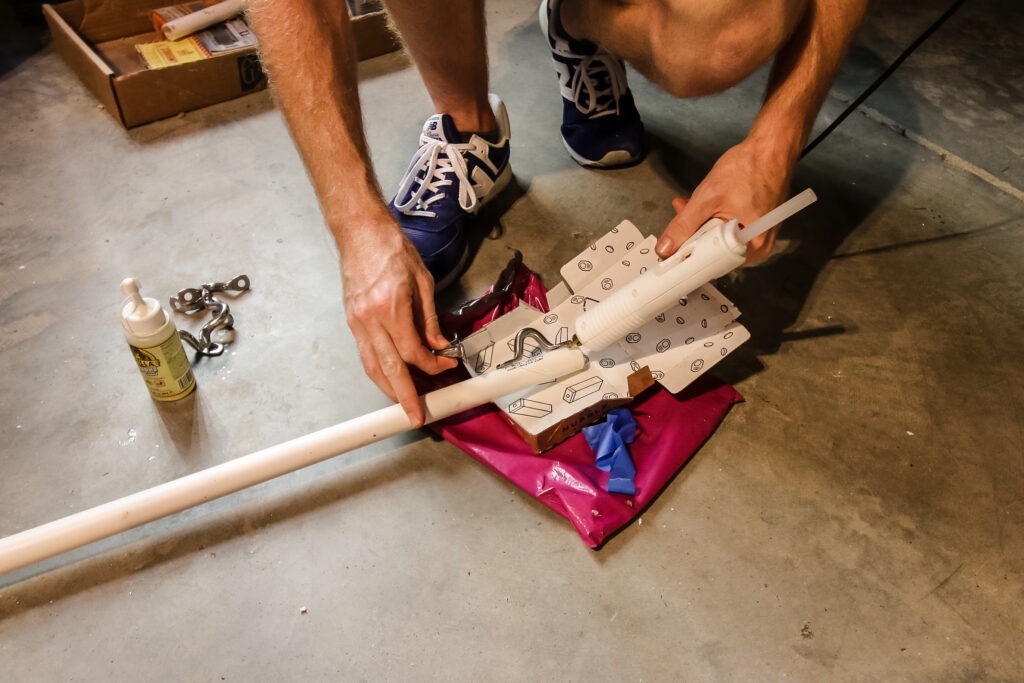
To attach the loops to the PVC, we used hot glue and Gorilla Glue. The hot glue provides the instant attachment to hold the loop in place and the Gorilla Glue dries strong and secure to hold it permanently.
We also used a line of epoxy putty around the screw holes of each of the loops just to be extra secure, but it probably isn't necessary.
Let dry overnight and then start construction!
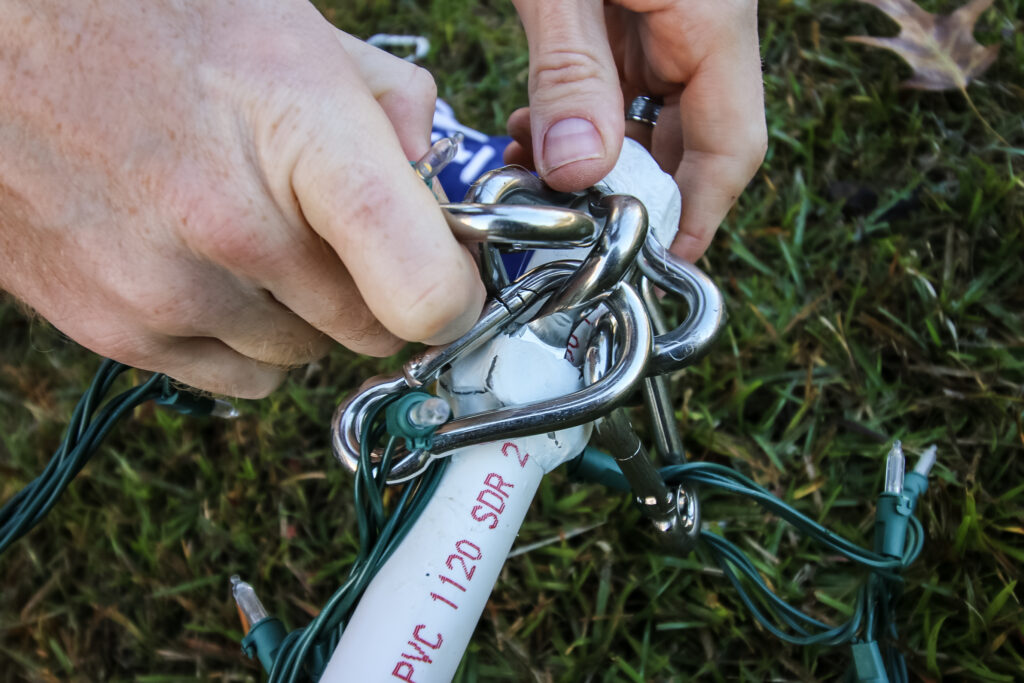
Step two: hook lights onto loops
Each hook on the PVC pole represents a strand of Christmas lights. We started by unraveling the first strand of lights and hooked a spring snap (carabiner) from National Hardware around the center of the strand.
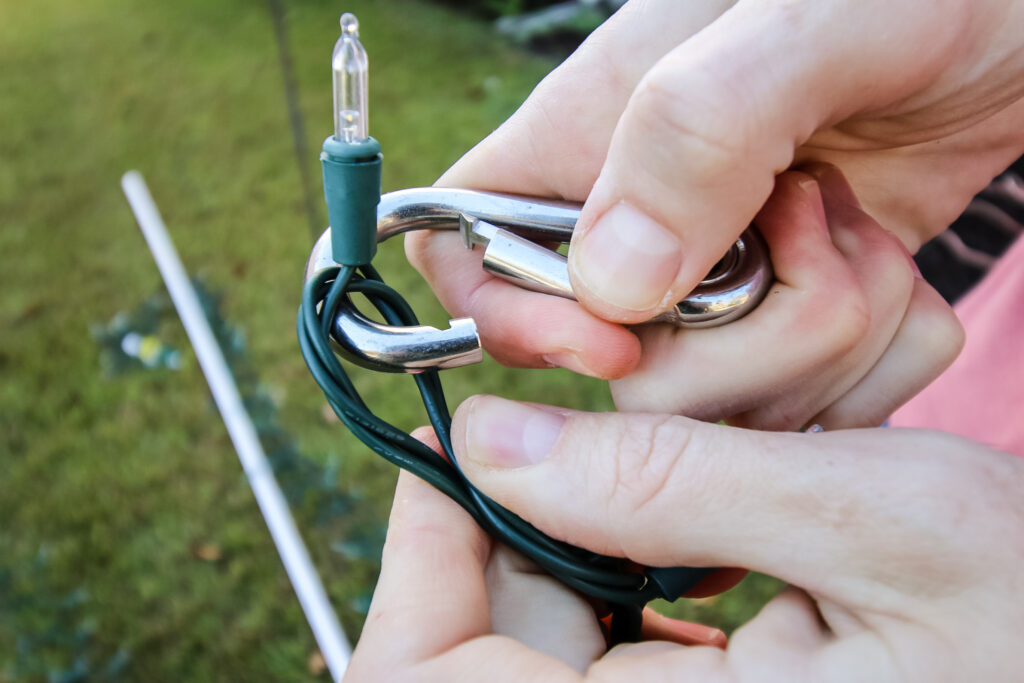
Then, we clipped the spring snap around one of the rope loops.
We continued this until all six strands of lights were attached to the end of the pole on the loops.
In hindsight, it may have been easier to put the pole in place and use a ladder to reach the end of the pole and do one strand at a time to avoid the strands getting tangled, but this is how we did it.
Step three: stand up PVC pole
Now it's time to stand up the pole. We started by driving a piece of National Hardware rebar about a foot into the ground for stability.
This is the same rebar we used to pose skeletons at Halloween!
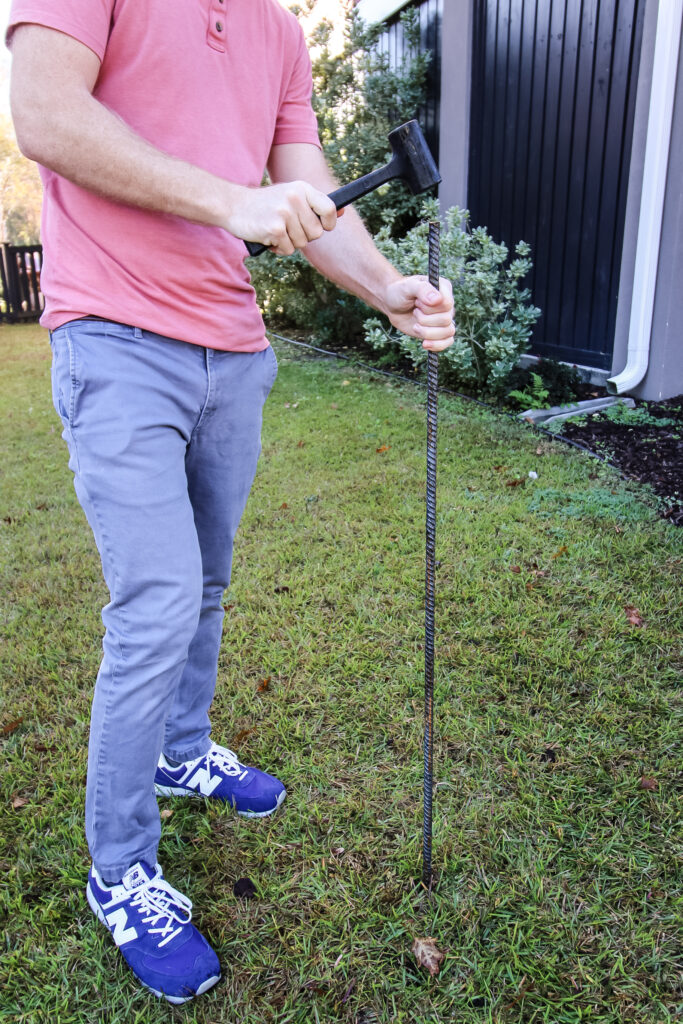
After hammering the rebar into the ground we slide the end of the PVC pipe that doesn't have the lights attached over the rebar down to ground level.
It might feel a little wobbly until you get the lights staked down, but it will hold up in the end.
Step four: expand light strands
Once the pole is in place, start separating out the lights into diagonals.
Start by plugging in one strand to your extension cord. Then grab the female end of the other half of the strand and connect it to the male end on the strand next to it.
Now, grab about 2 feet from the end of each strand and pull both ends out at an angle away from the pole. When you get to their maximum length, use a landscaping stake to secure it into the ground.
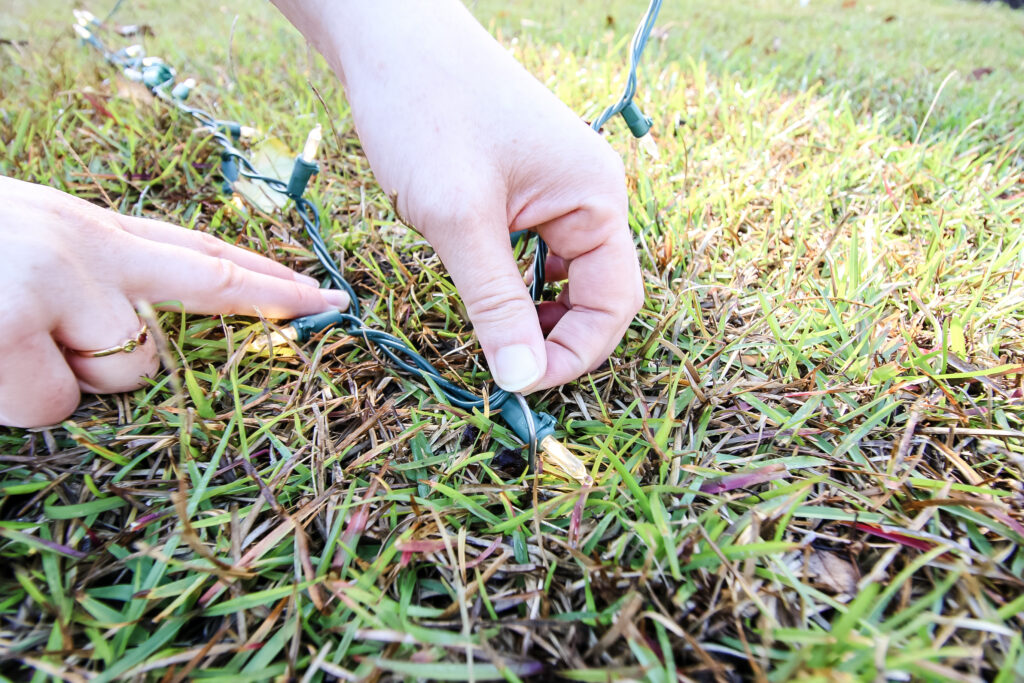
Then, pull the excess in toward the other end and stake that down in the middle. This will connect the strands into triangles of lights, with the connection between 2 strands in the center of the bottom segment of the triangle.
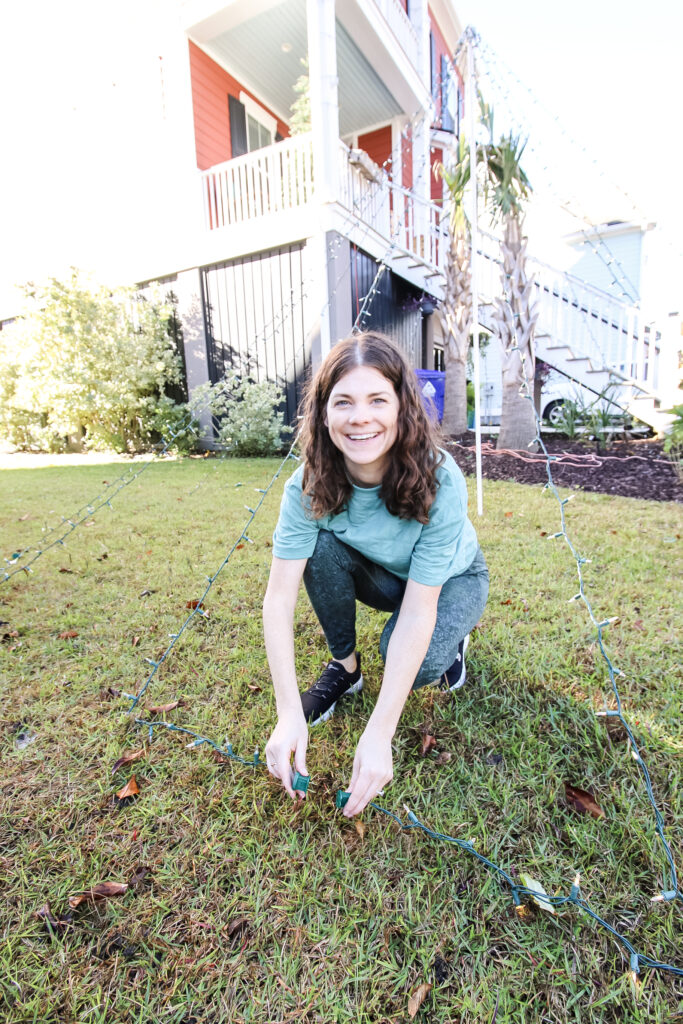
Repeat by connecting the female end from the second strand into the male end of the next strand and so on and so forth.
Step five: enjoy!
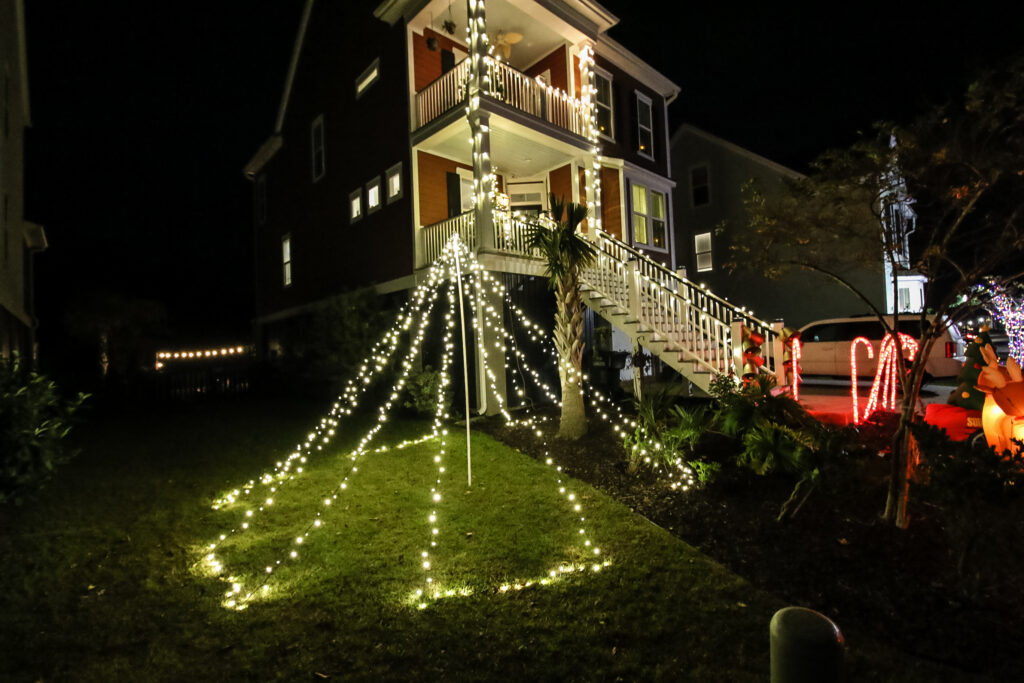
This DIY pole Christmas tree looks so cool! It's a great addition to the yard both day and night!

During the day, the height looks great on the side of our house. But, as it turns to night, the lights look even better!
We love how tall this pole tree is and how it really adds to the dimension on the side of our house.
We hope you love this project and try it out at your home!

Looking for something?
We've been doing this since 2012 so we have a LOT of blog posts!
Search stuff like: Ceiling Projects | DIY Plant Stands | Thrift Flips

Hey there, I'm Sean, the woodworking enthusiast and builder behind CharlestonCrafted.com! Since 2012, I've been sharing the magic of turning raw materials into beautiful creations. I love teaching others the art and satisfaction of woodworking and DIY. I try to inspire fellow crafters to make something extraordinary out of nothing at all.


