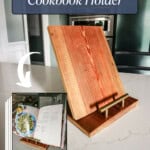
Here's how I made a quick and simple one-board DIY cookbook stand for my wife's birthday! It's an easy project that's great for a gift!
I always run into a dilemma this time of year because my anniversary, my wife's birthday and Mother's Day all happen in a one month span.
That's a lot of gift ideas! Well, luckily this project can work for any of those!
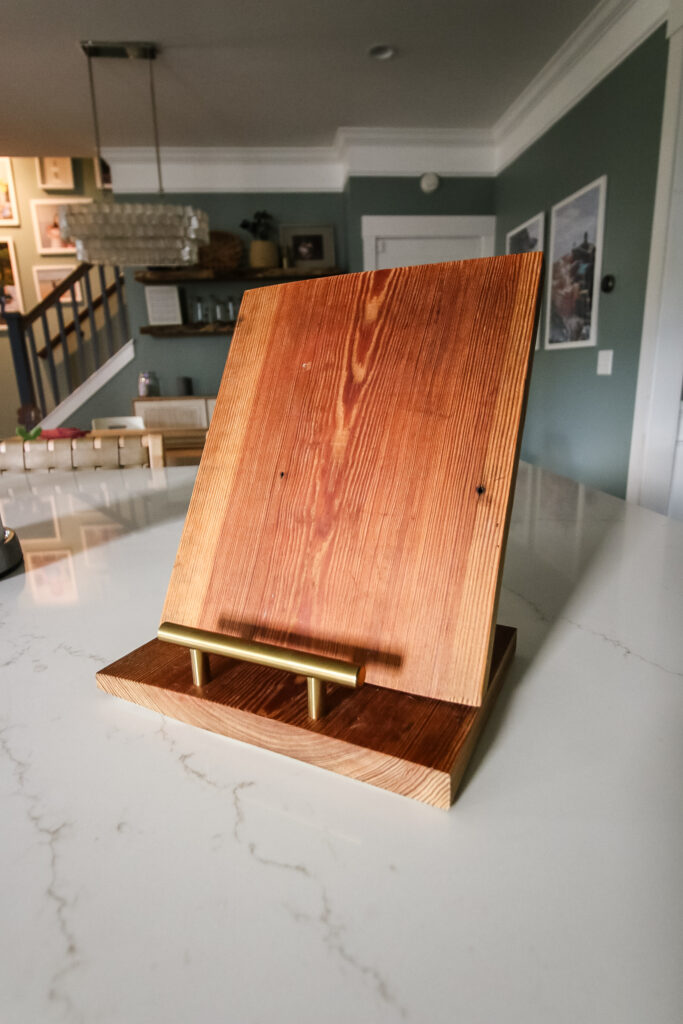
We're in the middle of a kitchen renovation and I wanted to make my wife this DIY cookbook stand as a functional decor item. The best thing is it's customizable in two different ways and it can be made with one scrap board!
How to make a DIY cookbook stand
This is a really easy project to make that is a great gift idea for Mother's Day, a birthday or Christmas. It's even better because you can customize the wood you use and the cabinet pull to match your kitchen!
Here's what you need to make it and the simple steps!

Materials needed:
- 18" of 1x10 board (any scrap board is perfect for this project!)
- (1) cabinet pull to match your kitchen
- Oil (linseed, tung or cutting board are all fine)
- (2) pocket hole screws
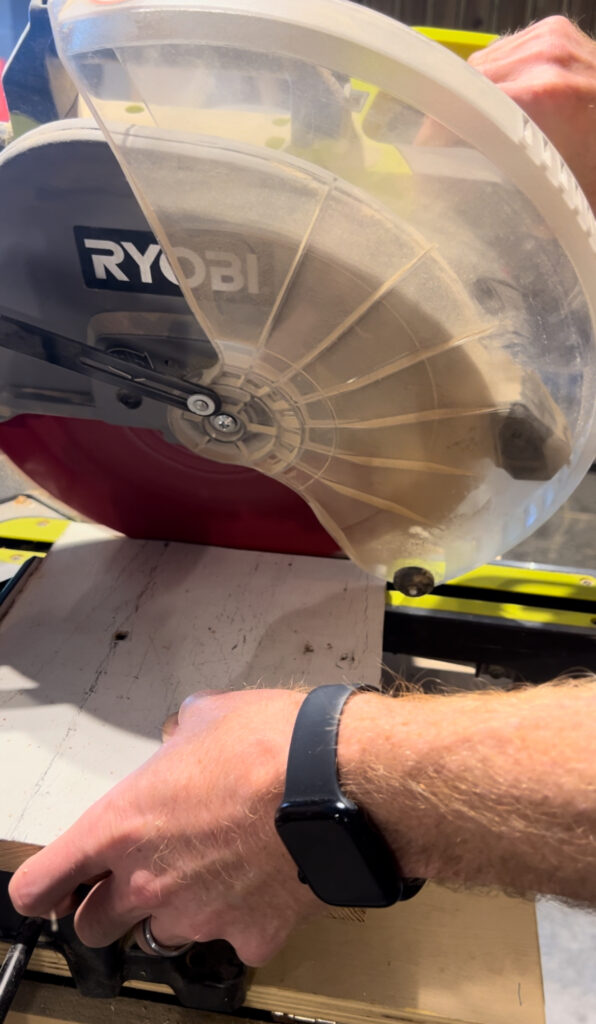
Step one: Make cuts
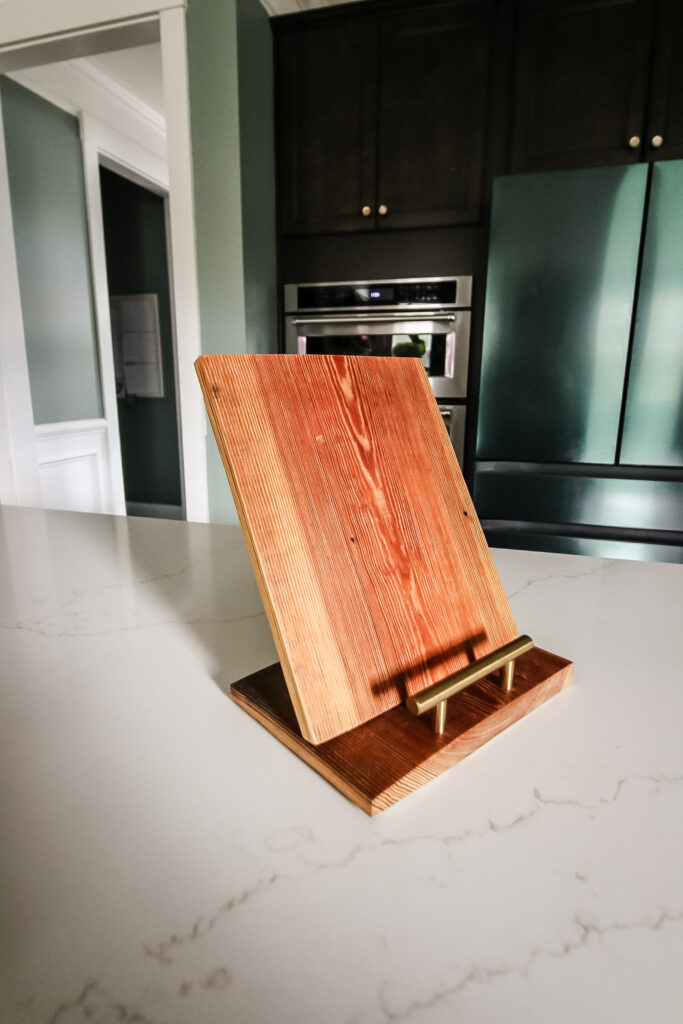
Start out by making two cuts on your wood. I used a piece of old barn wood that we picked up at the Antique Tobacco Barn in Asheville a couple years ago.
We were going to use it for something else and never did, so it's just been sitting in my garage. Spoiler alert- most of it still is because this project doesn't require much wood.
Cut one piece to 6" long and one piece to 10 ½" long with a 25 degree beveled angle on one side.
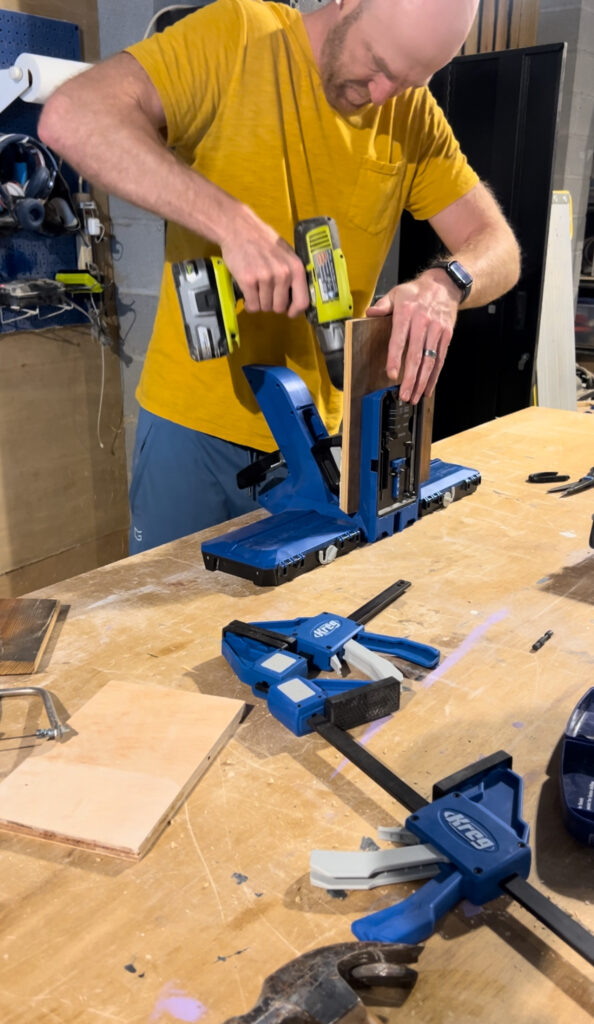
Step two: Drill holes
Next, drill your holes on each board. Start by drilling two pocket holes on the beveled end of the longer board.
Learn more about drilling pocket holes here!
Then, drill two holes ½" in from one side of the shorter board so that they are spaced to fit the cabinet pull. You'll want to countersink these holes so that the screw heads sit inside the wood and aren't making contact with the countertops.
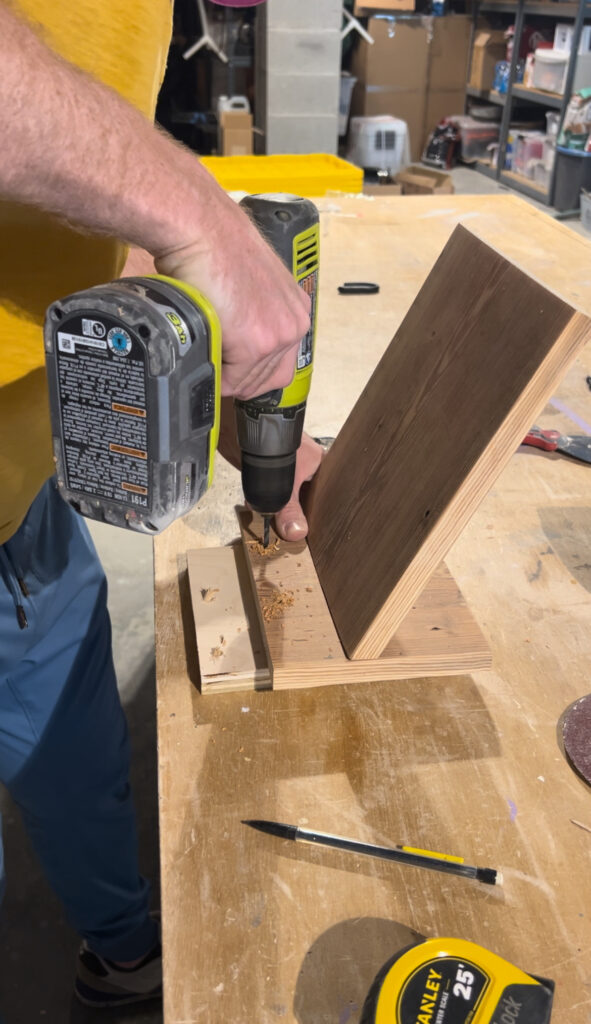
Step three: Assemble
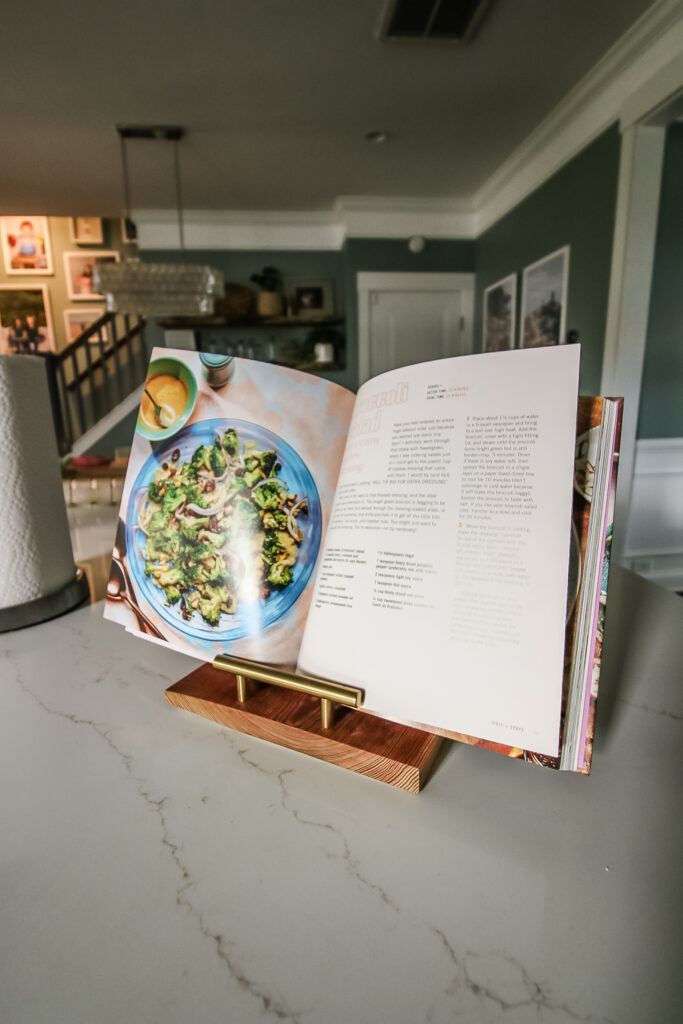
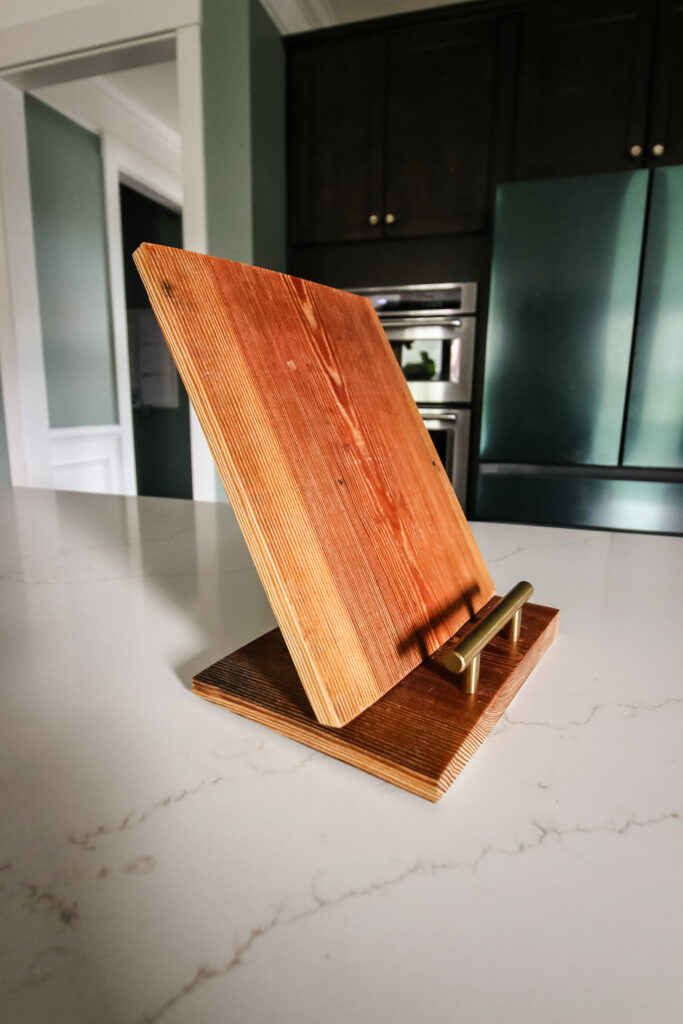
Next, assemble the cookbook stand! Use wood glue and pocket hole screws to attach the angled board 2" in from the edge with the holes on the other board.
Then, screw in the handle through the other holes.
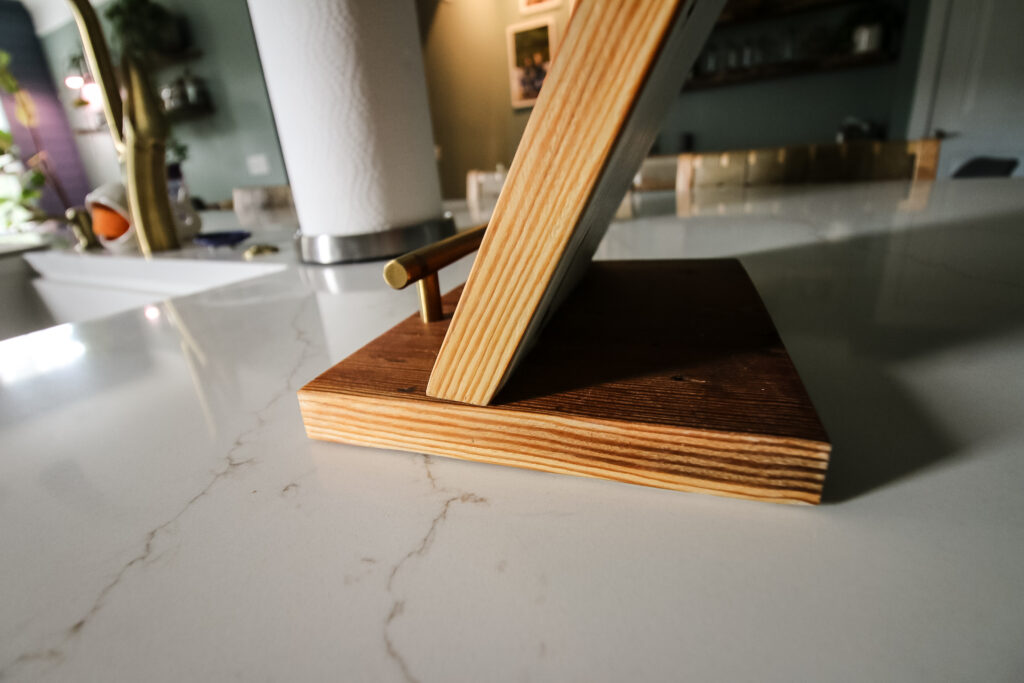
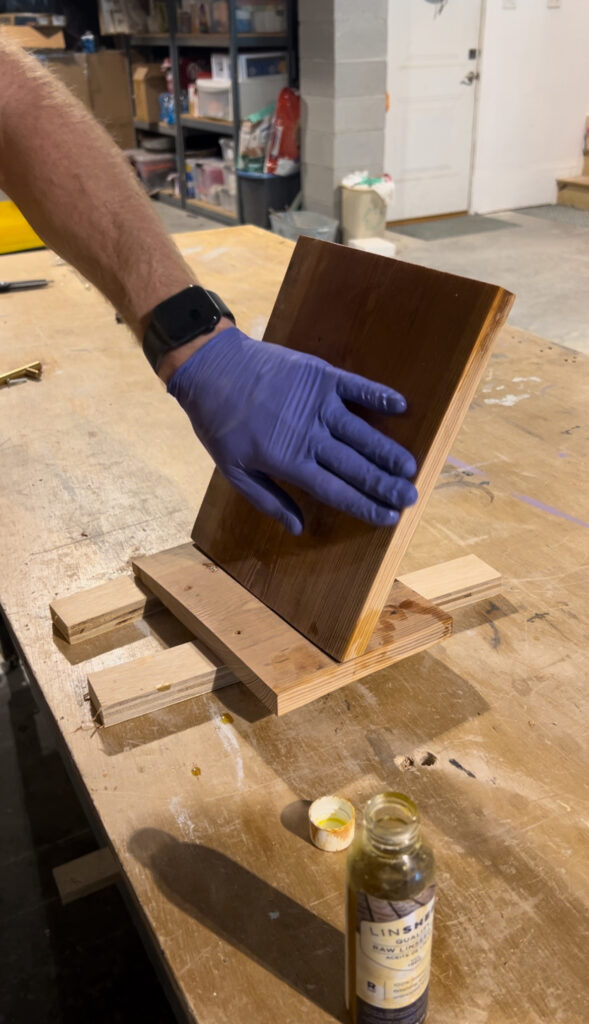
Step four: Oil
Finally, coat the whole piece with oil. This will bring out the pop of the grain (especially if you use a hardwood of some kind) and will also help protect it from any splatters that may occur during cooking.
Simple DIY cookbook stand
This is such a simple project that can make a great gift idea! If you know someone in your life that loves cooking (or maybe that person is you!) then this is a really easy one board project that can be done with scrap wood to really make it quick!
Hope you enjoy building this simple DIY cookbook stand!

Looking for something?
We've been doing this since 2012 so we have a LOT of blog posts!
Search stuff like: Ceiling Projects | DIY Plant Stands | Thrift Flips

Hey there, I'm Sean, the woodworking enthusiast and builder behind CharlestonCrafted.com! Since 2012, I've been sharing the magic of turning raw materials into beautiful creations. I love teaching others the art and satisfaction of woodworking and DIY. I try to inspire fellow crafters to make something extraordinary out of nothing at all.