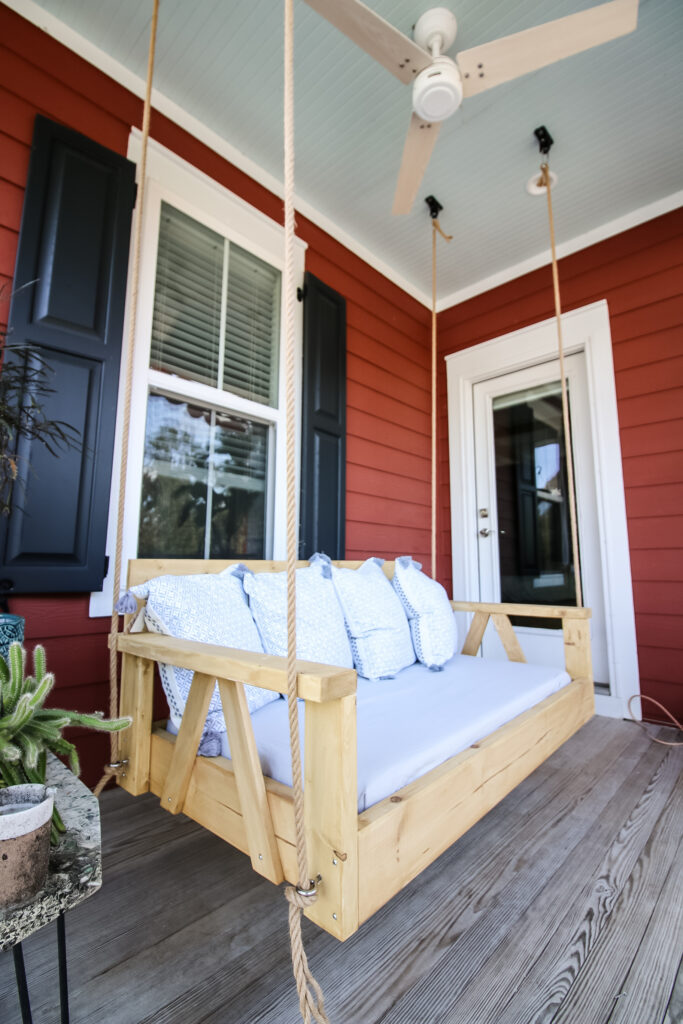
A bed swing on your porch is a perfect way to relax and looks incredible from the street. Our post will show you how to build a DIY porch bed swing to make your neighbors jealous!
This post was sponsored by National Hardware. All opinions are our own. Thank you for supporting the brands that make Charleston Crafted possible!
One of our absolutely favorite things about our house is that it has three porches. Two on the front and one on the back.
Having an elevated house with two porches on the front really makes it look more grand than it is, but, more importantly, we love spending time on these porches.
On our back porch, we've built a DIY square dining table and a sectional couch to go dine on and trifold shades to block the sun.
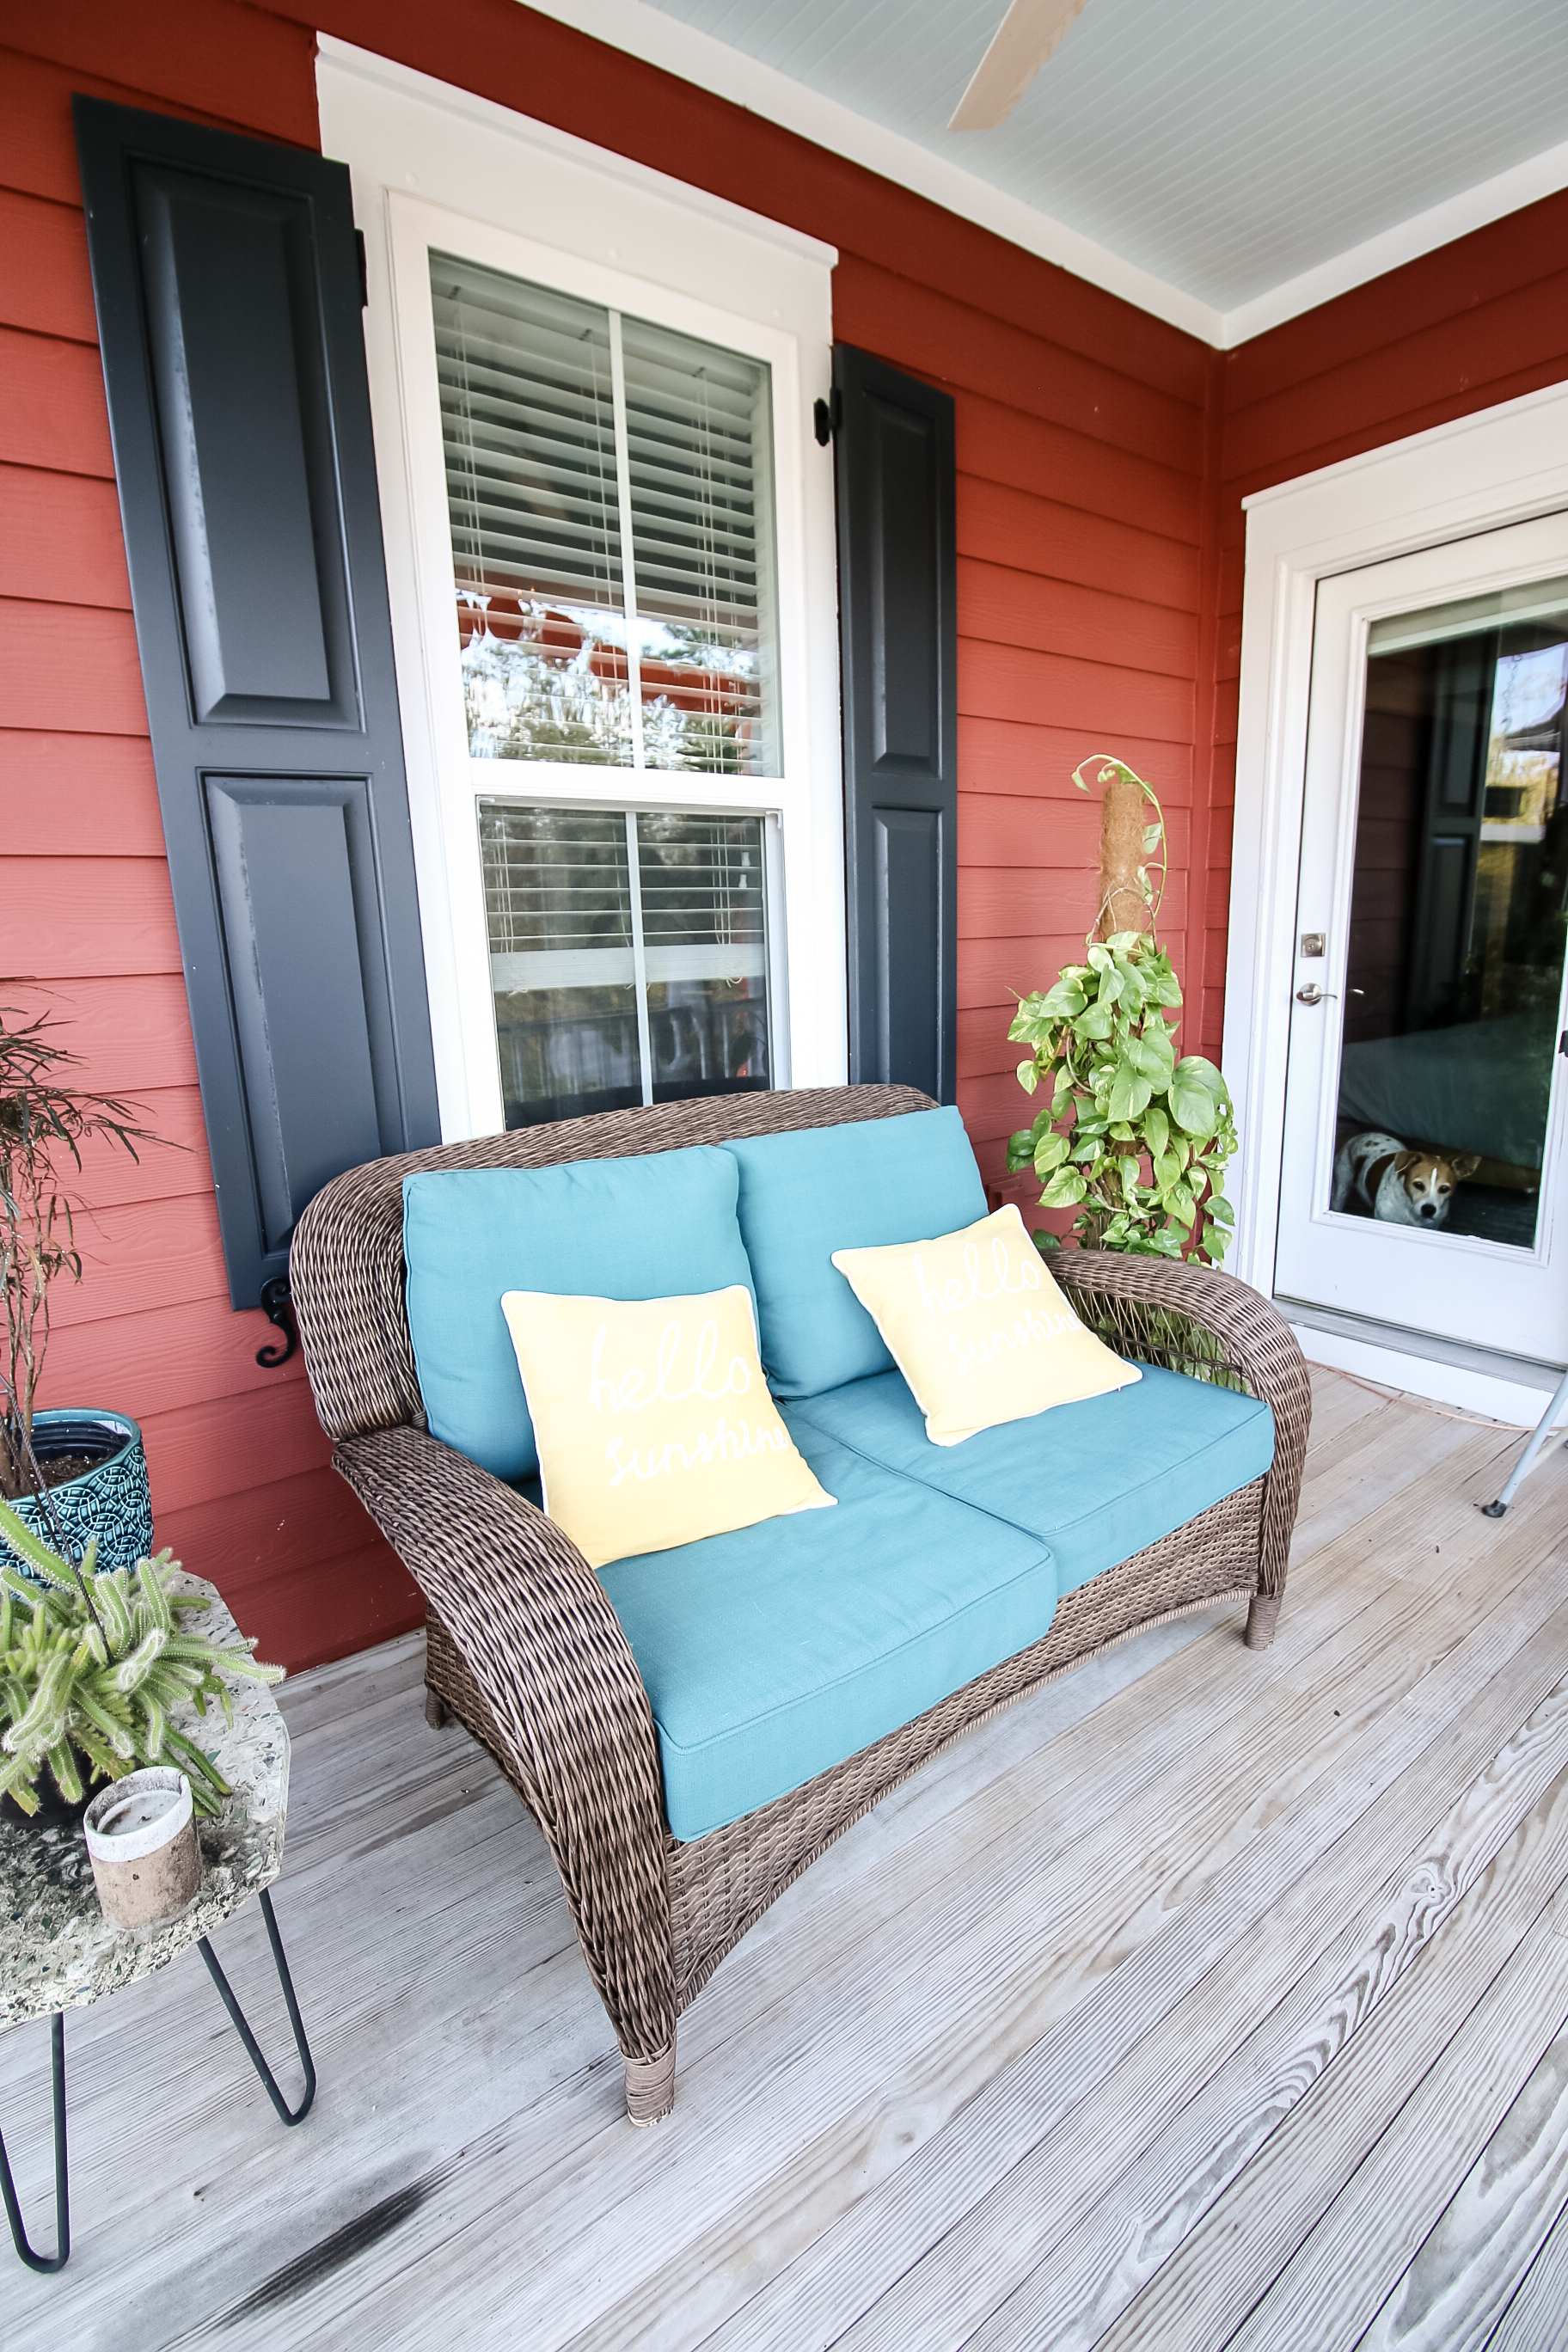
But on our front porches, we've never done anything except drop down the wicker furniture we had on the patio at our old house.
Morgan and I love to sit on the couch on the upper porch off our bedroom in the evening to watch the sunset and have a glass of wine when the weather is nice. And ever since we've moved in, she's asked for a bed swing.
Porch bed swings are very popular in the south for people to curl up and enjoy a deep seat for reading a book or having a conversation.
We finally had the opportunity to build and install a porch bed swing and wanted to share with you everything we learned about the process!

DIY porch bed swing
A DIY bed swing for your porch is a wonderful project that will make a big impact on the look of the outside of your home. You'll also love sitting on it or taking a nap!
Typically, a bed swing can be made using either a crib mattress or a twin mattress. We opted to use a crib mattress because we are also building our son a new twin-sized bed and upgrading him from his Thomas the Tank Engine bed and taking the mattress out of that.
So, while this post and tutorial will feature a crib mattress, we also have woodworking plans available for a DIY bed swing with a twin mattress!
Materials needed to build a porch bed swing
To build a DIY porch bed swing, you'll need a few pieces of lumber and some hardware and finishes. Here are the items you'll need, but make sure to get the full material list in our printable PDF woodworking plans!
- 2x6s
- 2x4s
- 1x4s
- National Hardware Porch Swing Hardware Kit
- 4 ½" long screw eyes
- ¾" rope
- Outdoor stain
- Crib mattress
- Pillows
How to build a swing bed
Here's the overview on how to build a DIY porch swing bed, but remember to grab our printable woodworking plans so that you can see every step and get all the insider tips!
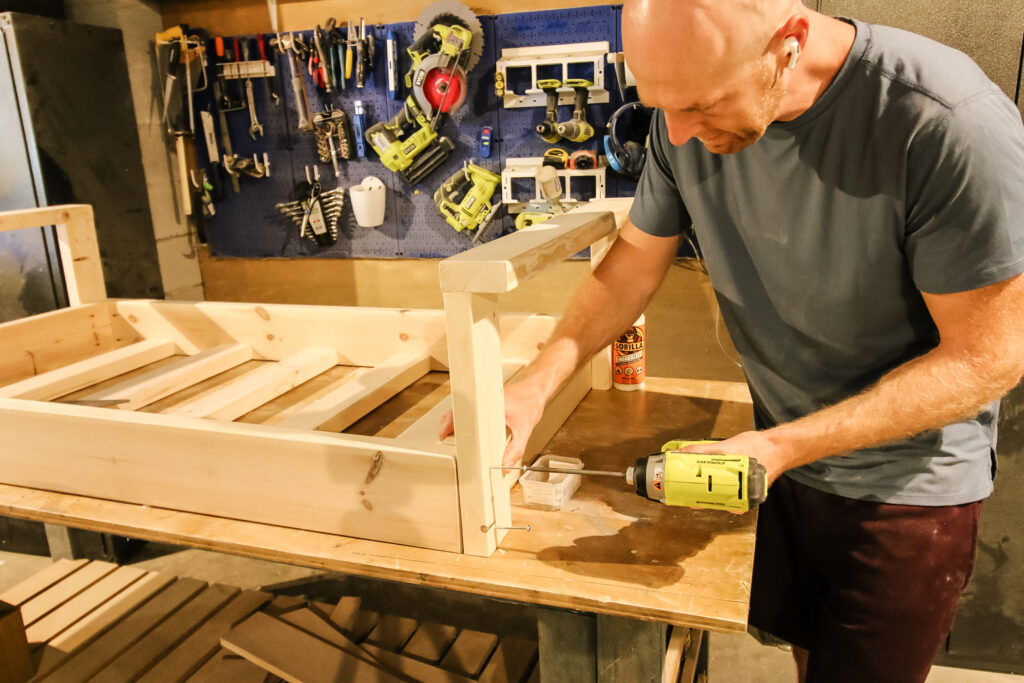
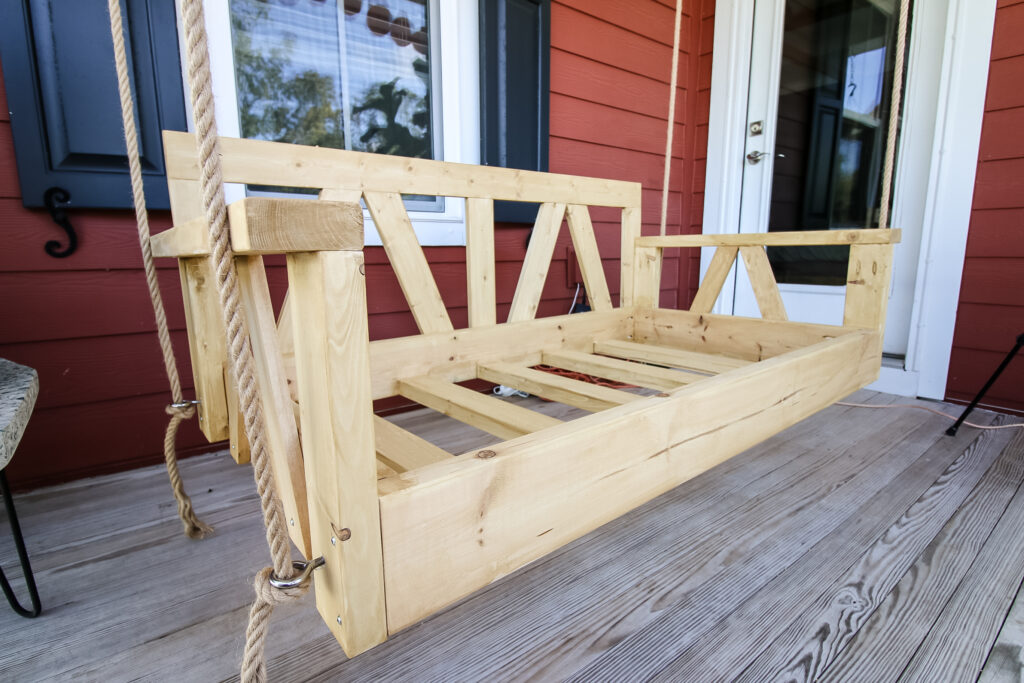
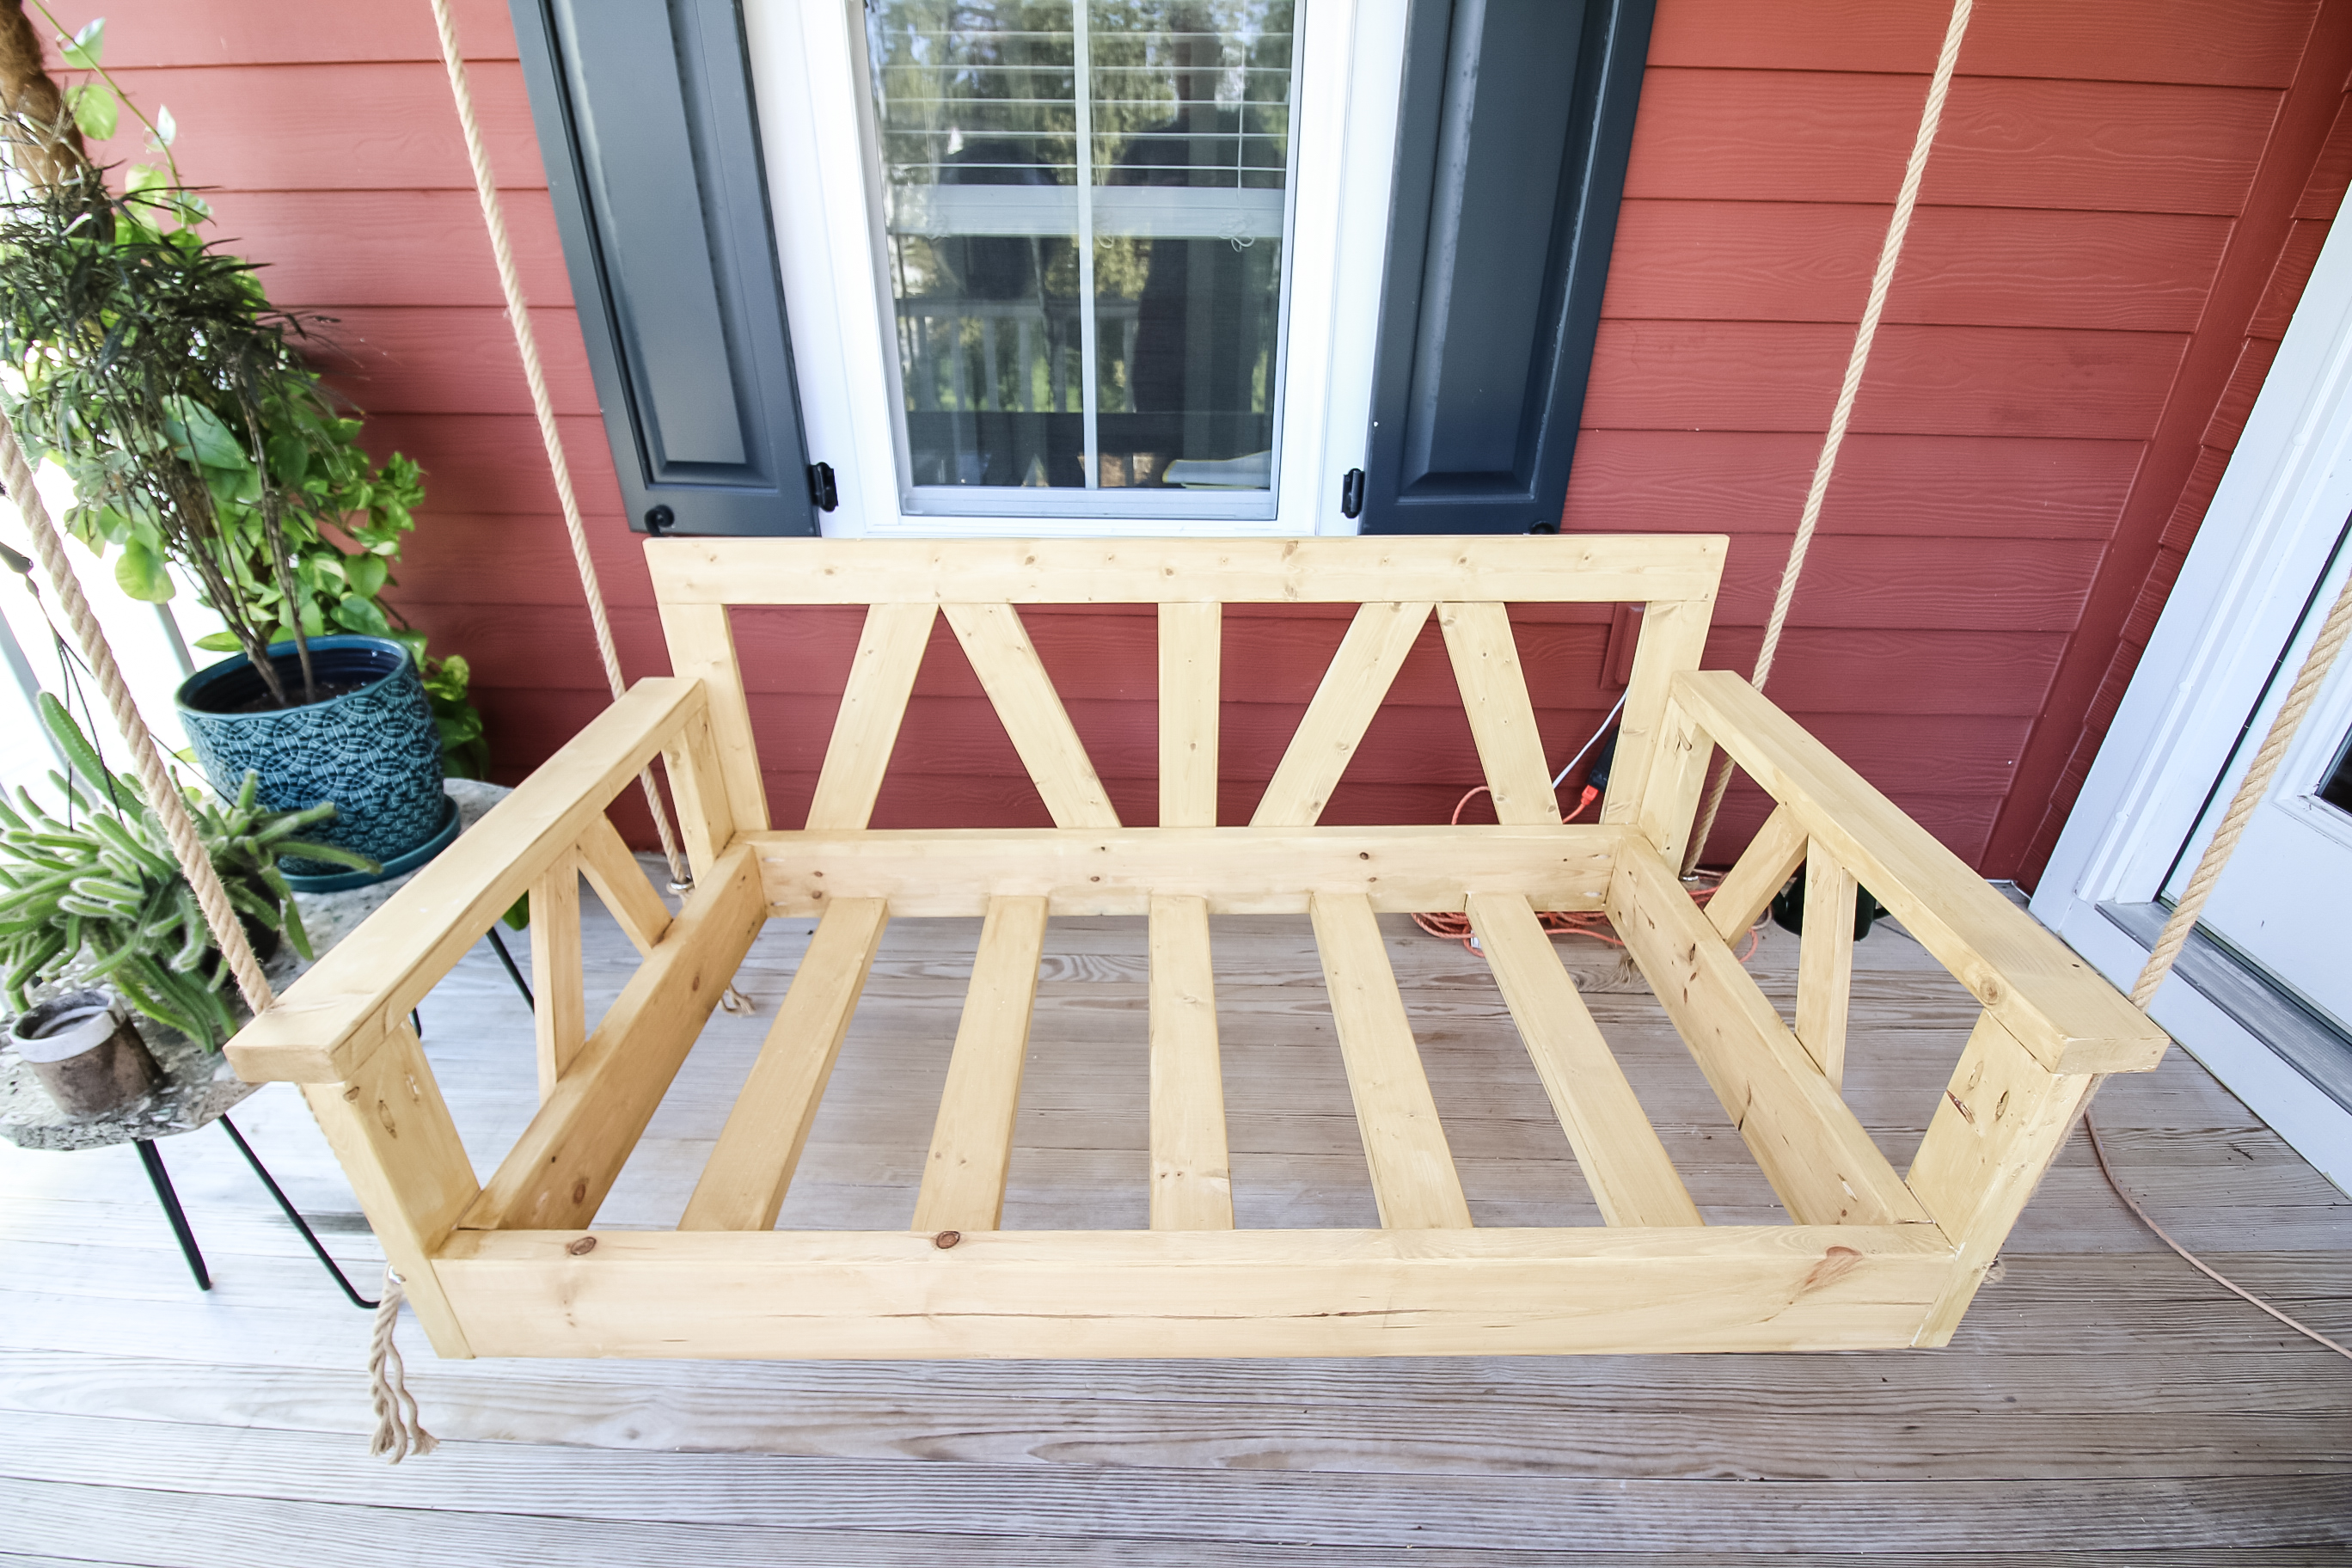
Step one: Build base
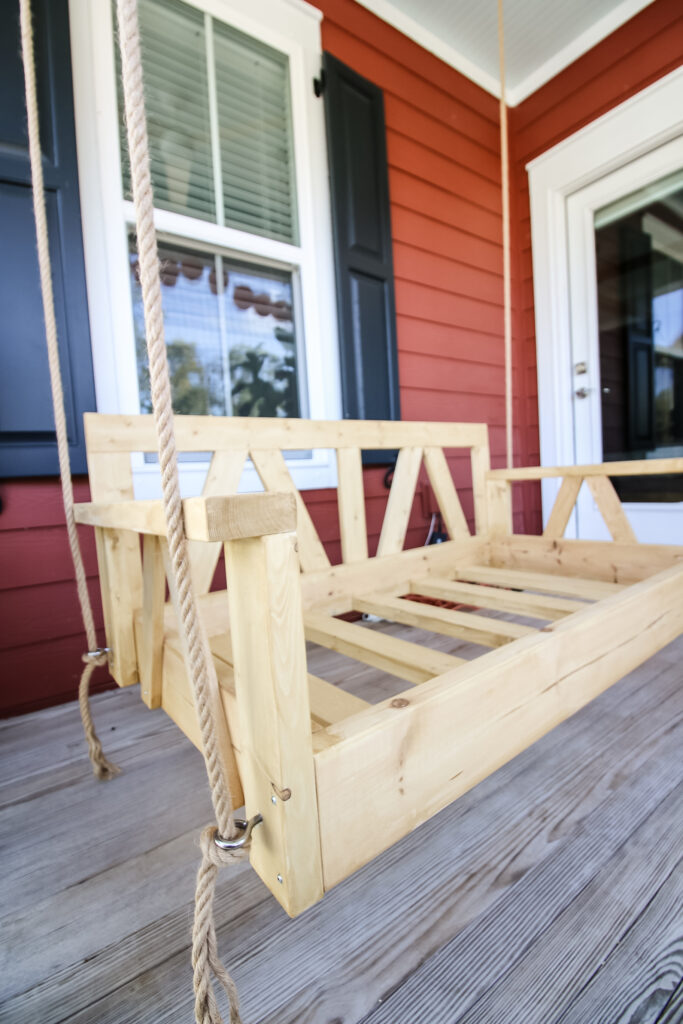
Start out by building the base. We used 2x6s for the outside of the base and 2x4s for the supports because we wanted it to look chunky, but you could definitely just use 2x4s all the way around.
We used wood glue and pocket hole screws to create the rectangle frame the size of the mattress.
Then, we did the same to attach five support boards in the middle.
The base is going to hold the entire weight of the swing, including the swing itself and the people sitting on it, so we wanted it to be super sturdy.

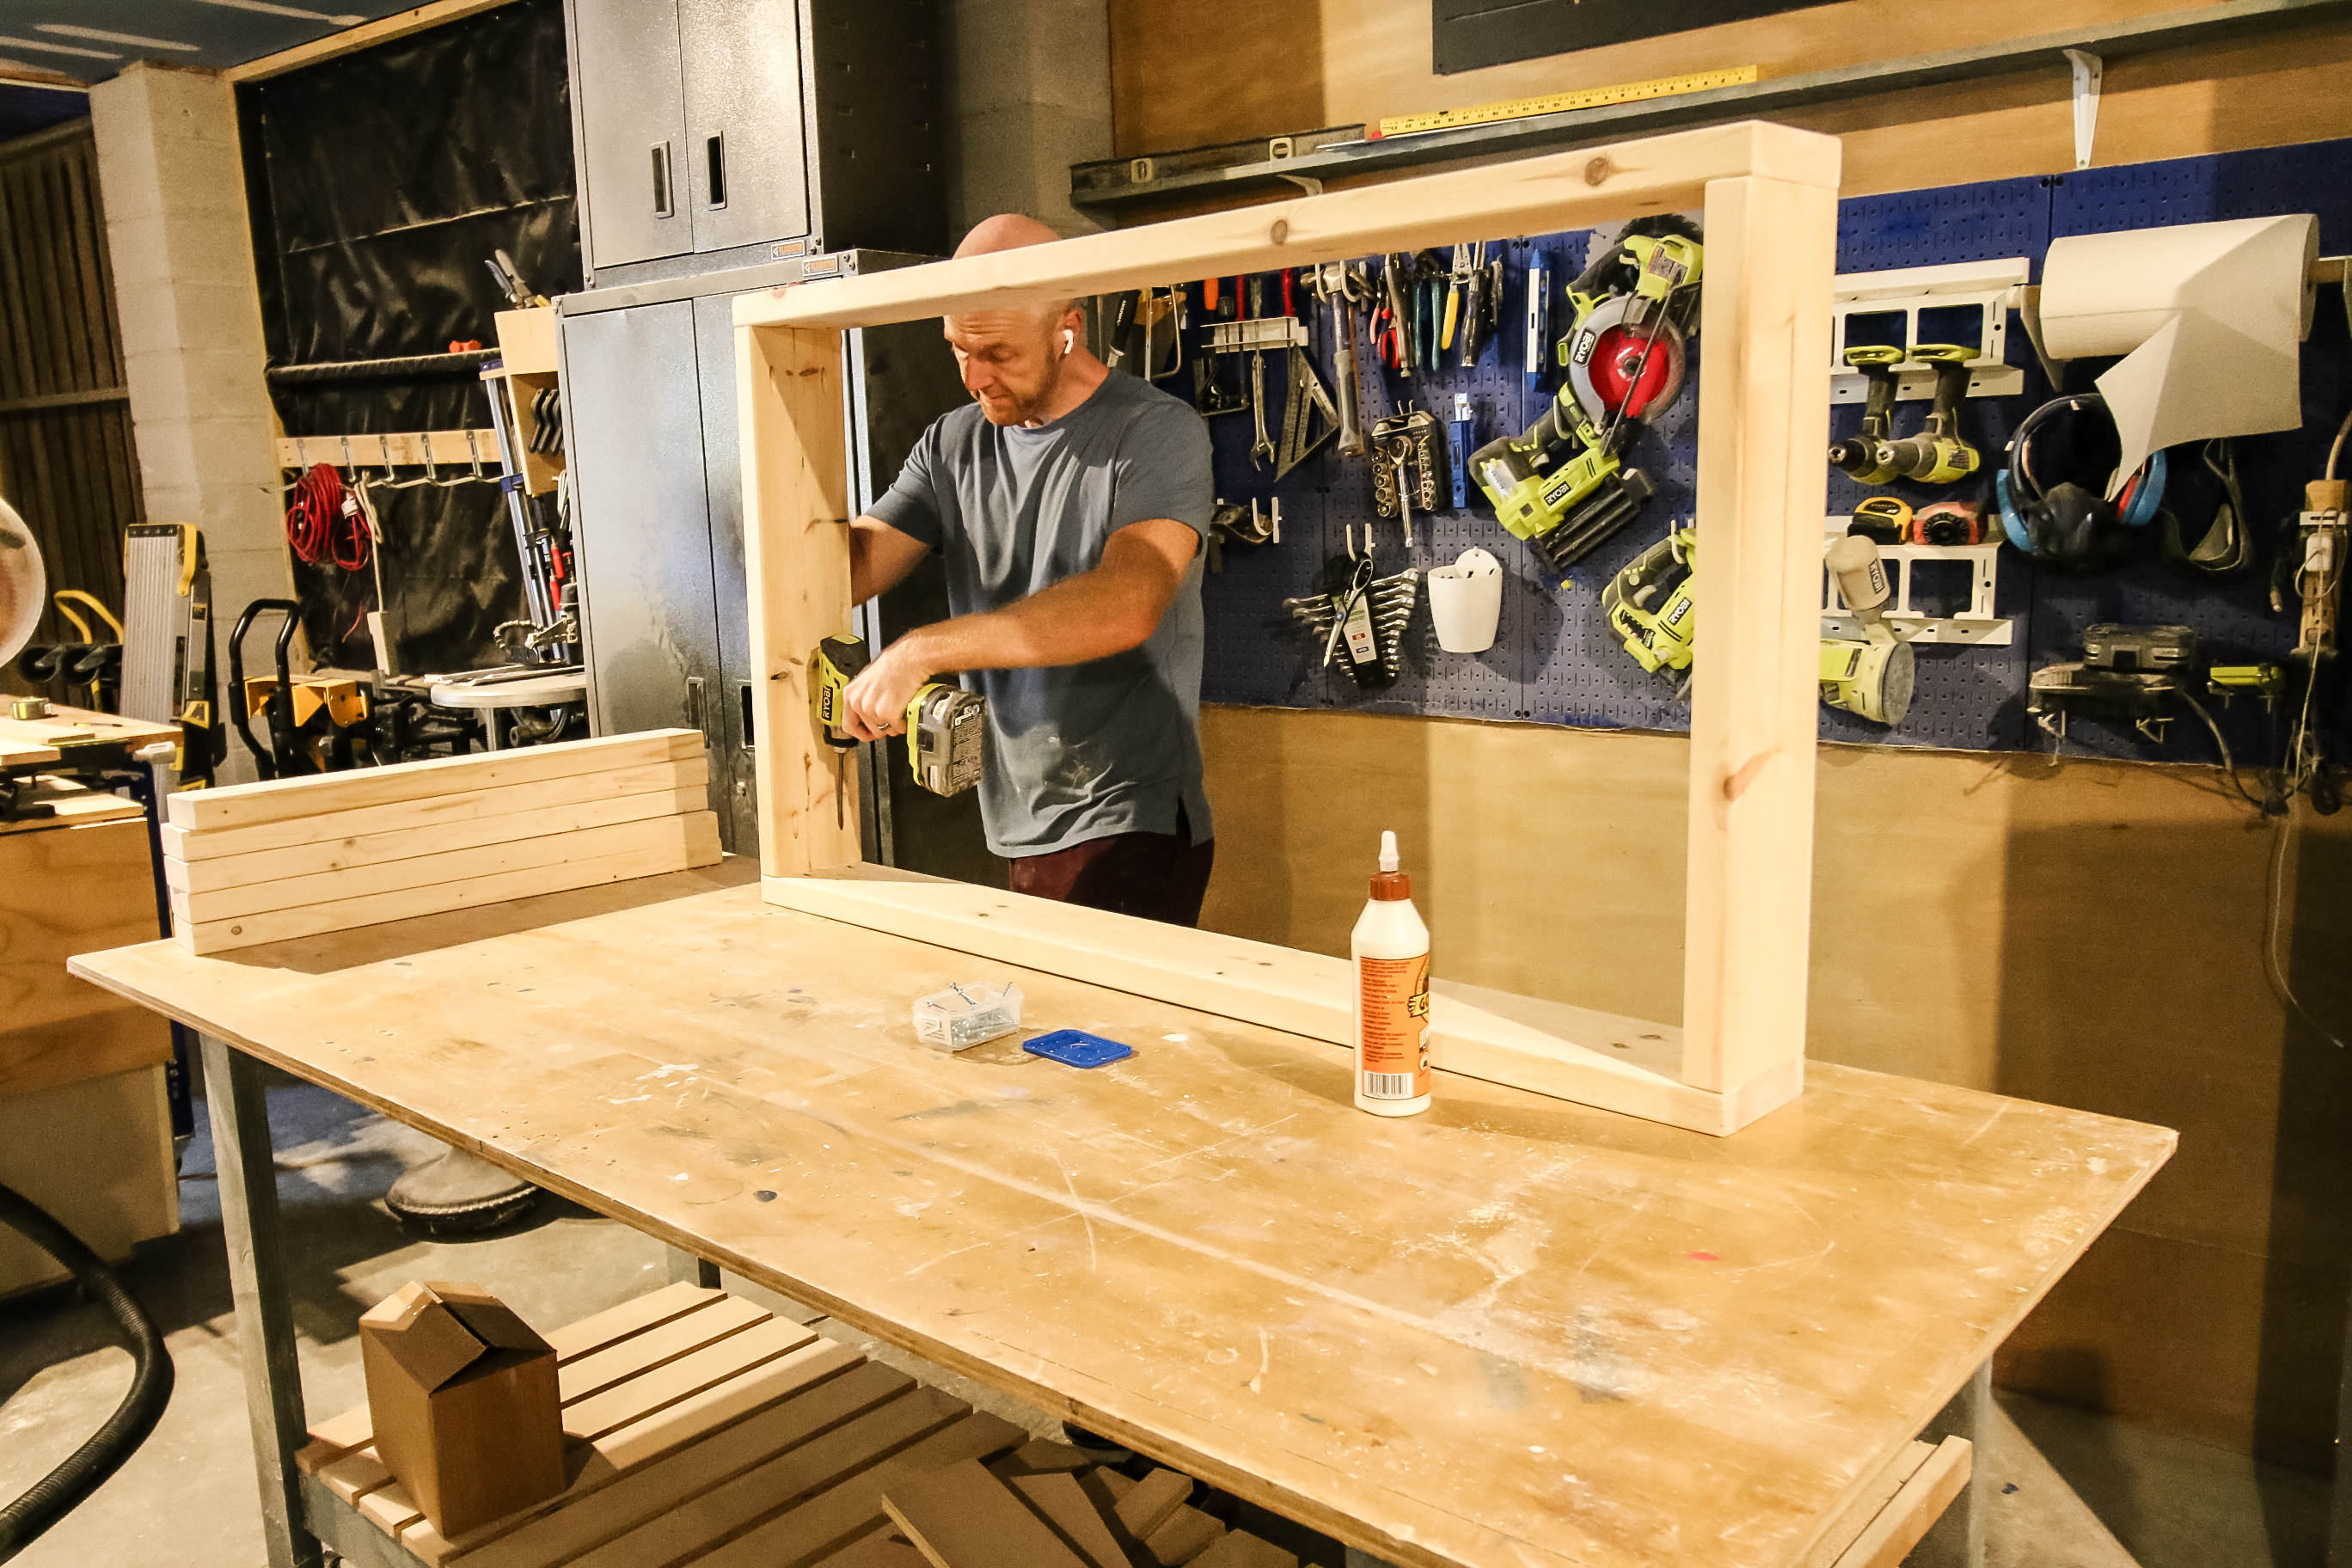
Step two: Attach arms
Next we attached the arms, which was as simple as two vertical posts going into a horizontal board.
We repeated this on the other side, then added angled 1x4s in the middle to give it a little design.
A lot of people choose to go with all vertical boards on a porch swing, but we decided to mimic the same design we used on our DIY outdoor garden bench plans.
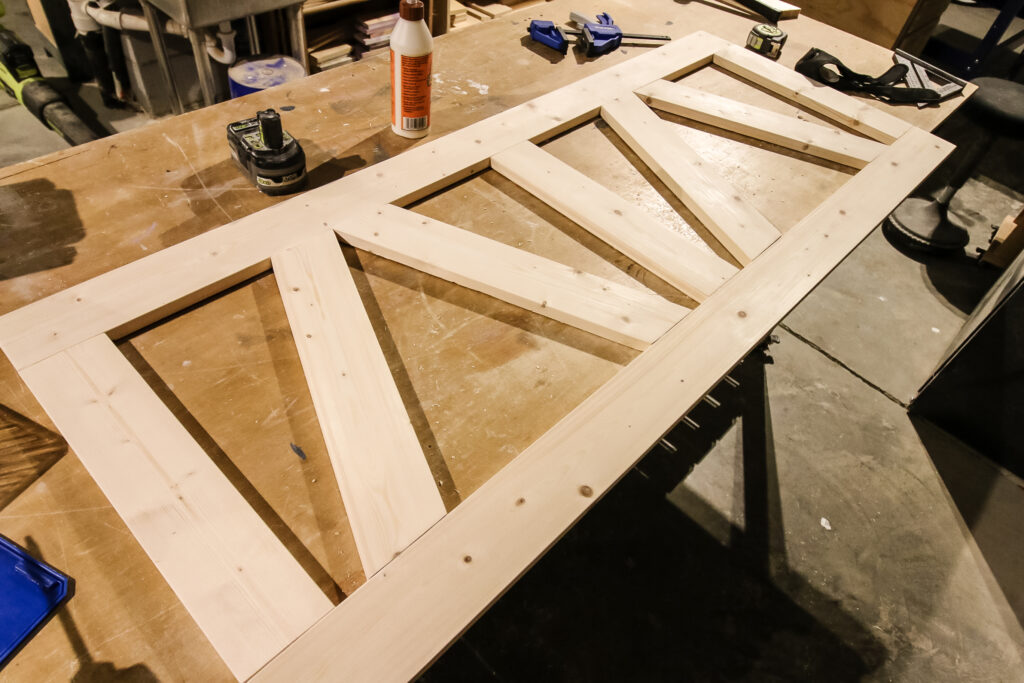
Step three: Build back
Finally, we finished off construction by building the back. For the back, we used all 1x4 boards and copied the same angled pattern we used on the arms.
The back won't be supporting any weight, so we didn't need to go with a thicker lumber.
We didn't attach the back until after the next step, but the back simply attaches into the base and arms using wood glue and screws.
Step four: Add outdoor stain
Next we added an outdoor weatherproof stain. This bed swing is not in any direct light and will only get rained on if it's a crazy storm.
Still, we wanted it to be weather resistant just in case and because we have so much humidity around here.
We used regular untreated lumber and added this Behr outdoor transparent stain to give it a little color and protection, but if your swing will be in the weather a lot, you might want to consider treated wood or cedar.
Step five: How to hang a porch bed swing
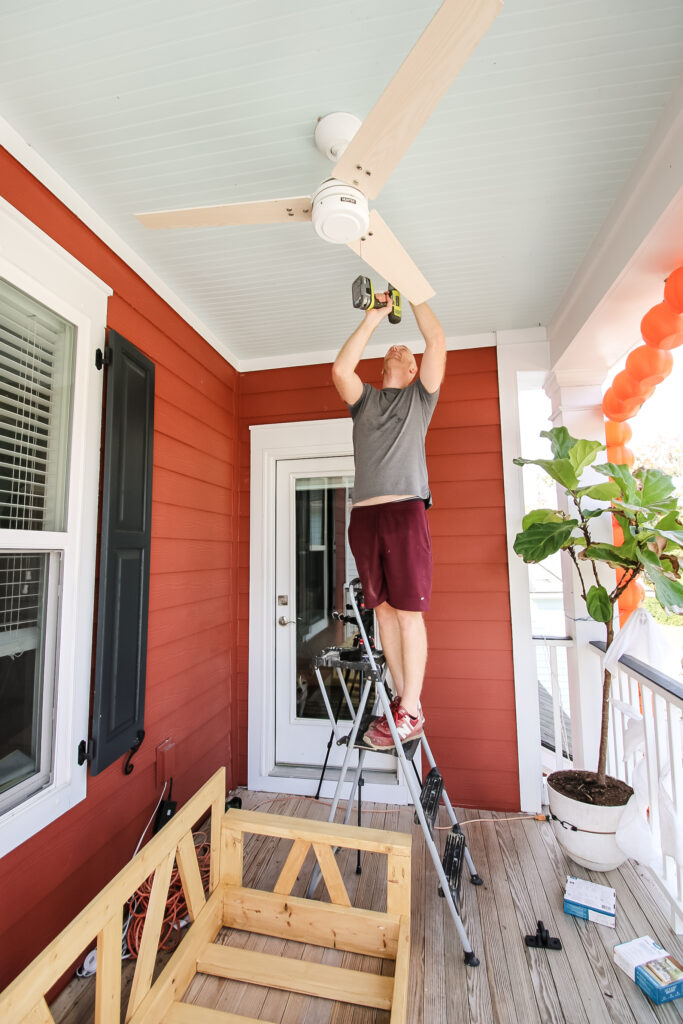
Next comes arguably the most important part of a front porch swing- hanging your swing.
It's very important to make sure you are hanging your bed swing from the joists in the ceiling. This may be very easy to figure out if you're hanging it on exposed joists, but if it's covered like ours, you are going to want to spend some time figuring out exactly where the joists are.
If this is not something you feel comfortable doing or aren't able to access the joists from above, contact a handyman in your neighborhood.
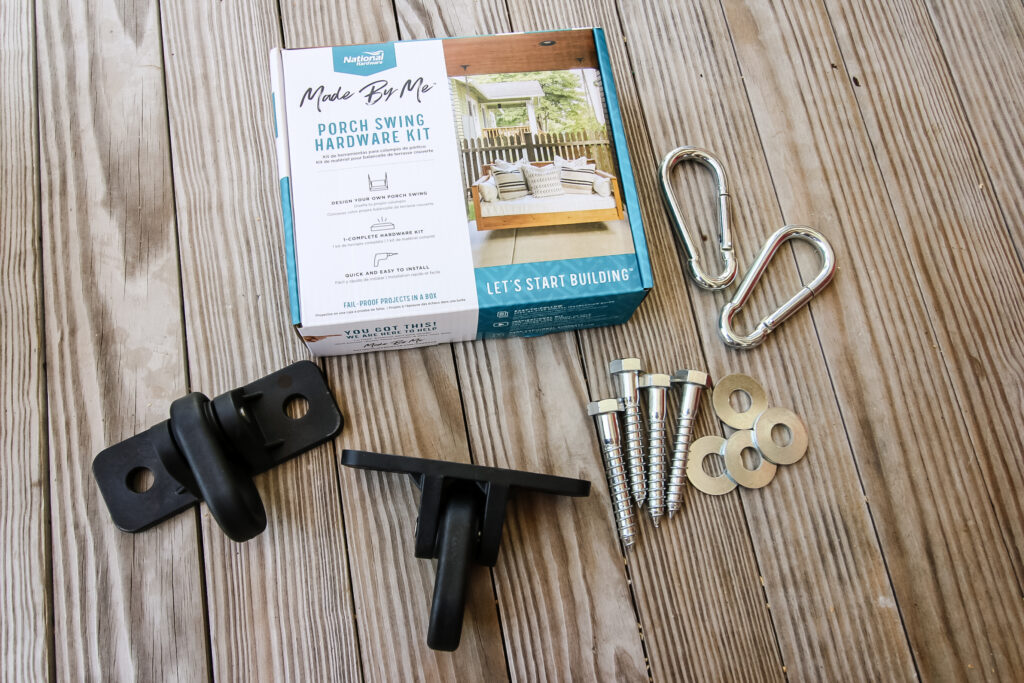
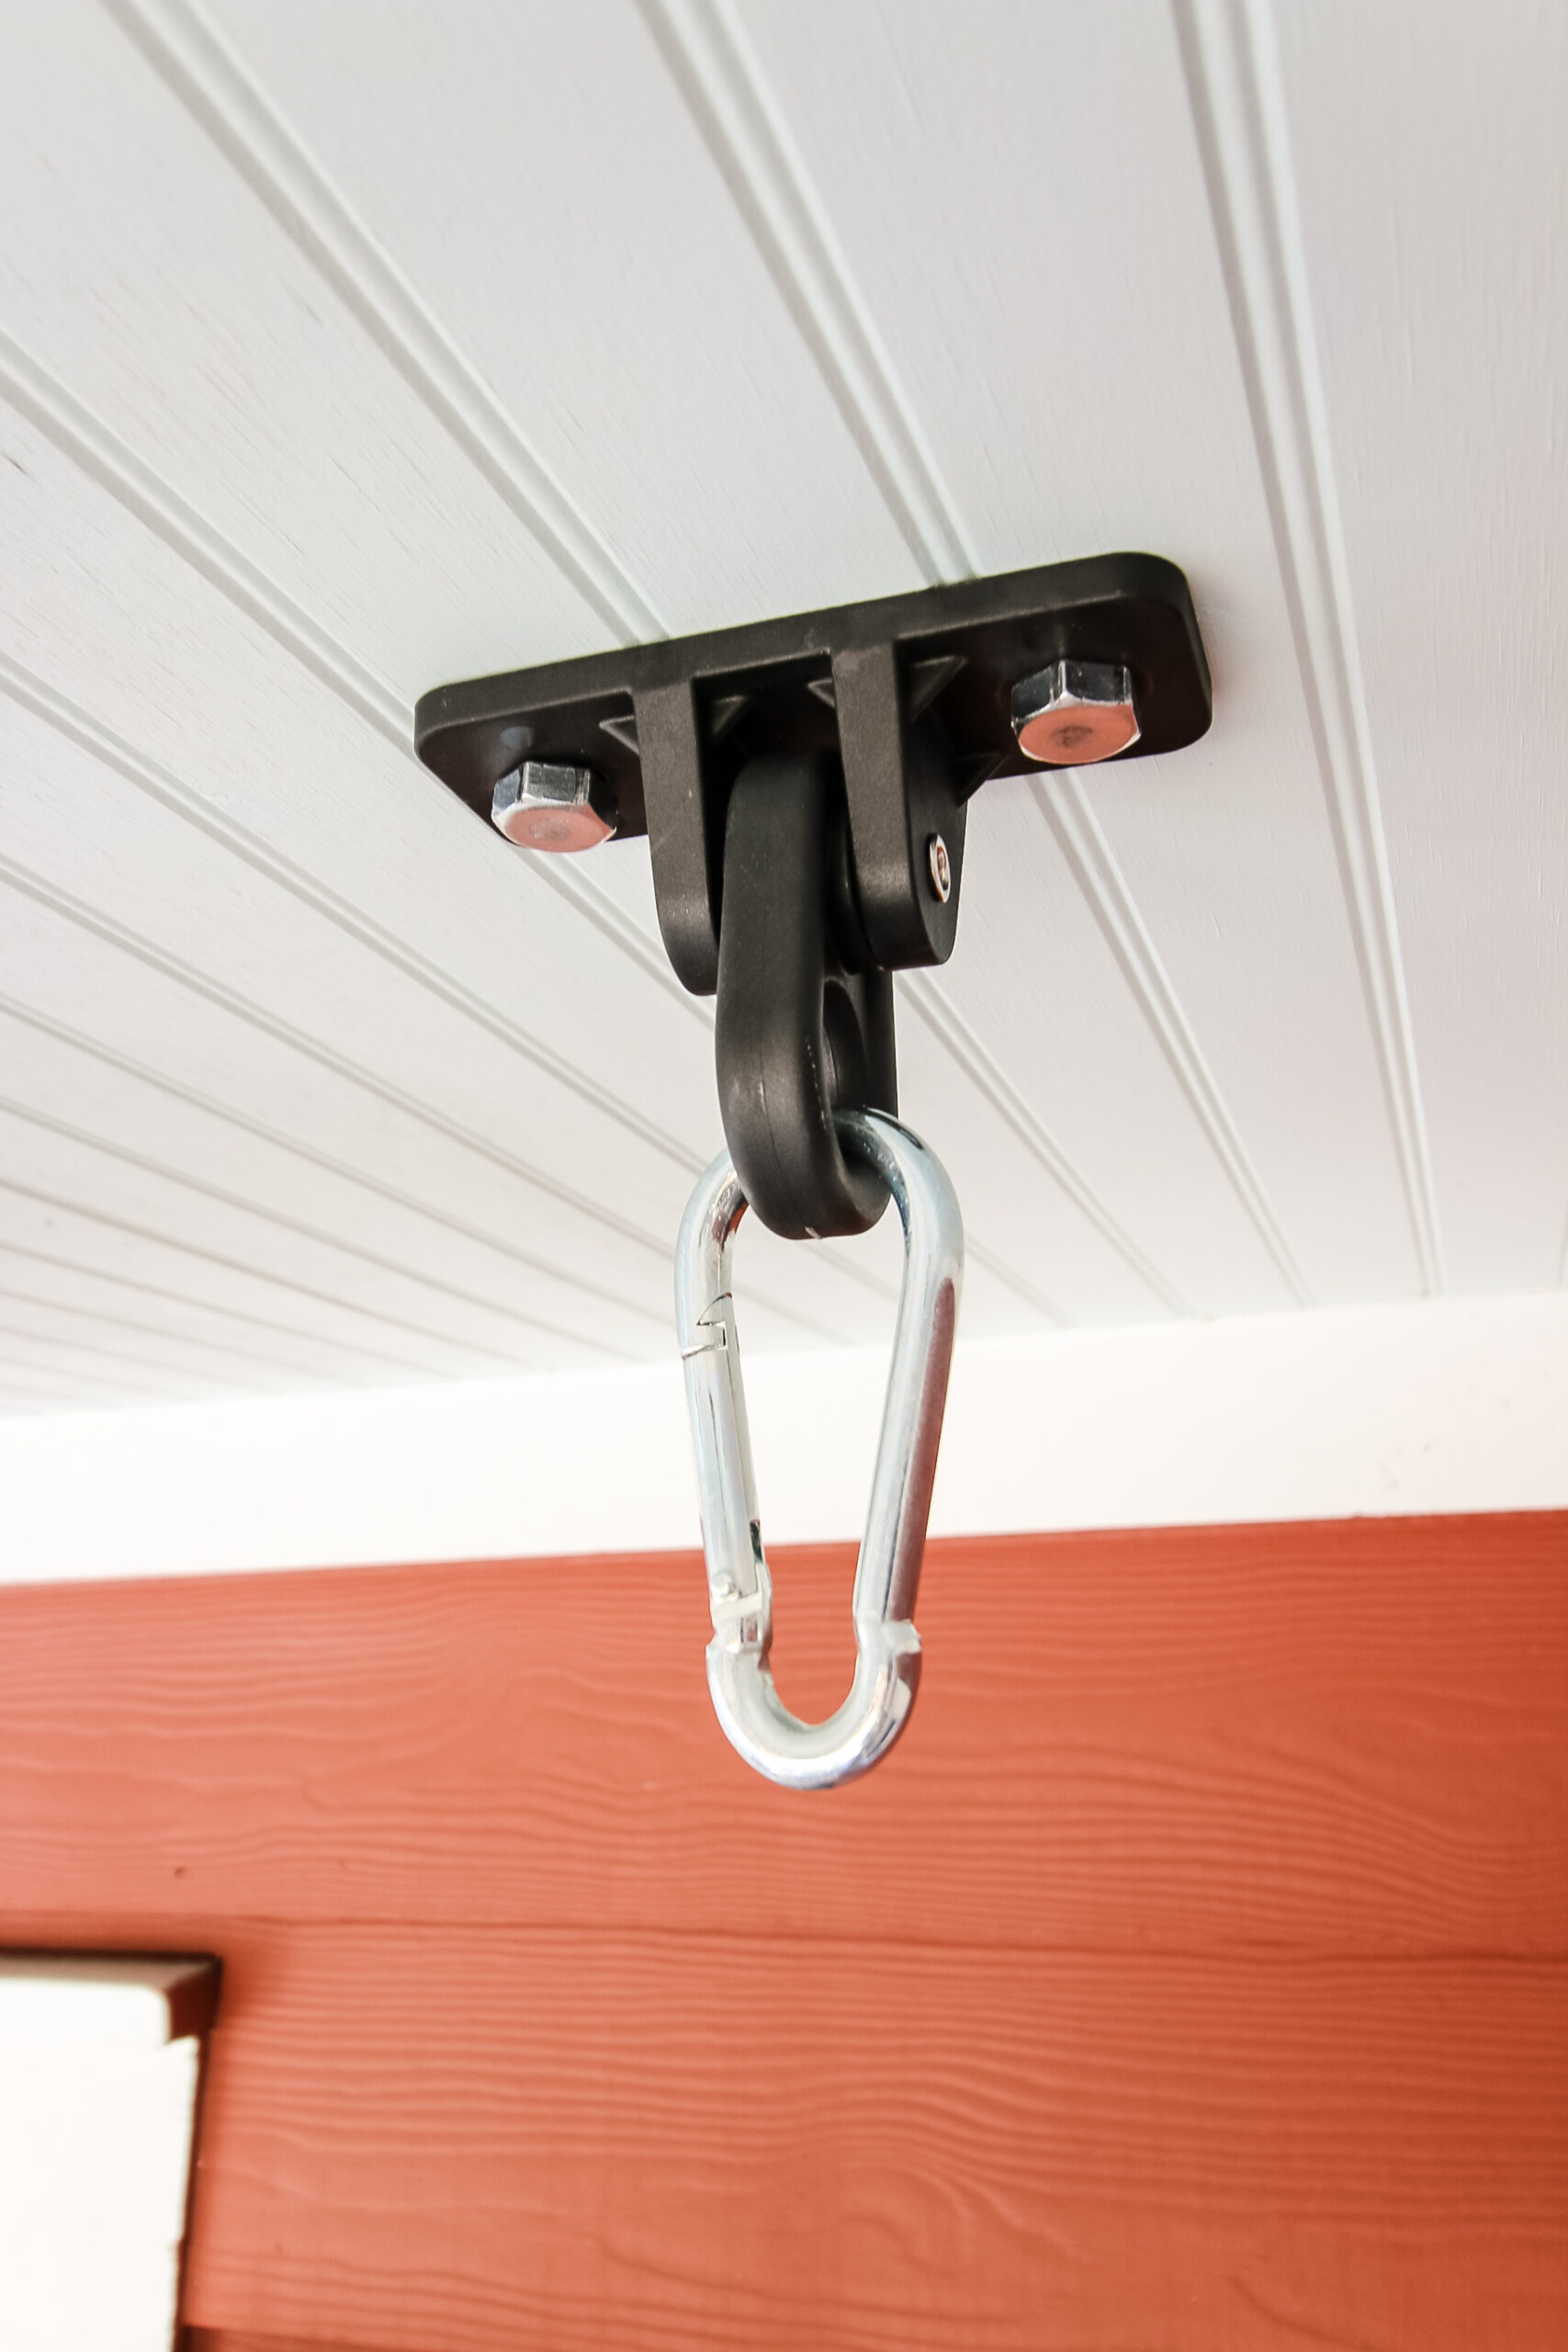
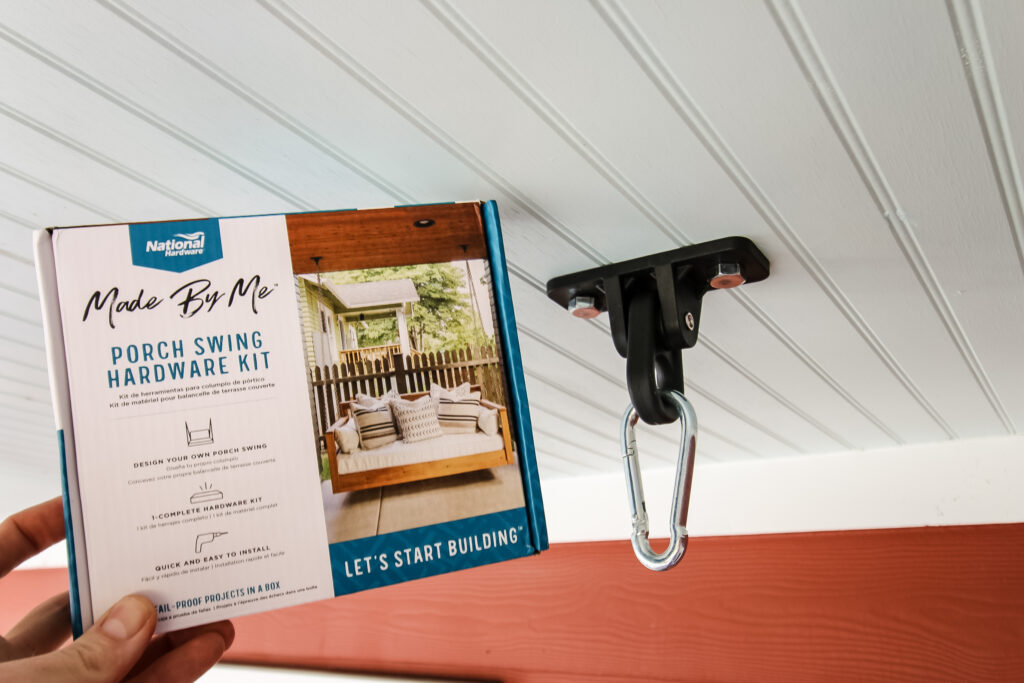
We used National Hardware's Made By Me Porch Swing Kit to hang our porch swing from the rafters. This kit comes with the mounting bracket for the joists, screws to attach them in, and carabiners to connect the rope to the bracket.
Having these things in one place makes it really easy, and the kit is super affordable without you having to find all the pieces you want.
Determine where on your porch you're going to hang your swing. Depending on your situation, you may need one kit or two.

It's perfectly safe to just use one kit and have two brackets holding up your swing. For us, however, the positioning of our joists and ceiling fan meant we had to spread out the ropes and have four points of contact, so we needed two kits.
The mounting brackets attach straight into the support beams with the included screws after you drill pilot holes.
Then, hook the carabiners onto the bracket and you're ready to hang your rope!
Step six: Hang bed swing
Now the fun part, hanging your bed swing! Determine the height you want your swing to be at off the ground and ideally set something underneath it to hold it up at that height.
Next, screw the eye screws into the base of the swing at the four corners.
After that, drill 1" holes in the arm rest above the eye screws.
Here, you'll cut four lengths of rope and string them down through the hole in the armrest and tie them off underneath each of the eye screws.
Then, run the rope up to each carabiner and tie a knot there too to hold it in place. Cut off any excess rope you don't want dangling.
DIY outdoor swing bed
This outdoor swing bed is a perfect DIY project for your porch!
We absolutely love how it turned out and how it looks in the space.
We put a mattress cover over the crib mattress and added a fitted sheet, then spruced up the whole thing with throw pillows.
Now we can lounge and lightly swing on this big deep bed swing while enjoying the weather this time of year!
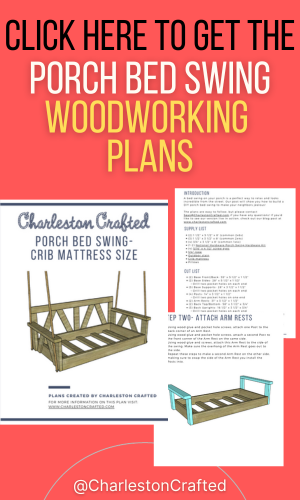
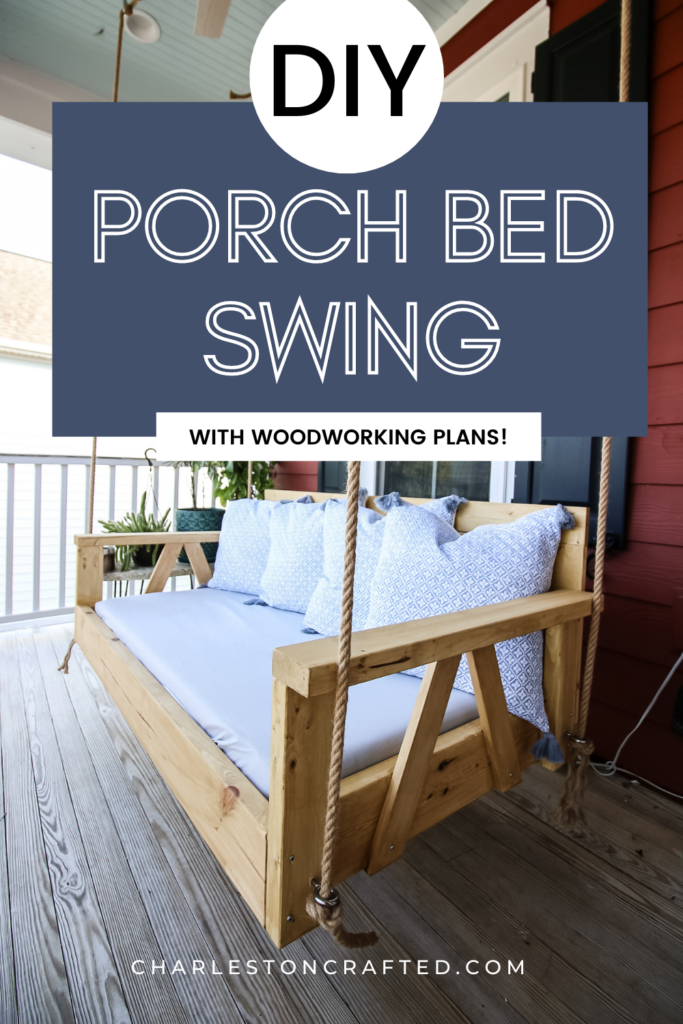
Porch bed swing woodworking plans
If you love this project and want to make it easy on yourself, you can grab our porch bed swing woodworking plans!
Remember that we have the plans available in two sizes:
Our printable woodworking porch swing plans come with a complete material list, cut list and step-by-step instructions with computer model imagery to help you with each step.
This porch bed swing is a simple project, but one that looks complex and will make a big statement at your house.
Porch bed swing frequently asked questions
Here are some quick answers to some more questions you might have about building your DIY porch bed swing.
If your bed swing will be exposed to a lot of weather, you should use treated lumber or something naturally water resistant, like cedar. If your bed swing won't be in the elements, you can use untreated lumber and add an outdoor stain to keep it protected and minimize the total weight.
Typically a bed swing should be about 21 inches off the ground, but you will want to tailor yours to best suit your height. If you're taller or shorter, you might want to adjust it to be most comfortable for you to get on.
Rope that is ¾ inch thick is a good size rope for hanging a bed swing. The most important thing is making sure the hardware is securely fastened into the joists in your porch ceiling.

Looking for something?
We've been doing this since 2012 so we have a LOT of blog posts!
Search stuff like: Ceiling Projects | DIY Plant Stands | Thrift Flips

Hey there, I'm Sean, the woodworking enthusiast and builder behind CharlestonCrafted.com! Since 2012, I've been sharing the magic of turning raw materials into beautiful creations. I love teaching others the art and satisfaction of woodworking and DIY. I try to inspire fellow crafters to make something extraordinary out of nothing at all.