After choosing a bridesmaids dress, I quickly began to think about accessories. Because of the ruffled halter neck, we collectively agreed that a necklace would be unnecessary. I wanted a very southern, yet "colorful coastal" style to the whole day.
So, I decided (and the BMs agreed) that it would look lovely to have no necklace, simple pearl earrings, and updos. The updos are for another post, and the girls provided their own pearls (everyone already owned a pair of some sort, and I didn't care if they were an exact match). However, I did want some kind of fun jewelry. Since I knew that people have their own rings (wedding rings, class rings, heirlooms, or just things they love - I feel like most girls have a couple of rings that they wear every day) I decided that the safest bet would be a bracelet.
I looked online at Kate Spade bangles and beaded roll over bracelets, but didn't want huge stacks and thought they looked kinda off on their own.
I used to make a lot of jewelry as a kid (a few times, I sold it at craft fairs, nothing fancy at all, but a fun childhood hobby) and I actually set up a whole jewelry station in the condo when I was in between jobs and extremely restless in 2012.
So, I decided that I wanted to try to make something. It would be less perfect, probably more expensive (OK not compared to Kate Spade, but buying beads and clasps and wires really adds up), and take a lot of time. But, I started this process in September and really like making jewelry.
I'll side note to say that these bracelets were actually really annoying to make. My initial plan was to knock off this KJP bracelet. But I couldn't get the stupid knot to sit right. I fought with it for way too long, cried (a lot) and finally... gave up. Or, made a new plan.
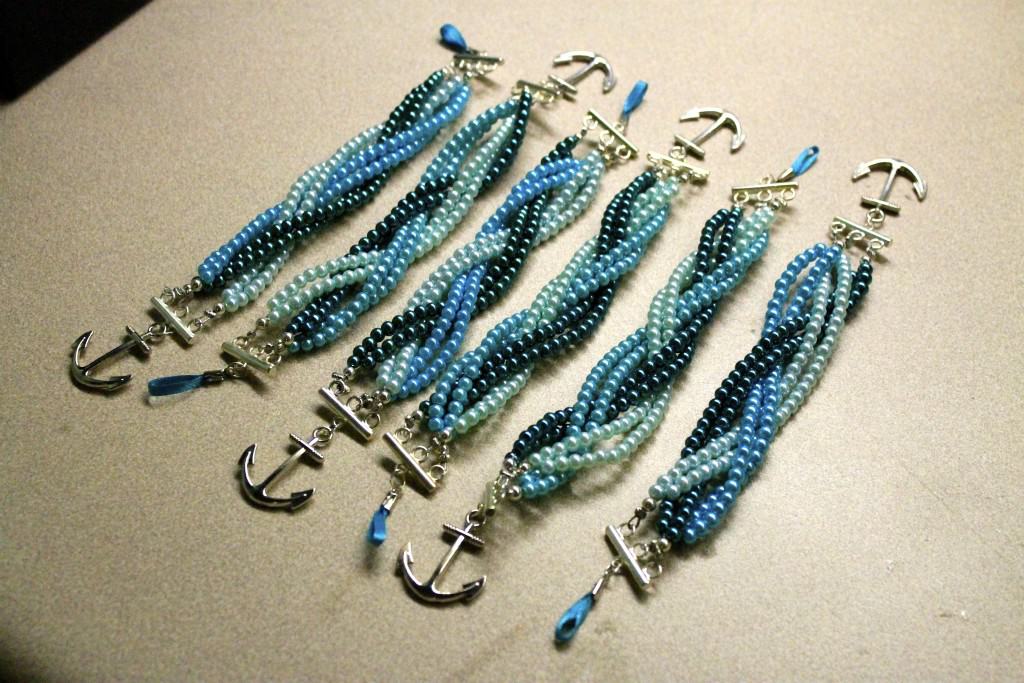
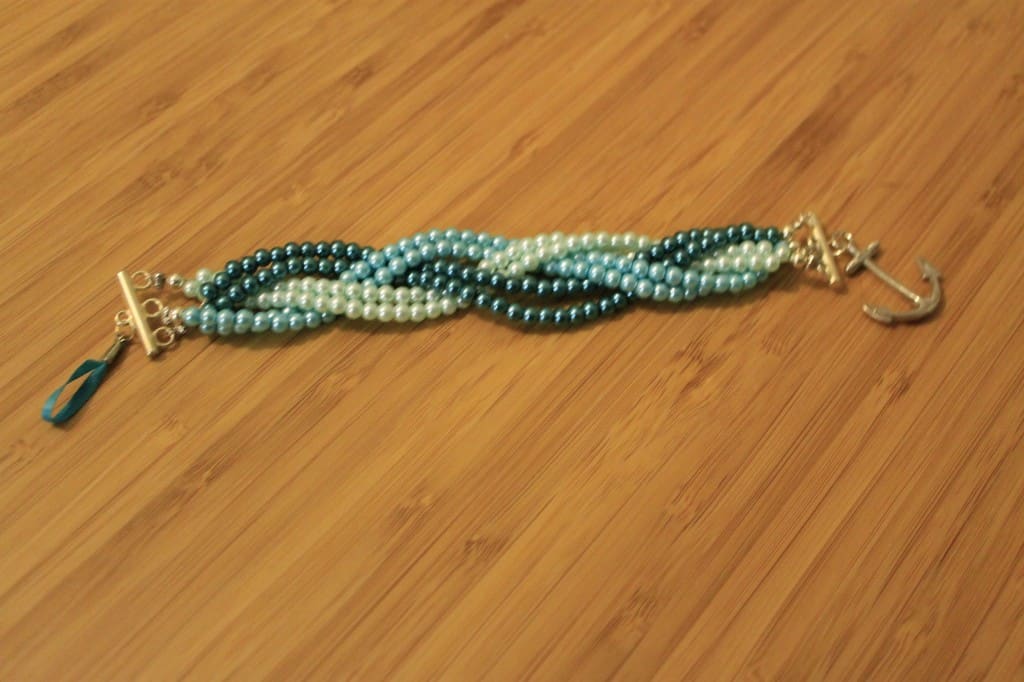
I decided that I wanted color, so I returned twenty strands of glass pearls (I have a lot of pearls that I couldn't return because I cut up the strands - so I'll have to make something with them) and picked up colored glass pearls instead. Less classy maybe, less classic for sure, but a lot of fun. I grabbed three shades that perfectly mimic my bridesmaids dress colors - I called it destiny.
Once I saw three colors I had my 6 year old girl thought - three strings makes a braid! Duh... So here's what I ended up with:
Now, buckle up. This is a straight forward tutorial but, if you try to make it, you must have patience. It is very detailed work, especially the finishing of the final end. It's really hard to work with those tiny wires. Ok, enough warning.
What you need (for one bracelet):
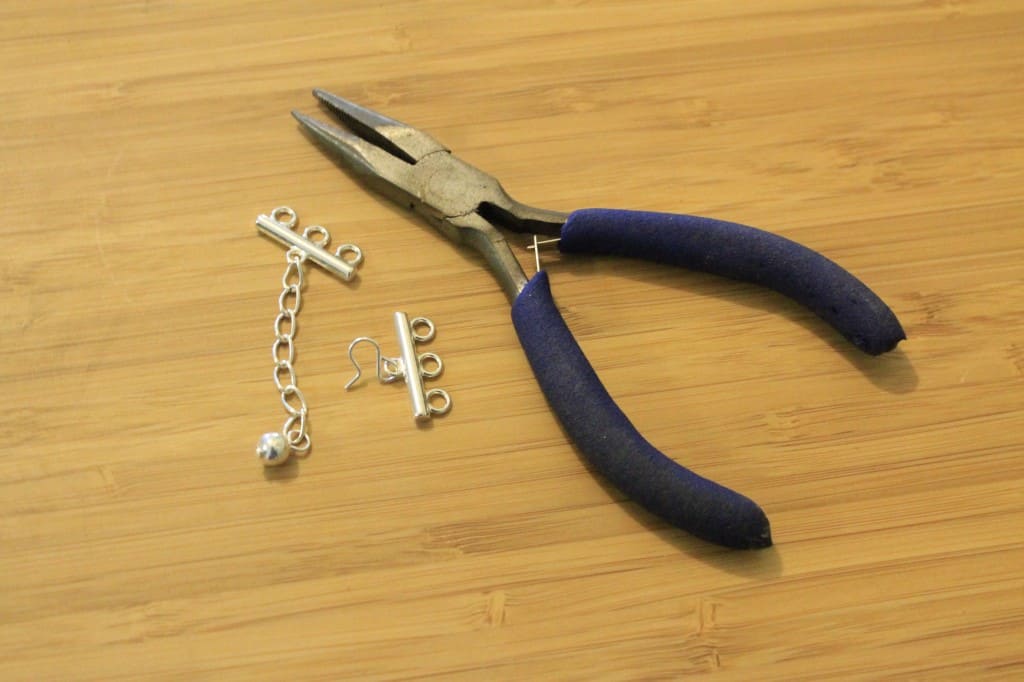
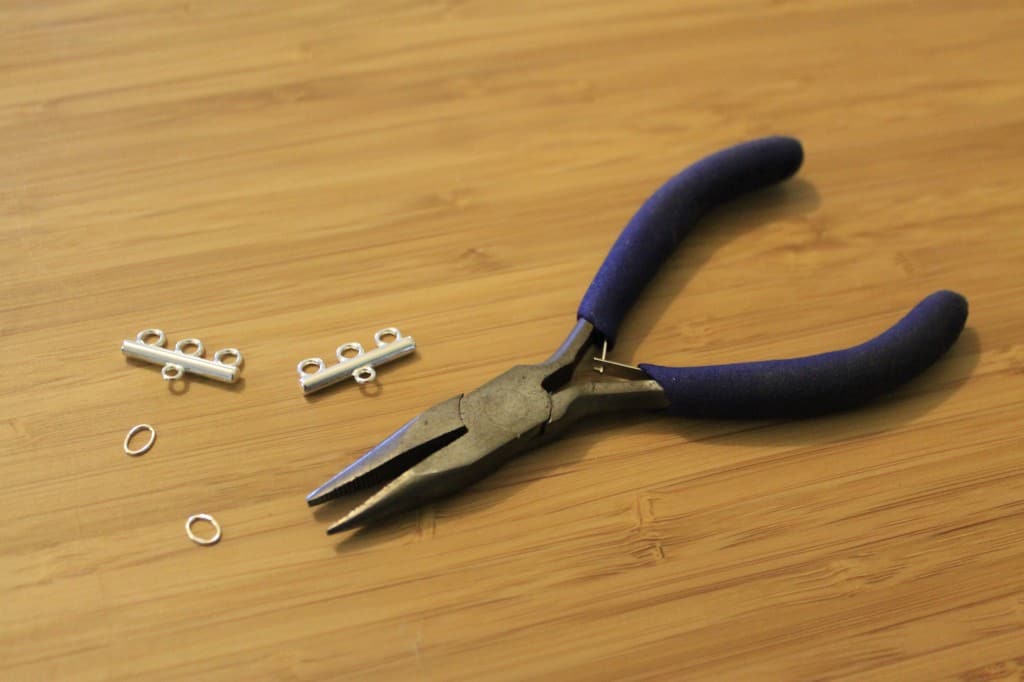
- Small jewelry making pliers
- 3 strands of beads, each about twice as long as your bracelet. I used 4mm glass pearls from Michaels in 3 shades of teal.
- 4 silver jump rings
- 6 silver crimp beads
- 6 silver ball beads
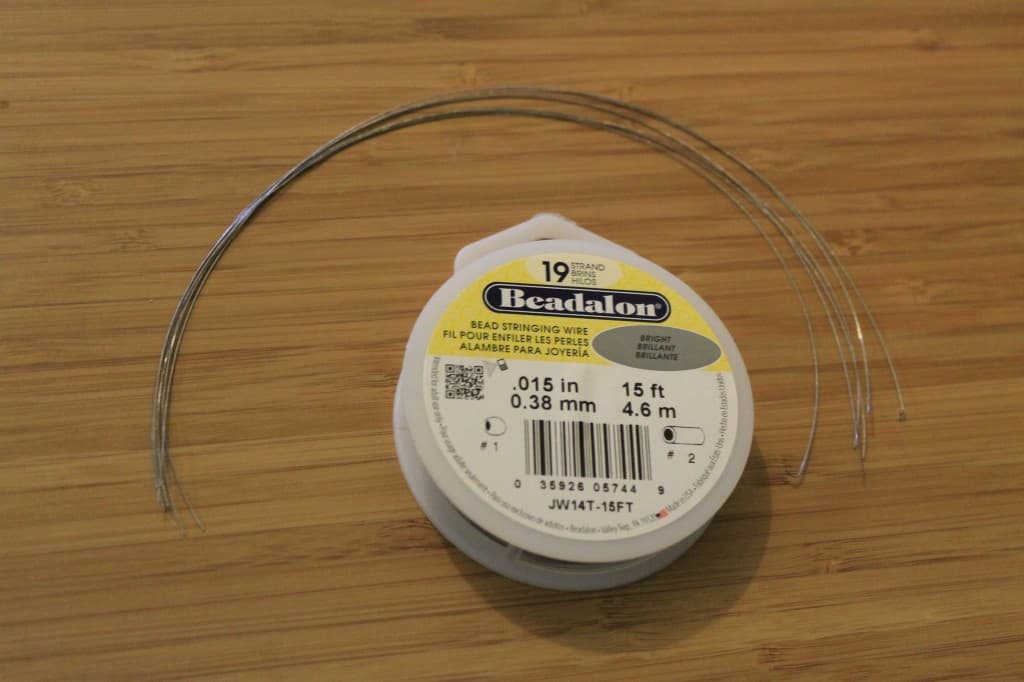
- Bead stringing wire
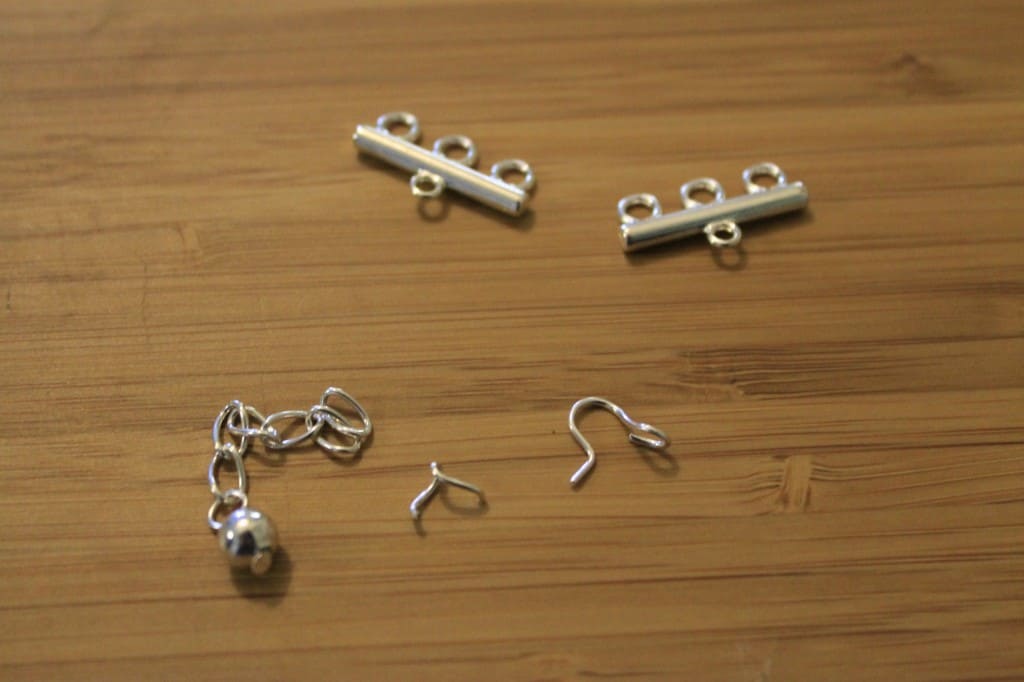
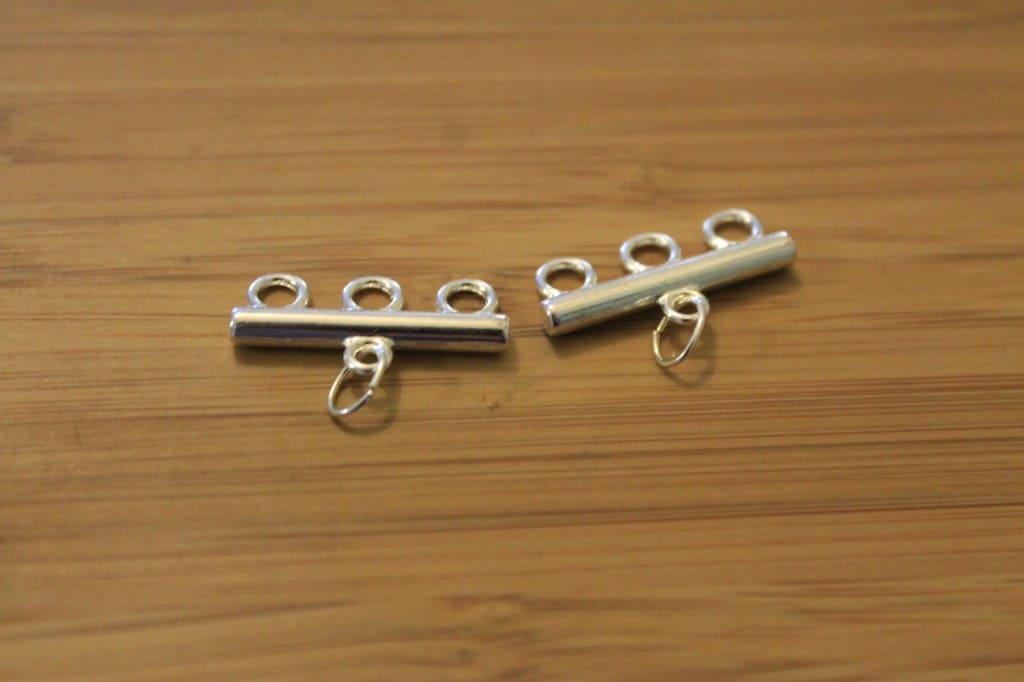
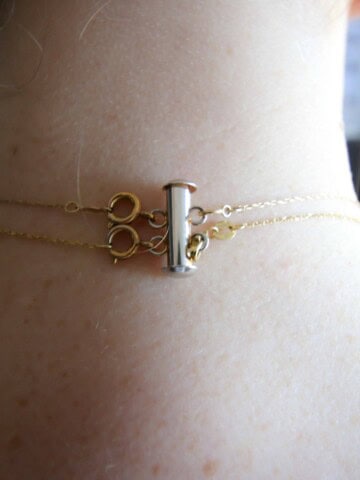
- 2 three loop silver end bars
- Full clasp - I made this to mimick the KJP version. The tutorial is below the bracelet tutorial. You could use any clasp that you like.
- Masking tape
What you do:
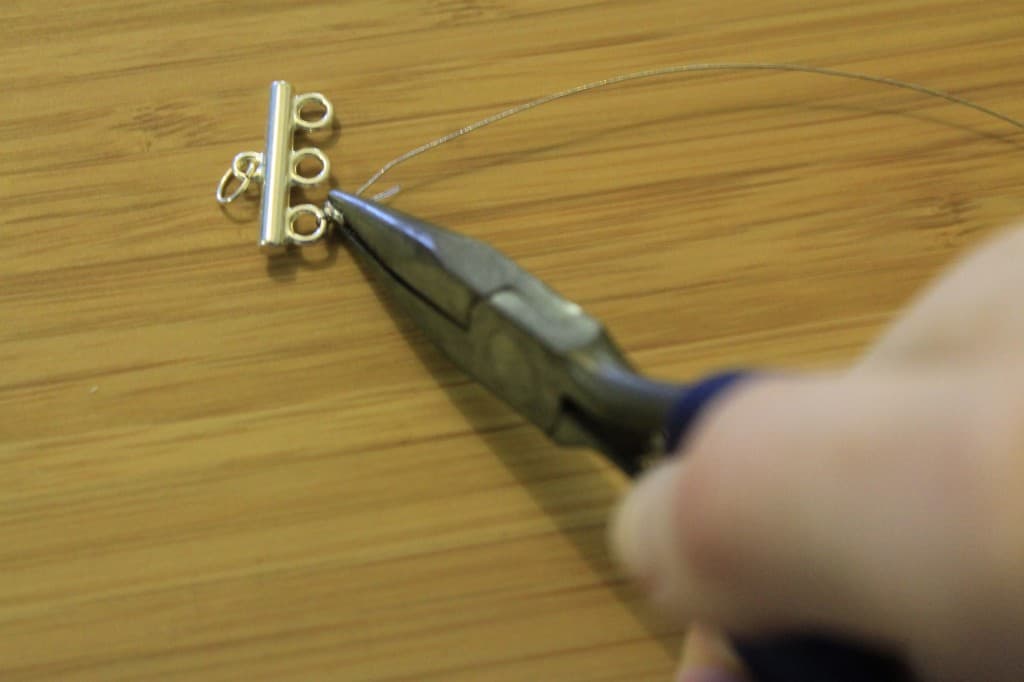
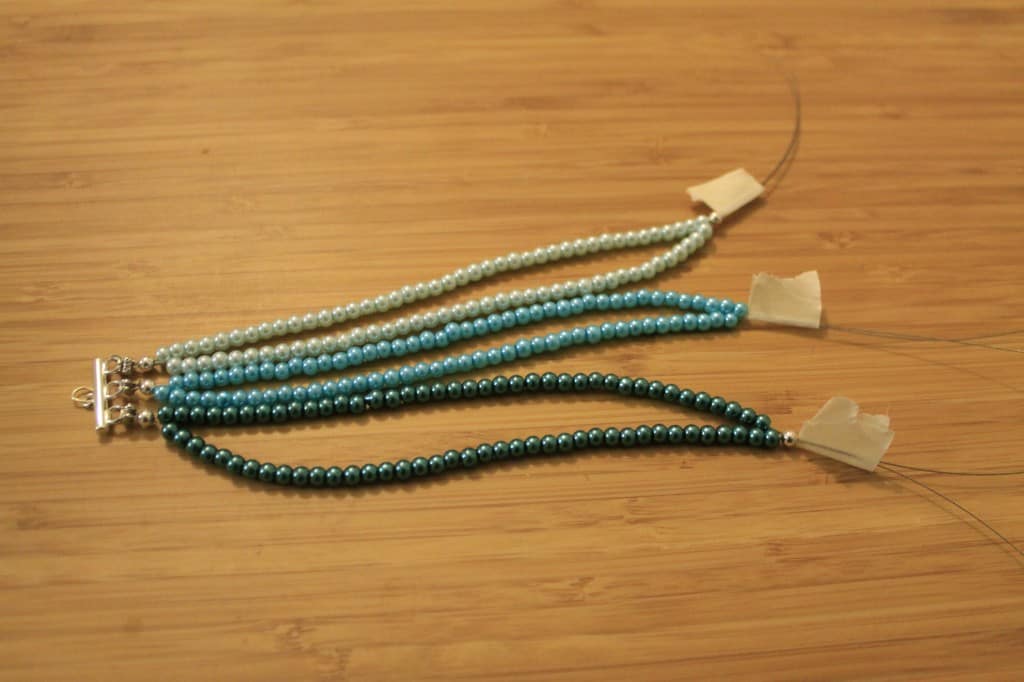
Do any prep work you need to on the clasps. I removed the chain pieces from my end bars, and connected them to my clasp ends using small jump rings and pliers.
You need to cut six lengths of your wire. Add 2 inches to each end (4 inches total) plus the length of bracelet that you want. Two inches is way over kill, but I found it was so much easier to have extra wire that you trim in the end than to not have enough. Mine were pretty short because the clasps are pretty significant. Each strand of pearls is 34 pearls long.
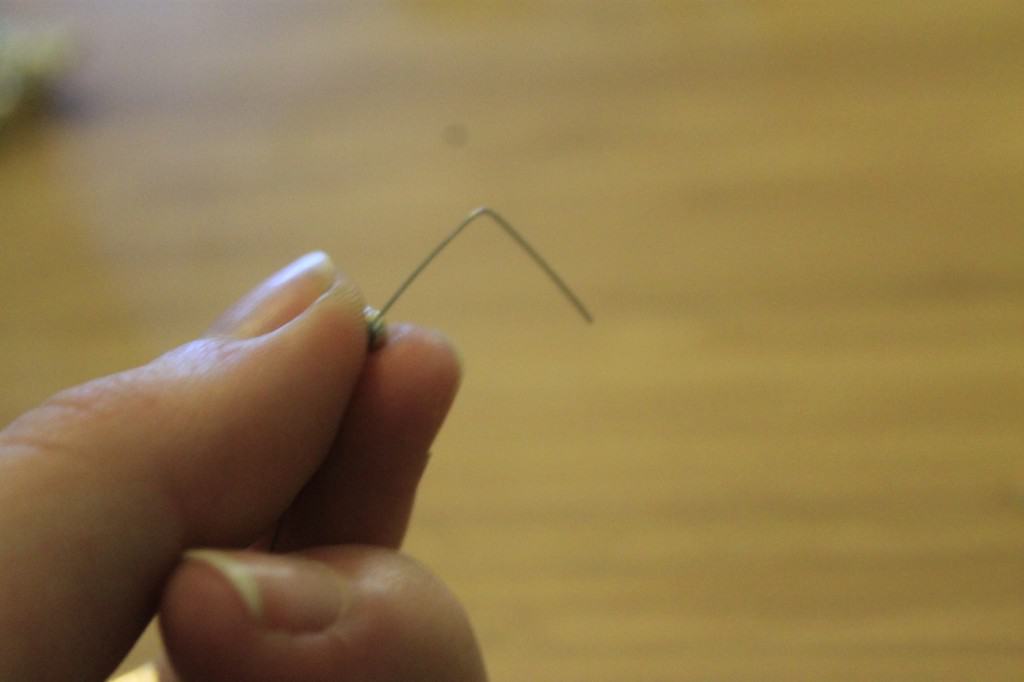
Now, attach the wire to your end bars. To do this, pick up two pieces of wire. Bend them and use your pliers to create a sharp bend approximately ½ an inch from the end of the wire.
Slip one crimp bead on the long ends of BOTH wires. Loop the wires through the loop of the end bar. Slip the crimp bead over the bent wire and use your pliers to squeeze the crimp bead shut. This will hold the loop in place. Repeat for the two remaining loops (two wires per loop, but one crimp bead each.)
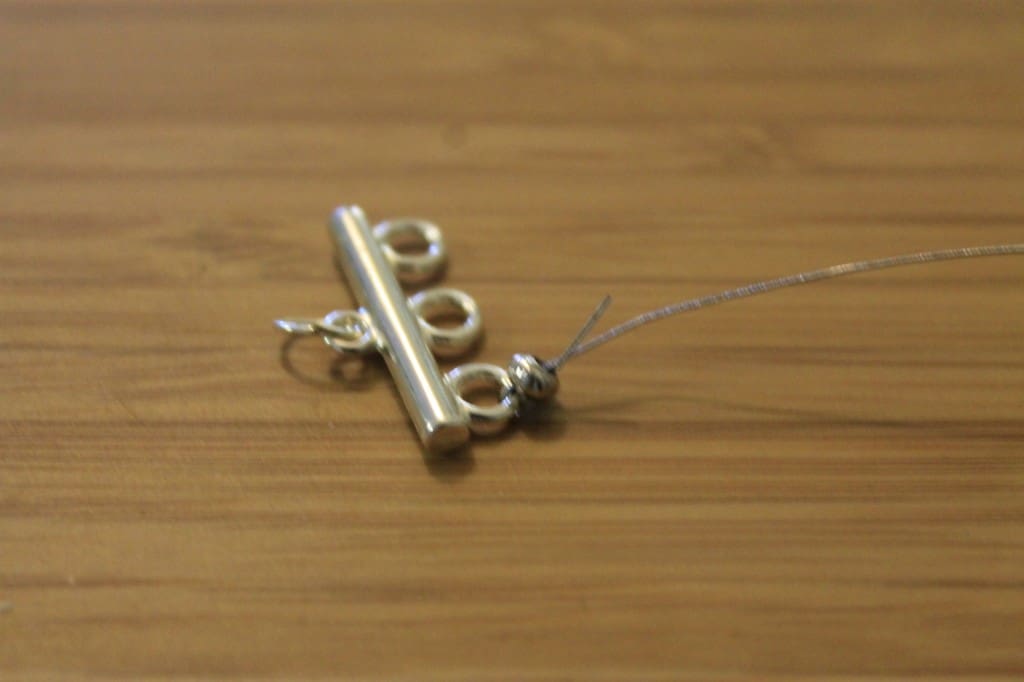
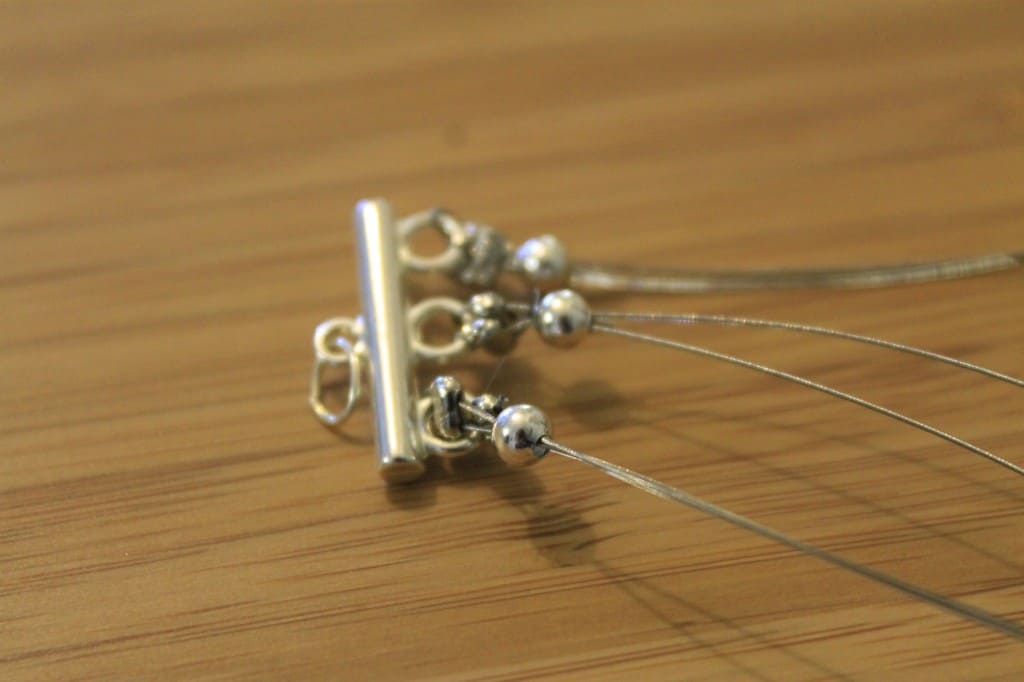
To give it a more polished look, I strung a silver ball bead on first. The silver bead went on both wires.
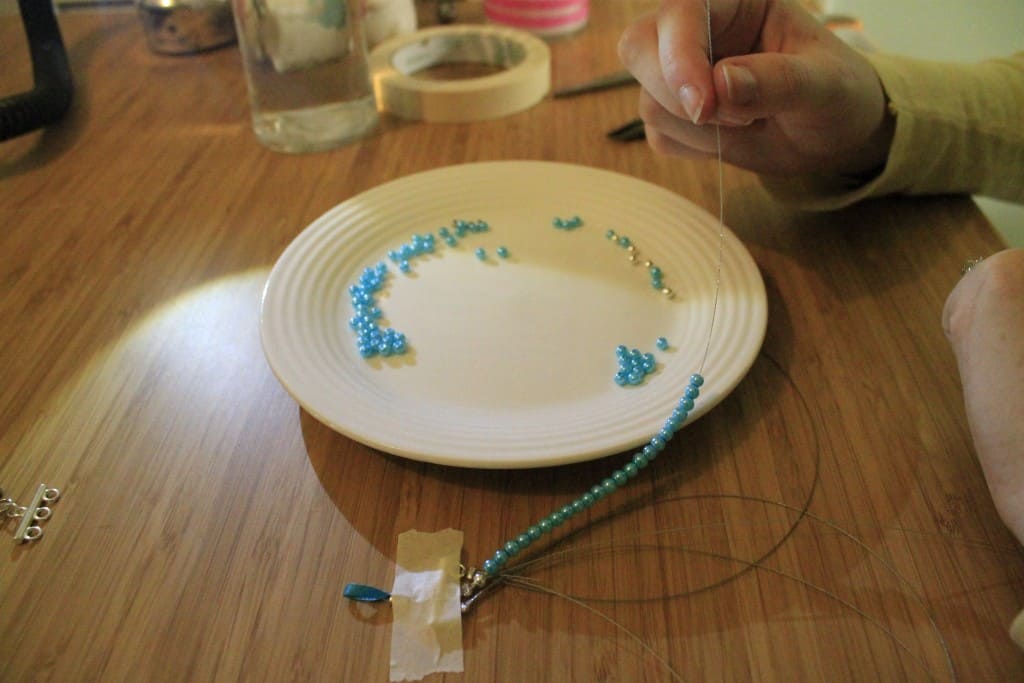
Then, being threading your beads. I like to count beads so they are even. Each strand got 34 beads.
Some general beading tips:
- I like to put my beads on a plate. This keeps them from rolling away. Try to use a white plate if you can, unless you are using white beads in which case a darker solid color plate is preferable.
- I leave the beads on the plate then stab their holes from above with the wire. This is the fastest and easiest way for me to bead.
- Count your beads in advance! It's hard to put down a half beaded strand if you need to cut more beads.
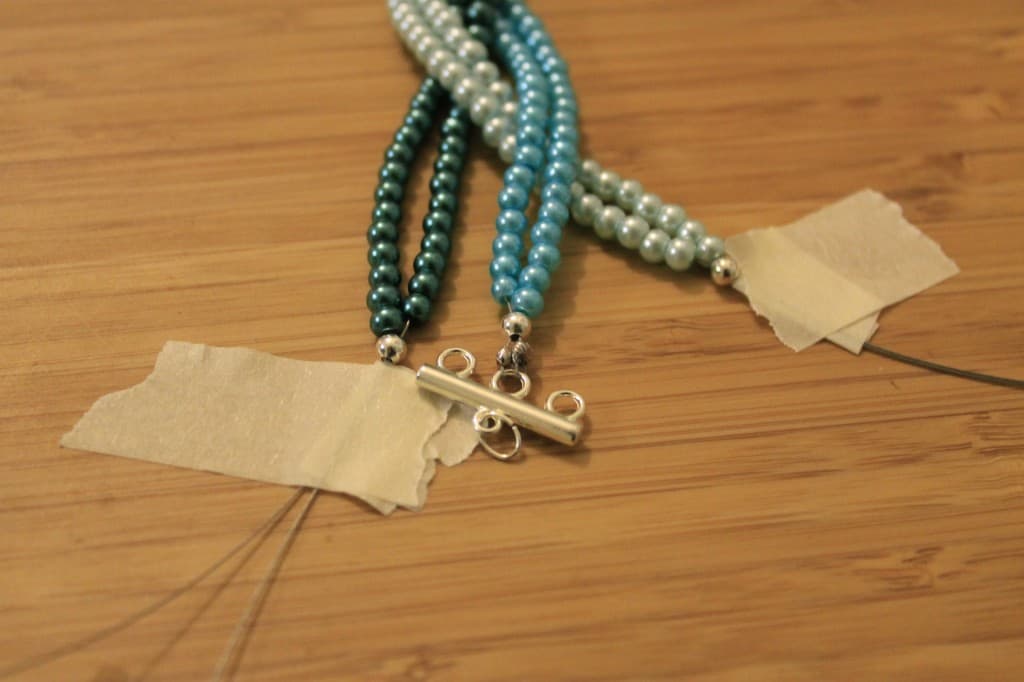
- Tape the end bar to your working surface. It makes such a difference.

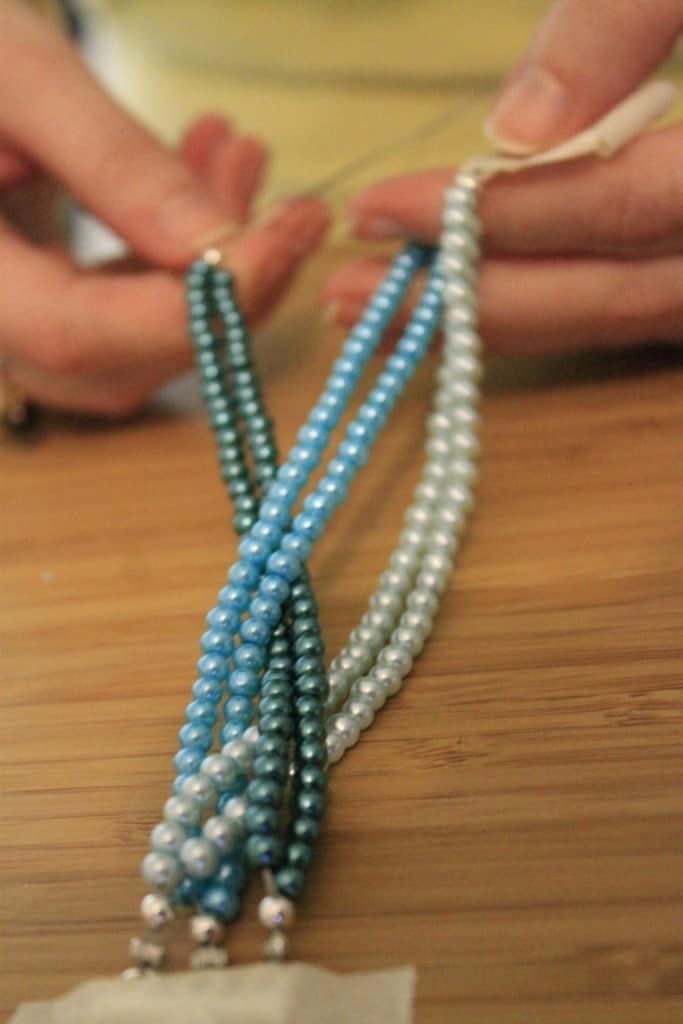
Seal each end off by folding a piece of tape over the end. Once you finish the two strands that are on one end bar loop, remove the tape from the first strand, string a silver bead over both strands, and then seal with tape.
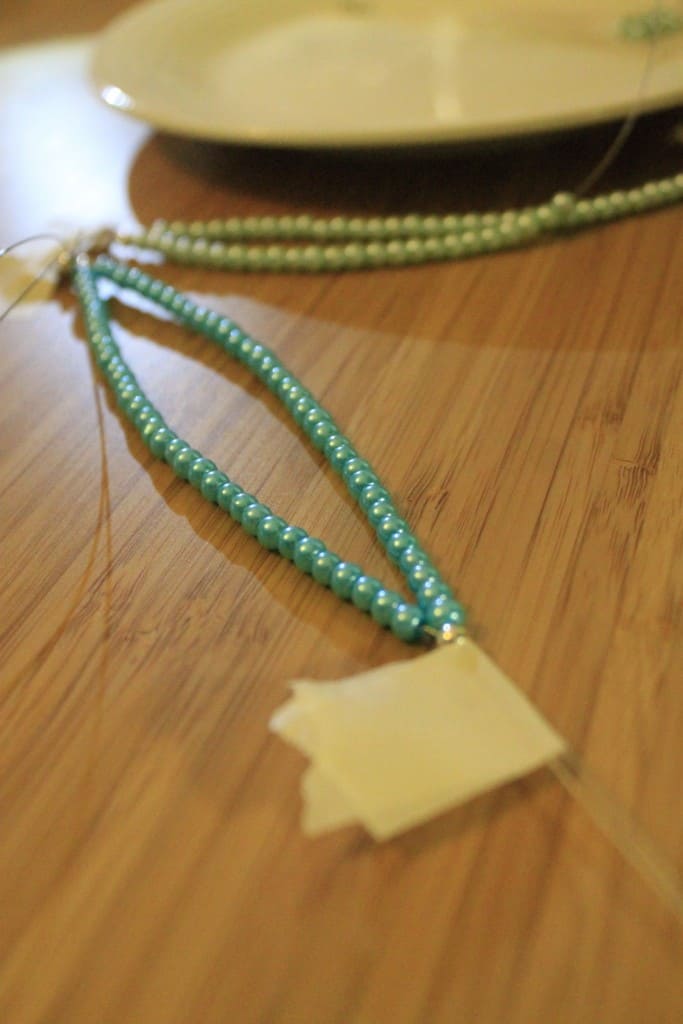
Once you have finished and securely taped the ends of all six strands, it's time to braid! Follow your girl scout braiding to gently wind your strands together. When you get to the end, tape it to the table.

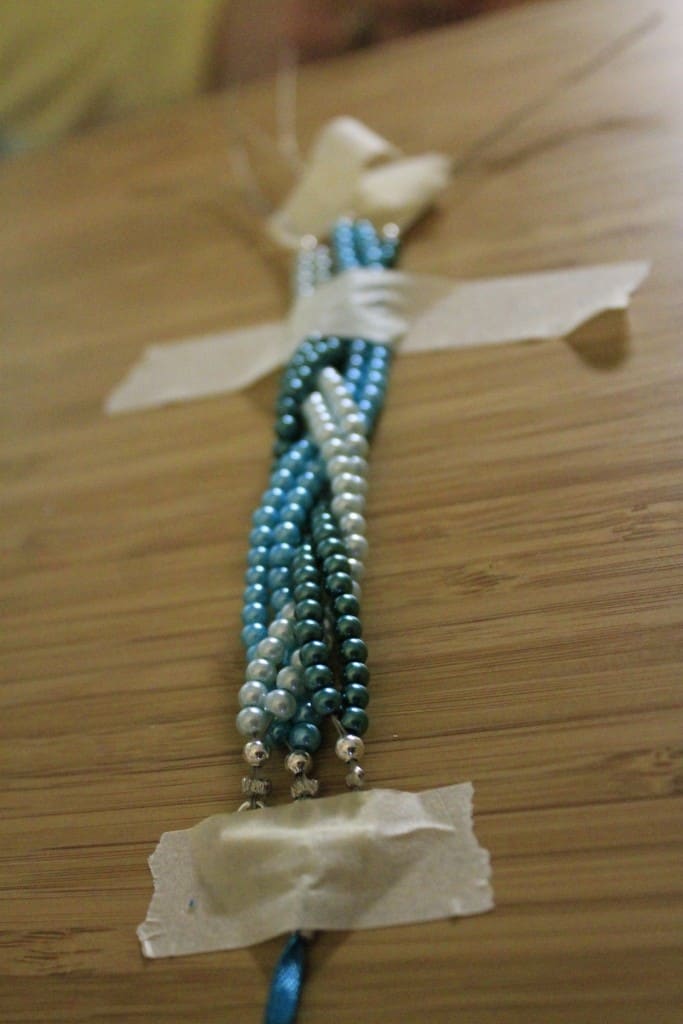
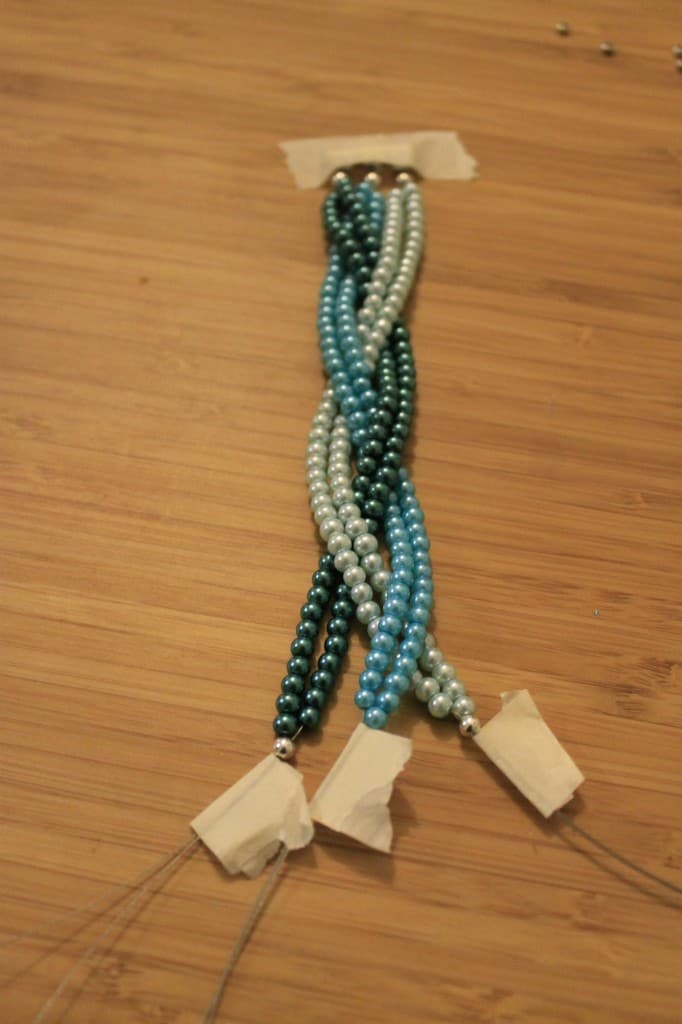
Now comes my least favorite part - finishing. I recommend that you start with the center strand. Remove the tape, string on a crimp bead (and a silver ball if you havent already - crimp is last bead on, closest to the clasp) loop the loop over the loop in the end bar (that's a lot of loops). Run the end of the wires through the crimp bead, the silver bead, and as many pearls as you need to. You can trim the wire at this point. Pull it tight and use the pliers to squash the crimp.
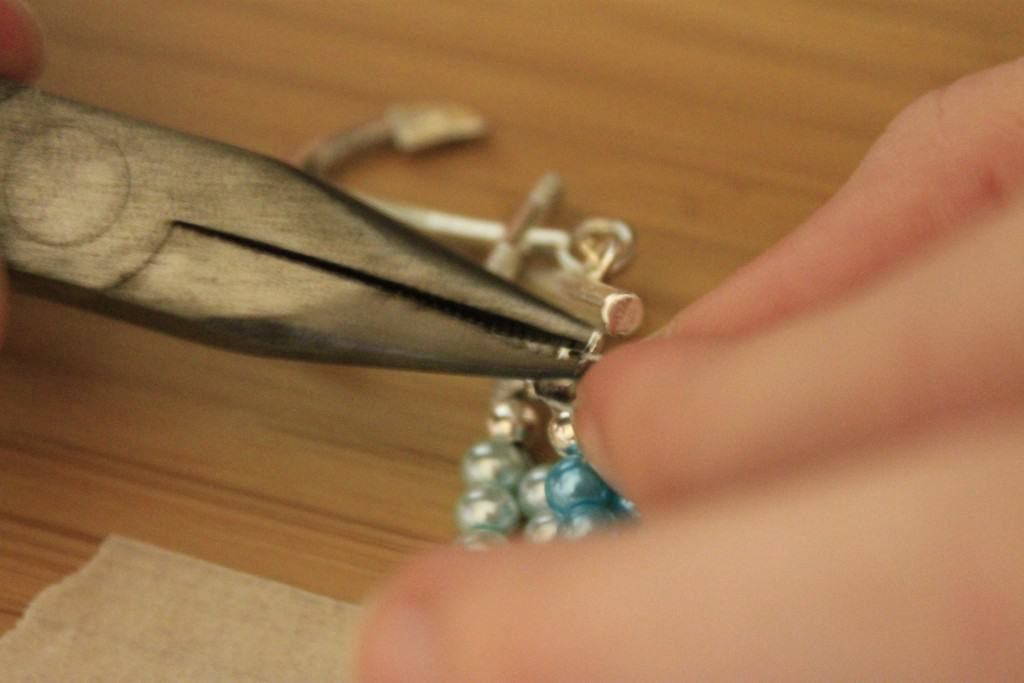
Repeat for all three ends and you are done! This part is hard for me because you are dealing with a short end of a full strand of beads. Don't drop it (I did this several times, beads spilled everywhere, curse words flew, tears fell, Sean left the room) and don't trim the wire too short! It makes it nearly impossible.
----------------------------------------------------------------------------------------
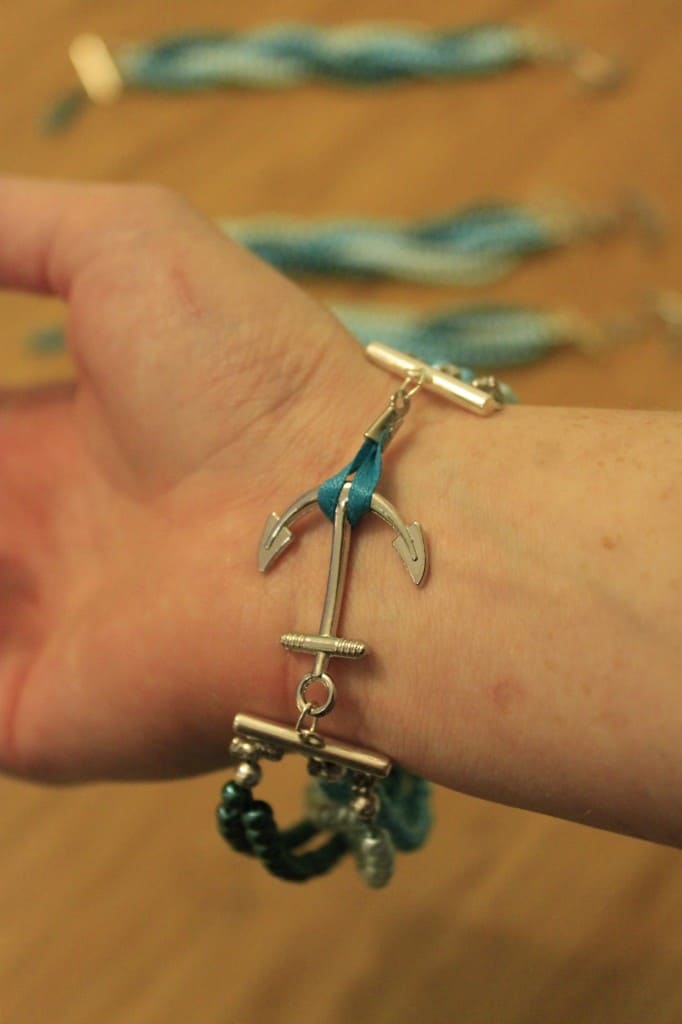
If you are interested in making the ribbon & anchor clasps, here is how you do that:
What you need (per clasp)
- One silver anchor charm
- One grooved crimps with loops
- Jewelry/beading glue (super glue would be OK too)
- A toothpick
- Thin ribbon
- Scissors
- Jewelry making pliers
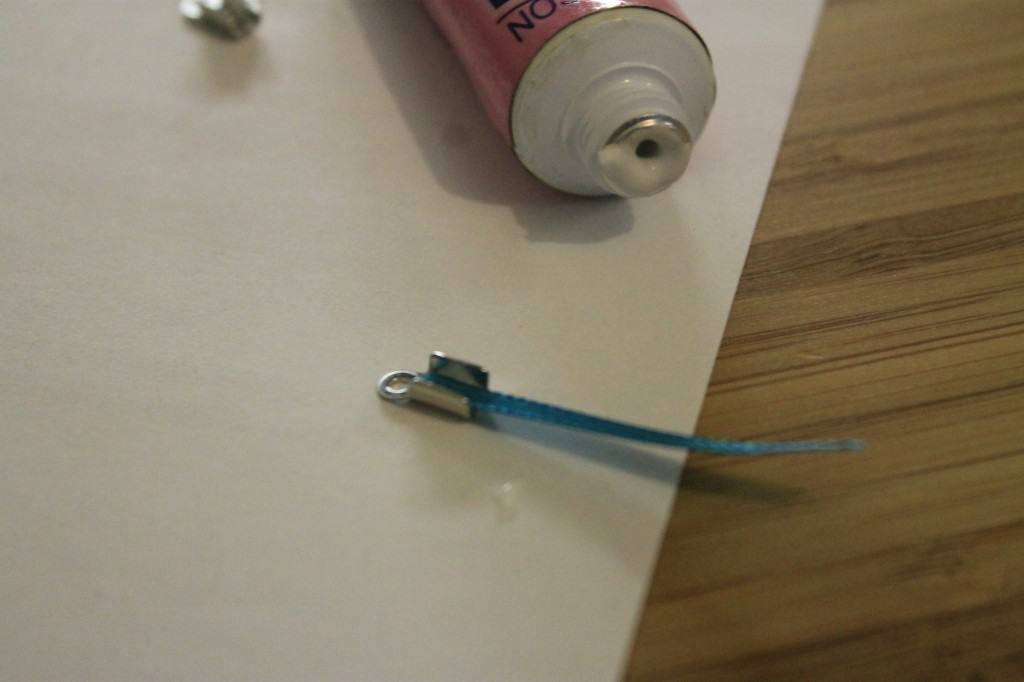
For each clasp, cut a length of ribbon approximately 1.5 inches long.

Use jewelry glue and toothpick to carefully put glue on the inside of the crimp. stick the end of the ribbon in there and use a clean toothpick to stick it in well.

Let that dry.
Apply more glue on top, loop the ribbon up, and use the toothpick to push the loop down into the glue.
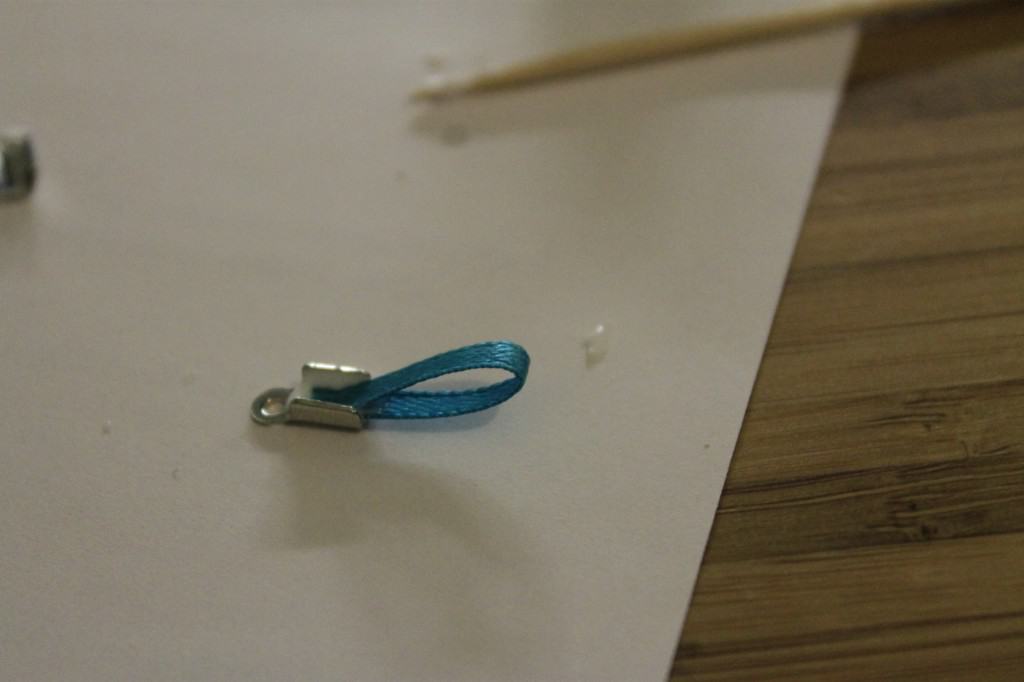
Let that dry.
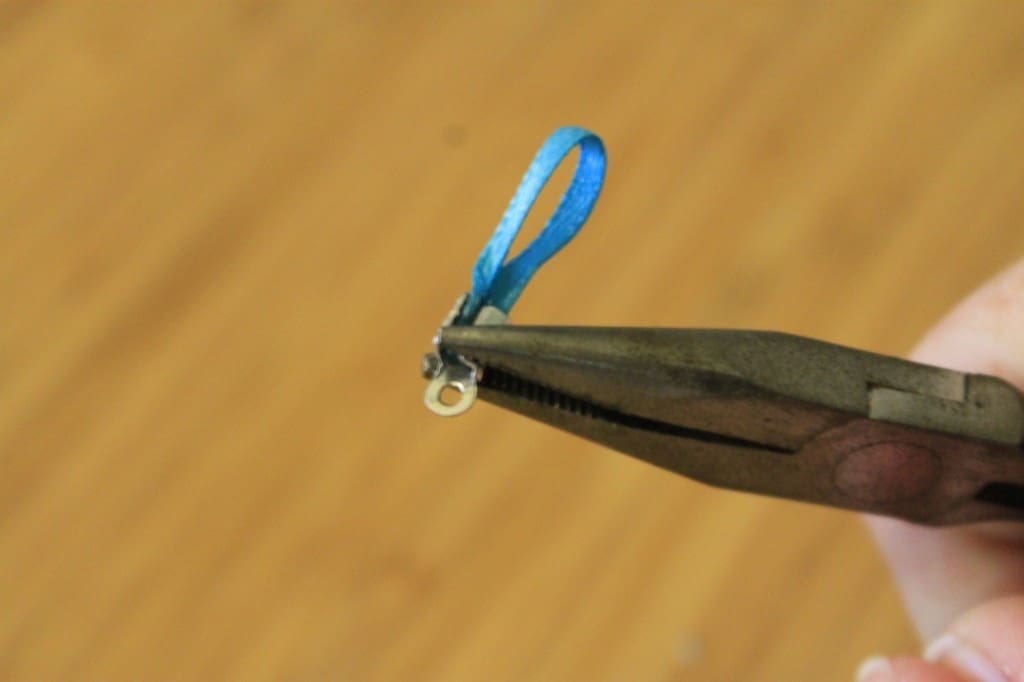
Use your pliers to fold down the ends of the clasp over the glued ribbon.
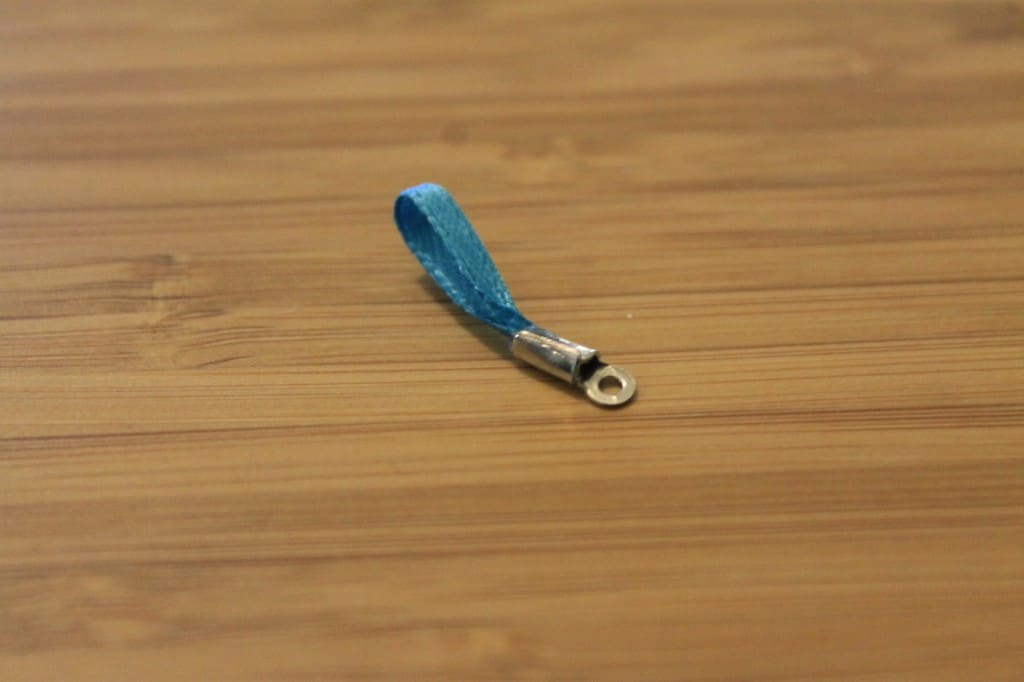
Ta-da! Use a jump ring to connect it to the end bar of any bracelet. Connect an anchor charm to the other end bar using a jump ring. When you wear the bracelet, you slip the anchor through the ribbon loop. It's super cute, but a very long clasp, and so it takes up most of the wrist side of a bracelet.
----------------------------------------------------------------------------------------
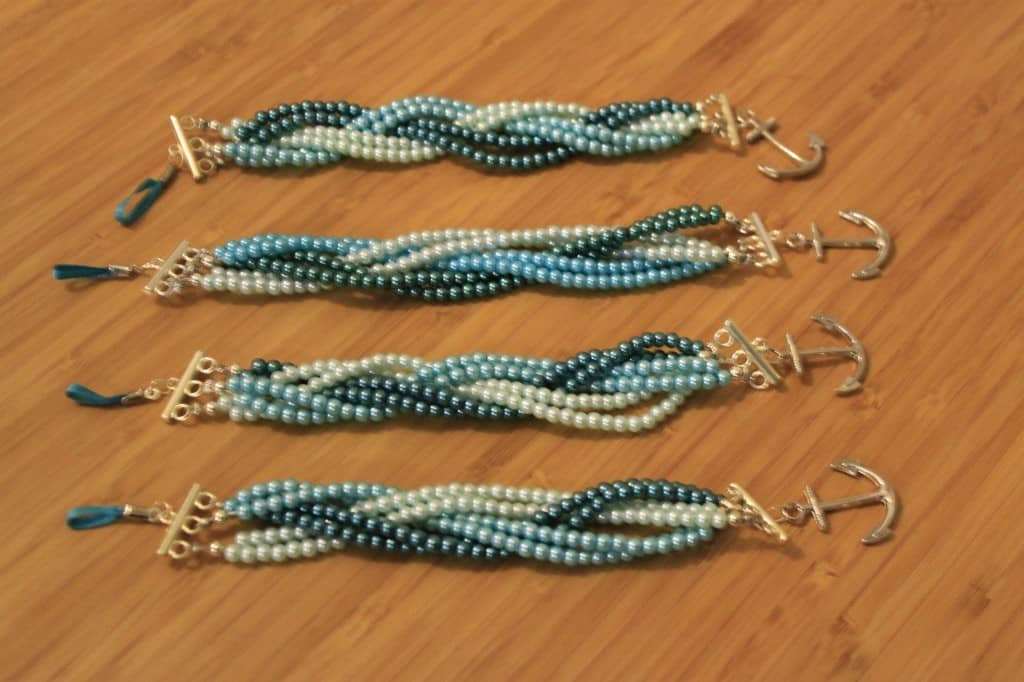
I presented them to my bridesmaids on the morning of the wedding along with some other goodies. I asked them to wear them on the wedding day, but hope they will wear them again!
 |
|||
| |
|
|
|

Hello, I'm Morgan, half of the creative force behind CharlestonCrafted.com! With a passion for DIY that dates back to 2012, I've transformed three homes and now I'm dedicated to helping others craft their dream spaces. Let's turn your house into a home together!

MADELINE l NEWTON says
wow great idea ...have to go and buy beads are try this ...thank you ...have a wonderful day and of course many more ...love and happiness..