Check out how I made floating shelves to fit the corner between my kitchen cabinets and window during our renovation. This was a fun project that adds a great look!
Y'all I feel like I have been working on our kitchen renovation for, like... ever. In truth, it's been about 6 months and the major parts of the project are long over, but the finish work has dragged because of other priorities.
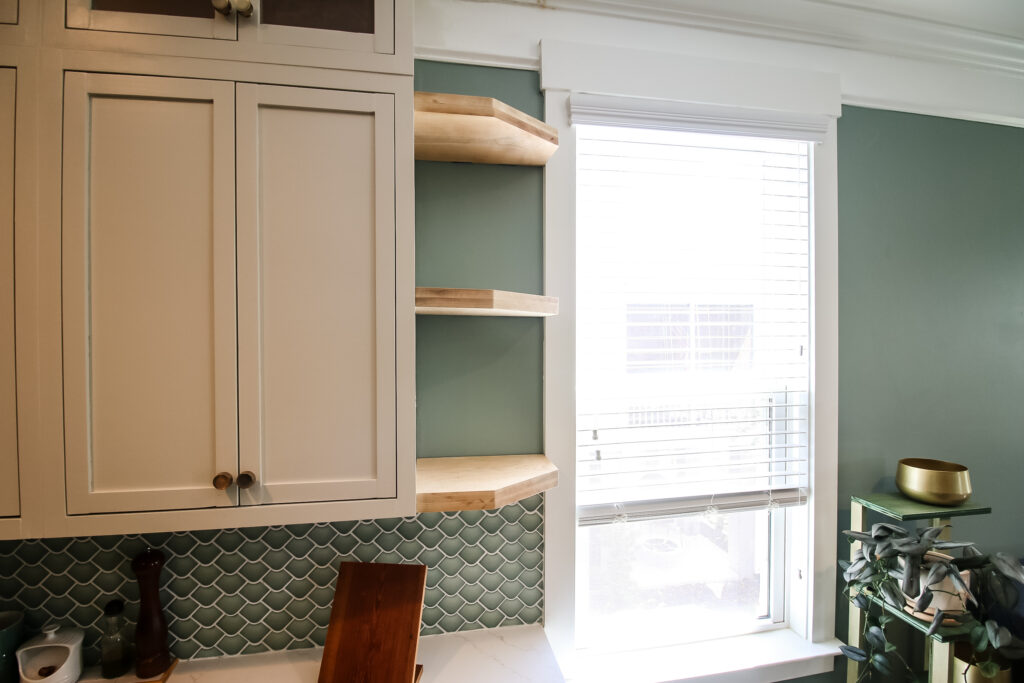
But after all the cabinets were installed, we installed our backsplash using a tile adhesive mat and when we did that, we took it all the way to the window next to the kitchen. We knew that would be a great place to stop because we wanted to add floating shelves in the corner between the cabinets and the window.
In our last house, we added some store-bought rounded corner shelves off the end of our kitchen cabinets and it gave us the idea to build some this time around. In that case, we had extended our lower cabinets all the way to our French door by adding a DIY tilt-out trash can cabinet, and in this case we had the wine fridge cabinet I made.
Corner shelves are a great way to maximize space and add some decor to your kitchen. This time around, I was able to make our corner shelves instead of buying them, so here's how I did it!
Grab our full DIY kitchen woodworking bundle here to build your own cabinets, island and range hood!
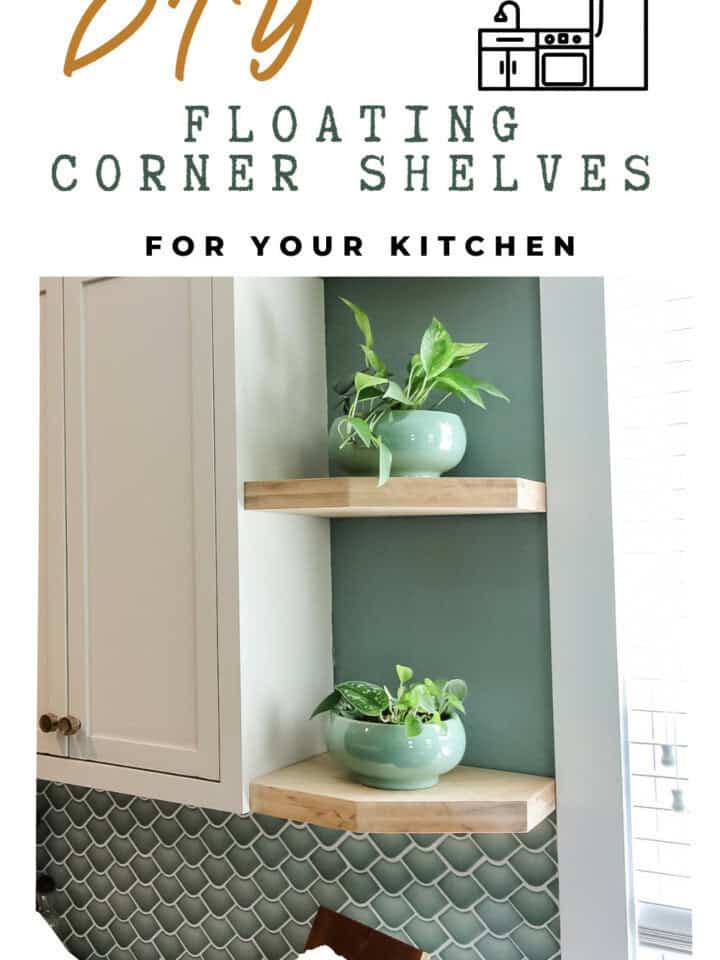
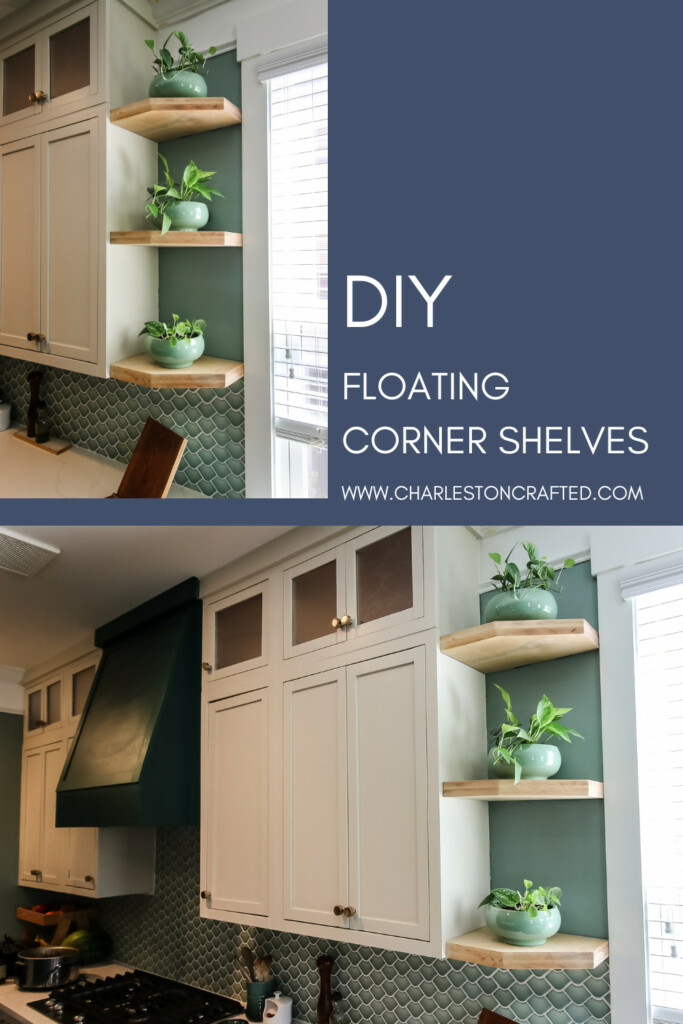
DIY floating corner shelves for the kitchen
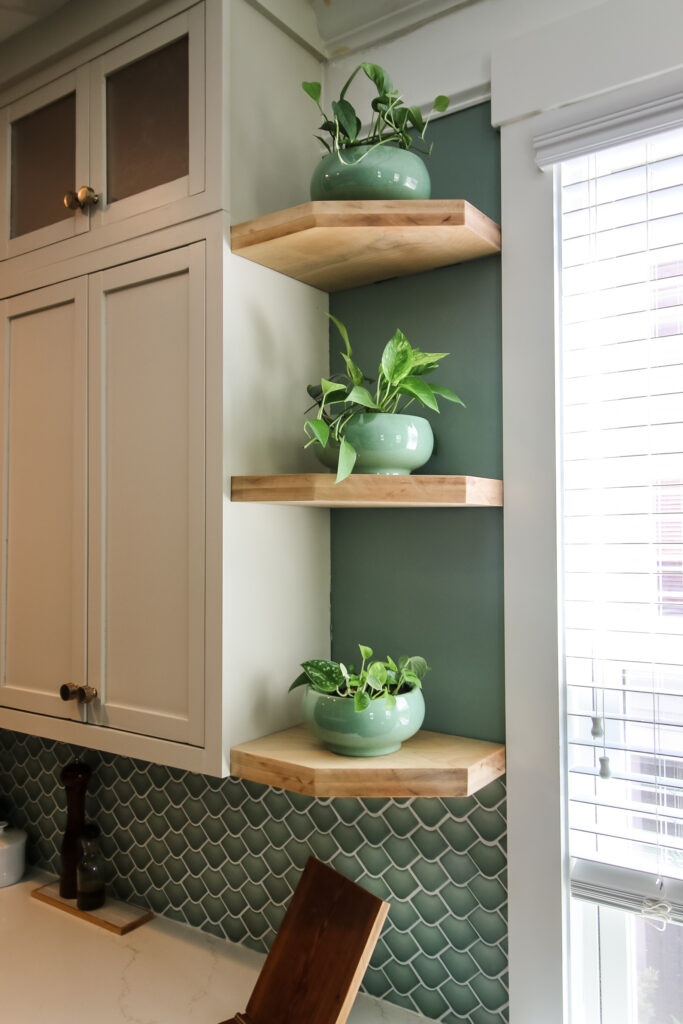
We wanted these shelves to match the curly maple mantel that we installed after we removed the builder-grade fireplace surround. They are fairly near each other and you can definitely see them both at the same time in the open floor plan, so we wanted them to be the same wood and thickness.
The lumber yard didn't have a board thick enough to match the mantel, so I got a thinner one for this project and glued them up. So I'll be showing you how to make a thick, chunky board as part of this project!
Check out these simple floating shelves that are much longer and perfect for displaying decor!
Materials needed to make corner floating shelves:
- Hardwood of choice
- Floating shelf brackets
- Chisel
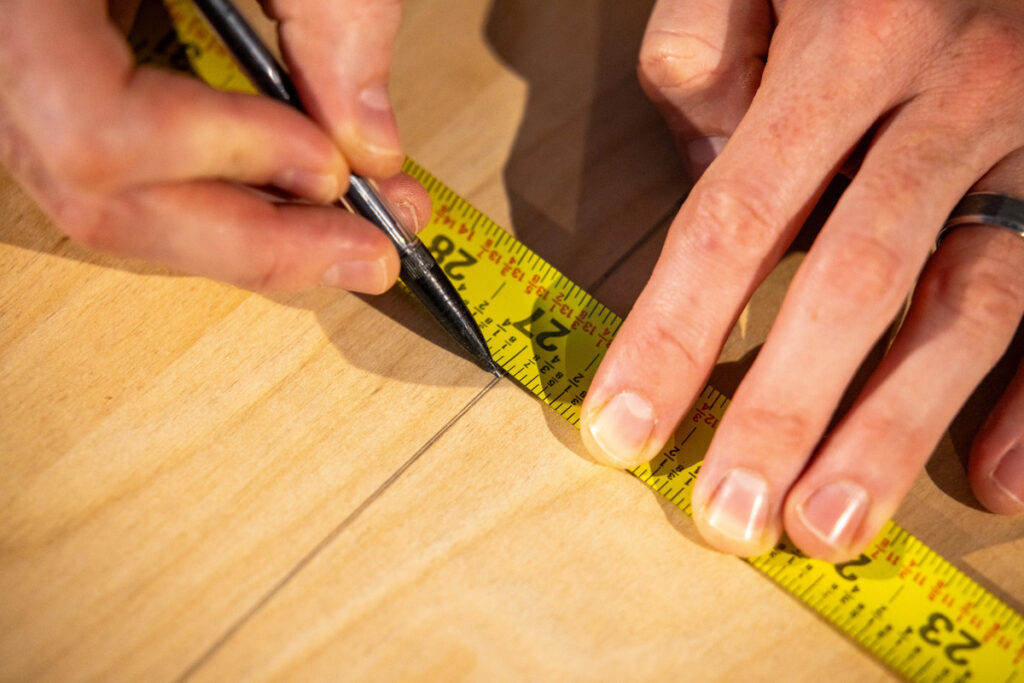
Step one: measure
First thing you need to do is measure your space. I don't normally write out a step in a blog post about needing to measure, but in this case it can be important.
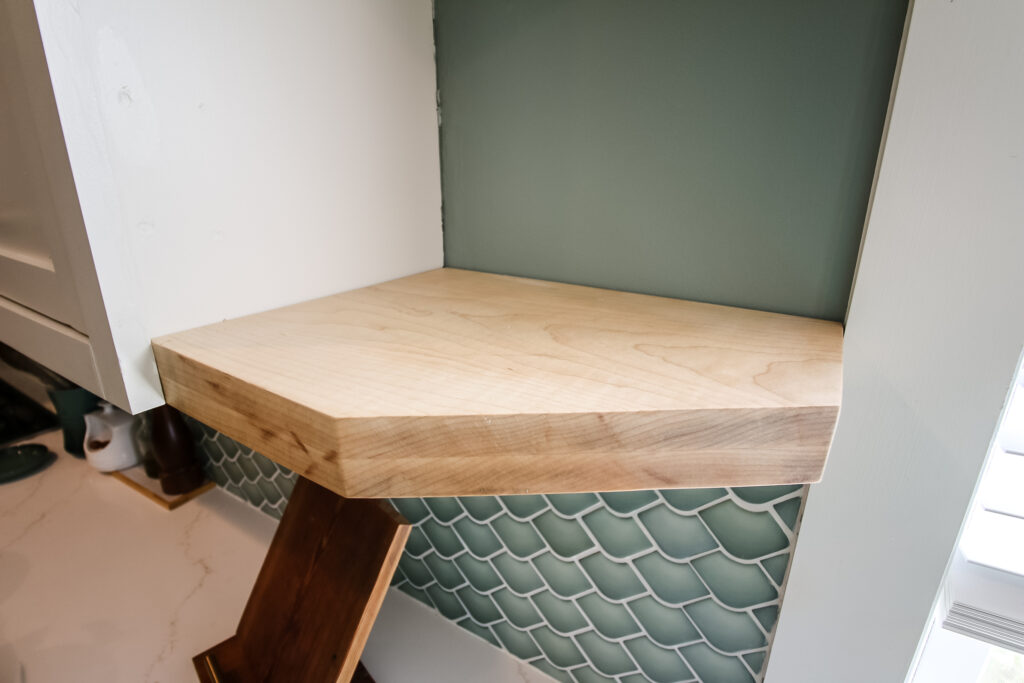
One important thing to take into consideration when you're measuring is if your cabinet has a little extra lip on the face frame. Mine stuck out about ⅛" off the end of the cabinet and I thought that I could just muscle the shelf into place past the lip, but man, I just couldn't do it and ended up having to shave a little extra off that side of the shelf.
Other than that, decide if you want your shelves to go all the way to a certain object (like the window in my case) or where you want them to end naturally. I'd recommend either roughly the same width as the depth of your cabinets or fairly significantly longer so that they don't look oddly short and dinky.
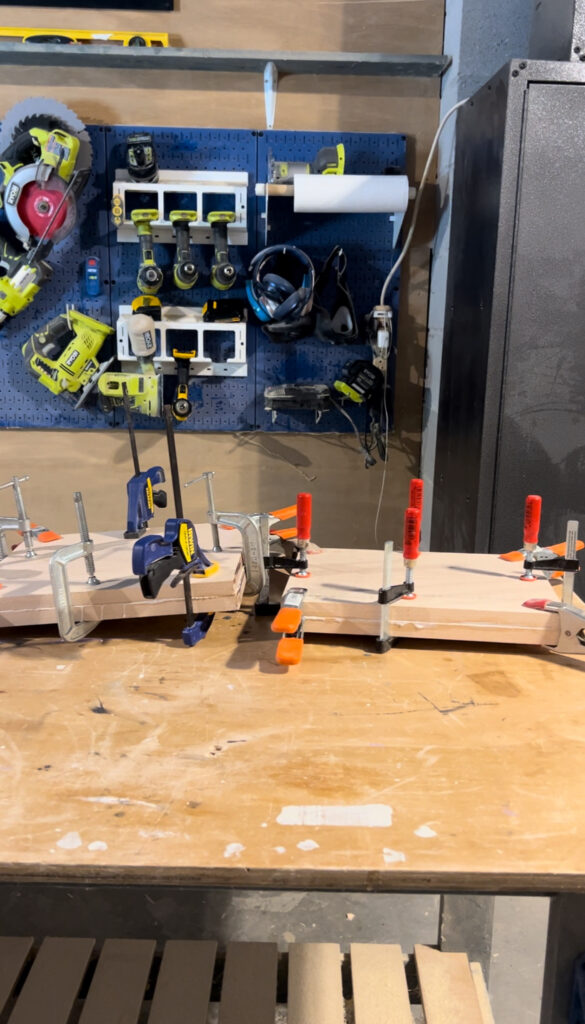
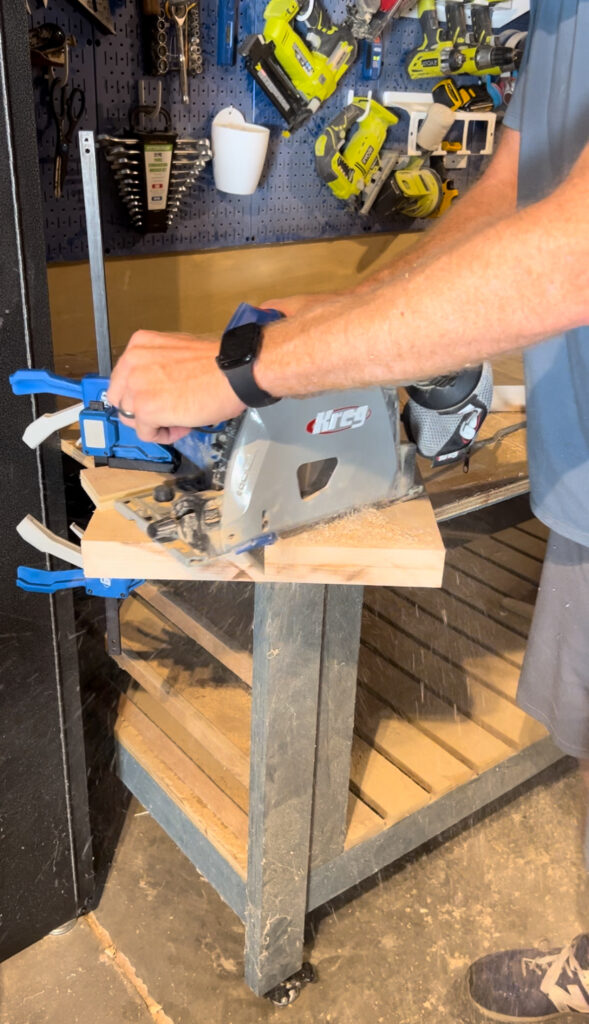
Step two: cut and glue
Next step is to cut your pieces down. I got a single board and cut mine into six pieces so I could double stack the thinner boards, but you could go with a shorter board if it's thicker.
If you're using a solid board like I did for our DIY shiplap fireplace mantel, you obviously won't have to glue your pieces together.
I cut my pieces down a little bit wider than they were going to be in the end so that I wouldn't have to worry as much about precision in the gluing process, knowing I could just trim them down.
I spread the glue on using a Rockler glue spreader and tray kit that I really like because it's easy to clean. Then I clamped all three boards up when they were dry with approximately 200 clamps.
Once each of my three shelves was glued, I cut off the front corner. I tested them out as a square, but didn't like how the corner felt like it stuck so far out. So I marked a point halfway on the front and right side, drew a line and cut that off.
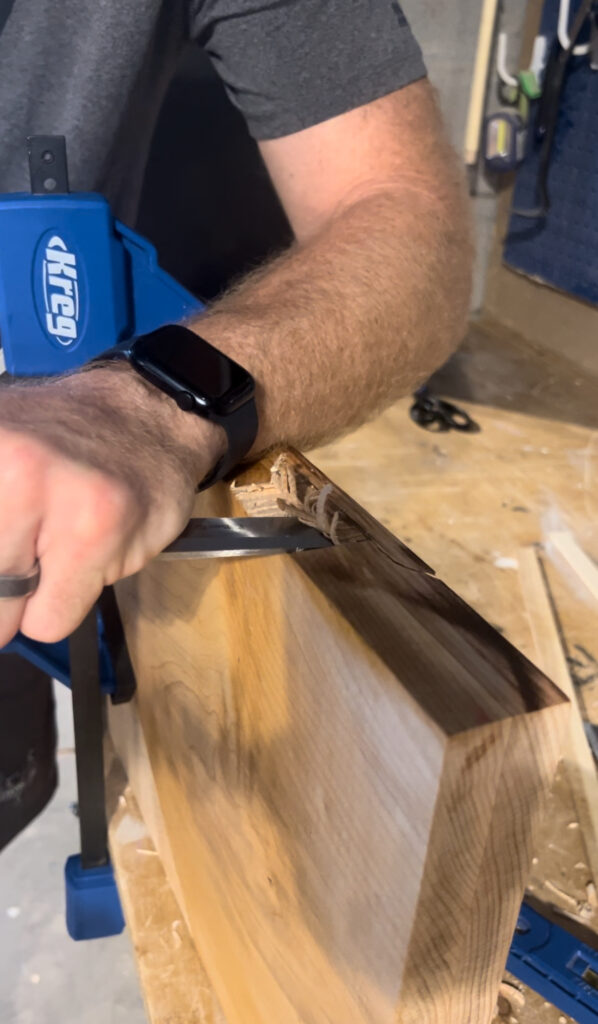
Step three: drill for brackets
Next up was to mark the placement of the brackets on the wall and measure that onto the shelves. Then, I drilled deep holes through back of the shelves for the floating shelf brackets to go into.
When drilling deep holes like this, if you don't have a drill press, make sure you use something like this Kreg Drilling Guide so that your holes stay straight all the way through, otherwise your brackets will not slide in right.
Then I used my chisel to chisel out a notch for the bracket plate to go inside of to make sure it was truly flush on the wall.
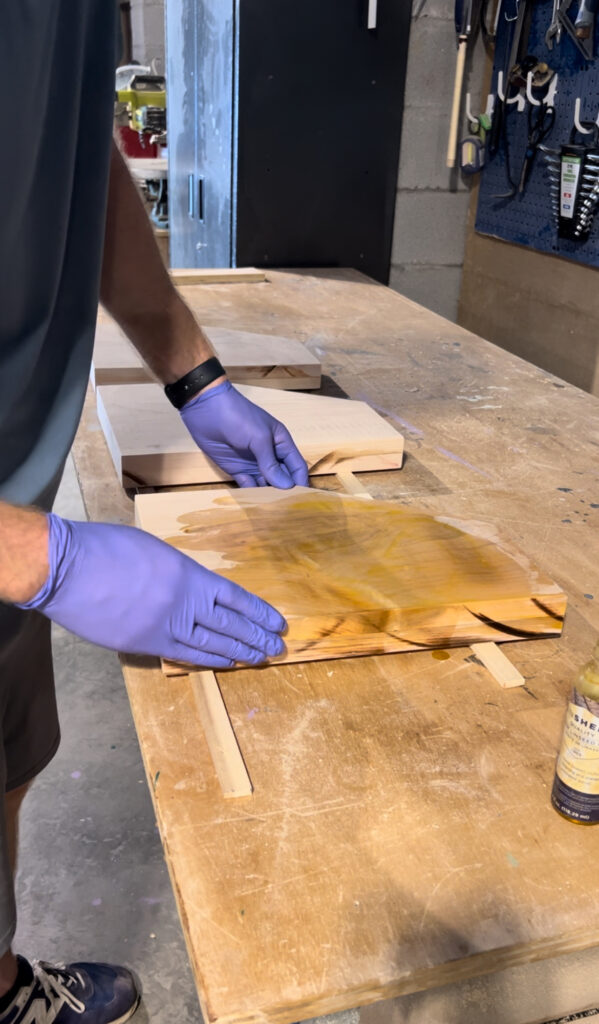
Step four: add finish
Once everything is all ready to go, I sanded it down super smooth and buffed down the edges before coating them in linseed oil.
I used the same oil on these live edge floating shelves!
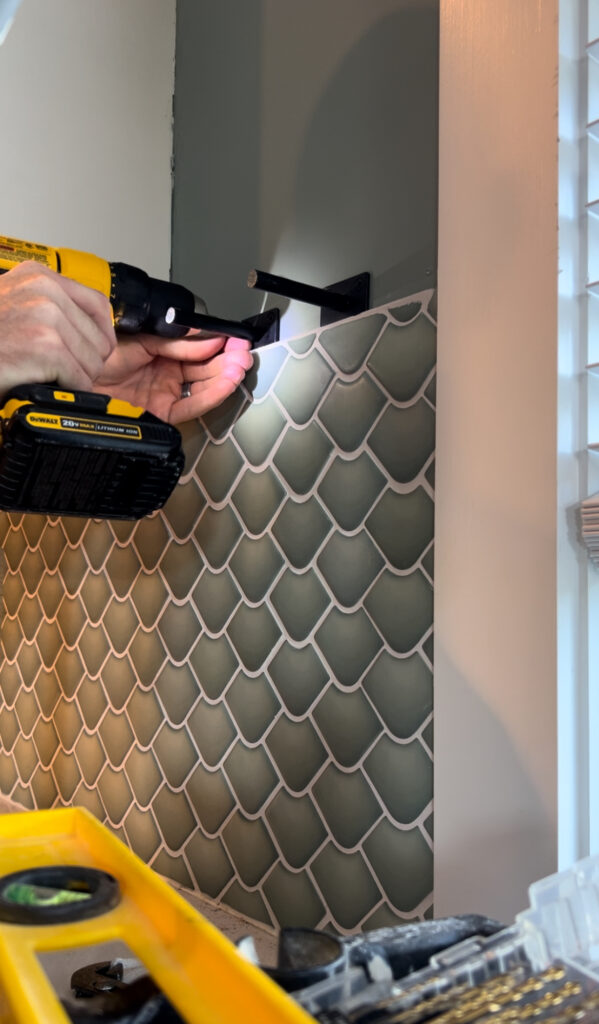
Step five: install brackets
When the shelves are curing, this is a great time to install the brackets. Hopefully you marked where they need to go when you cut and drilled the placement on the actual shelves.
Install the brackets into studs or with anchors into your wall. I installed two brackets for each shelf, but since it was next to the cabinet, I also had a plan for a third anchor point in a minute.
Step six: hang shelves
Finally, I hung the shelves. I slide each one in on their brackets while trying to squeeze past that lip on the cabinet face frame. Then, I drilled through the inside of the cabinet into the side of each shelf as a third anchor point to make sure they are solid from front to back.
DIY floating corner shelves
I love how these floating corner shelves turned out! We now have at least five different kinds of floating shelves in our house and I love them.
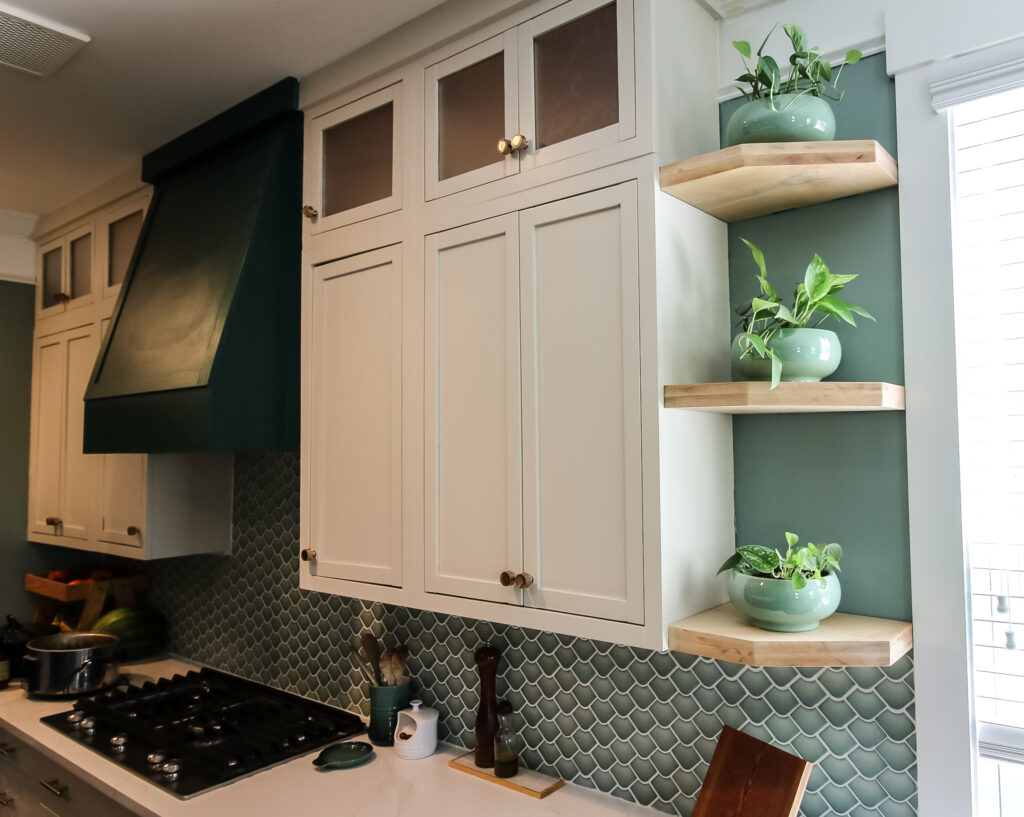

These really help fill out the kitchen and make it feel complete and like the window is part of the design. Plus, it's a great spot for our dripping plants to get lots of light!

Looking for something?
We've been doing this since 2012 so we have a LOT of blog posts!
Search stuff like: Ceiling Projects | DIY Plant Stands | Thrift Flips

Hey there, I'm Sean, the woodworking enthusiast and builder behind CharlestonCrafted.com! Since 2012, I've been sharing the magic of turning raw materials into beautiful creations. I love teaching others the art and satisfaction of woodworking and DIY. I try to inspire fellow crafters to make something extraordinary out of nothing at all.