Have a lot of little girl's headbands or hair bows to store? Here's how we turned wooden monogram letters into a wall hanging headband display and organizer!
I was so excited to have a baby girl and I'm not going to lie - one thing I was really looking forward to was lots of big hairbows.
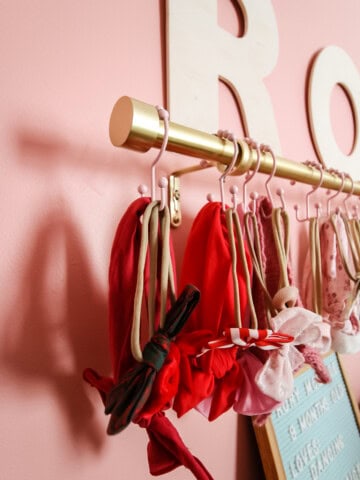
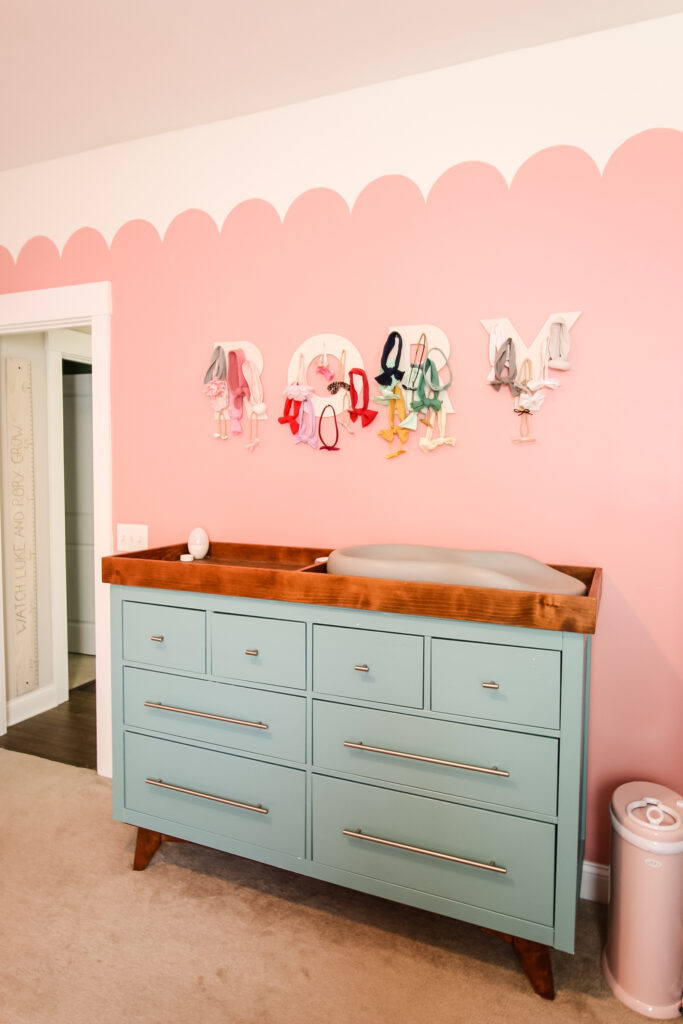
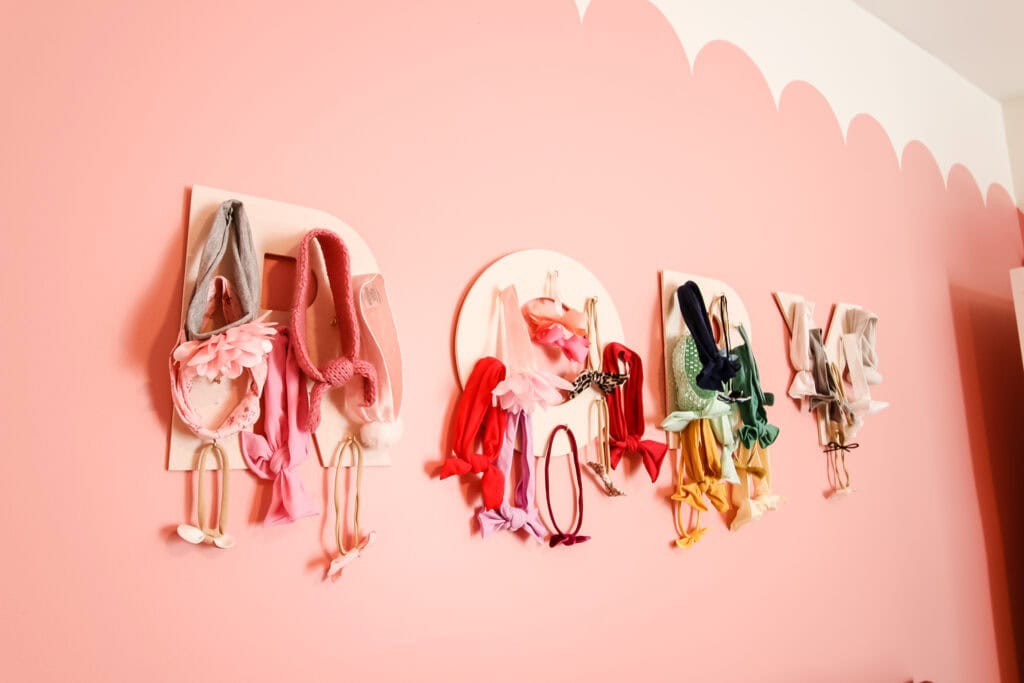
Well, Rory has accumulated quite a collection already (and it's ever growing!) and so we wanted to have an easy way to display and organize them in her bedroom.
Her hair bows are primarily headbands since she doesn't have much hair yet. So, it's easiest to hang them each on a hook.
If you need more of a DIY hair bow holder, you can mix up the hook type or add short pieces of ribbon with hot glue on to clip clips to!
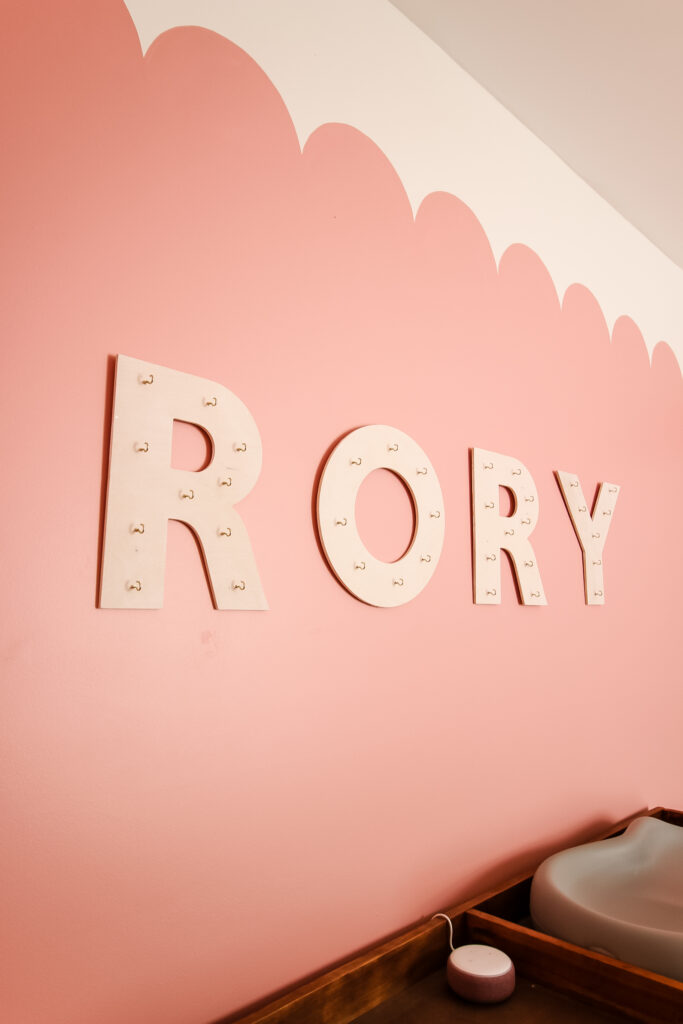
I decided to take the Southern look up a notch by making a headband organizer on wooden letters to spell out her name.
This was a really easy project but it has a big impact on her walls!
I really love how this DIY hair bow holder turned out. We made it a few months ago and at the time we had extra hooks. But, she keeps getting new bows!
If your daughter has a lot of bows and a short name, I'd consider larger letters so you can fit more hooks!
How to make a baby girl headband holder display
Supplies needed:
- Wooden letters (mine are 12" - I would go as big as you can!)
- Paint or stain & brush to apply
- Cup hooks
- Drill with small drill bit (optional but makes it easier to add hooks)
- Hanging hardware (if not included with your wood letters)
- Gorilla glue or super glue (if adding hanging hardware)
Steps to make a DIY headband holder:
Here's how easy it is to make your own DIY hairbow holder and headband storage using pre-cut wooden letters!
STEP 1: Get wooden letters
Most craft stores sell wooden letters. I ordered these online.
As I've mentioned a few times, I wish I had gotten 18 or even 24" tall ones instead. Like, I'm pretty close to doing a bigger hair bow display, soon!
Anyways, some things to keep in mind when selecting letters:
Do you want wood? Or to paint it a solid color? If you want wood grain to show, like I did, you need wood letters. If you plan to paint, you can use wood or the white plastic-y ones.
What font do you like? There's a lot of different styles and font preference is why I picked the ones I did.
You can definitely cut these out yourself using a CNC machine (I don't have one) or a scroll saw. However, with the price of plywood what it is right now, it was cheaper for me to buy than make!
STEP 2: Stain or paint the letters
Decide on the look that you want and paint your letters. I added a white wash for a light beachy look. You could use acrylic craft paint, wall paint, or wood stain.
Paint with a brush and paint the sides, too. Let dry completely.
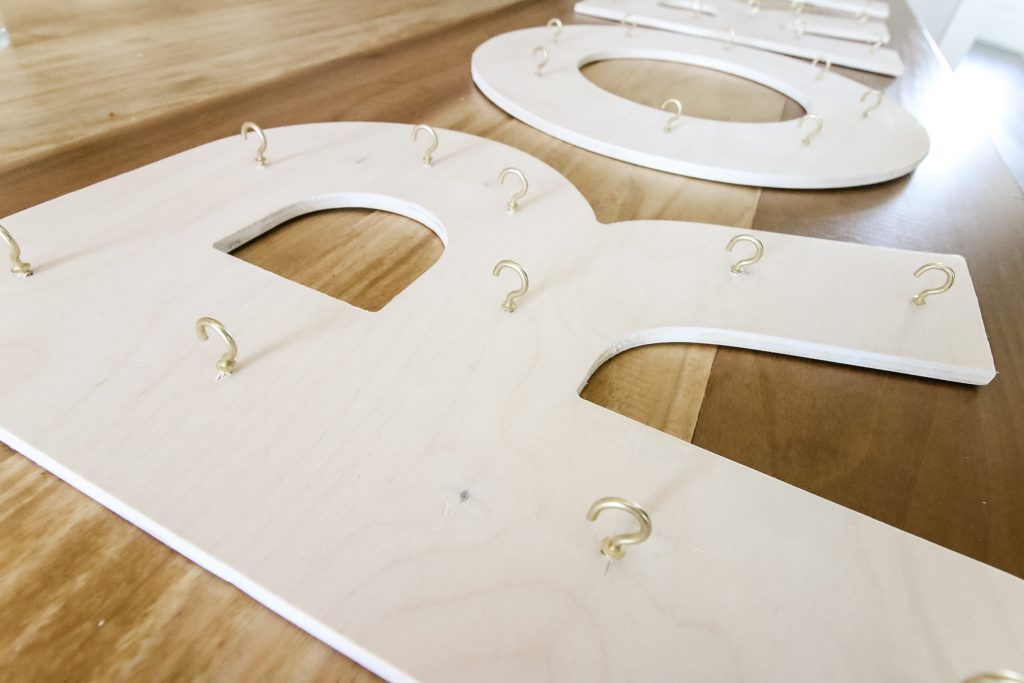
STEP 3: Add hardware to the back of the letters
Flip the letters over and add hardware to the back. Some letters might come with hooks or little indents for nails already.
If not, use gorilla glue or similar to glue D-hooks on the back so you can easily hang them on the wall. Usually 2 hooks per letter is best.
STEP 4: Add hooks to the front of the letters
I added gold cup hooks to the front of my letters for hainging baby headbands. If you have hairclips, replace these with little loops of ribbon.
For the hooks, it was best to use a drill to get the hole started and then twist the hooks in by hand. You can do them fully by hand, but it was easier to start it with a drill with a tiny drill bit.
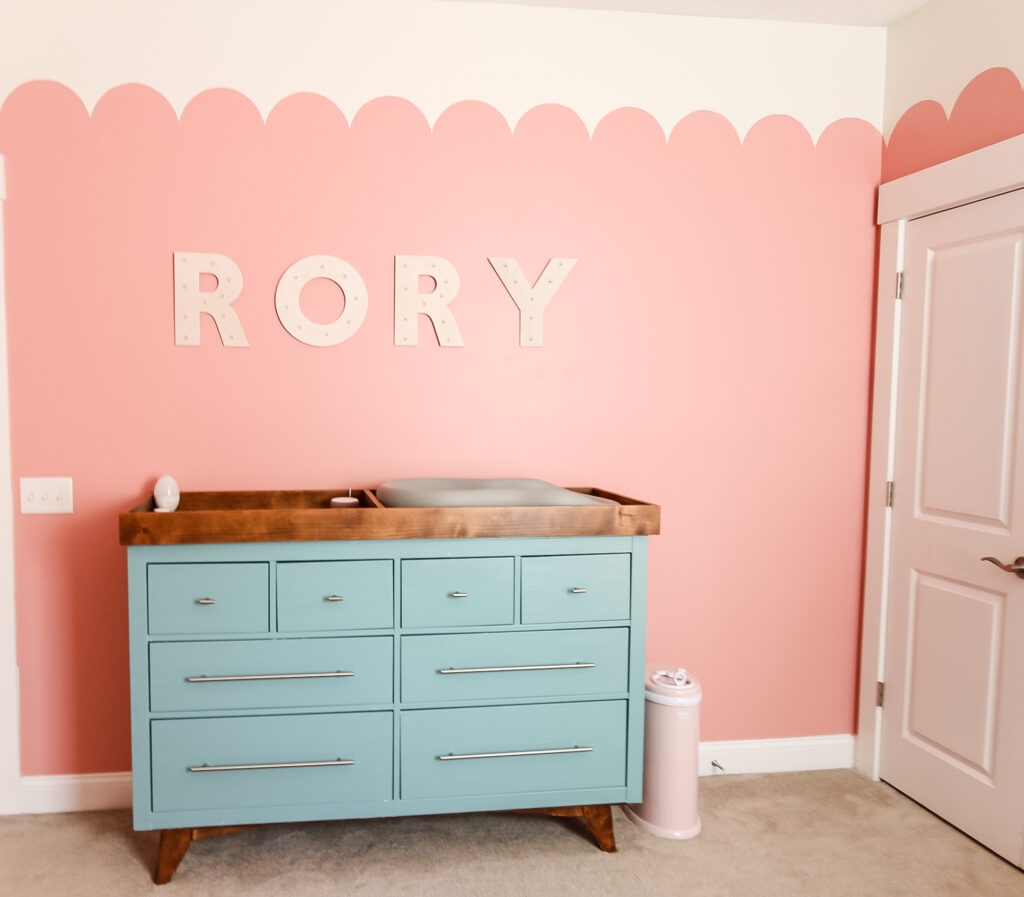
STEP 5: Hang the letters
Hang your letters! Start with the center letters and work your way out in each direction. I tapped 2 nails in the wall for the 2 hooks on each letter.
Then, hang your baby bows. I organized mine by color but you can hang them however you prefer.
That's it! Your baby headband holder is done. You have made wall art and a DIY hair bow organizer in one!
I love how this project turned out. The hair bow organizer is the perfect nursery decor but could work for a big girls room too!
Any more questions about how to make a headband holder for the baby in your life?

Looking for something?
We've been doing this since 2012 so we have a LOT of blog posts!
Search stuff like: Ceiling Projects | DIY Plant Stands | Thrift Flips

Hello, I'm Morgan, half of the creative force behind CharlestonCrafted.com! With a passion for DIY that dates back to 2012, I've transformed three homes and now I'm dedicated to helping others craft their dream spaces. Let's turn your house into a home together!