This post will show you how to make a geometric wood table top that is perfect for a small space. It can give you a great modern or boho look, depending how you want to use it!
This post is sponsored by Kreg Tool. All opinions are our own and our opinion is that we love Kreg Tool. Thank you for supporting the brands that make Charleston Crafted possible!
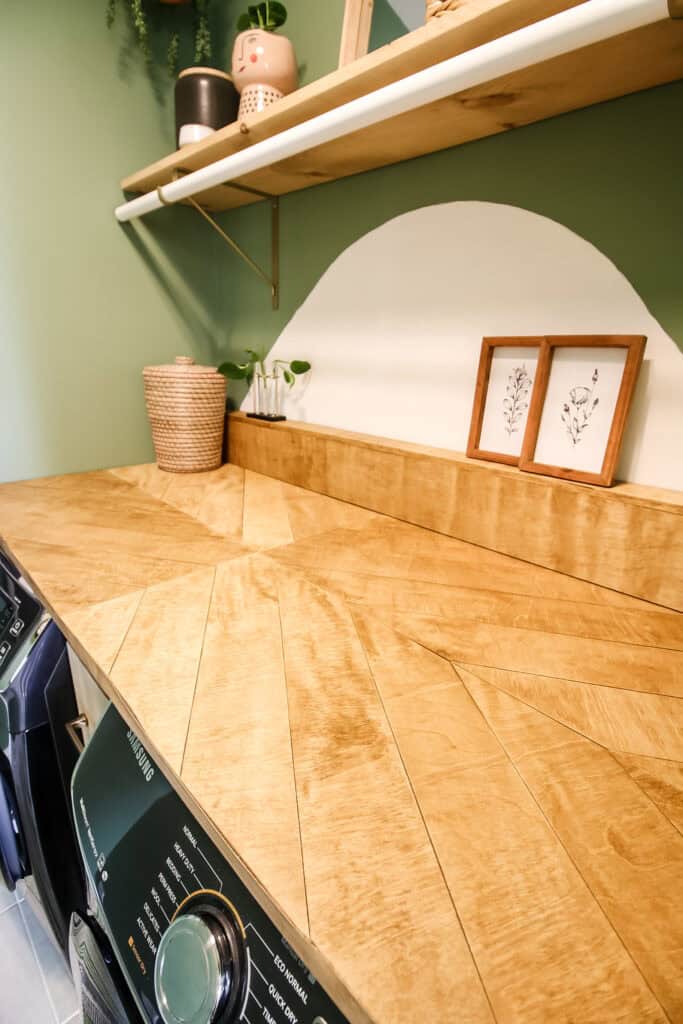
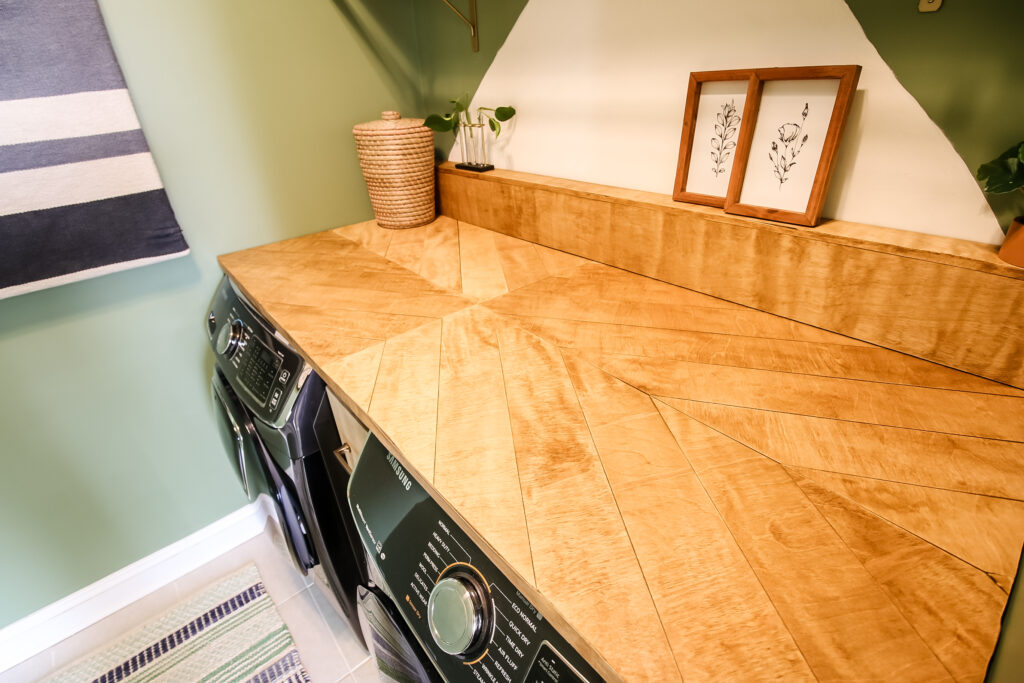
We just recently finished our laundry room makeover and the real feature piece is our geometric plywood countertop.
In our old house, we glued two pieces of ¾" plywood together for a thick DIY plywood countertop in our laundry room.
If you're like us, you probably hate having gaps around your washer and dryer. It makes it impossible to fold clothes! Things fall behind the machines, never to be seen again.
In our new house, we tackled our laundry room as our second room makeover (after our son's room) because it was so non-functional.
We made this geometric plywood countertop for folding clothes and we're going to show you how we made it!
This design was used as a countertop for us but would also work to make a tabletop in the same design - just add edge banding all the way around and add the legs of your choice!

DIY geometric plywood countertop
If you know how to make a plywood countertop, you'll never lose another sock again! Well, at least not behind the dryer.
Check out how we made this plywood countertop for our boho laundry room and how we added a geometric top!
Tools used:
- Kreg Straight Edge Guide
- Miter saw
- Circular saw
- Clamps
Basics of a plywood countertop
The first thing to know about building a plywood countertop is that it needs to be thick enough to support the weight you'll be putting on it.
Thicker plywood is less likely to sag, especially when supported correctly. For this project, we used a bottom layer of ¾" plywood and a top of ½" plywood.
The other basic thing to remember is to have support for the countertop.
With a free-floating counter like this one for our laundry room (one without legs) we screwed strips of ¾" plywood into the studs in the wall around machines for the counter to rest on.
The first step in any plywood countertop is to create a base layer that is a ¾" thick board.
We cut that board to size and then moved on to the fun part.
Steps to make a geometric table top
We wanted something more than a plain wood counter for our boho laundry room. We wanted something that reflected the natural, earthy style we were going for.
Step 1: Create your design
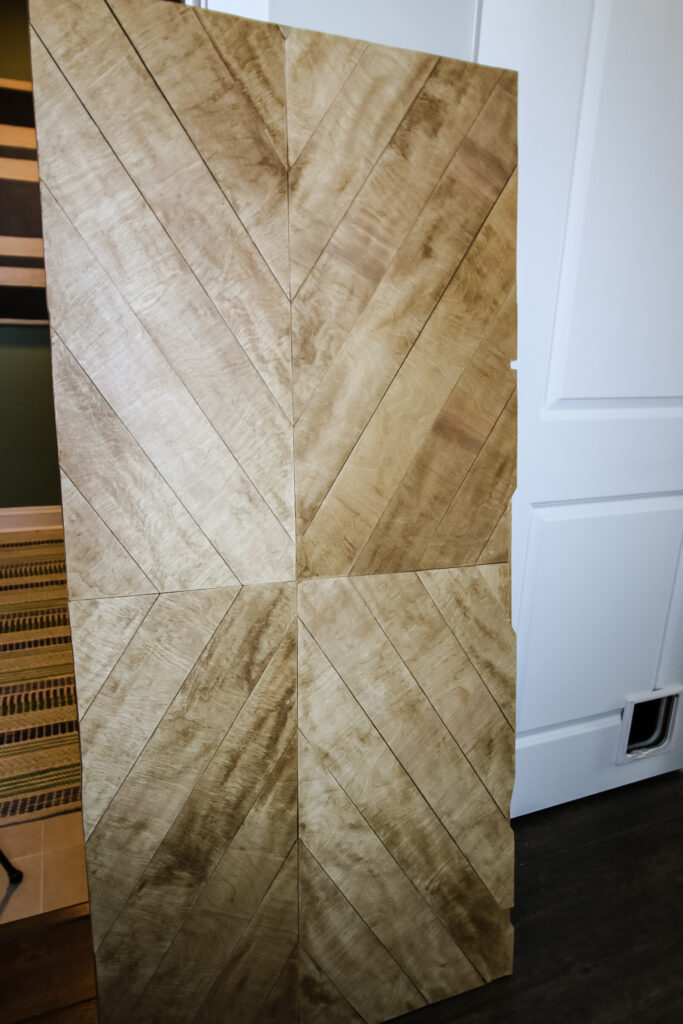
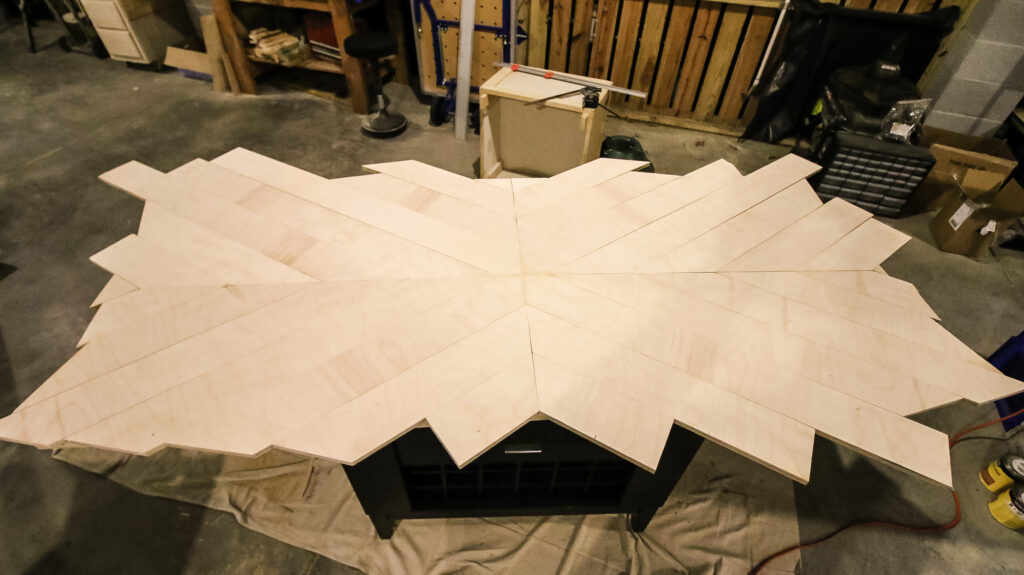
To get that look, we came up with the idea for a geometric top, with strips of ½" thick plywood going in different directions across the top.
We drew out the entire pattern on the ¾" base layer and got to work. Draw whatever angles you want and then mark them on your strips when you make them.
To do this, we needed to make a bunch of strips of ½" plywood to make the design.
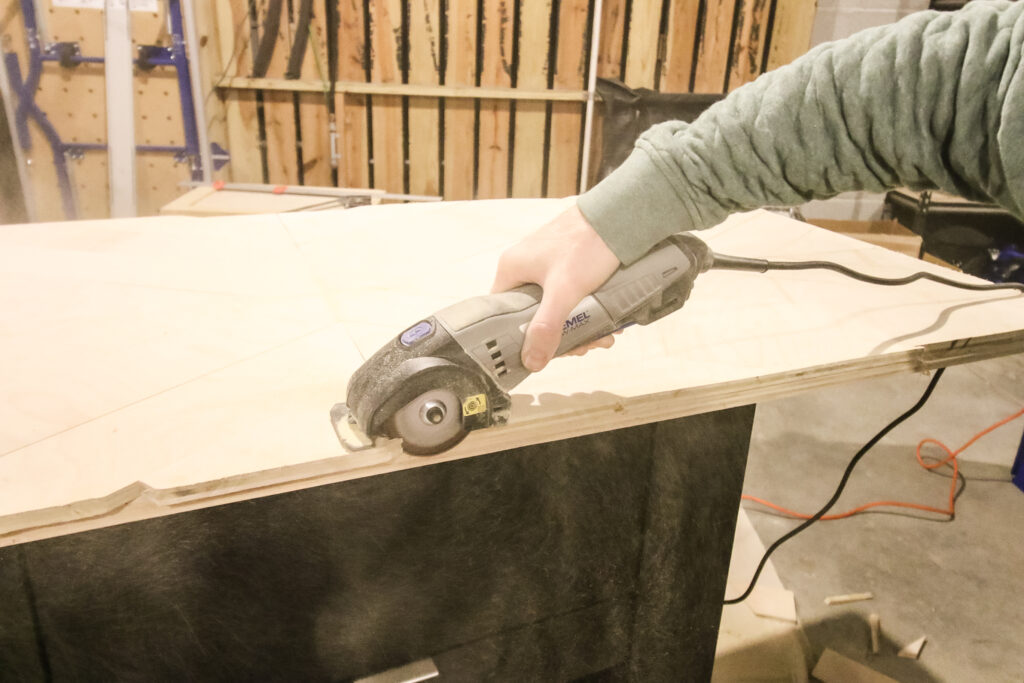
Step 2: Cut wood strips
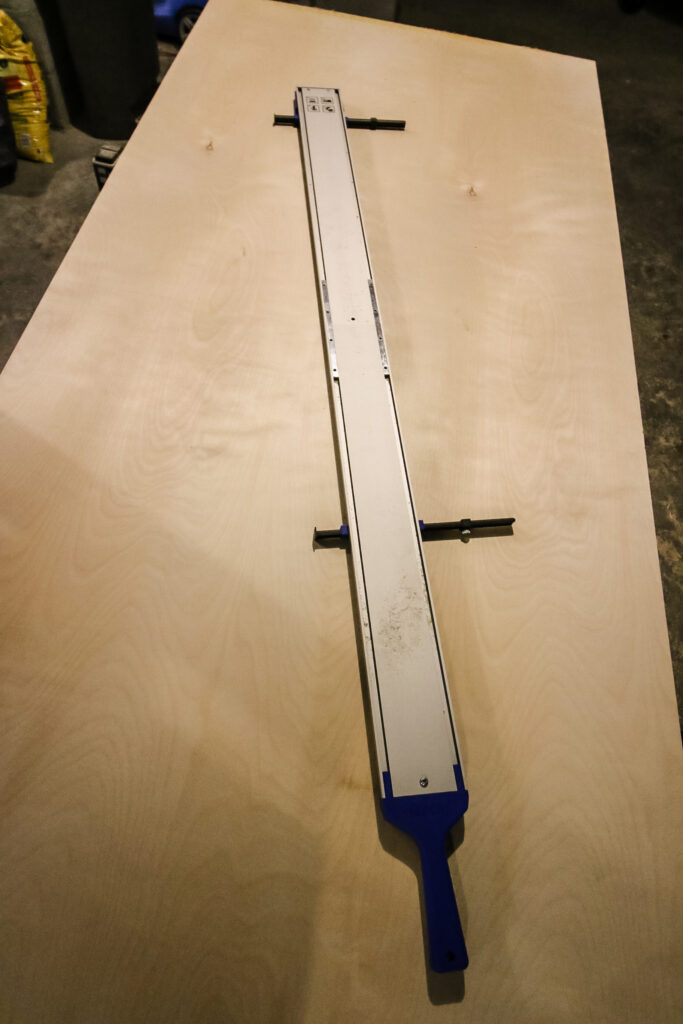
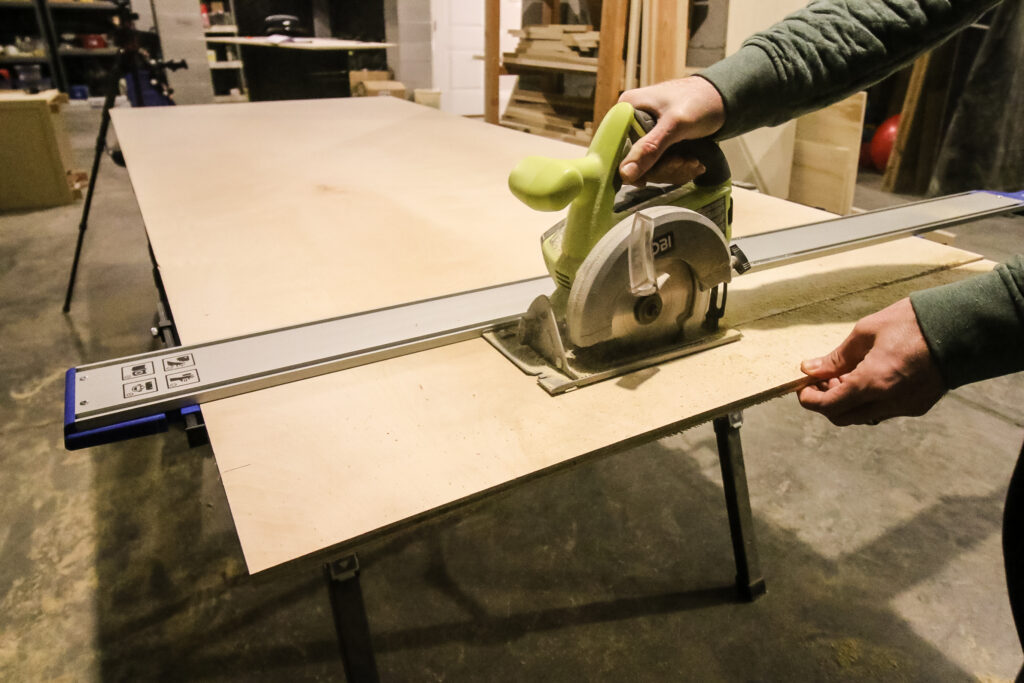
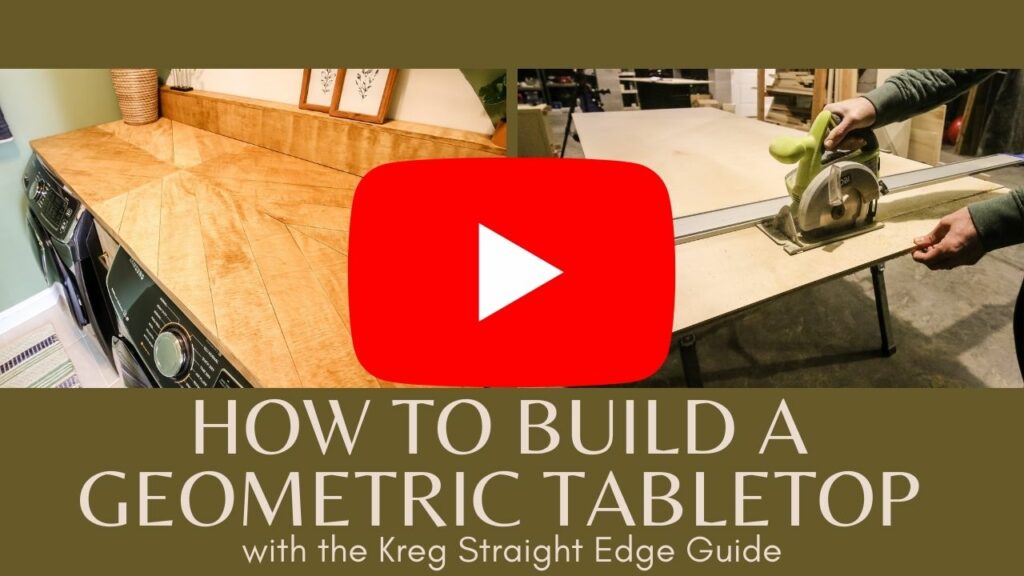
Since it's extremely difficult and unsafe to push a full sheet of plywood through a table saw, we used the brand new Kreg Straight Edge Guide to make accurate strips.
Make sure to check out our full review of the Kreg Straight Edge Guide and learn how it works!
The Straight Edge Guide is a great tool that lets you get perfectly accurate cuts with a circular saw across long areas.
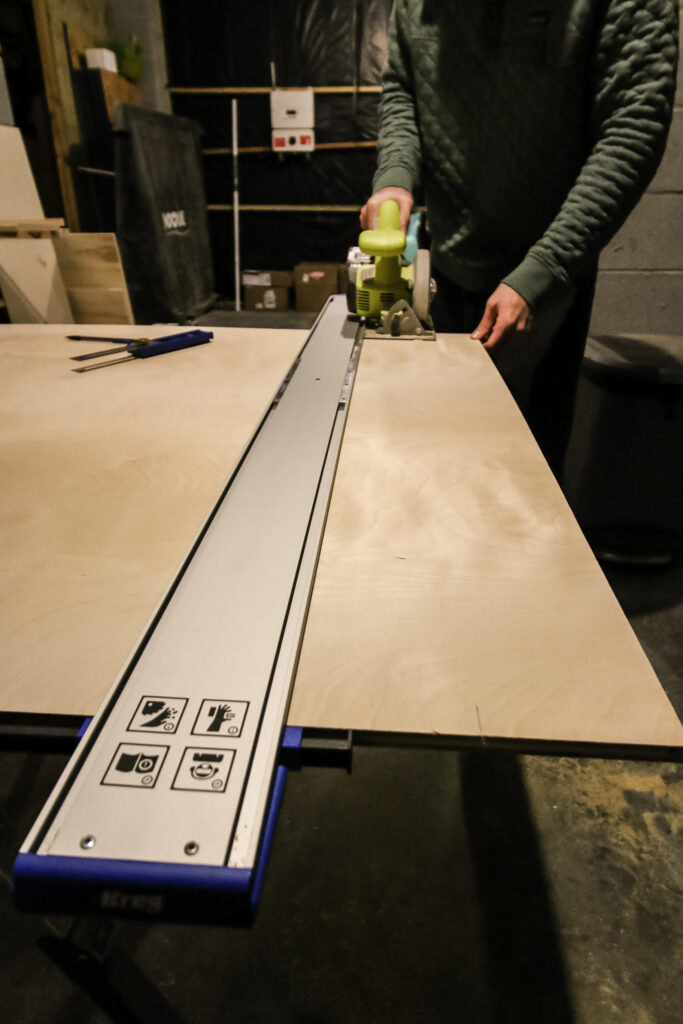
The Straight Edge Guide spans large sheets of plywood and serves as a fence for your circular saw.
We started by cutting two long strips across the entire 8' length of our plywood sheet that would later serve as our riser and shelf (more on that later).
Then, we set up the Straight Edge Guide to do rip cuts of 4" wide boards and cut down the rest of the sheet of plywood.
PS- We used our most-used tool in the shop, the Kreg Multi-Mark, to get that exact 4" width.
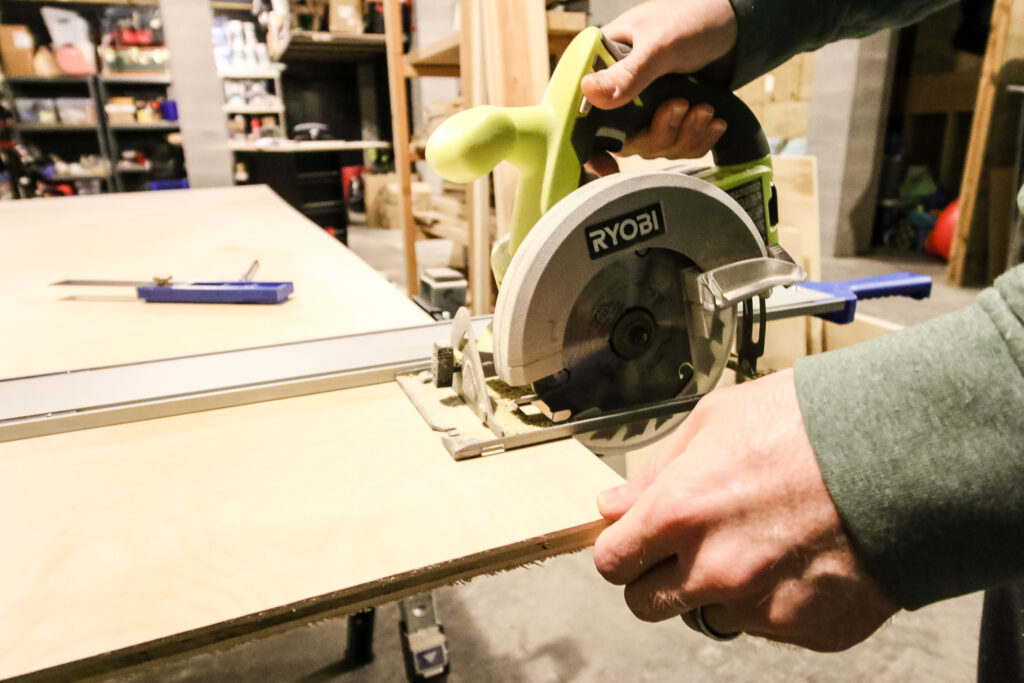
Step 3: Cut the angles
After ripping down all the boards, we got to work. We cut all of the angles for the boards and laid them in place one by one, working in each quadrant of the design at a time.
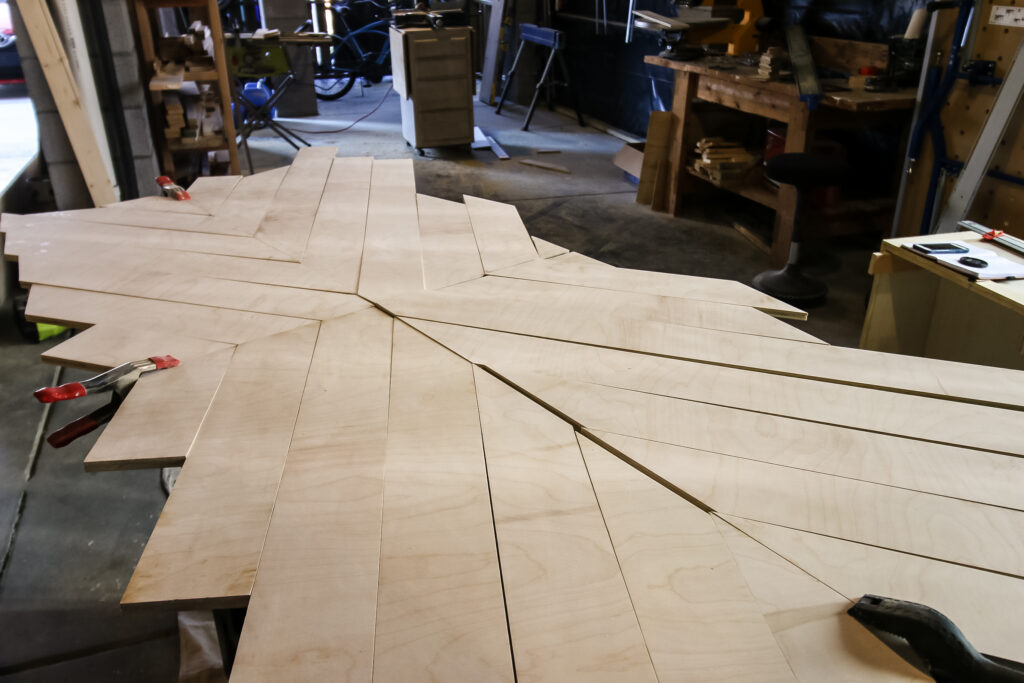
Each side was a mirror of the side next to it, so with each piece, we made four exact copies.
Step 4: Glue down the strips
Once all the cuts were made, we glued them on, quadrant by quadrant and clamped them all down with another plywood board across the top.
Step 5: Trim the excess
After everything was dry, we cut all the excess off around the edges.
Step 6: Sand
Use a sander to sand the top and sides for a smooth finish. Wipe clean.
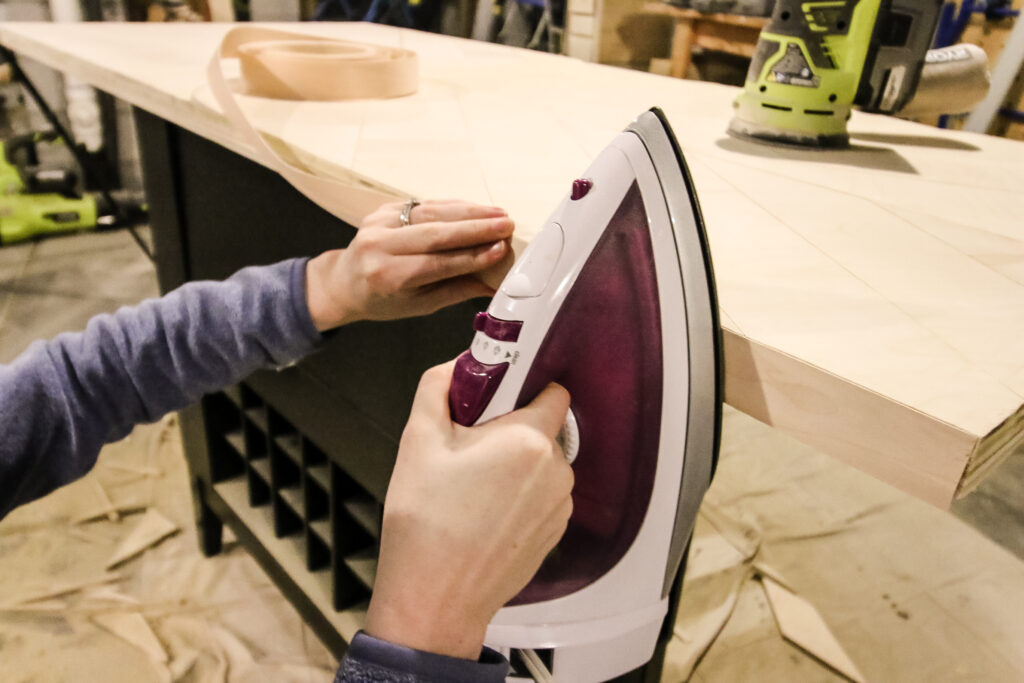
Step 7: Edge banding
After sanding smooth, we ironed on a strip of edge banding to cover the plywood edge and make it look much more finished.
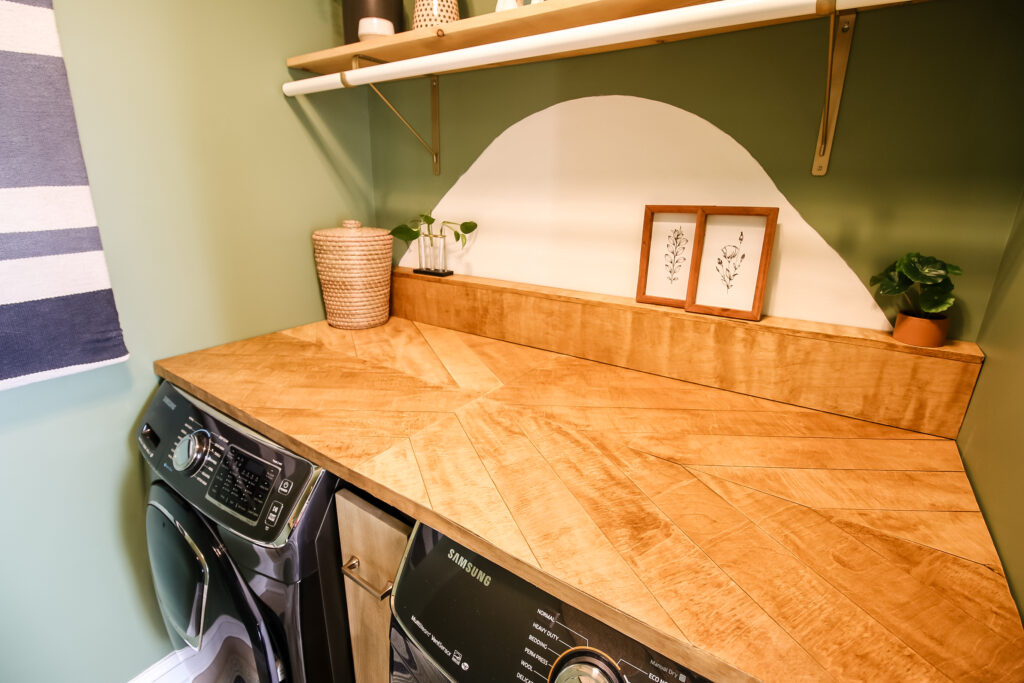
Building a riser to cover water hookups
The thing about laundry rooms is that there are a bunch of water hookups and large electrical outlets right behind the machines that prevent a counter from going 100% flush against the back wall.
To account for that, we built a 6" tall riser with a 3" shelf to put on the back. This allows the hookups to be completely covered but also we can pull the shelf away if we need to access the hookups.
Finishing touches
The last thing we did was stain the entire counter with a beautiful coat of Golden Oak stain.
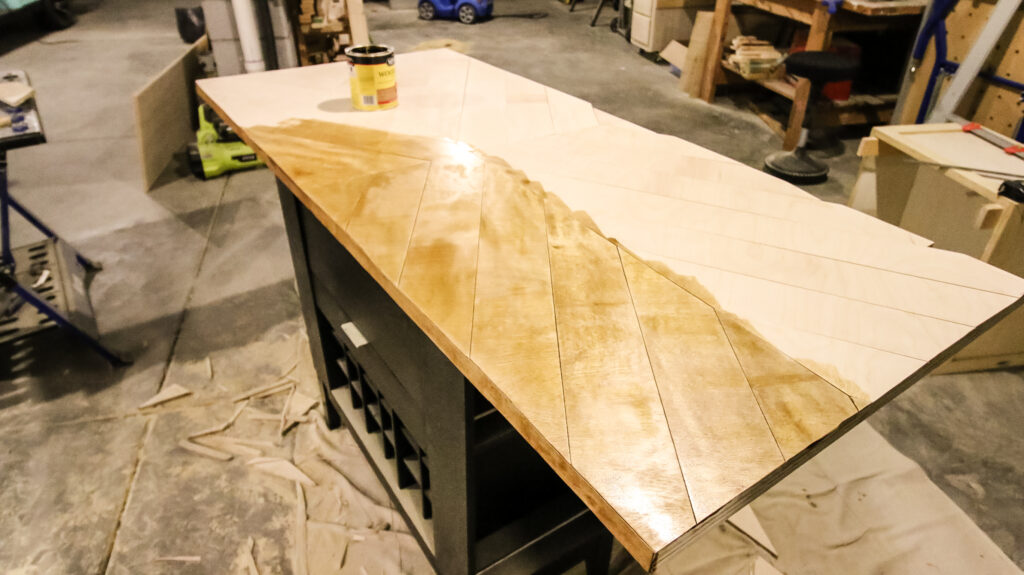
The stain made all the grain and angles pop and it was stunning.
We absolutely love how this geometric wood table top turned out and how stunning it looks in our laundry room!
Video tutorial
Be sure to watch the full video showing the process of making this countertop!

Looking for something?
We've been doing this since 2012 so we have a LOT of blog posts!
Search stuff like: Ceiling Projects | DIY Plant Stands | Thrift Flips

Hey there, I'm Sean, the woodworking enthusiast and builder behind CharlestonCrafted.com! Since 2012, I've been sharing the magic of turning raw materials into beautiful creations. I love teaching others the art and satisfaction of woodworking and DIY. I try to inspire fellow crafters to make something extraordinary out of nothing at all.


