Acrylic signs are really trending right now - especially for weddings! However, they can be really pricey to purchase on Etsy. So, here is how to make your own custom acrylic sign!
I'm not planning a wedding but instead wanted to make a sign to hang above my desk. But, you can use this same tutorial to make whatever design you prefer.
Acrylic is also known as plexiglass and can be purchased at hardware stores like Lowes or Home Depot or on Amazon.
If you plan to engrave your acrylic with a Cricut Maker, be sure that it is under 3mm thick.

How to make a custom acrylic sign
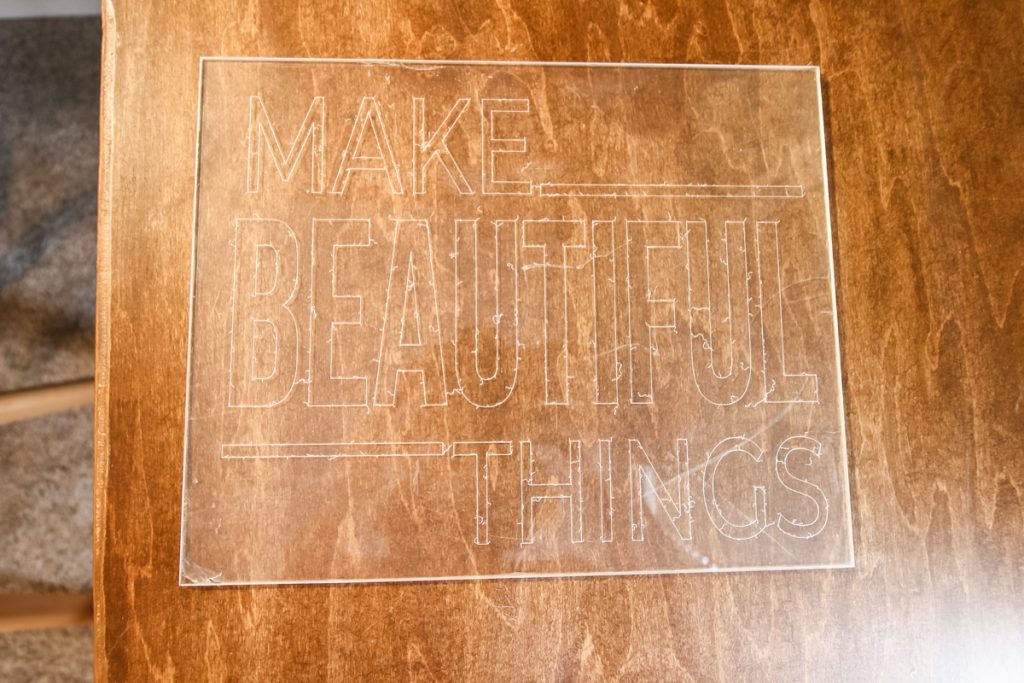
First, you need to design your design. I decided to use a pre-made design on Design Space.
If you want a wedding sign, select a font that you love and write your text with that!
Remember: the engraving tool will engrave the border of images/fonts and will not fill them in. For a single lined font, you need to select a writing font in design space!
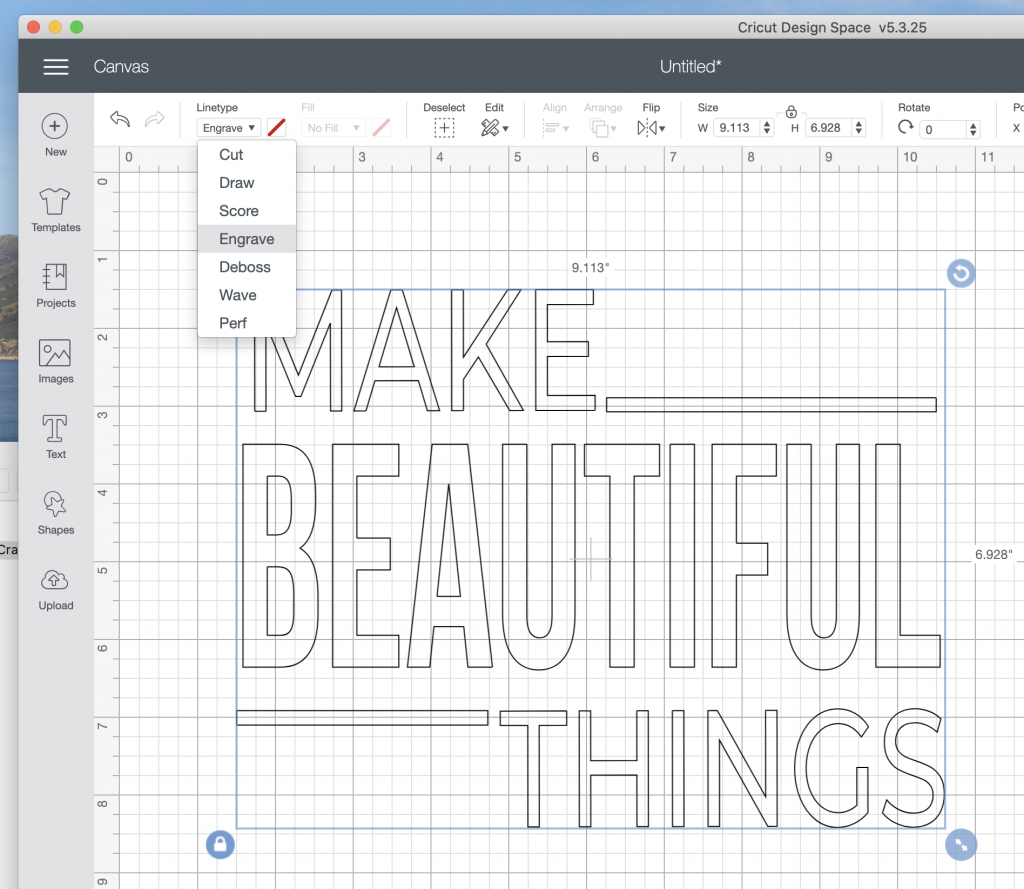
In the top left of Design Space, choose "line type" and change it to "Engrave".
This gives you a preview of the outline of your design.
Once you are happy, make it!
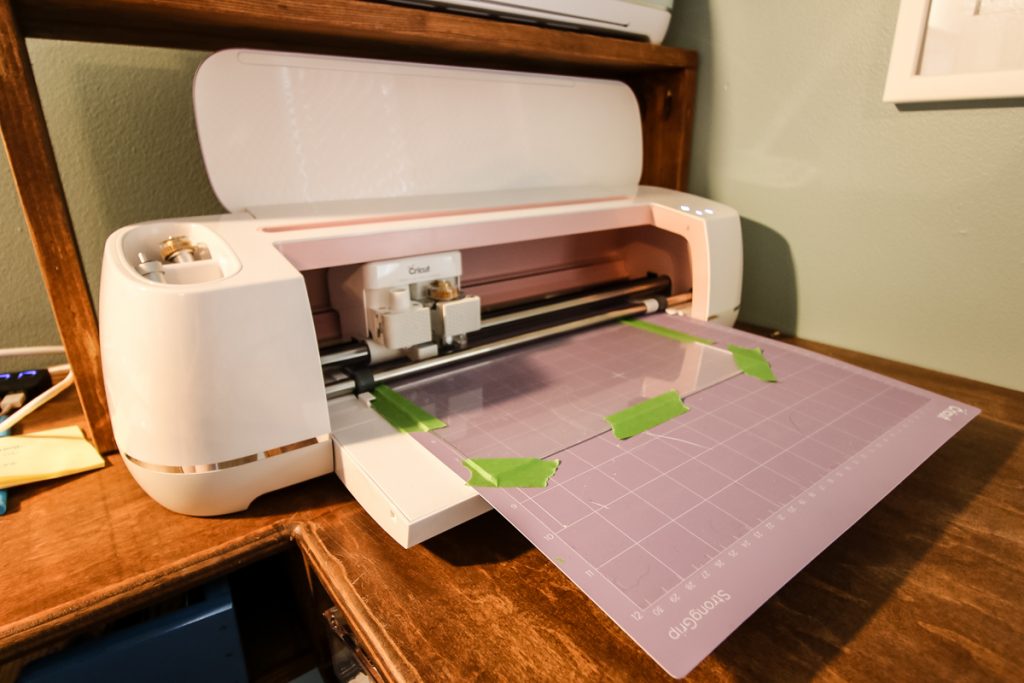
Place your acrylic on the purple mat and use tape to hold in place.
The most important step is to be sure that your design is centered exactly as you want it to engrave onto your acrylic sheet.
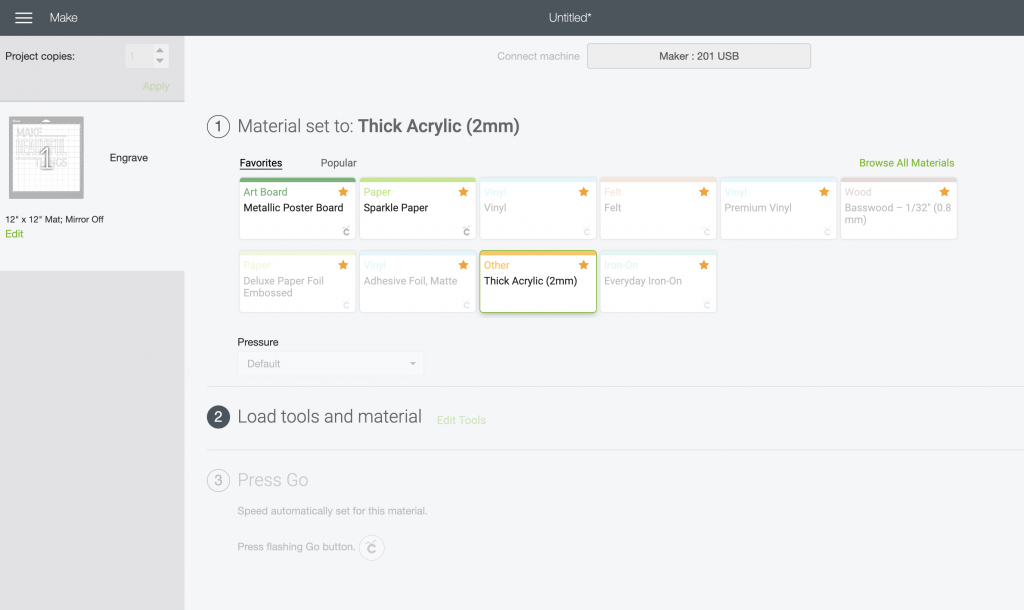
Set your material to acrylic and insert the engraving tool. Press go!
Once it's done, you will need to use a soft cloth or t-shirt to wipe off the little bits of acrylic chips that come off during the engraving process.
How to paint an acrylic sign
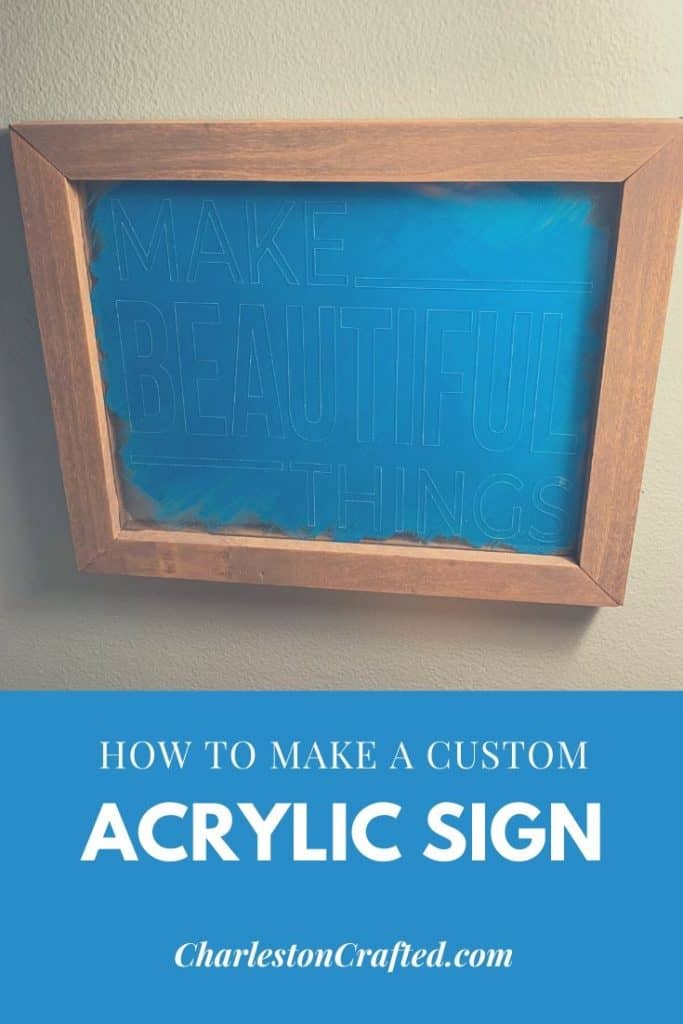
I wanted my acrylic sign to pop a bit off the wall, so I decided to paint the back of it.
To do this, I simply used a foam brush and dipped it into acrylic paint. Then I dabbed the brush to get off most of the paint!
Brush the paint across the BACK of the sign. Repeat until you get the desired effect.
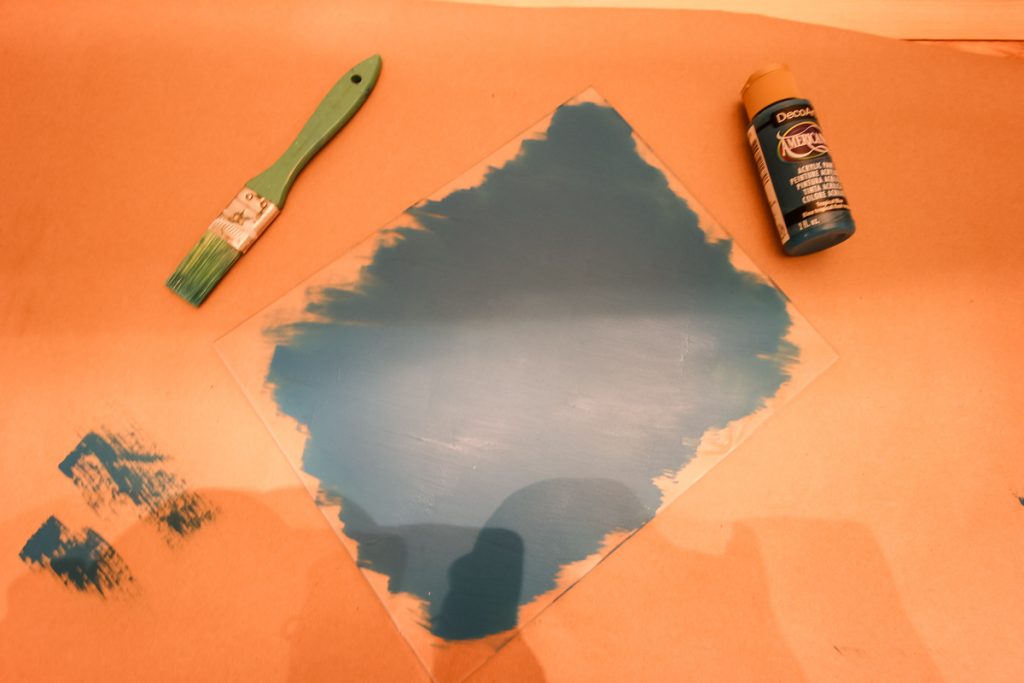
I let the paint dry between coats, because painting wet paint over wet paint often just smears.
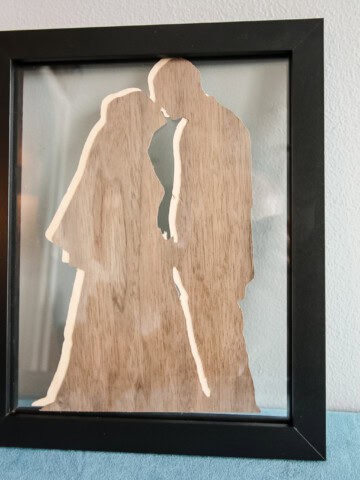
How to frame an acrylic sign
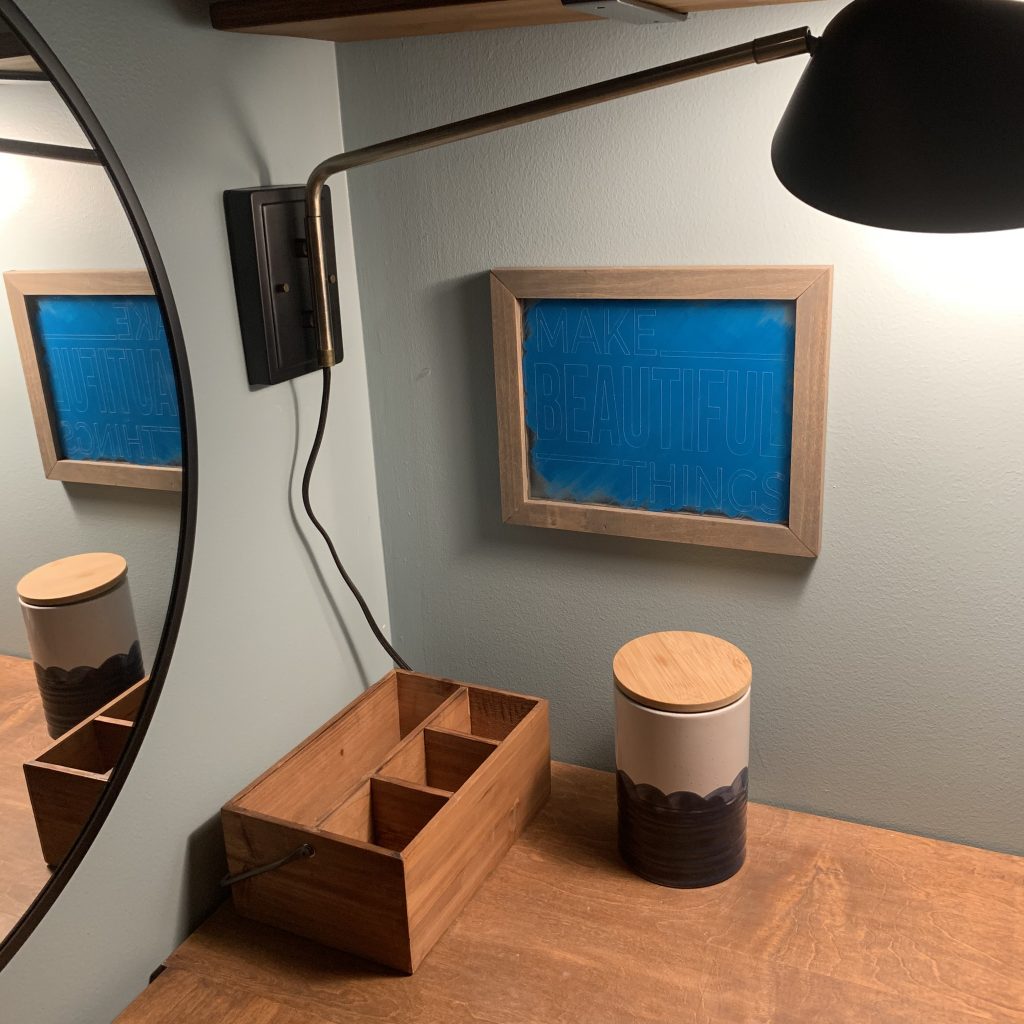
Since my frame was to be hung on the wall, I wanted it to have a wooden frame to make it pop!
Sean built this frame from scrap poplar boards. Each side of the frame is 1 ½" thick. In order to make the acrylic sign fit inside the frame, he ran to boards for the frame through the table saw to create a shallow groove.
He set the table saw at it's lowest setting, then pushed each board through. Then each board was cut with a 45 degree mitered angle and glued together with the acrylic inside.
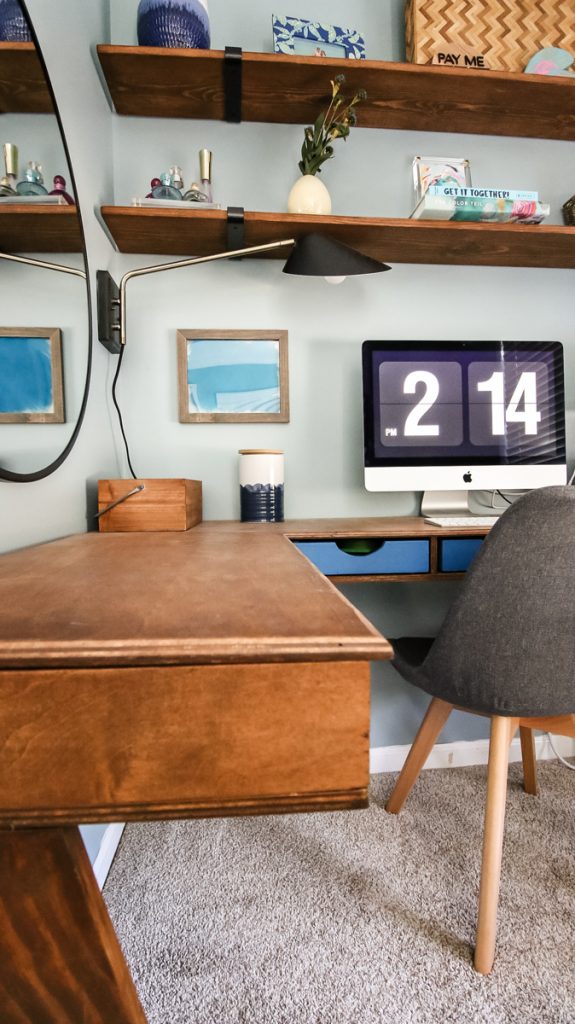
I hung the frame over my desk and I love how it turned out! The perfect pop of color, interest, and inspiration!
Can I write on acrylic?
Yes! The easiest way to write on acrylic is to use a paint pen! These work great if you want a painted calligraphy look. Just do several passes to make your font thicker in certain areas.
You could write on the front or back of the acrylic, depending on the look that you want (fully glossy or visible paint).
Can the Cricut cut acrylic?
The Cricut Maker can cut .020 sheets of acrylic with the knife blade on the basswood setting. Use the purple mat and tape your acrylic sheet to the mat before cutting.
Time to get making! Share your projects with us once you complete them!

Looking for something?
We've been doing this since 2012 so we have a LOT of blog posts!
Search stuff like: Ceiling Projects | DIY Plant Stands | Thrift Flips

Hello, I'm Morgan, half of the creative force behind CharlestonCrafted.com! With a passion for DIY that dates back to 2012, I've transformed three homes and now I'm dedicated to helping others craft their dream spaces. Let's turn your house into a home together!