• Skip to primary navigation
  • Skip to main content
  • Skip to primary sidebar
Charleston Crafted
  • DIY
  • Woodworking
  • Popular Posts
  • Blog
  • About
  • Shop
menu icon
go to homepage
  • DIY
  • Woodworking
  • Popular Posts
  • Blog
  • About
  • Shop
search icon
Homepage link
  • DIY
  • Woodworking
  • Popular Posts
  • Blog
  • About
  • Shop
×
Home » Building

Furniture Flip: Upholstered Stool to Herringbone Wooden Plant Stand

Published: Jan 24, 2018 · Modified: Jul 14, 2023 by Morgan · As an Amazon Associate, we earn from qualifying purchases. This site contains affiliate links. ·

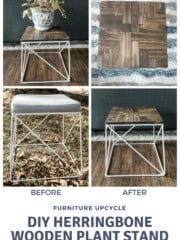
I am back today with another furniture flip for you! I started with this small stool. It was from Target in 2013. I love the metal geometric base but the upholstered cushion is pretty worn.

Since Sean built me a new vanity stool, I decided to try to replace the top of this one and transform it into a wooden plant stand with a herringbone patterned top.

Herringbone Wooden Plant Stand via Charleston Crafted

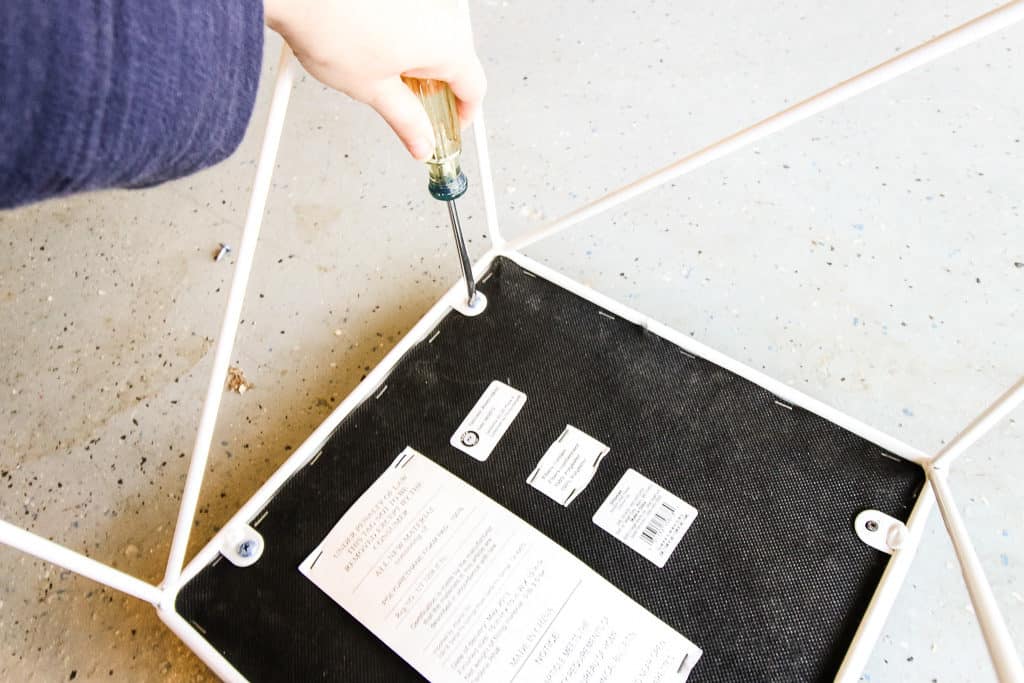
The first step was to remove the existing top. It was held into place with 4 screws that were really easy to remove.

Herringbone Wooden Plant Stand - Charleston Crafted

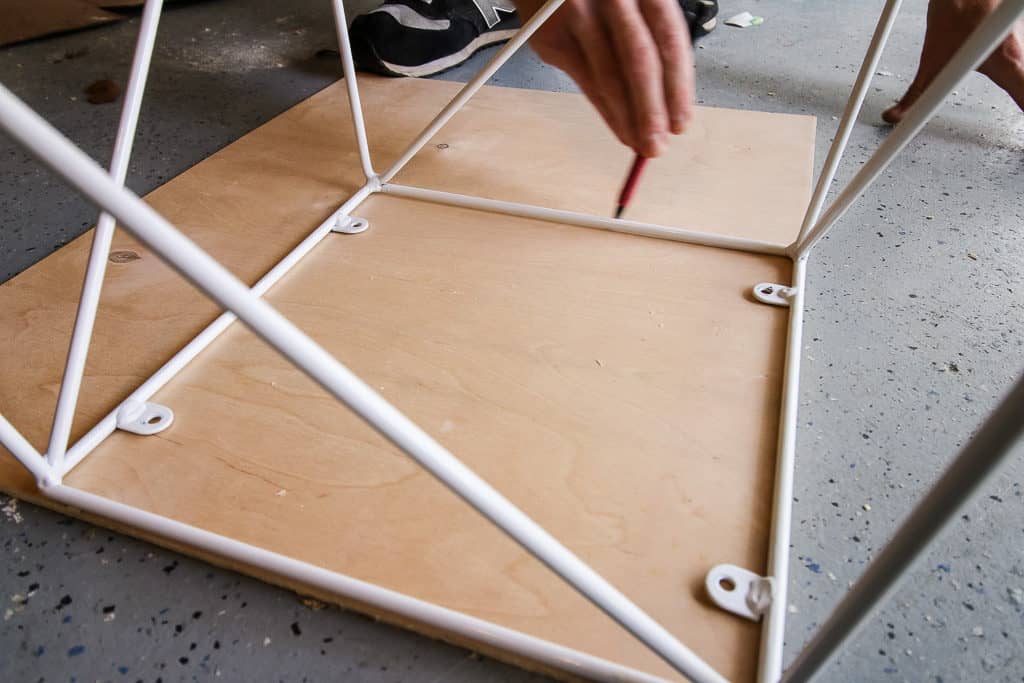
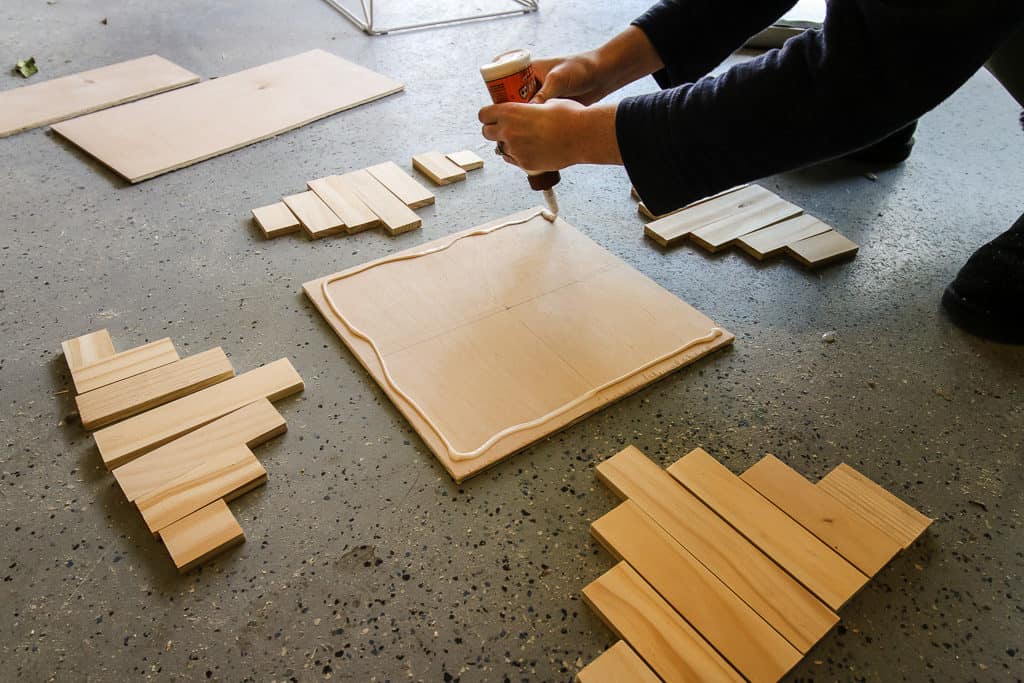
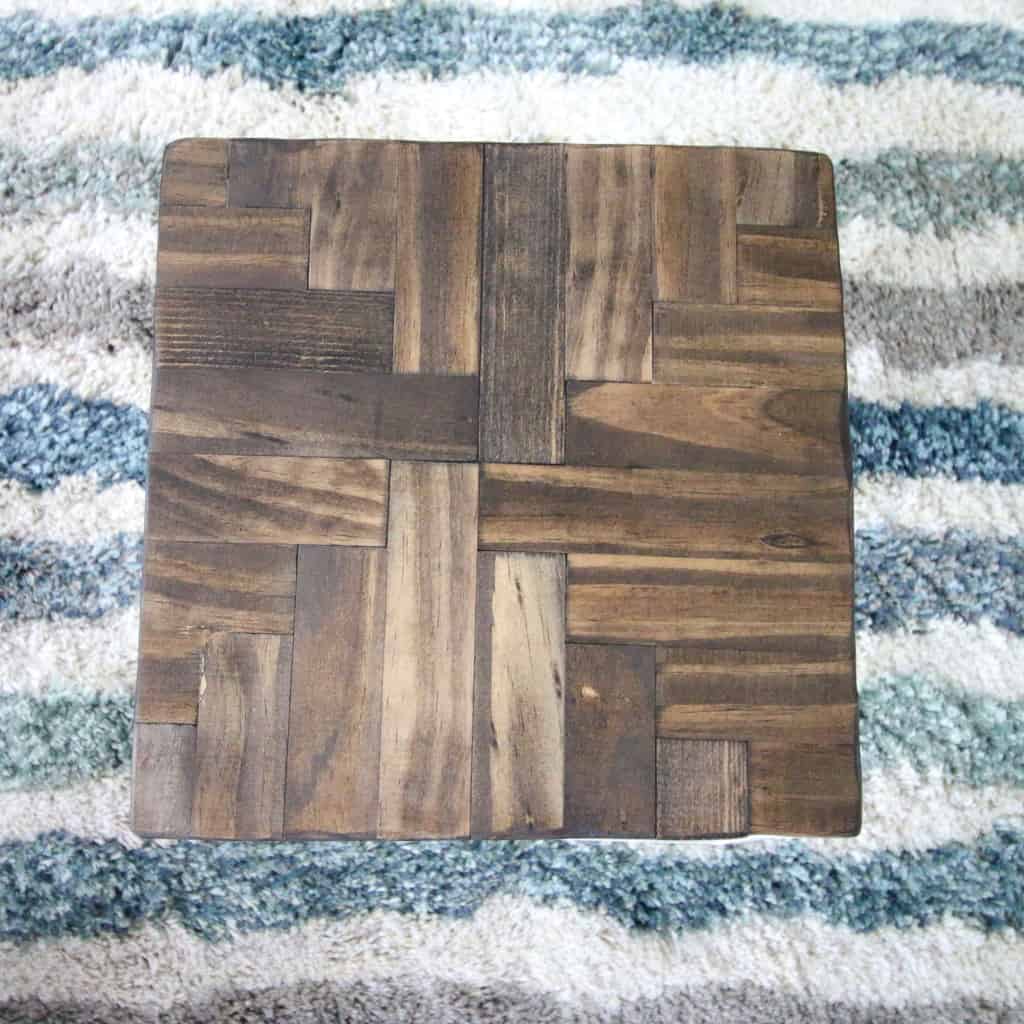
Next I needed to build the new top. I started with a piece of scrap ½ inch thick plywood. The top of the stool is 12" square, but I used a pencil to trace it exactly, just in case some of the edges were not perfect, it was more important that the top fit the base than the top be any specific size. Note: if you wanted the stool to be strong enough to sit or stand on, you might want to use a thicker plywood - I'd say at least ¾".

Herringbone Wooden Plant Stand - Charleston Crafted

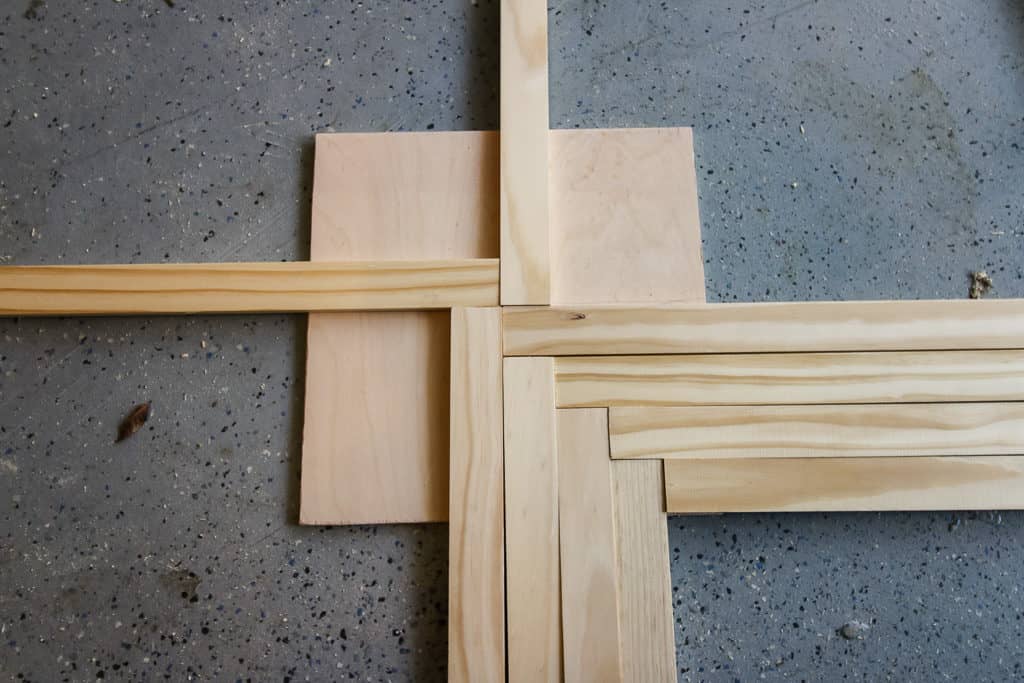
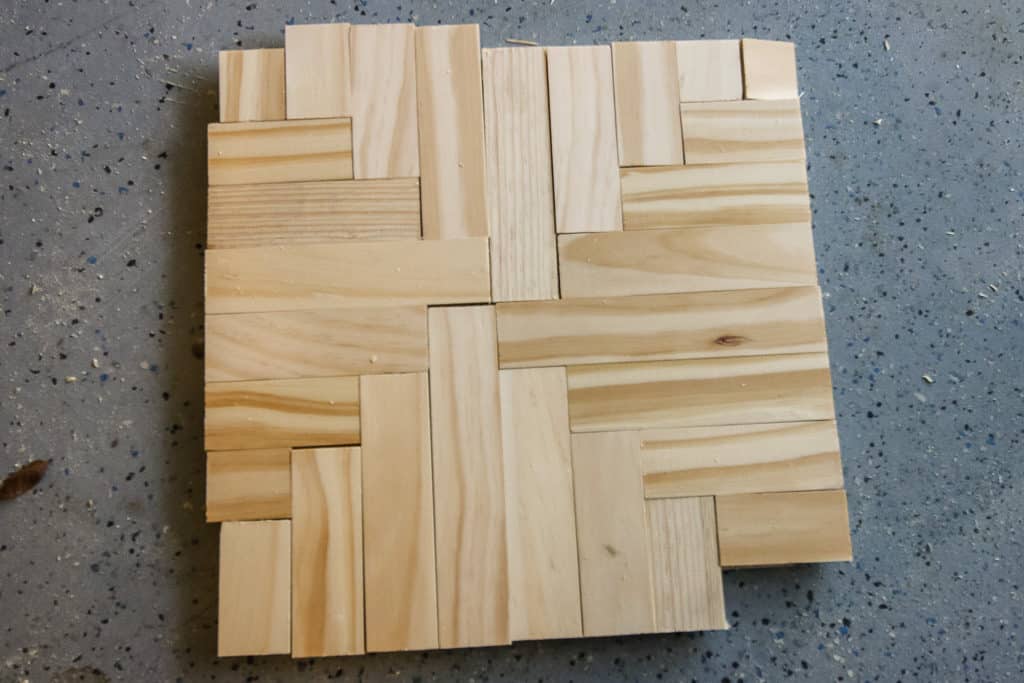
To add a herringbone detail to the new top, I used eight 2"x¼" boards. I used a pencil and ruler to mark the center of the square and used that as my starting point. I added boards in an alternating herringbone pattern to one quarter of the top at once.

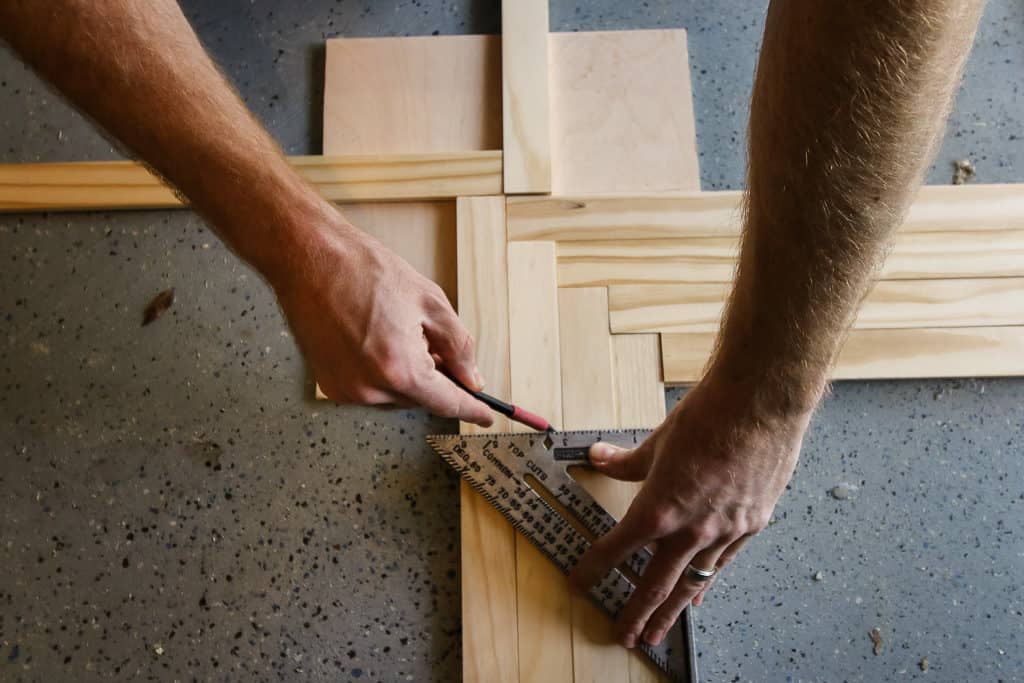
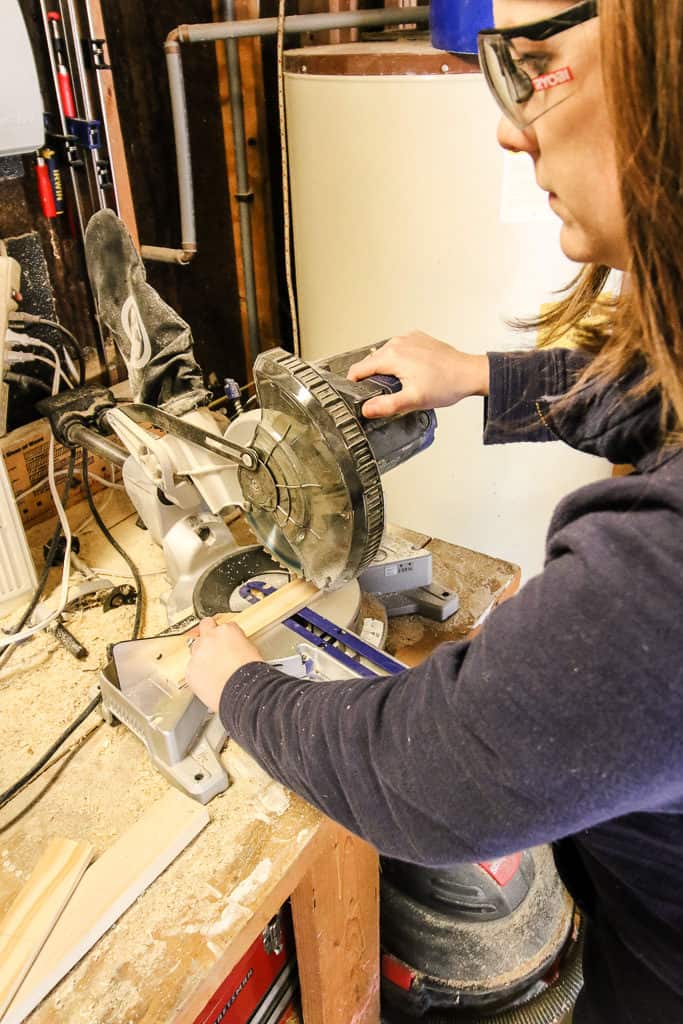
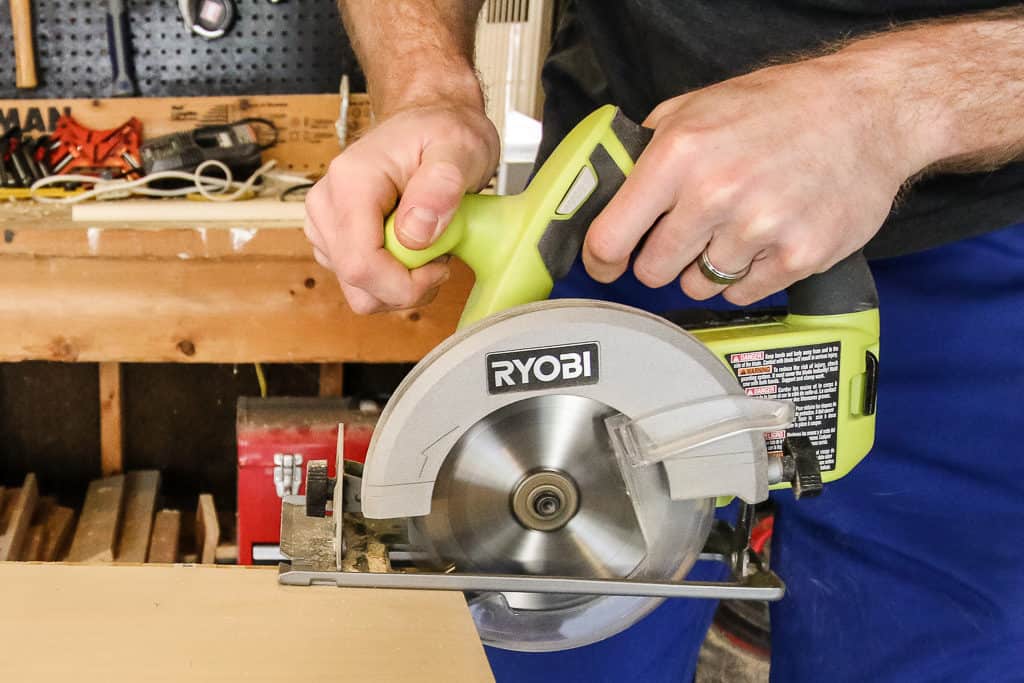
I used a speed square to draw a cut line across the boards, leaving a little wiggle room. It's better to be too long than too short! I used the circular saw to cut the boards along these lines, and then repeated this 4 times to cover the whole stool top.

Herringbone Wooden Plant Stand - Charleston Crafted

I applied wood glue liberally all over the wood square and placed each of the cut boards into place. I used clamps and allowed it to dry for 24 hours.

Herringbone Wooden Plant Stand - Charleston Crafted

Once it was totally dry, I used the circular saw to cut any excess overhang wood off. I then used my sander to smooth the top and the edges.  I took extra care to round off the corners and any sharp edges for a more finished look.

Herringbone Wooden Plant Stand - Charleston Crafted

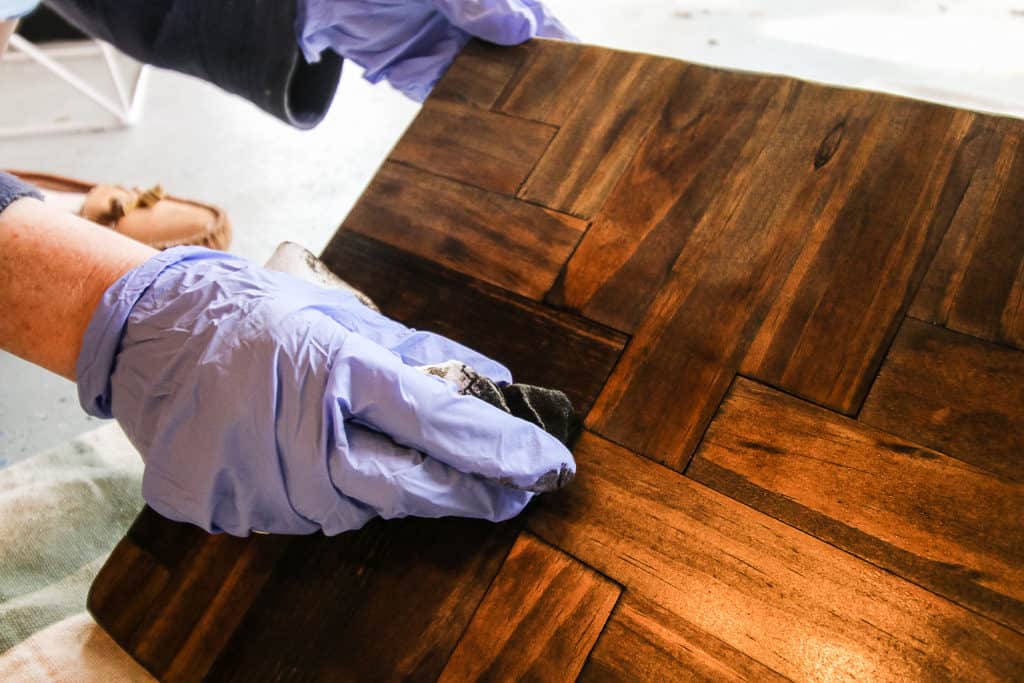
I applied one coat of stain (the color is Dark Walnut) and 2 coats of polyurethane.

Be sure to check out our Dark Walnut by Minwax wood stain review!

Herringbone Wooden Plant Stand - Charleston Crafted

All that was left was to screw the top into the base using the same 4 screws that were holding the original upholstered top in place.

Herringbone Wooden Plant Stand via Charleston Crafted

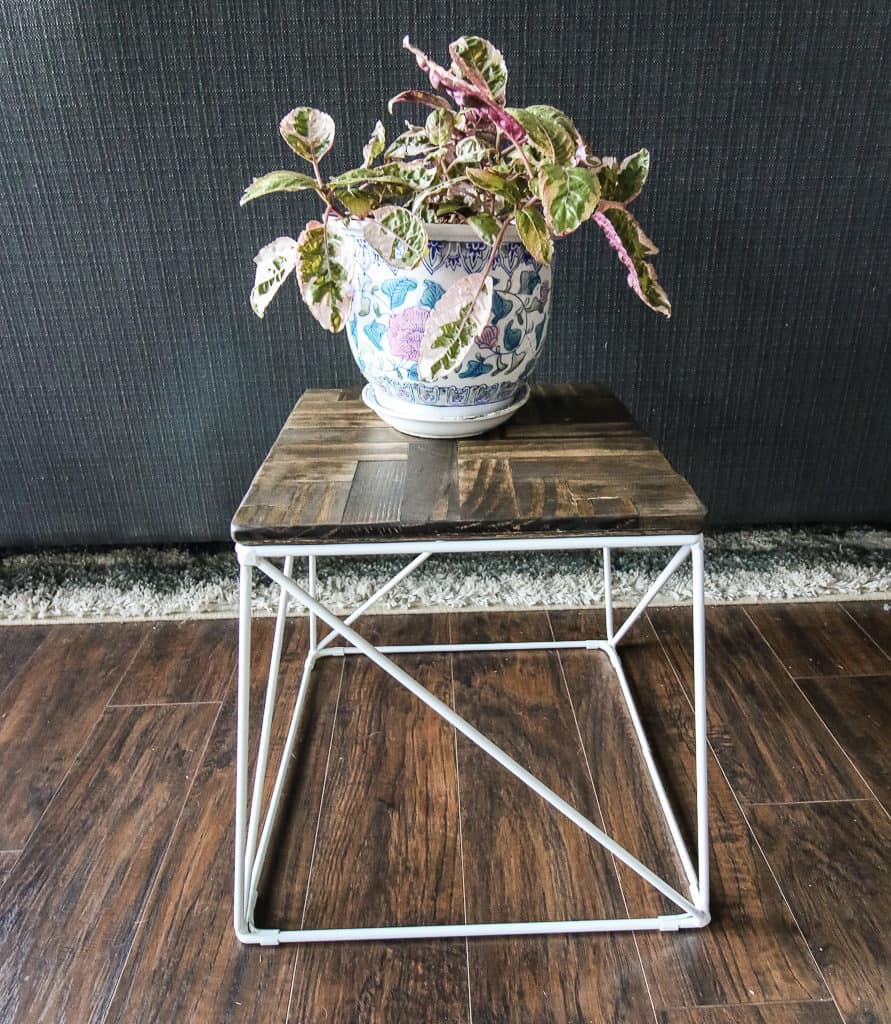
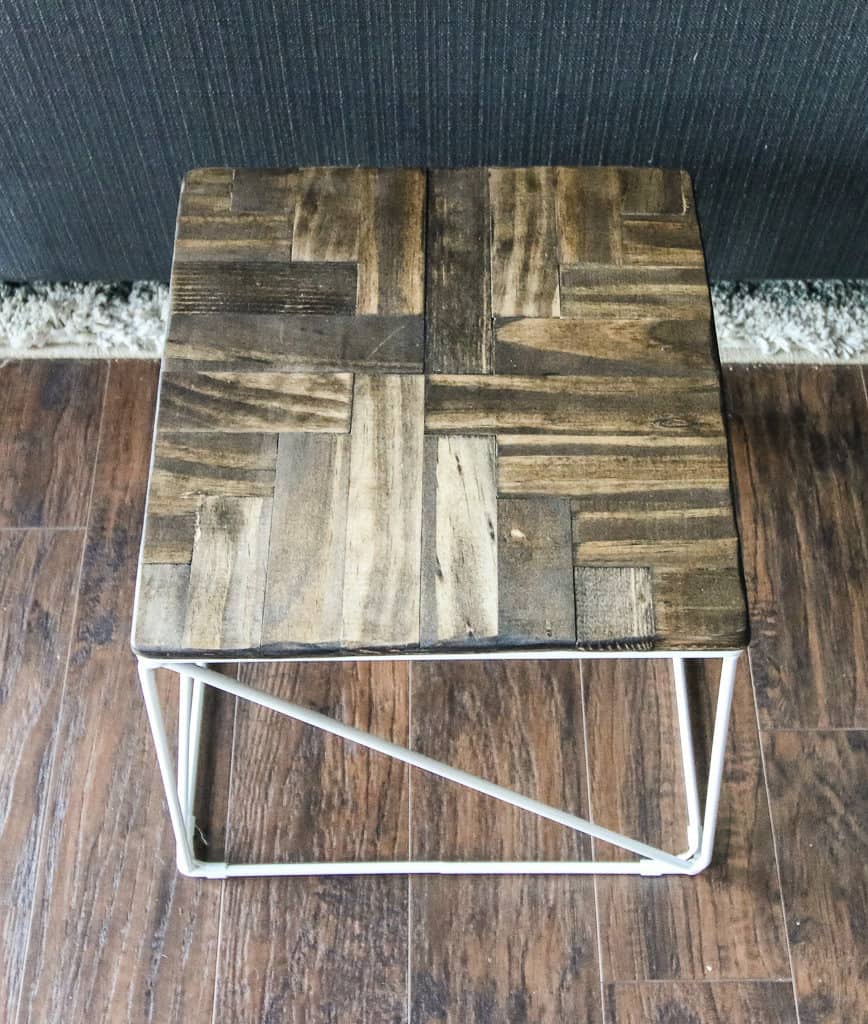
I love how the herringbone wooden top looks with the geometric white metal base! It's the perfect plant stand now and I really love how I was able to reuse a piece of furniture that I was planning to give away.

Have you been up cycling any furniture lately?


Want to learn to flip furniture for a profit? We have a whole resource library of files to help you get started! Sign up for free:

Love this project? Here are some other DIY plant holders:

Scallop planter from pallet wood

3 Tiered corner plant stand

Peacock chair to a plant basket

Foot stool to a herringbone plant stand

Elevated wood plant stand

Slatted plant stand

Wood house planter

Click here to see all of our favorite DIY plant stand ideas.

Charleston Crafted Signature

Follow us on:
Pinterest | Instagram | TikTok | YouTube | Facebook | Amazon Storefront | LTK Shop

Looking for something?

We've been doing this since 2012 so we have a LOT of blog posts!
Search stuff like: Ceiling Projects | DIY Plant Stands | Thrift Flips

Charleston Crafted logo banner
Morgan headshot cropped
Morgan

Hello, I'm Morgan, half of the creative force behind CharlestonCrafted.com! With a passion for DIY that dates back to 2012, I've transformed three homes and now I'm dedicated to helping others craft their dream spaces. Let's turn your house into a home together!

More Building

  • How to build a DIY gate pergola- Charleston Crafted
    How to build a DIY gate pergola
  • DIY modern rolling storage table - Charleston Crafted
    DIY modern rolling storage table
  • DIY folding desk for walking pad - Charleston Crafted
    DIY folding desk for walking pads
  • DIY cube storage console table - Charleston Crafted
    DIY cube storage console table

Primary Sidebar

Charleston Crafted about us image

Hey y'all!

We are Morgan & Sean McBride and we are crafting our home together in Charleston, South Carolina.

More about us

Popular Posts

  • DIY Coffered Ceiling
    DIY Coffered Ceiling
  • How to Make DIY Concrete Pumpkins via Charleston Crafted
    How to Make DIY Concrete Pumpkins
  • How to Make a Cupid's Arrow Valentine's Day Wall Hanging with felt on the Cricut
    How to make a Cupid's Arrow Valentine's Day Wall Hanging
  • Our Tropical Oasis - A backyard Hammock area - Charleston Crafted
    Our Tropical Oasis

Recent Posts

  • fisherman aesthetic home inspiration
    Fisherman Aesthetic Decor for Your Home
  • Senix Tools Review- Charleston Crafted
    Are Senix power tools any good?
  • Your Weekend To-Do List: 15 Things to Do for Summer Home Upkeep
    Your Weekend To-Do List: 15 Things to Do for Summer Home Upkeep
  • How to stain wood with RIT dye - step by step instructions
    How to stain wood with RIT dye

Privacy Policy

Footer

↑ back to top

Navigation

  • Home
  • Blog
  • Contact Us
  • Terms of Use
  • Disclaimer

Newsletter

  • Sign up for emails and updates
  • Follow us on Instagram
  • Work with Us

Browse by Category

  • Woodworking
  • Home Projects
  • Paint Colors
  • Room Reveals

© 2025 The Charleston Crafted Blog LLC DBA “Charleston Crafted” and “CharlestonCrafted” (also known as N/A) / All Rights Reserved.
Official Website: (Charleston Crafted)
Registered in USA (Co. Reg. No.: 565586)
Address: Charleston, USA 29414, South Carolina
Contact Phone: Not applicable — contact is via email: sean@charlestoncrafted.com

DISCLAIMER: The content on this website is provided for general informational purposes only and is not intended as professional advice. The Charleston Crafted Blog LLC and The Charleston Crafted Blog LLC make no representations or warranties—express or implied—regarding the accuracy, completeness, or suitability of the information contained herein. Any reliance you place on this information is strictly at your own risk. In no event shall The Charleston Crafted Blog LLC or The Charleston Crafted Blog LLC be liable for any loss or damage, including without limitation, indirect or consequential loss or damage, arising from the use or inability to use this website. This website is the official website of The Charleston Crafted Blog LLC.

AFFILIATE DISCLOSURE: This website contains affiliate links. If you click through and make a purchase, we may earn a commission at no extra cost to you.

As an Amazon Associate, I earn from qualifying purchases.

Site Editor: Morgan Smith McBride

Copyright © 2025 Charleston Crafted