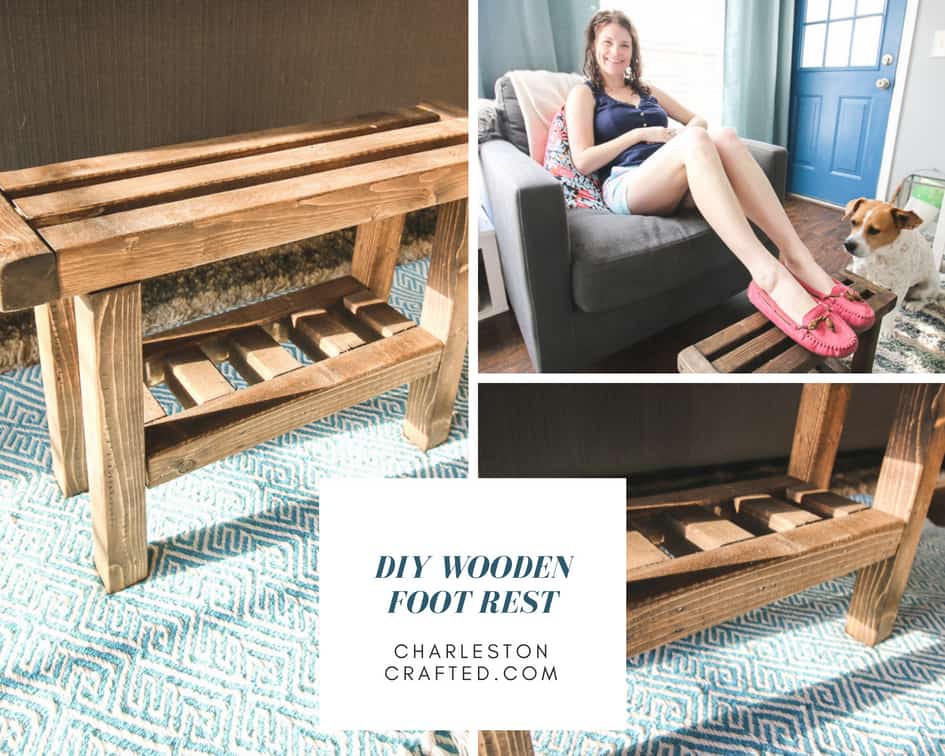
Want to build a wooden foot rest for under your desk? Check out this simple step by step tutorial!
When Morgan's office switched from desktop computers to laptops, everyone was happy about the technology upgrade, except Morgan lost her foot rest.
She always put her feet on top of her computer tower, and was really sad about the loss. So, I decided to make her a new DIY wooden foot rest.
This foot rest is very simple to build, but has a little bit of unique style to it.
This is a great beginner level woodworking project and would make a thoughtful gift for the holidays, too! I know Morgan sure did love it!
She's going to use it at work, but you could build this DIY desk foot rest and use it anywhere your feet desired.
If you are working from home, this is a great way to get more comfortable while stuck on your butt all day.
Wherever you need to kick up your feet, this foot rest is sure to help you out!
How to make a DIY Foot Rest
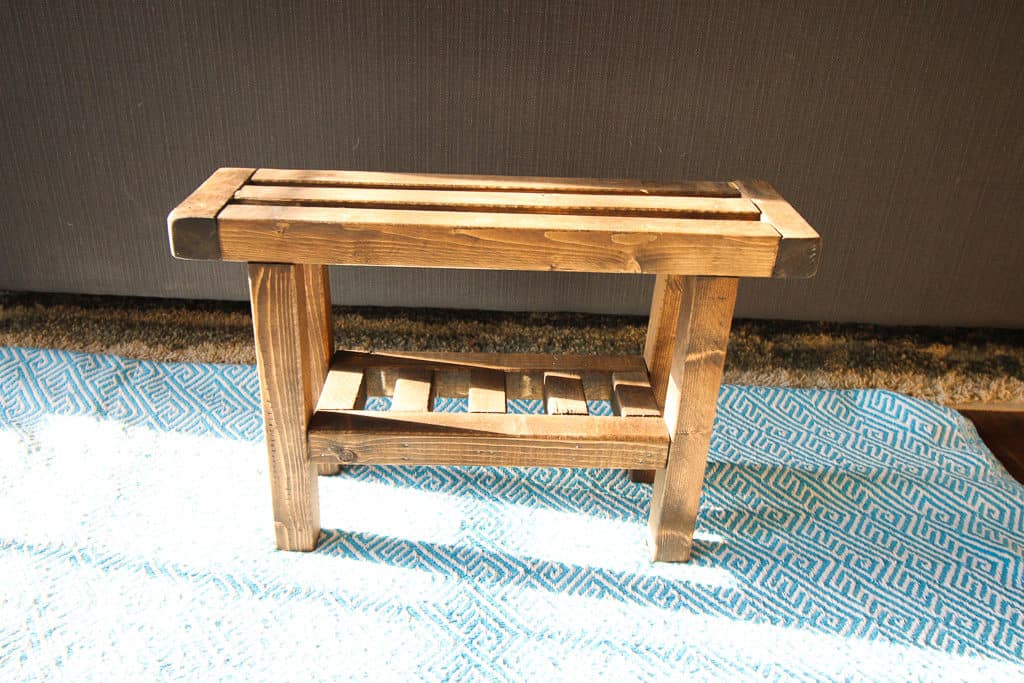
I built this in a Japanese-inspired style that was the perfect height for her feet.
She is 5'6" tall, so if you are extremely taller or shorter than that, you may prefer to adjust the height.
I built the entire foot rest out of 2"x2" wood, which keep in mind is actually 1.5"x1.5".
It uses a lot of really small cuts of boards, so this would be a great scrap wood DIY project, too!
Tools needed:
- Saw of choice (miter saw, circular saw, table saw, etc)
- Sander
- Drill
Supplies needed:
- 2"x2" lumber - 155" total, cut as stated below
- ¼" dowel
- Screws
- Wood glue
- Sanding paper for sander
- Stain, paint, or polyeurathane of choice + brush to apply
Steps to make an under desk foot rest DIY
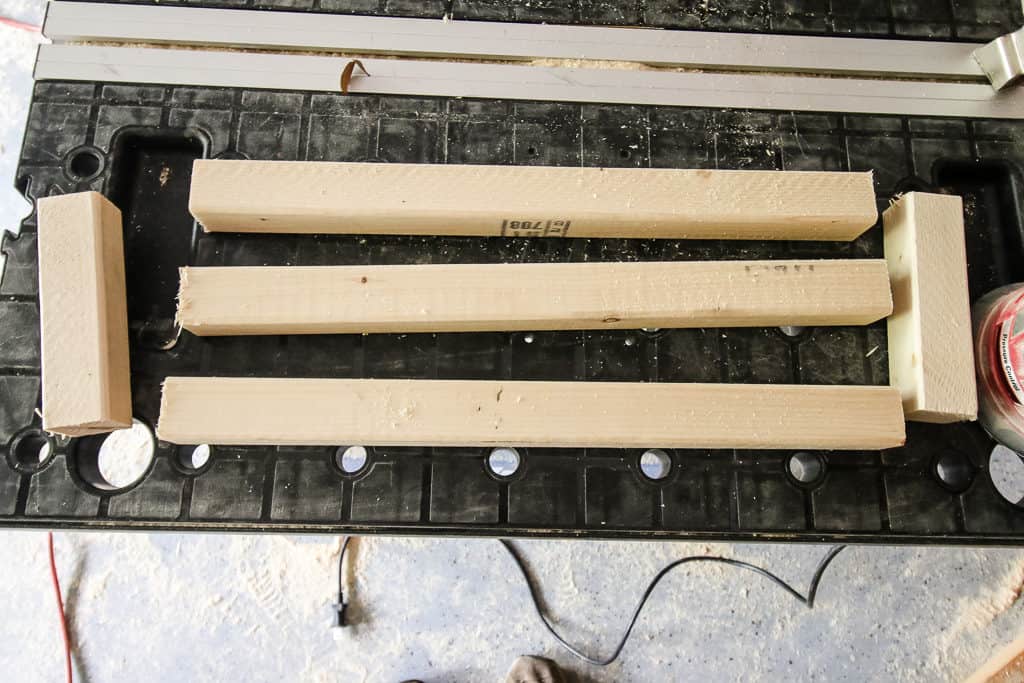
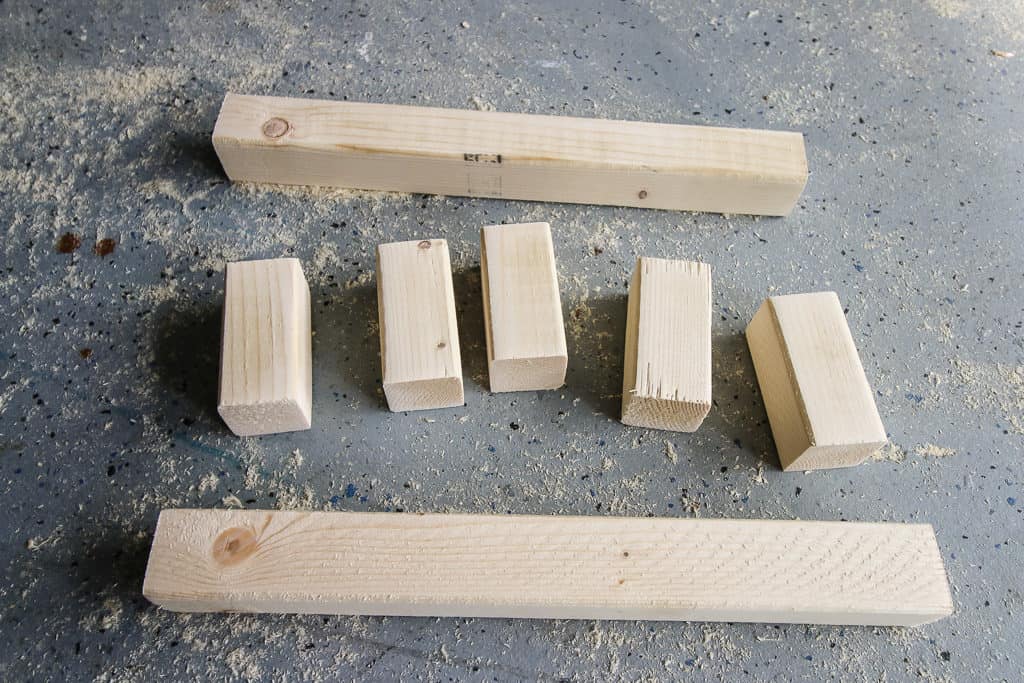
Step 1: Make your cuts
Cut List:
Top:
- two- 6" (outside edges)
- three- 18" (inner beams)
Bottom:
- four- 12" (legs)
- two- 13" (outer edges)
- five- 3" (inner beams)
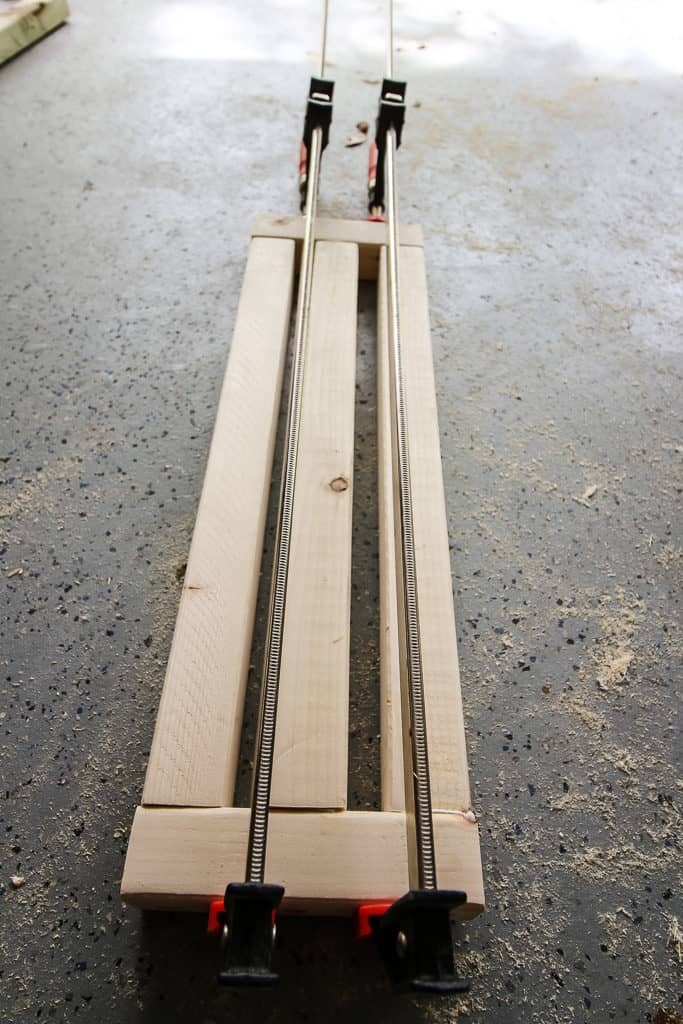
STEP 2: Assemble the top
First, I built the top. I attached the long 18" pieces to the 6" pieces.
I used dowels for this, by drilling holes into the ends of the long pieces and through the short pieces, but you could glue the top up or use nails or screws.
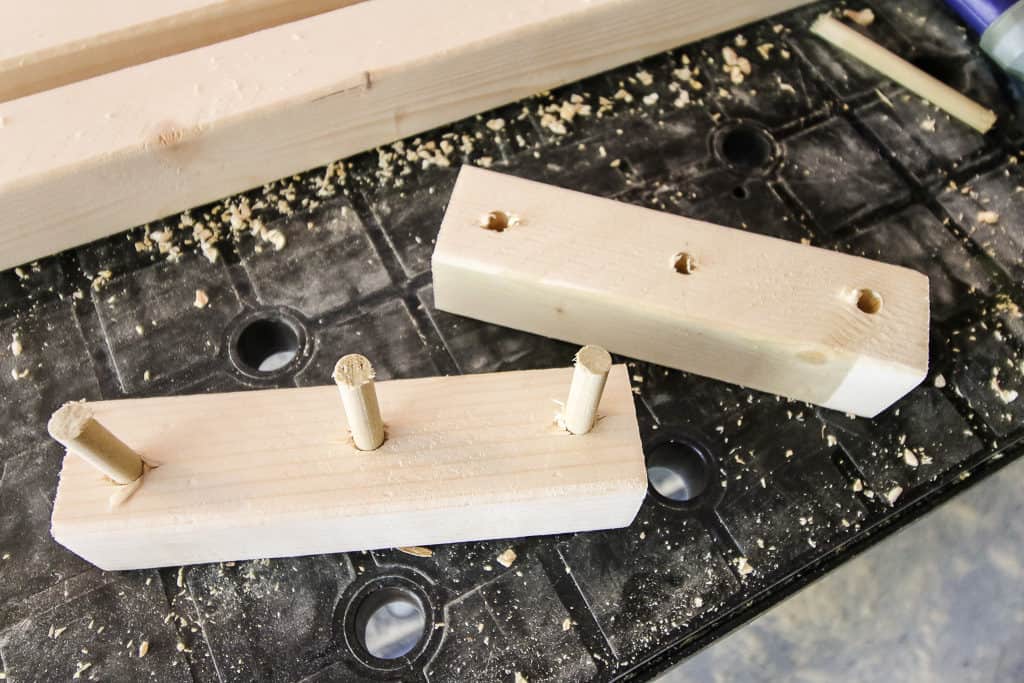
STEP 3: Assemble the base
For the bottom, I used nails to attach the 3" pieces to the inside of the 13" pieces to form what looks like a ladder.
Then I attached this lower ladder pieces to the legs about about 4 ½ inches to 6 inches up.
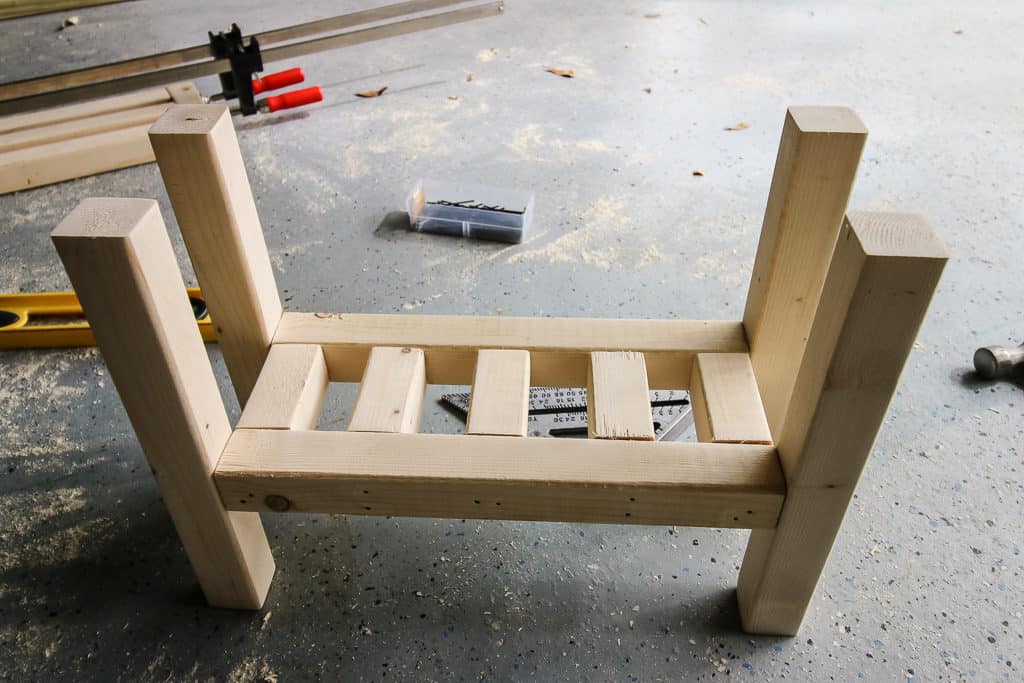
STEP 4: Attach the top to the base
Next, I attached the top to the bottom. For this, I just used Gorilla Wood Glue and clamped it together.
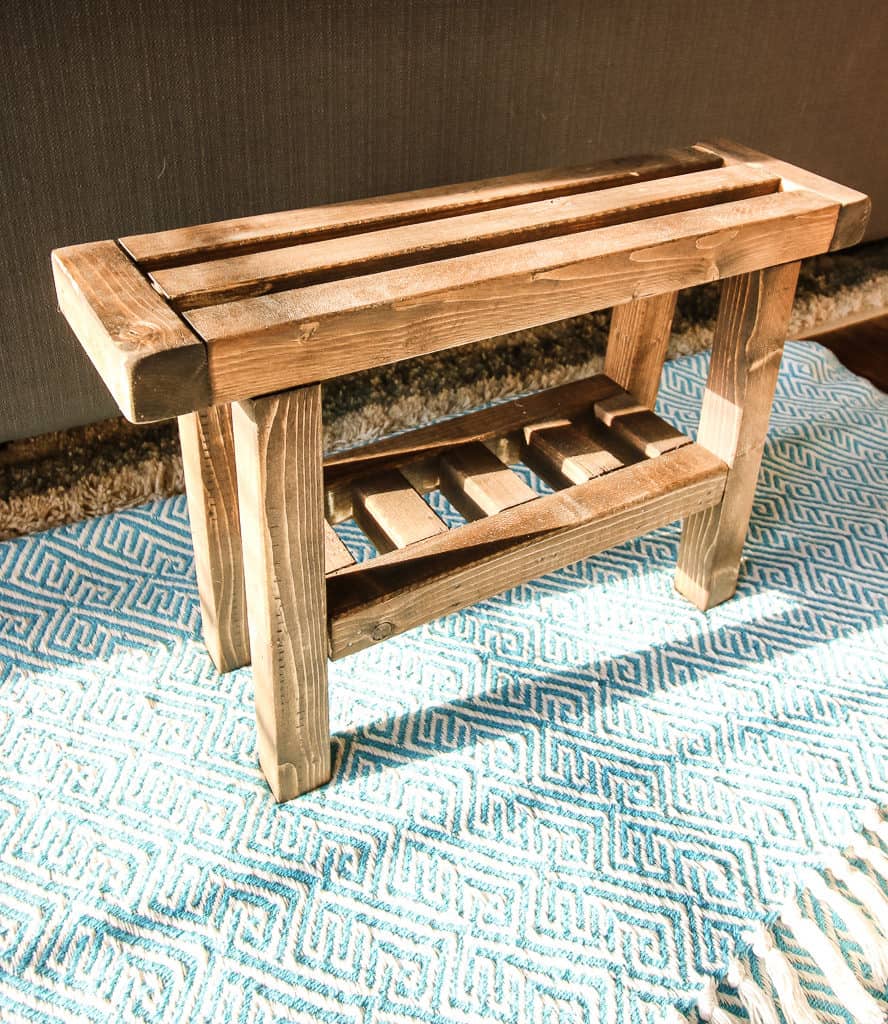
STEP 5: Paint or stain
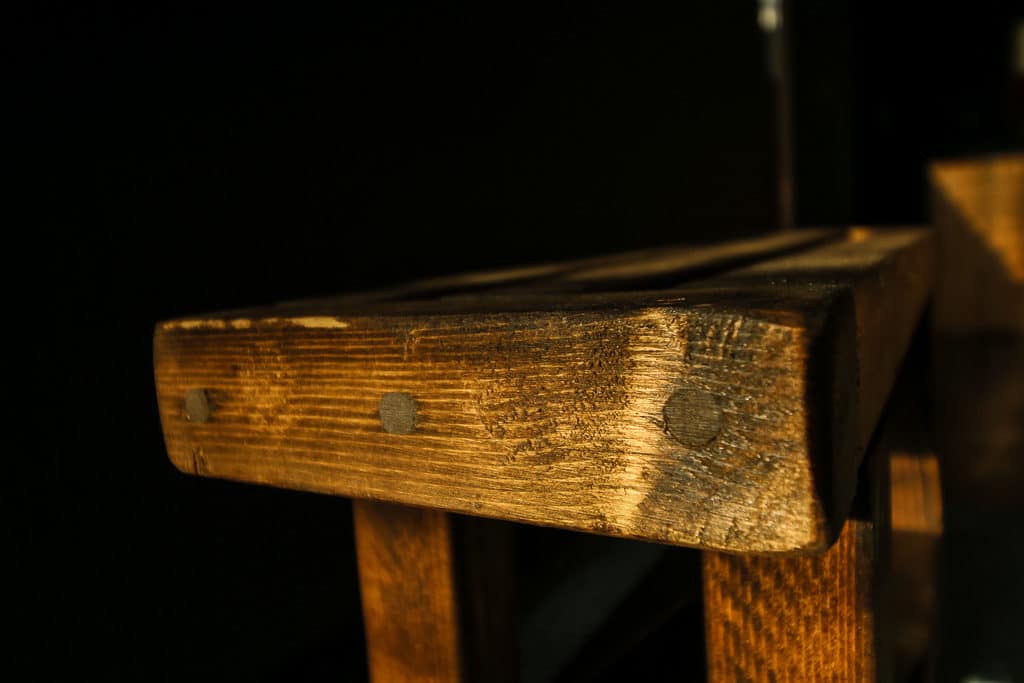
Finally, I added a dark walnut stain to the whole thing. You could paint or stain it, but then apply polyeurathane to protect it from scuffs and scratches.
Be sure to check out our Dark Walnut by Minwax wood stain review!
That's it! That is all there is to these wood foot rest plans. I hope that this tutorial will help show you how to make a DIY foot rest under desk stool.
I loved the look of the cross beams on the top and bottom going in different directions and I really liked not putting the legs all the way on the outside corners.
This gave it an Asian flare that I really liked.
Now Morgan has a better DIY wooden foot rest to use instead of putting her feet on top of a computer... that she doesn't even have anymore.
This was a quick build that took very little time at all. It's very customizable in the size, color, what you attach it with and so much more.
Let us know if you make a DIY footrest! Be sure to check out all of our wood projects.

Looking for something?
We've been doing this since 2012 so we have a LOT of blog posts!
Search stuff like: Ceiling Projects | DIY Plant Stands | Thrift Flips

Hey there, I'm Sean, the woodworking enthusiast and builder behind CharlestonCrafted.com! Since 2012, I've been sharing the magic of turning raw materials into beautiful creations. I love teaching others the art and satisfaction of woodworking and DIY. I try to inspire fellow crafters to make something extraordinary out of nothing at all.


