This DIY rolling scroll saw stand is a simple build project for making a mobile table for your scroll saw. This post will show you how to build a scroll saw stand with our free woodworking plans available for download!
The deeper you get into woodworking, the more tools you accumulate. That's how I ended up with a scroll saw a couple years ago.
A scroll saw is great for making quick cuts, shaping corners or making intricate designs.
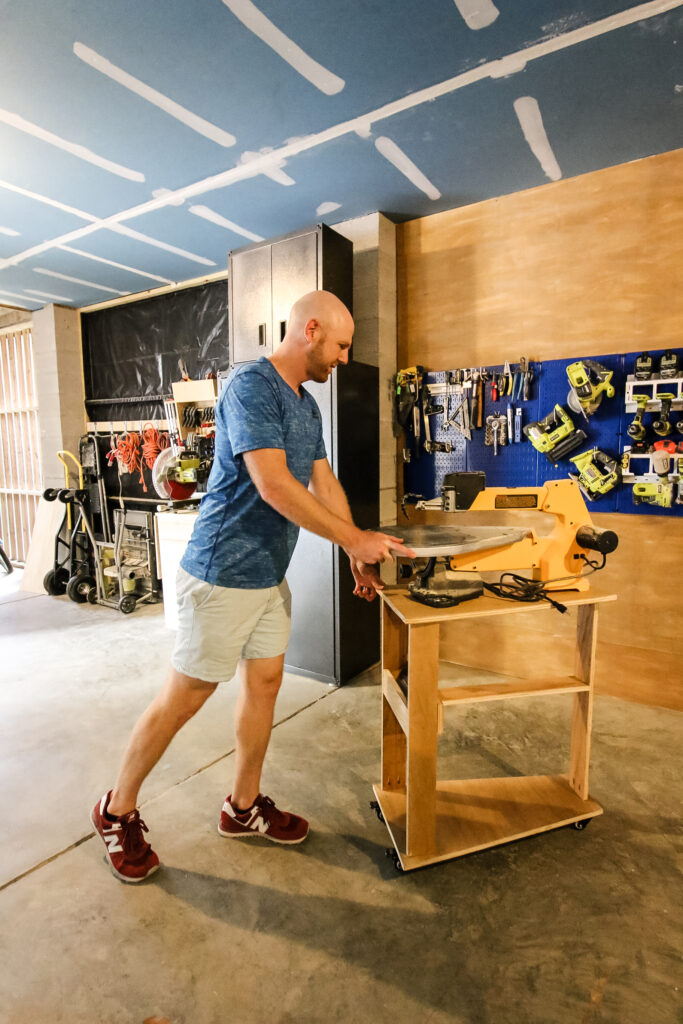
Our scroll saw has been sitting on our workbench since we got it, taking up half the available work space. Right now, we're going through a workshop build which will include a new mobile workbench.
So, we also built a new rolling scroll saw stand.
Do you need a stand for a scroll saw?
We have had a scroll saw without a stand for 2 years. However, you do need somewhere to sit the scroll saw. Since scrolling is a slow process, you don't want to be crouching on the ground!
Scroll saws are very heavy, so you don't want to be moving them around from table to shelf. They need a place to live where you can use them in place.
We kept ours on our workbench for a long time, but it took up so much tabletop space, we wanted a dedicated scroll saw stand.
Sure, you can buy a scroll saw stand, but even with wood prices the way they are right now, it's going to be cheaper to build your own.
This rolling scroll saw stand is simple to copy and build, likely using material you already have in your shop. We made ours entirely from scrap plywood!
Scroll down to see how we built this DIY scroll saw stand and get the free printable woodworking plans!
Check out our workbook on how to organize your workshop in 30 days!
How to build a DIY scroll saw stand
Unlike workbenches or miter saw stands that need lots of space, a scroll saw stand doesn't need to take up a lot of space.
Click here to see how we upcycled a kitchen cabinet into a rolling miter saw stand!
Most scroll saws are set up in the same way, with a large plate in the front, tapering off to a small motor section in the back.
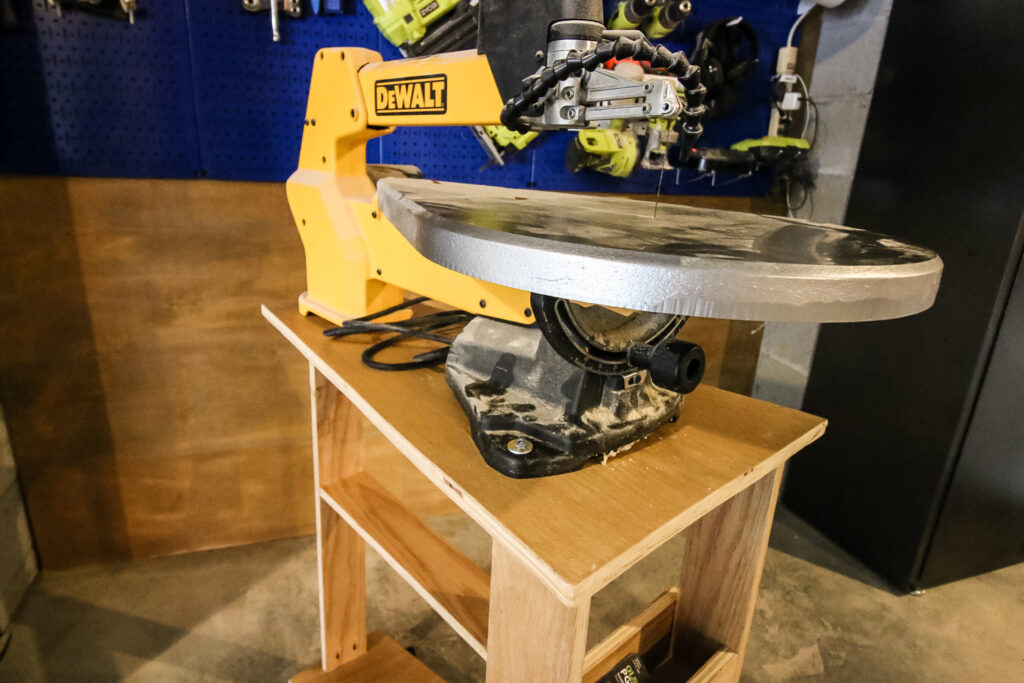
With this design, it seems best to follow that model for the stand itself.
Supplies needed to build a scroll saw stand:
- ¾" plywood
- Wood glue
- Pocket hole screws
- Brad nails
- 4 casters
Tools needed to build a scroll saw stand:
- Table saw or circular saw
- Sander
- Drill
- Pocket hole jig
- Brad nailer
All of the pieces for this DIY rolling scroll saw stand are made from ¾" plywood. It was all scrap laying around the shop. This is a great project for scrap plywood because none of the pieces used are very large!
How do you make a scroll saw stand?
We started out by making all the cuts and sanding everything down. You can get the full cut list with dimensions in the printable plans!
First, we attached two of the legs to the wider front section of the stand using wood glue and pocket holes.
This scroll saw stand has a little storage bin for holding extra blades, pencils or whatever you need. Scroll saw blades often snap or need replacing, so it's good to have them handy.
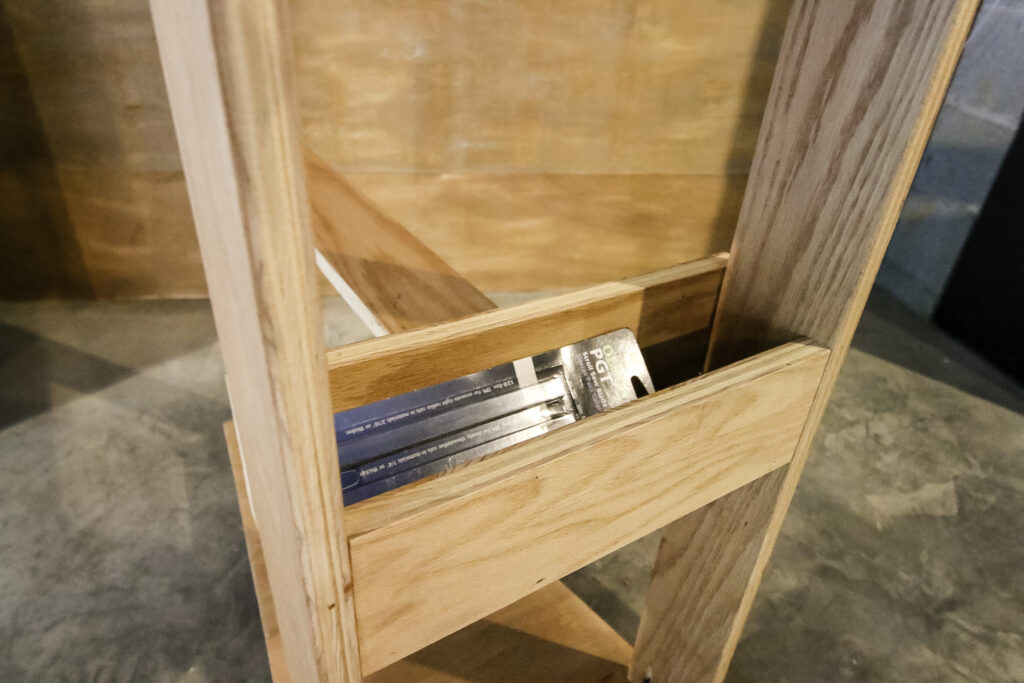
We used wood glue and brad nails to tack the storage bin together, then nailed that into place between the two front legs.
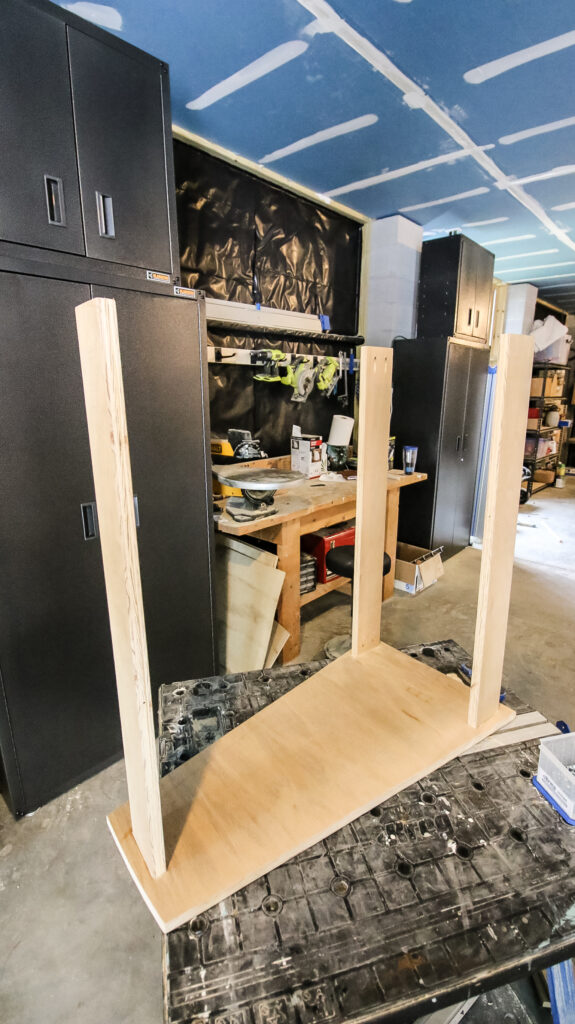
Then we attached the back leg with pocket holes and added a support beam between the back leg and the back of the storage bin.
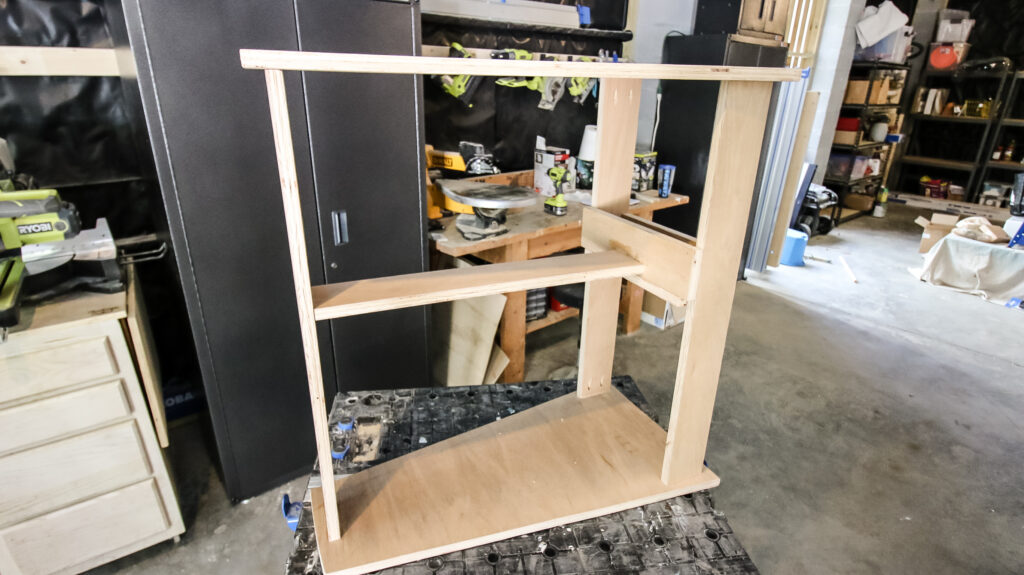
With the base all set up, we attached the top panel centered exactly like the bottom one.
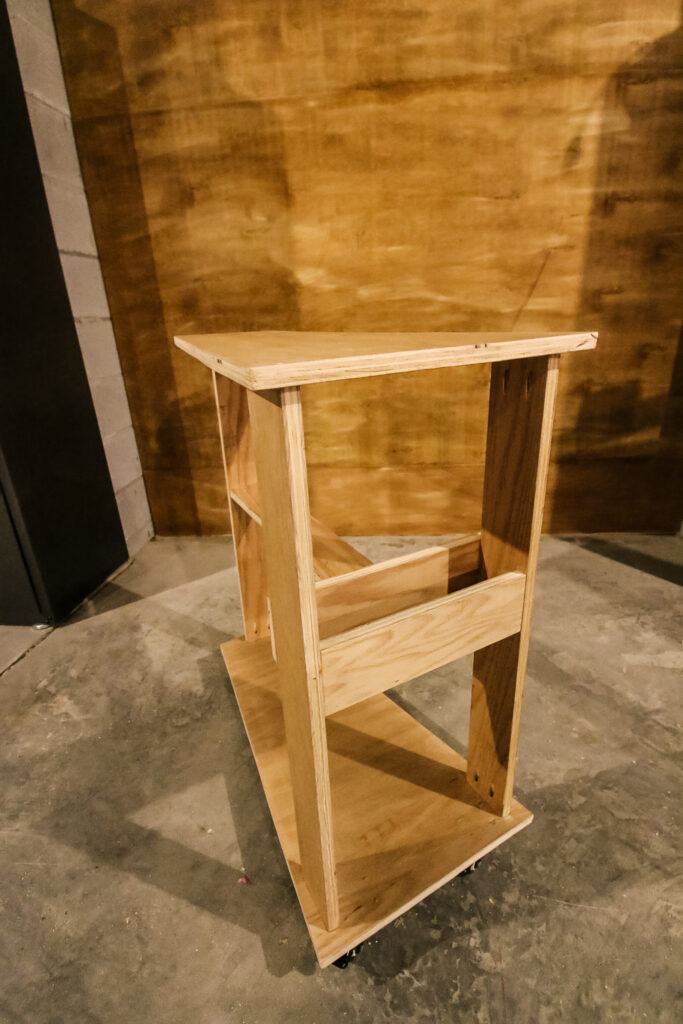
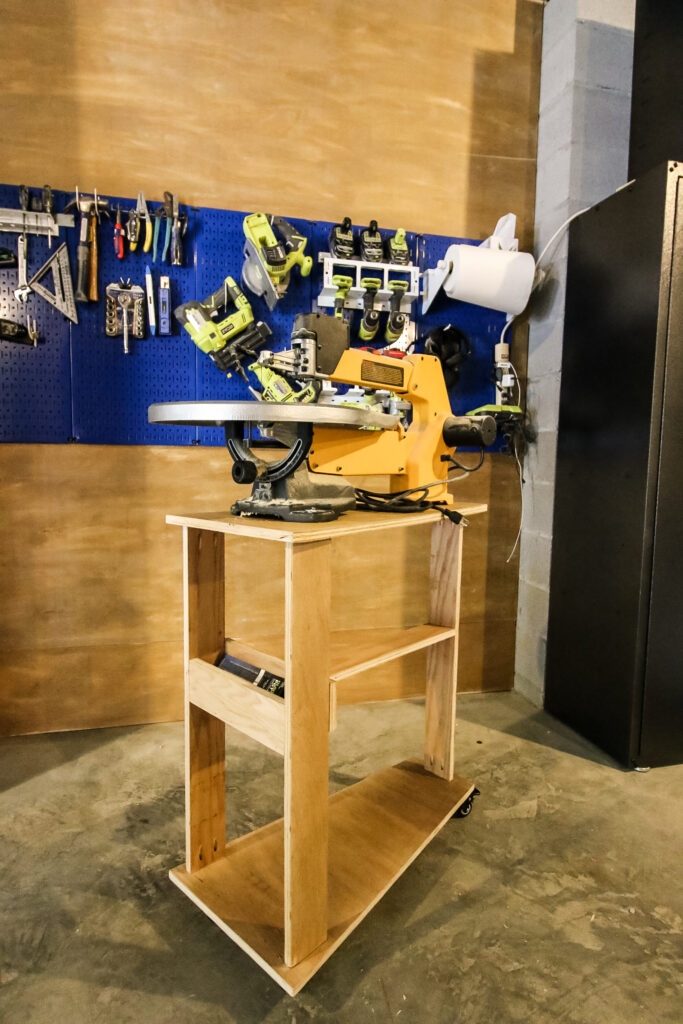
Stand built, we flipped it over and added four casters to the base. We initially added just three, with only one on the back, but after the scroll saw was attached, that was a little top heavy, so we added the fourth caster.

We have a Dewalt DW788 scroll saw and it's really heavy, so it really doesn't even need to be screwed down to the stand, but we did add two screws through the appropriate holes on the base of the saw just to be safe.
How tall is a scroll saw stand?
This scroll saw stand is 34 inches tall, PLUS the height of whatever casters that you choose. We have found that 36" total is the perfect height for a workbench (and our potting bench!)
Free printable PDF scroll saw stand plans
This scroll stand is really simple to build and works great.
Being in the garage, we didn't stain it or anything, so it was a quick afternoon build that we should have done a long time ago.
If you need a stand for your scroll saw, download our free printable PDF plans.
Our tutorial will give you the full material list, cut list and step-by-step instructions with computer model imagery.
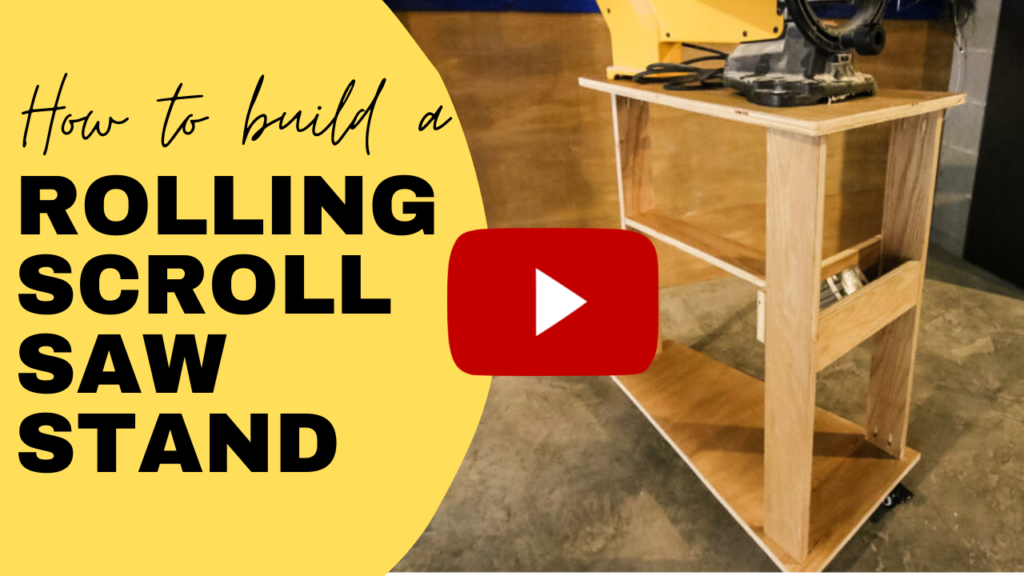
Video Tutorial
If videos are your thing, check out how we built this DIY scroll saw table on our YouTube channel for a detailed in-depth look!

Looking for something?
We've been doing this since 2012 so we have a LOT of blog posts!
Search stuff like: Ceiling Projects | DIY Plant Stands | Thrift Flips

Hey there, I'm Sean, the woodworking enthusiast and builder behind CharlestonCrafted.com! Since 2012, I've been sharing the magic of turning raw materials into beautiful creations. I love teaching others the art and satisfaction of woodworking and DIY. I try to inspire fellow crafters to make something extraordinary out of nothing at all.