• Skip to primary navigation
  • Skip to main content
  • Skip to primary sidebar
Charleston Crafted
  • DIY
  • Woodworking
  • Popular Posts
  • Blog
  • About
  • Shop
menu icon
go to homepage
  • DIY
  • Woodworking
  • Popular Posts
  • Blog
  • About
  • Shop
search icon
Homepage link
  • DIY
  • Woodworking
  • Popular Posts
  • Blog
  • About
  • Shop
×
Home » Rope Projects

DIY Nautical Round Rope Mirror Frame Tutorial

Published: Mar 15, 2017 · Modified: Feb 6, 2023 by Morgan · As an Amazon Associate, we earn from qualifying purchases. This site contains affiliate links. ·

Want to make a DIY rope mirror? You'll love this simple tutorial!

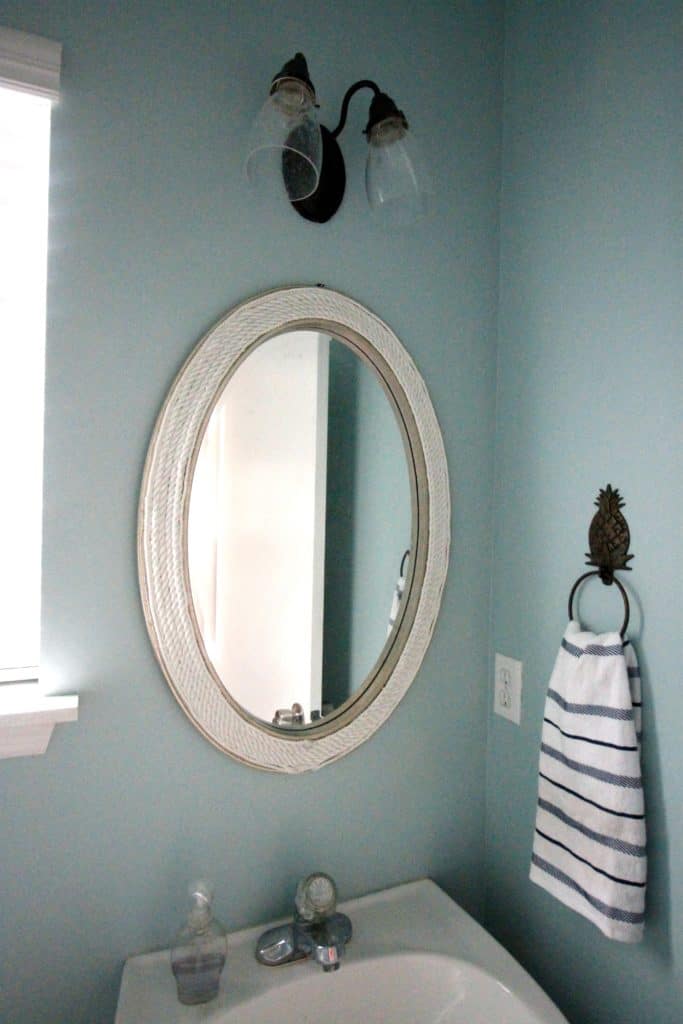
One thing that I really wanted to include in our half bathroom makeover was a rope mirror. I have pinned a ton as inspiration, but y'all know that I love the coastal vibe of rope everything! Luckily, rope is really inexpensive and easy to work with. Rope projects are budget friendly and a great DIY! 

Click here to see a full reveal of our half bathroom!

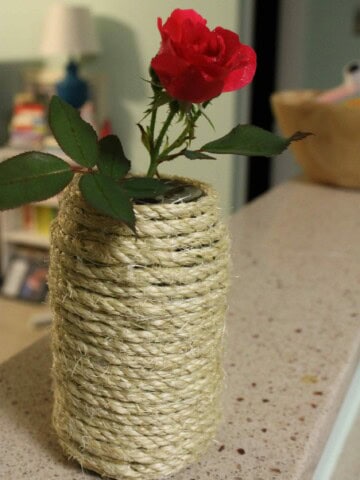
In the past I have made a rope lamp, a rope vase, a rope doorstop, rope coasters, a rope bowl, and rope placecards for our wedding. So, I was totally ready to conquer this project as a DIY!

DIY Rope Mirror

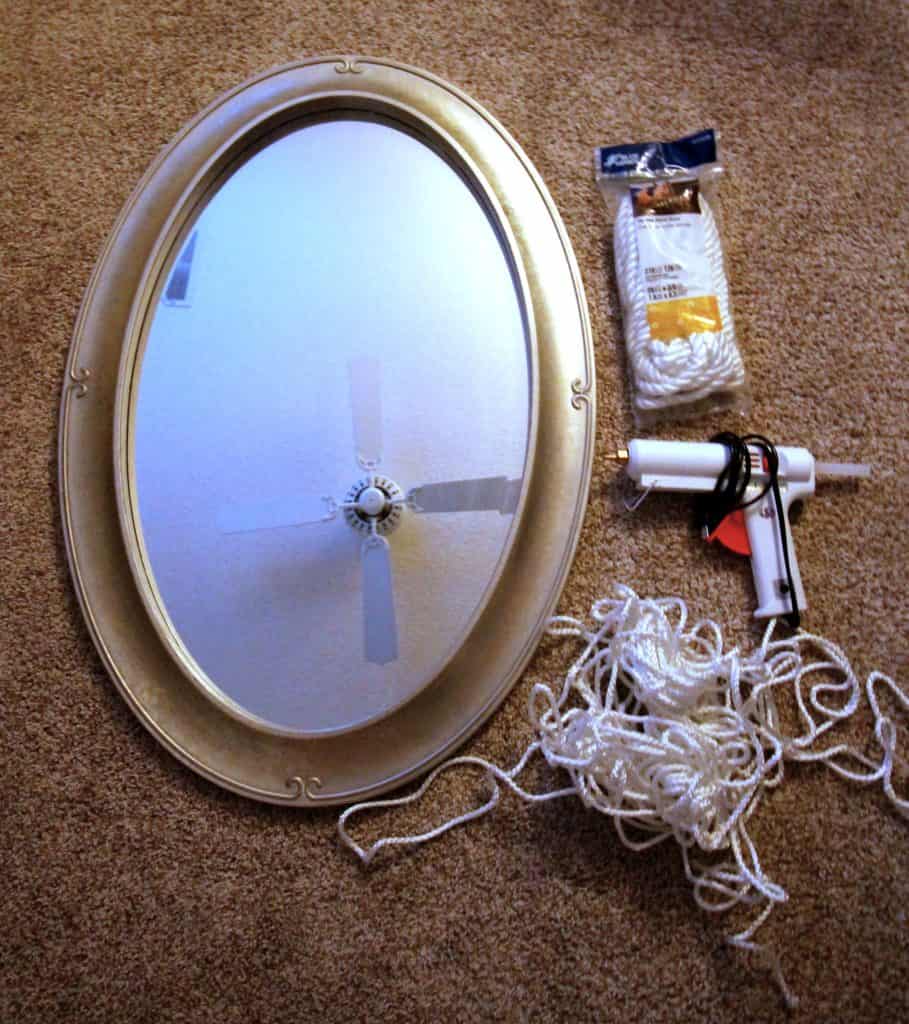
Here is what you will need:

  • A framed wall hanging mirror + hardware to hang
  • Hot glue gun + hot glue
  • Rope

When selecting your rope, you can choose either cotton or nylon. They have different looks - nylon is usually whiter and shiny. Cotton is more of a matte fabric, off-white look. Neither is wrong, you just should check them out in person at your favorite hardware store! 

Here is what you do:

I of course wanted to use the mirror that we already had to save cash. So, I simply took it off the wall and laid it flat to work on. We were painting so it had to come down anyways.
DIY Round Rope Mirror Tutorial - Charleston crafted

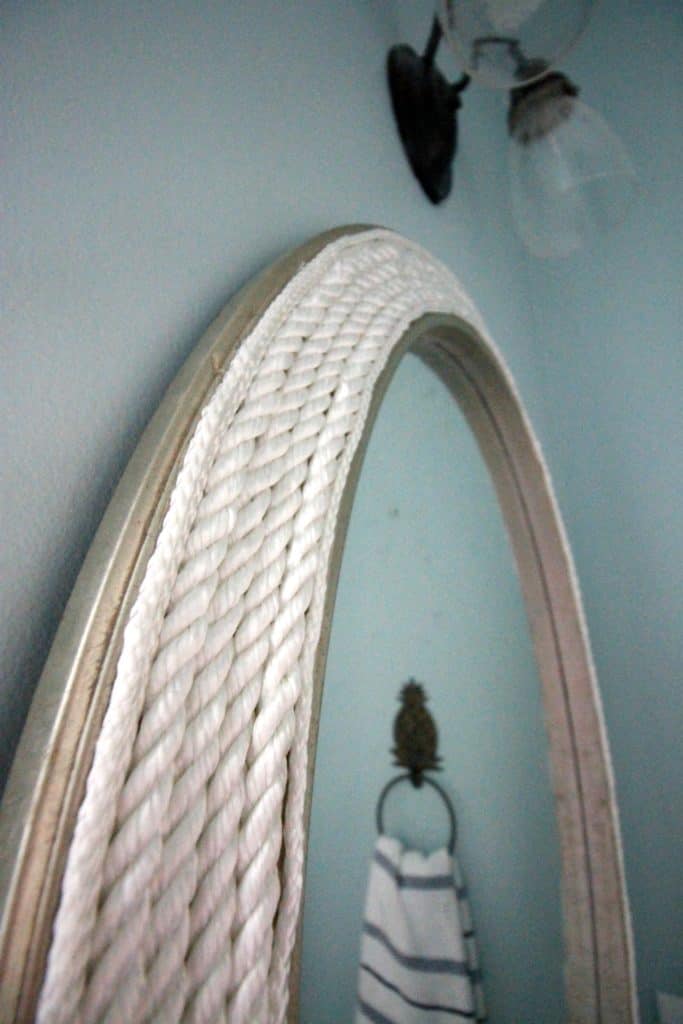
I decided that I wanted 2 widths of rope - a thicker one for the middle and a thinner one for the border. I already had a lot of rope on hand but ended up picking up a 25' roll of ⅜" inch rope from Lowe's for $8.

My thinner rope is ¼" in width. If you mix ropes, plan to stick to a similar finish (these are both glossy white). The total length that you need will depend on the size of your mirror.

DIY Round Rope Mirror Tutorial - Charleston crafted

DIY Round Rope Mirror Tutorial - Charleston crafted

DIY Round Rope Mirror Tutorial - Charleston crafted

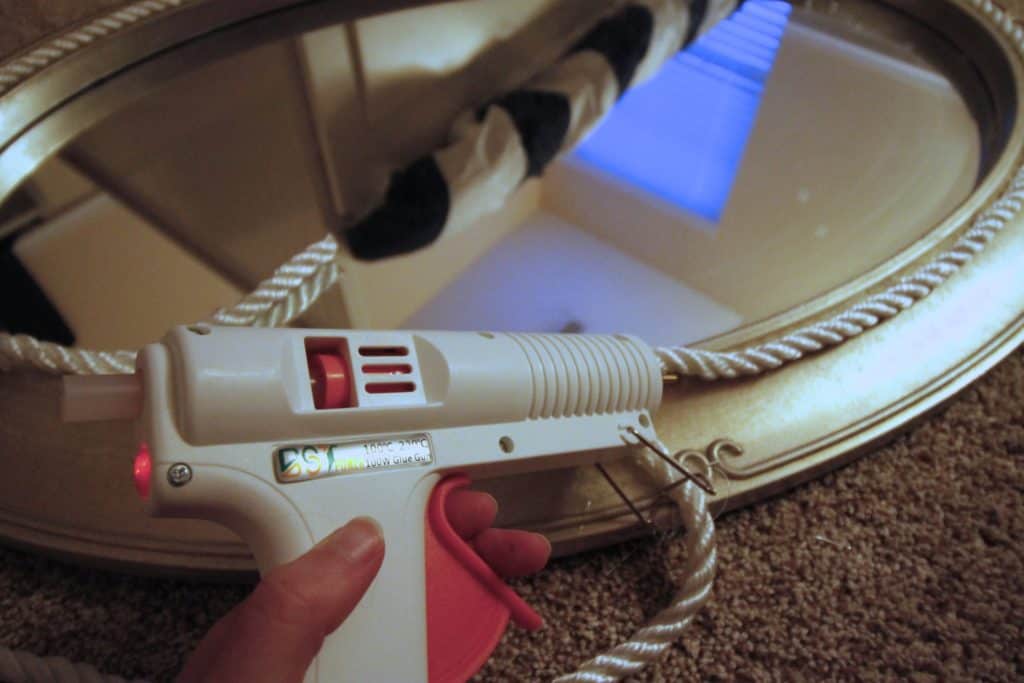
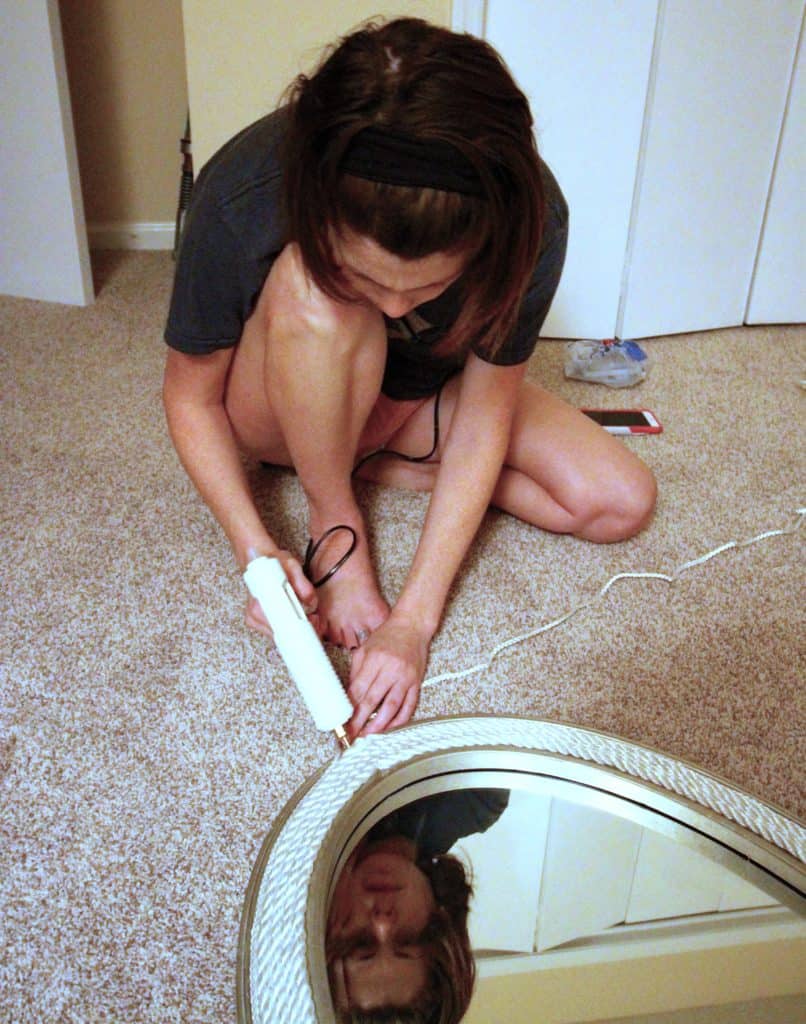
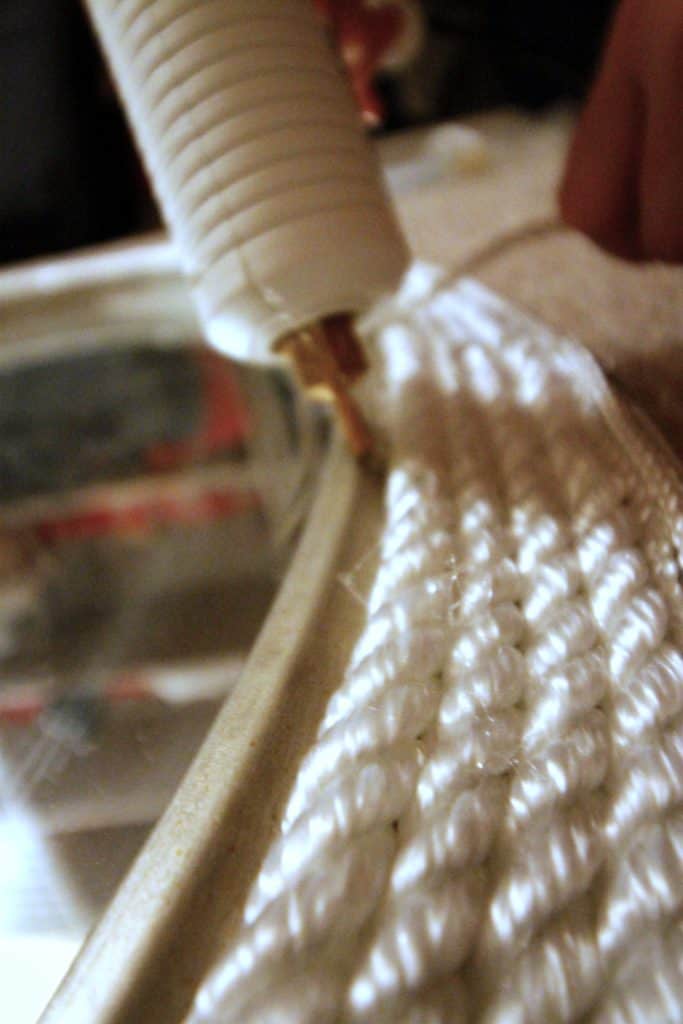
Pick a spot to start. I chose the bottom of the O. Hot glue your rope in place and work your way around the frame. I found it easier for me to sit in place and spin the mirror. I went around and around for about 30 minutes, gluing it down in 6 inch sections and then pressing it with my fingers to secure.

My biggest tip is that you neeeeeeeed a high heat glue gun. This is the one I have. It is not expensive and works amazingly - it melts the glue very quickly and keeps it going. It puts my old dinky gun to shame!

DIY Round Rope Mirror Tutorial - Charleston crafted

Next, we hung it up on the wall. Looking good!

DIY Round Rope Mirror Tutorial - Charleston crafted

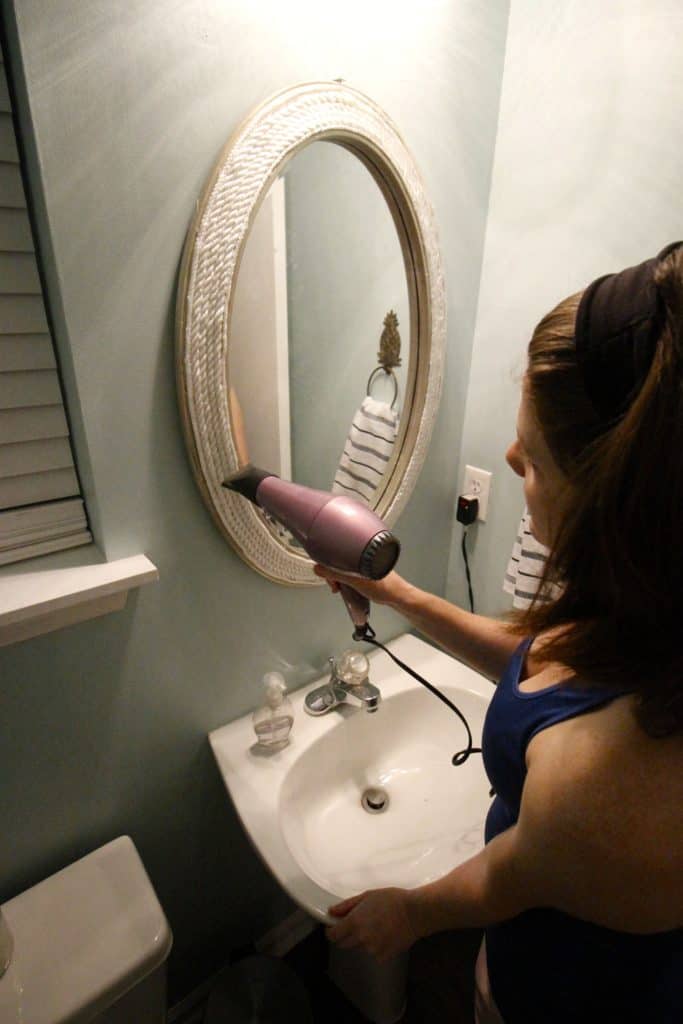
My final step is optional but makes a big difference. Hot glue can be stringy and messy. I suggest taking a hair dryer to the project to melt the strings and get a cleaner result. 

DIY Round Rope Mirror Tutorial - Charleston crafted

DIY Round Rope Mirror Tutorial - Charleston crafted


Pretty good for $8 out of pocket! Of course, I had a lot already on hand, but that's the game in this project - for $100 make over, you really have to use what you have!

Be sure you check out the other participants in the $100 challenge this week:

[inlinkz_linkup id=703337 mode=1]

 Charleston Crafted Logo heart
 Charleston Crafted Logo facebook
 Charleston Crafted Logo insta
 Charleston Crafted Logo pinterest
 Charleston Crafted Logo twitter
Morgan headshot cropped
Morgan

Hello, I'm Morgan, half of the creative force behind CharlestonCrafted.com! With a passion for DIY that dates back to 2012, I've transformed three homes and now I'm dedicated to helping others craft their dream spaces. Let's turn your house into a home together!

More Rope Projects

  • DIY Rope Bowl Tutorial & A Coastal Easter Basket for Him - Charleston Crafted
    DIY Rope Basket Tutorial
  • how to make monkey fist knot balls
    How to make Decorative Monkey Fist Knot Balls
  • DIY Rope Lamp Upgrade - Charleston Crafted
    How to cover a lamp with rope
  • Oops I Covered Something in Rope Again

Reader Interactions

Comments

  1. sherry cole says

    March 15, 2017 at 10:54 am

    I love this mirror and $8 is awesome. I am looking forward to the reveal of your room.

  2. Kati says

    March 15, 2017 at 12:24 pm

    Love the rope mirror! I need to add some ropes to more DIYs.

    • Morgan says

      March 15, 2017 at 12:49 pm

      I agree I LOVE rope! We have a whole rope category on our sidebar --> use the dropdown to find it!

  3. Brittany Goldwyn says

    March 15, 2017 at 12:51 pm

    Oh man, I bet this took a ton of patience!!

  4. Jess says

    March 15, 2017 at 3:34 pm

    Smart idea with the hairdryer!

  5. Liz says

    March 15, 2017 at 5:21 pm

    The mirror looks great! Great tip using a hair dryer to clean up the strings.

  6. Cindy says

    March 15, 2017 at 8:03 pm

    Cute mirror redo, I love that you recycled your old one!!

    • Morgan says

      March 16, 2017 at 10:08 am

      yes it was budget friendly and kept it out of the landfill 🙂 thanks for stopping by

  7. Sue Purdy says

    March 15, 2017 at 10:27 pm

    Your mirror looks fantastic. I love the nautical vibe you have going on.

  8. Tracy says

    March 16, 2017 at 11:09 am

    It turned out so cute!!! What a creative project!

  9. Erin @ Lemons, Lavender, & Laundry says

    March 16, 2017 at 1:12 pm

    Love the mirror! As you were listing all your rope projects, I realized I need to start adding rope to more stuff. I love the look, but never think of it.

  10. Sarah says

    March 18, 2017 at 6:08 pm

    What a great DIY for this space! I can't wait to see how things progress this week.

  11. Chandra says

    March 19, 2017 at 1:03 am

    The mirror turned out great! Great idea with the hair dryer, I'll have to give it a shot the next time I'm cursing all the stringy hot glue leftovers!

  12. Corinna - ADesignerAtHome says

    March 19, 2017 at 3:17 pm

    It looks lovely! Easy project for the perfect change in vibe. I love that!

  13. Morgan Smith says

    March 22, 2017 at 7:59 pm

    We have the exact same bathroom...lol. Are you in Nelliefield Plantation?

    • Morgan says

      March 22, 2017 at 8:57 pm

      No I am not. But are you Morgan Smith? That's my maiden name. Twins!!

  14. Peggy says

    June 19, 2021 at 4:00 pm

    I like the tile you used to frame the mirror. Could you please tell me where you purchased it. I have looked many places and have not had any luck in finding that pattern.

    • Sean says

      June 20, 2021 at 8:15 pm

      Thanks Peggy! This was from Lowes but it's been quite a few years so they might not carry it any more.

Primary Sidebar

Charleston Crafted about us image

Hey y'all!

We are Morgan & Sean McBride and we are crafting our home together in Charleston, South Carolina.

More about us

Popular Posts

  • DIY Coffered Ceiling
    DIY Coffered Ceiling

  • How to Make DIY Concrete Pumpkins via Charleston Crafted
    How to Make DIY Concrete Pumpkins

  • How to Make a Cupid's Arrow Valentine's Day Wall Hanging with felt on the Cricut
    How to make a Cupid's Arrow Valentine's Day Wall Hanging

  • Our Tropical Oasis - A backyard Hammock area - Charleston Crafted
    Our Tropical Oasis

Recent Posts

  • How to create a whole house color scheme
    How to create a whole house color scheme

  • DIY modern rolling storage table - Charleston Crafted
    DIY modern rolling storage table

  • how to organize a pantry with zones
    How to Organize Your Pantry in Zones (And Why It’s a Game Changer)

  • Keep outdoor rug from blowing up - Charleston Crafted
    How to keep your outdoor rug in place

Privacy Policy

Footer

↑ back to top

Navigation

  • Home
  • Blog
  • Contact Us
  • Terms of Use
  • Disclaimer

Newsletter

  • Sign up for emails and updates
  • Follow us on Instagram
  • Work with Us

Browse by Category

  • Woodworking
  • Home Projects
  • Paint Colors
  • Room Reveals

© 2025 The Charleston Crafted Blog LLC DBA “Charleston Crafted” and “CharlestonCrafted” (also known as N/A) / All Rights Reserved.
Official Website: (Charleston Crafted)
Registered in USA (Co. Reg. No.: 565586)
Address: Charleston, USA 29414, South Carolina
Contact Phone: Not applicable — contact is via email: sean@charlestoncrafted.com

DISCLAIMER: The content on this website is provided for general informational purposes only and is not intended as professional advice. The Charleston Crafted Blog LLC and The Charleston Crafted Blog LLC make no representations or warranties—express or implied—regarding the accuracy, completeness, or suitability of the information contained herein. Any reliance you place on this information is strictly at your own risk. In no event shall The Charleston Crafted Blog LLC or The Charleston Crafted Blog LLC be liable for any loss or damage, including without limitation, indirect or consequential loss or damage, arising from the use or inability to use this website. This website is the official website of The Charleston Crafted Blog LLC.

AFFILIATE DISCLOSURE: This website contains affiliate links. If you click through and make a purchase, we may earn a commission at no extra cost to you.

As an Amazon Associate, I earn from qualifying purchases.

Site Editor: Morgan Smith McBride

Copyright © 2025 Charleston Crafted