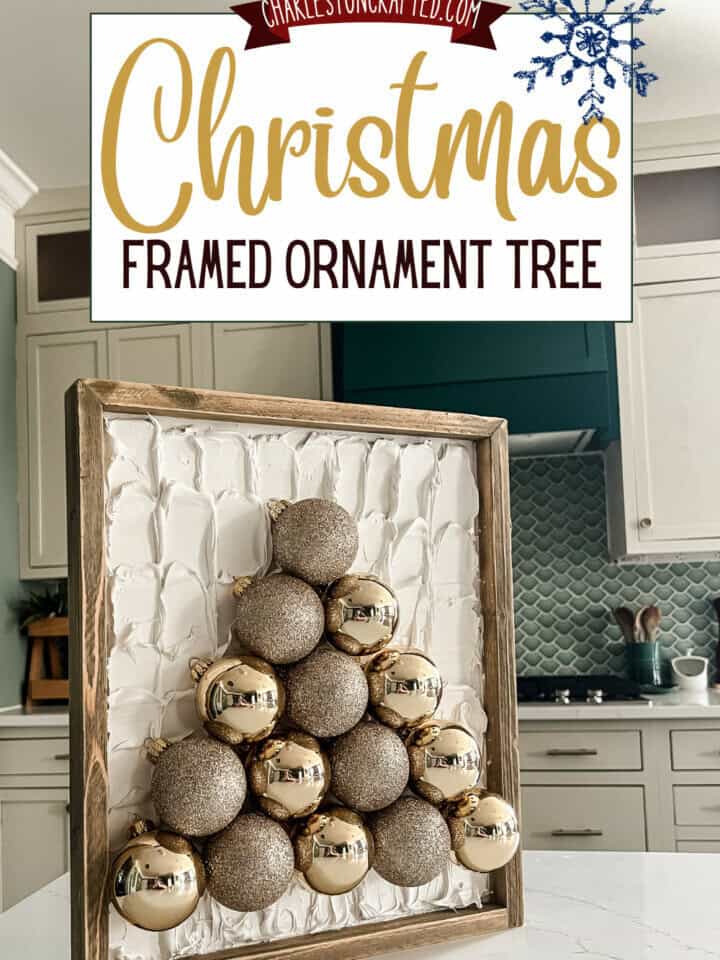
Check out this fun project that reuses an old frame and sticks Christmas tree ornaments into the shape of a tree inside! This is a quick and easy project that is easy to customize!
This post was sponsored by Flex Seal and their Flex Paste. All opinions are our own. Thank you for supporting the brands that make Charleston Crafted possible!
Fun and easy Christmas crafts are definitely the best ones. While I like building things, quick crafts have that immediate result and always spread cheer.
I was recently inspired when I saw someone who painted an old picture frame white and made a tassel Christmas tree in the middle. I liked the idea, but wanted to try something a little different.
I had an old inspirational quote frame laying around that I had picked up on the side of the road and decided to finally repurpose that into a Christmas craft using some Flex Paste as snow and ornaments to make the shape of a tree!
How to make a framed ornament Christmas tree
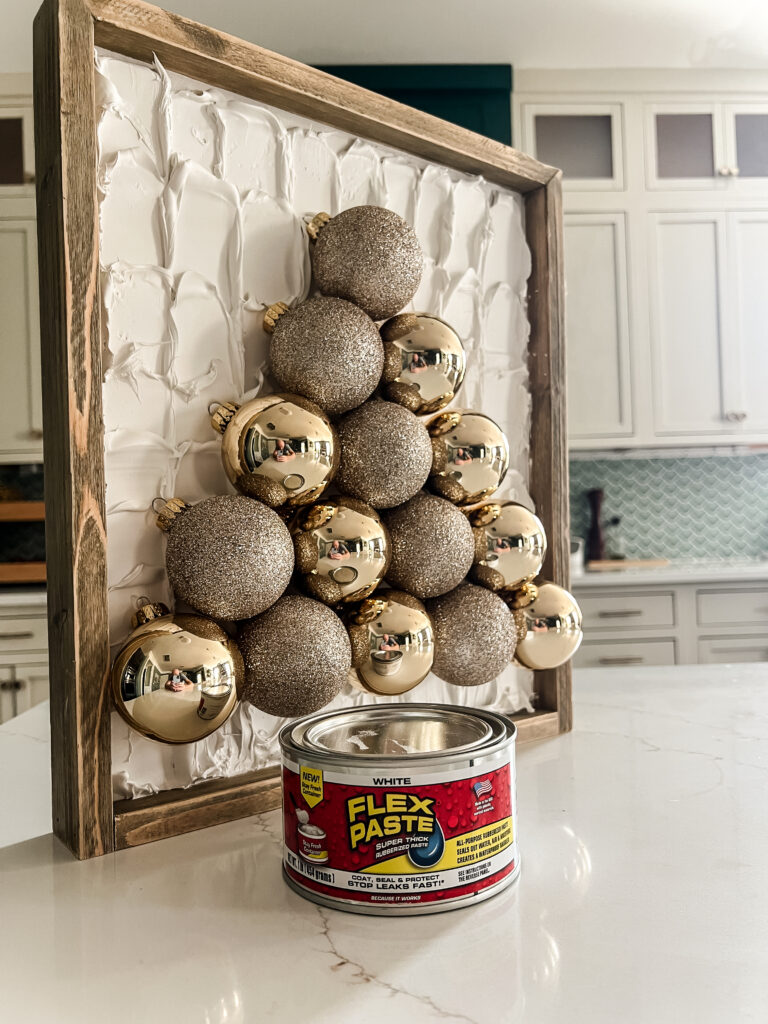
This really can be an almost-free holiday decor project if you have a frame and some ornaments you don't use anymore. All you'll need is the Flex Paste.
This project literally only takes about 15 minutes to make and is ready to go. You have to move quick anyways so the ornaments can get into the Flex Paste, and then it's so strong that it holds immediately.
The other great part about this project is it's totally customizable with whatever frame you have and whatever ornaments you want to use!
These tabletop Christmas trees are also customizable with different wrapping papers!
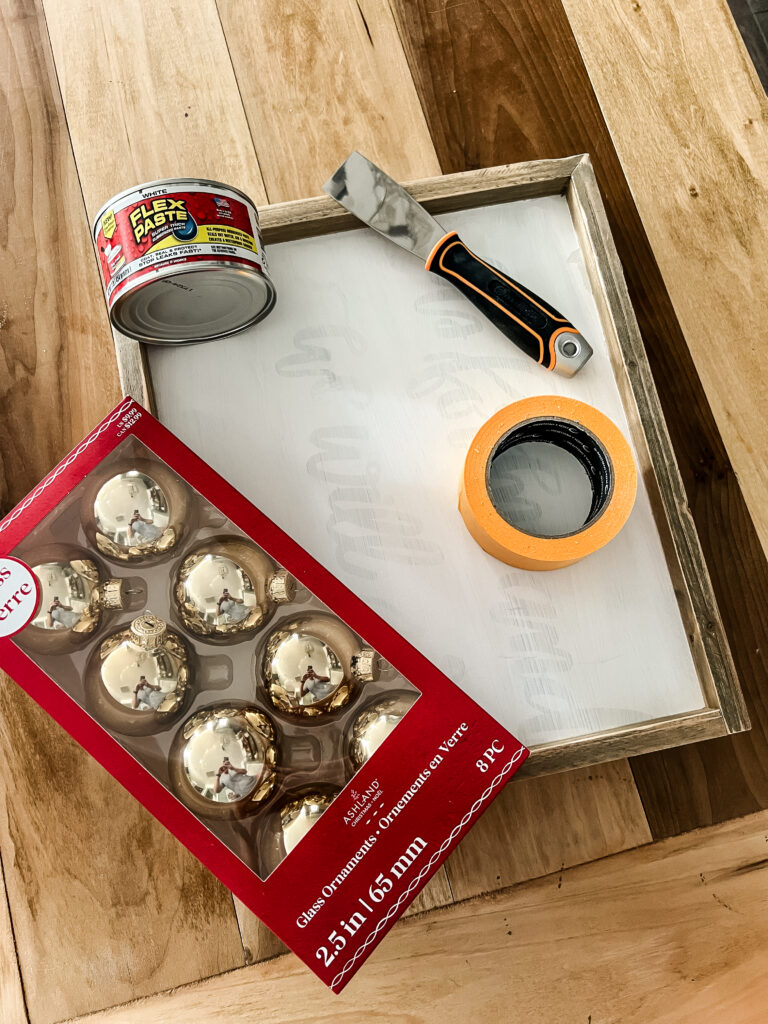
Materials needed:
Here's the materials you need to make this project.
- Frame (preferably with a deep lip and around 12"x 20")
- 12 round Christmas ornaments
- 2 cans of Flex Paste
- 2" wide paint scraper
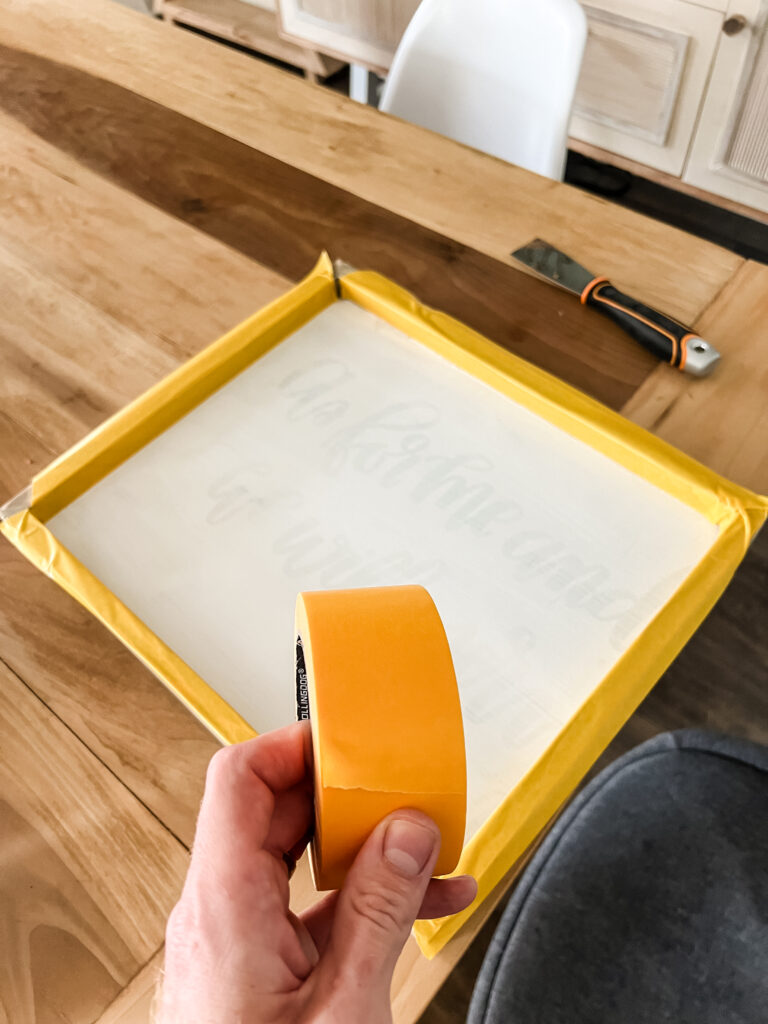
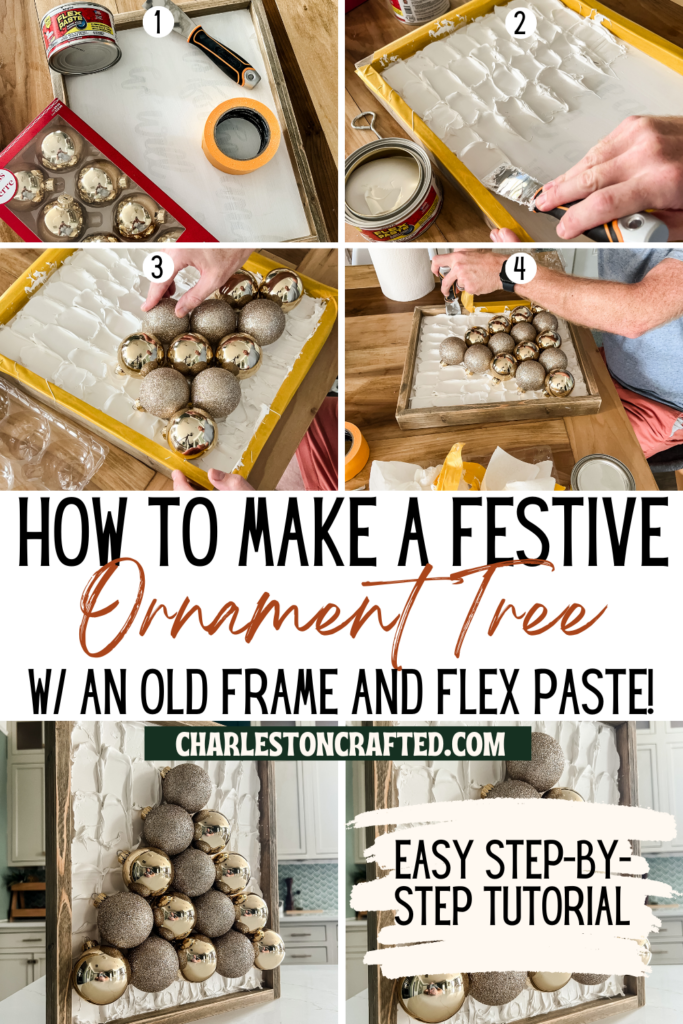
Step one: paint the inside of the frame
I started by painting the inside of the frame back white because I didn't want anything to show through on the edges if the Flex Paste didn't get 100% flush up against the edges.
Before painting, I put painter's tape around the inside edge of the frame so it wouldn't get paint or Flex Paste on it.
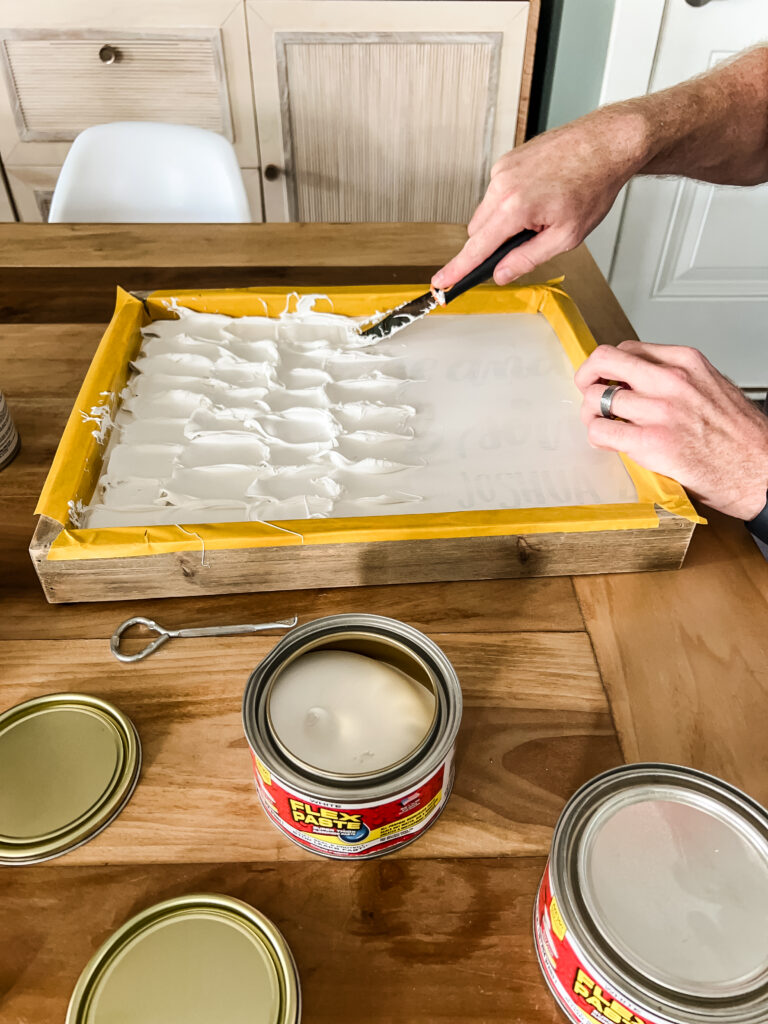
Step two: apply Flex Paste
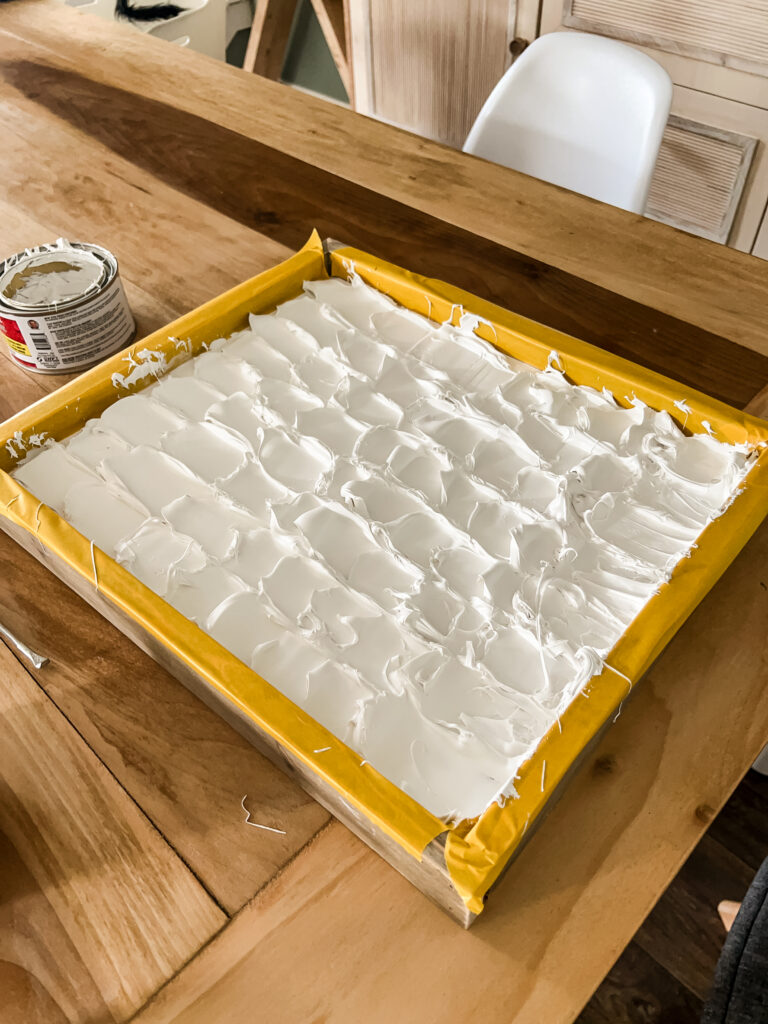
Next, I started applying the Flex Paste. It's pretty thick and can become a little stringy when you pull out a blob because it's sticking to itself, so try to do a little twirling action when you get some.
Grab a dollop of the Flex Paste on the end of your paint scraper and start in the top left corner of the frame and push down as you pull down on the scraper along the frame. This will result in a thicker glob at the top that tapers down to nothing about 2" later.
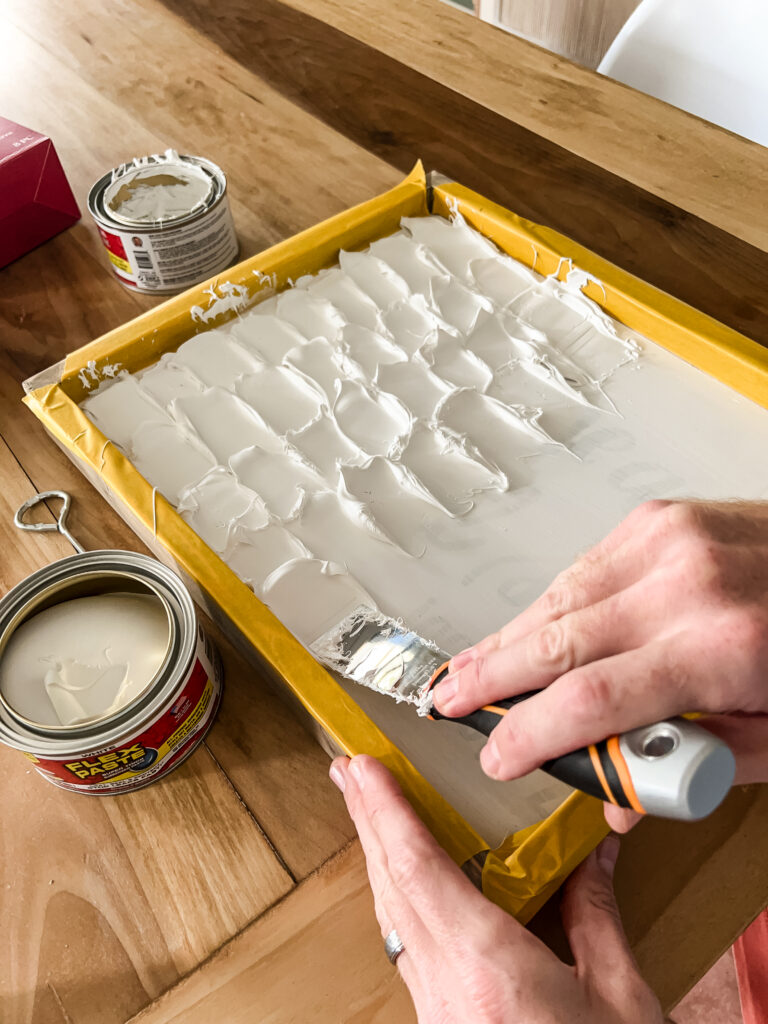
Repeat this step across the entire row of the frame, then drop down to the next row. For this row, don't start the glob of Flex Paste right under the thick part of the first row, start closer toward the bottom. Then continue across the row.
Repeat this for as many rows as necessary until you get down toward the bottom. For the bottom row, I actually flipped it and did my thicker section at the very end and then tapered up to the thick section of the next to last row.
Now, I didn't do this when I made the project, but in hindsight, I'd recommend removing the painter's tape now. It's more difficult when the ornaments are in the paste in the next step.
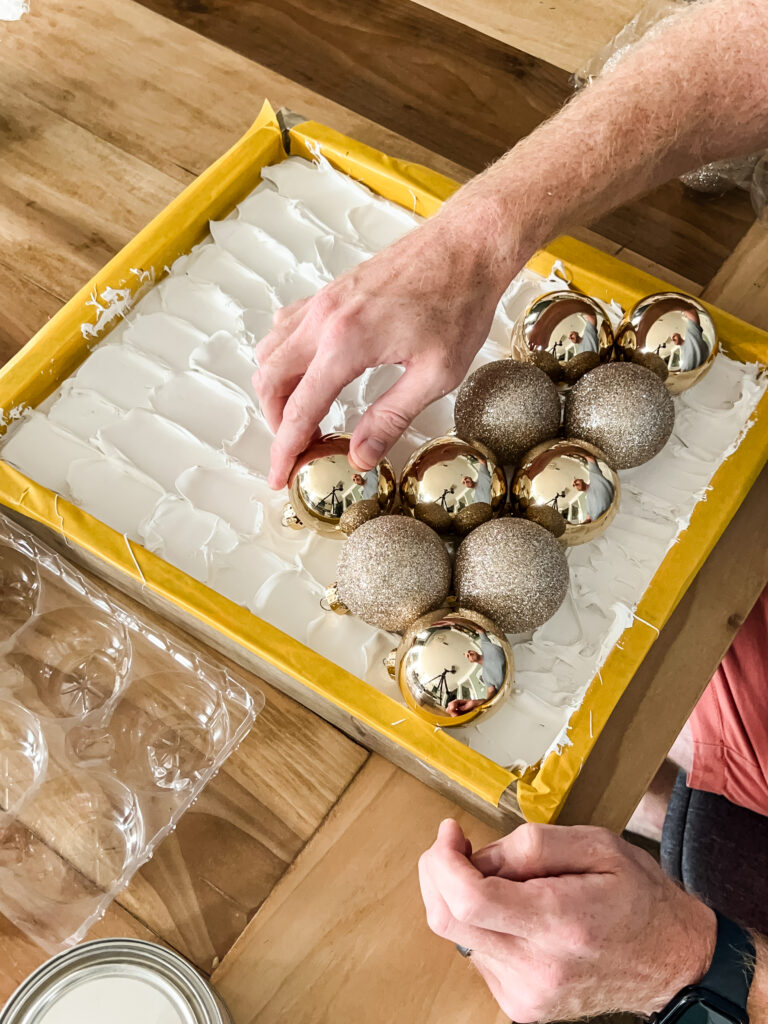
Step three: stick in ornaments
Now, immediately start this next step. Flex Paste works fast and starts to skin in about 15-30 minutes, which is why it's so great for immediate watertight repairs in more typical situations.
Choose the point for your bottom row of ornaments and press them down into the Flex Paste ensuring the ball and the neck of the ball are into the paste with the next facing up and a little angled to the side.
Loose ornaments also look good in a DIY wooden trough on your dining table!
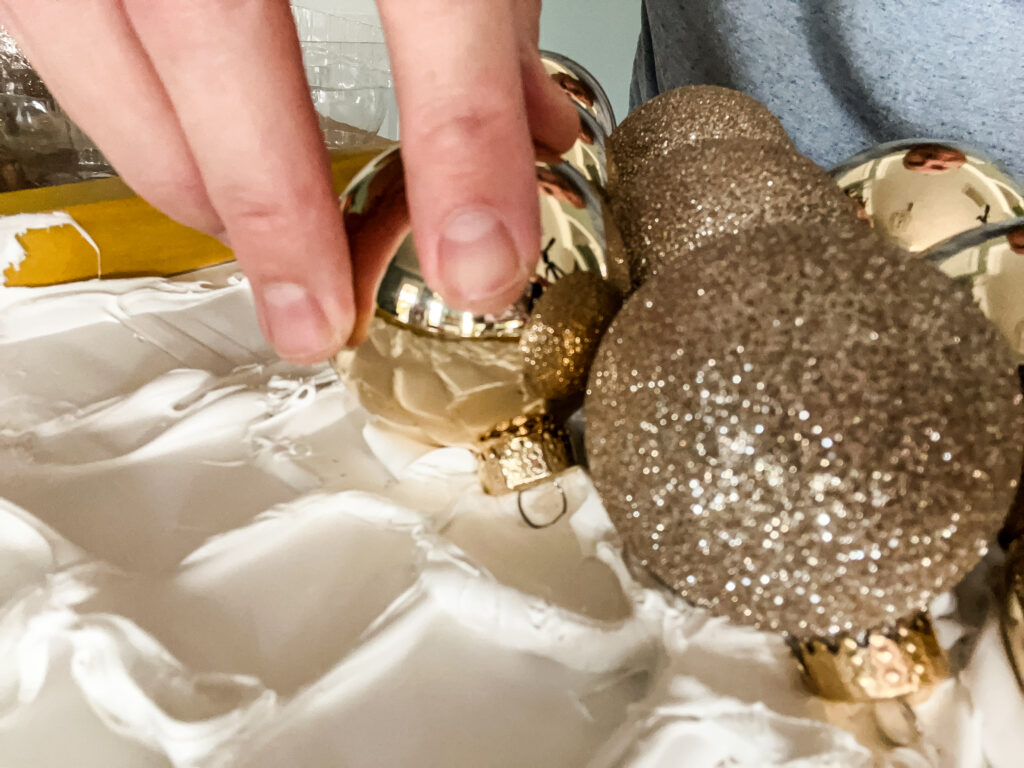
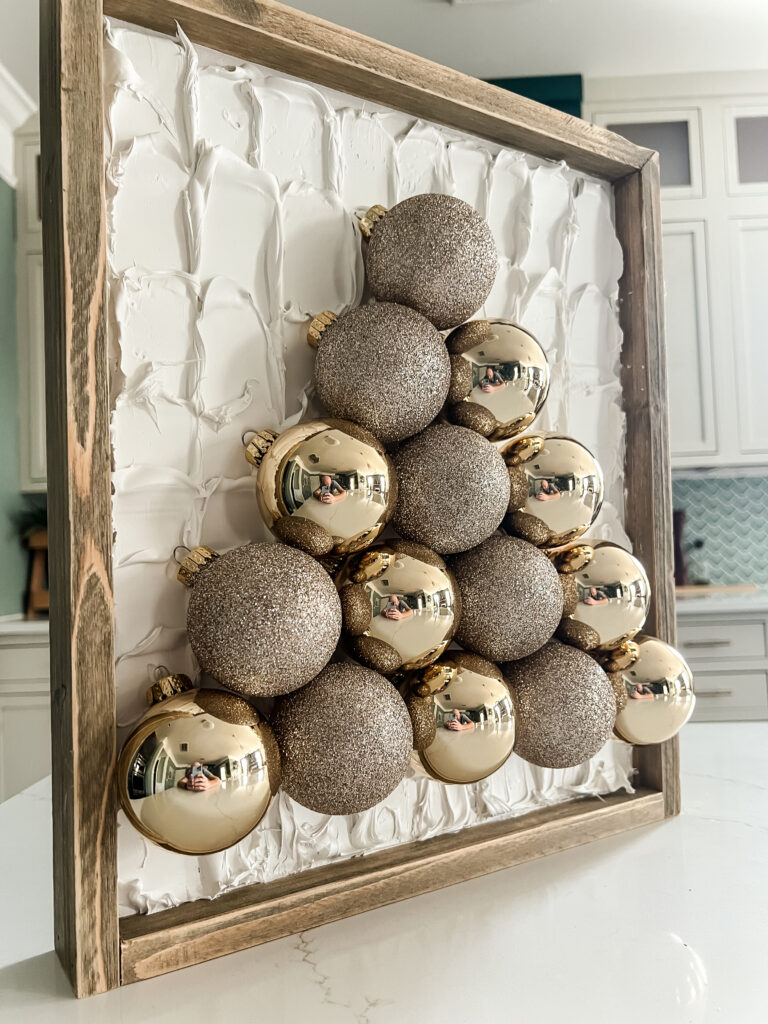
I went with a 5 ball wide base because that fit perfectly. When you get to the next row, use one less ball and put them in between the nooks of the lower row. Continue this until you finish with one ball at the top.
The Flex Paste holds these in place immediately but gives you a little flexibility if you need to push them around. Just make sure you keep the part of the ornament down that you first pushed into the paste because it would be hard to remove.
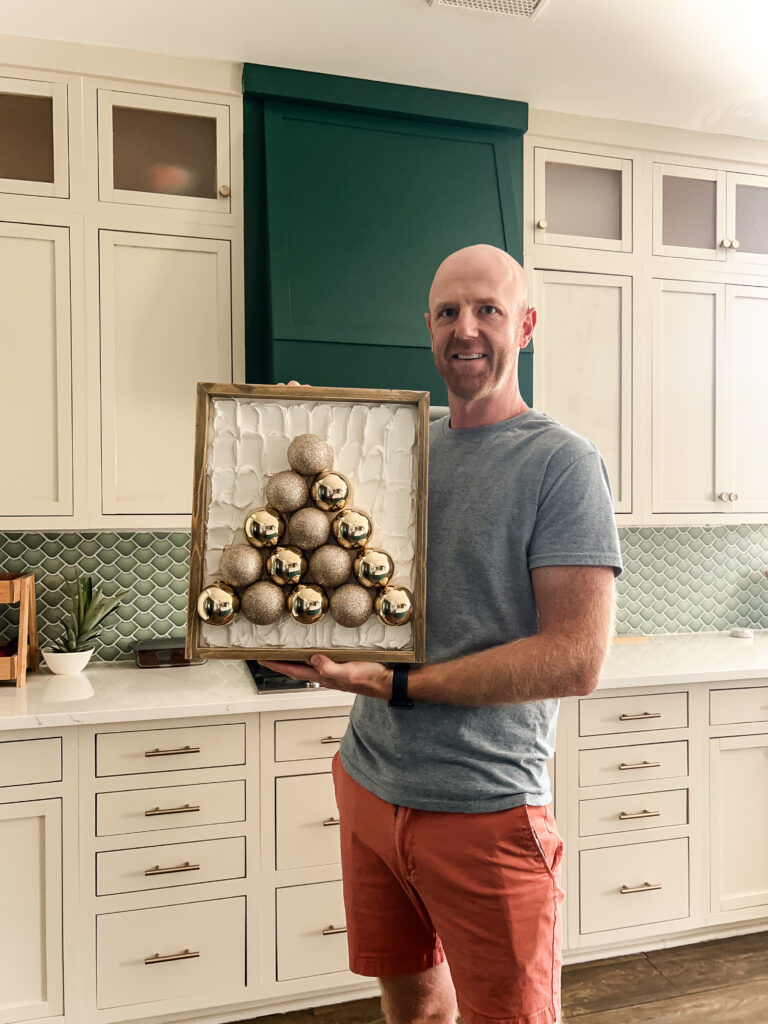
Step four: display
Now you can display your framed ornament Christmas tree! Like, literally immediately. The Flex Paste has an amazing immediate hold, so you can show it off right away.
I'd recommend waiting 24 hours before hanging this to the wall just to be sure it's good and dry, but then you can choose a spot, add a nail and hang it up.
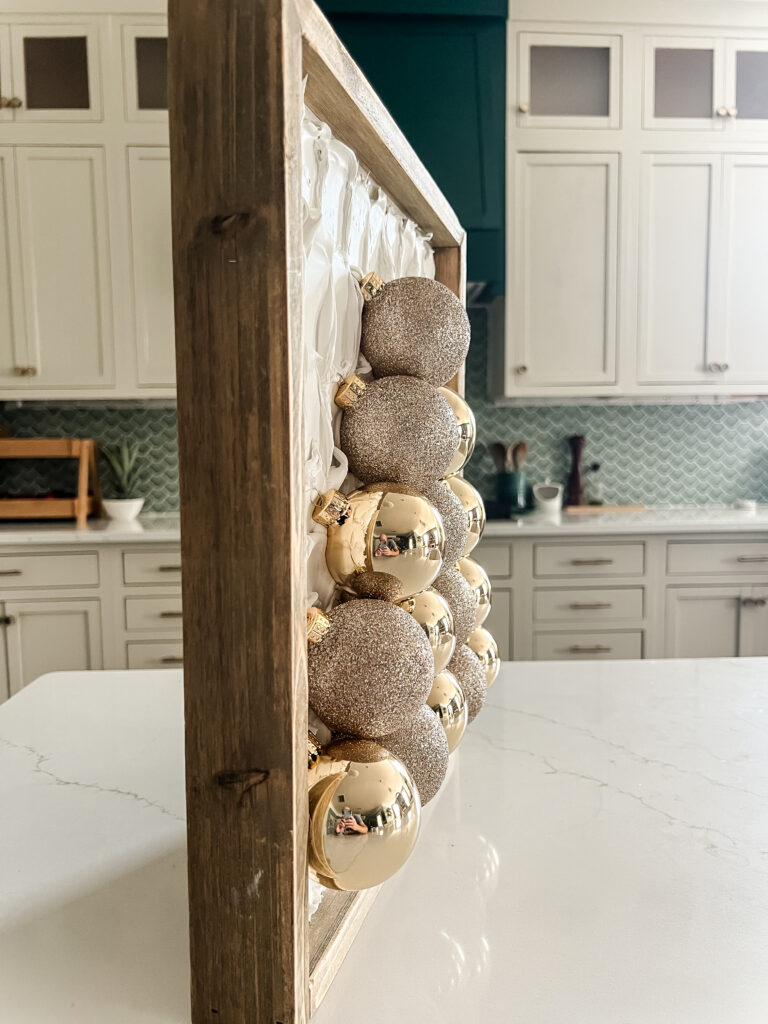
If you used a thicker frame like I did, you can also display this as a table top or mantel decoration as well as it will sit up on its base. I love that!
Here's a DIY Christmas tree-shaped card holder that can also be hung on the wall!
DIY framed ornament Christmas tree
This DIY framed ornament Christmas tree is a quick and easy project that I love! It's completely customizable and looks great in a variety of places.
I love that the Flex Paste looks like falling snow around the tree and it really puts me in the holiday mood!

Looking for something?
We've been doing this since 2012 so we have a LOT of blog posts!
Search stuff like: Ceiling Projects | DIY Plant Stands | Thrift Flips

Hey there, I'm Sean, the woodworking enthusiast and builder behind CharlestonCrafted.com! Since 2012, I've been sharing the magic of turning raw materials into beautiful creations. I love teaching others the art and satisfaction of woodworking and DIY. I try to inspire fellow crafters to make something extraordinary out of nothing at all.


