This tutorial will show you exactly how we built a custom wooden chair plant stand and added a welcoming stenciled design to it using our Cricut Explore Air 2 cutting machine!
This is a sponsored post written by me on behalf of Cricut for Cricut. All opinions are 100% mine.
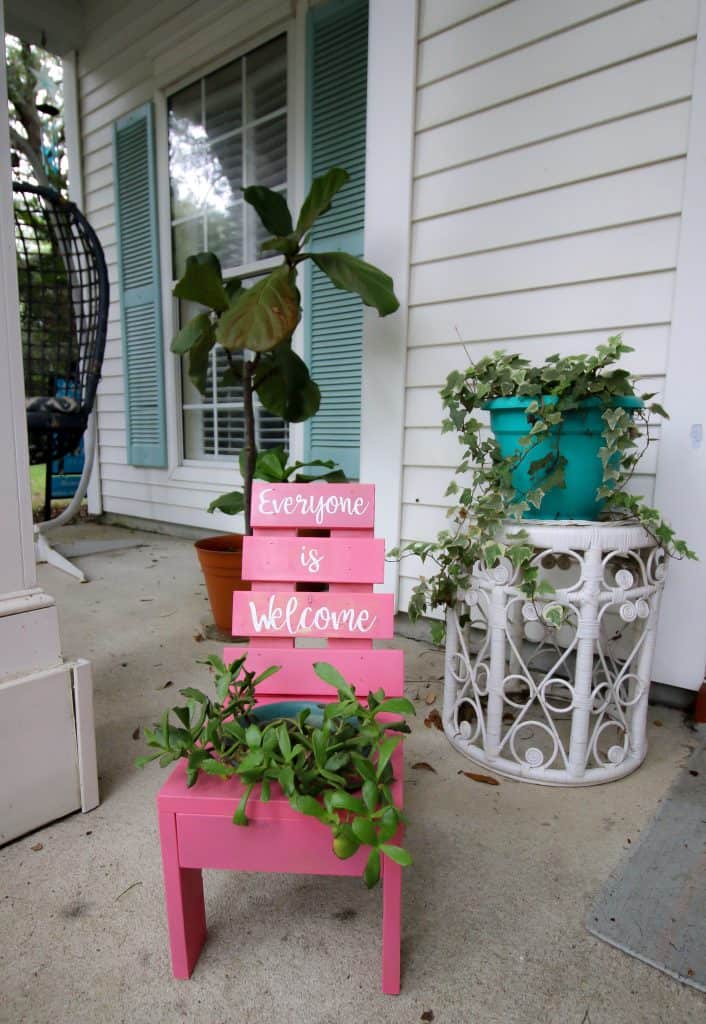
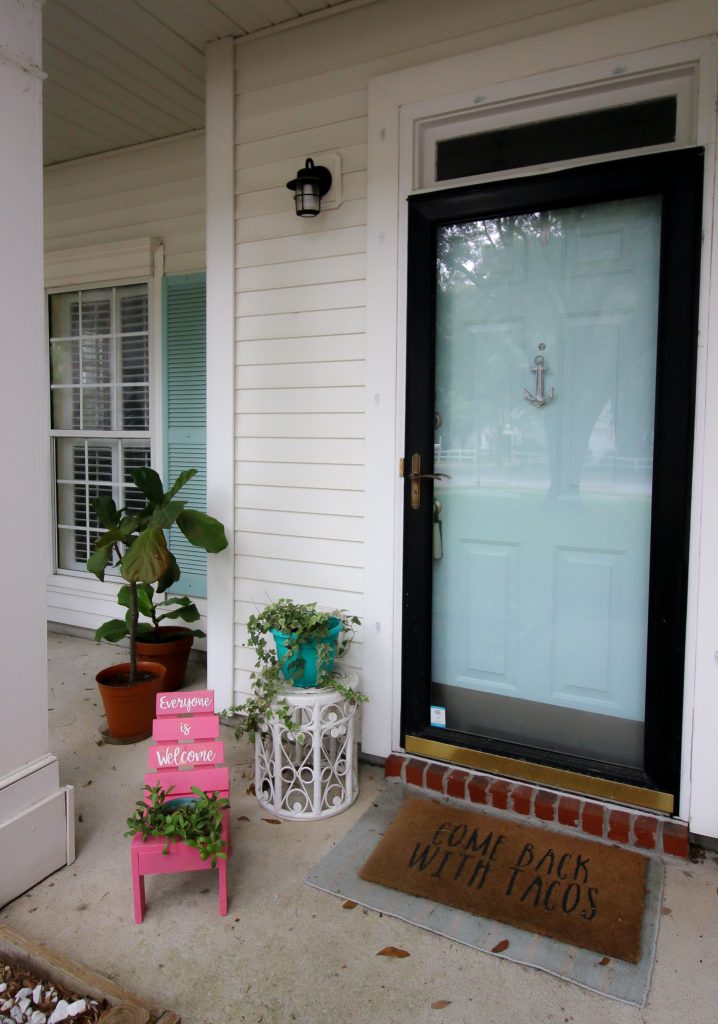
We're getting ready to move to a new house and we want to make sure we get off on the right foot with our new neighbors!
To do that, we decided to make a welcoming planter for our new front porch that will show off our colorful personality and bring a smile to people's faces.
We built this DIY chair planter and added a message using our Cricut and want to show you how to build the planter and how to add welcoming messages with a Cricut.
How to build a DIY chair planter
This small DIY chair planter is great for adding flair around a small pot. You can use any size potted plant up to about 8 inches in diameter and adjust the hole for your needs.
We have the full PDF plans available for you to build this planter yourself! The plans have the full material list, cut list and step-by-step instructions!
Step one: build base
The build for the project is simple. Start by building a base by connecting the legs together using the support boards.

Step two: make seat for pot
Then connect the seat top boards together using glue. Once the glue is dry, trace out a circle slightly smaller than the rim of your potted plant. If you make the hole the exact size of the pot's rim, it will slide right through, so make sure the hole is smaller.
Cut out the circle you traced using a jig saw, then attach the seat top to the leg base.
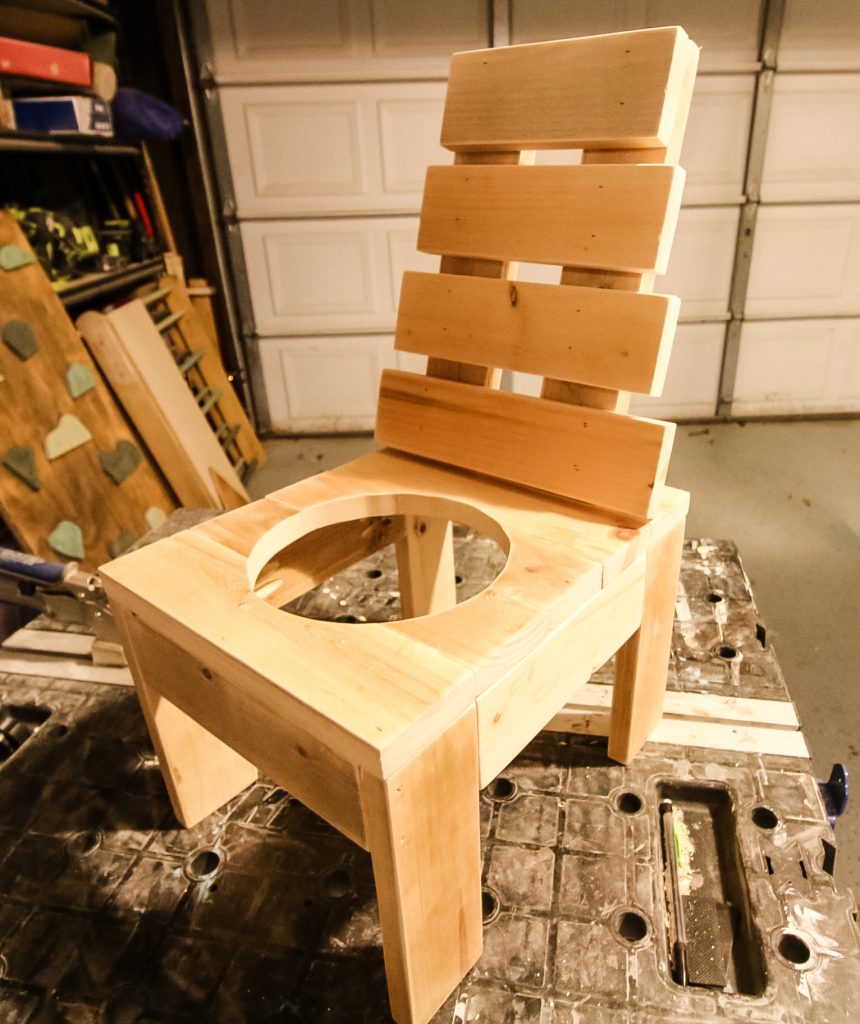
Step three: attach back
Make the back of the seat using two support beams and four boards that get slightly smaller as they work their way up.
Finish your DIY chair planter off by painting it a fun, vibrant color that lets your neighbors know your spirit!
Again, don't forget that you can get the plans for the DIY chair planter by clicking right here!
Step four: Add a stenciled message with a Cricut
Once your chair planter is done, show off your welcoming side by adding a fun message to your neighbors.
I decided to paint a stenciled message and created the stencil using my Cricut Explore Air 2 machine.
I love my Cricut Explore Air 2! It can cut over 100 materials, including everything from iron-on, vinyl and paper, to specialty materials like glitter paper, cork and bonded fabric. For a full list of Cricut Explore Air 2 materials, click here.
It can be used in everything from personal gifting, to personalization to home décor. The Cricut Explore Air 2 really gives you a great value for the price.
Cricut Explore Air 2 is easy to set up, and allows DIYers and makers to get up and running with projects quickly. With Cricut Design Space on desktop and mobile, you can design and make from anywhere within quickly and easily.
Be sure to read my full comparison of the Cricut Maker + Explore Air 2!
How to make a stencil with a Cricut
Making a stencil with a Cricut is easy!
All you need is:
- Cricut Explore Air 2, Cricut Maker, or Cricut Joy machine
- Removable vinyl
- Cricut Design Space
- Transfer tape
- Scissors and weeding tools
- Paint of choice - base color AND stencil color
- Your own design OR use my design!
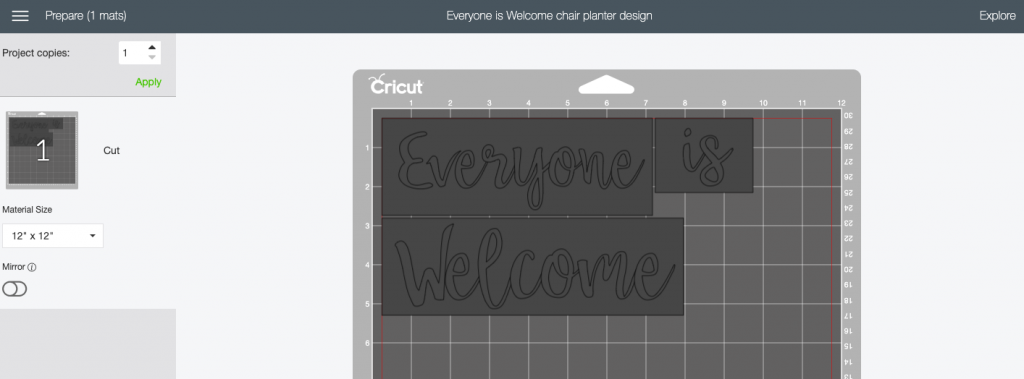
How to design a stencil in Design Space
First, add your text or design to Cricut Design Space. Here is my design!
Be sure that each line of text is it's own text box, since for this project you want each line to be it's own stencil.
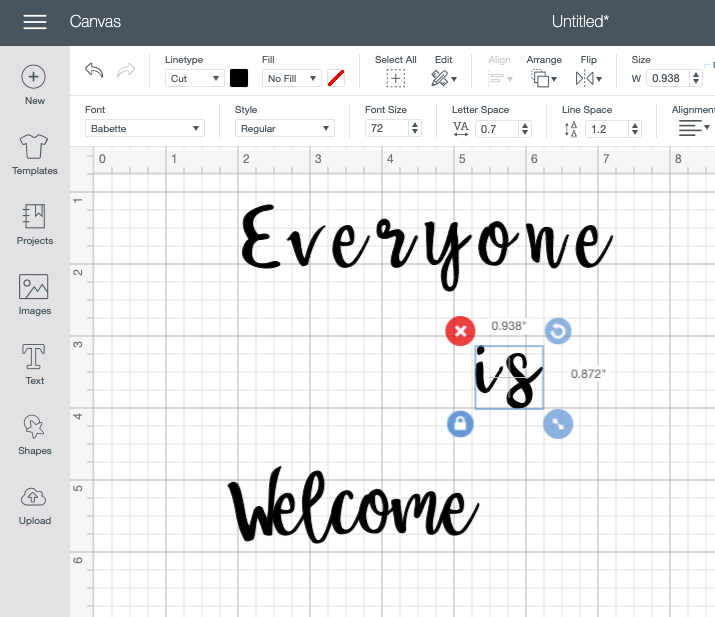
If you are adding cursive text, be sure to adjust the <-- --> Letter Space so that all of your letters connect.
Once you are satisfied with your design, on the far left go to SHAPES and instert a square shape.
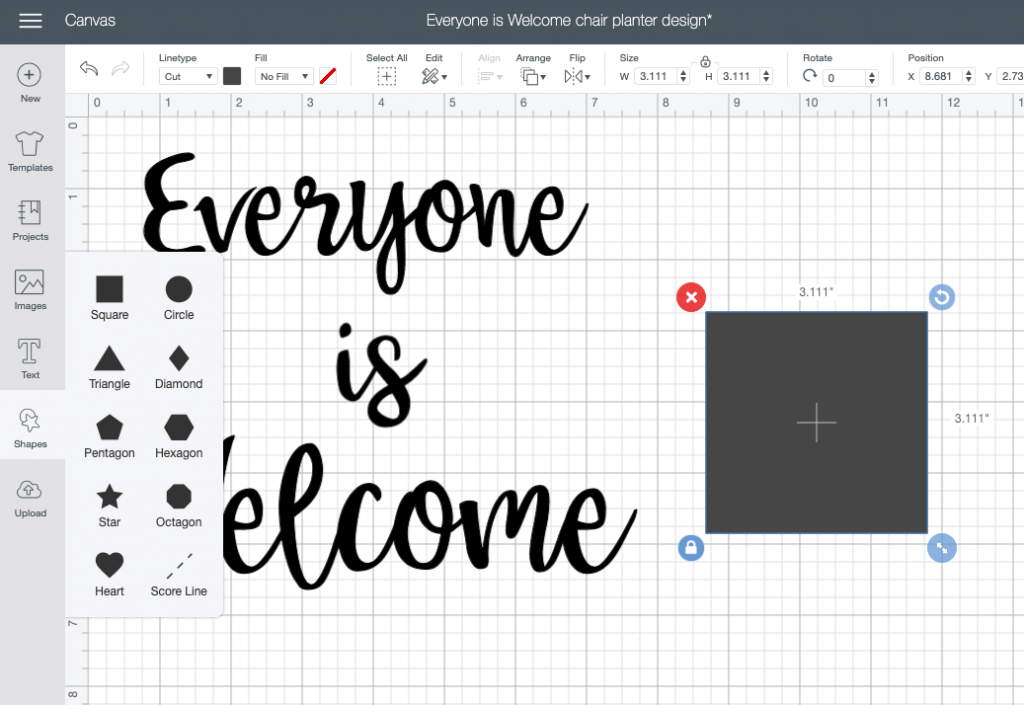
In the bottom left corner of the square, hit the lock symbol to unlock the shape. Now, use the bottom right to adjust the size and shape of the square.
TIP: Make your square the height of each beam of the chair (in this case - 2.5"). This will make it much easier to line the stencil up straight!
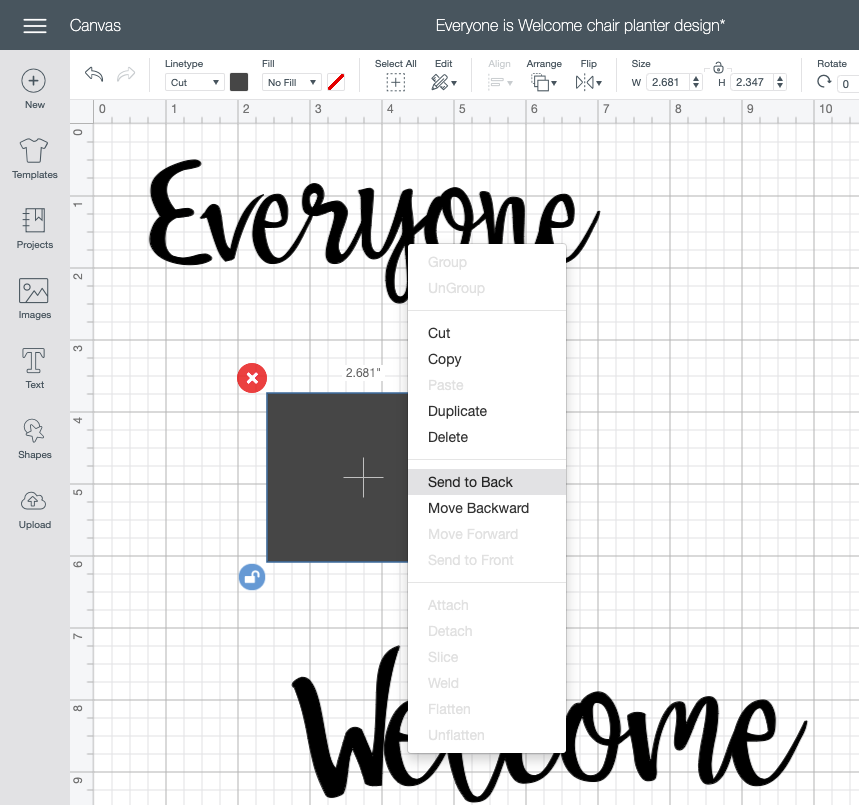
Right click the square and select SEND TO THE BACK to make your text or design visible again. I made my text white to make it easier to see.
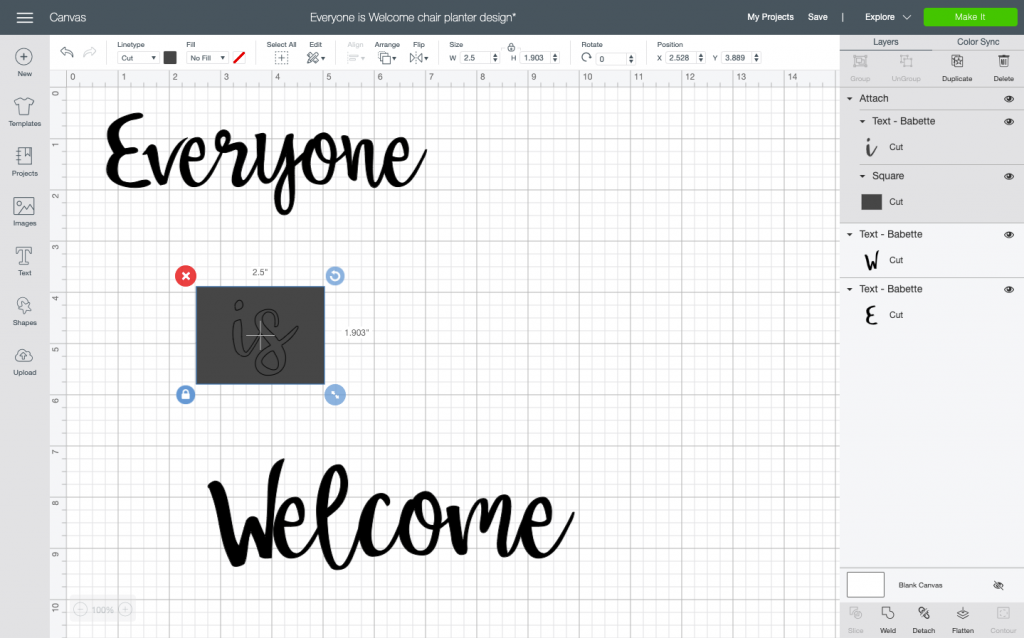
Once you are satisfied with the placement of your words on the stencil rectangle, highlight both the text and box and select ATTACH to make them one big cut.
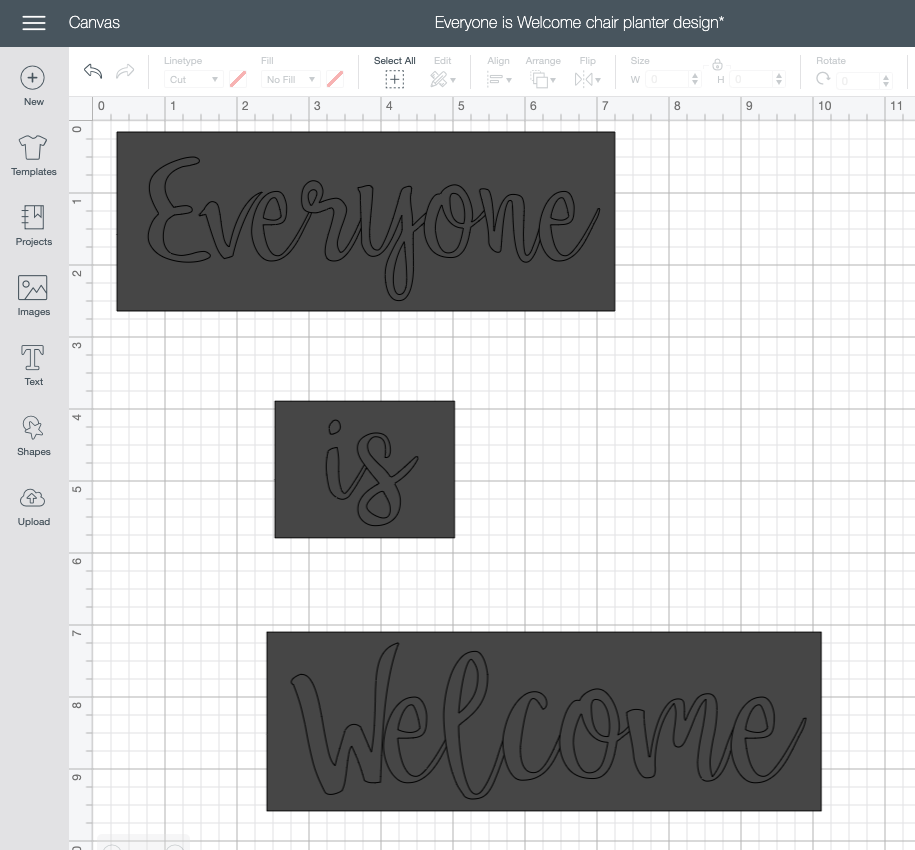
Repeat this for each line of your text or design. Then, make the project.
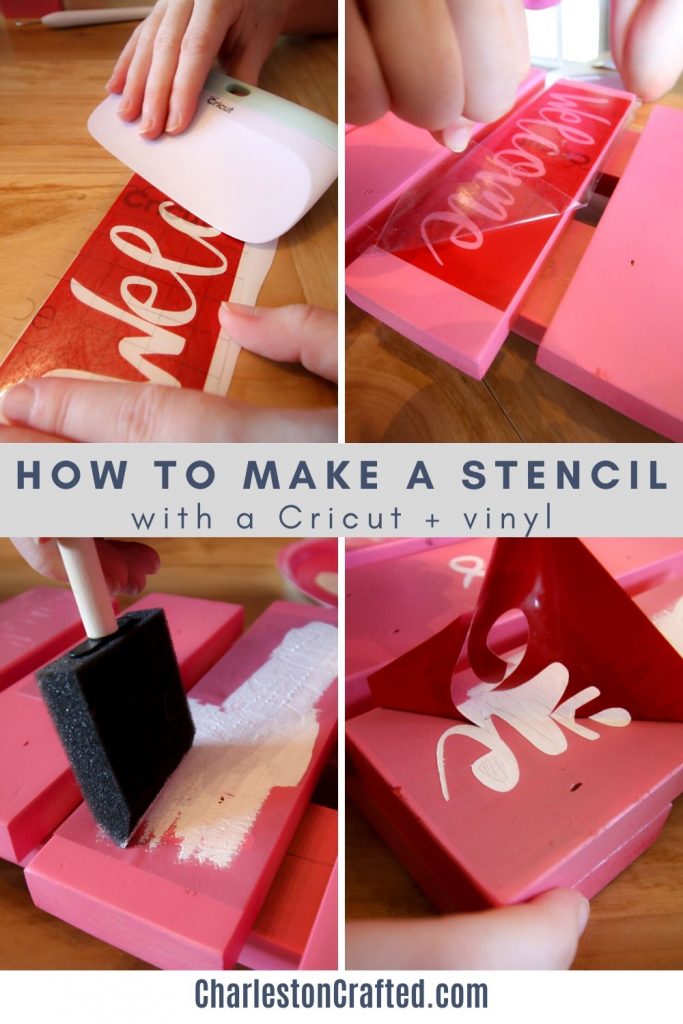
I used my Cricut Explore Air 2 and cut the design onto removable vinyl.
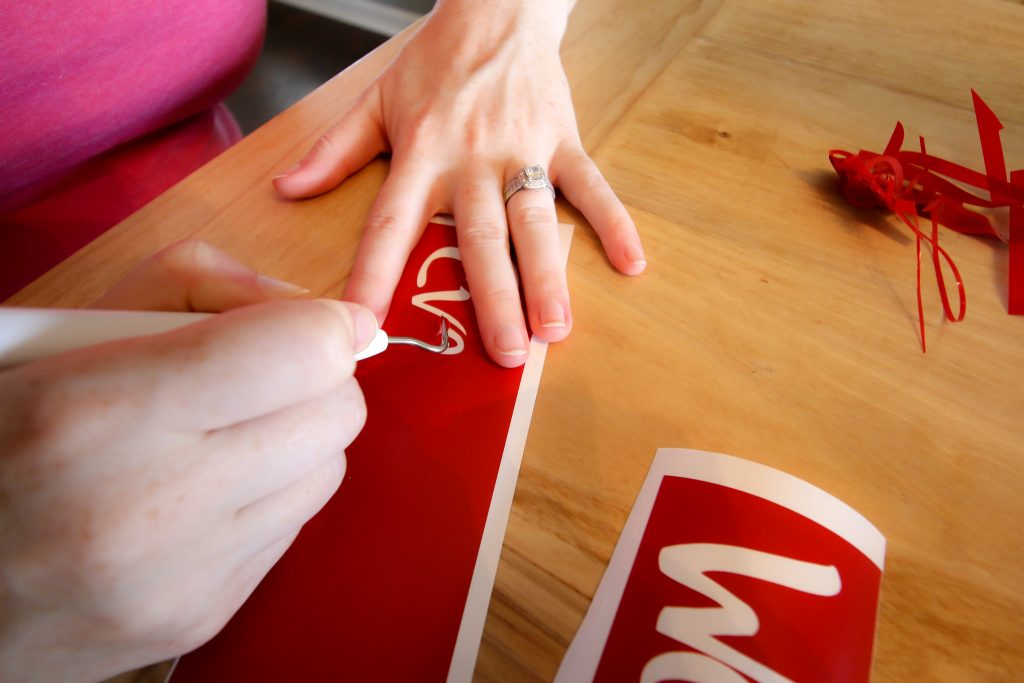
Once the design is done, use scissors to cut the pieces out. Use your preferred tools to weed off any excess - removing the text and leaving the outline for a stencil!
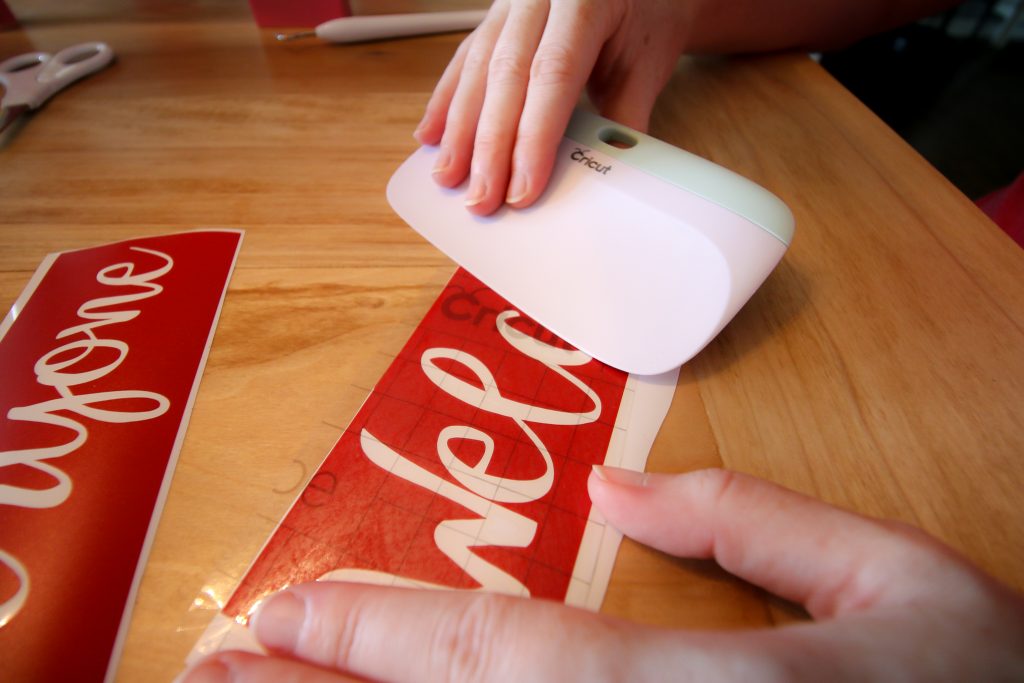
Apply transfer tape to the front of your design, using a scraper to adhere completely. Peel off the backing and apply to your plant stand.
Use the scraper to press into the wood and then peel off the transfer tape. Repeat for all 3 lines.

Once your stencil is in place, you will want to apply a coat of your base coat paint color. This seals off the stencil to prevent bleeding - if there is any paint bleed under the stencil, it will be your base coat color!
My base coat was pink spray paint, so I sprayed a light coat over the stencil and allowed to dry.

Then, use paint and a paint brush to paint over your stencil.
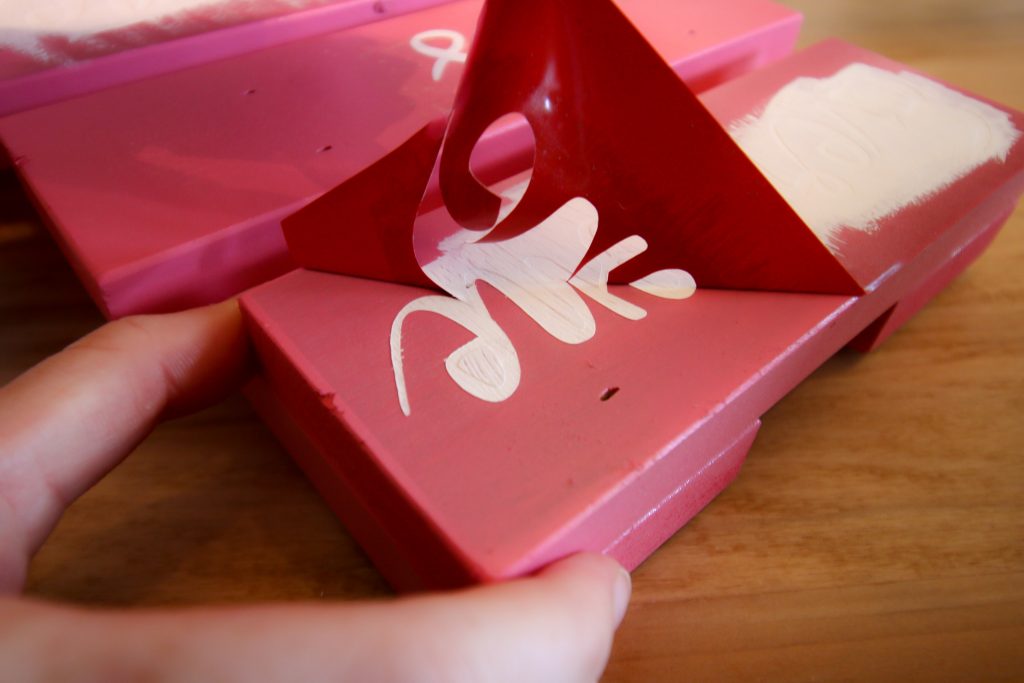
Once dry, carefully peel off the stencil.
You can apply a sealant to the whole thing if you like.
Enjoy your plant stand as it welcomes your neighbors and visitors!
Be sure to check out the Cricut blog, where you will find weekly home renovation project inspiration and tutorials.
Any questions about this project?

Looking for something?
We've been doing this since 2012 so we have a LOT of blog posts!
Search stuff like: Ceiling Projects | DIY Plant Stands | Thrift Flips

Hey there, I'm Sean, the woodworking enthusiast and builder behind CharlestonCrafted.com! Since 2012, I've been sharing the magic of turning raw materials into beautiful creations. I love teaching others the art and satisfaction of woodworking and DIY. I try to inspire fellow crafters to make something extraordinary out of nothing at all.


[…] 33. DIY Chair Planter from Charleston Crafted […]