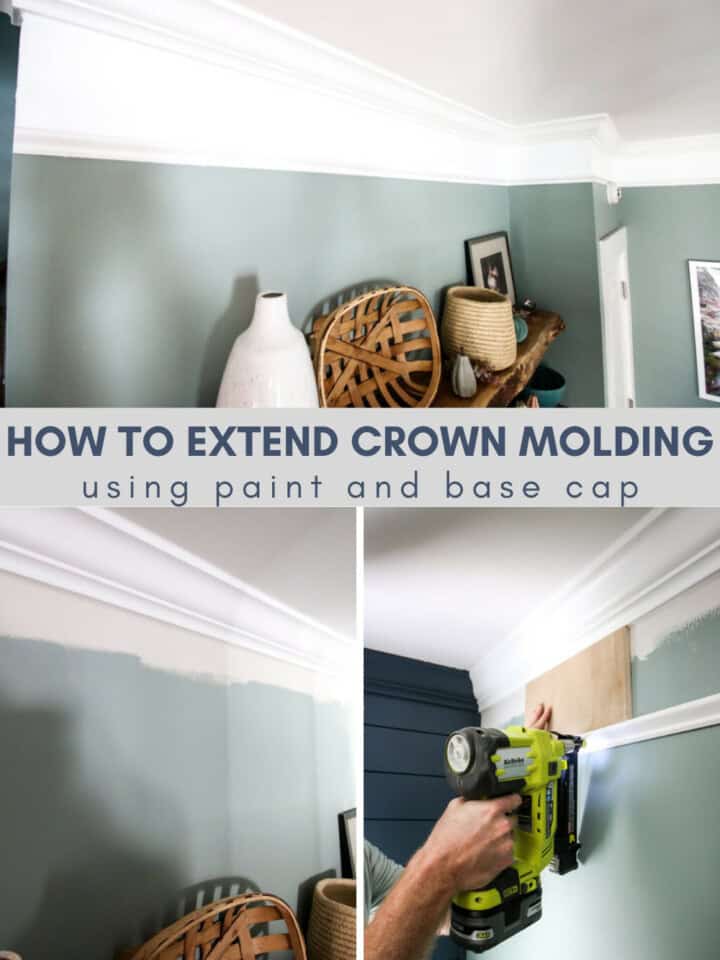
If you have simple crown molding around your home and want to give your space a luxurious upgrade, extending crown molding down with paint and base cap molding is really simple and has a huge impact!
We're working really hard right now on the overall appearance of the first floor gathering area of our home.
Our "gathering" area is the living room, kitchen and dining area that are all in one large space.
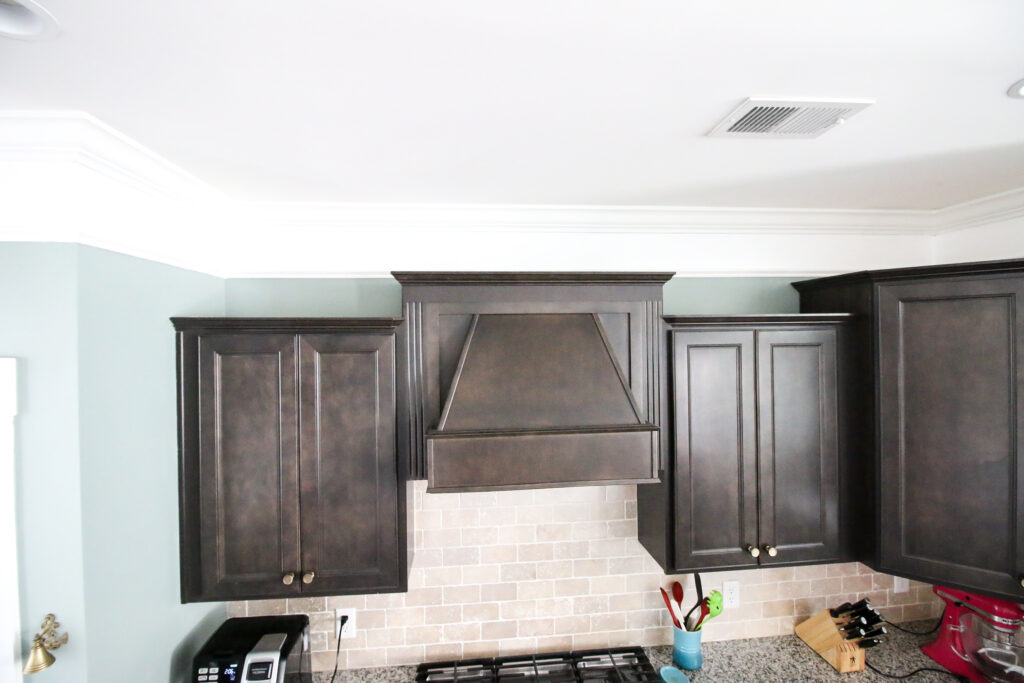
After finishing up the shiplap fireplace accent wall (where we painted our crown molding blue!), we wanted to make the rest of them space feel more regal.
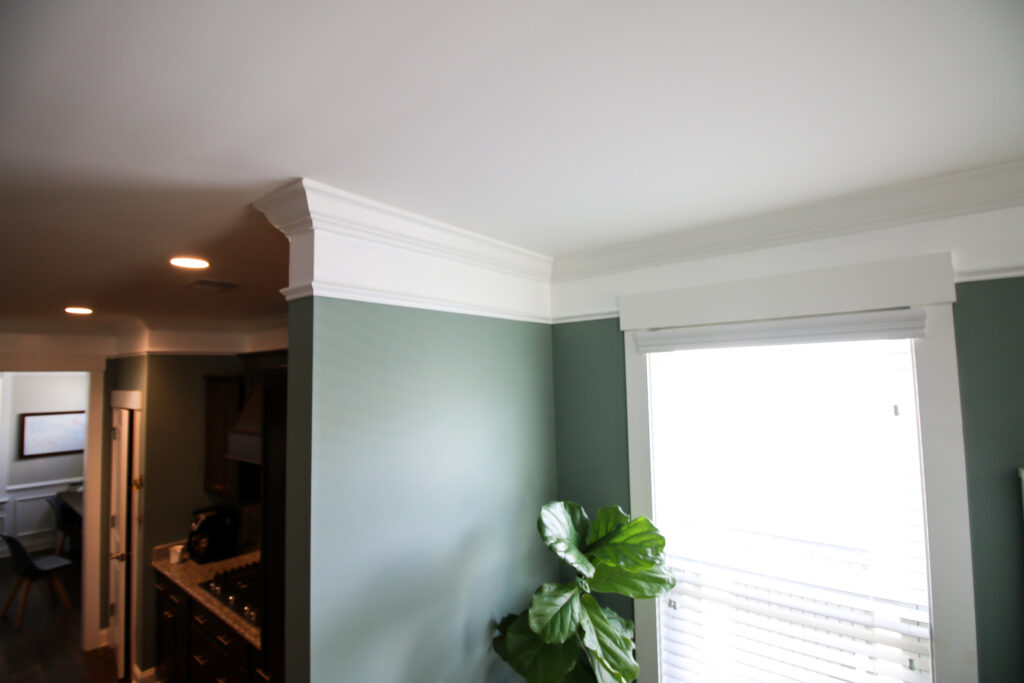
In the entryway and office of our home, the builders extended the crown molding down about six inches through the use of high gloss paint and an extra piece of base cap molding.
It really makes the entry look grand, so we wanted to extend that look throughout the first floor of our house!
Making crown molding look bigger and thicker through the use of paint is a simple process, so let's show you how to do it!
How to expand crown molding with paint
Crown molding is really just a fancy way to cover the corner of a room where the ceiling and wall come together and might not be perfectly seamless.
If you don't already have regular crown molding in place, here's how to install it!
Using different types of molding and different looks can give you the option to have a unique look throughout your home.
A popular option for a lot of people is to stack different types of molding to make a thick, chunky crown style.
We wanted something a little more elegant and to also match the rest of the house, so we just needed paint and 10 strips of base cap molding.
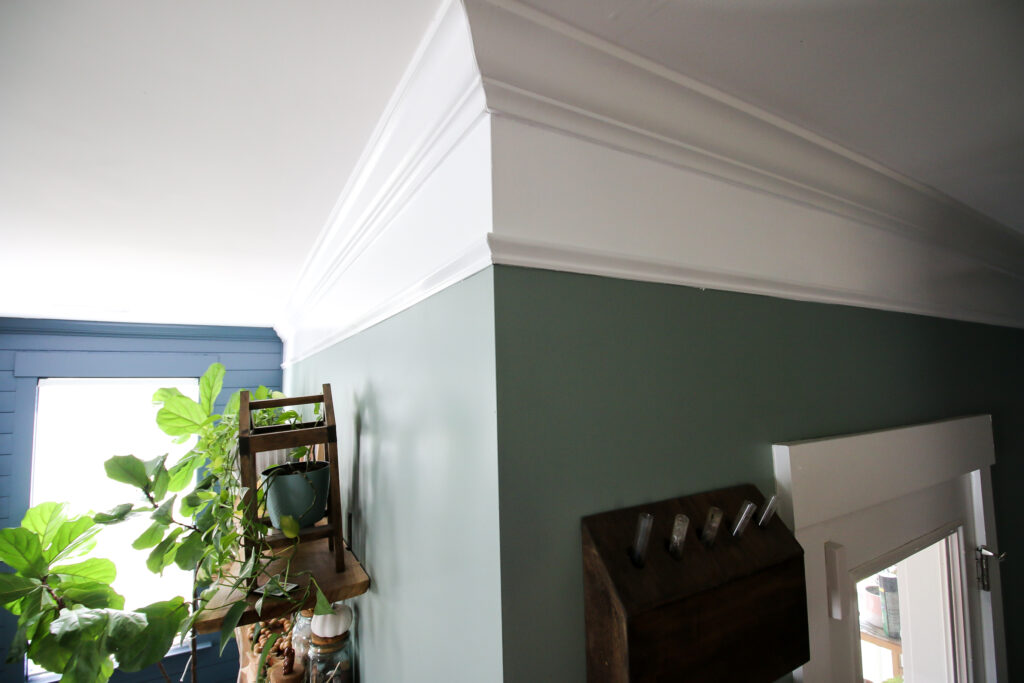
This is the easiest way to expand existing crown molding into something that looks bigger and nicer.
Here's what you need:
- Existing crown molding
- Base cap molding the length of all the walls you're covering
- Semi-gloss trim paint
- Miter saw
- Nail gun
- 1 ½" 18 gauge brad nails
- Wood filler
- Caulk
- Adjustable work platform
Step One: Measure Your Walls
The first step is to measure all of your walls and write those measurements down.
These measurements are going to be used for cutting the base cap molding that will be hung just below the crown.
It's important to measure roughly where the base cap will actually go, because walls might not be perfectly square.
Use these measurements to determine how many total feet of base cap molding you need and then head to the store!
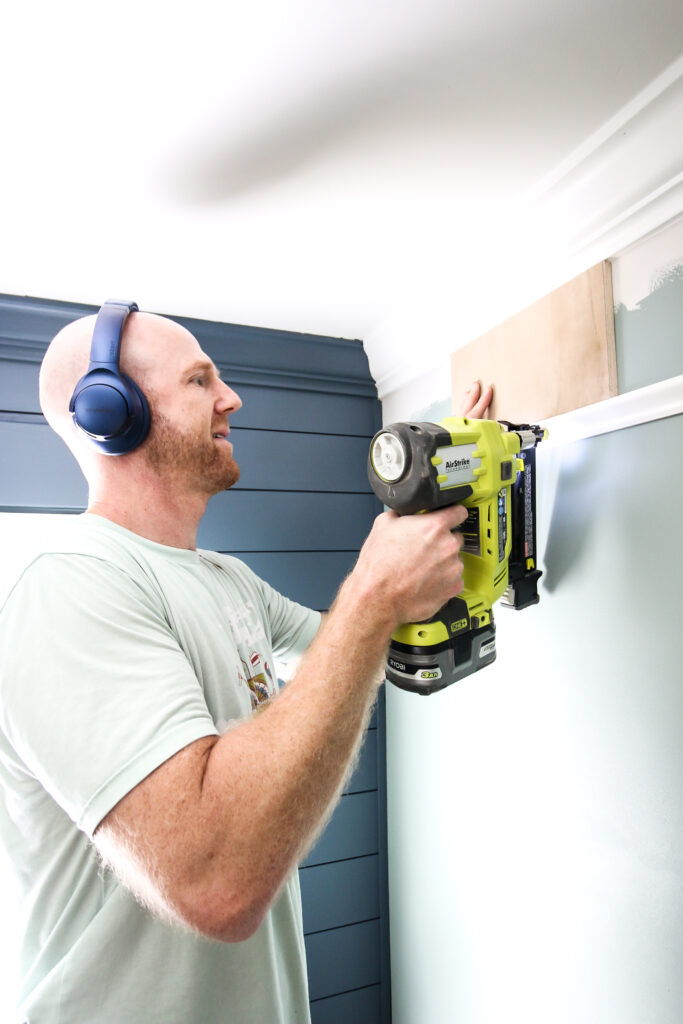
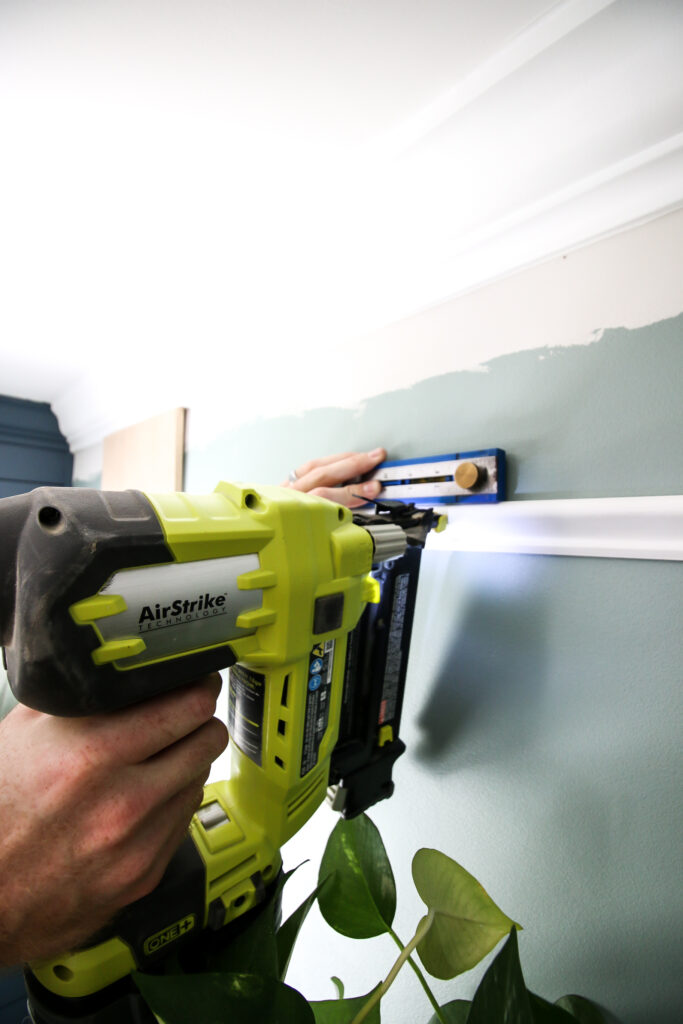
Step Two: Cut and Install Base Cap Molding
Cut each piece of base cap molding to fit each wall, nook and cranny.
I prefer to work a couple pieces at a time, but not the entire room at once.
It's important to remember that the measurement of the wall is for the BACK of the piece of base cap molding.
So, if you are coming into an inside corner, you need to cut a 45 degree miter cut from the front toward the back. If you're coming to an outside corner, you need to cut a 45 degree cut from the back toward the front. The measurement has to be for the part of the molding touching the wall.
Check out how we used base cap molding to install simple wainscoting in our son's old nursery!
In order to install the molding consistently, a tip is to cut a piece of wood to be the exact width you want to drop the molding down. So, if you want the base cap 6" below the crown, cut a 6" piece of plywood and use that to measure your space.
However, if the crown wasn't initially installed completely level, you'll need to use a level yourself to keep the base cap level, instead of just installing it at an even increment.
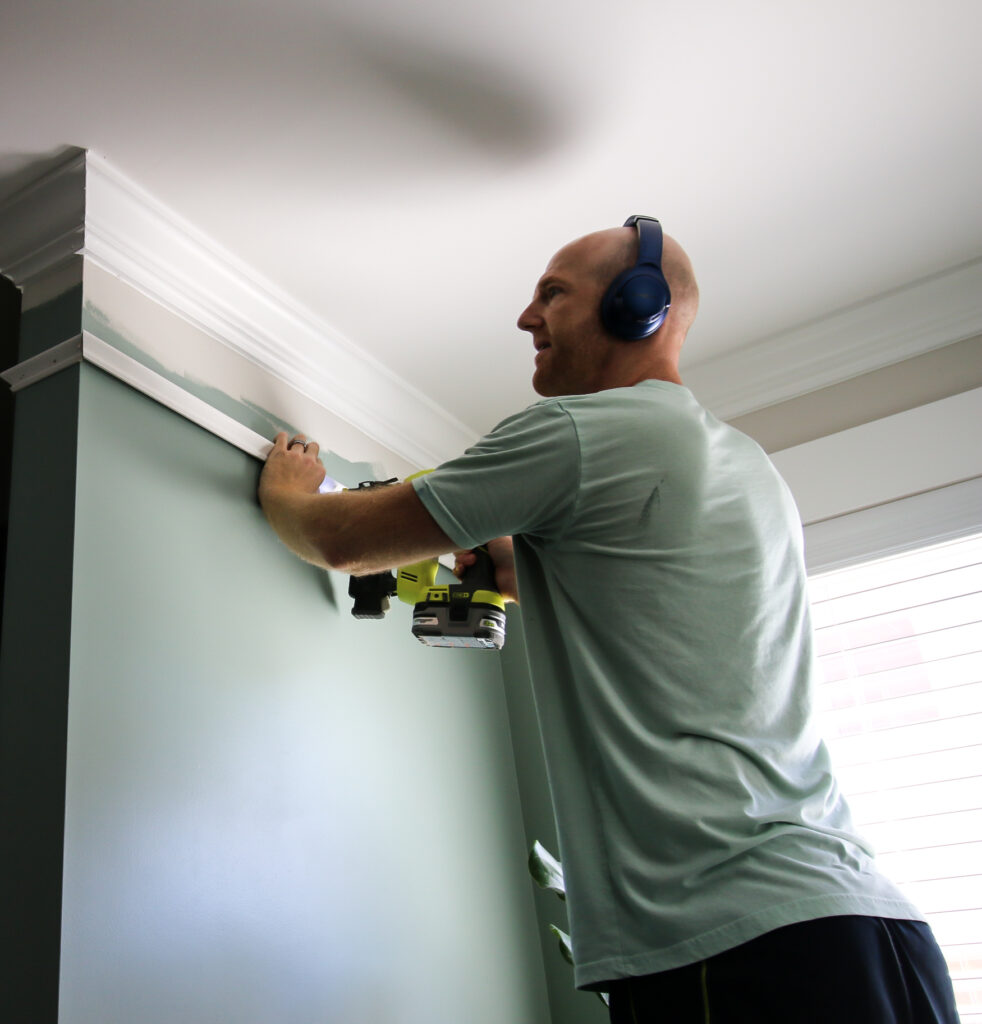
Use a brad nailer to shoot nails into the base cap at regular intervals for the entire span of the piece.
Repeat for all needed pieces of molding for your space.
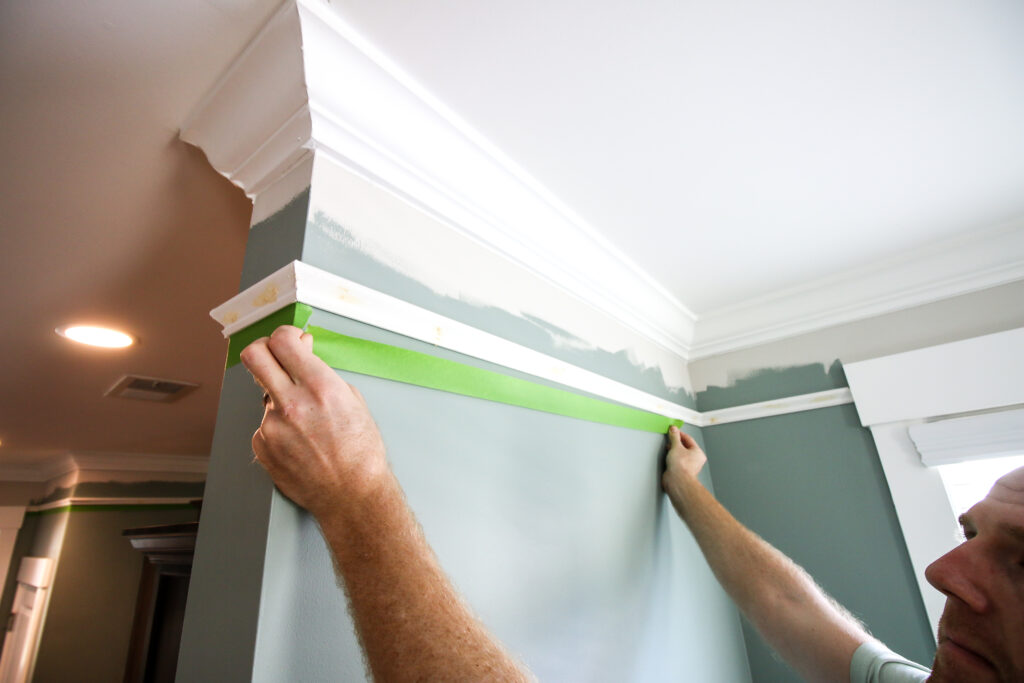
Step Three: Fill Nail Holes and Joints
Once all the base cap is nailed in, it's time to fill the nail holes and joints.
You'll need two products here: wood filler for the nail holes and caulk for the angled joints.
Learn more about when to use wood filler, caulk and spackle here!
Apply a small amount of wood filler to each nail hole and try to leave as little residue as possible. Once it's dry, you'll go back and lightly sand all these spots with fine grit sandpaper.
For all of the interior and exterior angles, fill those with caulk. Use a gloved finger to smooth the caulk as you squeeze it into place.
Let everything dry, sand and get ready to paint!
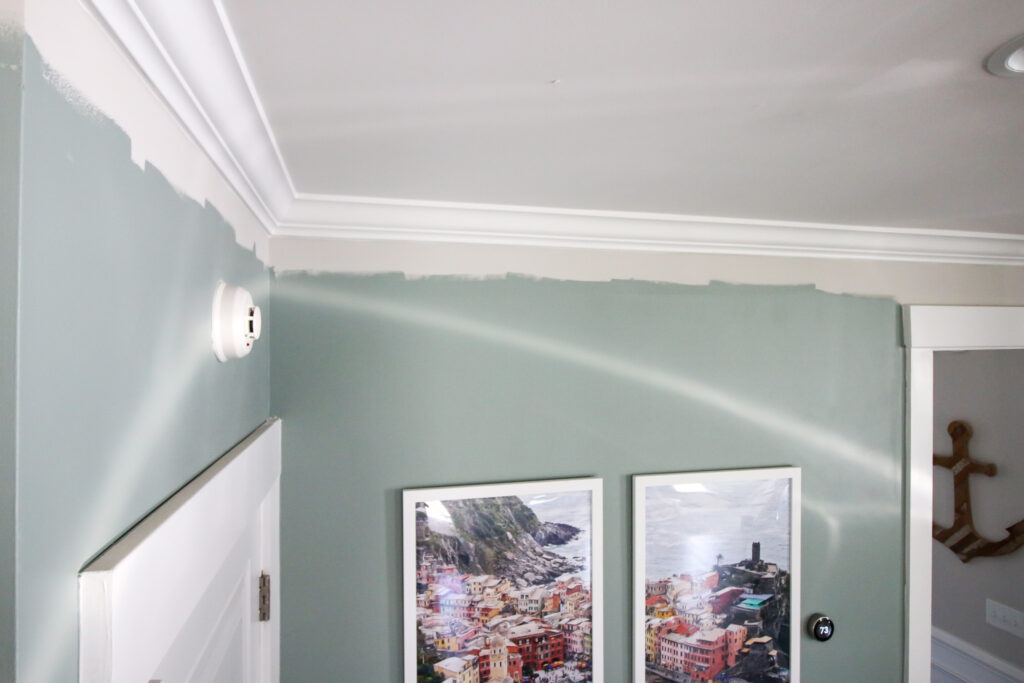
Step Four: Paint Between Molding
Crown molding is usually painted with a semi-gloss interior paint. So, to make this extended molding look seamless, use semi-gloss trim paint for this step.
Use painter's tape to tape off the wall underneath the base cap molding.
Use the semi-gloss paint to paint the base cap molding and the wall area above.
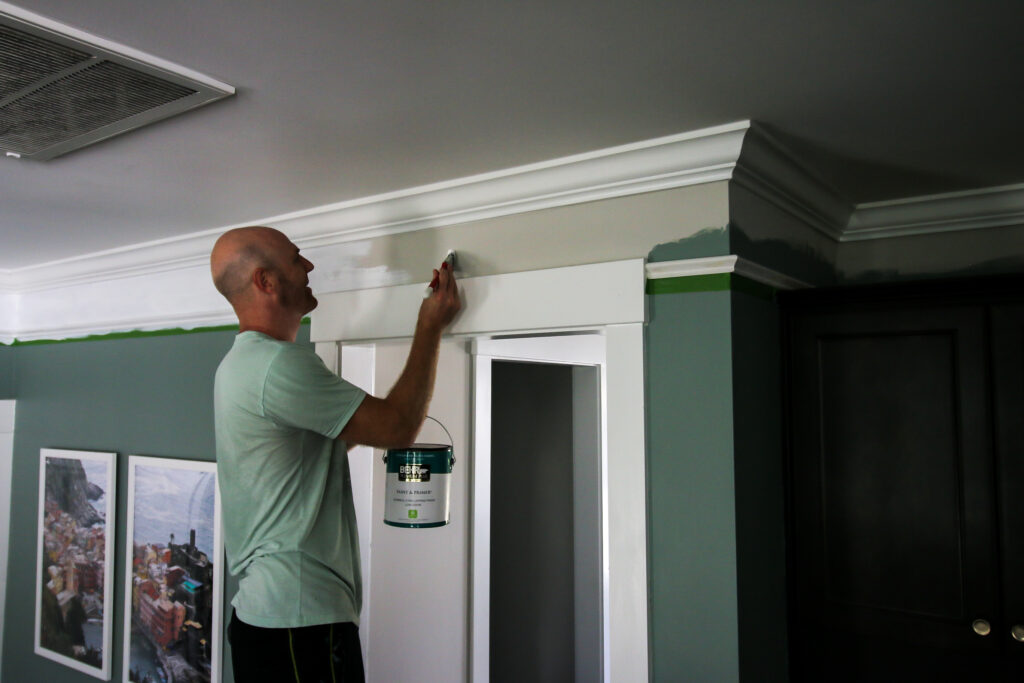
Be warned, semi-gloss paint is going to take quite a few coats to get the coverage needed. We lost count, but it was four or five coats to get full coverage on the wall.
You probably only need 2-3 coats on the base cap molding.
Once you're done, peel the tape off and take a look at what you made.
Step Five: Enjoy!
It's really easy to use paint to make thicker crown molding in your home and give your space a more grand feel!
This is a simple project for any homeowner and one that you should give a try!
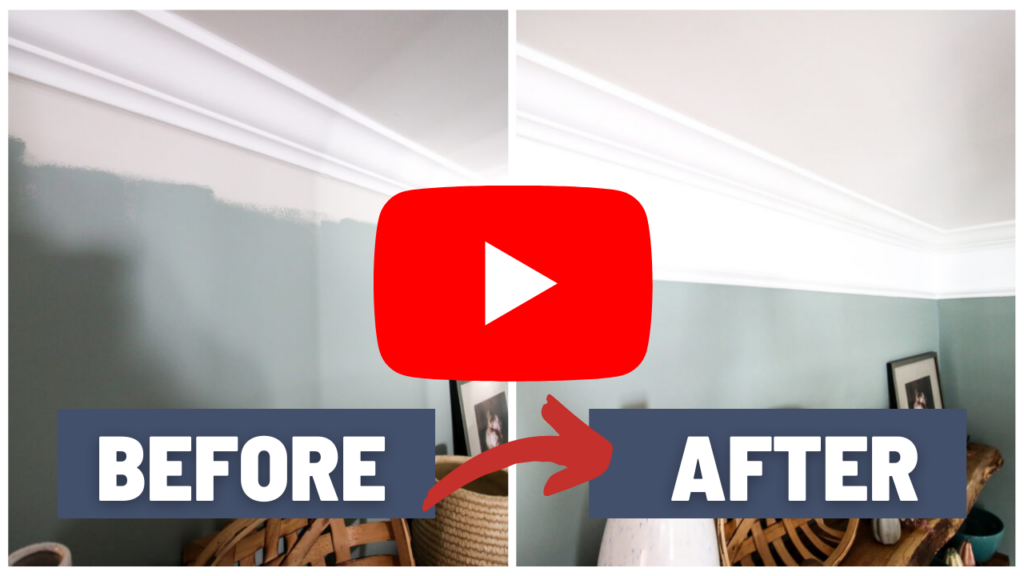
Video Tutorial
This is a great project to see in video action. If you want to see a video tutorial of how we expanded our crown molding with paint and base cap molding, check out the video at the link below!

Looking for something?
We've been doing this since 2012 so we have a LOT of blog posts!
Search stuff like: Ceiling Projects | DIY Plant Stands | Thrift Flips

Hello, I'm Morgan, half of the creative force behind CharlestonCrafted.com! With a passion for DIY that dates back to 2012, I've transformed three homes and now I'm dedicated to helping others craft their dream spaces. Let's turn your house into a home together!


