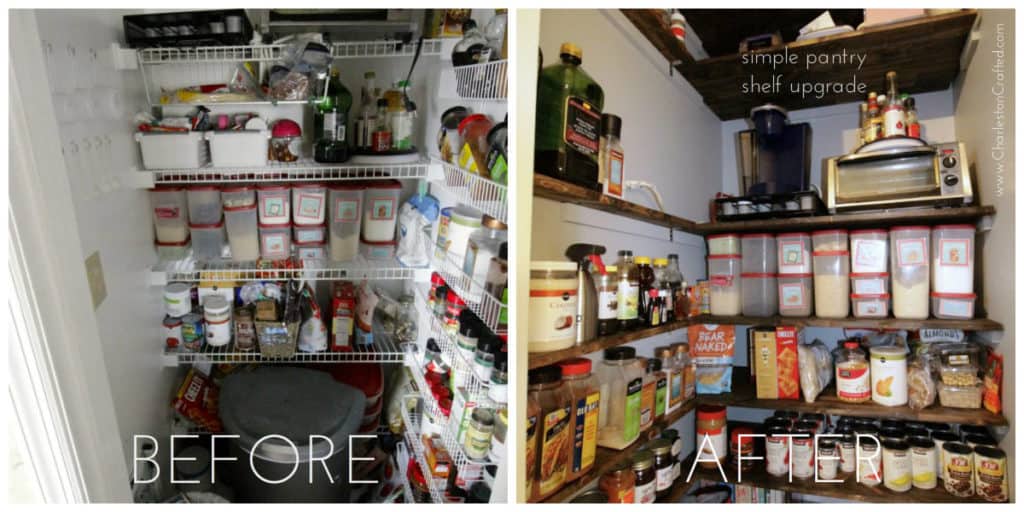
Wondering how to build pantry shelves? You will love this simple DIY tutorial and DIY pantry idea!
We aren't planning to remodel our kitchen until spring, but one of our biggest problems in the house has been our pantry.
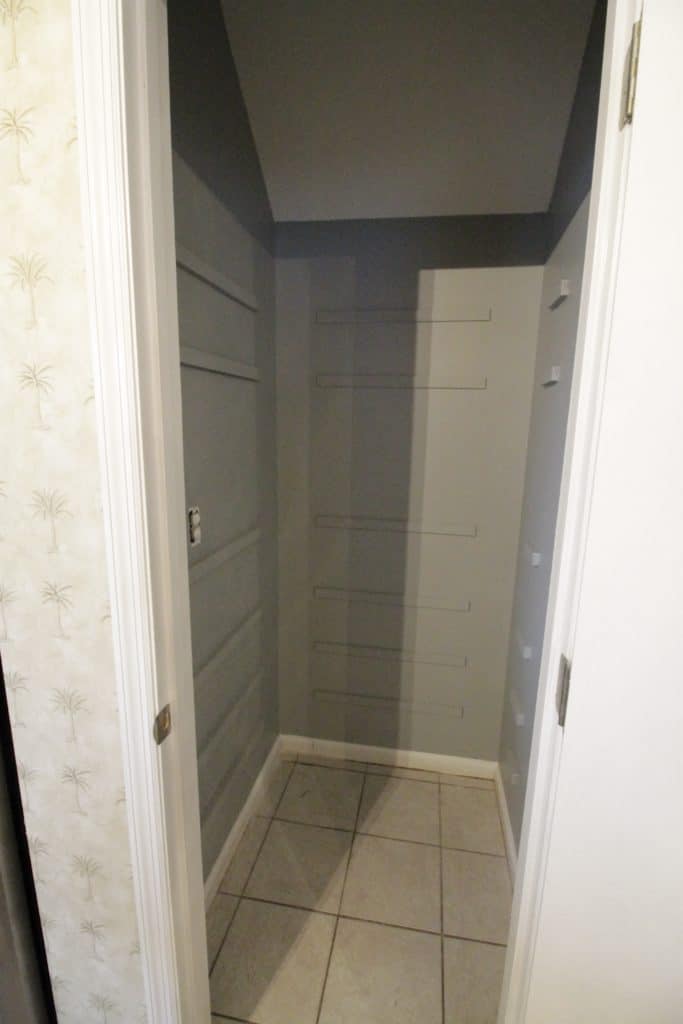
The pantry was full of shallow wire shelves and when we moved in all we did was just cram our food in there. That led to frustrations whenever we were looking for something we needed to cook with or when we realized we had just bought a box of something we already had but couldn't see before.
So, we decided to put that to an end and go ahead and remodel our pantry now.
Check out the pantry renovation we did in our new house now that we actually know what we're doing!
How to build pantry shelves
Our big goal for our new pantry was to create a custom storage solution that we could organize what we had, but also create more space for the future.
Back in the condo, we created a custom pantry and ripped out the wire shelving there too.
We wanted to go with the same plan and do wooden shelves with wooden railings to hold them up.
Since this pantry is wider and deeper, we knew we'd also be able to add some storage to the side walls as well.
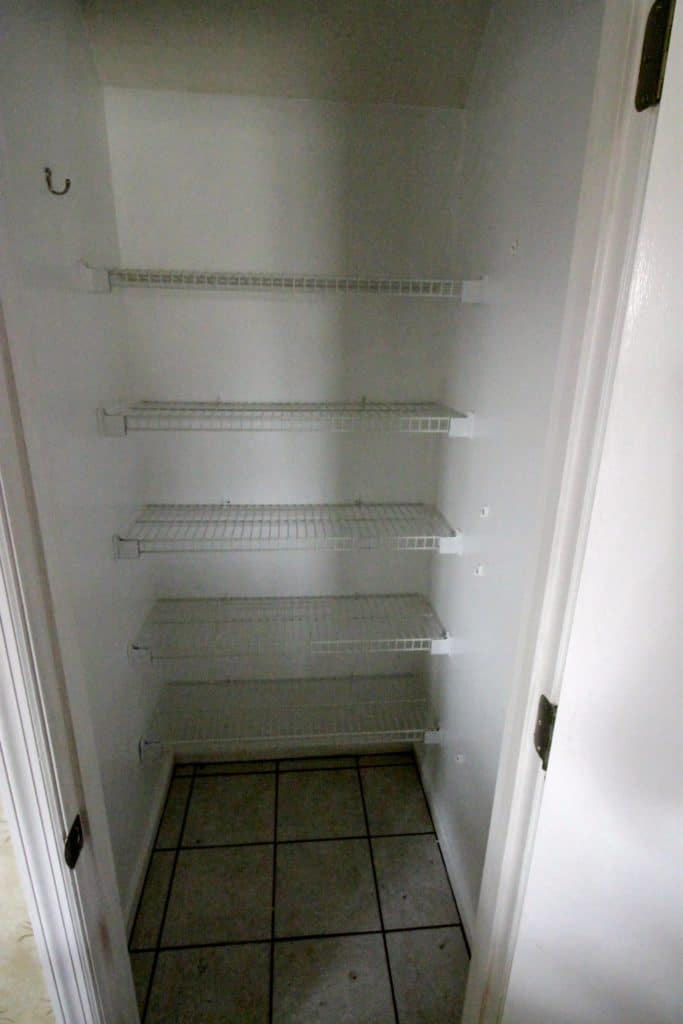
Step one: demolition
But in order to do anything, I had to start with demo. That included taking out all the food then ripping out all the old shelving.
I also got to get back into the swing of scraping popcorn ceilings! Super fun. Haven't done that since we did our master bedroom.
Here's all our best tips on how to DIY scrape popcorn ceilings!
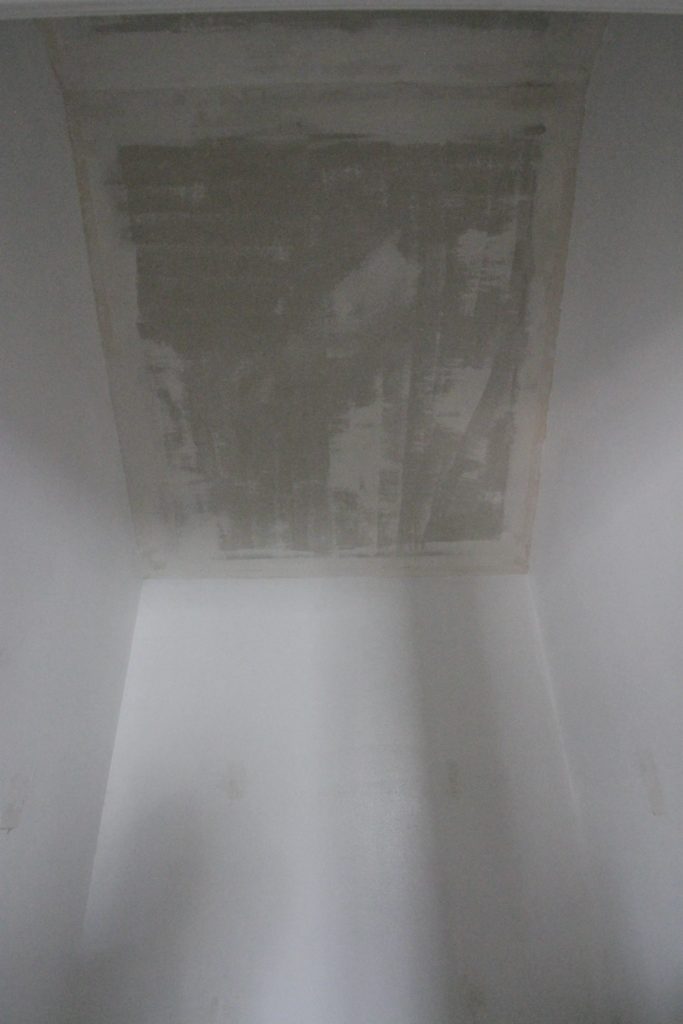
Then, I patched all the holes from the wire shelving's screws with spackle and sanded everything smooth.
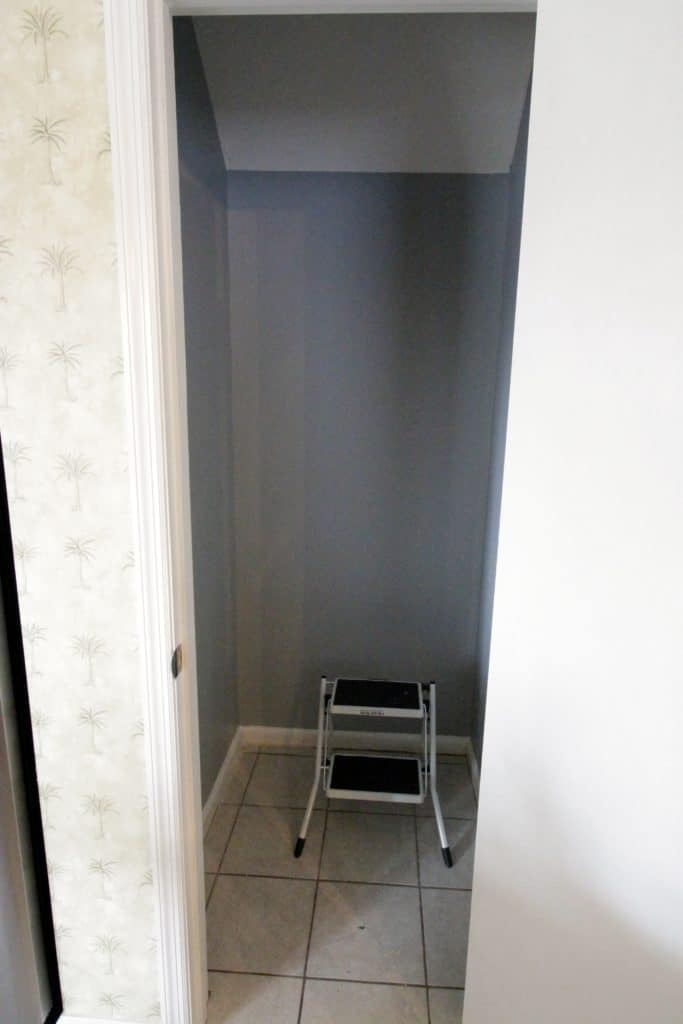
Step two: paint
Next we painted the walls with the same grey that we used in the front room and dining room.
We plan to take it throughout the downstairs.
Once everything was all painted, it was time to reconstruct.
Step three: Adding shelf brackets
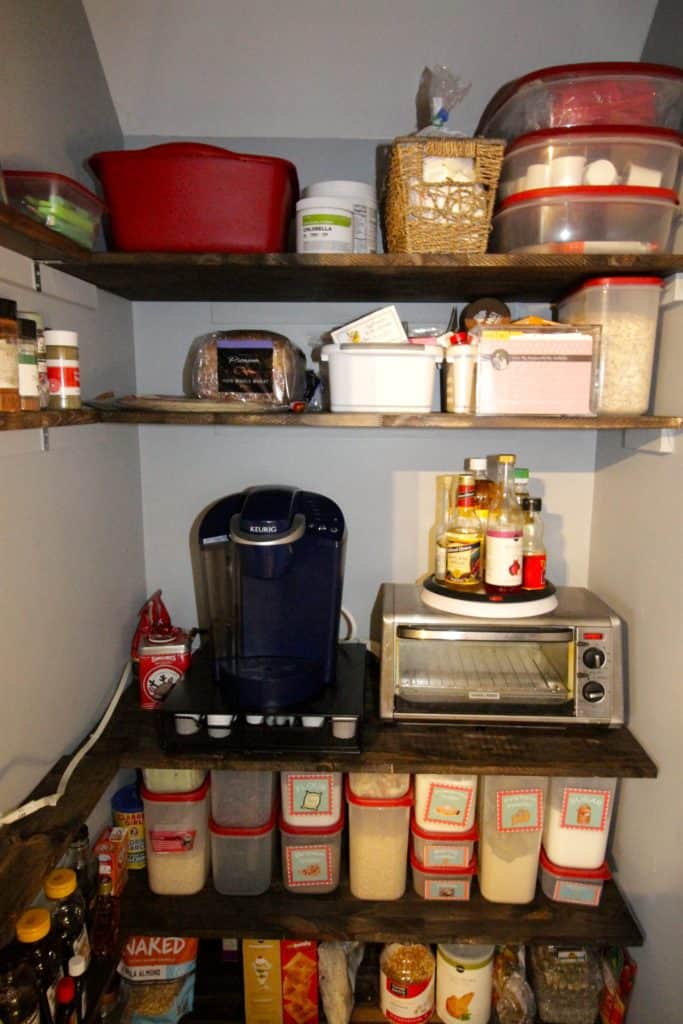
We designed a layout with the proper spacing we wanted in between each shelf. With that, we took things into account like a tall shelf in the middle where we're going to keep our coffee maker and toaster.
We have an outlet in the pantry and we didn't have a place to keep those two appliances after we had the walls taken down.
Once the walls were open to the dining room, we didn't like having the toaster oven and coffee maker be the first thing you saw when you walked into the front door.
Putting them in the pantry tucks them away while still making them readily accessible.
We used 1" x 2" boards as the railings for each shelf along the back and sides.
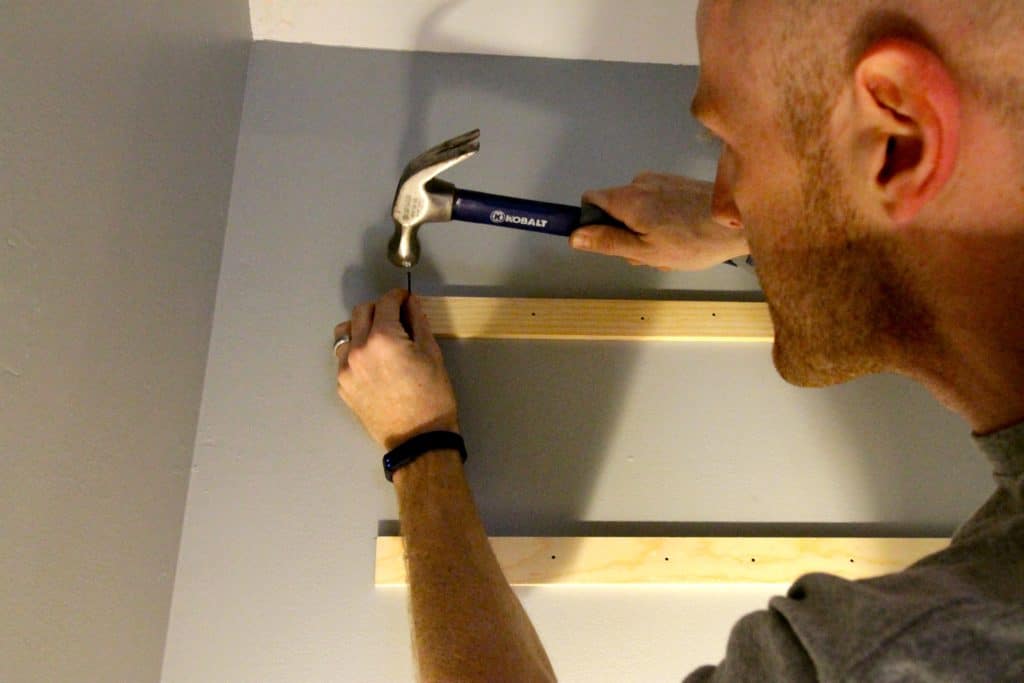
We nailed them up in the "L-shape" we wanted for deep shelves in the back and thing shelves on the side.
Once all the boards were up, we painted them the same color as the wall to "blend in."
Step four: install shelves
Last thing was the actual shelves.
We used boards that were ¾" thick, 36" wide, and 16" deep for the back, and ¾"x 3"x 25" boards for the side shelves.
We stained all of these with our favorite Dark Walnut stain to bring out the texture.
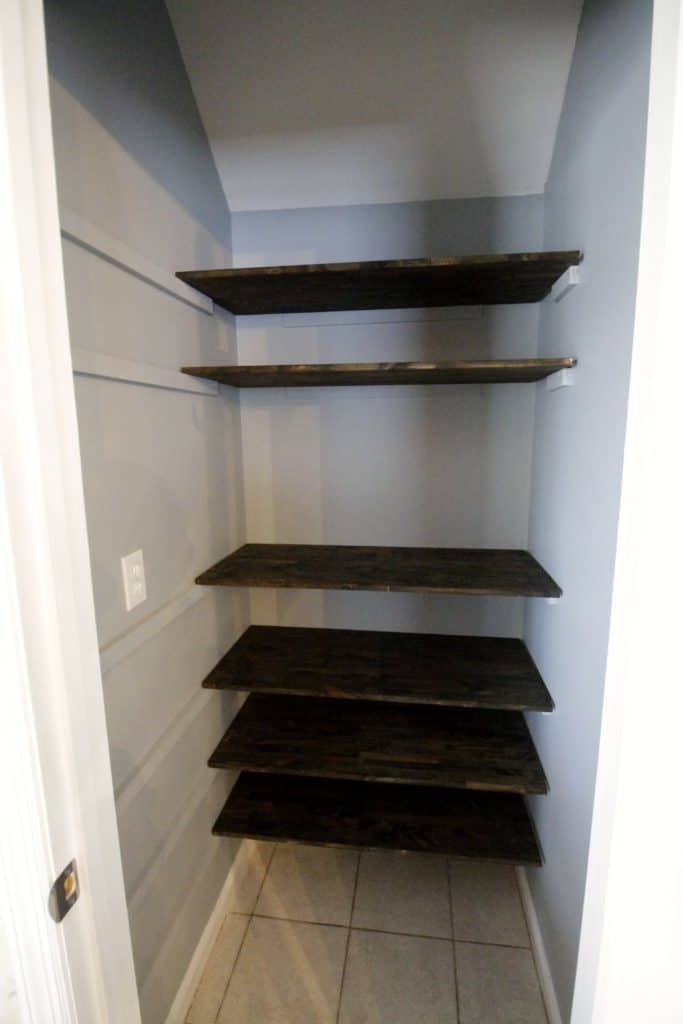
The long term plan is to run the laminate "wood" flooring in the kitchen when we remodel, so the shelves will match the floors pretty closely at that point.
We also added some shelving to the lefthand wall. These are made from 4" wide boards cut to go from the end of the back wall shelves to the wall next to the door.
This allows for some additional storage about 1 can deep (just over 3.5" deep). Then, we tossed the shelves up on the railings with no problem.
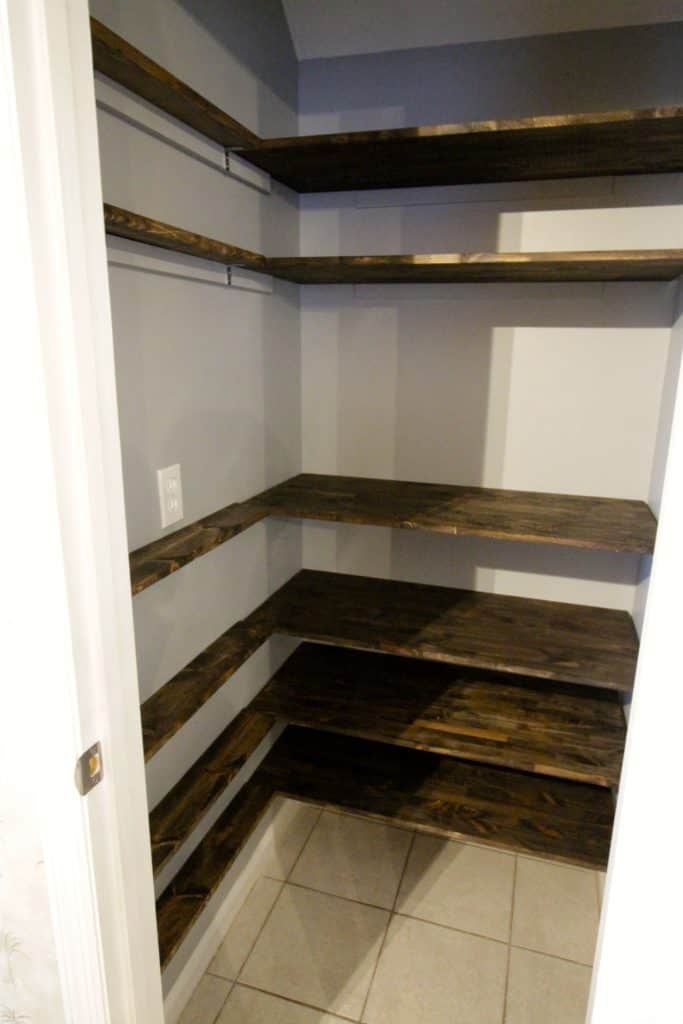
We also added one additional shelf over the door.
It's hidden when you look in unless you look up, but it's a little bonus storage for little-used items like a drink canister or soft cooler.
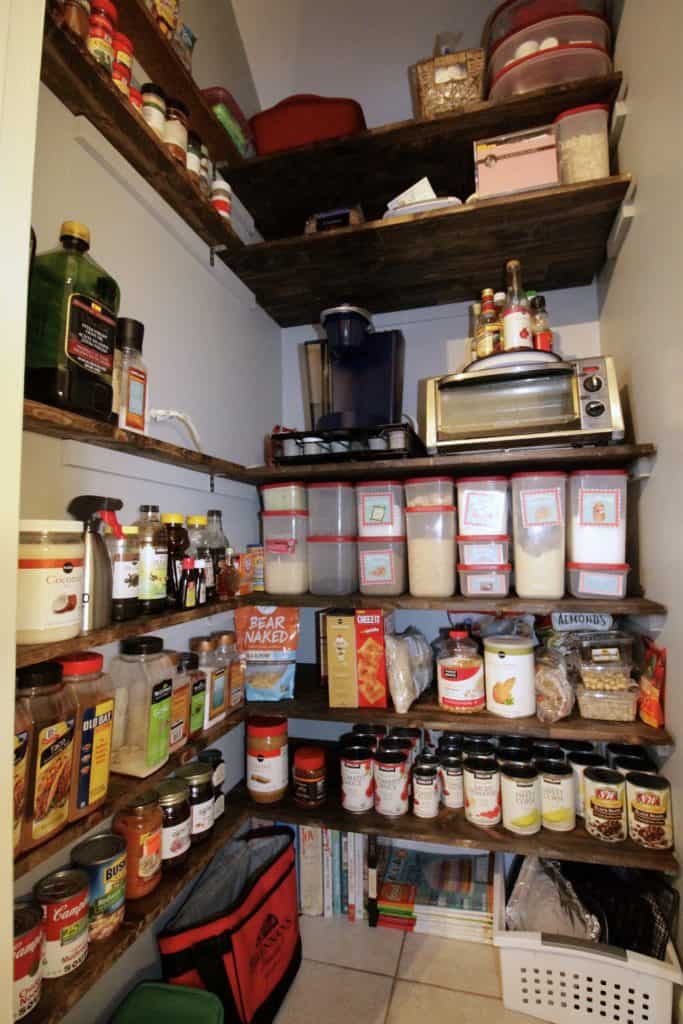
Step five: restock the pantry
The last thing to do was to stock our shelves!
We're thrilled with how our pantry remodel turned out. It really wasn't hard at all, but we needed three days to allow for various drying times. Now, we have custom pantry that fits everything we had before and more, plus allows for rearranging in the future.
A few things to note - we are on the lookout for a shorter extension cord for the appliances. The current one is 6 foot and has a lot of excess, but we haven't been able to find a 3 foot 3 prong 2 plug cord yet.
Also, this set up works for us because we really don't have a lot of pantry food. We have baking stuff, a selection of similar cans that we buy in bulk, oils and spices, and a few dry goods.
We primarily eat fresh foods or freezer meats. If we had a lot of pantry-items, the large shelf in the middle probably wouldn't have worked for us. That's why it's great to go custom!
Be sure to check out a couple other details we did to accessorize and complete our pantry!
Here's how we added an antique door to the pantry!

Looking for something?
We've been doing this since 2012 so we have a LOT of blog posts!
Search stuff like: Ceiling Projects | DIY Plant Stands | Thrift Flips

Hey there, I'm Sean, the woodworking enthusiast and builder behind CharlestonCrafted.com! Since 2012, I've been sharing the magic of turning raw materials into beautiful creations. I love teaching others the art and satisfaction of woodworking and DIY. I try to inspire fellow crafters to make something extraordinary out of nothing at all.


Amanda Peterson says
Looks great! I needed this motivation to finish my pantry. It's all painted. Need to measure, buy supplies, install everything and move all my food from my kitchen cabinets to the shelves in pantry.
Morgan says
You can do it! Demo was the most time consuming honestly. It's worth it for the results! Thanks for stopping by.
Anissa Prickett says
I was wondering where you purchased your solid wood that was 36 x 16 for your pantry. I am having a hard time finding one piece. It is beautiful. Ours needs to be about the same and it would make it so much easier if we could find one big piece like you did. Thank you!
Blessings, Anissa Prickett
Morgan says
This is called "project board" and its in the shelving section at lowes!
Terri says
Beautiful job! What stain did you use?
Sean says
Early American- https://amzn.to/2SHj5so
Marcia Beck says
I found a 3' cord at HOME DEPOT