• Skip to primary navigation
  • Skip to main content
  • Skip to primary sidebar
Charleston Crafted
  • DIY
  • Woodworking
  • Popular Posts
  • Blog
  • About
  • Shop
menu icon
go to homepage
  • DIY
  • Woodworking
  • Popular Posts
  • Blog
  • About
  • Shop
search icon
Homepage link
  • DIY
  • Woodworking
  • Popular Posts
  • Blog
  • About
  • Shop
×
Home » Art Projects

How to Make an Oversized DIY Chalkboard

Published: May 11, 2016 · Modified: Apr 30, 2024 by Sean · As an Amazon Associate, we earn from qualifying purchases. This site contains affiliate links. ·

Need to make a giant oversized chalkboard? This is a great addition for a classroom or backyard for kids of all ages and you can make it yourself!

I have to be honest with you- I haven't seen a chalkboard in quite some time. Like, literally, not since elementary school.

I was probably one of the last classes of people that had chalkboards in their classrooms. My school switched over to whiteboards when I was in elementary school and I know that because I can still smell those scented markers the teachers had.

But, we have an event coming up at my office soon and my boss had the idea to have a chalkboard available for people to write messages about the theme. I don't really know where you buy a chalkboard anymore so I decided to build one using wood and chalkboard paint.

Here's how to make a DIY chalkboard.
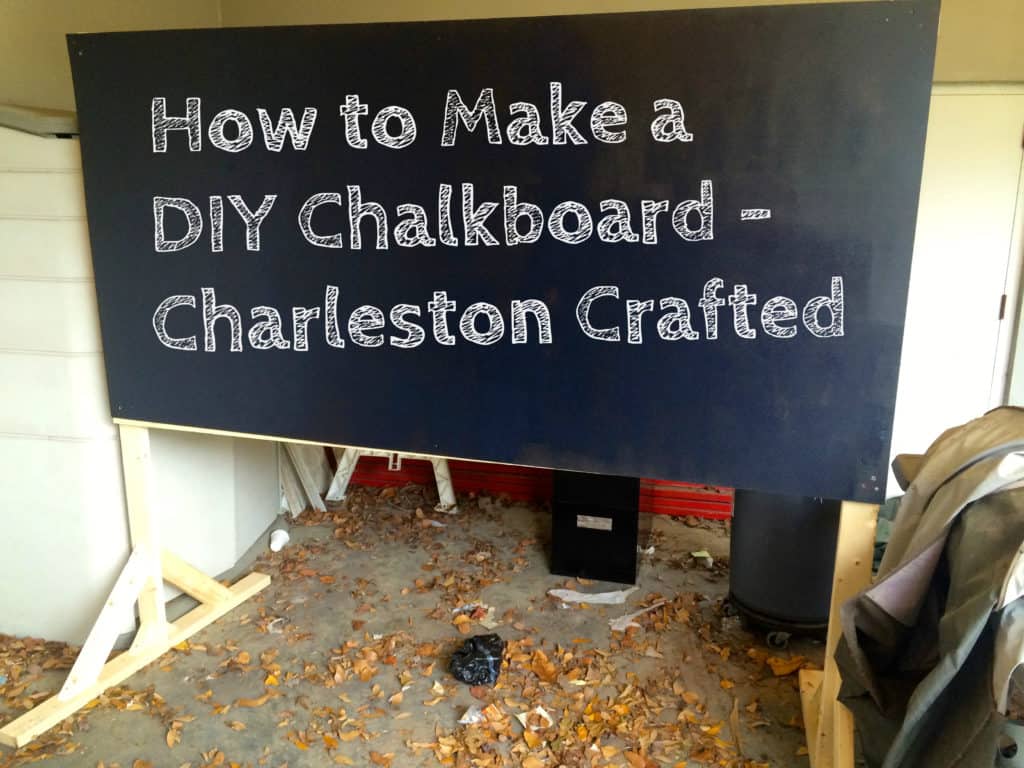
How to Make a DIY Chalkboard - Charleston Crafted

DIY oversized chalkboard

At Lowe's, my coworker and I got six 8-foot 2'x4' boards and a 4'x8' piece of thin whitewood. This was going to be a pretty big chalkboard, so you might want to go with something a little smaller if you're using it in your home.

Step one: build legs

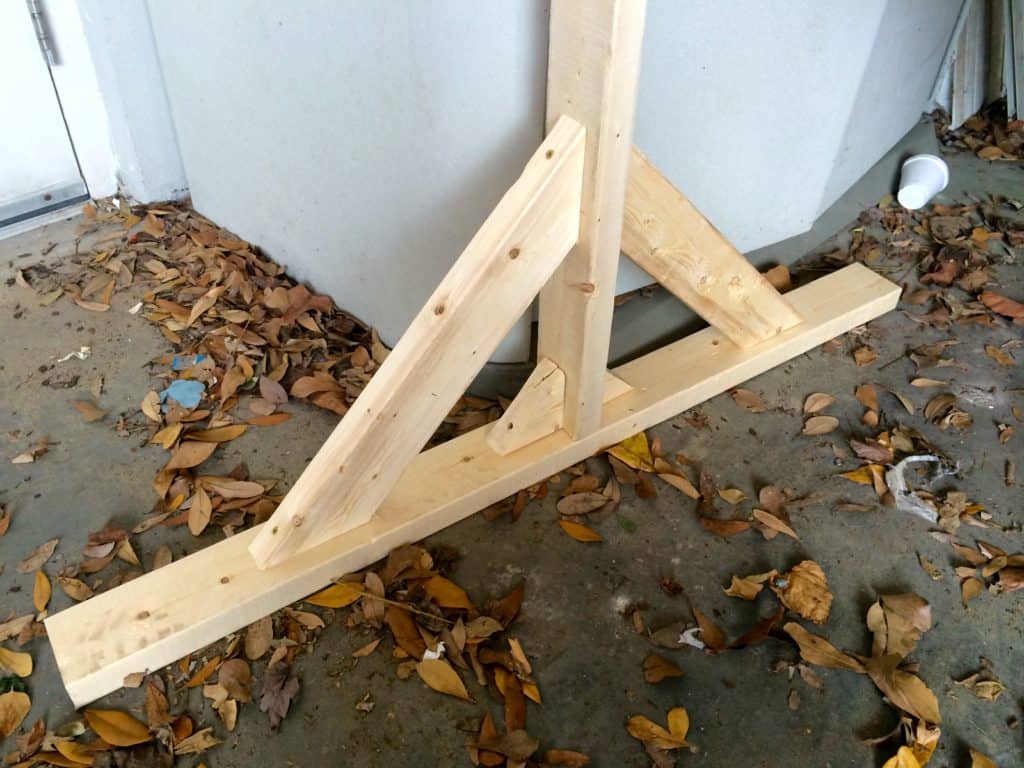
The first thing we did was build the legs of the structure. We cut one of the boards in half to act as the feet. Then, we attached two of the other boards to the feet perpendicularly, after cutting a foot off the top.

Then, we took one of the remaining boards and used a miter saw to cut them at 45 degree angles to act as stabilizers between the legs and the feet of the board.
How to Make a DIY Chalkboard - Charleston Crafted

Step two: attach board

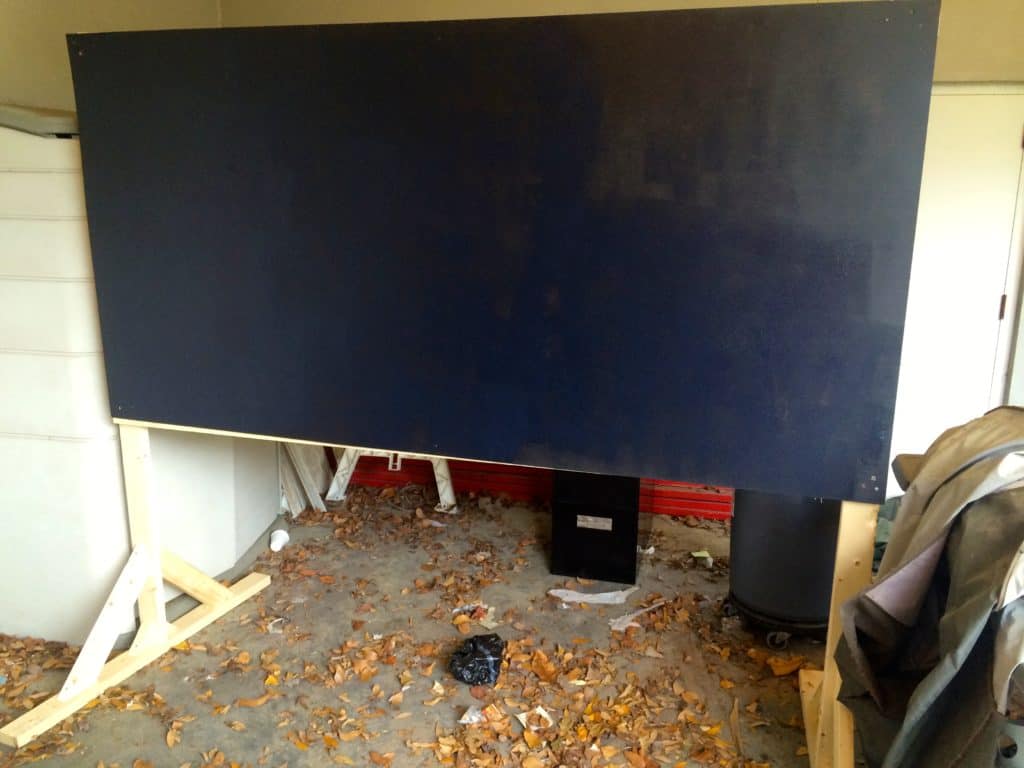
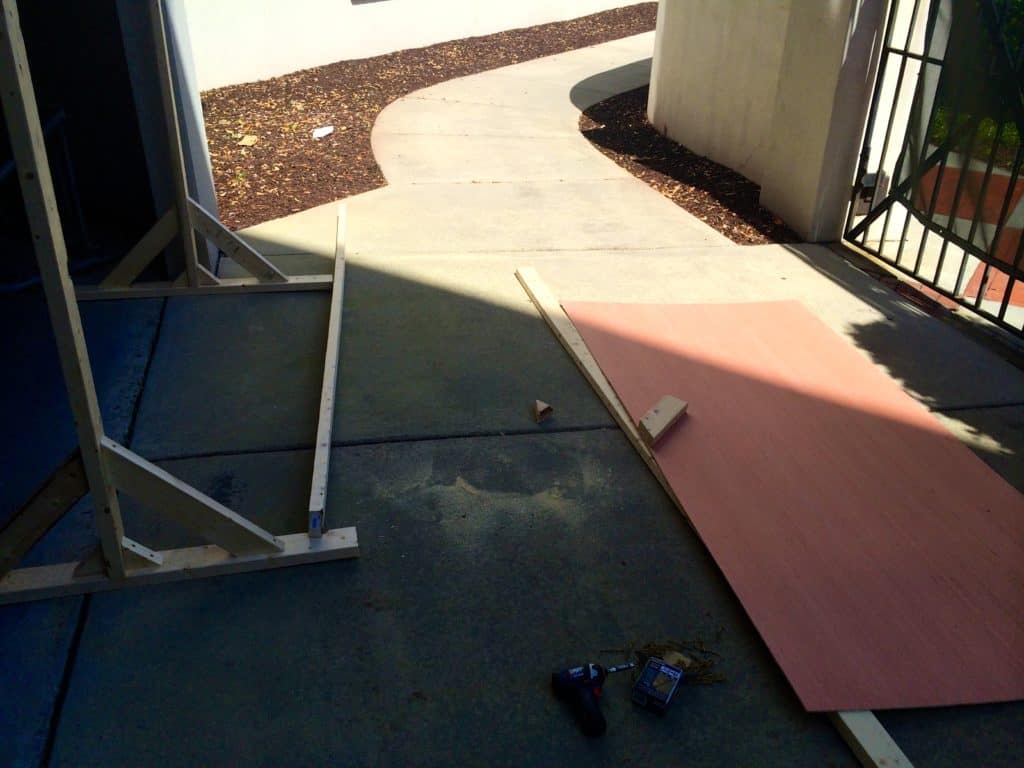
Now that we had the two legs built, we needed to attach what would be the chalkboard. We used the remaining two 8-foot boards and screwed them into the 4x8 board at the top and bottom.

Then we simply attached those to the legs that we had already built, using two screws in each corner.
How to Make a DIY Chalkboard - Charleston Crafted

Step three: chalkboard paint

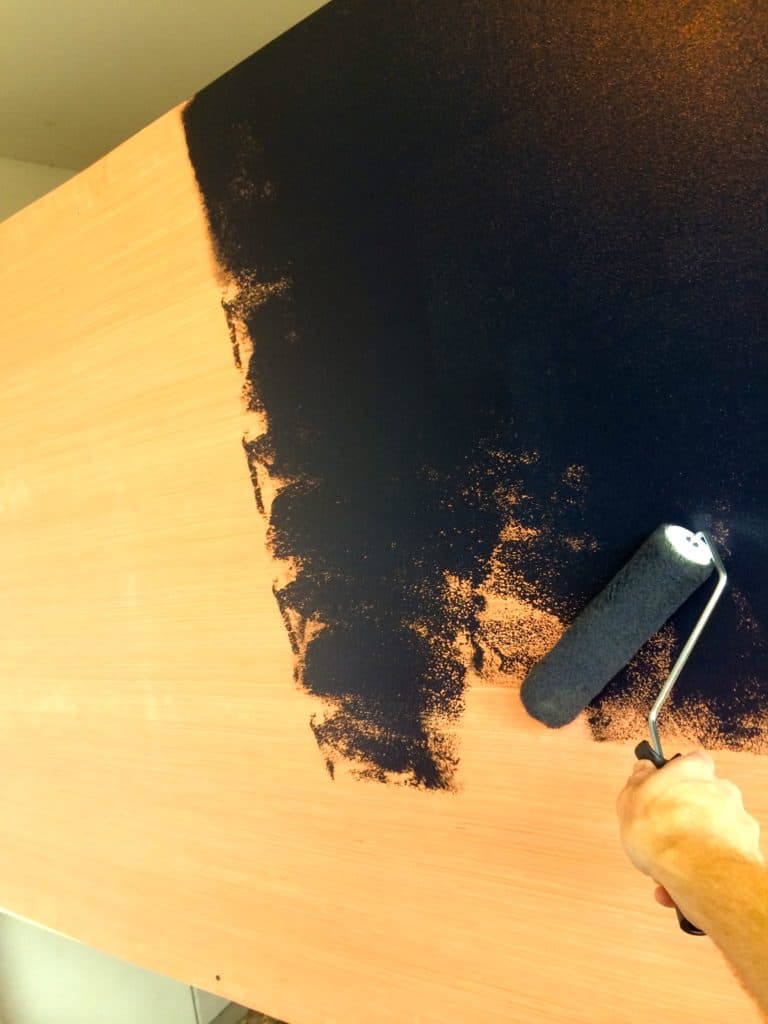
Once the board was entirely constructed, it was time to paint it with the chalkboard paint. I got one pint of black chalkboard paint, which is supposed to cover 100 square feet.

With the board being 32 square feet, this was going to get me a good three coats. The paint went on super easy and smooth and dried up nicely.
How to Make a DIY Chalkboard - Charleston Crafted

Step four: test the chalk

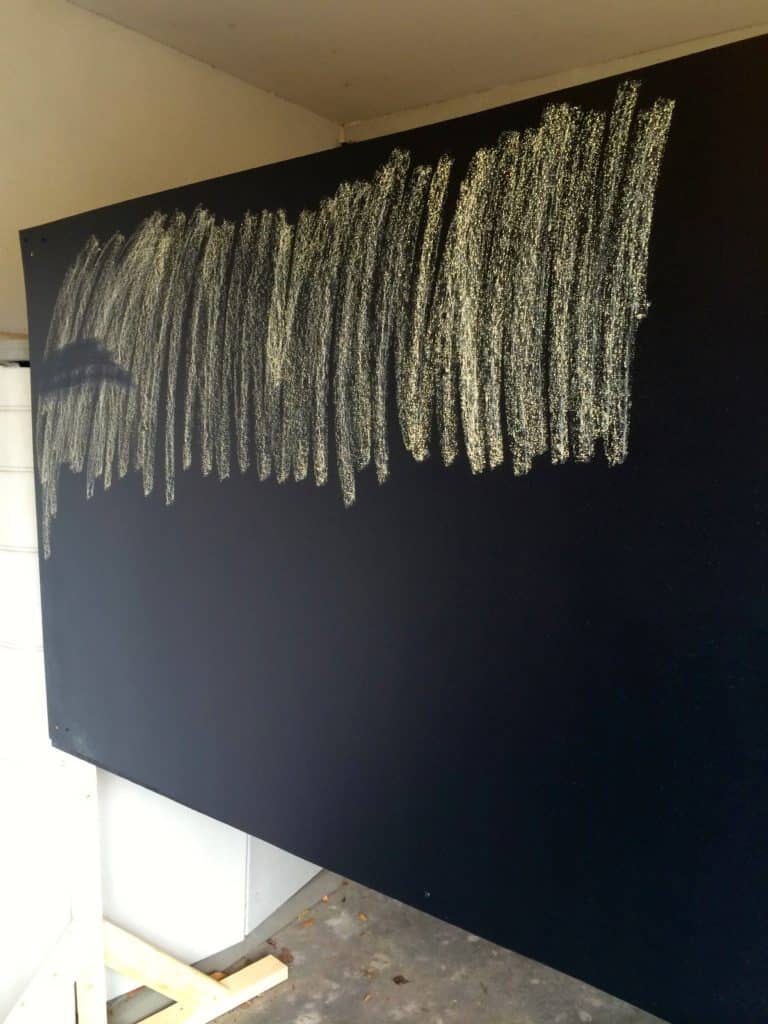
Then it was time to test if the chalkboard paint actually did make a chalkboard. I was a little skeptical, but here goes nothing.
How to Make a DIY Chalkboard - Charleston Crafted

Morgan had told me that we should use the flat side of the chalk to go over the entire board first with a layer of chalk so that, in the future, the first words we ever write on the board don't end up on the background of everything. I tested it in the corner so that you can see the difference.
How to Make a DIY Chalkboard - Charleston Crafted

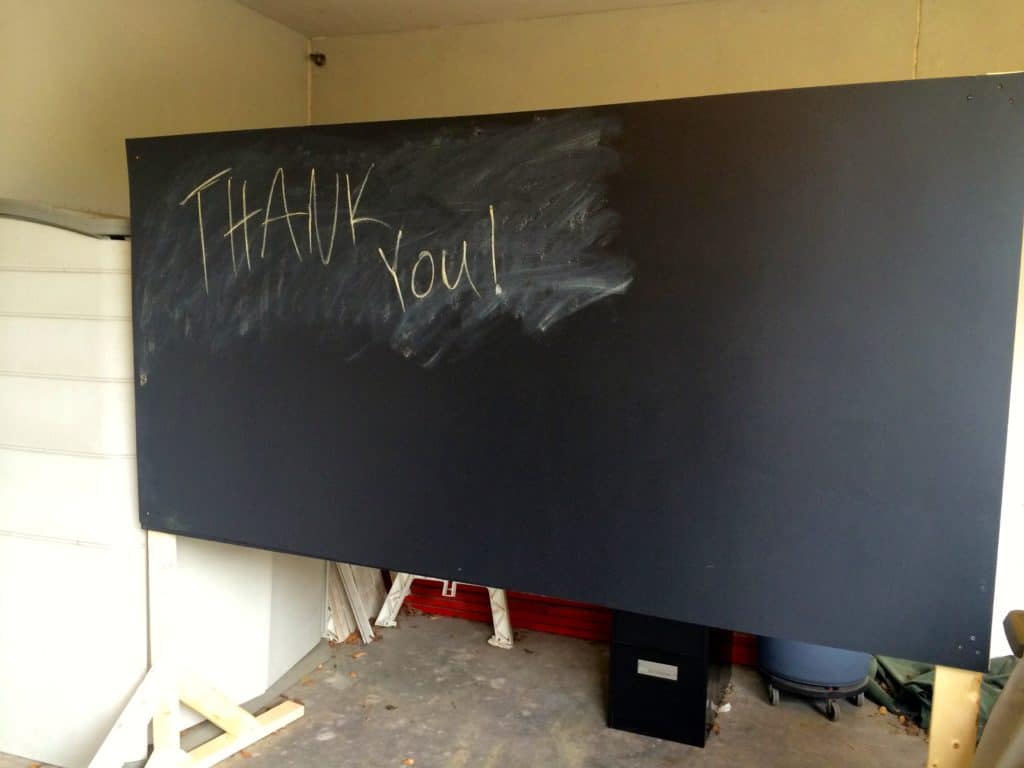
In the end, it works out great! The chalk wiped off nicely with a damp rag and gave it that dusty chalkboard look it's supposed to have.

The chalkboard paint really works and it took me only about an hour and a half to build the board, plus probably 30 minutes total for three coats of paint. It worked out well and looks great. Can't wait to show it off at our event!

Charleston Crafted Signature

Follow us on:
Pinterest | Instagram | TikTok | YouTube | Facebook | Amazon Storefront | LTK Shop

Looking for something?

We've been doing this since 2012 so we have a LOT of blog posts!
Search stuff like: Ceiling Projects | DIY Plant Stands | Thrift Flips

Charleston Crafted logo banner
Sean headshot cropped
Sean

Hey there, I'm Sean, the woodworking enthusiast and builder behind CharlestonCrafted.com! Since 2012, I've been sharing the magic of turning raw materials into beautiful creations. I love teaching others the art and satisfaction of woodworking and DIY. I try to inspire fellow crafters to make something extraordinary out of nothing at all.

More Art Projects

  • best Christmas wall art
    15 Christmas Wall Art - Easy DIY Projects
  • 15 creative Wooden Wall Art Ideas
  • 34 DIY large wall decor ideas
    34 Large DIY Wall Decor Ideas
  • How to build a DIY kid's arts and crafts table - Charleston Crafted
    How to build a DIY Kid's Art Table

Primary Sidebar

Charleston Crafted about us image

Hey y'all!

We are Morgan & Sean McBride and we are crafting our home together in Charleston, South Carolina.

More about us

Popular Posts

  • DIY Coffered Ceiling
    DIY Coffered Ceiling
  • How to Make DIY Concrete Pumpkins via Charleston Crafted
    How to Make DIY Concrete Pumpkins
  • How to Make a Cupid's Arrow Valentine's Day Wall Hanging with felt on the Cricut
    How to make a Cupid's Arrow Valentine's Day Wall Hanging
  • Our Tropical Oasis - A backyard Hammock area - Charleston Crafted
    Our Tropical Oasis

Recent Posts

  • how to organize a pantry with zones
    How to Organize Your Pantry in Zones (And Why It’s a Game Changer)
  • Keep outdoor rug from blowing up - Charleston Crafted
    How to keep your outdoor rug in place
  • kitchen design mistakes to avoid
    Kitchen design mistakes to avoid
  • DIY Faux Tropical Window Box That Looks Real (But Won’t Die!)

Privacy Policy

Footer

↑ back to top

Navigation

  • Home
  • Blog
  • Contact Us
  • Terms of Use
  • Disclaimer

Newsletter

  • Sign up for emails and updates
  • Follow us on Instagram
  • Work with Us

Browse by Category

  • Woodworking
  • Home Projects
  • Paint Colors
  • Room Reveals

© 2025 The Charleston Crafted Blog LLC DBA “Charleston Crafted” and “CharlestonCrafted” (also known as N/A) / All Rights Reserved.
Official Website: (Charleston Crafted)
Registered in USA (Co. Reg. No.: 565586)
Address: Charleston, USA 29414, South Carolina
Contact Phone: Not applicable — contact is via email: sean@charlestoncrafted.com

DISCLAIMER: The content on this website is provided for general informational purposes only and is not intended as professional advice. The Charleston Crafted Blog LLC and The Charleston Crafted Blog LLC make no representations or warranties—express or implied—regarding the accuracy, completeness, or suitability of the information contained herein. Any reliance you place on this information is strictly at your own risk. In no event shall The Charleston Crafted Blog LLC or The Charleston Crafted Blog LLC be liable for any loss or damage, including without limitation, indirect or consequential loss or damage, arising from the use or inability to use this website. This website is the official website of The Charleston Crafted Blog LLC.

AFFILIATE DISCLOSURE: This website contains affiliate links. If you click through and make a purchase, we may earn a commission at no extra cost to you.

As an Amazon Associate, I earn from qualifying purchases.

Site Editor: Morgan Smith McBride

Copyright © 2025 Charleston Crafted