• Skip to primary navigation
  • Skip to main content
  • Skip to primary sidebar
Charleston Crafted
  • DIY
  • Woodworking
  • Popular Posts
  • Blog
  • About
  • Shop
menu icon
go to homepage
  • DIY
  • Woodworking
  • Popular Posts
  • Blog
  • About
  • Shop
search icon
Homepage link
  • DIY
  • Woodworking
  • Popular Posts
  • Blog
  • About
  • Shop
×
Home » Building

101 in 1001: Build a Work Station for Porch

Published: Nov 13, 2013 · Modified: Nov 5, 2024 by Sean · As an Amazon Associate, we earn from qualifying purchases. This site contains affiliate links. ·

The tough thing about living in a condo is that if you need to do some labor like sawing or anything, you don't have a lot a space to do it in. That becomes even harder when you have someone like Morgan around that constantly wants to do projects.

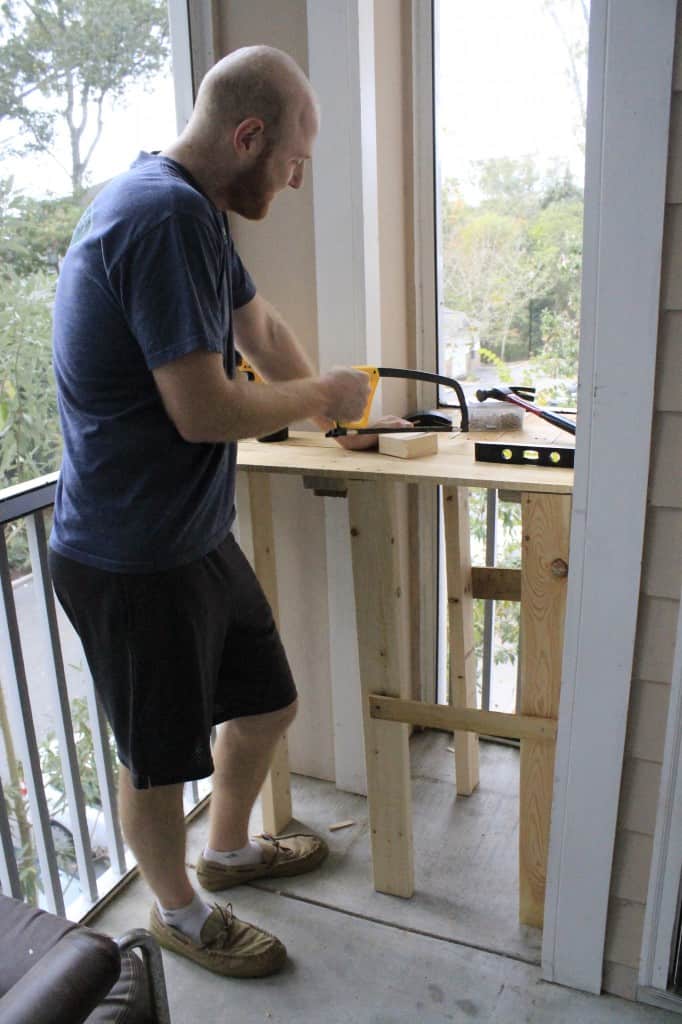
I do all the work out on the porch, but it's really small and I end up doing most of the work while sitting on the ground. Plus, I have to put all my hardware and tools on our dining table we have out there. So, Morgan suggested I build a small table to do some basic work on and have a place to put my materials.

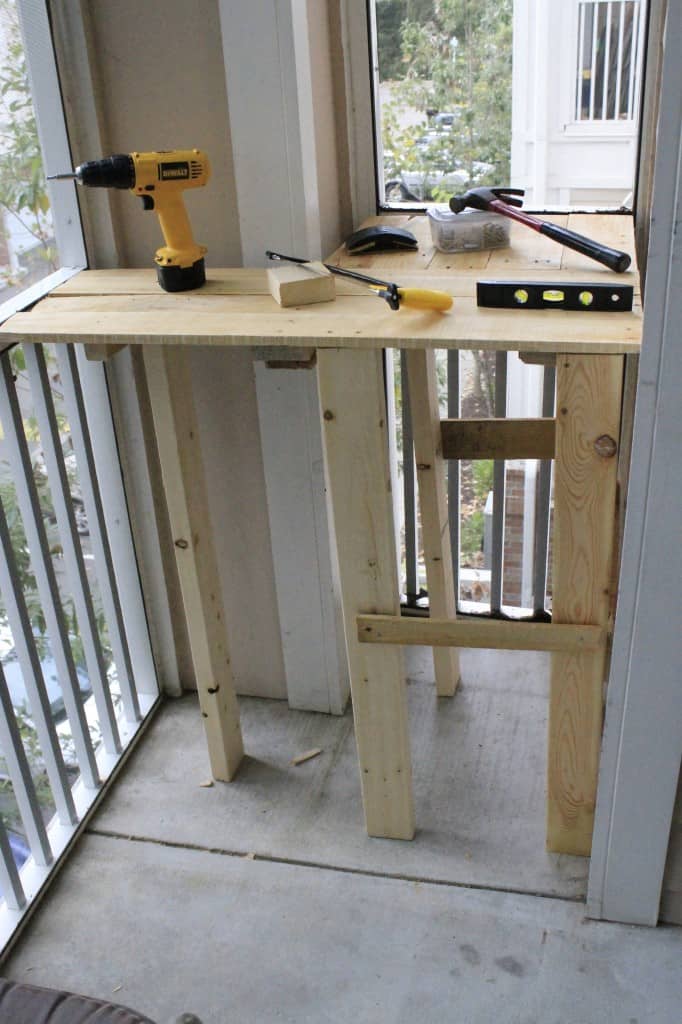
The way the porch is built, there are two small alcoves on each side. One of them has a cat tree in it for Bear, so I thought the best place would be on the other side in an L-shape around the column.

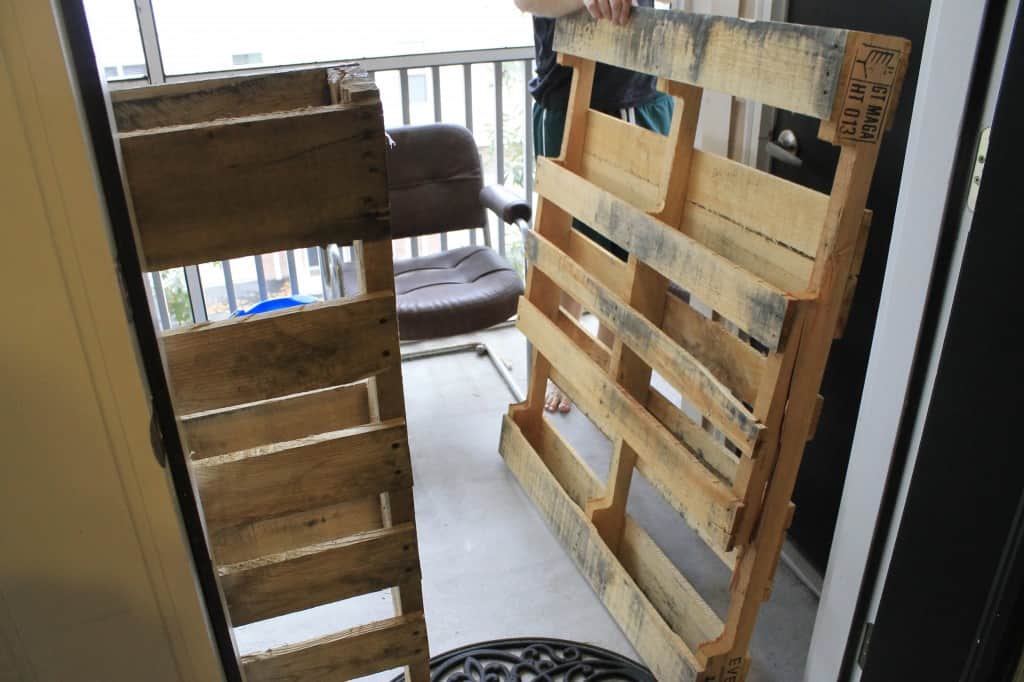
I didn't want to spend too much money on a table that was going to be used for work, so I searched for some good, free wood for a while. One night, while walking the dog, I saw someone had thrown out some pallets, so I decided to grab two of them.

Check out my actually good design for a mobile workbench!

Building a Work Station - Charleston Crafted

How I built a screened porch workstation

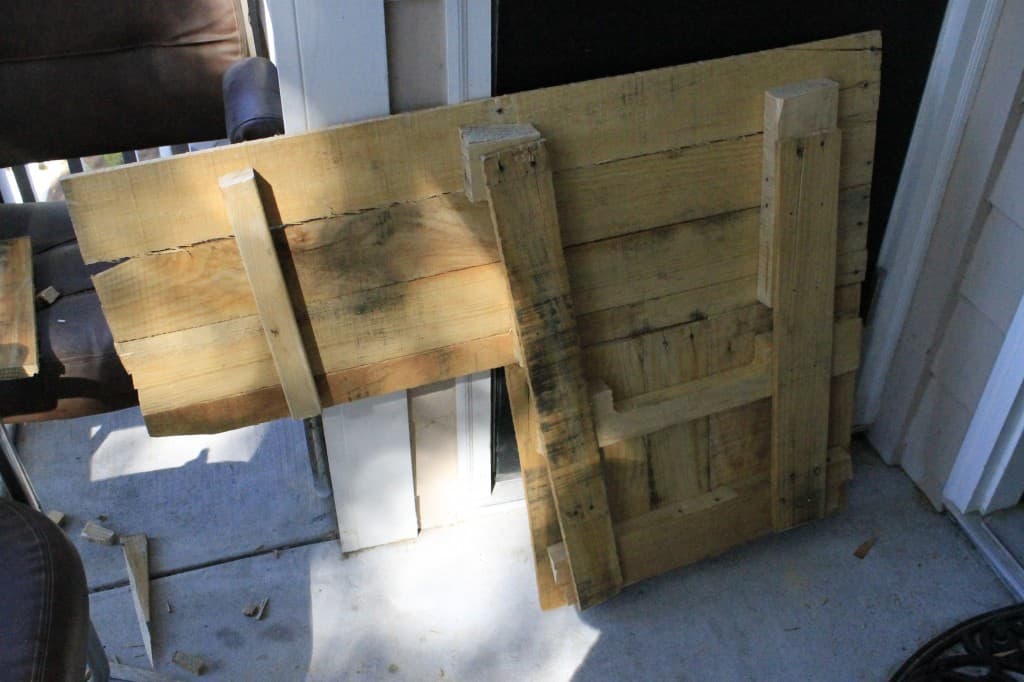
First step was to tear them apart and salvage the wooden slats. This turned out to be a much harder task than I thought. Those pallets were meant to hold tons of weight and be re-used over and over again. That means they are meant to be durable, therefore they are hard to break apart.

Building a Work Station - Charleston Crafted

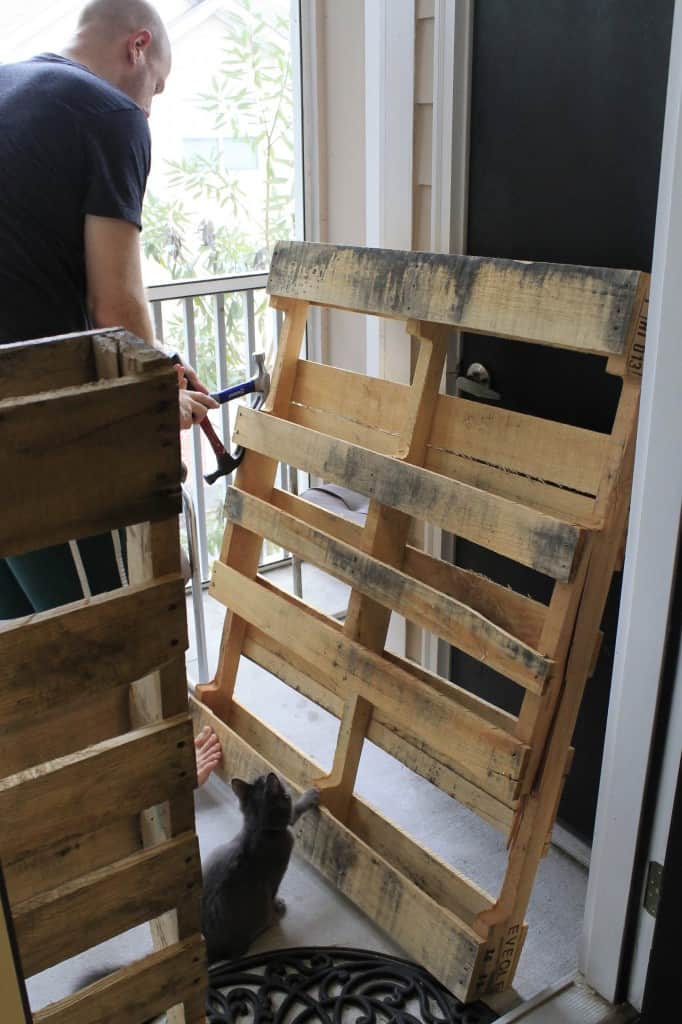
I drew out a small diagram and measured the space. Once I had the pallets torn into pieces, I cut the slats into the lengths they needed to be and laid them out on the porch floor.

Building a Work Station - Charleston Crafted

Then I cut some of the thicker pieces of wood from the sides of the pallets as braces for the parts of the table.

Building a Work Station - Charleston Crafted

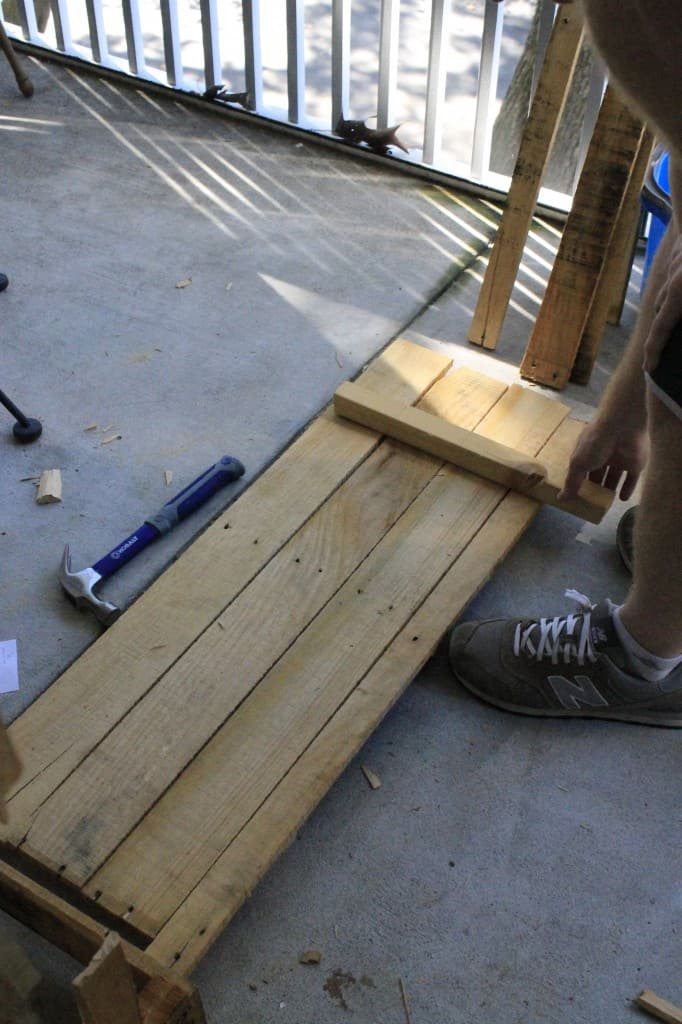
I finished off the top of the table by using more pieces of the slats to connect the two pieces of the L-shape.

Building a Work Station - Charleston Crafted

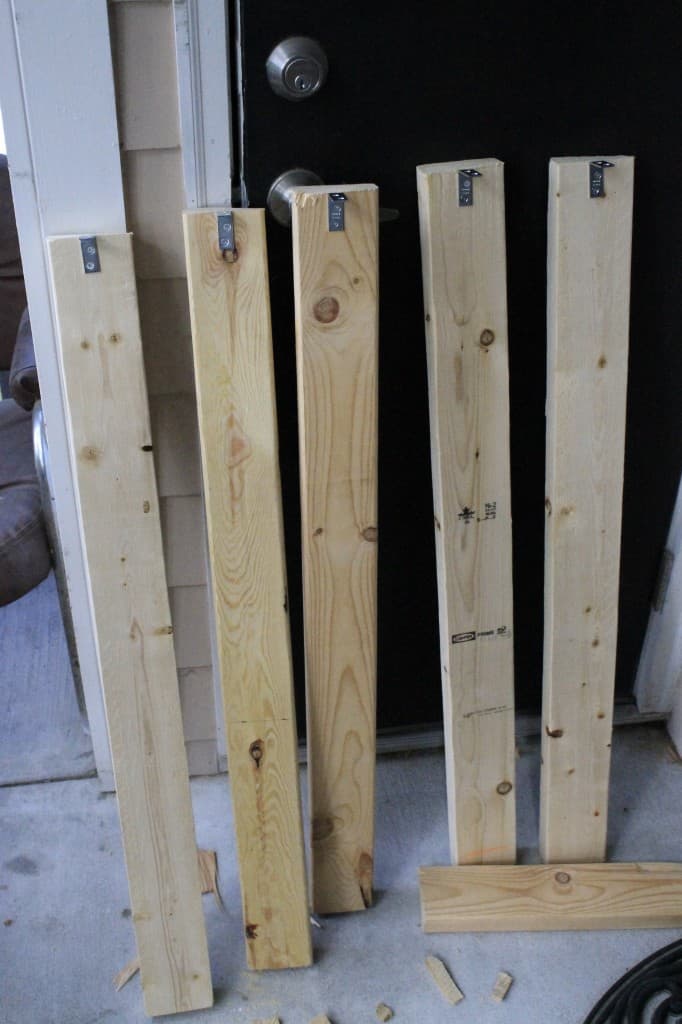
The only part of this project that cost me any money was that I bought a 10 foot 2"x4" for the legs. I wanted five legs for this table that were 39 inches long.

I had one nine foot 2"x4" already to cut, so I spent $4.50 on this entire project by buying that one piece of wood. I cut the legs to the right lengths and then attached them with brackets to the table top. Finally, I used some more slats to brace the legs to each other.

Building a Work Station - Charleston Crafted

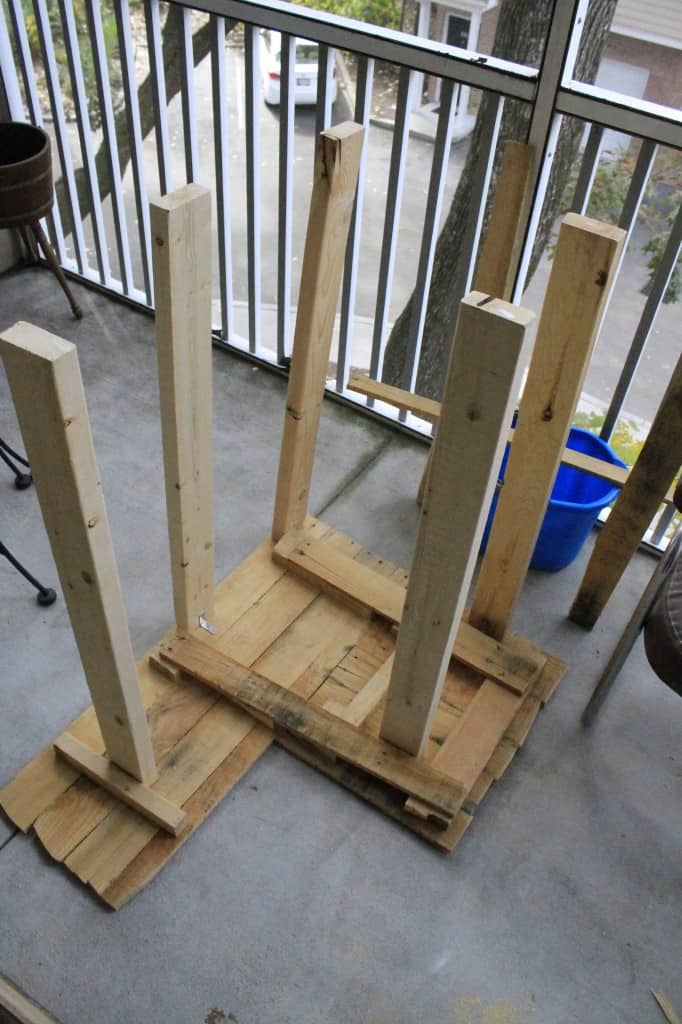
Last thing I did was drill extra screws through the top of the table into the legs just to make sure it was steady. Then it was ready to work!

Building a Work Station - Charleston Crafted

This was a really great idea for a project and was basically free. We have already put the table to good use on a couple of projects we'll be sharing with you soon! Plus, this is half of #73 off of our 101 in 1001 list. Once I finished organizing the shed, we'll have that one off the list!

Tell us about your latest free project!

Charleston Crafted Signature

Follow us on:
Pinterest | Instagram | TikTok | YouTube | Facebook | Amazon Storefront | LTK Shop

Looking for something?

We've been doing this since 2012 so we have a LOT of blog posts!
Search stuff like: Ceiling Projects | DIY Plant Stands | Thrift Flips

Charleston Crafted logo banner
Sean headshot cropped
Sean

Hey there, I'm Sean, the woodworking enthusiast and builder behind CharlestonCrafted.com! Since 2012, I've been sharing the magic of turning raw materials into beautiful creations. I love teaching others the art and satisfaction of woodworking and DIY. I try to inspire fellow crafters to make something extraordinary out of nothing at all.

More Building

  • How to build a DIY gate pergola- Charleston Crafted
    How to build a DIY gate pergola
  • DIY modern rolling storage table - Charleston Crafted
    DIY modern rolling storage table
  • DIY folding desk for walking pad - Charleston Crafted
    DIY folding desk for walking pads
  • DIY cube storage console table - Charleston Crafted
    DIY cube storage console table

Primary Sidebar

Charleston Crafted about us image

Hey y'all!

We are Morgan & Sean McBride and we are crafting our home together in Charleston, South Carolina.

More about us

Popular Posts

  • DIY Coffered Ceiling
    DIY Coffered Ceiling
  • How to Make DIY Concrete Pumpkins via Charleston Crafted
    How to Make DIY Concrete Pumpkins
  • How to Make a Cupid's Arrow Valentine's Day Wall Hanging with felt on the Cricut
    How to make a Cupid's Arrow Valentine's Day Wall Hanging
  • Our Tropical Oasis - A backyard Hammock area - Charleston Crafted
    Our Tropical Oasis

Recent Posts

  • fisherman aesthetic home inspiration
    Fisherman Aesthetic Decor for Your Home
  • Senix Tools Review- Charleston Crafted
    Are Senix power tools any good?
  • Your Weekend To-Do List: 15 Things to Do for Summer Home Upkeep
    Your Weekend To-Do List: 15 Things to Do for Summer Home Upkeep
  • How to stain wood with RIT dye - step by step instructions
    How to stain wood with RIT dye

Privacy Policy

Footer

↑ back to top

Navigation

  • Home
  • Blog
  • Contact Us
  • Terms of Use
  • Disclaimer

Newsletter

  • Sign up for emails and updates
  • Follow us on Instagram
  • Work with Us

Browse by Category

  • Woodworking
  • Home Projects
  • Paint Colors
  • Room Reveals

© 2025 The Charleston Crafted Blog LLC DBA “Charleston Crafted” and “CharlestonCrafted” (also known as N/A) / All Rights Reserved.
Official Website: (Charleston Crafted)
Registered in USA (Co. Reg. No.: 565586)
Address: Charleston, USA 29414, South Carolina
Contact Phone: Not applicable — contact is via email: sean@charlestoncrafted.com

DISCLAIMER: The content on this website is provided for general informational purposes only and is not intended as professional advice. The Charleston Crafted Blog LLC and The Charleston Crafted Blog LLC make no representations or warranties—express or implied—regarding the accuracy, completeness, or suitability of the information contained herein. Any reliance you place on this information is strictly at your own risk. In no event shall The Charleston Crafted Blog LLC or The Charleston Crafted Blog LLC be liable for any loss or damage, including without limitation, indirect or consequential loss or damage, arising from the use or inability to use this website. This website is the official website of The Charleston Crafted Blog LLC.

AFFILIATE DISCLOSURE: This website contains affiliate links. If you click through and make a purchase, we may earn a commission at no extra cost to you.

As an Amazon Associate, I earn from qualifying purchases.

Site Editor: Morgan Smith McBride

Copyright © 2025 Charleston Crafted