• Skip to primary navigation
  • Skip to main content
  • Skip to primary sidebar
Charleston Crafted
  • DIY
  • Woodworking
  • Popular Posts
  • Blog
  • About
  • Shop
menu icon
go to homepage
  • DIY
  • Woodworking
  • Popular Posts
  • Blog
  • About
  • Shop
search icon
Homepage link
  • DIY
  • Woodworking
  • Popular Posts
  • Blog
  • About
  • Shop
×
Home » Building

How to Make a Wood Desk Organizer

Published: Feb 27, 2019 · Modified: Feb 29, 2024 by Sean · As an Amazon Associate, we earn from qualifying purchases. This site contains affiliate links. ·

This wood desk organizer is a simple build to help you with decluttering your desk. Using a small amount of plywood, you can build this wood desk organizer.

If you're anything like me, you don't keep any papers if you can avoid it. If you're like my brother, you still keep papers, physical business cards, notes and more.

He has an at home office and before Christmas I saw his desk. Papers... everywhere.

Gave me the idea to build him a wood desk organizer. This wood desk organizer is simple to build with some scrap ½" plywood or any wood of your choice!

DIY wood desk organizer - Charleston Crafted

How to Make a Wood Desk Organizer

With the current trend of minimalist organization, you might be looking for some work desk organization ideas or specifically for a desk tray for papers.

This wood desk organizer has space for full size sheets of paper, business cards and a couple of miscellaneous sized notes or writing utensils.

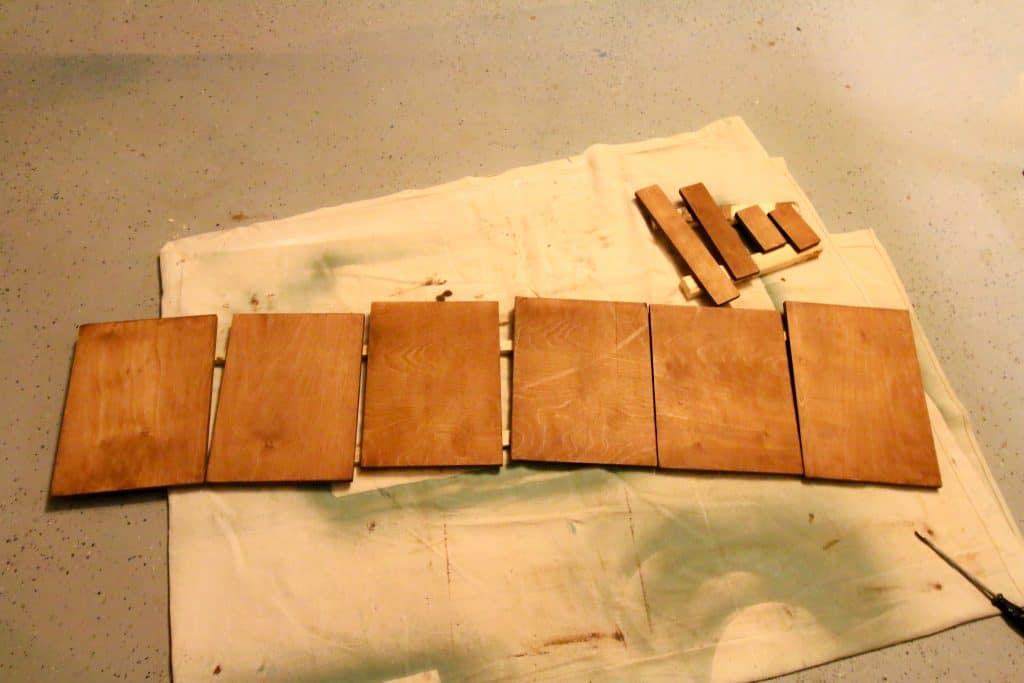
Wood desk organizer cut list

As mentioned, I used ½" plywood for this build. If you want to use a nicer wood, knock yourself out. These dimensions are length and width, based on ½" thickness of wood on all pieces.

  • (1) back- 10" x 9 ½"
  • (2) sides- 12" x 9 ½"
  • (3) shelves- 12" x 9"
  • (1) front lip- 9" x 2"
  • (1) middle divider- 11 ½" x 2"
  • (2) short dividers- 4" x 2"
Wood Desk Organizer - Charleston Crafted

How to build a wooden desk organizer

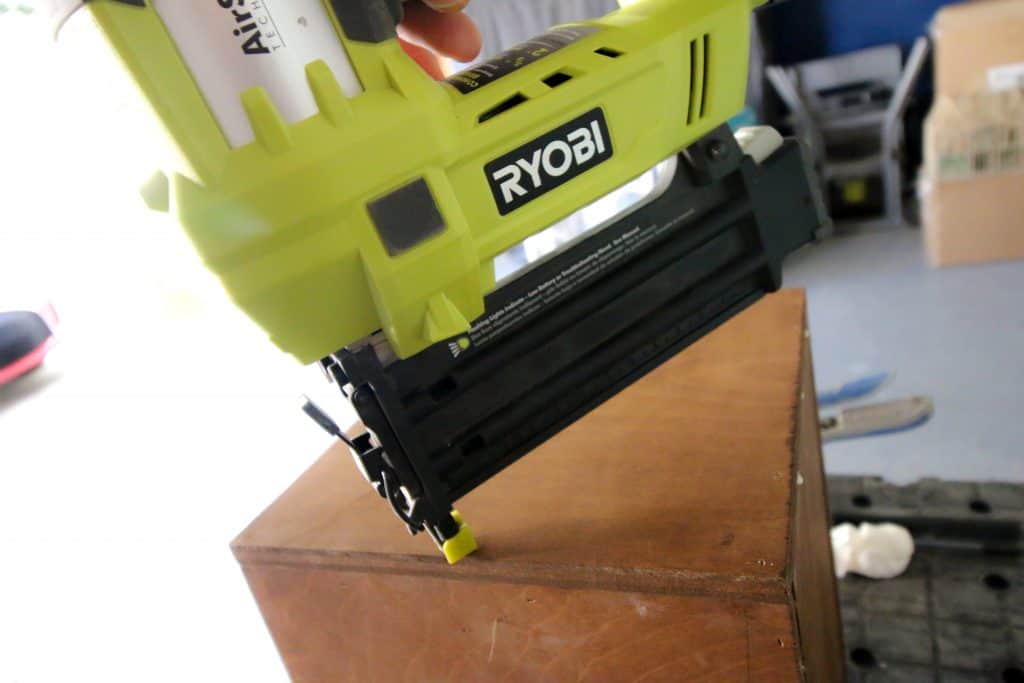
For the entire build, I used Gorilla Wood Glue, 1" brad nails and right angle clamps to connect everything. Keep that in mind with how I did the following!

Also, I would stain or paint all your pieces before assembly. Once it's assembled, it would be basically impossible to do that inside the cubbies. 

Step one: attach bottom to sides

Lining up the 12" edges, start by attaching one of the inside pieces to the bottom of the two sides.

Step two: attach front lip

Now, to make sure alignment is correct, attach the front lip piece to the front flush with the top of the sides.

Take your next shelf and attach it flush with the bottom of the front lip.

Step three: attach last shelf

Add your last shelf to split the difference in the middle of the box.

Step four: attach back

Next, attach the back to the outside of the two sides and the bottom piece.

Wood Desk Organizer - Charleston Crafted

Step five: add top dividers

Finally, add your middle divider and two short dividers to the top section. Space the short dividers out to make two areas for business cards (one for yours and one for your contacts). Attach the middle divider first, but use the two short dividers to make sure it is in the right place.
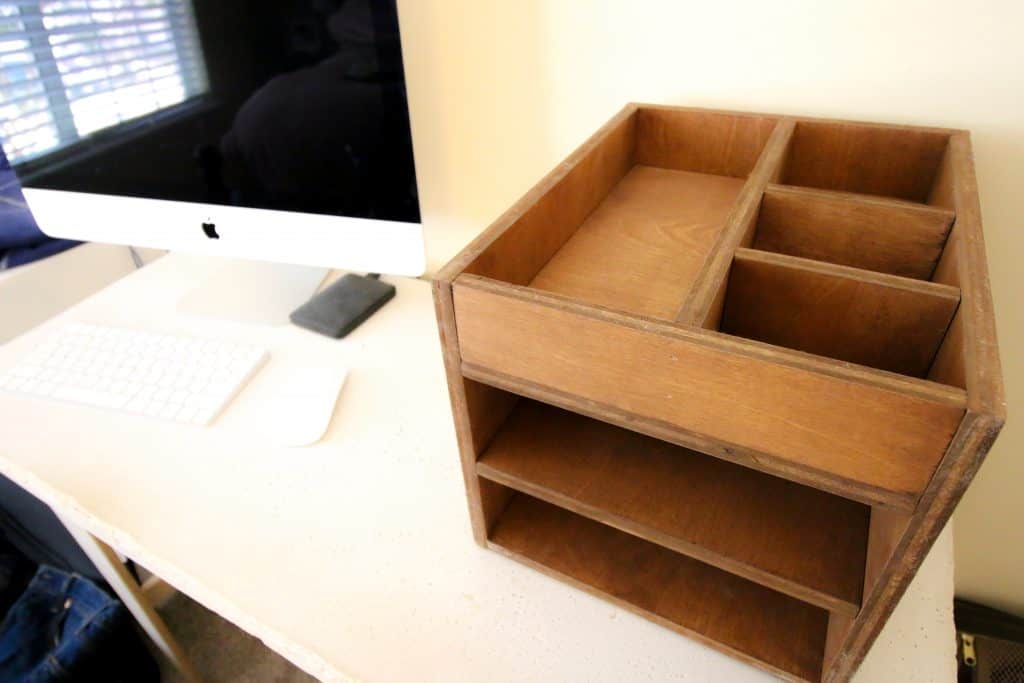
Wood Desk Organizer - Charleston Crafted

Finished Product

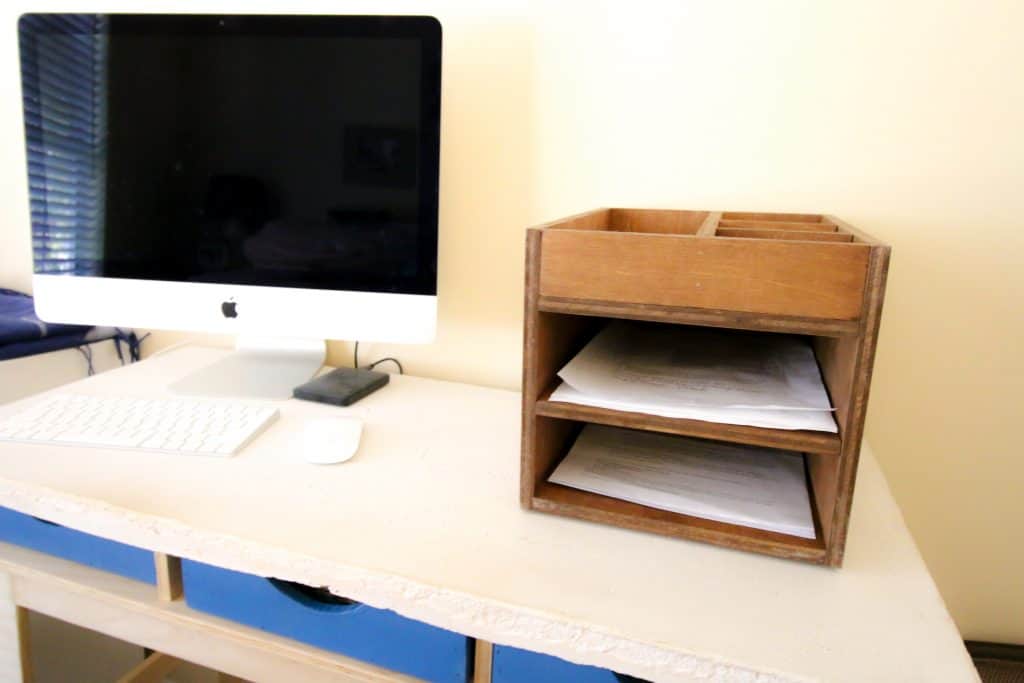
I think this wood desk organizer is great for dividing papers, business cards and notes.

Organizing the papers on your desk is a great way to declutter and keep a cleaner space. This will lead to a cleaner mind and people will ooh and aah over your new organizer.

This project is also great for organizing a desk without drawers if you're using a simple minimalist desk and didn't build our concrete and plywood desk with our simple desk trays.

Wood Desk Organizer - Charleston Crafted
Charleston Crafted Signature

Follow us on:
Pinterest | Instagram | TikTok | YouTube | Facebook | Amazon Storefront | LTK Shop

Looking for something?

We've been doing this since 2012 so we have a LOT of blog posts!
Search stuff like: Ceiling Projects | DIY Plant Stands | Thrift Flips

Charleston Crafted logo banner
Sean headshot cropped
Sean

Hey there, I'm Sean, the woodworking enthusiast and builder behind CharlestonCrafted.com! Since 2012, I've been sharing the magic of turning raw materials into beautiful creations. I love teaching others the art and satisfaction of woodworking and DIY. I try to inspire fellow crafters to make something extraordinary out of nothing at all.

More Building

  • How to build a DIY gate pergola- Charleston Crafted
    How to build a DIY gate pergola
  • DIY modern rolling storage table - Charleston Crafted
    DIY modern rolling storage table
  • DIY folding desk for walking pad - Charleston Crafted
    DIY folding desk for walking pads
  • DIY cube storage console table - Charleston Crafted
    DIY cube storage console table

Reader Interactions

Trackbacks

  1. Desk Organizer – Free Woodworking Plan.com says:
    May 13, 2019 at 6:00 am

    […] space on your desk by building this wooden desk organizer. This one was built using 1/2 inch plywood but you can use a wood of your […]

  2. DIY Wooden Paper Organizer – Incredible Recipes says:
    May 17, 2019 at 12:59 am

    […] You can get the full cut list in our blog post. We used 1/2 inch plywood and stained it prior to assembly. The stain color is Early American. The large pieces make the shelves and the smaller pieces make the organizer on the top level . […]

  3. Free Woodworking Plans Desk Organizer – Woodworking Plans says:
    October 18, 2020 at 5:59 am

    […] Download Plan More @ http://www.charlestoncrafted.com […]

  4. Desk Paper Organizer – Free Woodworking Plan.com says:
    March 5, 2021 at 2:37 pm

    […] space on your desk by building this wooden desk organizer. This one was built using 1/2 inch plywood but you can use a wood of your […]

  5. Free Woodworking Plans Desk Organizer - MockUp Design says:
    November 28, 2021 at 12:15 pm

    […] Download Plan More @ http://www.charlestoncrafted.com […]

Primary Sidebar

Charleston Crafted about us image

Hey y'all!

We are Morgan & Sean McBride and we are crafting our home together in Charleston, South Carolina.

More about us

Popular Posts

  • DIY Coffered Ceiling
    DIY Coffered Ceiling
  • How to Make DIY Concrete Pumpkins via Charleston Crafted
    How to Make DIY Concrete Pumpkins
  • How to Make a Cupid's Arrow Valentine's Day Wall Hanging with felt on the Cricut
    How to make a Cupid's Arrow Valentine's Day Wall Hanging
  • Our Tropical Oasis - A backyard Hammock area - Charleston Crafted
    Our Tropical Oasis

Recent Posts

  • fisherman aesthetic home inspiration
    Fisherman Aesthetic Decor for Your Home
  • Senix Tools Review- Charleston Crafted
    Are Senix power tools any good?
  • Your Weekend To-Do List: 15 Things to Do for Summer Home Upkeep
    Your Weekend To-Do List: 15 Things to Do for Summer Home Upkeep
  • How to stain wood with RIT dye - step by step instructions
    How to stain wood with RIT dye

Privacy Policy

Footer

↑ back to top

Navigation

  • Home
  • Blog
  • Contact Us
  • Terms of Use
  • Disclaimer

Newsletter

  • Sign up for emails and updates
  • Follow us on Instagram
  • Work with Us

Browse by Category

  • Woodworking
  • Home Projects
  • Paint Colors
  • Room Reveals

© 2025 The Charleston Crafted Blog LLC DBA “Charleston Crafted” and “CharlestonCrafted” (also known as N/A) / All Rights Reserved.
Official Website: (Charleston Crafted)
Registered in USA (Co. Reg. No.: 565586)
Address: Charleston, USA 29414, South Carolina
Contact Phone: Not applicable — contact is via email: sean@charlestoncrafted.com

DISCLAIMER: The content on this website is provided for general informational purposes only and is not intended as professional advice. The Charleston Crafted Blog LLC and The Charleston Crafted Blog LLC make no representations or warranties—express or implied—regarding the accuracy, completeness, or suitability of the information contained herein. Any reliance you place on this information is strictly at your own risk. In no event shall The Charleston Crafted Blog LLC or The Charleston Crafted Blog LLC be liable for any loss or damage, including without limitation, indirect or consequential loss or damage, arising from the use or inability to use this website. This website is the official website of The Charleston Crafted Blog LLC.

AFFILIATE DISCLOSURE: This website contains affiliate links. If you click through and make a purchase, we may earn a commission at no extra cost to you.

As an Amazon Associate, I earn from qualifying purchases.

Site Editor: Morgan Smith McBride

Copyright © 2025 Charleston Crafted