• Skip to primary navigation
  • Skip to main content
  • Skip to primary sidebar
Charleston Crafted
  • DIY
  • Woodworking
  • Popular Posts
  • Blog
  • About
  • Shop
menu icon
go to homepage
  • DIY
  • Woodworking
  • Popular Posts
  • Blog
  • About
  • Shop
search icon
Homepage link
  • DIY
  • Woodworking
  • Popular Posts
  • Blog
  • About
  • Shop
×
Home » Building

Turning a Cabinet into an Open Bookshelf

Published: Feb 22, 2017 · Modified: Jan 18, 2024 by Sean · As an Amazon Associate, we earn from qualifying purchases. This site contains affiliate links. ·

Here's the process for how to repurpose an upper cabinet and turn it into an open bookshelf! We did this for our kitchen remodel project!

Seriously, one of my favorite things to do is find ways to use old materials to make new things.

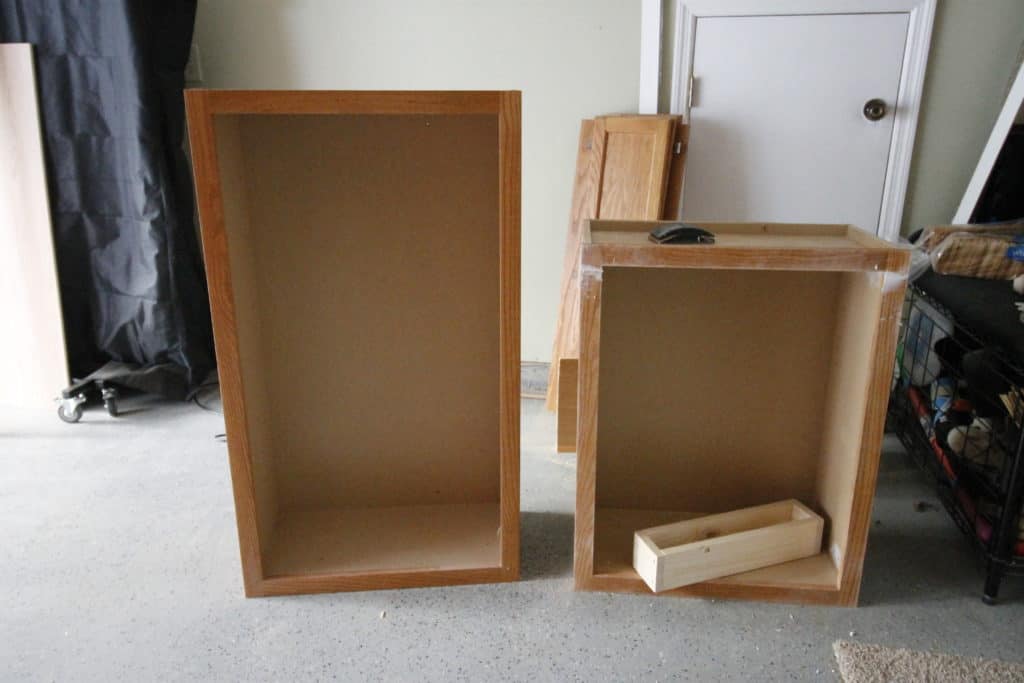
When we had our walls taken down, we lost two upper cabinets. We asked the contractor to save them for us and they have been sitting in our garage for four months.

We had initial thoughts that we would put them up in the laundry room, but we found two better uses for them in the end.

The first is that we turned one of the cabinets into an open bookshelf to go on the end of our kitchen island!

Turning a Cabinet into an Open Bookshelf

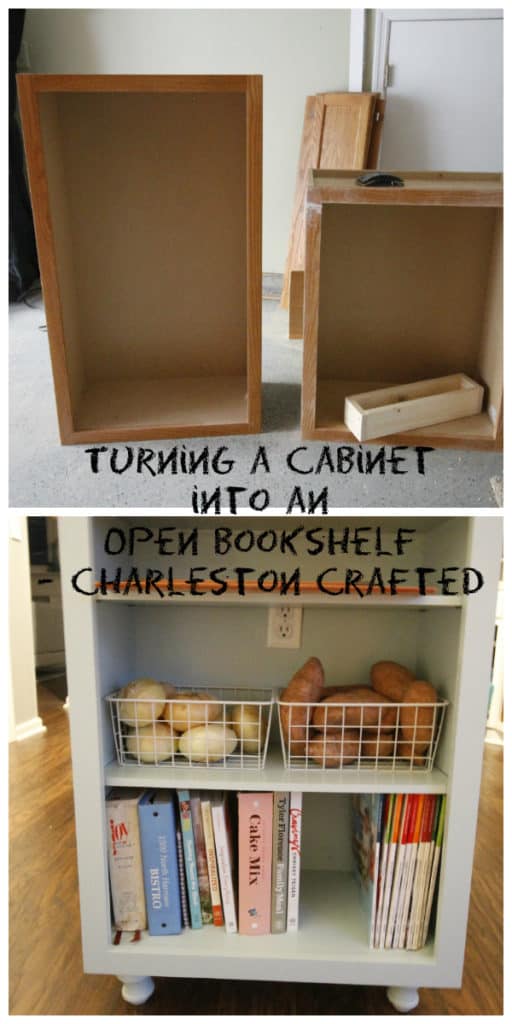
How to turn a cabinet into a bookshelf

First thing I had to do was to make it the right size. The upper cabinets are taller than the lowers, so they needed to be cut down.

Turning a Cabinet into an Open Bookshelf - Charleston Crafted

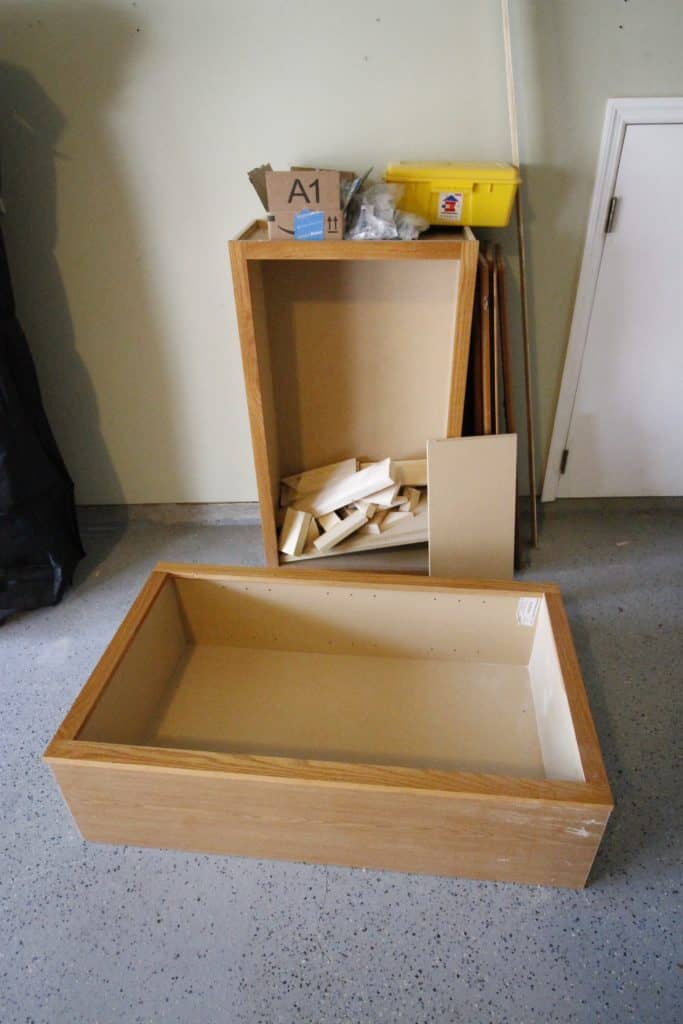
Step one: cut cabinet to size

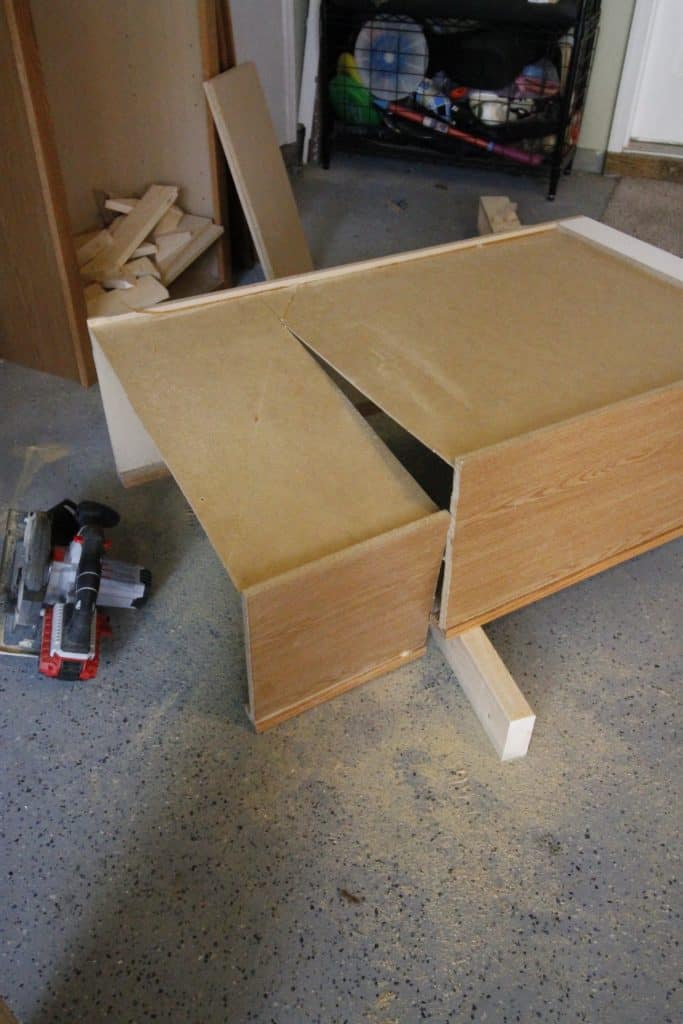
I used a combination of my circular saw and jig saw to cut the solid top part of the cabinet off to reattach later. Since it's solid, we needed that to rest the counters on.

Turning a Cabinet into an Open Bookshelf - Charleston Crafted

Then, I went down 13 inches and cut off another section of cabinet to make it the appropriate size. The top was going to be reattached, but we needed to remove the appropriate amount to make the cabinet the right height.

Turning a Cabinet into an Open Bookshelf - Charleston Crafted

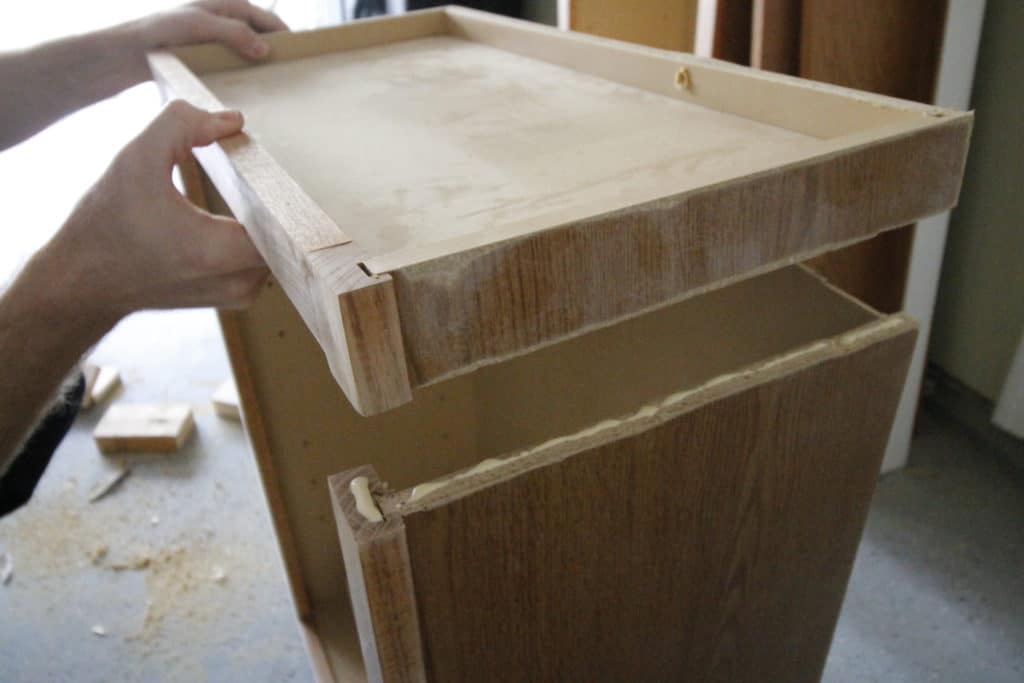
Step two: reattach top

The next step was to reattach the top piece that I cut off back to the main section of the cabinet. I used wood glue and caulk to make it look seamless.

Turning a Cabinet into an Open Bookshelf - Charleston Crafted

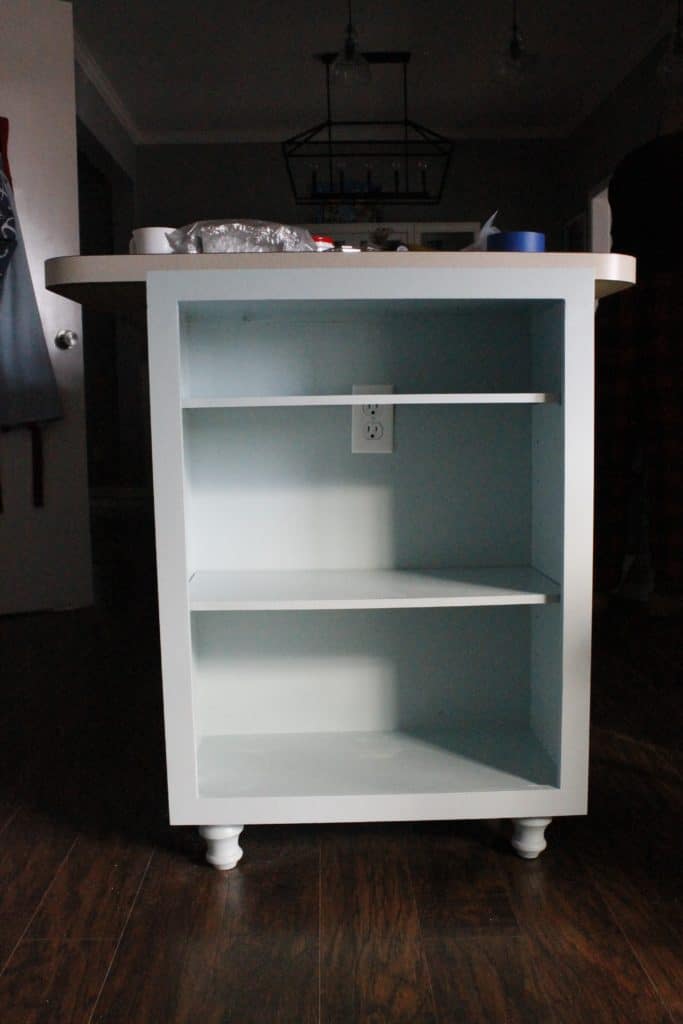
Step three: build base

Now that the cabinet was the right size, I had to build the base. As you know, lower cabinets aren't flush on the floor.

They have recessed bottoms, so I had to match that by building a new base. I used 1"x4"s to make a box frame on the back of the cabinet that would tie into the back of the existing island and added two stylish legs in the front to give it a modern look.

I had to add some extra pieces of 1x4 flat in order to compensate for the bottom lip of the cabinet, but this all worked out and created the base.

Turning a Cabinet into an Open Bookshelf - Charleston Crafted

Step three: attach to island

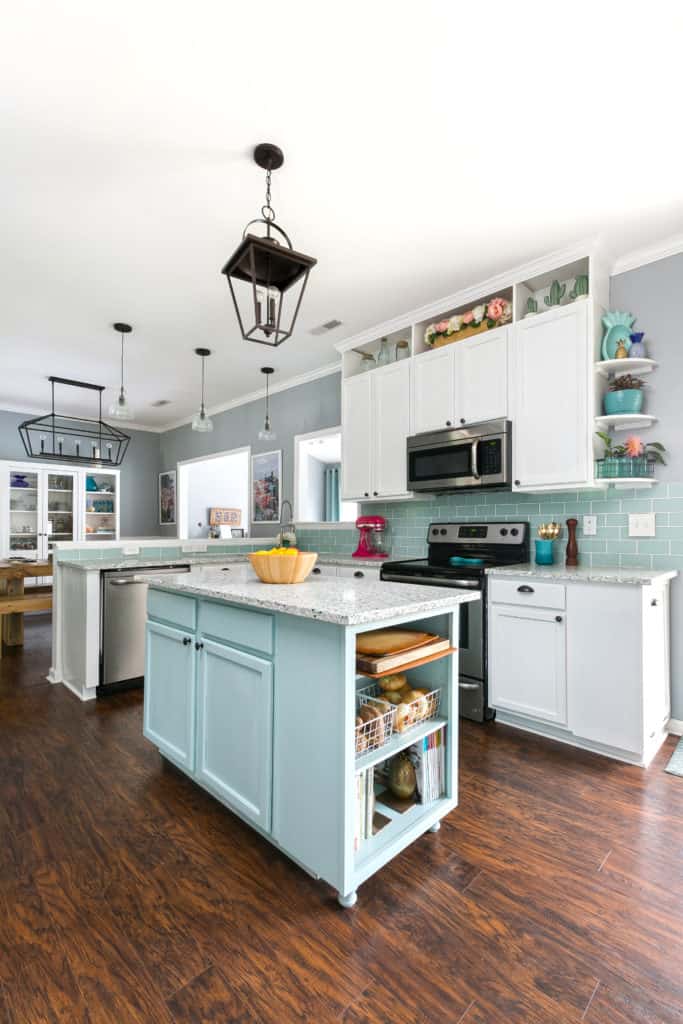
Finally, we screwed it into the island and patched over all the screws, then we painted it and our island a new color to get rid of that '90s light oak color.

Here's what we learned about painting cabinets!

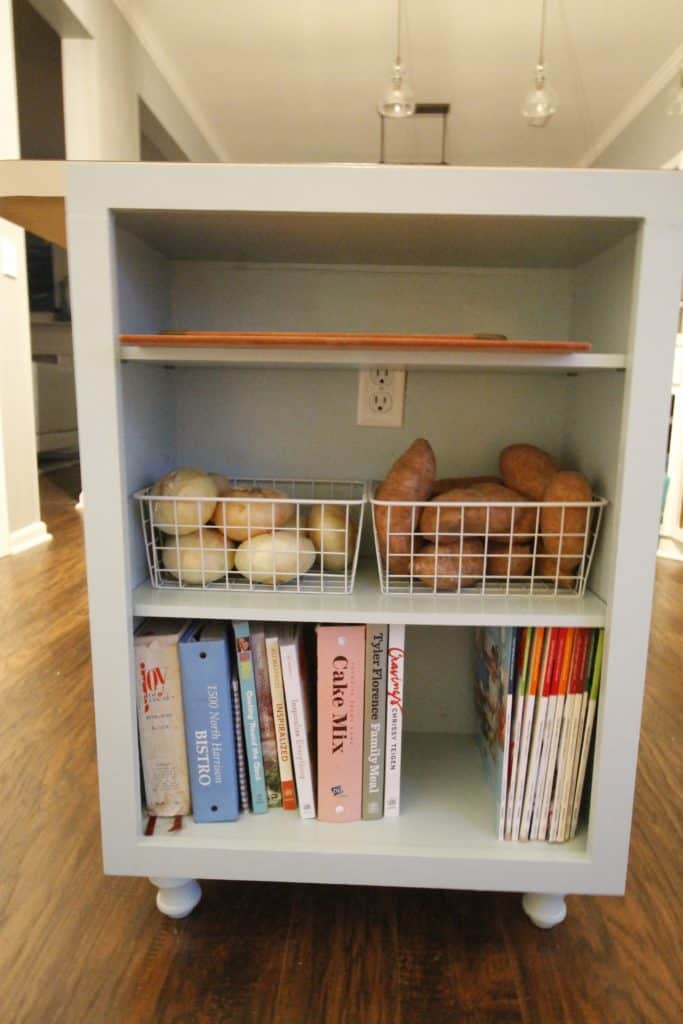
I used a jig saw to cut out a hole for the island's electrical outlet and that was it. We popped in shelves and all the sudden we had turned an old cabinet into open shelving on the end of our kitchen island.

Turning a Cabinet into an Open Bookshelf - Charleston Crafted

Step four: add new countertop

Finally, we got the new countertops installed and it looks like a seamless island!

DIY Coastal Kitchen
DIY Kitchen makeover

This is an easy project and a great way to reuse an old cabinet. Click here to see how we turned the other cabinet into a tilt out trash can!

Charleston Crafted Signature

Follow us on:
Pinterest | Instagram | TikTok | YouTube | Facebook | Amazon Storefront | LTK Shop

Looking for something?

We've been doing this since 2012 so we have a LOT of blog posts!
Search stuff like: Ceiling Projects | DIY Plant Stands | Thrift Flips

Charleston Crafted logo banner
Sean headshot cropped
Sean

Hey there, I'm Sean, the woodworking enthusiast and builder behind CharlestonCrafted.com! Since 2012, I've been sharing the magic of turning raw materials into beautiful creations. I love teaching others the art and satisfaction of woodworking and DIY. I try to inspire fellow crafters to make something extraordinary out of nothing at all.

More Building

  • How to build a DIY gate pergola- Charleston Crafted
    How to build a DIY gate pergola
  • DIY modern rolling storage table - Charleston Crafted
    DIY modern rolling storage table
  • DIY folding desk for walking pad - Charleston Crafted
    DIY folding desk for walking pads
  • DIY cube storage console table - Charleston Crafted
    DIY cube storage console table

Reader Interactions

Trackbacks

  1. 19 Kitchen Organization And Storage Ideas - Trust In Line says:
    January 17, 2019 at 5:17 am

    […] Source […]

Primary Sidebar

Charleston Crafted about us image

Hey y'all!

We are Morgan & Sean McBride and we are crafting our home together in Charleston, South Carolina.

More about us

Popular Posts

  • DIY Coffered Ceiling
    DIY Coffered Ceiling
  • How to Make DIY Concrete Pumpkins via Charleston Crafted
    How to Make DIY Concrete Pumpkins
  • How to Make a Cupid's Arrow Valentine's Day Wall Hanging with felt on the Cricut
    How to make a Cupid's Arrow Valentine's Day Wall Hanging
  • Our Tropical Oasis - A backyard Hammock area - Charleston Crafted
    Our Tropical Oasis

Recent Posts

  • fisherman aesthetic home inspiration
    Fisherman Aesthetic Decor for Your Home
  • Senix Tools Review- Charleston Crafted
    Are Senix power tools any good?
  • Your Weekend To-Do List: 15 Things to Do for Summer Home Upkeep
    Your Weekend To-Do List: 15 Things to Do for Summer Home Upkeep
  • How to stain wood with RIT dye - step by step instructions
    How to stain wood with RIT dye

Privacy Policy

Footer

↑ back to top

Navigation

  • Home
  • Blog
  • Contact Us
  • Terms of Use
  • Disclaimer

Newsletter

  • Sign up for emails and updates
  • Follow us on Instagram
  • Work with Us

Browse by Category

  • Woodworking
  • Home Projects
  • Paint Colors
  • Room Reveals

© 2025 The Charleston Crafted Blog LLC DBA “Charleston Crafted” and “CharlestonCrafted” (also known as N/A) / All Rights Reserved.
Official Website: (Charleston Crafted)
Registered in USA (Co. Reg. No.: 565586)
Address: Charleston, USA 29414, South Carolina
Contact Phone: Not applicable — contact is via email: sean@charlestoncrafted.com

DISCLAIMER: The content on this website is provided for general informational purposes only and is not intended as professional advice. The Charleston Crafted Blog LLC and The Charleston Crafted Blog LLC make no representations or warranties—express or implied—regarding the accuracy, completeness, or suitability of the information contained herein. Any reliance you place on this information is strictly at your own risk. In no event shall The Charleston Crafted Blog LLC or The Charleston Crafted Blog LLC be liable for any loss or damage, including without limitation, indirect or consequential loss or damage, arising from the use or inability to use this website. This website is the official website of The Charleston Crafted Blog LLC.

AFFILIATE DISCLOSURE: This website contains affiliate links. If you click through and make a purchase, we may earn a commission at no extra cost to you.

As an Amazon Associate, I earn from qualifying purchases.

Site Editor: Morgan Smith McBride

Copyright © 2025 Charleston Crafted